

Page 1

®
EnglishDeutsch Français
Italiano
NN-A755
Bedienungsanleitung und
Kombi-Mikrowellen-Kochbuch
Mode d’emploi et livre de recettes
micro-ondes combinés
Operating Instructions & Cookbook
Istruzioni
Page 2

WICHTIGE SICHERHEITSANWEISUNGEN. Bitte sorgfältig
durchlesen und zur weiteren Bezugnahme aufbewahren.
INSTRUCTIONS DE SÛRETÉ IMPORTANTES. Avant d’utiliser
le four à micro-ondes, lisez attentivement les recommandations d’utilisation et conservez-les soigneusement.
IMPORTANT SAFETY INSTRUCTIONS.
Please read carefully and keep for future reference.
ISTRUZIONI IMPORTANTI PER LA SICUREZZA. Leggere
attentamente queste note e conservarle per riferimento
futuro.
Page 3
English
En-1
Examine your microwave oven
Unpack the oven, remove all packing material,
and examine the oven for any damage such as
dents, broken door latches or cracks in the door.
If you find any damage, notify your dealer
immediately. Do not install a damaged microwave
oven.
Earthing instructions
IMPORTANT: THIS UNIT HAS TO BE
PROPERLY EARTHED FOR PERSONAL
SAFETY.
If your AC outlet is not grounded, it is the personal
responsibility of the customer to have it replaced
with a properly grounded wall socket.
Operation voltage
The voltage has to be the same as specified on
the label on the oven. If a higher voltage than
specified is used, it may cause a fire or other
damages.
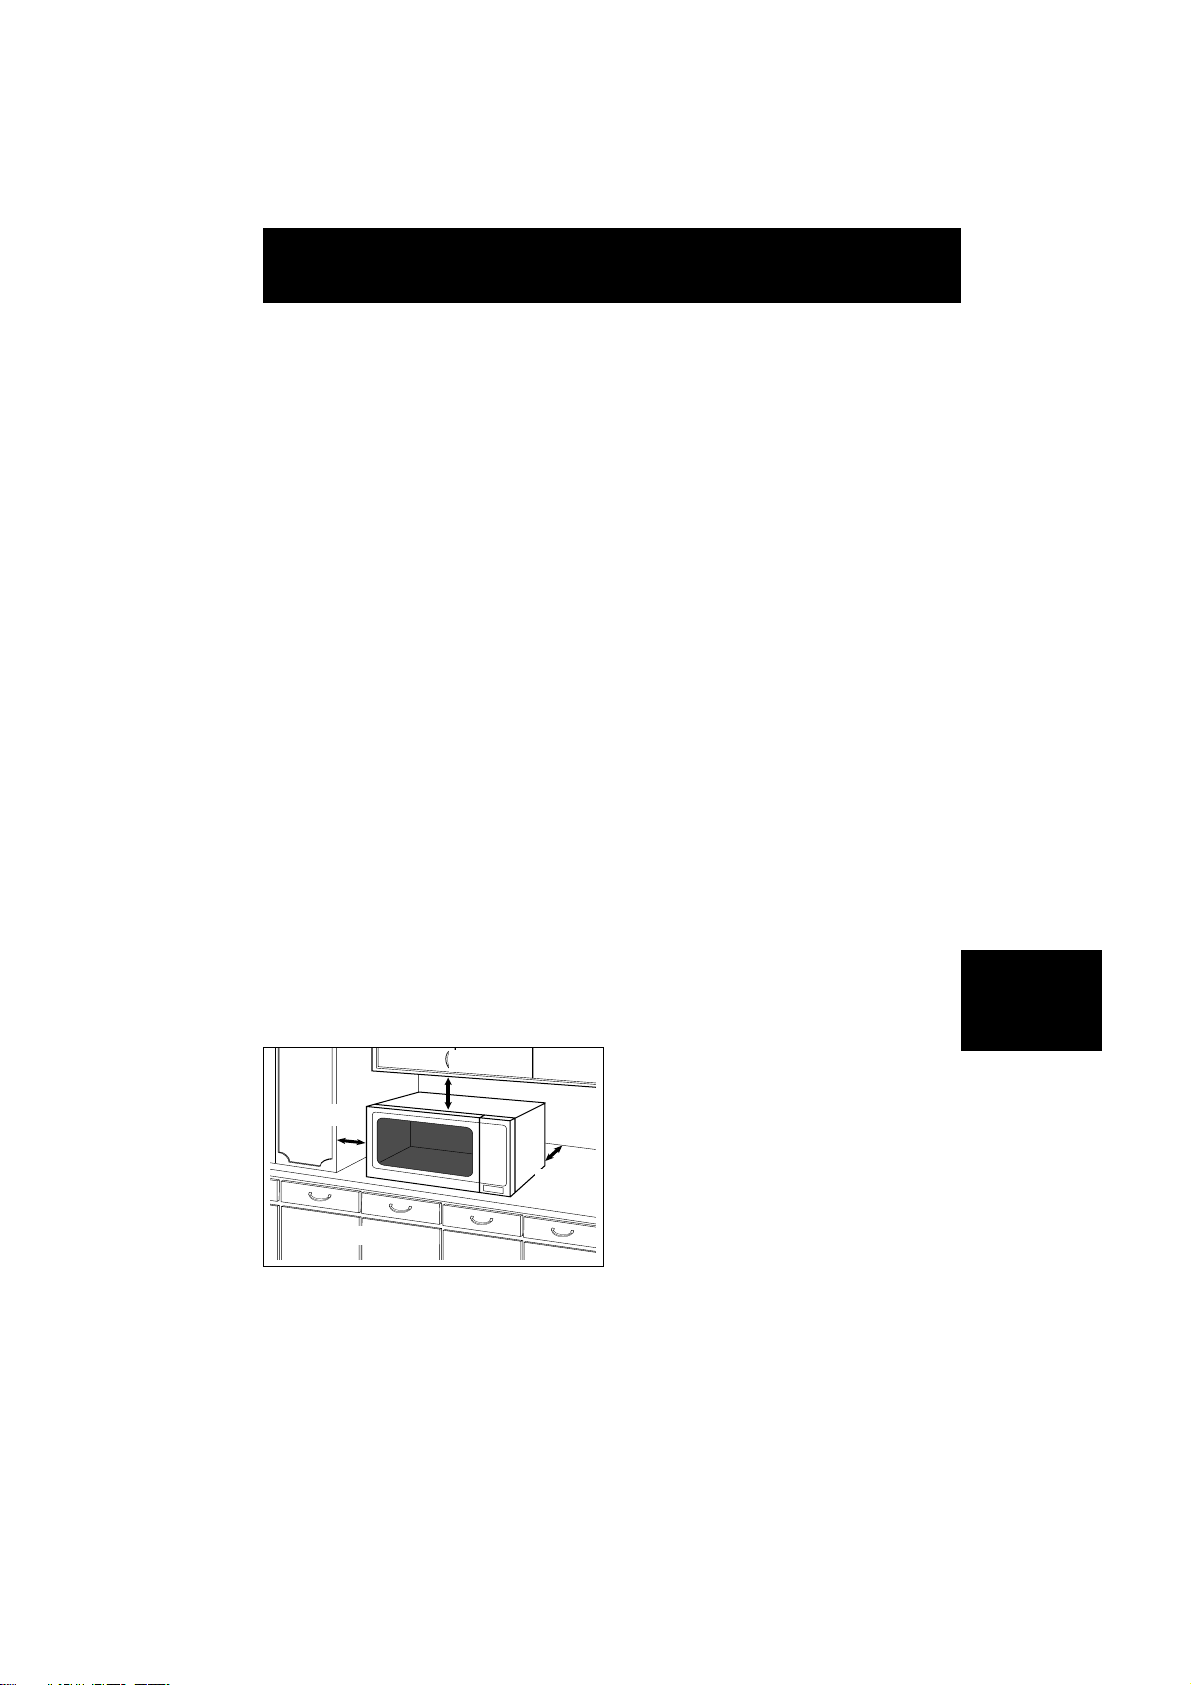
Placement of the Oven
1. Place the oven on a flat and stable surface,
more than 85 cm above the floor.
2. When this oven is installed, it should be easy
to isolate the appliance from the electricity
supply by pulling out the plug or operating a
circuit breaker.
3. For proper operation, ensure a sufficient air
circulation for the oven.
Counter-top use:
a. Allow 15 cm of space on the top of the
oven, 10 cm at the back, 5 cm on one side,
and the other side must be opened more
than 40 cm.
b. If one side of the oven is placed flush to a
wall, the other side or top must not be
blocked.
4. Do not place this oven near an electric or gas
cooker range.
5. The feet should not be removed.
6. This oven is only for household usage. Do not
use outdoors.
7. Avoid using the microwave oven in high
humidity.
8. The power cord should not touch the outside
of the oven. Keep the cord away from hot
surfaces. Do not let the cord hang over the
edge of a table or work top. Do not immerse
the cord, plug or oven in water.
9. Do not block the air vents on the top and back
of the oven. If these openings are blocked
during operation the oven may overheat. In
this case the oven is protected by a thermal
safety device and resumes operation only after
cooling down.
Counter-top
WARNING
1. The door seals and door seal areas should be
cleaned with a damp cloth.
The appliance should be inspected for
damage to the door seals and door seal areas
and if these areas are damaged the appliance
should not be operated until it has been
repaired by a service technician trained by the
manufacturer.
2. Do not attempt to tamper with or make any
adjustments or repairs to the door, control
panel housing, safety interlock switches or any
other part of the oven. Do not remove the
outer panel from the oven which gives
protection against exposure to microwave
energy.
Repairs should only be done by a qualified
service technician.
3. Do not operate this appliance if it has a
damaged CORD OR PLUG, if it is not working
properly, or if it has been damaged or
dropped. It is dangerous for anyone other than
a service technician trained by the
manufacturer to perform repair service.
Open
10cm
15cm
5cm
4. If the supply cord of this appliance is damaged,
it must be replaced with the special cord
available from the manufacturer.
5. Only allow children to use the oven without
supervision when adequate instructions have
been given so that the child is able to use the
oven in a safe way and understands the
hazards of improper use.
6. Liquids and foods must not be heated in sealed
containers since they are liable to explode.
Installation and Connection
Page 4

En-2
Safety Instructions
Use of your oven
1. Do not use the oven for any reason other
than the preparation of food. This oven is
specifically designed to heat or cook food.
Do not use this oven to heat chemicals or
other non-food products.
2. Before use, check that utensils/containers
are suitable for use in microwave ovens.
3. Do not attempt to use this microwave oven to
dry newspaper, clothing or any other
materials. They may catch fire.
4. When the oven is not being used, do not
store any objects other than oven
accessories inside the oven in case it is
accidentally turned on.
5. The appliance shall not be operated by
MICROWAVE or COMBINATION
WITHOUT FOOD IN THE OVEN. Operation
in this manner may damage the appliance.
Exception to this is point 1 under heater
operation or pre-heating on CONVECTION
with enamel shelf.
6. If smoke or a fire occurs in the oven, press
Stop/Cancel pad and leave the door closed
in order to stifle any flames. Disconnect the
power cord, or shut off power at the fuse or
the circuit breaker panel.
Attention: Hot Surfaces
Heater Operation
1. Before using CONVECTION, COMBINATION
or GRILL function for the first time, wipe
excessive oil off in the oven cavity and
operate the oven without food and
accessories on CONVECTION 250˚C, for 10
minutes. This will allow the oil that is used for
rust protection to be burned off. This is the
only time the oven is used empty.
2. Exterior oven surfaces, including air vents on
the cabinet and the oven door will get hot
during CONVECTION, COMBINATION and
GRILLING. Take care when opening or
closing the door and when inserting or
removing food and accessories.
3. The oven has two heaters situated in the top
and back of the oven. After using the
CONVECTION, COMBINATION and GRILL
function, care should be taken to avoid
touching the inside surfaces of the oven as
these will be very hot.
4. The accessible parts may become hot when
the grill is in use. Children should be kept
away.
N.B: After coking by these modes, the oven
accessories will be very hot.
Fan Motor Operation
While the oven is in Microwave/Heater
operation, the cooling fan always rotates to cool
the electric components.
After the completion of operation, the fan may
continue rotating for a while. This is perfectly
normal, and you can take out the food from the
oven while the fan is still in operation.
Oven Light
When it becomes necessary to replace the oven
light, please consult your dealer.
Accessories
The oven comes equipped with a variety of
accessories. Always follow the directions given
for use of the accessories.
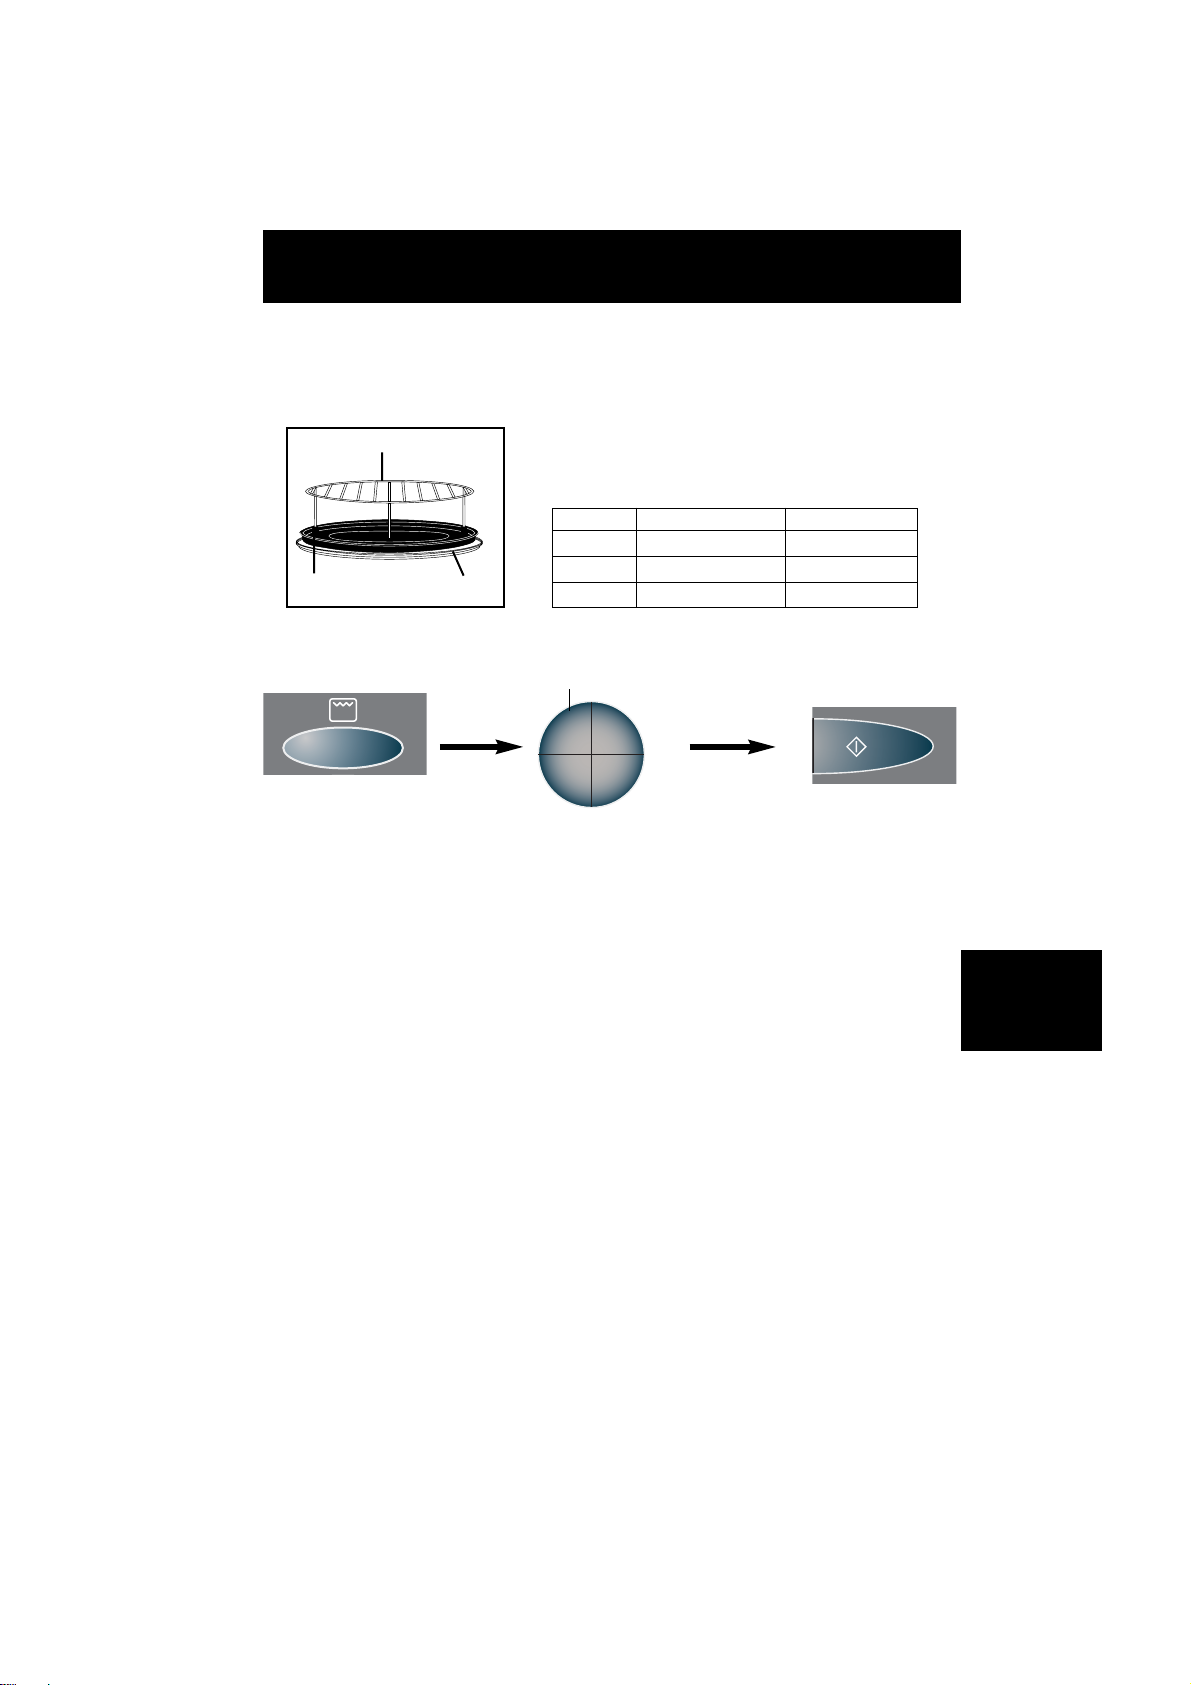
Glass Tray
1. Do not operate the oven without the roller
ring and the glass tray in place (except when
cooking on 1 level CONVECTION on enamel
shelf).
2. Never use another type of glass tray than the
one specially designed for this oven.
3. If the glass tray is hot, let it cool before
cleaning or placing in water.
4. The glass tray can turn in either direction.
5. If the food or cooking vessel on the glass
tray touches the oven walls and stops the
tray rotating, the tray will automatically rotate
in the opposite direction. This is normal.
6. Do not cook foods directly on the glass tray,
except when cooking Jacket Potatoes in
MICROWAVE mode only.
Roller Ring
1. The roller ring and the oven floor should be
cleaned frequently to prevent noise and
build-up of remaining food.
2. The roller ring must always be used for
cooking together with the glass tray.
Metal Tray
1. The Metal Tray is for cooking on GRILL,
CONVECTION and COMBINATION modes.
Do not use Metal Tray in MICROWAVE
mode only.
2. The Metal Tray should be placed on the
Glass Tray or Wire Rack.
Wire Racks
1. The Wire Racks are used to facilitate
browning of small dishes and help with the
circulation of heat.
2. Do not use any metal container directly on
the Wire Racks in COMBINATION with
MICROWAVE.
3. Do not use the Wire Racks in MICROWAVE
mode only.
Enamel Shelf
1. The Enamel Shelf is for cooking on
CONVECTION mode only. Do not use on
MICROWAVE, GRILL or COMBINATION
modes.
2. For 2 level CONVECTION cooking, the
Enamel Shelf can be used as the upper level
and the Metal Tray (with or without low wire
rack) on the Glass Tray as the lower level.
Page 5

English
En-3
Important Information
1) Cooking Times
• Cooking times given in the cookbook are
approximate. The cooking time depends on
the condition, temperature, amount of food
and on the type of cookware.
• Begin with the minimum cooking time to
help prevent overcooking. If the food is not
sufficiently cooked you can always cook it
for a little longer.
N.B.: If the recommended cooking times
are exceeded the food will be spoiled
and in extreme circumstances could
catch fire and possibly damage the
interior of the oven.
2) Small Quantities of Foods
• Small quantities of food or foods with low
moisture content can burn, dry out or catch
on fire if cooked too long. If materials
inside the oven should ignite, keep the
oven door closed, turn the oven off and
remove the plug from the socket.
3) Eggs
• Do not cook eggs in
their shells and
whole hard-boiled
eggs by
MICROWAVE.
Pressure may build
up and the eggs may explode, even after
the microwave heating has ended.
4) Piercing Skin
• Food with non
porous skins, such
as potatoes, egg
yolks and sausages
must be pierced
before cooking by
MICROWAVE to prevent bursting.
5) Meat Thermometer
• Use a meat thermometer to check the
degree of cooking of roasts and poultry
only when the meat has been removed
from the oven. Do not use a conventional
meat thermometer when using
MICROWAVE or COMBINATION because
it may cause sparking.
6) Liquids
• When heating liquids, e.g. soup, sauces
and beverages in your microwave oven,
overheating the liquid beyond boiling point
can occur without evidence of bubbling.
This could result in a sudden boil over of
the hot liquid. To prevent this possibility the
following steps should be taken:
a) Avoid using straight-sided containers
with narrow necks.
b) Do not overheat.
c) Stir the liquid before
placing the container
in the oven and again
halfway through the
cooking time.
d) After heating, allow it to stand in the
oven for a short time, stir again before
carefully removing the container.
7) Paper/Plastic
• When heating food in plastic or paper
containers, check the oven frequently as
these types of containers ignite if
overheated.
• Do not use recycled paper products (e.g.
Kitchen Roll) unless the paper product is
labelled as safe for
microwave oven use.
Recycled paper products
may contain impurities
which may cause sparks
and/or fires during use.
• Remove wire twist-ties
from roasting bags before placing the bags
in the oven.
8) Utensils/Foil
• Do not heat any closed cans or bottles
because they might explode.
• Metal containers or dishes with metallic
trim should not be used during
MICROWAVE cooking. Sparking will occur.
• If you use any aluminium foil, meat spikes
or metalware the distance between them
and the oven walls and door should be at
least 2 cm to prevent sparking.
9) Feeding Bottles/Baby Food Jars
• The top and teat or lid must be removed
from feeding bottles or baby food jars
before placing in the oven.
• The contents of feeding bottles and baby
food jars are to be stirred or shaken.
• The temperature has to be checked before
consumption to avoid burns.
Page 6
En-4
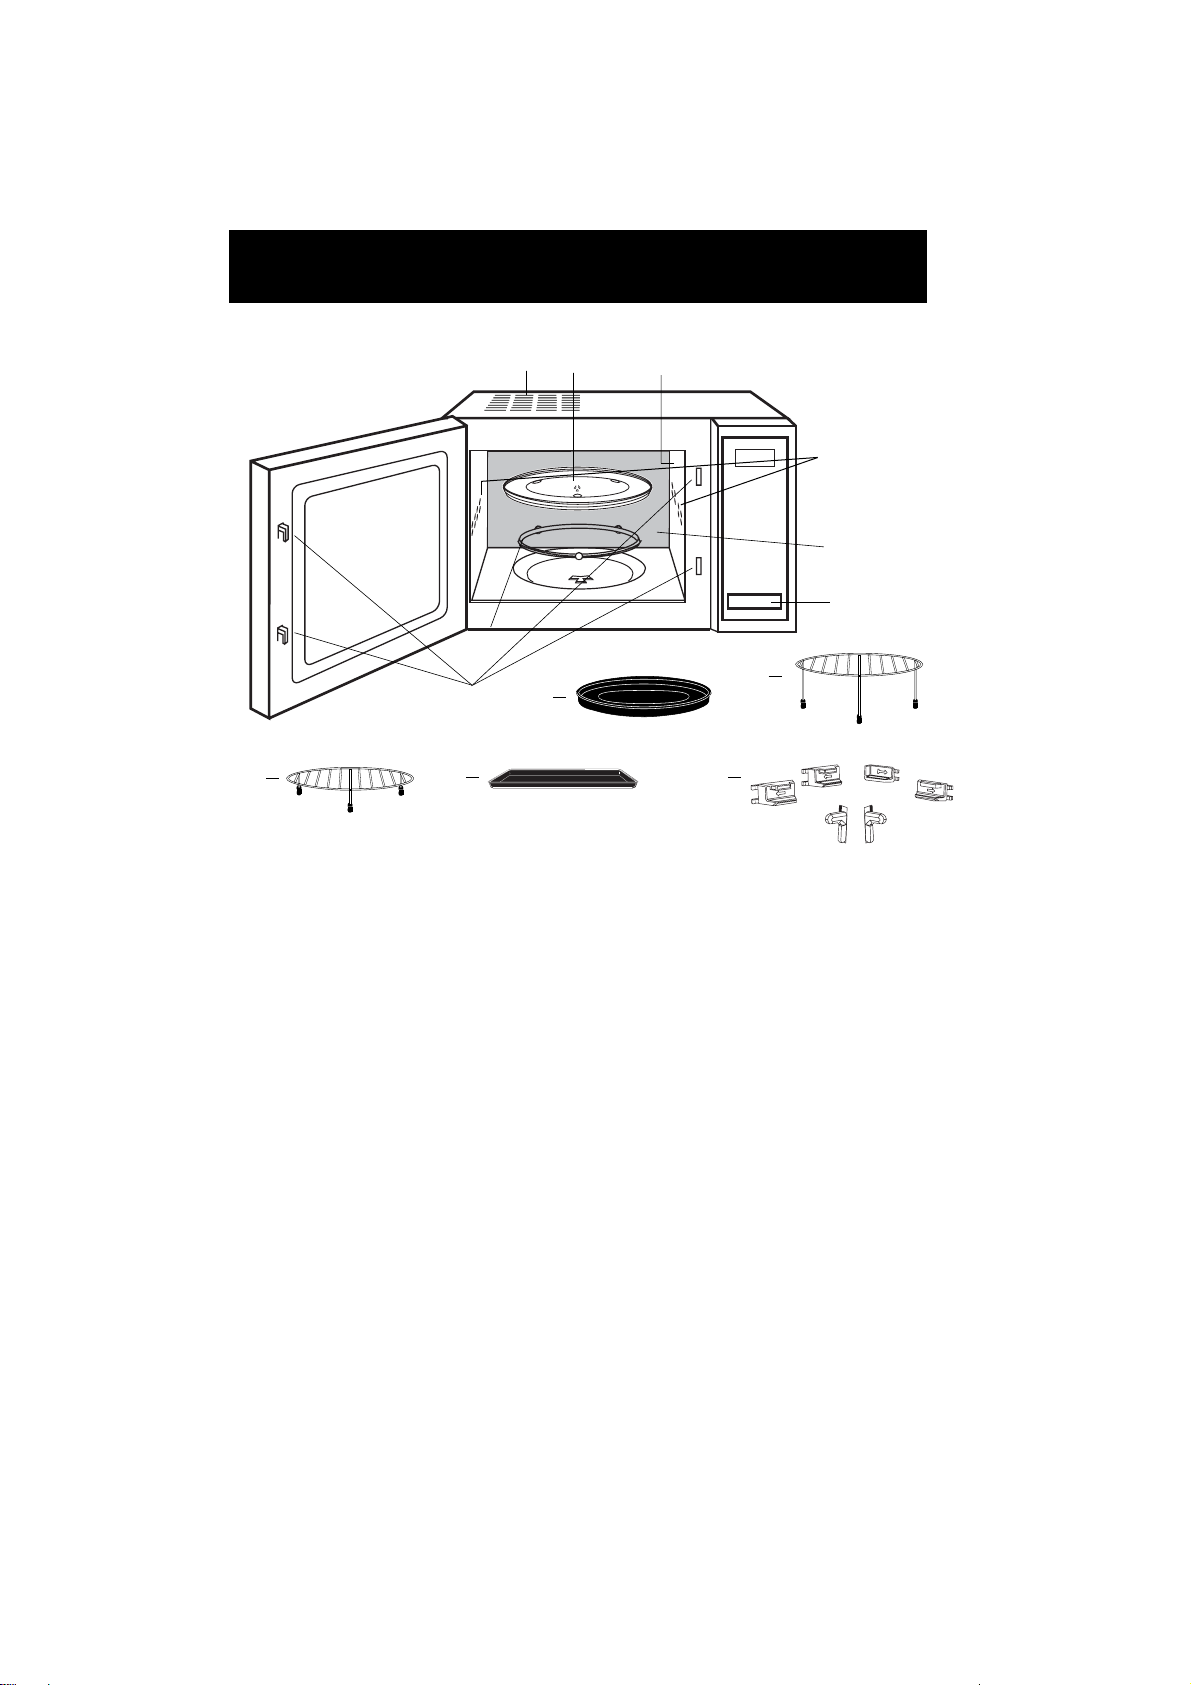
Outline Diagram
[1] Door Release Button
Press to open the door. When you
open the oven door during cooking,
the cooking is stopped temporarily
without clearing earlier made
settings. The cooking is resumed as
soon as the door is closed and Start
Pad pressed. The oven lamp lights
as soon as the oven door is opened.
[2] Oven Window
[3] Door Safety Lock System
[4] Oven Air Vent
[5] Control Panel
[6] Glass Tray
[7] Roller Ring
[8] External Oven Air Vents
[9] Metal Tray
[10] High Wire Rack
[11] Low Wire Rack
[12] Enamel Shelf
[13] Shelf Supports
[14] Shelf Support Slots
[15] Catalytic lining on back of cavity
[1]
[2]
[3]
[4]
[5]
[7]
[8]
[10]
[6]
[11]
[9]
[12]
[13]
[14]
[15]
Page 7

English
En-5
Control Panel
Beep Sound:
A beep sounds when a pad is pressed. If this beep does not sound, the setting is incorrect.
When the oven changes from one function to another, two beeps sound. After the completion of
the preheating on CONVECTION or COMBINATION mode, three beeps sound. After
completion of cooking, five beeps sound.
(1)
(2)
NN-A755*
(3)
(4)
(5)
(6)
(7)
(8)
(12)
(13)
(9)
(1) Display Window
(2) Time Pads
(3) Microwave Power Pad
(4) Grill Power Pad
(5) Convection Pad
(6) Grill Convection Pad
(7) Combination Pad
(8) Auto Defrost Pad
(9) Weight Select Pads
(10) Clock Pad
(11) Delay/Stand Pad
(12) Auto Weight Program
Pads
(13) Start Pad:
Press to start operating
the oven.
If during cooking the door
is opened or Stop/Cancel
Pad is pressed once, Start
Pad has to be pressed
again to continue cooking.
(14) Stop/Cancel Pad:
Before cooking: one
press clears your
instructions.
During cooking: one
press temporarily stops
the cooking program.
Another press
cancels all your
instructions and the time
of day will appear in the
display.
*The design of your control panel
may vary from the panel displayed
(depending on colour), but the
words on the pads will be the
same.
(11)
(14)
(10)
1
10
h
min
1
min10 s
Combi
1-2-3
g
NN-A755W
Page 8
En-6
Oven Accessories
The following chart shows correct use of the accessories in the oven.
Glass Tray Metal Tray High Wire Rack Low Wire Rack Enamel Shelf
Microwave YES NO NO NO NO
Grill YES YES YES YES NO
Convection YES YES YES YES YES
Combination YES YES YES YES NO
Page 9

English
En-7
1. There are six shelf supports to be fitted. Each support should be located into its
corresponding set of slots as shown. When fitting the supports, the arrow marked on
the shelf support should point towards the front of the oven. Please note the
following part numbers are printed on the back side of the individual supports.
E22926Y5BP (X 1)
Right back
2. Fully insert the locating pegs into
the front slots as shown. When
fitting the supports, the arrows on
them should point towards the
front of the oven. The arrow
refers to the front of the support.
3. Push the support back as shown
so that the rear pegs locate into
the rear slots.
E22916Y5BP (X 1)
Right middle
E22906Y5BP (X 2)
Left back & middle
E22936Y5BP (X 2)
Right & left front
Attaching Shelf Supports
Page 10

En-8
4. Once all pegs have been located,
push the support towards the back
of the oven, until the part clicks
securely into position. Repeat the
process for the remaining shelf
supports.
5. The supports are now ready to
position the enamel shelf. Ensure
all shelf supports are securely in
position before placing
the shelf in the oven.
6. Insert the enamel shelf as shown.
The shelf supports do not need to
be removed for non-shelf cooking.
The supports can be removed for
cleaning, if required. To remove
the supports, repeat steps 1 - 4
above, in reverse order.
CAUTION!
● The enamel shelf should only be used in CONVECTION mode. It must be removed
for MICROWAVE, GRILL and COMBINATION functions, but the shelf supports
can stay in position.
● Take care when removing the enamel shelf. It should be fully supported using two
hands during removal to avoid any possibility of enamel shelf and its contents tilting
or falling from shelf supports.
● Clean the shelf supports with warm soapy water and a damp cloth. If cleaning the
oven cavity without the shelf supports in position, take care around the open slots.
● The roller ring and glass turntable should be removed when using the enamel shelf
for cooking on one level CONVECTION.
Note:
The two shelf supports on either
side of the oven and closest to the
door need to be inserted vertically.
Push the support into the top slot
first, then locate the bottom peg
and push down.
Attaching Shelf Supports
Page 11

English
En-9
The diagrams shown below are examples of the accessories.
It may vary depending on recipe/dish used. Further information can be found in the
Cookbook.
Microwave
Grill
Convection 1 level on Metal
Tray (with or without Low
Wire Rack) on Glass Tray
Convection + Grill
Grill + Convection +
Microwave
Grill + Microwave
Convection + Microwave
Combination
Microwave
Heater
Cooking Modes
Convection
1 level on Enamel Shelf
Convection
2 levels
Page 12

En-10
Controls and Operation Procedure
Word Prompting:
These models have a unique function “Word Prompting” which guides you through the
operation of your microwave. After plugging in the oven press the Start Pad until you
locate your language.
As you press the pads, the display will scroll the next instruction eliminating the
opportunities for mistakes.
If for any reason you wish to change the language displayed, unplug the oven and
repeat this procedure.
Plug-in "88:88"
Press
"DEUTSCH"
Press
"FRANCAIS"
Press
"ITALIANO"
Press
"ENGLISH"
Word Prompting
In German
In French
In Italian
In English
Page 13

English
En-11
Child Safety Lock:
Using this system will make the oven controls inoperable; however, the door can be
opened. Child Lock can be set when the display shows a colon or the time.
To Set:
To Cancel:
• Press Start Pad three times.
☛ The time of day will disappear.
Actual time will not be lost.
• Press Stop/Cancel Pad three times.
☛ The time of day will reappear in the
display.
Clock Setting:
Example: To set 14:25
• Press Clock Pad.
☛ The colon starts to
blink.
• Enter the time by pressing the appropriate Time Pads.
☛ The time appears in the display and the colon blinks.
• Press Clock Pad.
☛ The colon stops blinking and the
time of day is entered.
NOTE:
1. To reset the time of day repeat all the above steps.
2. The time of day is displayed, unless the power supply is interrupted.
3. This clock has a 24 hour display.
14 times twice
inoperable
5 times
Controls and Operation Procedure
1
10
h
min
1
min10 s
Page 14
En-12
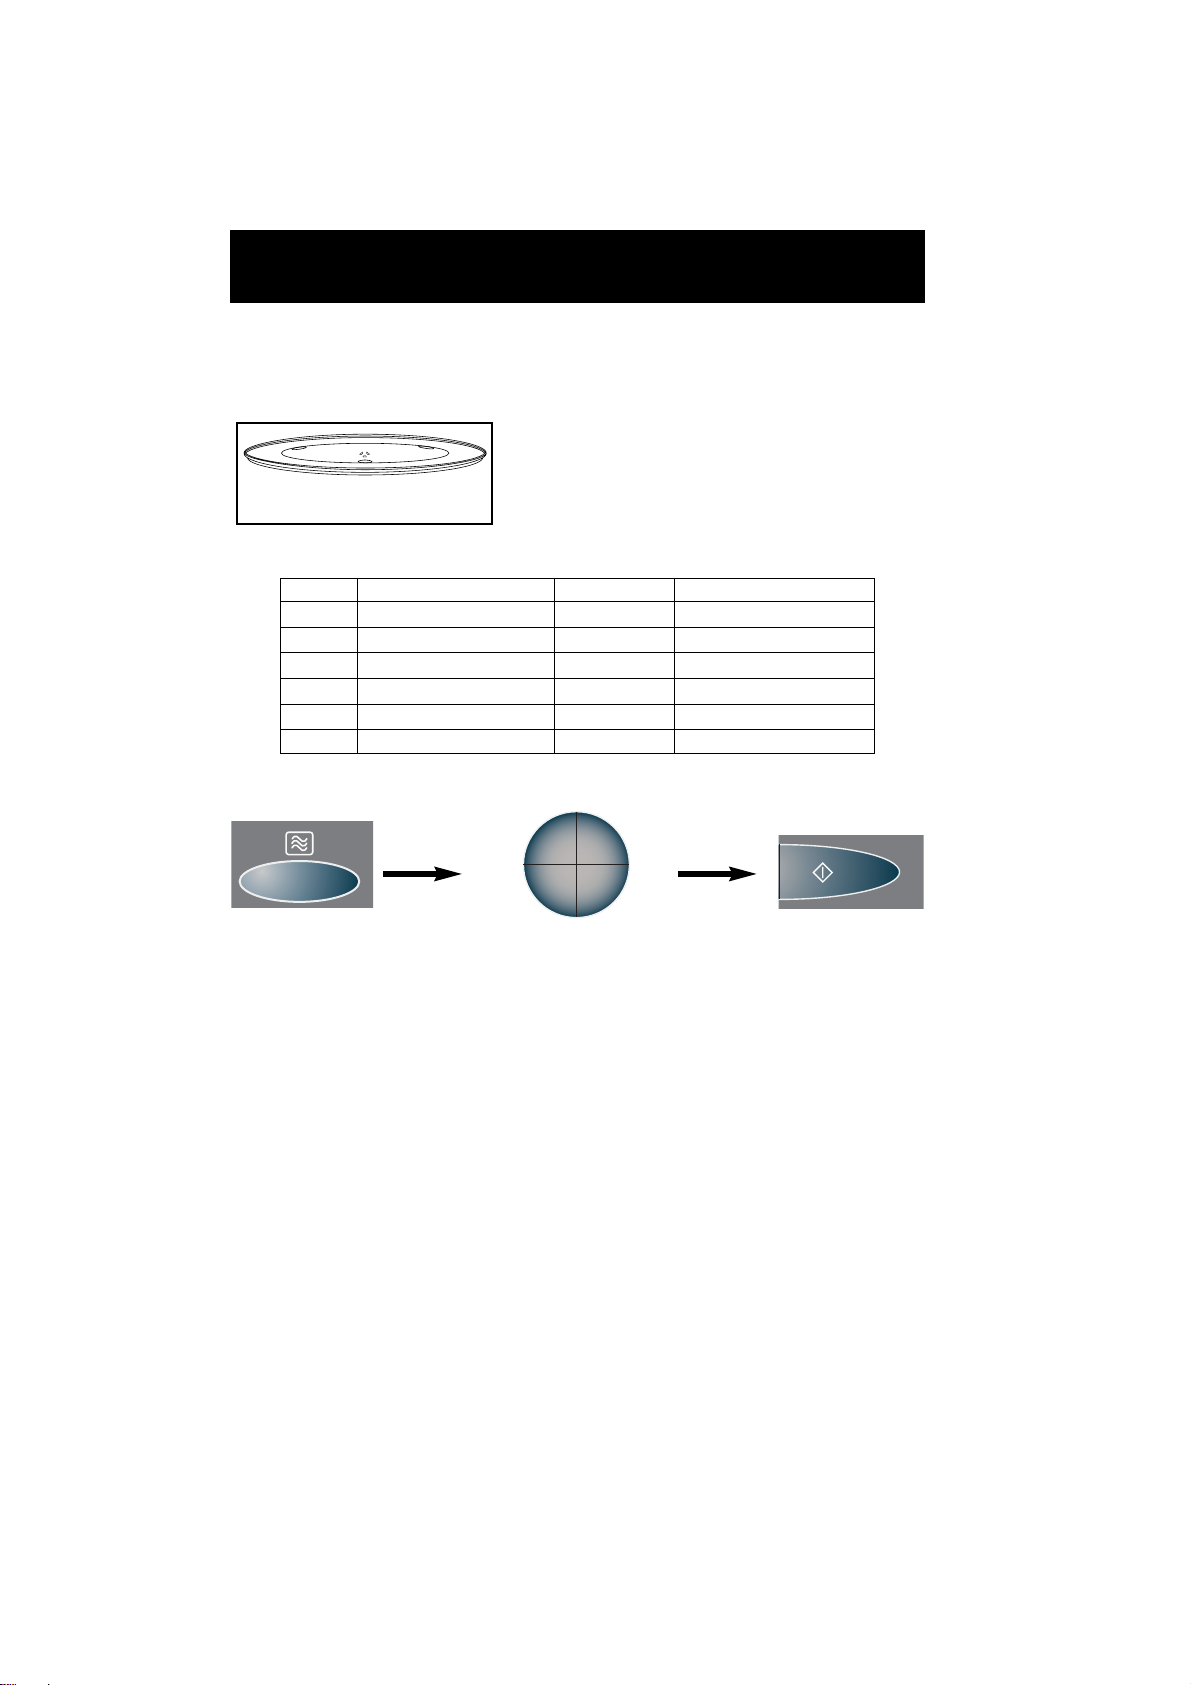
Microwave Cooking and Defrost
There are 6 different microwave power levels available (see the chart below).
• Select Microwave
power level.
• Set the cooking time.
• Press Start Pad.
Press Power Level Wattage Max time available
once MAX 1000 W 30 minutes
twice MIN (DEFROST) 270 W 99 min. 90 sec.
3 times MEDIUM 600 W 99 min. 90 sec.
4 times LOW 440 W 99 min. 90 sec.
5 times SIMMER 250 W 99 min. 90 sec.
6 times WARM 100 W 99 min. 90 sec.
NOTE:
1. For 2 or 3 stage cooking, before pressing Start Pad, repeat setting the Microwave
power level and cooking time.
e.g. Casserole –– High 10 minutes to bring the casserole to boil. Simmer 60 mins.
to cook. Warm 10 minutes to allow flavours to develop.
2. Stand time can be programmed after the Microwave power and time setting.
3. You can add to the cooking time during cooking, if required. Press 1 min pad to
increase the cooking time. Time can be added in 1 minute increments up to
maximum time available.
This chart shows approximate wattage for each power level.
Use of accessory:
CAUTION: The oven will automatically operate on 1000 W Microwave Power if a
cooking time is entered without selecting the power level.
Glass Tray
1
10
h
min
1
min10 s
Page 15
English
En-13
Grilling
The Grill Pad provides 3 Grill settings.
• Press Grill Power
Pad for the desired
Grill setting.
• Set the cooking time
(up to 99 minutes
90 seconds).
• Press Start Pad.
Press Power Level Wattage
once 1 HIGH 1300 W
twice 2 MEDIUM 950 W
3 times 3 LOW 700 W
NOTE:
1. The Grill will only operate with the oven door closed.
2. The Grill cannot be preheated.
3. You can add to the cooking time during cooking, if required. Press 1 min pad to
increase the cooking time. Time can be added in 1 minute increments, up to 99
minutes.
inoperable
Use of accessory:
High Wire Rack
Glass Tray
Metal Tray
10
1
min
h
1
min10 s
Page 16

En-14
If using the turntable.
Cooking by Convection/Grill Convection
These Pads offer a choice of convection temperatures 40°C (only for Convection mode) and 100 250°C in 10°C increments. For quick selection of the most commonly used cooking temperatures,
the temperatures start at 150°C and count up to 250˚C then 40˚C (only for Convection mode) and
100°C. It is possible to cook on one or two levels when using convection cooking. See En-16-17
for shelf cooking.
One level cooking
High Wire Rack
Glass Tray
Metal Tray
Low Wire Rack
Glass Tray
Metal Tray
Cooking by Convection:
• Set the desired
temperature.
• Set the cooking time (up to
9 hours 99 minutes).
• Press Start Pad.
• Press Start Pad to start
preheating.
After preheating,
place the food in
the oven.
inoperable
Glass Tray
Metal Tray
Roasting Meat: Glass Tray, Metal Tray and
Low Wire Rack.
Baking: Glass Tray, Metal Tray.
If cooking on one level, you can use the round Metal Tray on top of the Glass Tray or
you can use the Enamel Shelf.
If using the turntable, the food is then placed on the Low Wire Rack or directly onto
the Metal Tray. Follow your individual recipe guidelines.
1
10
h
min
1
min10 s
Page 17
English
En-15
• Set the cooking time
(up to 9 hours
99 minutes).
• Press Start
Pad.
• Press Start Pad to
start preheating.
After preheating,
place the food in
the oven.
• If desired to
change Grill
power, press
once for
Low twice for
High.
• Set the desired
temperature. (Grill
power is preset to
Medium).
inoperable
NOTE ON PREHEATING:
1. Do not open the door during preheating. After preheating 3 beeps will be heard
and the “P” will flash in the display window. If the oven door is not opened after
preheating, the oven will maintain the selected temperature. After 30 minutes, the
oven will shut off automatically and revert to time of day.
2. If you want to cook without preheating, after selecting the desired temperature, set
the cooking time then press Start Pad.
NOTE:
1. When the selected cooking time is less than one hour, the time counts down
second by second.
2. When the selected cooking time is over one hour, the time counts down minute by
minute until only “1H 00” (1 hour) remains. The display then indicates minutes and
seconds and counts down second by second.
3. You can add to the cooking time during cooking, if required. Press 1 min pad to
increase the cooking time. Time can be added in 1 minute increments.
4. After pressing Start Pad, the selected temperature can be recalled and changed.
Press Convection or Grill Convection Pad once to indicate the temperature in the
display window. While the temperature is recalled in the display window, you can
change the temperature by pressing Convection or Grill Convection Pad.
Cooking by Grill Convection
10
1
min
h
1
min10 s
Page 18
En-16
You can use the Enamel Shelf as a baking dish for roasting potatoes or vegetables,
and for baking cakes, cookies and muffins. It is also ideal for re-heating pre-cooked
convenience pastry items.
Roasting Veg / Potatoes: Enamel Shelf. Reheating: Enamel Shelf.
Shelf Cooking
Enamel Shelf
One Level Cooking
To attach the oven supports to the oven cavity, see pages 7 and 8.
Page 19

English
En-17
When cooking on two levels use the Metal Tray (with or without Low Wire Rack) on the
Glass Tray on the lower level and the Enamel Shelf in position as the upper level. To
attach the shelf supports to the oven cavity, see pages 7 - 8.
Depending on the recipe, you can preheat with or without the accessories in position.
See individual recipes for details.
Two level cooking is ideal for:-
1. Batch baking. Cakes, cookies and muffins on two levels.
2. Cooking a complete meal together. Frozen pizza on the upper level and frozen
chips on the lower level.
3. Cooking roast potatoes on the upper level and roast vegetables on the lower level.
4. Re-heating small pastry items in large batches- Sausage rolls, pastry pies,
quiches (all pre-cooked).
Ensure that the shelf is inserted correctly, and is secure before use.
Do not place a dish of food weighing more than 4 Kg on the shelf.
ALWAYS USE OVEN GLOVES WHEN REMOVING THE FOOD AND ACCESSORIES
AFTER COOKING AS THE OVEN & ACCESSORIES WILL BE VERY HOT.
MAKE SURE THAT YOU HOLD THE DISH AND/OR SHELF FIRMLY WHEN YOU
ARE REMOVING THEM FROM THE OVEN.
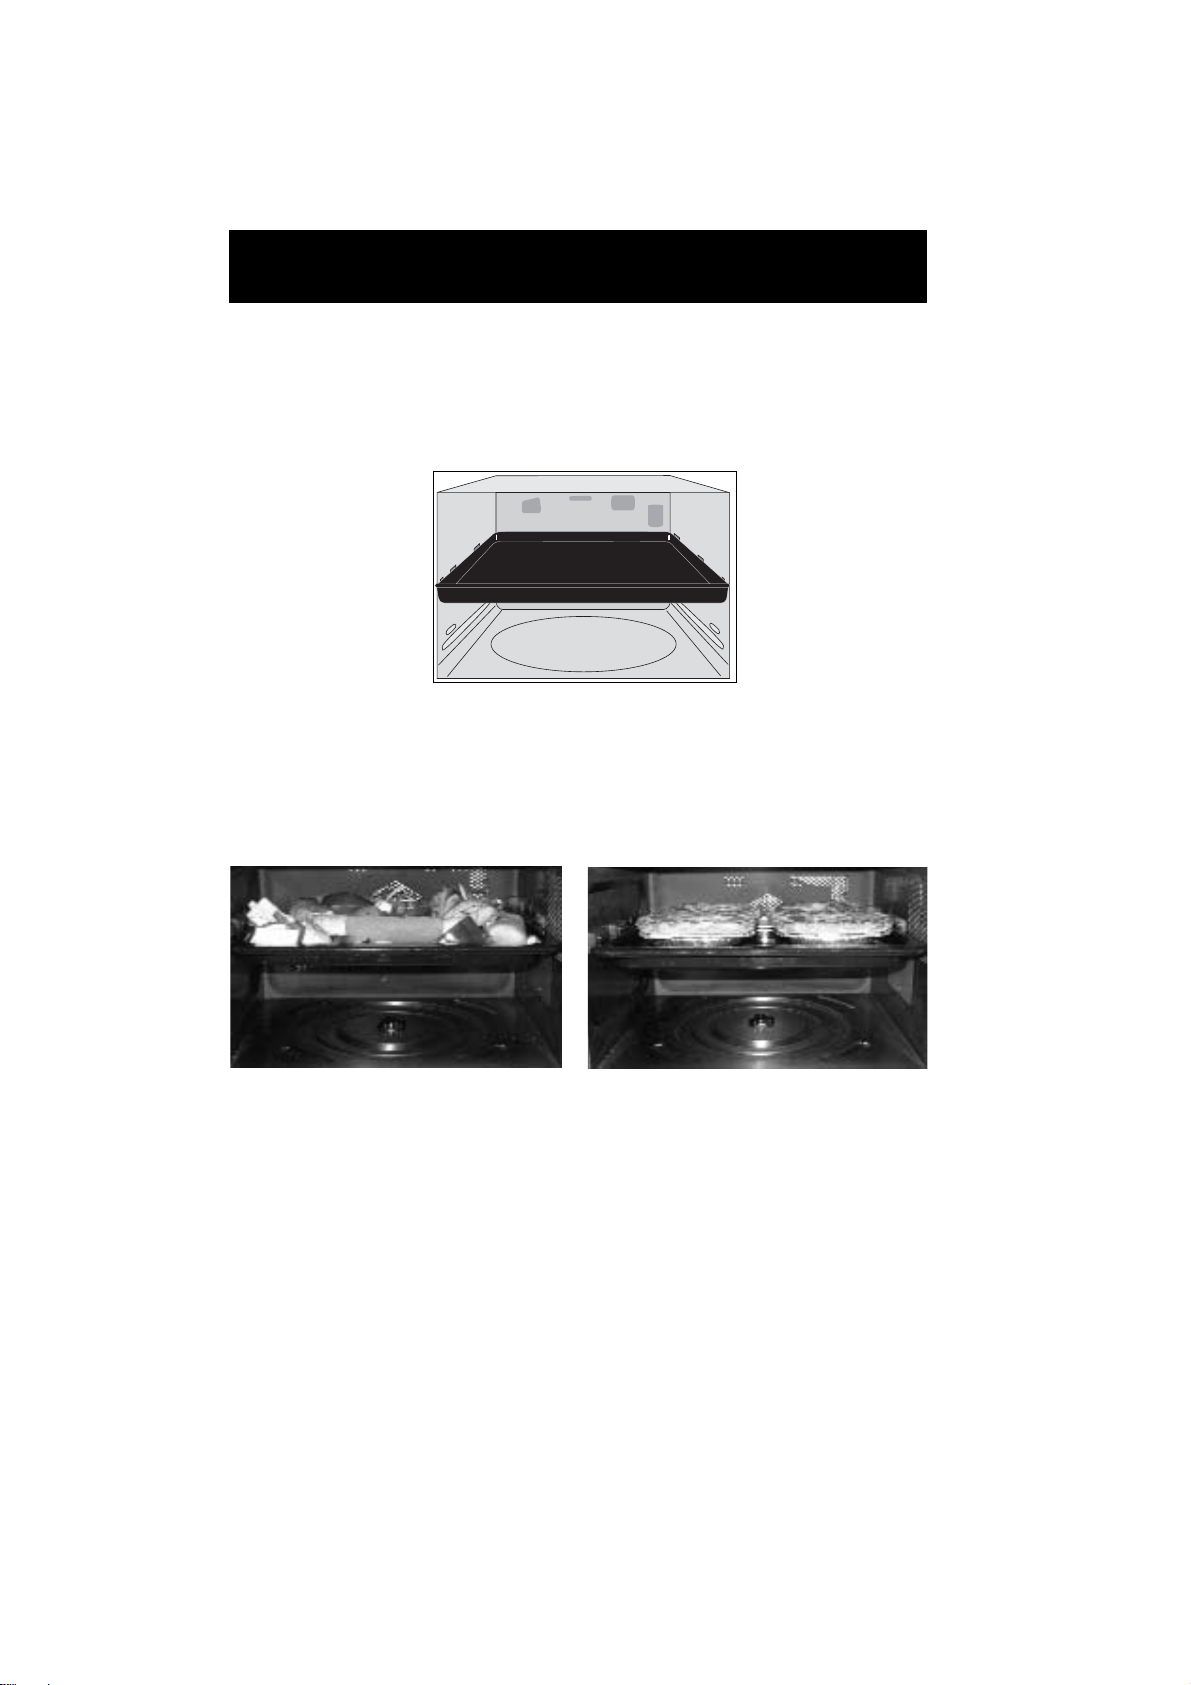
Batch Baking: Small Cakes
Cooking a complete meal: Frozen pizza on
upper level, frozen oven chips on lower
level
Two Level Cooking
Page 20

En-18
Combination Cooking
1) Grill + Microwave
• Press
Combination Pad.
• Set the desired
Grill setting.
• Set the desired
Microwave power
level.
• Set the desired
cooking time (up to
9 hours 99 minutes).
• Press Start
Pad.
2) Convection + Microwave
• Press
Combination Pad.
• Set the desired
temperature.
• Set the desired
Microwave power
level.
• Set the desired
cooking time (up to
9 hours 99 minutes).
• Press Start
Pad.
There are 3 combinations settings; 1) Grill + Microwave, 2) Convection + Microwave, 3) Grill
Convection + Microwave. 1000 W Microwave power level is not available on Combination
cooking. This would not be useful in normal use (the food would be cooked before browning is
achieved).
Use of accessory:
inoperable
inoperable
Combi
Combi
Low Wire Rack
(or High Wire Rack)
Low Wire
Rack
Glass Tray
Glass Tray
Metal Tray
Metal Tray
Grill + Microwave
Convection + Microwave / Grill convection + Microwave
High Wire Rack
Glass Tray
Metal Tray
1
10
h
min
1
min10 s
1
h
1
min10 s
10
min
Page 21

English
En-19
3) Grill Convection + Microwave
• Press
Combination
Pad.
• Set the desired
Microwave
power level.
• Set the desired
cooking time
(up to 9 hours
99 minutes).
• Press Start
Pad.
• If desired to
change Grill
power, press
once for
Medium twice
for Low.
• Set the desired
temperature.
(Grill power is
preset to High).
inoperable
Combi
Combination Cooking
NOTE ON PREHEATING:
The oven can be preheated on Combination cooking. Press Start Pad before setting
the cooking time and follow the NOTE ON PREHEATING on page En-15.
NOTE:
1. When the selected cooking time is less than one hour, the time counts down
second by second.
2. When the selected cooking time is over one hour, the time counts down minute by
minute until only “1H 00” (1 hour) remains. The display then indicates minutes and
seconds and counts down second by second.
3. You can add to the cooking time during cooking, if required. Press 1 min pad to
increase the cooking time. Time can be added in 1 minute increments, up to 99
minutes.
4. After pressing Start Pad, the selected temperature can be recalled by pressing
Combination Pad. The selected setting appears in the display for 2 seconds.
1
10
h
min
1
min10 s
Page 22
En-20
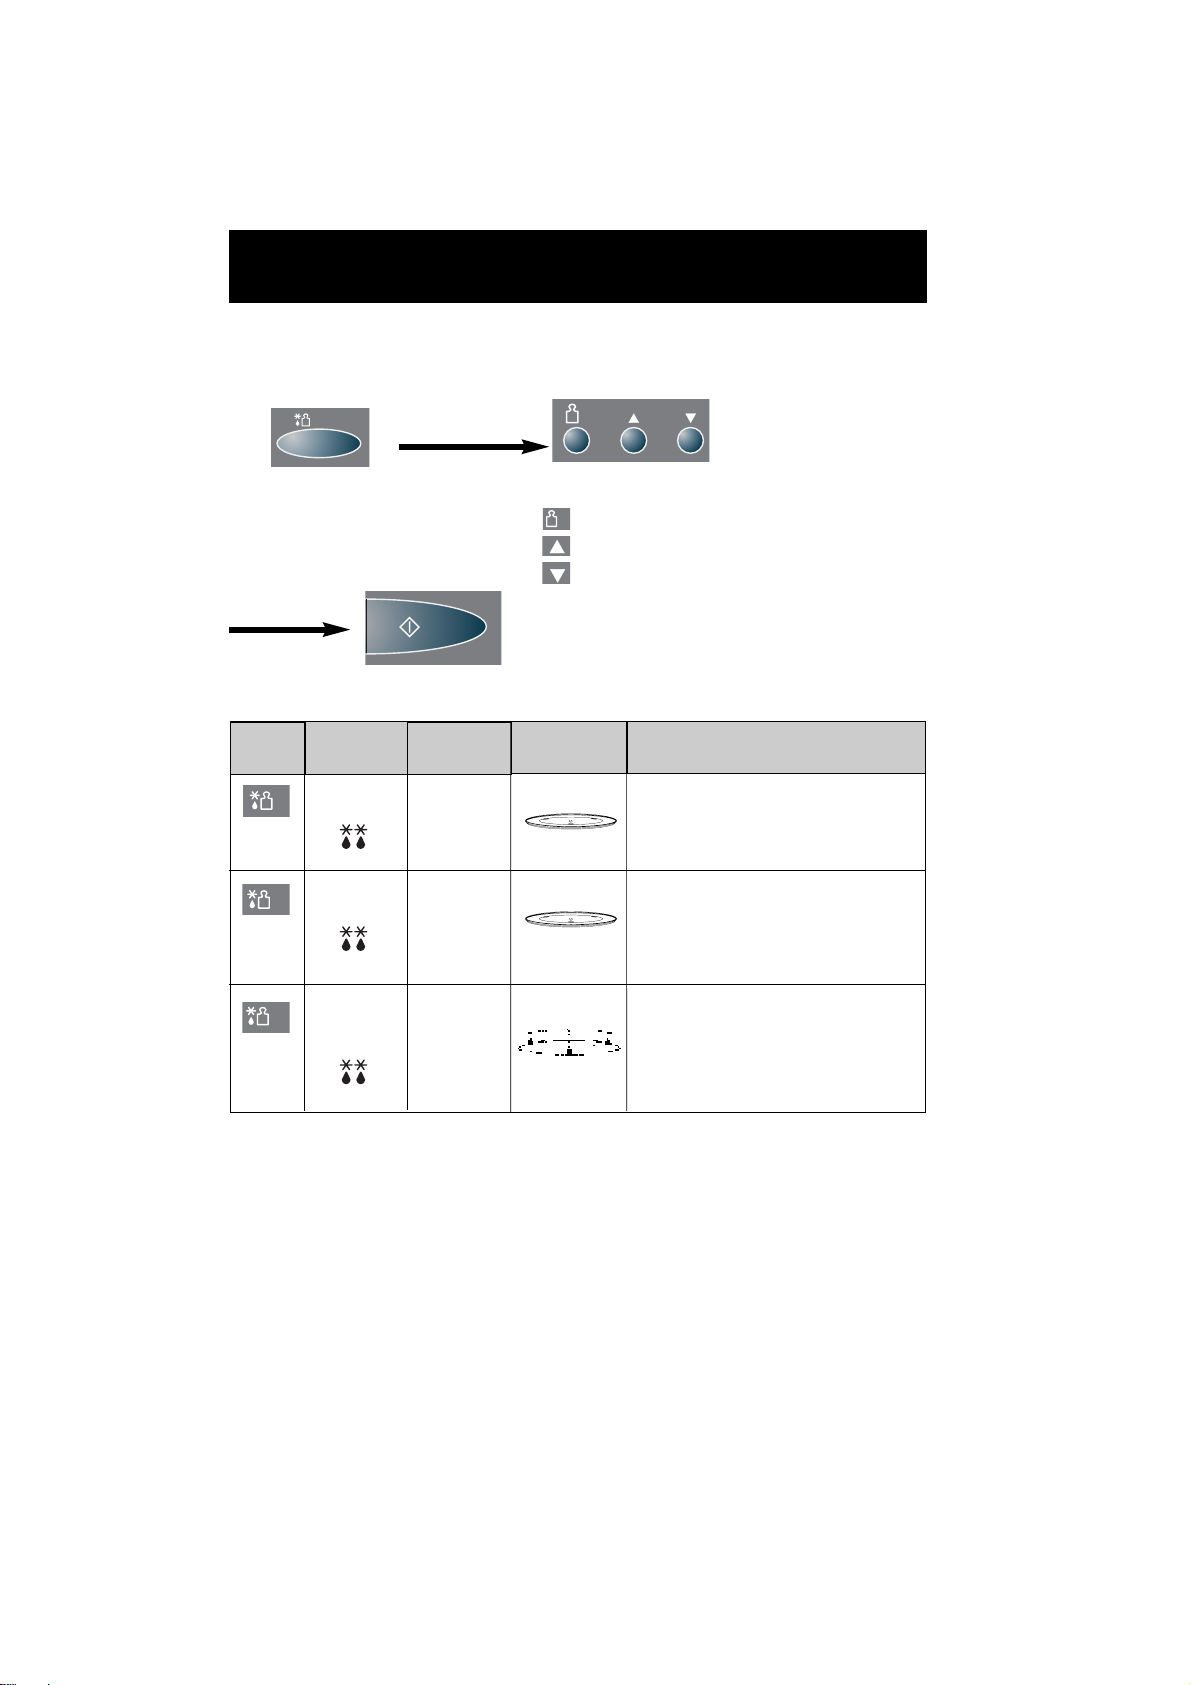
Auto Defrost
With this feature you can defrost frozen foods according to the weight. Select the
category and set the weight of the food. The weight is programmed in grams. For
quick selection, the weight starts from the most commonly used weight for each
category.
• Select the desired Auto
Defrost Program.
• Set the weight of the frozen food.
weight counts up in 100 g increments
weight counts up in 10 g increments
weight counts down in 10 g increments
• Press Start Pad.
Program
Weight
Accessories
Suitable Foods
150 - 1000 g
500 - 1500 g
50 - 500 g
NOTE:
1. When the defrosting time is longer than 60 minutes, the time will appear in hours
and minutes.
2. The shape and size of the food will determine the maximum weight the oven can
accommodate.
NOTE on Program 3:
Take care when removing Bread and Rolls from the oven. The oven and accessories
will get hot during/after defrosting.
Word
Prompt
SMALL
BIG
BREAD
Small
pieces
Big
piece
Frozen
bread
and rolls
Mince, chops, chicken portions, fish.
Arrange foods in a single layer. Place the
meat on an upturned saucer on plate. If
required, shield during defrosting. Large
quantities will require turning at beep.
Meat joints, whole chickens. Place the
meat on an upturned saucer on a plate.
If required, shield during defrosting. Turn
at beep. It is recommended to allow
standing time corresponding to the total
defrosting time.
For reheating and browning frozen
bread. Place frozen bread directly on
Low Wire Rack on Glass Tray. Stand
after cooking. This program is not for
toasting bread slices.
1-2-3
g
1
2
3
g
Page 23
English
En-21
This feature allows you to cook most of your favourite foods by setting the weight only.
The oven determines Microwave power level, Grill setting, Convection temperature
and cooking time automatically. Select the category and set the weight of the food.
The weight is programmed in grams. For quick selection, the weight starts from the
most commonly used weight for each category.
• Select the desired Auto
Weight Program.
• Press Start Pad.
e.g.
• Set the weight of food.
weight counts up in 100 g increments
weight counts up in 10 g increments
weight counts down in 10 g increments
Auto Weight Programs
NOTE:
1. When cooking time is over 60 minutes, the time will appear as Hours and Minutes.
2. Follow the charts on the following pages for the recommended weight and accessories
to be used.
g
g
Page 24

En-22
Category
Recommend
ed Weight
Accessories
Instructions
Reheat fresh
1 Press
200 - 1000 g
Reheat frozen
2 Presses
200 - 1000 g
For re-heating pre-cooked, room/refrigerator temperature foods.
Place food in a suitable sized dish/container. Cover with lid or
microfilm, then place on Glass Tray. Stir after completion of cooking and
stand covered for 2 to 3 minutes.
For re-heating a frozen pre-cooked meal (except soup). All foods
must be pre-cooked and frozen. Remove all packaging and place in a
suitable sized dish/container. Cover with lid or microfilm, then place on
Glass Tray. Stir after completion of cooking and stand covered for 2 to 3
minutes.
Word
Prompt
FRESH
FROZEN
Cook fresh
vegetables
1 Press
200 - 1000 g
VEG
For cooking fresh vegetables. Place prepared vegetables into a
suitable sized container. Add 1 tbsp (15 ml) of water per 100g of
vegetables. Cover with microfilm or lid. Stir at beep.
Cook fresh
fish
2 Presses
200 - 1100 g
Cook rice
1 Press
200 - 1000 g
FISH
RICE
For cooking fresh fish (whole, fillets, steaks). Shield thinner
portions and place fish in a suitable container. Cover with microfilm or
a lid. Stand covered for 3 minutes.
For boiling rice. Add 2 parts water to 1 part rice and 1/2 tbsp of salt
and a little bit of butter. Cover with a lid or microfilm. Stir at beep.
Auto Weight Programs
500 - 1500 g
For cooking Rice Pudding. Cook the pudding with a lid. Stir the
pudding when the oven beeps, and continue cooking without a lid. See
the recipe on page 71.
Cook rice
pudding
2 Presses
PUDD
Page 25

English
En-23
700 - 1800 g
For roasting beef. Place beef in dish on Low Wire Rack on Glass
Tray. Turn over at beeps. Wrap the beef and stand for 10 to 15
minutes after cooking.
Roast beef
2 Presses
BEEF
Category
Poids
recommandé
Accessories
Instructions
700 - 2000 g
For roasting pork. Place pork, fat side down, in a dish, on Low Wire
Rack on Glass Tray, add 1 dl water and 1 tbsp of salt. Turn over at
beeps. Stand for 10 to 15 minutes after cooking.
Roast pork
1 Press
PORK
Word
Prompt
Fresh chicken
pieces
1 Press
250 - 1500 g
For roasting fresh chicken pieces. Place chicken in a dish on Low
Wire Rack on Glass Tray. For even cooking, spread out the chicken
pieces. Stand for 10 to 15 minutes.
CHICK
Frozen
chicken pieces
2 Presses
250 - 1000 g
For roasting frozen chicken pieces. Place chicken in a dish on Low
Wire Rack on Glass Tray. For even cooking, spread out the chicken
pieces. Stand for 10 to 15 minutes.
CHICK
Auto Weight Programs
Page 26
En-24
Category
Recommended
Weight
Accessories
Instructions
Word
Prompt
Jacket
potatoes
200 - 2000 g
For cooking, browning and crisping the skins of baking potatoes.
Wash the potatoes and pierce the skins of the potatoes with a fork.
Place on Low Wire Rack.
BAKPOT
Fresh gratin/
lasagne
500 - 2000 g
For cooking fresh pasta gratin. Prepare the fresh or boiled pasta
covered with a sauce and cheese. For 100 g pasta use 4 dl (400 g)
sauce/cream and cover with grated cheese. This program is also
suitable for cooking pre-cooked refrigerated pasta gratin meals. Place
dish on low wire rack on Glass Tray.
GRATIN
Frozen pizza
100 - 500 g
For reheating, crisping the base and browning the top of frozen
purchased pizza. Remove all packaging and place the pizza on the
High Wire Rack on the Metal Tray on Glass Tray.
PIZZA
Frozen potato
products
200 - 500 g
For reheating, crisping and browning frozen potato products.
Spread out the frozen potato products on the Metal Tray on High Wire
Rack on Glass Tray. Turn at beep. For best results cook in a single
layer.
CHIPS
Auto Weight Programs
Page 27
English
En-25
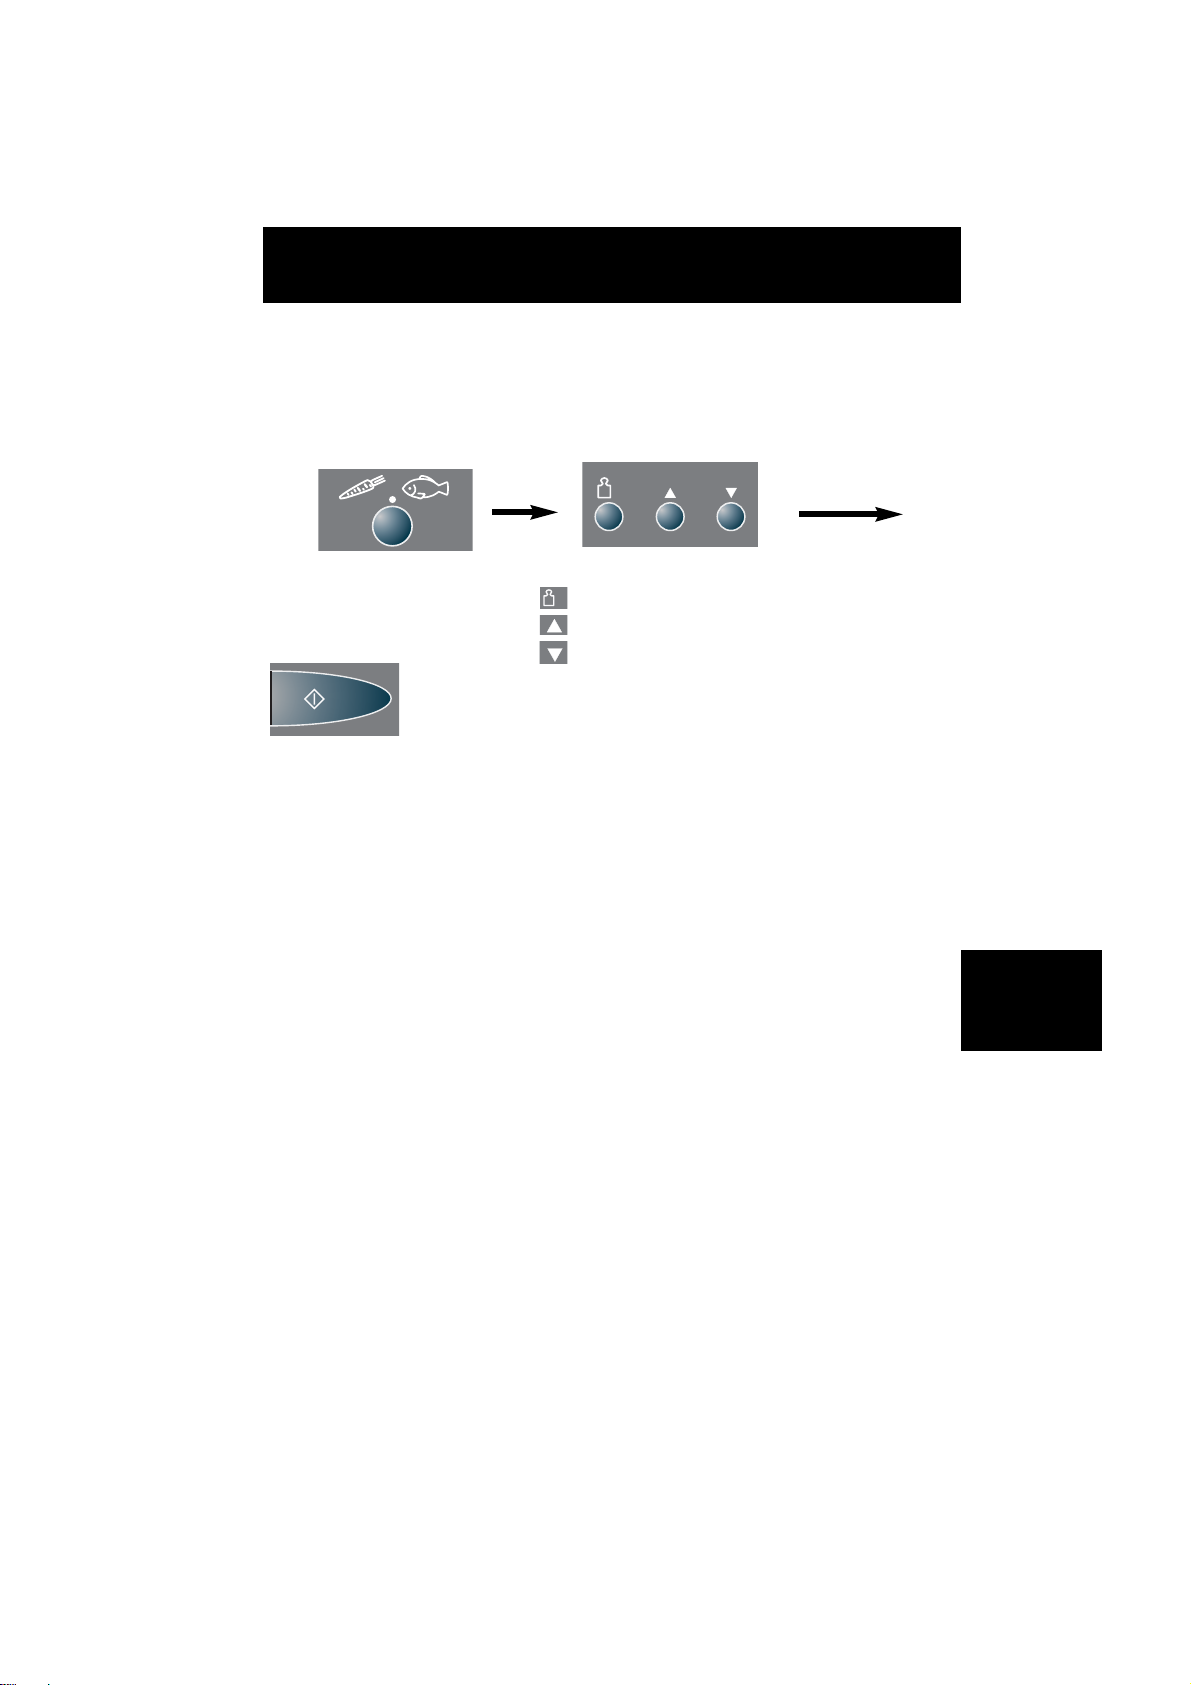
Delay Start Cooking
By using Delay/Stand Pad, you are able to program Delay Start cooking.
NOTE:
1. Three stage cooking can be programmed including Delay Start cooking.
e.g.
2. If the programmed delay time exceeds one hour, the time will count down in units of minutes.
If less than one hour, the time will count down in units of seconds.
3. Delay Start cannot be programmed before any Auto Programs.
• Press
Delay/Stand
Pad.
• Set the delay time
by pressing Time
Pads (up to 9 hours
99 minutes).
• Set the desired
cooking program
and cooking
time.
• Press Start Pad.
e.g.
inoperable
Delay Start: 1 hour High Power: 10 min.
Simmer Power: 20 min.
once once once
5 times twice
inoperable
inoperable
inoperable
10
1
min
h
1
min10 s
10
min
1
h
1
min10 s
10
min
1
10
h
min
1
min10 s
1
h
1
min10 s
1
10
h
min
1
min10 s
Page 28

En-26
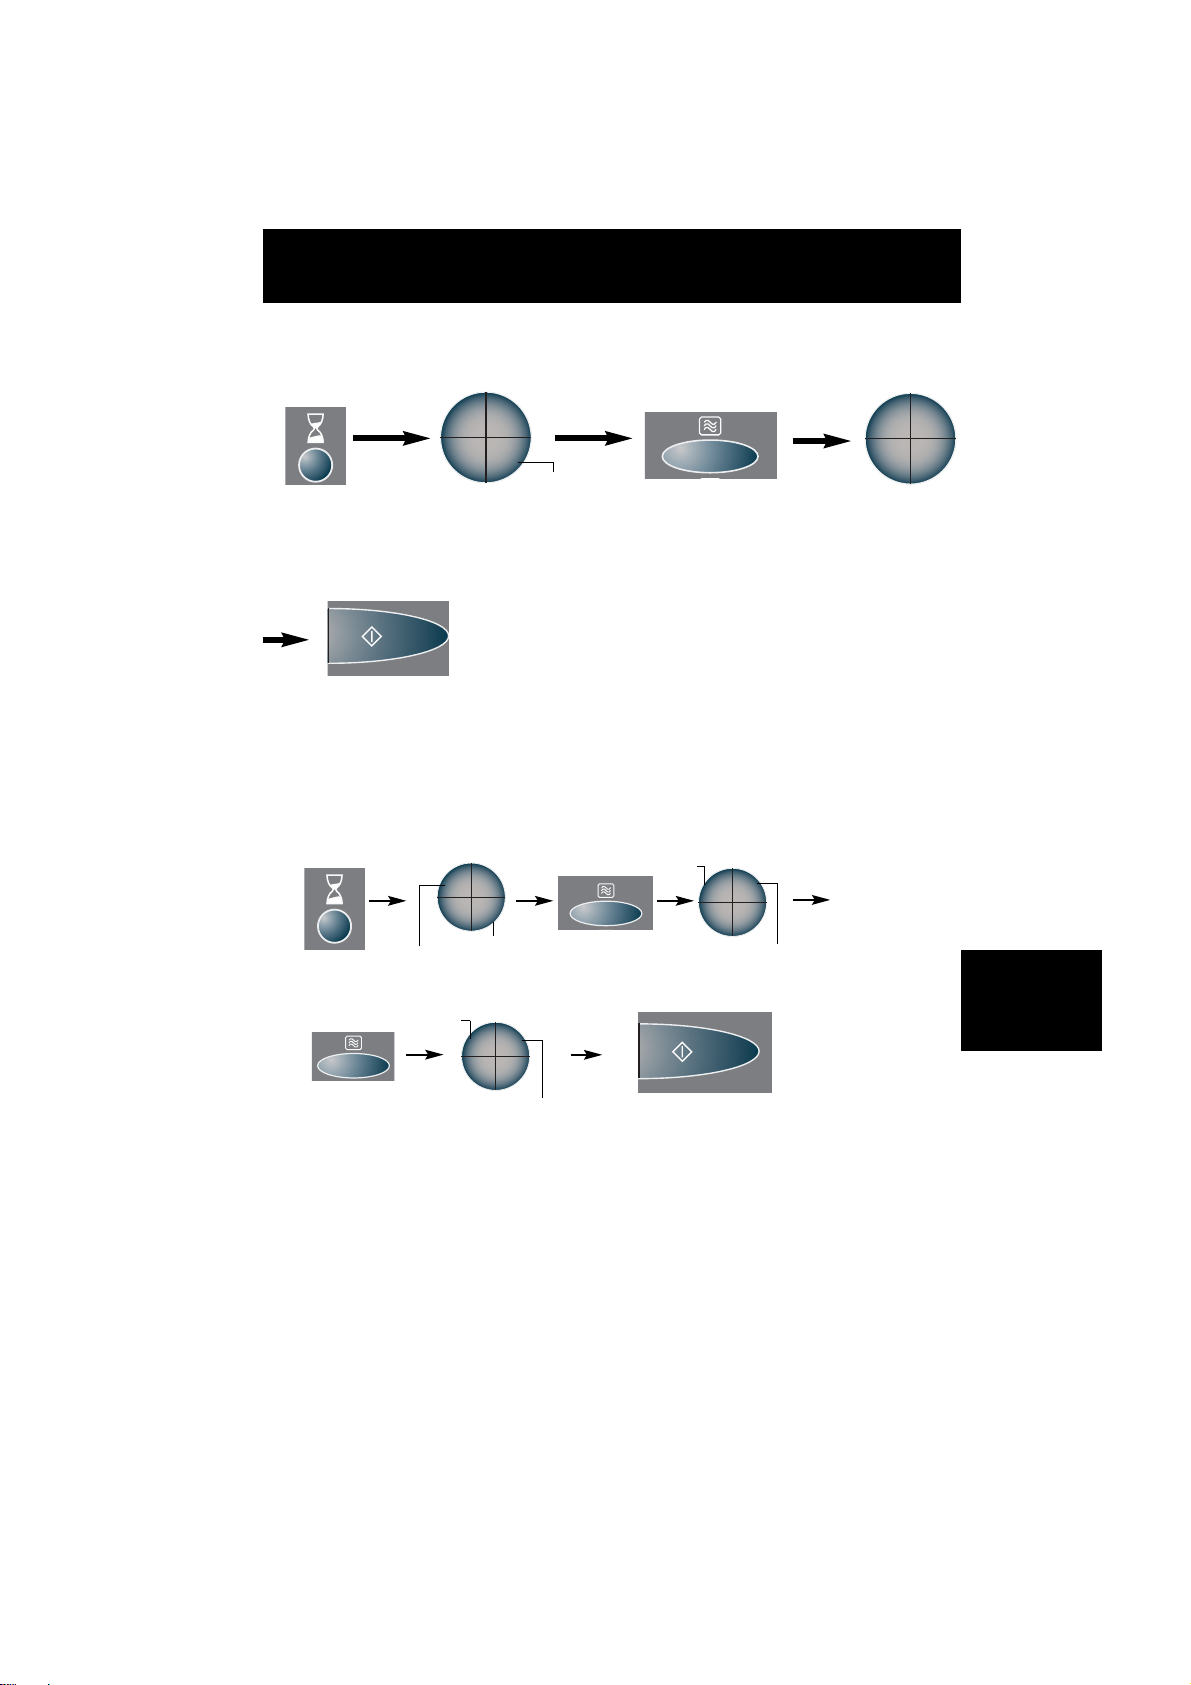
By using Delay/Stand Pad, you can program Stand Time after cooking is completed or
use to program the oven as a minute timer.
• Set the desired cooking program
and cooking time.
• Press
Delay/Stand
Pad.
• Set desired amount of time by
pressing Time Pads (up to 9
hours 99 minutes).
• Press Start Pad.
NOTE:
1. Three stage cooking can be programmed including Stand Time.
e.g.
2. If the oven door is opened during the Stand Time or Minute Timer, the time in the
display window will continue to count down.
3. This feature may also be used as a timer. In this case press Delay/Stand Pad, set
time and press Start Pad.
e.g.
High Power: 4 min. Stand Time: 5 min.
High Power: 2 min.
inoperable
Stand Time
once
once
twice
inoperable
4 times
inoperable
5 times
inoperable
1
h
1
min10 s
10
min
1
10
h
min
1
min10 s
1
h
1
min10 s
10
min
1
h
1
min10 s
10
min
1
h
1
min10 s
10
min
Page 29

English
En-27
Questions and Answers
Q: My microwave oven causes
interference with my T.V. Is this
normal?
Q: The oven won’t accept my
program. Why?
Q: Sometimes warm air comes from
the oven vents. Why?
Q: There are humming and clicking
noises from my oven when I cook
by COMBINATION. What is
causing these noises?
Q: Can I check the pre-set oven
temperature while cooking or
preheating by CONVECTION?
Q: Can I easily cook my favourite
recipes using
CONVECTION/GRILL?
Q: “D” appears in the display and the
oven does not cook. Why?
Q: Can I use a conventional oven
thermometer in the oven?
Q: My oven has an odour and
generates smoke when using the
CONVECTION, COMBINATION
and GRILL function. Why?
A: When the oven does not turn on, check the following:
1. Is the oven plugged in securely? Remove the plug
from the outlet, wait 10 seconds and reinsert.
2. Check the circuit breaker and the fuse. Reset the
circuit breaker or replace the fuse if it is tripped or
blown.
3. If the circuit breaker or fuse is all right, plug
another appliance into the outlet. If the other
appliance works, there probably is a problem with
the oven. If the other appliance does not work,
there probably is a problem with the outlet.
If it seems that there is a problem with the oven,
contact an authorized Service Center.
A: Some radio and TV interference might occur when
you cook with the microwave oven. This interference
is similar to the interference caused by small
appliances such as mixers, vacuums, blow dryers,
etc. It does not indicate a problem with your oven.
A: The oven is designed not to accept an incorrect
program. For example, the oven will not accept a
fourth stage, and will not accept Auto Weight
Program after Delay Start.
A: The heat given off from the cooking food warms the
air in the oven cavity. This warmed air is carried out
of the oven by the air flow pattern in the oven. There
are no microwaves in the air. The oven vents should
never be blocked during cooking.
A: The noises occur as the oven automatically switches
from microwave power to CONVECTION/GRILL to
create the combination setting. This is normal.
A: Yes. Press Convection Pad and the oven
temperature will appear in the display window for 2
seconds.
A: Yes. You can cook your favourite recipe just as you
would in a conventional oven. Check instructions in
the Panasonic Cookbook for suggested oven
temperatures and cooking times.
A: The oven has programmed DEMO MODE. This
mode is designed for retail store display. Deactivate
this mode by pressing Clock Pad three times.
A: Only when you are using CONVECTION/GRILL
cooking mode. The metal in some thermometers may
cause arcing in your oven and should not be used on
MICROWAVE and COMBINATION cooking modes.
A: After repeated use, it is recommended to clean the
oven and then run the oven without food, glass tray,
and roller ring on CONVECTION 250°C for 20 mins.
This will burn off any food, residue or oil which may
cause an odour and/or smoking.
Q: Why won’t my oven turn on?
Page 30

En-28
Care of Your Oven
1. Turn the oven off before cleaning.
2. Keep the inside of the oven, door
seals and door seal areas clean.
When food splatters or spilled liquids
adhere to the oven walls, door seals
and door seal areas wipe off with a
damp cloth. Mild detergent may be
used if they get very dirty. The use of
harsh detergent or abrasive is not
recommended.
DO NOT USE COMMERCIAL OVEN
CLEANERS.
3. The outside oven surface should be
cleaned with a damp cloth. To prevent
damage to the operating parts inside
the oven, water should not be allowed
to seep into the ventilation openings.
4. If the Control Panel becomes dirty,
clean it with a soft, dry cloth. Do not
use harsh detergents or abrasives on
the Control Panel. When cleaning the
Control Panel, leave the oven door
open to prevent the oven from
accidentally turning on. After cleaning
touch STOP/CANCEL Pad to clear the
display window.
5. If steam accumulates inside or around
the outside of the oven door, wipe with
a soft cloth. This may occur when the
microwave oven is operated under
high humidity conditions and in no way
indicates a malfunction of the unit.
6. It is occasionally necessary to remove
the glass tray for cleaning. Wash the
tray in warm soapy water or in a
dishwasher.
7. The roller ring and oven cavity floor
should be cleaned regularly to avoid
excessive noise. Simply wipe the
bottom surface of the oven with mild
detergent and hot water then dry with
a clean cloth. The roller ring may be
washed in mild soapy water. Cooking
vapours collect during repeated use
but in no way affects the bottom
surface or roller ring wheels. After
removing the roller ring from the cavity
floor for cleaning, be sure to replace it
in the proper position.
8. The back of the oven has a self-clean
catalytic lining. It is therefore not
necessary to clean this area.
9. When using the GRILL,
CONVECTION or COMBINATION
mode, some foods may inevitably
splatter grease on to the oven walls. If
the oven is not cleaned occasionally, it
may start to “smoke” during use.
10. A steam cleaner is not to be used
for cleaning.
11.This oven should only be serviced by
qualified personnel. For maintenance
and repair of the oven contact the
nearest authorized dealer.
12. Keep air vents clear at all times.
Check that no dust or other material
is blocking any of the air vents on the
top, bottom or rear of the oven. If air
vents become blocked this could
cause overheating which would affect
the operation of the oven.
13. Failure to maintain the oven in a
clean condition could lead to
deterioration of surfaces that could
affect the life of the appliance and
possibly result in a hazardous
situation.
Page 31

English
En-29
Technical Specifications
Power Source: 230 V, 50 Hz
Power Consumption: Maximum; 2150 W
Microwave; 1250 W
Grill; 1350 W
Convection; 1470 W
Output: Microwave; 1000 W (IEC-60705)
Grill Heater; 1300 W
Convection Heater; 1400 W
Outside Dimensions: 510 (W) x 477 (D) x 304 (H) mm
Oven Cavity Dimensions: 359 (W) x 352 (D) x 217 (H) mm
Uncrated Weight: 15 kg
Specifications subject to change without notice.
This product is an equipment that fulfills the European standard for EMC disturbances (EMC =
Electromagnetic Compatibility) EN 55011. According to this standard this product is an equipment
of group 2, class B and is within required limits. Group 2 means that radio-frequency energy is
intentionally generated in the form of electromagnetic radiation for warming up of foods. Class B
means that this product may be used in normal household areas.
Information on Disposal for Users of Waste Electrical & Electronic Equipment
(private households)
This symbol on the products and/or accompanying documents means that used
electrical and electronic products should not be mixed with general household
waste.
For proper treatment, recovery and recycling, please take these products to
designated collection points, where they will be accepted on a free of charge basis.
Alternatively, in some countries you may be able to return your products to your
local retailer upon the purchase of an equivalent new product.
Disposing of this product correctly will help to save valuable resources and prevent
any potential negative effects on human health and the environment which could
otherwise arise from inappropriate waste handling. Please contact your local authority for further
details of your nearest designated collection point.
Penalties may be applicable for incorrect disposal of this waste, in accordance with national
legislation.
For business users in the European Union
If you wish to discard electrical and electronic equipment, please contact your dealer or supplier
for further information.
Information on Disposal in other Countries outside the European Union
This symbol is only valid in the European Union.
If you wish to discard this product, please contact your local authorities or dealer and ask for the
correct method of disposal.
Page 32

En-30
Preface
The recipe book was prepared for the NN-A755 microwave. The following pages
give everything you need to know about the operation, use and features of your
combination microwave oven.
The recipes were developed with the customer in mind at the Panasonic cooking
studio.
We hope you have fun preparing the dishes and … bon appétit!
Page 33

English
En-31
Introduction:
The benefits of the microwave oven . . . . . . . . . . . . . . . . . . . . .32-33
Microwave automatic functions . . . . . . . . . . . . . . . . . . . . . . . . . . . 34
Automatic weight defrosting . . . . . . . . . . . . . . . . . . . . . . . . . . . . . . 35
Using the fan oven . . . . . . . . . . . . . . . . . . . . . . . . . . . . . . . . . . . . . .36
Using the grill . . . . . . . . . . . . . . . . . . . . . . . . . . . . . . . . . . . . . . . . . 36
Using the grill with fan oven . . . . . . . . . . . . . . . . . . . . . . . . . . . . . .37
Grill chart . . . . . . . . . . . . . . . . . . . . . . . . . . . . . . . . . . . . . . . . . .38-39
Ovenware to be used . . . . . . . . . . . . . . . . . . . . . . . . . . . . . . . . .40-41
Recipes:
Tips . . . . . . . . . . . . . . . . . . . . . . . . . . . . . . . . . . . . . . . . . . . . . . .42-44
Starters . . . . . . . . . . . . . . . . . . . . . . . . . . . . . . . . . . . . . . . . . . . .45-46
Fish . . . . . . . . . . . . . . . . . . . . . . . . . . . . . . . . . . . . . . . . . . . . . . 47-48
Meat . . . . . . . . . . . . . . . . . . . . . . . . . . . . . . . . . . . . . . . . . . . . . 49-51
Poultry . . . . . . . . . . . . . . . . . . . . . . . . . . . . . . . . . . . . . . . . . . . . .52-54
Gratin dishes, pies and soufflés . . . . . . . . . . . . . . . . . . . . . . . . 55-59
Vegetables . . . . . . . . . . . . . . . . . . . . . . . . . . . . . . . . . . . . . . . . .60-63
Sauces . . . . . . . . . . . . . . . . . . . . . . . . . . . . . . . . . . . . . . . . . . . .64-65
Side dishes and light suppers . . . . . . . . . . . . . . . . . . . . . . . . . . 65-66
Gateaux, cakes, tarts and pastries . . . . . . . . . . . . . . . . . . . . . . 67-70
Desserts . . . . . . . . . . . . . . . . . . . . . . . . . . . . . . . . . . . . . . . . . . . . . .71
Bread and Pizza . . . . . . . . . . . . . . . . . . . . . . . . . . . . . . . . . . . . .72-73
Defrosting/Reheating/Cooking charts:
Heating baby food . . . . . . . . . . . . . . . . . . . . . . . . . . . . . . . . . . . . . .74
Defrosting and reheating pre-cooked dishes . . . . . . . . . . . . . . . . . .74
Manual combination cooking . . . . . . . . . . . . . . . . . . . . . . . . . . . . . .75
Defrosting and reheating pre-cooked frozen dishes . . . . . . . . . . . .76
Defrosting and cooking vegetables . . . . . . . . . . . . . . . . . . . . . . . . .77
Chart showing cooking times for dishes and grains . . . . . . . . . .78-80
Defrosting in the combination microwave oven . . . . . . . . . . . . . . . .81
Defrost chart for dairy products . . . . . . . . . . . . . . . . . . . . . . . . . . . .82
Defrost chart for fruit . . . . . . . . . . . . . . . . . . . . . . . . . . . . . . . . . . . .83
Index of recipes . . . . . . . . . . . . . . . . . . . . . . . . . . . . . . . . . . . . . . .84
Contents
• Unless otherwise indicated, all recipes are for 4 people.
• The times indicated are a guide only and may vary depending on the food used.
Page 34

En-32
The benefits of the microwave oven
For many foods, the microwave oven is the quickest and healthiest method of cooking.
Since the microwaves act directly on the food (the food container hardly becomes hot
and the inside of the microwave stays cool), the microwave oven is also very energy
efficient.
The microwaves prevent a burned crust from forming on the food. Most foods can be
cooked with very little water and oil, preserving more of the flavour, colour, vitamins
and minerals. You can practically do without salt.
You will avoid destroying the vitamins and minerals when the food is heated for any
length of time, since your microwave can reheat a meal in a matter of minutes, without
loss of flavour.
Similarly, defrosting with your microwave is fast and simple. You can surprise unexpected guests by serving frozen meals prepared in the blink of an eye.
Cooking food directly on the plates cuts down on the washing up.
Cooking times with the microwave oven
Cooking times are affected by a number of factors; firstly, the quantity of food used.
For example, it takes around 20 minutes to cook potatoes on the stove after they
come to the boil, whether there are two potatoes or two kilos of potatoes to cook.
Microwaves act directly on the food, i.e. without a hotplate for example, so it only takes
two minutes to cook a potato. If you want to cook two potatoes, you will need
4 minutes to cook them. The cooking time doubles, in direct proportion to the quantity.
Guideline
Furthermore, the composition of the food plays a part. Foods with a high fat and sugar
content absorb more microwaves so that they heat more quickly than foods with a high
water content. The packaging of the food also has a considerable impact on the cooking time in a microwave oven. A large joint takes longer to cook than the same
amount of meat cut into cubes.
Small pieces cook more quickly than large pieces which is why food must always be
cut up, e.g. vegetables and potatoes into pieces of the same size. Since the initial
temperature also plays a part, dishes taken out of the refrigerator will take a little
longer to reheat than dishes at room temperature.
DOUBLE THE QUANTITY - NEARLY DOUBLE THE TIME
HALVE THE QUANTITY - HALF THE TIME
Page 35

English
En-33
Just as with electric hotplates, you can select different power levels on your combination microwave oven so that you can make the most of your oven at all times.
Selecting the different power levels is simple with the symbols on the control panel.
If you wish to use your microwave in manual mode, all you need do is choose the
power level (e.g. full power = 1000 watts), state the cooking time and push the Start
button.
The power levels available on the Panasonic combination microwave oven are as
follows:
1000 watts To bring to the boil, cook on full power, heat
portioned meals
600 watts To defrost frozen dishes and heat them, to reheat
precooked dishes.
440 watts To simmer food, cook delicate food, melt chocolate.
270 watts To defrost meat, fish, fruit, cakes and pastries.
250 watts To finish cooking rice, pasta, semolina, defrost
delicate food, e.g. cream pie, to prove dough.
Operating instructions
:
Accessory:
The NN-A755 microwave
-
1.
Place the food on the glass turntable in the microwave,
making sure to use a microwaveable dish.
2. Turn the select button to the microwave position .
3. Select the power level .
4. Indicate the cooking time.
5. Push the start button .
Page 36

En-34
Microwave automatic functions
As well as manual operation, when the power level must be selected (e.g. 1000
watts), if applicable, the method of operation (e.g. "Grill") and a cooking time, the
microwave has various automatic functions, which dispense with the need to select
the power level, temperature and time. All you need do is choose a programme,
indicate the weight and press the start button. The cooking time will be calculated
according to the weight indicated.
Cooking
The "Vegetables" and "Fish" settings enable automatic cooking. The use of
microwaveable glass, lidded dishes is recommended such as Jenaer, Schott and
Pyrex
®
. Select the size of the dish according to the quantity of food to be cooked.
To achieve the best results, it is essential to keep to the maximum and minimum
quantities indicated. No cooking liquid is required for vegetables that are low in
fibre. High-fibre vegetables such as cabbage, asparagus, salsify and fennel, need 2
tbsp water for every 100 g vegetables. Jacket potatoes must be pricked with a fork
and can be simply cooked while moist. However, 1 tbsp water for every 100 g
potato is needed for boiled potatoes. The potatoes should be roughly the same size.
Page 37

English
En-35
Automatic weight defrosting
To obtain the best defrosting results, the food should be smoothly wrapped,
horizontally if possible, frozen and kept at a minimum temperature of -18°C.
Remove packaging from the food before defrosting. When defrosting, liquid from
meat, fish and poultry must drain freely. For this reason, a defrost tray (if supplied)
or an upturned plate is placed on the turntable, and the food placed on top.
You will also find detailed instructions on defrosting on page 74-83. With automatic
weight defrosting, reckon on a period of around 15-60 minutes (depending on the
quantity, type and composition of the food) before the food is ready to use. After
defrosting, separate the small pieces of meat when using minced meat, and break up
any remaining ice crystals.
You can use automatic weight defrost for the following foods:
- cuts of meat such as steaks, cutlets, goulash, kebabs
- minced meat, offal, joints
- poultry, game, fish.
TIP: Food which is not suitable for automatic weight defrosting can nonetheless be
defrosted with the Panasonic combination microwave oven. The charts on pages 7483 therefore give the necessary defrost power levels and times which must be
selected manually.
Operating instructions:
Accessories:
1. Place the food in the microwave using a defrost tray or an
upturned plate placed on the turntable.
2. Select the defrost programme.
3. Set the weight or the defrost time.
4. Push the Start button .
Page 38

En-36
Using the fan oven
In this operating mode the heat generated by the heating element is fanned continually and distributed evenly by a fan housed at the back of the microwave.
Operating instructions:
Accessories:
Using the grill
When using the grill, the door of the Panasonic combination microwave oven must
remain closed. This reduces cooking odours and the consumption of electricity.
When it is in operation, the heating element inside the oven generates a powerful
heat.
The grill combined with the microwave is particularly appropriate for browning the
top of gratins for example.
You will find several examples on the pages devoted to the recipes. The grill
described above is used mainly to brown smooth dishes.
Operating instructions:
Accessories:
1. Set the cooking mode by selecting fan oven .
2. Select the temperature by pressing .
3. Press the Start button .
4. The letter P appears on the digital display (P for Preheat).
5. When the desired temperature is reached, the P flashes.
6. Open the door and place the cooking dish inside the oven.
7. Set the cooking time.
8. Press the Start button.
0
C
1. Select the grill .
2. Set the cooking time.
3. Press the Start button .
Page 39

English
En-37
Using the grill with the fan oven
In this operating mode, the hot air produced by the heating element is fanned by the
fan attached to the back of the microwave.
For grilling, use the high rack on the turntable. In theory, no preheating is necessary, which will reduce the consumption of electricity accordingly.
Cuts of meat such as slices, steak and cutlets are particularly suited to this method
of cooking, as are hamburgers, sausages, kebabs and chicken thighs. The thickness of the steaks, slices and cutlets must be 2-3 cm. White meat and lean meat
such as fish steaks, take on a very appetising golden colour.
Operating instructions:
Accessories:
1.
Select the (convection) temperature by pressing (Grill
2 is automatically selected).
2. To change the grill power press once for grill 3 and twice
for grill 1.
3. Press the start button to preheat.
4. After preheating, open the door and place the cooking dish in
the oven.
5. Set the cooking time.
6. Press the start button .
Page 40

En-38
Chart for grilling meat and poultry
Select: Gril 1
Manual combinations
Using the microwave on a low power level combined with the fan oven is recommended for baking and roasting.
For roast meat and poultry, use of the fan oven combined with microwave cooking is
appropriate to give a crisp and even top.
To brown gratins, use the microwave oven combined with the grill. The pages devoted to the recipes give several examples of combination cooking.
For manual combination, proceed as follows:
Operating instructions:
Food
Cooking time
Accessories
1st side 2nd side
Steak 10 Min. 5 Min.
Cutlets 14 Min. 7 Min.
Kebabs 14 Min. 7 Min.
Hamburgers 13 Min. 7 Min. Glass Turntable.
Grilled sausages 10 Min. 5 Min. Wire Rack.
Chicken thighs 12 Min. 8 Min.
Chicken Drumsticks 20 Min. 7 Min.
After cooking the oven will be hot so that if re-used, the grilling time is reduced. It is
recommended that you check the grilled food 1-2 min. before the end of the cooking
time. For thin cuts of grilled meat, the use of the grill in conjunction with microwave
cooking is not recommended. The food will be cooked by the microwaves before it
can brown.
1 Select the Grill setting or Fan oven setting or Fan and
Grill .
2. If you wish to combine the Fan oven or Fan oven and Grill
with microwave cooking, you must set the temperature by
pressing Fan .
3. Press Microwave to select the desired microwave power
level.
4. Set the cooking time.
5. Press the Start button .
0
C
Page 41

English
En-39
Combination according to weight
Keep to the maximum and minimum weights indicated for each programme to obtain
the best results.
Operating instructions
Gratin dishes
The tastiest gratin dishes are easy to prepare with this programme. The oven is
equipped with a high metal rack and a low metal rack. To brown the top, put the
gratin dish in the oven uncovered. Heat-proof oven dishes are the best dishes to use.
Operating instructions
Automatic programmes
For automatic programmes, set the weight of the food. The cooking time will be calculated according to the weight indicated.
1. Place the food on the turntable with the low rack.
2. Select the programme, e.g. pork, set the weight.
3. Press the Start button .
Programs Food Quantity
Pork Neck of pork, roast pork, 700-2000 g
rolled meat, shoulder, ham
Poultry Fowl, duck, turkey, game, 250-1500 g
stuffed poultry
1. Place the gratin dish in the oven with the high rack or the low
rack.
2. Select the Gratin programme.
3. Press the Start button .
Page 42

En-40
Ovenware to be used...
… for microwave cooking
YES
NO
…for grilling
… fan oven
YES
NO
-dishes resistant to high temperatures (e.g. Jena, Pyrex®etc.)
-ceramic dishes (e.g. Arcoflam)
-heat-proof plastic dishes
-enamel dishes or Römertopf pots
Pots, pans, jugs with a metal ring,
china decorated with gold motif,
lead crystal, fine, delicate glassware, plastic which is not heatproof, wax-coated paper plates
and sealed containers (e.g. screw
tops).
Page 43

English
En-41
Ovenware to be used …
… for combination cooking
YES
NO
… for fan oven cooking
YES
NO
- all heat-proof dishes made of glass,
ceramic and enamel
- all plates and racks supplied with
the microwave
- metal dishes (e.g. foil dishes for precooked meals) no more than 3 cm
high
- standard pastry tins (e.g. gateau
and cake tins)
- ceramic ware decorated with gold or
silver motif
- dishes that are not heatproof.
Page 44

En-42
SOFTENING BUTTER:
Place in the oven for 30-60 seconds on power level 250 W.
MELTING BUTTER:
Put 100 g butter in a lidded dish and leave to melt for 1-1
1
/
2
minutes on power level
440 W.
MELTING CHOCOLATE:
Break into small pieces and leave to melt for 2-2
1
/
2
minutes for every 100 g on power
level 440 W (a little longer for white chocolate, if necessary). Stir from time to time.
MELTING GELATINE:
Soak 6 leaves of gelatine according to the instructions. Put the water drenched
leaves in a bowl and leave to melt for 20-30 seconds on power level 250 W.
WARMING COLD DRINKS:
1-2 minutes on power level 250 W for e.g. wine or beer.
WARMING COLD LETTUCE:
Put around 500 g washed lettuce (taken out of the fridge) in a salad bowl and warm
on power level 250 W for 1
1
/
2
minutes to bring out the flavour of the lettuce.
WARMING SALAD DRESSINGS:
Put around 125 ml marinade or salad dressing in a bowl for around 30 seconds on
power level 250 W.
RESTORING CHEESE TO ROOM TEMPERATURE:
To enhance the flavour of cheese, pop into the microwave before serving. For example, 200 g Brie 40 seconds on power level 250 W, 400 g Tilsit 30-40 seconds on
power level 250 W.
RESTORING SALMON TO ROOM TEMPERATURE:
Popping 150-450 g of smoked salmon into the microwave for
1
/
2
-2
1
/
2
minutes on
power level 250 will bring out the full flavour.
PREVENTING FISH ODOURS:
You can prevent fish odours by placing half a glass of vinegar on the turntable when
cooking.
ICING:
Prepare the icing for cakes according to the instructions in a small bowl or measuring jug and heat for 2-2
1
/
2
minutes on full power (1000 W) until the mixture becomes
transparent. Stir once.
FOR CREAMY ICE-CREAM:
To serve ice-cream more easily, heat 500 ml briefly for 1-2 minutes, and 1000 ml for
2-3 minutes on power level 250 W.
TO CARAMELISE SUGAR:
Mix 3 tbsp sugar with 1 tbsp water in a heat-proof bowl and leave to caramelise for 2
minutes on full power (1000 W). Stir several times.
BLANCHING ALMONDS:
Heat 50 g almonds with 3 tbsp water on full power for 2 minutes. Leave to stand for
2 minutes and blanch.
Tip "quickly done, well done"
Page 45

English
En-43
TOASTING ALMONDS:
Put 50 g flaked almonds in a small bowl and leave to toast for 2-3 minutes on full
power (1000 W). Stir several times.
…AND FOR TOASTING FOR EXAMPLE:
60 g pine nuts for 3-4 minutes on full power, 50 g grated coconut for 2 minutes on
full power, 50 g sesame seeds for 4-5 minutes on full power, 100 g sunflower seeds
for 2-3 minutes on full power, 100 g croutons with 40 g butter (melted on a setting of
1000 watts for 30 seconds) for 3 minutes on full power. For each of these recipes,
stir several times during preparation.
REMOVING CABBAGE LEAVES:
Rinse a white cabbage (around 2000 g) under running water, place on a plate and
heat on full power for 8 minutes. The outer leaves are then easy to remove. To
remove the next layer, place the cabbage back in the oven for a further 2 minutes.
STONING FRUIT:
Heat 300-500 g cherries, prunes or other fruit with stones that are not fully ripe for 2
minutes on power level 250 to facilitate stoning.
SQUEEZING CITRUS FRUITS MORE EFFICIENTLY:
Roll the citrus fruit on the work top and then heat in the microwave. Heat for around
30 seconds on power level 250 W for one lemon.
SOAKING DRIED FRUIT:
Put 200 g dried fruit in a bowl, add
1
/
4
l liquid and heat for 2-4 minutes on full power.
The fruit will absorb a sufficient amount of water to be used.
LIQUEFYING CRYSTALLISED HONEY:
Heat for 3-4 minutes on power level 440 W sufficient to liquefy 500 g honey.
PREPARING BREADCRUMBS:
Heat 2-3 bread rolls for 2-3 minutes on full power and crush.
HOT COMPRESSES:
Place a damp and lightly wrung compress, (e.g. a dish cloth) on a plate and heat for
1-2 minutes on full power. If necessary, check to make sure that it does not become
too hot.
PREHEATING PLATES:
Dampen 4 plates slightly and preheat for 1-2 minutes on full power.
PROVING LEAVENED BREAD:
Heat for around 5 minutes on 250 watts for dough prepared with 500 g flour.
BLANCHING VEGETABLES:
Put 500 g washed vegetables in a glass dish and add 50 ml water. Blanch for 4
minutes on full power. Next, plunge them into cold water.
COOKING BACON:
Pop 4 slices of bacon between 2 sheets of paper towelling and cook for 1-2 minutes
on full power.
DELICIOUS BREAD STICK APPETISERS:
Wrap bacon rashers around 8 Grissini sticks. Pop between 2 sheets of paper towelling. Heat for 2-3 minutes on full power.
Page 46

En-44
MELTED CHEESE:
Cut a slice of cheese into cubes, arrange on paper towelling on the turntable and
heat for around 2 minutes on full power.
POPCORN:
Put 2 tbsp popping corn and 2 tsp butter in a bowl. Cover and cook for 3 minutes on
power level 600 W. Salt or sweeten to taste.
BAKED APPLES:
Wash an apple weighing around 200 g, core and fill with dried fruit. Put on a plate
and cook for around 2 minutes on full power.
MULLED WINE:
Fill a heat-proof mug with red wine flavoured with cinnamon and sugar according to
taste. Add 2 cloves and 1 slice of lemon and heat for 1-1
1
/
2
minutes on full power.
Page 47

English
En-45
Starters
The following recipes for starters are merely suggestions to encourage your creativity. All kinds of soup are easy to make in your microwave. Remove the soup from the
oven and stir to ensure that the heat is evenly distributed. The soup can be prepared
the night before and then reheated before serving. A bowl of soup can be reheated,
depending on its temperature to start with, in 1-2 minutes on full power. Meat and
fish pâtés traditionally cooked in a bain-marie are quick and easy to prepare in the
microwave on low power.
Starters
Ingredients
4 chicken fillets
Salt, pepper
1 onion, chopped
1 clove garlic, crushed
1 tbsp mustard
1 bunch of chives,
finely chopped
4 tbsp vinegar
5 tbsp oil
Condiment powder
2 pickled gherkins
Preparation
Dry the chicken fillets with paper towelling.
Sprinkle with salt and pepper. Place them in a
dish, cover and poach on the "Fish" setting
(according to the weight). To prepare the
dressing, mix the onion, garlic, mustard, chives,
vinegar, oil and condiment powder. Dice the
gherkins and add to the dish. Cut the fillets
diagonally and arrange them on a dish. Pour over
the dressing. Serve warm as a starter or light
supper.
Chicken Suprême with vinaigrette
dressing
Cooking time: around 6 minutes
Ingredients
1
/2 loaf French bread
4 anchovy fillets
30 g softened butter
a little parsley and
basil
2 tomatoes
3 slices cheese
Salt, pepper
Preparation
Cut the French bread diagonally into slices. Chop
the anchovies, mix with the butter and sprinkle
lightly with salt. Spread the slices of bread with
the anchovy butter.
Finely chop the herbs. Slice the tomatoes,
sprinkle with herbs on one side, sprinkle lightly
with salt and pepper. Place the tomatoes,
seasoned side down, on the slices of bread. Cover
with the slices of cheese and grill on Grill1 for 58 minutes.
Bruschetta
Cooking time: around 8 minutes
Page 48

En-46
Starters
Ingredients
300 g carrots cut into
batons
150 g broccoli florets
150 g of green, red
and yellow peppers,
sliced
15 tbsp dried morel
mushrooms
1 [glass of] sherry
300 ml cream
5 leaves of gelatine,
soaked
Salt, pepper,
condiment powder
Preparation
Put the sliced carrots into a hollow dish, add 2
tablespoons of water, cover and cook on the
Vegetables setting, according to the weight. Cook
the broccoli in 2 tbsp water on the Vegetables
setting, according to the weight. Put the peppers
in a hollow dish, cover and heat for 3-4 minutes
on a power level of 600 watts. Drain the presoaked mushrooms, place them in a dish, add
the sherry, cover and cook for 3-4 minutes on
full power.
Carefully dry the vegetables and layer in a terrine
mould. Put the cream in a jug and flavour with
salt, pepper and condiment powder. Boil for 2-3
minutes on full power. Remove the gelatine from
the water, drain and add to the warm cream. Mix
thoroughly. Pour over the vegetables, cover and
leave to stand in a cool place overnight. Turn out
the terrine, cut into slices and serve on a plate.
Serve with a cream of chive or watercress sauce.
Vegetable terrine
Cooking time: around 20-22 minutes
Ingredients
1 onion, chopped
1 tbsp butter
250 g frozen green peas
1-2 tbsp curry powder
400 ml chicken stock
100 ml whipped cream
1 tbsp flaked almonds
Preparation
Cook the onions in the butter in a covered bowl
for 2 minutes on full power.
Add the peas, curry and stock, cover and cook
for 8
1
/
2
minutes on full power. Purée in a mixerblender. Add the cream. Place the almonds in a
dish and toast for 3-4 minutes on full power.
Sprinkle almonds on the soup before serving.
Spicy pea soup
Cooking time: around 14 minutes
Page 49

English
En-47
Fish
Fish is ideally suited to microwave cooking. Cooking without oil and with little or no
liquid preserves the nutrients and flavour of the fish, as it does with all other foods.
For small quantities, you can replace fresh fish with frozen, but in this case,
increase the cooking time. In addition, make sure the fish is left to stand for a while
[after cooking] so that the heat is evenly distributed. Fish cooked in a Panasonic
microwave stays firm and moist thanks to the quick cooking time.
Fish
Ingredients
400 g fish fillets
Salt, white pepper
Parsley, dill and tar-
ragon, chopped
1 onion, chopped
100 ml cream
1 tbsp tomato purée
1 clove garlic, crushed
1 tsp cornflour
1 tbsp butter
Preparation
Sprinkle the fillets with salt, pepper and herbs.
Leave to marinate for a while. Put the butter,
onions, fish and wine in a casserole dish, cover
and cook on the "Fish" setting (according to the
weight). Pour the cooking liquid into a bowl, add
the cream, tomato purée, garlic and cornflour.
Cook on full power for 2-3 minutes, then pour
the sauce over the fillets.
«Dézaley» fish fillets
Cooking time: around 8-9 minutes
Ingredients
500 g prawns
Salt, pepper, lemon
juice
1
/2 tsp Worcester
sauce
1 tbsp dill
2 tbsp butter
1 onion, chopped
100 ml white wine
2 tbsp Pernod
100 ml cream
2 tsp cornflour
Preparation
Season the prawns with salt, pepper, and add
the lemon juice, Worcester sauce and dill. Leave
to marinate for a while. Put the butter and
onions in a casserole dish, cover and cook on
full power for 3 minutes. Add the prawns, pour
in the wine and Pernod, cover and cook on the
"Fish" setting (according to the weight).
Next, remove the prawns from the cooking liquid. Add the cream and cornflour and cook on
full power for 3 minutes.
Prawns with dill and Pernod sauce
Cooking time: around 10 minutes
Page 50

En-48
Fish
Ingredients
4 fillets of monkfish,
weighing 130 g each
Salt, pepper, lemon juice
3 tbsp butter
2 tbsp breadcrumbs
1
/2 bunch tarragon,
chopped
1
/2 bunch parsley, chop-
ped
1 clove garlic, crushed
Preparation
Melt the butter in a casserole dish on full power
for 1 minute. Add the breadcrumbs, tarragon,
parsley and garlic to the butter. Season with salt
and pepper. Season the monkfish with salt and
pepper and sprinkle on the lemon juice. Score
the flesh lengthways
1
/
2
cm deep and fill with the
herb mixture. Place the fish fillets in a dish and
cook, covered, on the "Fish" setting (according to
the weight).
Monkfish fillets with herbs
Cooking time: around 6 minutes
Ingredients
400 g salmon slices
Juice of half a lemon
1 tbsp butter
1 onion, chopped
1 apple, grated
1 tbsp coconut flakes
1 tsp curry [powder]
1 tomato, diced
2 tbsp half-fat sour
cream
Salt, pepper
Preparation
Cut the fish into slices 2 cm thick. Sprinkle with
salt and pepper. Butter a glass dish, place the
fish inside and add all the ingredients except for
the sour cream. Cook on the "Fish" setting
(according to the weight). Add the half-fat sour
cream and serve.
Spicy salmon slices
Cooking time: around 8-10 minutes
Page 51

English
En-49
Meat
Meat cooks very well in the microwave. Pork, lamb, smoked meat and minced meatbased dishes are particularly tasty. Cuts of beef, except for very tender cuts and
quick-cook meat such as roast beef and fillet of beef, are not suitable for microwave
cooking because they become dry and tough. As with traditional cooking, large cuts
of cooked meat must stand for 10 minutes before serving. By doing so, they preserve their moistness and cook a little longer.
Meat
Ingredients
1 kg pork loin
1 tbsp honey
2 tbsp Dijon mustard
2 tsp ground coriander
2 tsp curry [powder]
1
/2
tsp ground cloves
2 onions
1
/4
l cider
500 g cooking apples
2 tbsp gravy thickener
60 g pine nuts
10 g butter
Preparation
Place the meat in a glass dish, fat side down and
sear the meat on full power for 7 minutes. Make
a paste with the honey, mustard and spices, and
brush the fat part of the cutlets. Dice the onions
and add to the meat with half the cider. Cover
and cook on medium power for 20-22 minutes.
When cooked, keep the meat hot by covering with
tin foil.
Wash the apples and divide into eight segments.
Place in the dish with the rest of the cider and
cook on full power for 4-6 minutes. Remove the
apple slices, stir the gravy thickener into the
cooking juices and heat on full power for 1
minute. Toast the pine nuts and the butter in a
bowl on full power for 3-4 minutes. Add the apple
slices and pine nuts to the sauce and serve with
the sliced meat.
Spiced pork with apples
Cooking time: 35-40 minutes
Page 52

En-50
Ingredients
4 butterfly cutlets
(approximately 150g
each)
Salt, pepper
150g mushrooms
100g cherry tomatoes
1 carton of crème
fraiche with herbs
(125g)
1 carton of cream
(200ml)
1 triangle of processed
cheese (62.5g)
1 tsp Dijon mustard,
sharp
1 tbsp frozen parsley
1 tbsp frozen dill
Salt, pepper
Preparation
Season the cutlets and place in a gratin dish.
Clean the mushrooms and slice. Halve the
washed cherry tomatoes and spread on top of the
meat with the mushrooms. Mix together the
crème fraiche, cream, cheese spread and mustard. Add the parsley, dill and seasoning and
mix.
Pour the sauce over the meat and cover.
Marinade in the refrigerator for several hours.
Remove lid, then place on the glass tray and
brown using the combination method:
Grill 1 and microwave at 440 watts for 25-28
minutes.
Butterfly pork cutlets au gratin
Cooking time: approximately 25-30 minutes
Meat
Ingredients
1200g beef
Salt, pepper, oregano
2 tbsp oil
1 onion
1 clove of garlic
150 g carrots
100 g celery
125 ml red wine
1 bay leaf
1 tin of tomatoes
(drained weight 240 g)
2-3 tbsp crème fraiche
Preparation
Score the fatty side of the beef. Rub the seasoning into the meat and place fatty side down in a
shallow glass dish brushed with oil. Cover and
cook at 600 watts for 8-10 minutes.
In the meantime, peel the onion and garlic clove
and chop finely. Clean the vegetables, grate the
carrots and cut the celery into very fine slices.
Turn the meat once partly cooked and add the
vegetables, red wine and bay leaf. Do not cover,
and cook using the combination method: Grill 2
and microwave at 250 watts for 20-25 minutes
until it is cooked through.
Then allow the beef to stand for 10 minutes
wrapped in aluminium foil. Add the tomatoes to
the vegetables and cover. Heat at 1000 watts for
8-10 minutes. Enrich with the crème fraiche and
serve with the meat.
Italian roast beef
Cooking time: approximately 36-45 minutes
Page 53

English
En-51
Meat
Ingredients
1 egg
60ml evaporated milk
175g grated Gruyere
cheese
4 rashers of bacon
25g fresh bread-
crumbs
1
/2 tsp garlic powder
1
/2
tsp onion powder
800g minced beef
Preparation
Place bacon onto a heatproof plate and cook on
microwave 1000 watts for 2 minutes. Allow to
cool, then chop into small pieces.
Pre-heat the oven on convection 190°C with the
enamel shelf in position.
In a large bowl, combine the egg, milk, handful of
grated cheese, half of the bacon, breadcrumbs,
garlic and onion powder.
Add the minced beef and mix well.
Shape into a greased 23 x 13 x 7cm loaf tin and
place on enamel shelf.
Cook, uncovered for 1 hour.
Drain off the excess fat.
Sprinkle with the remaining cheese and bacon.
Bake for 5 minutes longer on convection 190°C
or until cheese is melted.
Allow to stand for 10 minutes before slicing.
Bacon and cheese meatloaf
Cooking Time: 1 hour 5 minutes
Page 54

En-52
Poultry
Poultry can be prepared in a variety of ways. You can also make the tastiest poultry
dishes in your microwave. To obtain a crisp, golden skin, use the combination oven
or the grill. Poultry can be cooked without adding liquid, which preserves the flavour.
Poultry
Ingredients
2 tbsp oil
2 duck fillets,
weighing 300 g
without layer of fat
Meat seasoning
1 onion, finely
chopped
the zest of an orange
2 freshly squeezed
oranges
100 ml gravy
thickener
16 orange slices to
garnish
Preparation
Oil and season the fillets with the meat seasoning. Place the fillets on the rack and cook for 4
minutes on "Grill 1" until golden brown. Turn
over and cook for a further 3 minutes.
Put the onions and orange zest in a bowl, cover
and cook on full power for 2 minutes. Moisten
with the orange juice and add the gravy thickener. Stir and cook on full power for 2-3 minutes.
Season the sauce. Cut the fillets into thin slices
and arrange them nicely on a plate. Pour over
sauce and garnish with orange slices.
Fillet of duck with orange sauce
Cooking time: around 13 minutes
Ingredients
1 leg of turkey (700 g)
Salt, pepper, paprika,
mustard
2 tbsp oil
1
/8 l chicken stock
1
/8
l white wine
1
/8 l cream
1 tbsp gravy thickener
Madeira wine
Thyme
Zubereitung
Smear the leg of turkey with oil, pepper, salt,
paprika and mustard. Place the leg on the Metal
Tray. Place on the glass turntable. Cook on combination 440 watts microwave + 220°C convection for 30 minutes. Turn half-way through cooking time. Cover the leg with tin foil and leave to
stand for 10 minutes. For the sauce, mix the
cooking juices, stock, wine, cream, gravy thickener, Madeira wine and thyme and cook on full
power for 3 minutes. Serve the sauce with the
turkey cut into slices.
Leg of turkey
Cooking time: around 35 minutes
Page 55

English
En-53
Poultry
Ingredients
4 chicken fillets
2 tbsp soya sauce
Salt, pepper
1 tbsp flour
1 tbsp oil
1 tbsp lemon juice
4 tbsp white wine
100 ml cream for sauce
1
/
2
bunch chives
Preparation
Dry the fillets with paper towelling. Season with
salt and pepper and brush with the soya sauce
and oil. Place the chicken fillets on the rack on
Grill 1 for 5-6 minutes until golden brown, turn
over and cook for a further 4 minutes.
Cover the chicken fillets with tin foil and keep
warm. Mix the lemon juice, cream and white wine
in a bowl and cook on full power for 2-3 minutes.
Sprinkle with salt and pepper. Place the chicken
fillets on a plate, pour over sauce and garnish
with chives.
Chicken fillets with lemon sour
cream sauce
Cooking time: 9-10 minutes
Ingredients
30 g butter
1 onion, chopped
2 tsp curry powder
600 g chicken fillets, cut
into strips
Salt, pepper
3/8 -
1
/
2
l chicken stock
3 tbsp mango chutney
Beurre manié:
2 tbsp flour
20 g butter
1 tsp soya sauce
2 tbsp sour cream
Preparation
Put the butter and onions in a casserole dish and
cook on full power for 3 minutes. Season the
chicken strips with salt and pepper and add to
the onions. Cover and cook on full power for 4
minutes. Stir once or twice during the cooking
time.
For the beurre manié, work together the flour
and butter. Add the stock to the chicken. Also
add the mango chutney and beurre manié and
make a smooth sauce. Cook on full power for 3-5
minutes. Add the sour cream and soya sauce.
Chicken curry
Cooking time: 10-13 minutes
Page 56

En-54
Ingredients
6 chicken breast fillets
6 slices of ham
6 slices of Swiss cheese
1 tin of mushroom soup
(295g)
150ml white wine
50g croutons
60ml melted margarine
Preparation
Pre-heat the oven on convection 190°C with the
enamel shelf in position.
Wrap each chicken breast in a slice of ham and
then a slice of cheese.
Place into a 24 x 24cm ovenproof dish.
Mix the soup together with the wine and pour
over the chicken.
Sprinkle the croutons over the chicken and driz-
zle with the melted margarine.
Cook on convection 190°C for 1 hour.
Allow to cool for 5 minutes before serving.
Swiss Chicken
Cooking Time: 1 hour
Poultry
Page 57

English
En-55
Gratin dishes and soufflés
Whether savoury or sweet, cheese dishes and soufflés cook beautifully in the
microwave. They cook faster, consuming less electricity than traditional cooking.
Gratin dishes, pies and soufflés
Ingredients
6 potatoes, peeled
200 ml cream
100 ml milk
1 clove garlic, chopped
Salt, pepper, condiment
powder
Nutmeg
Grated cheese
Preparation
Cut the potatoes into rounds 2 cm thick and
arrange on a buttered gratin dish. Mix the milk,
cream, garlic, seasoning and spices and pour
over the potatoes. Sprinkle with the cheese. Cook
using the ‘Gratin’ auto program.
Gratin dauphinois
Cooking time: around 20 minutes
Ingredients
500 g aubergines
1 onion, chopped
1 clove garlic, chopped
400 g mixed minced
meat
Salt, pepper
1 tbsp tomato purée
4 tomatoes (400 g)
Mixed herbs
200 g cheese, sliced
200 ml cream
3 eggs
Salt, pepper
Preparation
Cut the aubergine into rounds 1 cm thick. Place
them in a dish, cover and cook on the
"Vegetables" setting (according to the weight). Mix
the onions, garlic, minced meat, salt, pepper,
tomato puree and a little cream. Slice the
tomatoes. Fill the glass dish with alternate layers
of aubergine, minced meat, tomatoes and cheese.
Sprinkle each layer of tomatoes with the mixed
herbs. Mix the cream, eggs and seasoning and
pour over the moussaka. Cook using the ‘Gratin’
auto program.
Moussaka
Cooking time: 17-18 minutes
Page 58

En-56
Ingredients
Pastry
150g plain flour
50g butter
25g grated Gruyere
cheese
60ml sour cream
Filling
15g Butter
2 cloves garlic, crus-
hed
450g brown mush-
rooms
150g grated Gruyere
cheese
1 tsp (5ml) salt
125ml single cream
2 eggs, lightly beaten
Preparation
For the filling: Melt the butter in a heatproof bowl
on microwave 1000 watts for 1 minute, add the
garlic and cook for 1 minute on microwave
1000 watts. Add 8 mushroom caps to the bowl
and cook for a further 2 minute, or until the tops
are just glazed.
Remove the mushroom caps and put to one side.
Slice the remaining mushrooms with the stems
and add to the bowl, cover and cook on
1000 watts for 10 minutes.
Pre-heat the oven on convection 220°C with the
enamel shelf in place.
Put the flour and butter into a bowl, rub in the
butter until the mixture resembles fine breadcrumbs.
Mix in the cheese and gradually add the sour
cream until the mixture becomes a dough.
Press the dough into a 22cm pie dish.
Cook the pastry for 15 minutes in the pre-heated
oven.
Sprinkle half of the cheese over the pastry, top
with the cooked mushrooms, then with the
remaining cheese.
Mix together the salt, cream and eggs and pour
into the pie dish.
Bake the pie for 25-30 minutes until set. About 5
minutes before the end of the cooking time, place
the 8 reserved mushroom caps around the top
edge of the pie.
Swiss mushroom pie
Cooking Time: 39-44 minutes
Gratin dishes, pies and soufflés
Page 59

English
En-57
Ingredients
Filling
3 rashers of bacon
Half an onion, chop-
ped
100g Grated Gruyere
cheese
125ml sour cream
1 egg
50g mature cheese
salt, pepper
Crust
100g salted crackers,
crushed
50g butter, melted
Preparation
Make crust by mixing together the crackers and
butter. Press into a 22cm pie plate.
Put the bacon onto a heatproof plate, cover with
a piece kitchen roll and cook on microwave
1000 watts for 2 minutes, chop into small pieces.
Put olive oil in a bowl, add the chopped onion
and cook for 3 minutes on microwave 1000
watts.
Pre-heat the oven on convection 190°C with the
enamel shelf in position.
Mix together the Swiss cheese, sour cream, eggs
and pepper.
Add the bacon and onions and pour into the
shell.
Cook on convection 190°C for 30 minutes.
Sprinkle the mature cheddar cheese on top.
Stand for 10-15 minutes before serving.
Onion Pie
Cooking Time: 35 minutes
Ingredients
150g Smoked ham,
cut into pieces
75g Gruyere cheese,
grated
1
/
2
onion, chopped
4 eggs
500ml full fat milk
1
/
4
tsp (2ml) salt
1 pinch of pepper
Preparation
Pre-heat the oven on convection 200°C with the
enamel shelf in position.
Grease a 22cm pie plate. Sprinkle the ham, cheese and onion into the pie plate.
Place the 4 eggs, milk and seasoning in a food
mixer and blend until smooth.
Pour the mixture into the plate.
Cook for 35-40 minutes until set and golden
brown.
Allow to cool for 5 minute before serving.
Ham and cheese pie
Cooking Time: 35-40 minutes
Gratin dishes, pies and soufflés
Page 60

En-58
Gratin dishes, pies and soufflés
Ingredients
6 fresh lasagne sheets
45ml (3 tbsp) olive oil
1 small onion, finely
chopped
3 garlic cloves, sliced
25g pack fresh thyme,
finely chopped
225g chestnut or
brown cap mushrooms, roughly
chopped
100g button mushrooms
2 x 125g goat's cheese
log
350g tub cheese sauce
Preparation
Put the lasagne sheets in a bowl with 1 litre of
boiling water, cover and cook on microwave
1000 watts 5 mins. Drain and keep covered in
cold water until ready to use.
In a bowl, put the olive oil and chopped onion,
cover with pierced cling film and cook on
microwave 1000 watts for 5 mins, add half the
garlic and cook for a further 2 mins.
Add the mushrooms and thyme to the onions
and cook, uncovered on microwave 1000 watts
for 5 mins. Season with salt and freshly ground
black pepper. Cool slightly.
Preheat the oven on convection 180°C with
enamel shelf in position.
Crumble one of the goat's cheese logs into the
cooled mushroom mixture and stir.
Drain the lasagne sheets on kitchen paper, spoon
2 - 3 tbsp of the mushroom mixture along the
edge of each lasagne sheet, leaving a 1cm border.
Roll up the pasta sheets and cut each one in
half.
Put the pasta in a shallow oven proof dish and
spoon over the cheese sauce. Slice the remaining
goat's cheese into thick rounds and arrange
across the middle of the pasta rolls. Sprinkle the
reserved garlic on top.
Bake on the enamel shelf on convection 180°C
for 30-35 mins.
Mixed Mushroom Cannelloni
Cooking Time: 42-47 minutes
Page 61

English
En-59
Gratin dishes, pies and soufflés
Ingredients
2 level (24 tartlets)
1 pack ready-made
shortcrust pastry
6 rashers of bacon
1 onion, chopped
2 eggs, beaten
250 ml sour cream
350g Gruyere cheese,
cut into very small
cubes
salt, pepper
2 tbsp olive oil
1 level (12 tartlets)
1 pack ready-made
shortcrust pastry
3 rashers of bacon
1
/
2
onion, chopped
1 egg, beaten
125 ml sour cream
225g Gruyere cheese,
cut into very small
pieces
salt, pepper
1 tbsp olive oil
Preparation
Put bacon onto a heatproof plate and cover with
a piece of kitchen roll, cook on microwave
1000 watts for 2 minutes.
Put oil into a bowl and add onions, cook on
microwave 1000 watts for 5 minutes.
Pre-heat the oven on convection 190°C. If cooking 12 tartlets, pre-heat with enamel shelf in
position. If cooking 24 tartlets, pre-heat with
metal tray on glass tray and enamel shelf in position.
Mix together the eggs, sour cream, onion, cheese
and seasoning (optional) to taste.
Cut the cooked bacon into pieces and add to the
mixture.
Roll the pastry out to a thickness of approx.
5mm. Cut out 12 or 24 pastry rounds, 6cm in
diameter. Place into bun tins. Fill each pastry
case with filling.
If cooking 12 tartlets, place bun tin on enamel
shelf. If cooking 24 tartlets, place one bun tin on
enamel shelf and one bun tin on metal tray on
glass tray. Bake for 20-25 minutes until the tarts
are golden and bubbling.
Serve immediately or store in refrigerator and
warm before serving.
Swiss cheese tartlets
Cooking Time: 27-32 mins.
Page 62

En-60
Vegetables
Microwave cooking is ideal for vegetables and cooks them in no time at all. Cooked
in very little water, the vegetables preserve all their nutrition.
Low-fibre vegetables with a high water content such as courgettes, tomatoes, leeks,
broccoli, etc. can be cooked without water. However, 1 tbsp of water must be added
to each 100 g portion of high-fibre vegetables such as carrots, celeriac, cauliflower,
etc.
Vegetables
Ingredients
500 g broccoli
Salt, pepper
1
/2
tbsp butter
1
/2 tbsp almonds
Preparation
Clean and wash the broccoli and break into florets. Place in a dish with the seasoning, cover
and cook on the "Vegetables" setting (according to
the weight). Put the butter and almonds in a bowl
and toast on full power for 3-4 minutes. Sprinkle
over the cooked and drained broccoli.
Broccoli with toasted almonds
Cooking time: around 11 minutes
Ingredients
650 g fennel
1
/4
l water
Salt
6 tbsp milk
1 tsp cornflour
1 small piece of Gala
[soft] cheese
Preparation
Clean and wash the fennel. Keep the green
shoots. Remove the dark green stems and
quarter the bulbs. Arrange them in a glass dish,
round side down. Salt, cover and cook on the
"Vegetable" setting (according to the weight).
Remove the fennel, place them on a dish and
cover with tin foil. Add the milk and cornflour to
the liquid, stir and heat on full power for 2
minutes. Add the cheese to the sauce and heat
on full power for 1 minute until melted. Pour the
sauce over the fennel and garnish with the green
shoots.
Fennel with cheese sauce
Cooking time: around 12 minutes
Page 63

English
En-61
Vegetables
Ingredients
500-600 g choice
asparagus
1
/8 l water
Salt, pepper
1 pinch sugar
Butter
Preparation
Carefully clean the asparagus and place in a long
glass dish. Add the water, salt and pepper, cover
and cook on the "Vegetable" setting (according to
the weight). Dot with butter and serve.
Asparagus
Cooking time: around 12 minutes
Ingredients
2 tbsp oil
1 onion, chopped
600 g courgettes
250 g red peppers
Salt, white pepper
1 pinch sugar
1 clove garlic, crushed
1 tbsp parsley,
chopped
Preparation
Wash the courgettes and cut into rounds
1
/
2
cm
thick. Wash the peppers and cut into thin strips.
Put the oil and onions in a glass dish, and cook
for 2 minutes on 1000 watts. Add the courgettes
and peppers with the salt, pepper, sugar and garlic. Mix and cook on the "Vegetable" setting
(according to the weight). Sprinkle with the parsley.
Mixed courgettes and peppers
Cooking time: around 8 minutes
Page 64

En-62
Ingredients
10 large flat cap
mushrooms
1 tsp olive oil
1
/4 onion, finely chop-
ped
2 large garlic cloves,
peeled and chopped
1
/2
tsp Basil
1
/2 tsp Oregano
1 tbsp Fresh Parsley,
chopped
50g fresh breadcrumbs
1
/2
tsp pepper
1 tbsp soy sauce
1 tbsp sherry
Preparation
Gently clean the mushrooms with a damp cloth,
remove the stems and chop them finely.
Put the oil into a bowl with the onion cook on
microwave 1000 watts for 5 mins. Add the garlic
and cook for 1 minute on microwave 1000 watts.
Add the chopped mushroom stems and herbs,
cook for a further 5 minutes on microwave
1000 watts. Add the breadcrumbs, soy sauce and
sherry and heat once more on microwave 1000
watts for 2 minutes. Pre-heat the oven empty on
convection 150°C. Add seasoning if desired. Place
mushroom caps onto a lightly greased enamel
shelf. Fill each mushroom cap with the breadcrumb mixture. Bake for 15 minutes and serve
immediately.
Stuffed Mushrooms
Cooking Time: 18 minutes
Vegetables
Page 65

English
En-63
Ingredients
2 parsnips (peeled and
cut into chunky pieces)
2 peppers (de-seeded
and cut into bite-size
chunks)
100g mushrooms
(washed and chopped
in half)
1 leek (cut into
chunks)
1 -2 tbsp olive oil
2 garlic cloves (crus-
hed)
Preparation
Place parsnips and leeks into a bowl, add 6 tbsp
water and cover. Cook on microwave 1000 watts
for 5 mins. Drain.
Drizzle olive oil onto enamel shelf. Preheat on
convection 220°C.
When the oven is preheated, lay the vegetables
on the enamel shelf, season and cook on convection 220°C for 30-35 mins. turning as required.
Roasted Vegetables
Cooking Time: 35-40 minutes
Ingredients
450g potatoes
2 tbsp oil
Preparation
Peel and cut potatoes into quarters. Place the
potatoes into a bowl, add 6 tbsp water and cover.
Cook on microwave 1000 watts for 5 mins.
Drain.
Put oil on enamel shelf and place in the oven.
Preheat on convection 220°C.
Place potatoes on enamel shelf and cook on convection 220°C for 25-30 mins. turning and basting potatoes during cooking, or until crisp and
brown.
Roast Potatoes
Cooking Time: 25-30 minutes
Vegetables
Ingredients
Follow the ingredients
for the above two recipes.
Preparation
Par-boil the parsnips, leeks and potatoes for 5
mins. (see roasted vegetables above).
Pre-heat the oven on convection 220°C and cook
for 30-35 mins. Roast the potatoes on the enamel
shelf and the vegetables on the metal tray on the
glass tray. Turn and baste during cooking.
2 level Roasted vegetables and
potatoes
Cooking Time: 30-35 minutes
Page 66

En-64
Sauces
Sauces made in the microwave are quick to prepare and do not stick. They must be
stirred frequently during cooking.
Sauces with ingredients that are high in protein and fat such as cheese, cream and
eggs require careful cooking and cook on a low power level of 440 watts or 250
watts. This rule also applies to sauces cooked traditionally in a bain-marie. A roux is
very simple to make in a microwave oven. All you need do is mix all the ingredients,
bring to the boil on full power and complete the cooking at half power.
Sauces
Ingredients
40 g flour
30 g butter
1
/4 l hot stock
1
/4 l milk
Salt, white pepper
1 pinch sugar
Preparation
Mix the flour, butter, stock and milk in a glass
bowl. Mix thoroughly. Begin cooking on full
power for 2-3 minutes, stirring from time to time.
Then cook at 440 watts for 2-3 minutes. Stir
once again, season with salt and pepper and add
the sugar.
TIP:
For a herb sauce, add 4-6 tbsp of chopped fine
herbs. For a cheese sauce, add a tiny piece of
melted cheese or 40 g grated Emmental. For a
curry sauce, add curry powder to taste.
Béchamel sauce
Cooking time: around 4-6 minutes
Ingredients
125 g butter
2 egg yolks
2 tbsp water
1 tsp lemon juice
Salt, white pepper
Cayenne pepper
1 pinch sugar
Preparation
Melt the butter in a small glass dish for 1 minute
on full power. Put the egg yolk, water and lemon
juice in another dish and heat on 250 watts for
3-4 minutes. Stir briskly several times during
cooking. Add the cooled butter spoon by spoon to
the egg mixture. Season with the salt and pepper
and add the Cayenne pepper and sugar. Heat
again for 1-2 minutes on 250 watts. Stir thoroughly during cooking. Serve at once.
This sauce is served with steamed vegetables
such as cauliflower, broccoli or asparagus.
TIP:
If the sauce becomes too thick, stir briskly with a
whisk.
Hollandaise sauce
Cooking time: around 5-7 minutes
Page 67

English
En-65
Sauces
Ingredients
30 g margarine
1 small onion, chopped
1 clove garlic
500 g minced beef
Salt, pepper
1 can tomato purée
(140 g)
1 can tomatoes
(drained weight 240 g)
Preparation
Put the margarine, chopped onion and garlic in a
glass dish and cook on full power for 3-4 minutes. Add the minced meat, seasoning, tomato
purée, the chopped tomatoes and their juice to
the onion and garlic mixture.
Stir thoroughly and cook, uncovered, on full
power for 9-11 minutes. Serve with pasta, e.g.
spaghetti.
Bolognese sauce
Cooking time: around 12-15 minutes
You can also cook rice and potatoes in your microwave oven. New potatoes can be
cooked without water but they must be pricked with a fork before cooking. With older
potatoes, a little water must be added. Small quantities are cooked on full power
only. For larger quantities, begin cooking on full power, then reduce the power level
for the remaining cooking time. For boiled potatoes, add 1 tbsp water for every 100
g of potatoes.
The potatoes should all be the same size to ensure they are evenly cooked.
Rice and pasta must not only cook, but also absorb water during cooking. For this
reason, cook on full power to begin with, then simmer on a reduced power level. For
these foods, cooking in the microwave is not much quicker than conventional cooking. However, rice cooked in the microwave is very light. Leave to stand, covered,
for 5-10 minutes after cooking.
Side dishes and light suppers
Ingredients
1 onion, chopped
1 clove garlic, chopped
1 tbsp butter
150 g risotto rice
100 ml white wine
400 ml chicken stock
Pepper, nutmeg
1 sachet of saffron
A little grated cheese
Preparation
Put the onions, garlic and butter in a casserole
dish, cover and cook on full power for 2 minutes.
Add the rice, wine, chicken stock and spices.
Stir, cover and cook on full power for 5 minutes,
then reduce the power level to 440 watts for a
further 15 minutes.
Allow to stand for a few minutes before serving. If
desired, sprinkle with grated cheese.
Saffron risotto
Cooking time: around 20 minutes
Page 68

En-66
Ingredients
1 tbsp butter
1 onion, chopped
50 g diced bacon
500 g leeks
500 g potatoes
100 ml white wine
100 ml stock
Salt, pepper, nutmeg
1 smoked sausage
A little cream
A little cumin
Preparation
Put the butter, onions and bacon in a casserole
dish, cover and cook on full power for 3 minutes.
Wash the leeks and cut into rounds 3 cm thick.
Peel and dice the potatoes. Add the vegetables to
the onions. Then add the wine, stock, seasoning
and nutmeg and mix thoroughly. Remove the
skin from the sausage, place it on top of the vegetables, cover and cook on the "Vegetable" setting
(according to the weight). Allow to stand for 5
minutes before serving. Finish off with the cream
and flavour with the cumin.
Smoked sausage and leek hotpot
Cooking time: around 12 minutes
Side dishes and light suppers
Ingredients
1 portion instant
mashed potato
1
/2
l water/milk
20 g butter
150 g diced bacon
3-4 slices of "raclette"
[e.g. Gruyère] cheese
Salt, pepper, nutmeg
Preparation
Heat the milk and water mixture on full power
for 4 minutes. Add the instant mashed potato
and butter. Stir, season with [salt and] pepper
and add the nutmeg.
Cook the diced bacon between two sheets of
paper towelling on full power for 3 minutes. Place
on top of the mashed potato. Place the slices of
cheese on top. Place the dish on the metal tray
and cook on Grill 1 for 7 minutes.
«Ofetori» Mashed potatoes with
cheese and bacon
Cooking time: around 15-18 minutes
Page 69

English
En-67
Gateaux, cakes, tarts and pastries
Our recipes are merely suggestions since you can make practically any standard
pastry dish in your combination microwave oven.
Make sure you put the baking dish directly onto the turntable to achieve the best
results. When cooking with the fan oven, we recommend preheating the oven with
the turntable and metal tray.
Pastries made with short-crust pastry, puff pastry or pizza dough are not suited to
combination cooking and must therefore be cooked using the fan oven.
Gateaux, cakes, tarts and pastries
Ingredients
50g butter
75g plain flour
2tbsp granulated
sugar
1 tbsp ground mixed
spice
200g plain flour
1
/
2
tsp bicarbonate of
soda
2 tsp baking powder
pinch salt
75g caster sugar
75g butter
200ml buttermilk
1 medium egg, beaten
175g fresh or frozen
berries, raspberries or
blueberries are ideal
Preparation
Make streusel topping by melting the butter on
1000 watts for 10-20secs. Add the remaining
topping ingredients and combine to make a soft
dough. Chill.
Sift together the flour, bicarbonate, baking powder and salt. Stir in the sugar.
Melt butter for the muffins on 1000 watts for
30secs - 1 min. Cool slightly then mix in the
buttermilk and egg.
Pre-heat oven on convection 200°C with the
enamel shelf and wire shelf in position.
Lightly stir the buttermilk mixture into the flour
mixture.
Fold fruit in gently.
Divide mixture equally between 12 muffin cases.
Crumble small amounts of streusel topping over
each muffin.
Place a muffin tin on each shelf and cook on
convection 200°C for 20-25 mins. or until
browned and well risen.
Streusel Topped Fruit Muffins
Cooking time: 20-25 minutes
Page 70

En-68
Ingredients
350g Plain Flour
15g Baking powder
300g Caster Sugar
2 tsp cinnamon
1
/4 tsp mixed spice
1
/2 tsp ground cloves
1 pinch of salt
250g carrots, grated
Juice and zest of 1
lemon
250g ground almonds
4 eggs
200g Margarine, mel-
ted
Preparation
Pre-heat the oven on convection 180°C with the
enamel shelf in position.
Sieve the flour and baking powder into a bowl.
Add the sugar, cinnamon, mixed spice, ground
cloves and salt and mix well.
Add the carrots, almonds, lemon juice and
lemon zest and mix thoroughly.
Beat the eggs together with the melted margarine. Add to the rest of the mixture and pour into
a 28cm greased cake tin.
Bake for approx. 1 hour 10 minutes at 180°C or
until cake is firm to touch.
Carrot Cake
Cooking Time: 1 hour 10 minutes
Gateaux, cakes, tarts and pastries
Page 71

English
En-69
Ingredients
Pastry
450g plain flour
150g caster sugar
1
/2 tsp salt
1 tsp baking powder
175g butter
3 eggs
Filling
350g Ground almonds
150g caster sugar
1 tsp almond extract
175g butter, cut into
small pieces
3 eggs
75g plain flour
450g fresh plums
25g sliced almonds
Preparation
Pre-heat the oven on convection 180°C with enamel shelf in position.
To make the dough, combine the dry ingredients
in a bowl and mix.
Add the butter and rub in until the mixture
resembles fine breadcrumbs.
Add the eggs and mix until the dough forms a
ball. Wrap and chill in the refrigerator for 30
minutes.
For the filling, put the almonds into a food mixer
add the almond extract and butter and mix until
smooth.
Add the eggs one at a time, then the flour and
mix thoroughly until smooth.
Roll the dough out on a floured surface and line
a greased 25cm flan dish.
Trim the edges and spread filling evenly. Remove
the stones from the plums and slice into quarters. Arrange sliced plums, cut side up on top of
the filling, scatter the top with the sliced
almonds. Bake for about 45 mins - 1 hour until
the filling is set.
Cool on a wire rack. Serve sprinkled with icing
sugar.
Swiss Plum Cake
Cooking Time: 45 minutes - 1 hour
Gateaux, cakes, tarts and pastries
Page 72

En-70
Ingredients
300g Sifted plain flour
1 tsp baking powder
1
/2
tsp salt
75g caster sugar
250ml water
50g butter
40g milk chocolate
2 eggs
125ml sour cream
Frosting
50g butter
80ml full fat milk
1
1
/2 oz milk chocolate
1 tsp vanilla extract
750 g icing sugar
water
Preparation
Grease and line enamel shelf with greaseproof
paper.
Put the water, chocolate and butter in a bowl,
heat on microwave 1000 watts for 3 minutes.
Pre-heat the oven on convection 190°C.
Sift the flour, baking powder, salt and mix in the
sugar.
Add the sifted ingredients to the chocolate mixture. Add combined eggs and cream and mix
well.
Pour directly into the lined enamel shelf.
Bake on convection 190°C for 20-25 minutes.
Frosting
Melt the butter, milk and chocolate together on
microwave 1000 watts for 3 minutes, stir in the
vanilla extract and mix in the icing sugar. If the
mixture is too thick add a drop of water.
Cover the cooled cake with the frosting.
Chocolate Squares
Cooking Time: 20-25 minutes
Ingredients
225g butter or margarine
100g icing sugar
2 tbsp vanilla essence
Zest of 1 lemon
2 eggs
1 egg yolk
350g plain flour
50g corn flour
Preparation
Pre-heat the oven on convection 180°C.
Beat the butter until soft.
Mix the sugar into the butter and beat until light
and fluffy.
Add the vanilla essence, lemon zest and mix in.
Add the eggs and egg yolk one by one and beat
thoroughly.
Combine the flour and cornflour and stir the
flour into the mixture.
Roll the dough to a thickness of 5mm.
Cut into 7cm rounds and place on the enamel
shelf and metal tray. Place the shelf in position
and the metal tray on top of the glass tray.
Bake on convection 180°C for 10 minutes.
Swiss Butter cookies
Cooking Time: 10 minutes
Gateaux, cakes, tarts and pastries
Page 73

English
En-71
Desserts
All desserts made with starch, such as pudding powder, cornflour or flour, must be
stirred several times during the cooking time.
Desserts
Ingredients
1 can rhubarb, approx.
750 g
500 g frozen strawberries
4 tbsp cornflour
1
/8 l white wine
4 tbsp sugar
4 tbsp Cointreau
Preparation
Clean and wash the rhubarb. Cut into 1 cm
pieces. Place the rhubarb in a glass dish with the
strawberries, cover and cook on the "Vegetables"
setting (according to the weight). Blend the mixture. Mix together the cornflour, wine and sugar
and add to the fruit. Cook on full power for 3
minutes. Stir once during the cooking time. After
cooking, leave to stand for 5 minutes. Flavour
with the Cointreau.
Rhubarb and strawberry cream
Cooking time: 10-12 minutes
Rice pudding
Rice pudding auto program
4 portions 2 portions
200 g rice (100 g)
1 litre skimmed or (
1
/2litre)
semi-skimmed milk
1 teaspoonful salt (
1
/2tsp)
Pour the rice and milk into a large
microwave-proof bowl (glass). Do not
cover with a lid.
Cook on the rice pudding program.
Input weight of rice and milk.
Stir the mix when the oven beeps.
When the oven stops add salt to
thicken the pudding mix.
Page 74

En-72
Ingredients
450g White bread flour
1 tbsp salt
30g fresh yeast, broken
into small pieces
1 tsp sugar
125g butter or margari-
ne
600ml full fat milk
1 egg yolk
Preparation
Mix flour and salt in a bowl, add the yeast, sugar,
butter and milk, knead into a soft dough for
about 10 minutes.
Cut dough into four equal pieces, roll each piece
into a sausage shape of approx. 20cm in length.
Put the four rolls next to each other and press
the tops together firmly.
Put the first roll on the left across the second roll
on the right. Then put the first roll on the right
across the second roll on the left. Continue until
no more dough is left. Press the ends together
and fold beneath the bread.
Put the dough onto the enamel shelf, which
should be covered with baking paper and brushed with water.
Allow the plait to rise for about 1 hour in a warm
place.
Pre-heat the oven empty on convection 200°C.
Brush the top with the egg yolk. Bake for 45 to
55 minutes.
Zopf
Cooking Time: 45-55 minutes
Bread and Pizza
Ingredients
500g Strong white flour
1
/2
cube fresh yeast
4 tbsp sugar
1
1
/2 tbsp salt
1 egg
90g butter
20ml warm milk
Preparation
Prepare the dough by mixing the flour, yeast, salt
and sugar in a bowl and mix well. Add the egg a
little at a time, and the warm milk to make a
dough.
Knead the dough for 5 minutes. Cover and leave
to prove for 1 hour 30 minutes in a warm place.
Turn the dough out onto a floured surface. Cut
into two pieces and these into two again.
Separate and roll each piece into four. Roll each
into a ball shape.
Place 8 balls on the metal tray and 8 on the enamel shelf.
Put the trays in the oven and prove on convection
40°C for 1 hour and 30 minutes.
Allow them to double in size, remove from the
oven. Pre-heat the oven on convection 220°C.
When the oven has pre-heated put the metal tray
on glass tray and enamel shelf in position and
cook for 11-12 minutes.
Warm from chill by placing under the grill for a
few minutes. The rolls will keep fresh in a plastic
bag for several days.
Enriched Bread Rolls
Cooking Time: 11-12 minutes
Page 75

English
En-73
Ingredients
Dough
7g Sachet of dried yeast
250g Plain flour
3ml (
1
/2 tsp) salt
8ml (
1
/2
tbsp) olive oil
Topping
1 large onion, cut into
rings
2 cloves garlic, crushed
400g tomatoes on the
vine
12 pitted black olives
16 capers
30ml (2 tbsp) olive oil
1 tsp chilli flakes
mixed herbs
12 basil leaves
150g grated mozzarella
Preparation
Put all of the dough ingredients into a mixing
bowl and mix thoroughly. Add enough warm
water (approx. 150 - 180ml or
1
/4
pint) to make
an elastic, pliable dough. Knead for 10 mins.
Prove on convection 40°C until the dough has
doubled in size.
Place the onions and crushed garlic into a Pyrex
®
bowl, cover with cling film and cook on microwave1000 watts for 5 mins.
Remove the cling film from the bowl. Add the
tomatoes, olives, capers and olive oil and cook,
uncovered on microwave 1000 watts for 5 mins.
Pre-heat the oven on convection 230°C.
Lightly oil the enamel shelf, put the dough on the
enamel shelf and pull out so that the dough
meets all the tray's edges. Spread the topping
over the dough evenly, sprinkle with chilli flakes,
mixed herbs, basil leaves and cheese. Place
enamel shelf into the oven and cook on convection 230°C for 20-25 mins.
Pizza Alle Cipole
Cooking Time: 30-35 minutes
Bread and Pizza
Page 76

En-74
Chart showing method of heating baby food
Heating baby food in your microwave is simple and trouble-free. The following chart
gives some examples. Figures are approximate and may vary.
Only use heat resistant feeding bottles or glass bowls. Place the containers in the
middle of the glass turntable. Stir the baby food or shake the feeding bottles that
have been heated for an even distribution of temperature.
Defrosting and reheating pre-cooked dishes
Food Quantity Power level Time
Recommendations/Tips
Hotpots
600 g
600 Watts 17-20 Min.
Freeze in an appropriate
container.
Defrost and heat in a covered
glass dish.
Stir from time to time.
1200 g
600 Watts 25-30 Min.
Meat with
sauce
400 g
600 Watts 10-15 Min.
Freeze in an appropriate
container. Defrost and heat in a
covered glass dish. Defrost time
according to thickness.
Goulash
300 g
600 Watts 10-12 Min.
Freeze in an appropriate
container.
Defrost and heat in a covered
glass dish.
Stir from time to time.
Vegetables
300-450 g
600 Watts 10-13 Min.
Freeze in an appropriate
container.
Defrost and heat in a covered
glass dish.
Stir from time to time.
600-900 g
600 Watts 17-22 Min.
Food Quantity
Power level
Time
Recommendations/Tips
Instant baby food 1 glass (190-220 g) 600 watts 0.5-1 min.
All the heating times
relate to chilled food.
Serving temperature
(for babies) approx.
30-40°C.
Feeding bottle 60 g/ml 250 watts 40-50 sec.
Feeding bottle 120 g/ml 250 watts 1 min. 20 sec.
Feeding bottle 180 g/ml 250 watts 2 min.
Page 77

English
En-75
The cooking times below are a guide only, based on food taken out of the freezer (-18°C) or
directly from the fridge (+5°C).
Manual Combination Cooking
Food Weight Preparation
Pizza,
frozen,
pre-cooked
Bruschetta
300 g
450 g
Remove all the packaging and place on the low
wire rack on the metal tray.
Combination grill 1 + 100 W, around 7-10 min.
Combination grill 1 + 250 W, around 5 min.
Then around 4-7 min. on grill 1 setting.
Frozen cake
Pieces of frozen
cake
300 g
300 g
Remove all packaging and place directly on the
metal tray.
Combination grill 1 + 250 W around 7 min.
Combination grill 1 + 100 W around 5 min then
grill 1 around 3 min.
Spring rolls
2 rolls 180 g
4 rolls 360 g
Combination grill 1 + 100 W, around 10 min.
Combination grill 1 + 250 W, around 5 min.
Then around 4 min. on grill 1 setting.
Turn halfway through cooking.
Poultry
Chicken pieces,
frozen
500 g
1 kg
Remove all the packaging and place on the high
wire rack on the metal tray
1000 W microwave, 8 min., Combination grill 1 +
440 W, around 15 min.
1000 W microwave, 17 min., Combination grill 1
+ 440 W, around 15 min.
Turn halfway through cooking.
Frozen potato
dishes
Potato quarters
Chips
200 g
400 g
Place on the metal tray on the wire rack.
Combination grill 1 + 250 W, around 10 min., then
around 5-10 min. on grill 1 setting
Turn halfway during cooking.
Combination grill 1 + 440 W, around 10 min., then
around 5-10 min. on grill 1 setting
Croissants,
frozen, precooked
40 g/croissant
4 croissants
Place on the metal tray.
Combination grill 1 + 250 W, around 10 min.
Muffins
40g/muffin
2 muffins
10 muffins
Combination grill 1 + 100 W, around 5 min. then
around 5 min. on grill 1 setting
Combination grill 1 + 250 W, around 8 min., then
around 5 min. on grill 1 setting
Page 78

En-76
Defrosting and reheating pre-cooked frozen dishes
Food Quantity
Combination
cooking
Time
Recommendations/
Tips
Cooked or precooked frozen
dishes For example
- cannelloni
- lasagne
- cheese potatoes
or pasta
300-400 g
250°C
and
440 Watts
24-28 Min.
Remove packaging.
Place on the metal
tray on the glass
turntable.
Defrost uncovered
and brown in the
oven.
Pre-cooked frozen
dishes.
For example:
- Potato dishes
e.g. rösti,
hashbrowns
- croquettes
300-400 g
250°C
and
440 Watts
27-30 Min.
Remove wrapping
and cook until golden
on the wire rack
placed on the glass
turntable.
Frozen, filled
French bread
250-300 g
250°C
and
250 Watts
10-13 Min.
Preheat the oven.
Remove wrapping
and cook on the
metal tray placed on
the glass turntable.
Frozen pizza 300-400 g
Grill
and
250 Watts
ca. 10 Min.
Remove wraping.
Place pizza on wire
rack on glass
turntable.
Page 79

English
En-77
Defrosting and cooking vegetables
The cooking times shown are for vegetables frozen to -18°C and are a guideline
only. Vegetables must be cooked in a covered dish. We recommend you stir the
vegetables after cooking and leave them to stand for 5 minutes outside the oven.
Food Quantity Ingredients Power level/Time
Broccoli
300 g 1 tsp butter, salt 600 watts, 12-15 min.
Brussels sprouts
300 g 1 tsp butter, salt 600 watts, 12-13 min.
Cauliflower
600 g 1 tsp butter, salt, nutmeg 600 watts, 19-21 min.
Kohlrabi
300 g 1 tsp butter, salt 600 watts, 11-13 min.
Beans
300 g 1 tsp butter, salt, savory 600 watts, 11-12 min.
Red cabbage
450 g 1 tsp butter, salt 600 watts, 15-17 min.
Spinach
600 g — 600 watts, 20-22 min.
Corn on the cob
450 g 1 tsp butter, salt, 125 ml water 600 watts, 16-18 min.
Sweet corn
300 g — 600 watts, 6-7 min.
Ratatouille
300 g — 600 watts, 10 min.
Page 80

En-78
Chart showing cooking times for accompanying dishes
and grains
Food Quantity
Amount
water added
Power level/Time
Preparation
Boiled potatoes
800 g 8 tbsp water 600 watts, 10-11 min.
Peel and cut into equal
sizes.
Cover and cook with water
and salt.
Drain immediately when
cooked.
400 g 4 tbsp water 600 watts, 5-6 min.
Potatoes
cooked in their
skins
800 g — 600 watts, 10-11 min.
Wash thoroughly and prick
all over.
Cover and cook without
water. Drain immediately
when cooked.
400 g — 600 watts, 5-6 min.
Pasta, e.g.
macaroni
250 g 1 l water
600 watts, 9-11 min.
and
600 watts, 3-5 min. and
250 watts, 3-5 min.
Put water and salt in a
large bowl and bring to the
boil. Add the pasta, stir
and boil, uncovered. Stir
and simmer until cooked.
125 g 500 ml water
600 watts, 5-7 min. and
600 watts, 2-4 min. and
250 watts, 2-4 min.
Parboiled rice
200 g 400 ml water
600 watts, 4-5 min. and
250 watts, 15 min.
Cover and cook with water
and salt.
100 g 200 ml water
600 watts, 2-3 min. and
250 watts, 10 min.
Wholegrain rice
200 g 400 ml water
600 watts, 4-5 min. and
250 watts, 18 min.
Soak overnight, cover and
cook in the soaking water.
100 g 200 ml water
600 watts, 2-3 min. and
250 watts, 15 min.
Wild rice
200 g 400 ml water
600 watts, 4-5 min. and
250 watts, 20 min.
Cover and cook with water
and salt.
100 g 200 ml water
600 watts, 2-3 min. and
250 watts, 20 min.
Wheat/Barley
200 g 400 ml water
600 watts, 4-5 min. and
250 watts, 10-15 min.
Soak overnight, cover and
cook in the soaking water.
100 g 200 ml water
600 watts, 3 min. and
250 watts, 10-15 min.
Page 81

English
En-79
Chart showing cooking times for accompanying dishes
and grains (continued)
Food
Quantity
Amount water
added
Power level/Time Preparation
Durum wheat
Spelt
Oats
200 g 300 ml water 600 watts, 4-6 min.
Soak overnight.
100 g 150 ml water 600 watts, 2-4 min.
Chickpeas
200 g 600 ml water
600 watts, 10 min. and
250 watts, 40 min.
Soak overnight, cover and
cook in the soaking water.
100 g 300 ml water
600 watts, 5-6 min. and
250 watts, 20 min.
Rye
250 g 400 ml water
600 watts, 4-5 min. and
250 watts, 20 min.
Soak overnight, cover and
cook in the soaking water.
125 g 200 ml water
600 watts, 2-3 min. and
250 watts, 20 min.
Lentils
200 g 500 ml water
600 watts, 6-7 min. and
250 watts, 17 min.
Cover and cook in water.
100 g 250 ml water
600 watts, 3 min. and
250 watts, 17 min.
Red lentils
125 g 500 ml water
600 watts, 6-7 min. and
250 watts, 5-10 min.
Cover and cook in water.
65 g 250 ml water
600 watts, 3 min. and
250 watts, 5 min.
Shelled
green peas
200 g
500 ml water
600 watts, 7-8 min. and
250 watts, 10-15 min.
Cover and cook with water
and salt.
100 g 250 mll water
600 watts, 4-5 min. and
250 watts, 10-15 min.
Porridge oats
200 g 400 ml water
600 watts, 3 min. and
600 watts, 4-5 min.
Soak overnight, cover and
cook in the soaking water.
100 g 200 ml water
600 watts, 1-2 min. and
600 watts, 3 min.
Page 82

En-80
Chart showing cooking times for accompanying dishes
and grains (continued)
Food
Quantity
Amount
water added
Power level/Time Preparation
Amaranth
200 g 400 ml water
600 watts, 7 min. and
250 watts, 25 min.
Cover and cook in water.
100 g 200 ml water
600 watts, 5 min. and
250 watts, 20 min.
Buckwheat
200 g 400 ml water
600 watts, 4-5 min. and
250 watts, 10 min.
Cover and cook in water.
100 g 200 ml water
600 watts, 2-3 min. and
250 watts, 10 min.
Buckwheat
porridge
200 g 750 ml water
600 watts, 3 min. and
600 watts, 8 min.
Place in a glass dish and
heat, uncovered. Add
water and cook.
100 g 375 ml water
600 watts, 2-3 min. and
600 watts, 3-4 min.
Hulled barley
250 g 400 ml water
600 watts, 4-5 min. and
250 watts, 5 min.
Soak overnight, cover and
cook in the soaking water.
125 g 200 ml water
600 watts, 2-3 min. and
250 watts, 5 min.
Pearl barley
250 g 500 ml water
600 watts, 5-6 min. and
250 watts, 25 min.
Cover and cook in water.
125 g 250 ml water
600 watts, 3 min. and
250 watts, 20 min.
Quinoa
200 g 400 ml water
600 watts, 6-7 min. and
250 watts, 25 min.
Cover and cook in water.
100 g 200 ml water
600 watts, 5 min. and
250 watts, 18 min.
Wheat porridge
200 g 400 ml water 600 watts, 8 min.
Cover and cook in water.
100 g 200 ml water 600 watts, 3-4 min.
Millet
250 g 500 ml water
600 watts, 6-7 min. and
250 watts, 20 min.
Cover and cook in water.
125 g 250 ml water
600 watts, 3 min. and
250 watts, 20 min.
Page 83

English
En-81
Defrosting food is incredibly easy in your combination microwave oven. Note that the
power level, defrosting time and standing time depend on the composition and
quantity of food.
Microwaves penetrate the food, so large pieces may start to cook on the outside
before the inside is completely defrosted.
For defrosting, you can also take the following guideline:
DOUBLE THE QUANTITY - NEARLY DOUBLE THE TIME
HALVE THE QUANTITY- HALF THE TIME
The charts give the standing times. The standing time is the time the food is left to
stand to ensure that the temperature is evenly distributed (defrosted outside and
frozen inside). During the standing time, either keep the food in the combination
microwave oven after cooking, or remove it from the oven.
If it proves difficult to remove packaging from an item of food, start to defrost it in
your combined microwave oven set to the position (1000 watts).
Well-planned freezing methods make defrosting easy.
Make sure you freeze portions of an appropriate size. Since the portions are to be
reheated, make sure you "size" them accordingly.
Meat, fish and poultry should drain freely when defrosting. Arrange them on an
upturned saucer placed on a plate. The turntable must be left in the oven during
defrosting.
Defrost meat, fish, game, poultry, bread and pastries using automatic defrost.
The defrosting times shown in the charts below are for guidance only. Times may
vary depending on the quantity, quality, shape and temperature at the time of
defrosting.
Defrosting in the combination microwave oven
Page 84

En-82
Defrost chart for dairy products
Food
Quantity
Power
level
Defrost
time
Standing
time
Accessories
Recommendations/
Advice
Sliced cheese 125-150 g 270 watts 2x0,5 min. 10-15 min. Tray
Turn once, separate
the slices during the
standing time.
Chunks of
cheese
400 g 270 watts 2x2,5 min. 15-20 min. Tray Turn once.
Fromage frais
250 g 270 watts 2x5 min. 10-15 min.
Bowl
Remove wrapping,
place the fromage
frais in a bowl to
defrost.
500 g 270 watts 2x8,5 min. 15-20 min.
Butter
125 g 270 watts 2x2,5 min. —
Tray
Remove wrapping,
put on a plate
placed at the edge
of the turntable.
250 g 270 watts 2x3 min. —
Cream 200-250 g 270 watts 2x3 min. 5-10 min. Bowl
Remove the foil top,
or pour into a bowl.
Beat if it still contains ice crystals.
Page 85

English
En-83
Food
Quantity
Power
level
Defrost
time
Standing
time
Accessories
Recommendations
/ Advice
Strawberries 250 g
270 watts
2x4 Min. 10-15 Min. Bowl Stir once.
Blueberries 300 g
270 watts
2x5 Min. 5-10 Min. Bowl Stir once.
Raspberries 250 g
270 watts
2x3,5 Min. 5-10 Min. Bowl Stir once.
Redcurrants 500 g
270 watts
2x7 Min. 5-10 Min. Bowl Stir once.
Blackberries 250 g
270 watts
2x3,5 Min. 10-15 Min. Bowl Stir once.
Cherries
Plums
Apricots
500 g
270 watts
2x7 Min. 10-15 Min. Bowl Stir once.
Mixed fruit 500 g
270 watts
2x8 Min. 10-15 Min. Bowl Stir once.
Defrost chart for fruit products
Page 86

En-84
A Asparagus . . . . . . . . . . . . . . . . . . . . . . . . . . . . . . . . . . . . . . . . . . . . .61
B Bacon and cheese meatloaf . . . . . . . . . . . . . . . . . . . . . . . . . . . . . . .51
Béchamel sauce . . . . . . . . . . . . . . . . . . . . . . . . . . . . . . . . . . . . . . . .64
Bolognese sauce . . . . . . . . . . . . . . . . . . . . . . . . . . . . . . . . . . . . . . .65
Broccoli with toasted almonds . . . . . . . . . . . . . . . . . . . . . . . . . . . . .60
Bruschetta . . . . . . . . . . . . . . . . . . . . . . . . . . . . . . . . . . . . . . . . . . . . .45
Butterfly pork cutlets au gratin . . . . . . . . . . . . . . . . . . . . . . . . . . . . .50
C Carrot cake . . . . . . . . . . . . . . . . . . . . . . . . . . . . . . . . . . . . . . . . . . . .68
Chicken curry . . . . . . . . . . . . . . . . . . . . . . . . . . . . . . . . . . . . . . . . . .53
Chicken fillets with lemon sour cream sauce . . . . . . . . . . . . . . . . . .53
Chicken suprême with vinaigrette dressing . . . . . . . . . . . . . . . . . . .45
Chocolate squares . . . . . . . . . . . . . . . . . . . . . . . . . . . . . . . . . . . . . .70
D «Dézaley» fish fillets . . . . . . . . . . . . . . . . . . . . . . . . . . . . . . . . . . . .47
E Enriched bread rolls . . . . . . . . . . . . . . . . . . . . . . . . . . . . . . . . . . . . .72
F Fennel with cheese sauce . . . . . . . . . . . . . . . . . . . . . . . . . . . . . . . .60
Fillet of duck with orange sauce . . . . . . . . . . . . . . . . . . . . . . . . . . .52
G Gratin dauphinois . . . . . . . . . . . . . . . . . . . . . . . . . . . . . . . . . . . . . .55
H Ham and cheese pie . . . . . . . . . . . . . . . . . . . . . . . . . . . . . . . . . . . .57
Hollandaise sauce . . . . . . . . . . . . . . . . . . . . . . . . . . . . . . . . . . . . . .64
I Italian roast beef . . . . . . . . . . . . . . . . . . . . . . . . . . . . . . . . . . . . . . . .50
L Leg of turkey . . . . . . . . . . . . . . . . . . . . . . . . . . . . . . . . . . . . . . . . . .52
M Mixed courgettes and peppers . . . . . . . . . . . . . . . . . . . . . . . . . . . .61
Mixed mushroom cannelloni . . . . . . . . . . . . . . . . . . . . . . . . . . . . . . .58
Monkfish fillets with herbs . . . . . . . . . . . . . . . . . . . . . . . . . . . . . . . .48
Moussaka . . . . . . . . . . . . . . . . . . . . . . . . . . . . . . . . . . . . . . . . . . . .55
O «Ofetori» [Mashed potatoes with cheese and bacon] . . . . . . . . . . .66
Onion Pie . . . . . . . . . . . . . . . . . . . . . . . . . . . . . . . . . . . . . . . . . . . . .57
P Pizza alle cipole . . . . . . . . . . . . . . . . . . . . . . . . . . . . . . . . . . . . . . . .73
Prawns with dill and Pernod sauce . . . . . . . . . . . . . . . . . . . . . . . . .47
R Rhubarb and strawberry cream . . . . . . . . . . . . . . . . . . . . . . . . . . . .71
Rice pudding with fruit . . . . . . . . . . . . . . . . . . . . . . . . . . . . . . . . . . .71
Roast vegetables and potatoes . . . . . . . . . . . . . . . . . . . . . . . . . . . .63
S Saffron risotto . . . . . . . . . . . . . . . . . . . . . . . . . . . . . . . . . . . . . . . . .65
Smoked sausage and leek hot pot . . . . . . . . . . . . . . . . . . . . . . . . . .66
Spiced pork with apples . . . . . . . . . . . . . . . . . . . . . . . . . . . . . . . . .49
Spicy pea soup . . . . . . . . . . . . . . . . . . . . . . . . . . . . . . . . . . . . . . . . .46
Spicy salmon slices . . . . . . . . . . . . . . . . . . . . . . . . . . . . . . . . . . . . .48
Streusel topped fruit muffins . . . . . . . . . . . . . . . . . . . . . . . . . . . . . . .67
Stuffed mushrooms . . . . . . . . . . . . . . . . . . . . . . . . . . . . . . . . . . . . . .62
Swiss butter cookies . . . . . . . . . . . . . . . . . . . . . . . . . . . . . . . . . . . . .70
Swiss cheese tartlets . . . . . . . . . . . . . . . . . . . . . . . . . . . . . . . . . . . .59
Swiss chicken . . . . . . . . . . . . . . . . . . . . . . . . . . . . . . . . . . . . . . . . . .54
Swiss mushroom pie . . . . . . . . . . . . . . . . . . . . . . . . . . . . . . . . . . . .56
Swiss plum cake . . . . . . . . . . . . . . . . . . . . . . . . . . . . . . . . . . . . . . . .69
V Vegetable terrine . . . . . . . . . . . . . . . . . . . . . . . . . . . . . . . . . . . . . . .46
Z Zopf . . . . . . . . . . . . . . . . . . . . . . . . . . . . . . . . . . . . . . . . . . . . . . . . . .72
INDEX OF RECIPES
Page 87

E00036Y50WP
M0905-0
Printed in the UK
Panasonic Manufacturing U.K Ltd (PMUK)
Wyncliffe Road
Pentwyn Industrial Estate
Cardiff
CF23 7XB
UK
 Loading...