

Panasonic LUMIX DMC-LZ4, LUMIX DMC-LZ5, LUMIX DMC-TZ1, LUMIX DMC-FX01, LUMIX DMC-LZ3 Operating Instructions [zh]
...Page 1
Operating Instructions
使用說明書
For Digital Camera PC Connection
QuickTime and the QuickTime logo are trademarks
or registered trademarks of Apple Computer, Inc.,
used under license.
VQT0W47
Page 2
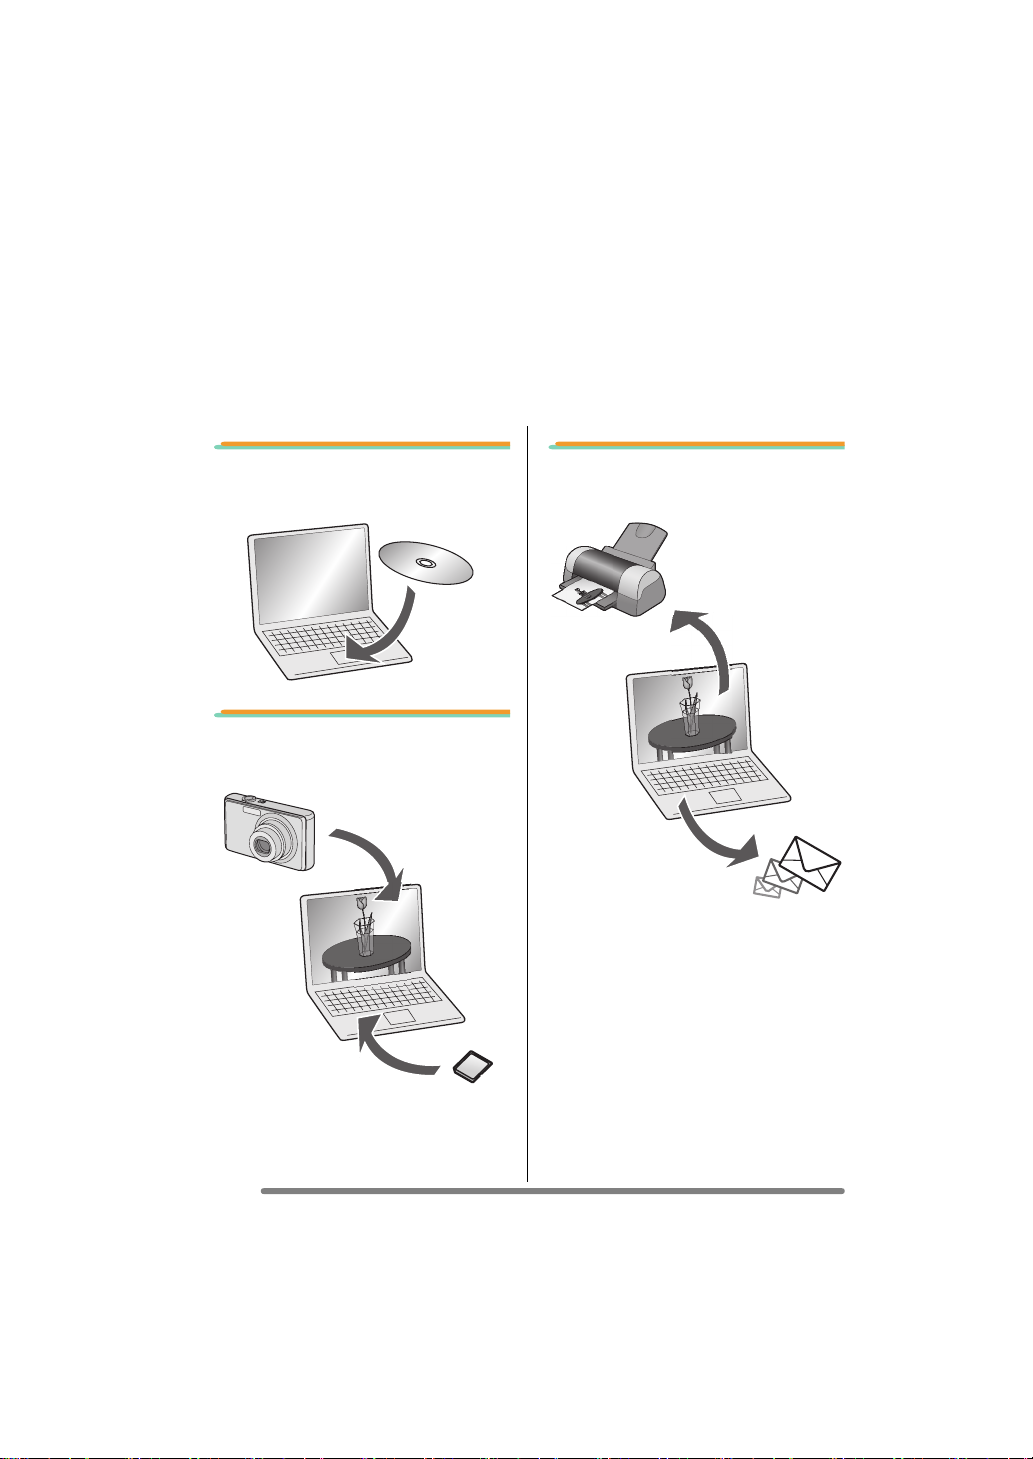
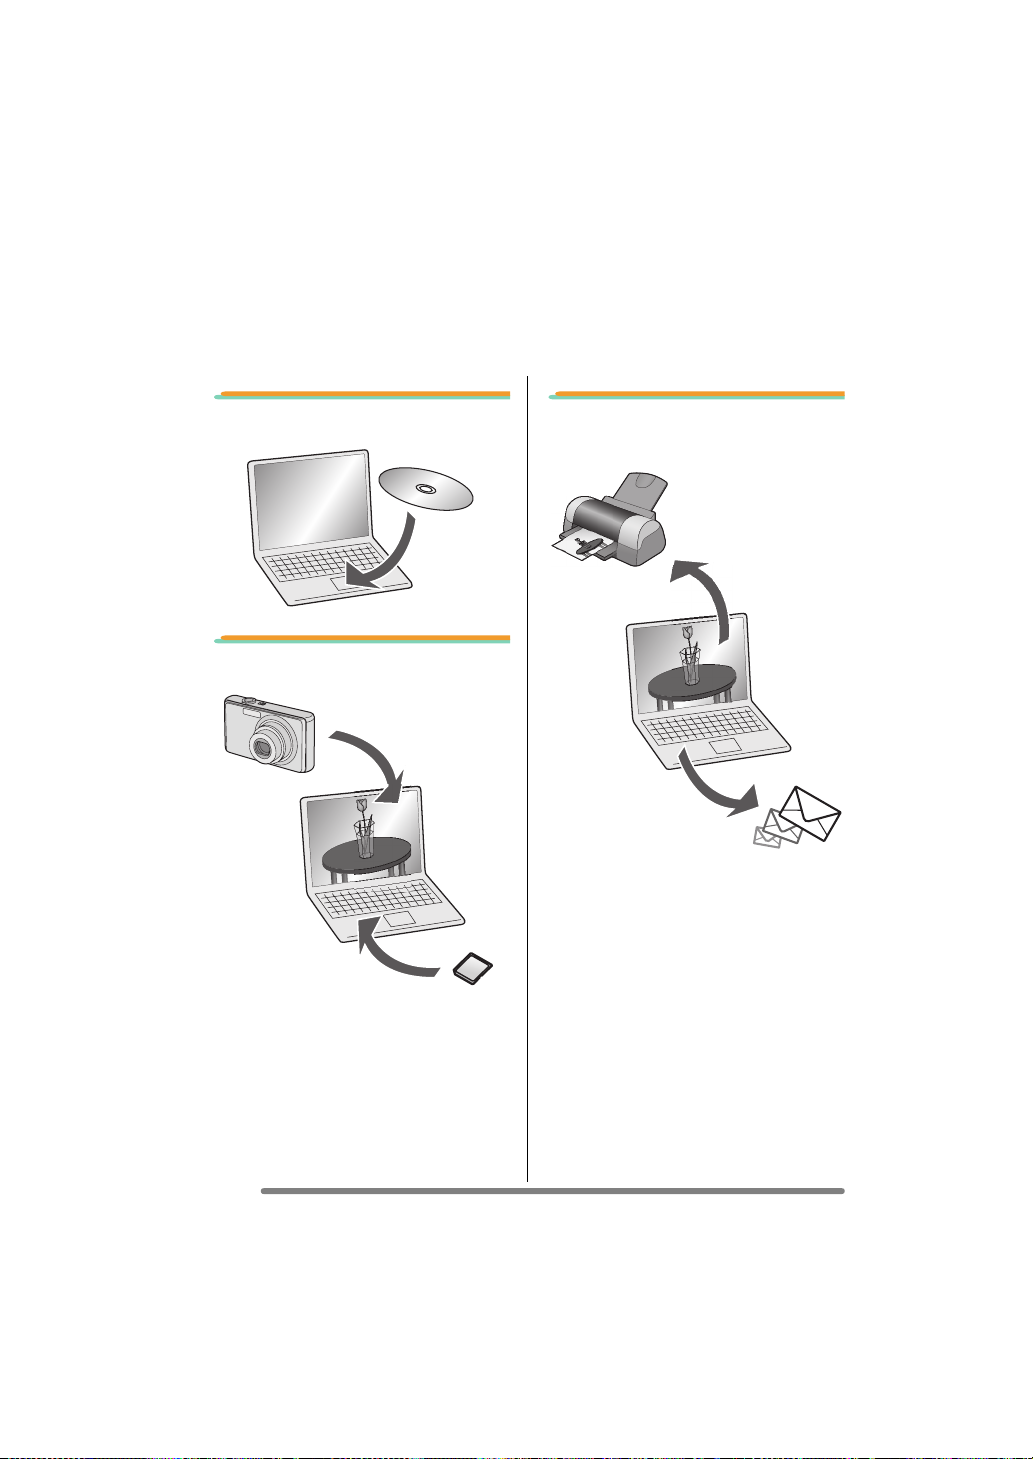
Connection with the PC Offers much more
Enjoyment
Using “LUMIX Simple Viewer” on the supplied CD-ROM, you can easily acquire pictures
to the PC, print them, attach them to e-mails, and so on.
• In these operating instructions, “LUMIX Simple Viewer” is referred to as “Simple
Viewer”.
1. Installing Simple Viewer,
first of all.
2. Acquiring recorded pictures
to the PC.
3. Printing pictures and
attaching them to e-mails.
2
VQT0W47
Page 3

Contents
Connection with the PC Offers much more Enjoyment ..................................................... 2
Introduction
Read Before Use ...............................................................................................................4
Key terms ....................................................................................................................4
Is Simple Viewer compatible with any PC? .................................................................5
Setting up
Installing the Software 1 ................................................................................................... 6
Installing the USB driver (Windows 98/98SE only) ...................................................... 6
Installing the Software 2 ................................................................................................... 7
Installing Simple Viewer .............................................................................................. 7
Connecting the Digital Camera to PC ................................................................................ 8
Using Simple Viewer
Acquiring pictures to the PC (Acquire to PC) ..................................................................... 9
Viewing pictures (View) ...................................................................................................10
Printing pictures (Print) ....................................................................................................13
Sending pictures by e-mail (Send by e-mail) ...................................................................16
Advanced ......................................................................................................................... 18
Enabling the pictures stored in the PC to be used on Simple Viewer
(Add pictures) .......................................................................................................... 19
Viewing pictures on the PC with the digital camera
(Export to the card) .................................................................................................20
After Using Simple Viewer ...............................................................................................22
Others
To Acquire Picture without Using Simple Viewer ............................................................. 23
How to Use on Macintosh ................................................................................................ 24
How to Remove the USB Driver and Simple Viewer (Uninstall) ......................................25
When Pictures cannot be Acquired .................................................................................26
Troubleshooting ............................................................................................................... 27
Operating Environment .................................................................................................... 30
VQT0W47
3
Page 4
Introduction
Read Before Use
• Please note that some of the explanations and screens covered in these operating
instructions may differ from actual ones depending on the operating environment of the
PC.
• The explanations of these operating instructions are subject to change without prior
notification.
• No part of these operating instructions may be reproduced without permission.
• Microsoft product screen shot(s) reprinted with permission from Microsoft Corporation.
• Explanations about Windows in these operating instructions are based on Windows XP
screens.
• In these operating instructions, a Card refers to an SD memory card, including the built-in
memory.
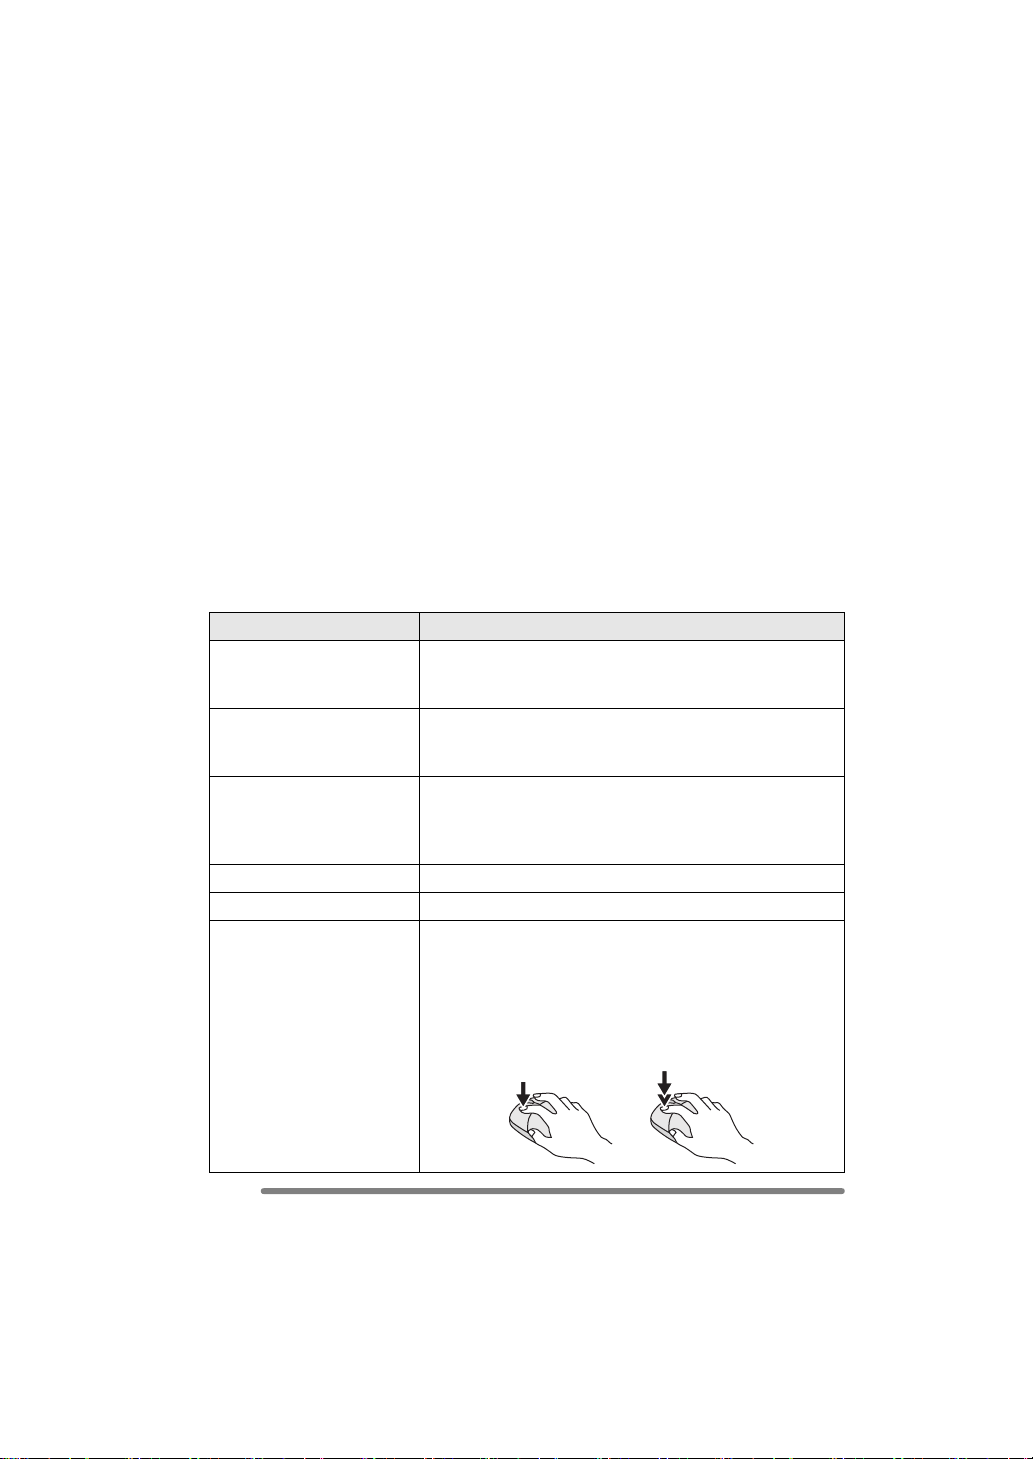
Key terms
• Key terms you should know at the minimum when using the PC are listed below. Refer to
the operating instructions for the PC too.
Ter m Explanation
Introduction
Application software Refers to software programmes to be used for various
Install/Uninstall “Install” refers to incorporating software into the PC and
Drive/Driver A “Drive” refers to a PC peripheral device (CD-ROM drive,
File Refers to a document, picture, or other data.
Folder Refers to a place where a grouping of files are stored.
Click/Double-click “Click” refers to pressing and releasing the mouse button.
purposes such as word processing, spread sheet
operation, picture editing, and e-mail sending/receiving.
making it ready for use, and deleting the installed software
is referred to as “Uninstall”.
digital camera, etc.) that files are written in and read from,
and the software to operate such a drive is referred to as a
“Driver”.
Clicking the mouse button twice in rapid succession is
referred to as “Double-click”.
• In these operating instructions, description is made on the
basis of left-click.
• If double-clicking cannot be performed well, change the
interval of the clickings.
4
VQT0W47
Page 5
Introduction
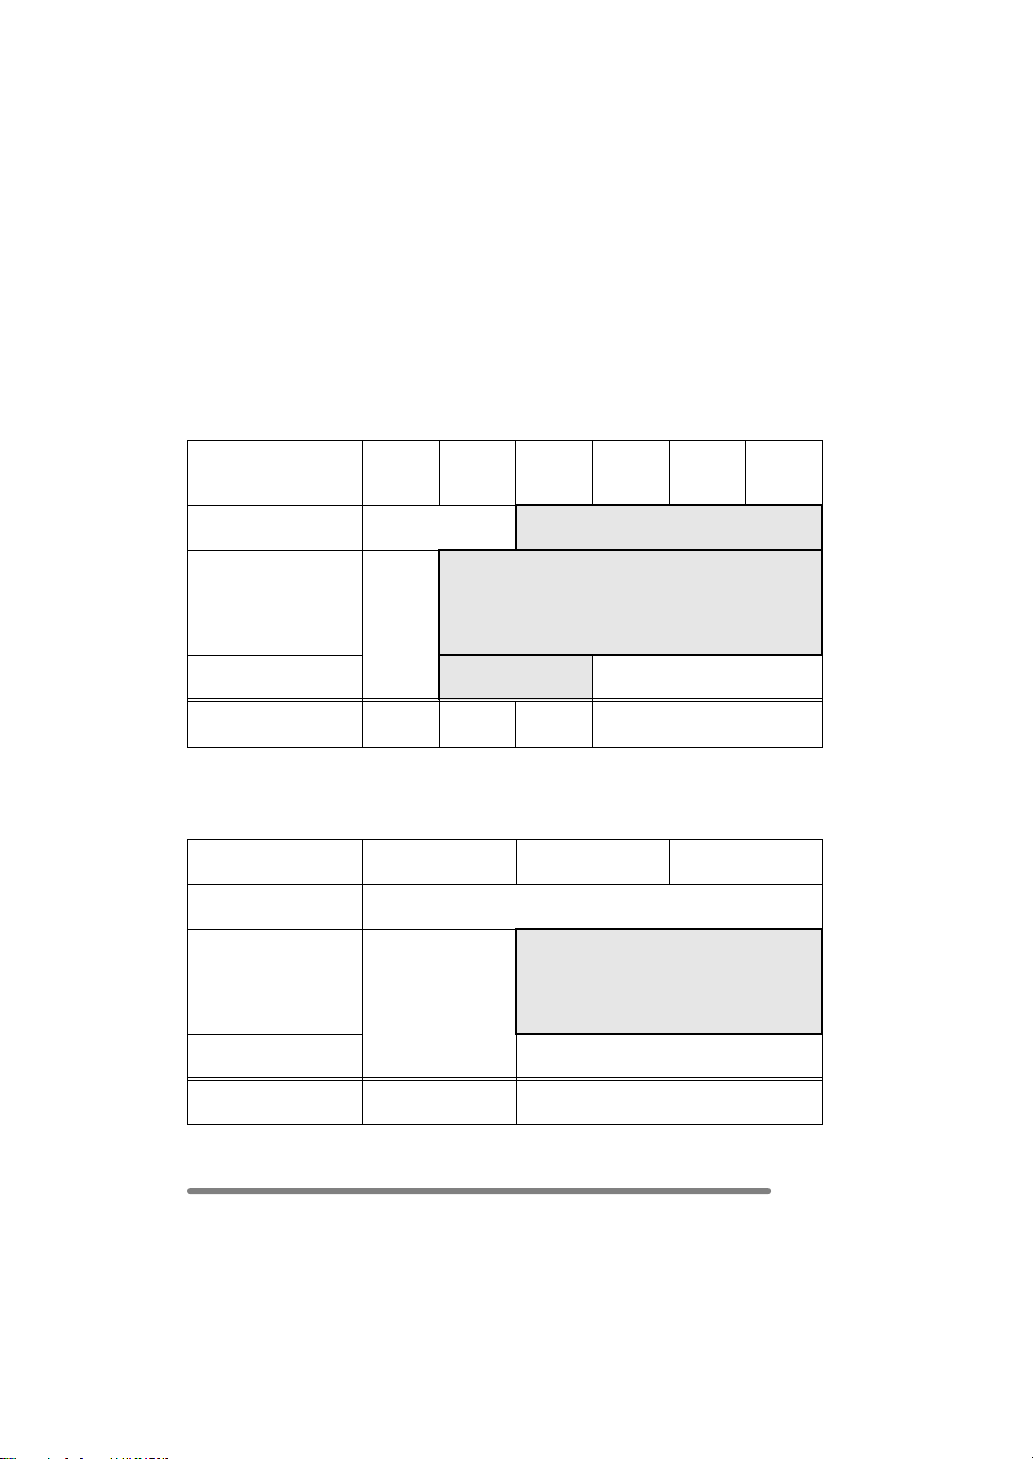
Is Simple Viewer compatible with any PC?
Using a USB connection, you can acquire the pictures held in the digital camera to the PC.
With Simple Viewer, however, you can save them to the PC more easily.
∫ Windows
• To identify the OS (PC type), select [start] >> ([Setup] >>) [Control Panel]
(>> [Performance and Maintenance]), and then (double-) click [System]. You can see the
OS.
95 and
earlier
versions
Possible to use Simple
Viewer?
Can I acquire the
pictures held in the
digital camera to the
PC using the USB
connection cable?
Necessary to install the
USB driver?
Which page should I
refer to?
¢1: You can acquire them if the PC has a PC card slot.
¢2: To learn how to acquire pictures, refer to P23.
¢1
P27
∫ Macintosh
OS 8.x and earlier
versions
Possible to use Simple
Viewer?
Can I acquire the
pictures held in the
digital camera to the
PC using the USB
connection cable?
Necessary to install the
USB driver?
Which page should I
refer to?
¢3: You can acquire them if the PC has a PC card slot.
98 98SE Me 2000 XP
— ≤
≤
≤ —
P6, 8
¢2
¢3
P27 P24
P6– P7–
OS 9 OS X
—
≤
—
VQT0W47
5
Page 6
Setting up
Setting up
Installing the Software 1
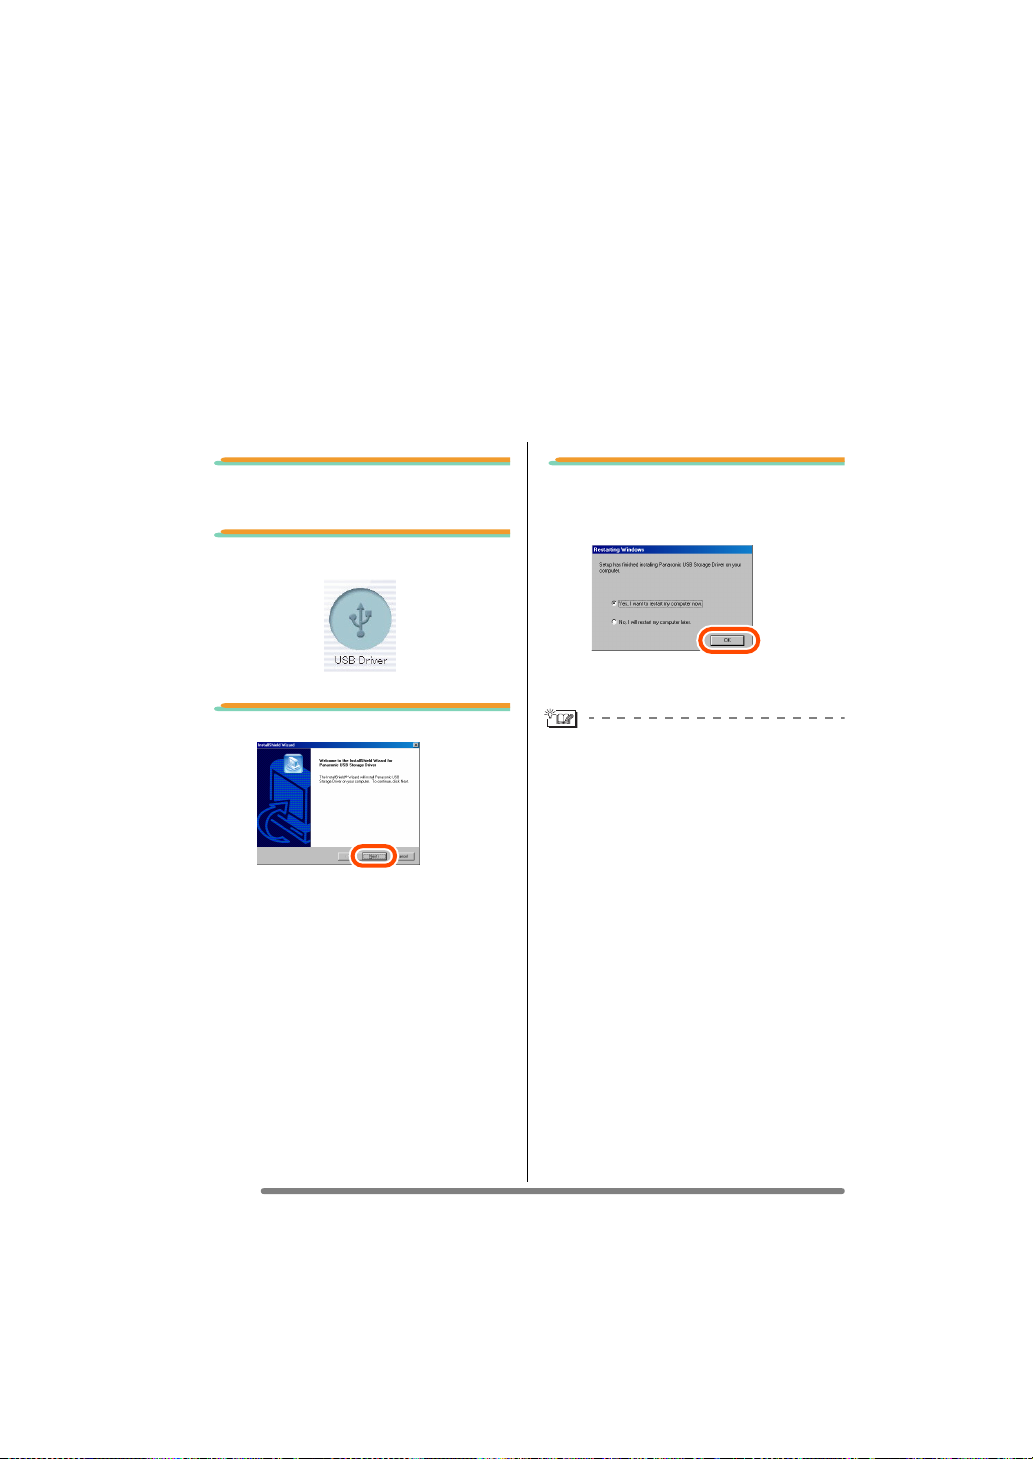
Installing the USB driver (Windows 98/98SE only)
• If Windows 98/98SE is used, install the USB driver (software for operating the digital
camera through a PC) before connecting the digital camera to the PC.
• This installation is not required on the 2nd and later connections.
• If any OS other than Windows 98/98SE is used, this installation is not required.
• Before inserting the CD-ROM, close all running applications.
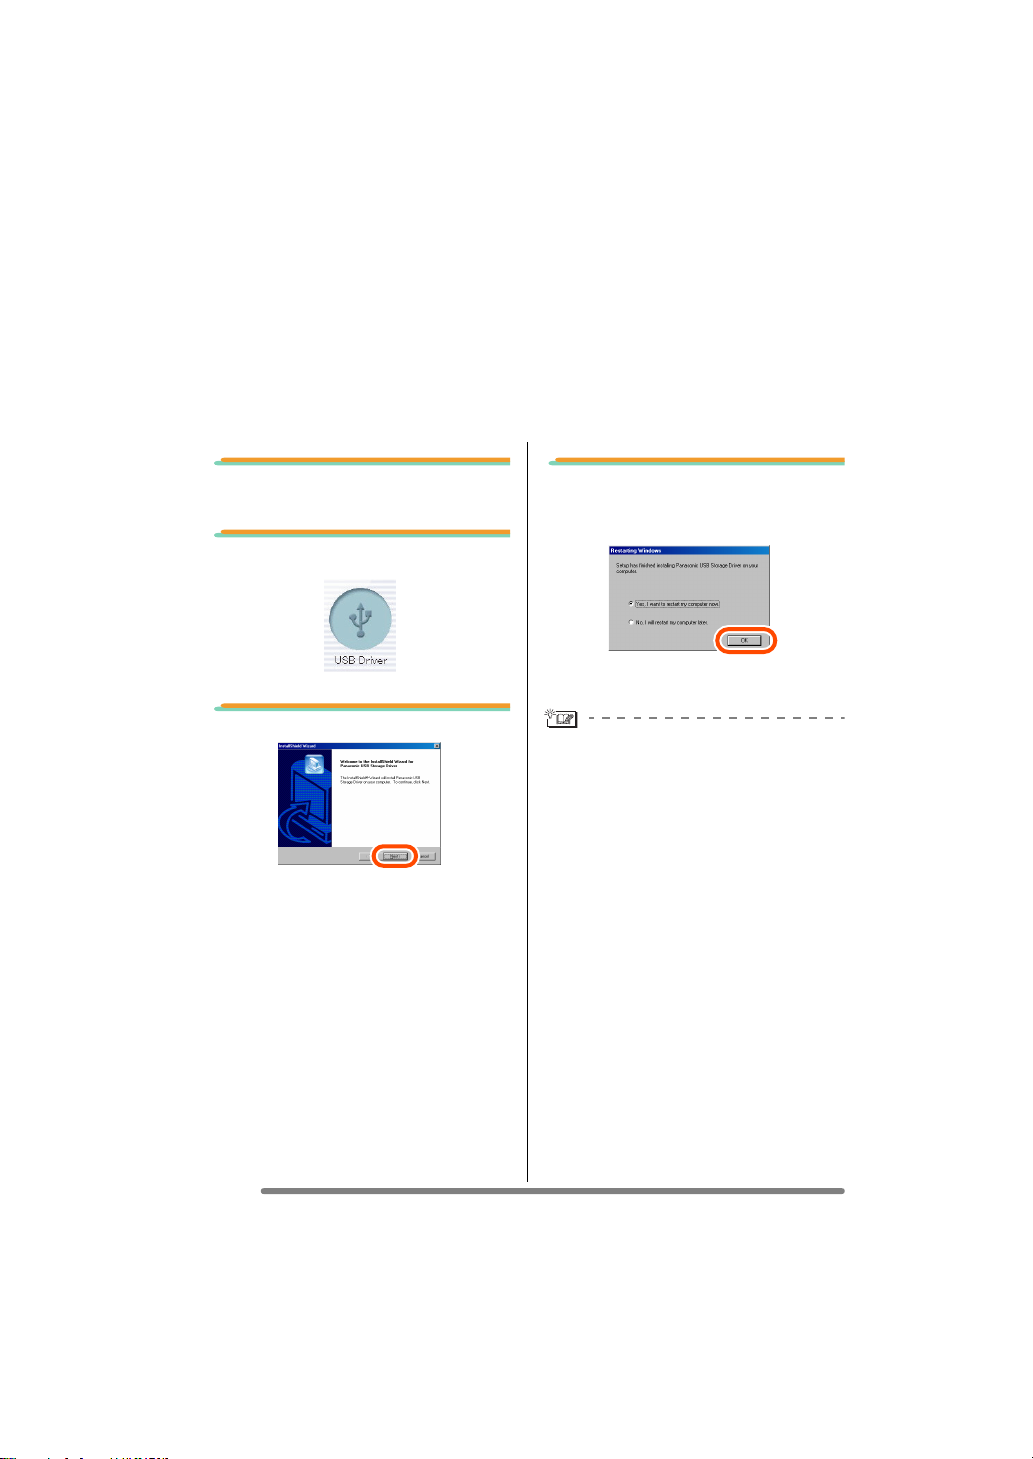
1. Insert the CD-ROM.
The setup menu will start.
2. Click [USB Driver].
3. Click [Next].
• Installation of the USB driver starts.
4. If the [Restarting Windows]
dialogue box appears, click
[OK].
After the PC is restarted, installation of the
USB driver will be completed.
If the setup menu does not start
automatically:
• Double-click [My Computer] on the
desktop, double-click or open
[VFFXXXX] (part No. XXXX varies by
model), and double-click [InstMenu.exe].
6
VQT0W47
Page 7
Setting up
Installing the Software 2
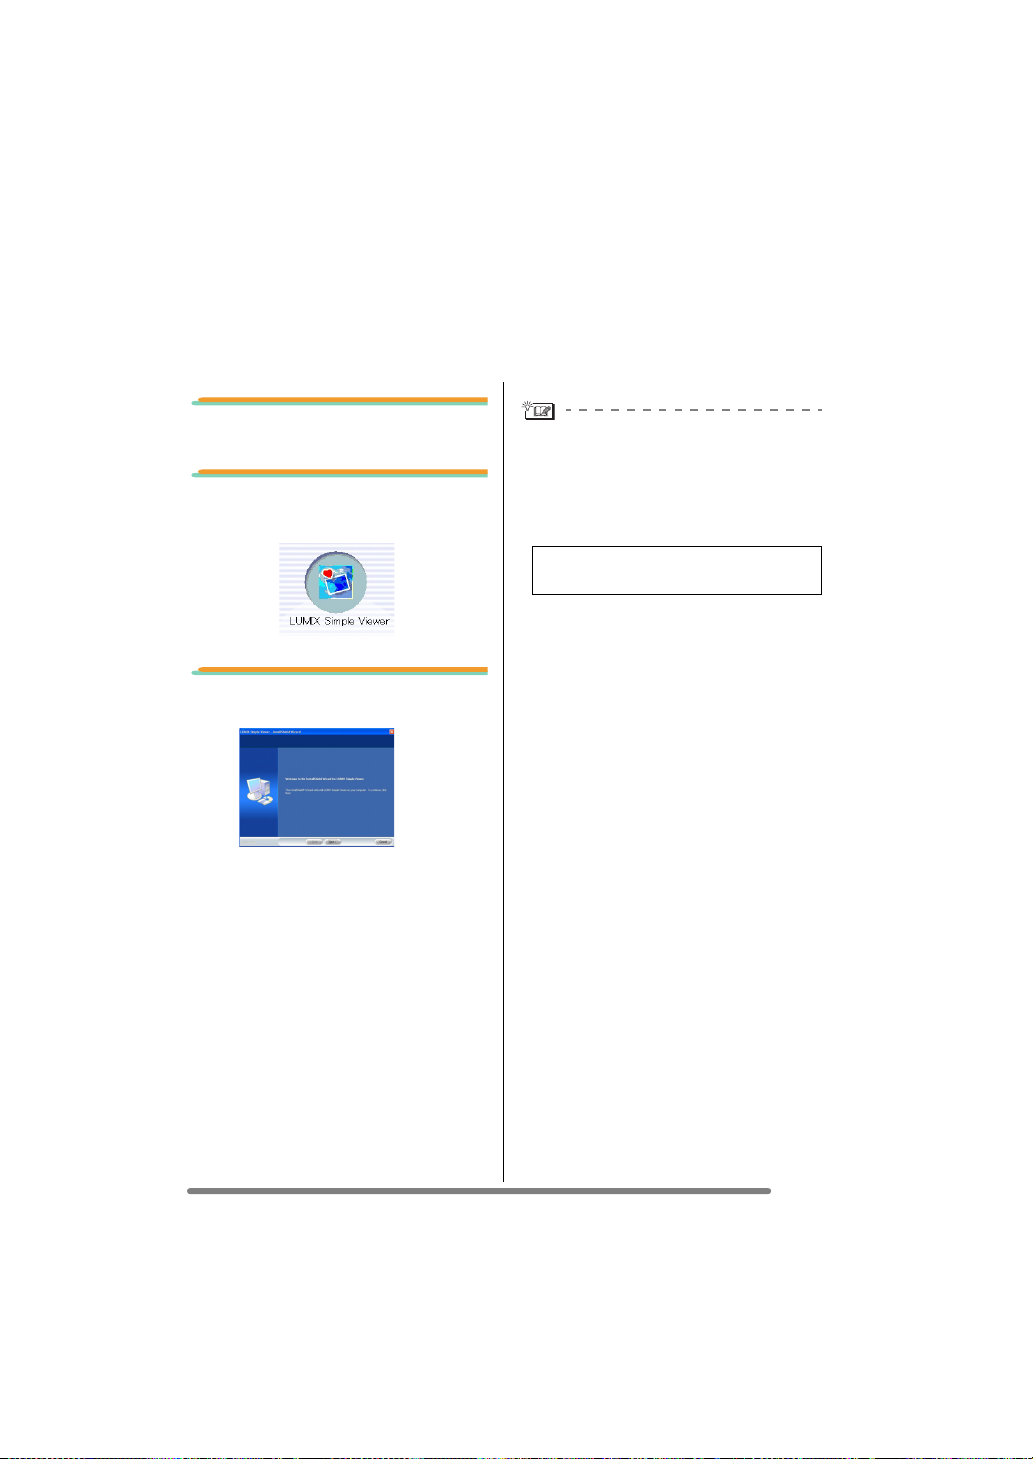
Installing Simple Viewer
• This installation is not required on the 2nd and later connections.
• Before inserting the CD-ROM, close all running applications.
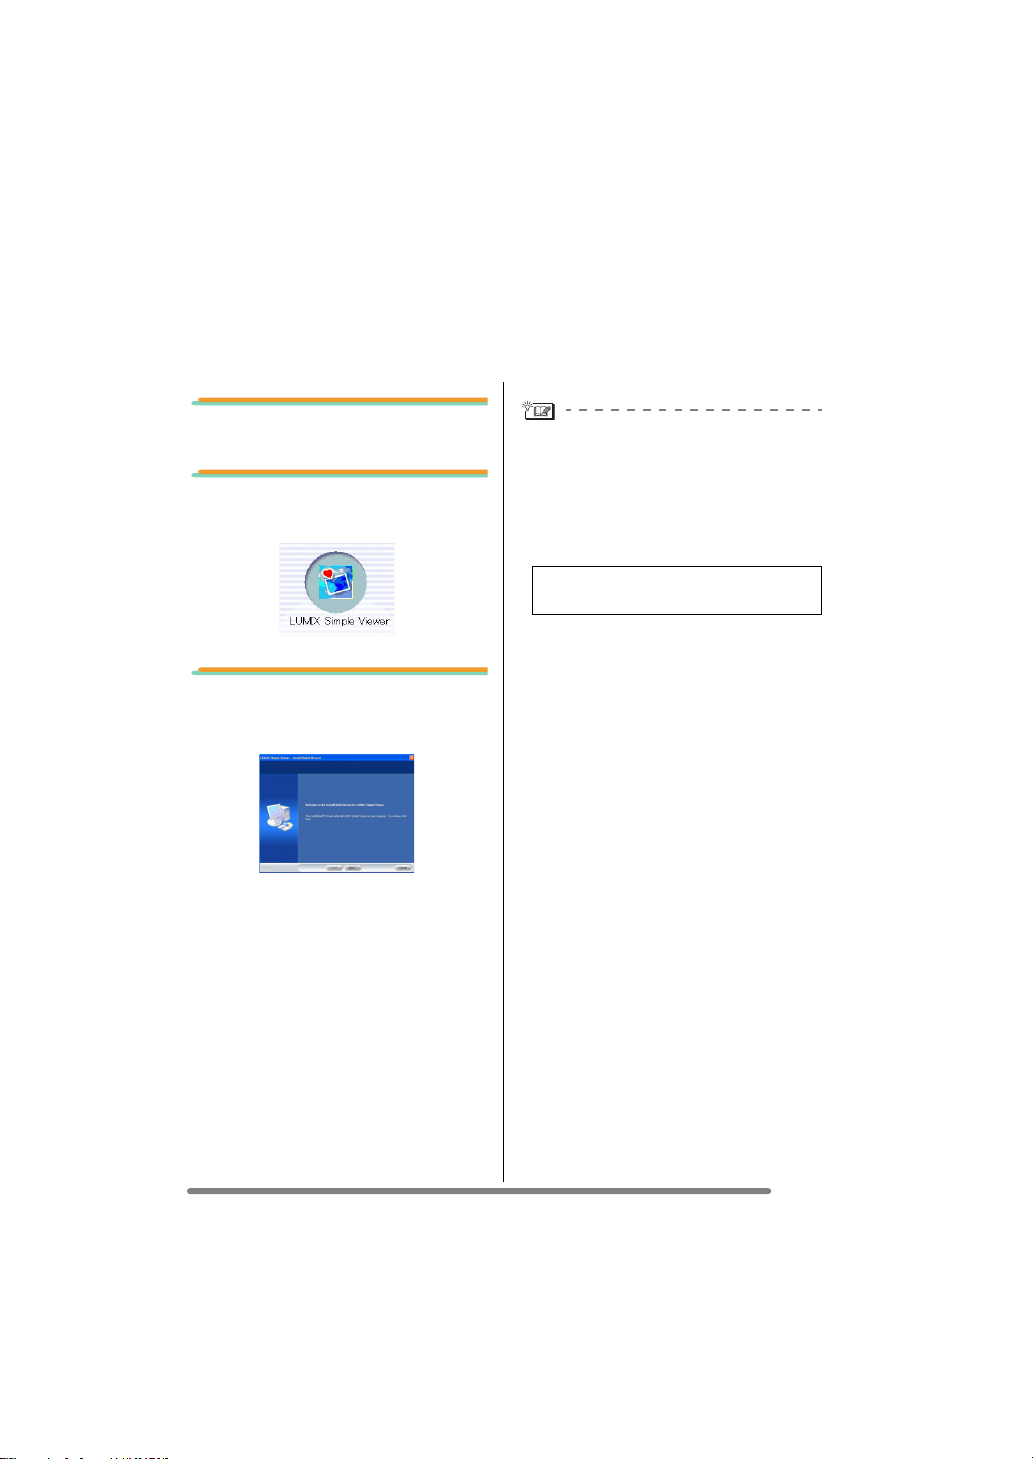
1. Insert the CD-ROM.
The setup menu will start.
2. Click [LUMIX Simple
Viewer].
3. Proceed with installation
according to messages
appearing on the screen.
• Only when Windows 98SE is used,
MDAC2.8 (Microsoft Data Access
Components 2.8) may also be installed.
Install it according to messages shown
on the screen.
• Before first use following the completion
of installation, be sure to select
[Readme] from [start] >> [All programs]
>> [Panasonic] >> [LUMIX Simple
Viewer] to read additional information.
• Simple Viewer is installed in the following
folder. (It cannot be changed.)
C:\Program Files\Panasonic\
LUMIXSimpleViewer
If the setup menu does not start
automatically:
• Double-click [My Computer] on the
desktop, double-click or open
[VFFXXXX] (part No. XXXX varies by
model), and double-click [InstMenu.exe].
If Simple Viewer cannot be installed:
• If Windows 2000/XP is used, you cannot
install when you have logged on to the
PC as a Limited Account user. Log on as
an Administrator Account user and install
again. For details, refer to the operating
instructions for the PC.
VQT0W47
7
Page 8
Setting up
Connecting the Digital Camera to PC
• When Windows 98/98SE is used, install the USB driver (P6) before connection.
• If the PC has a built-in SD memory card slot, insert a Card into the slot and you can
acquire pictures to the PC by use of Simple Viewer.
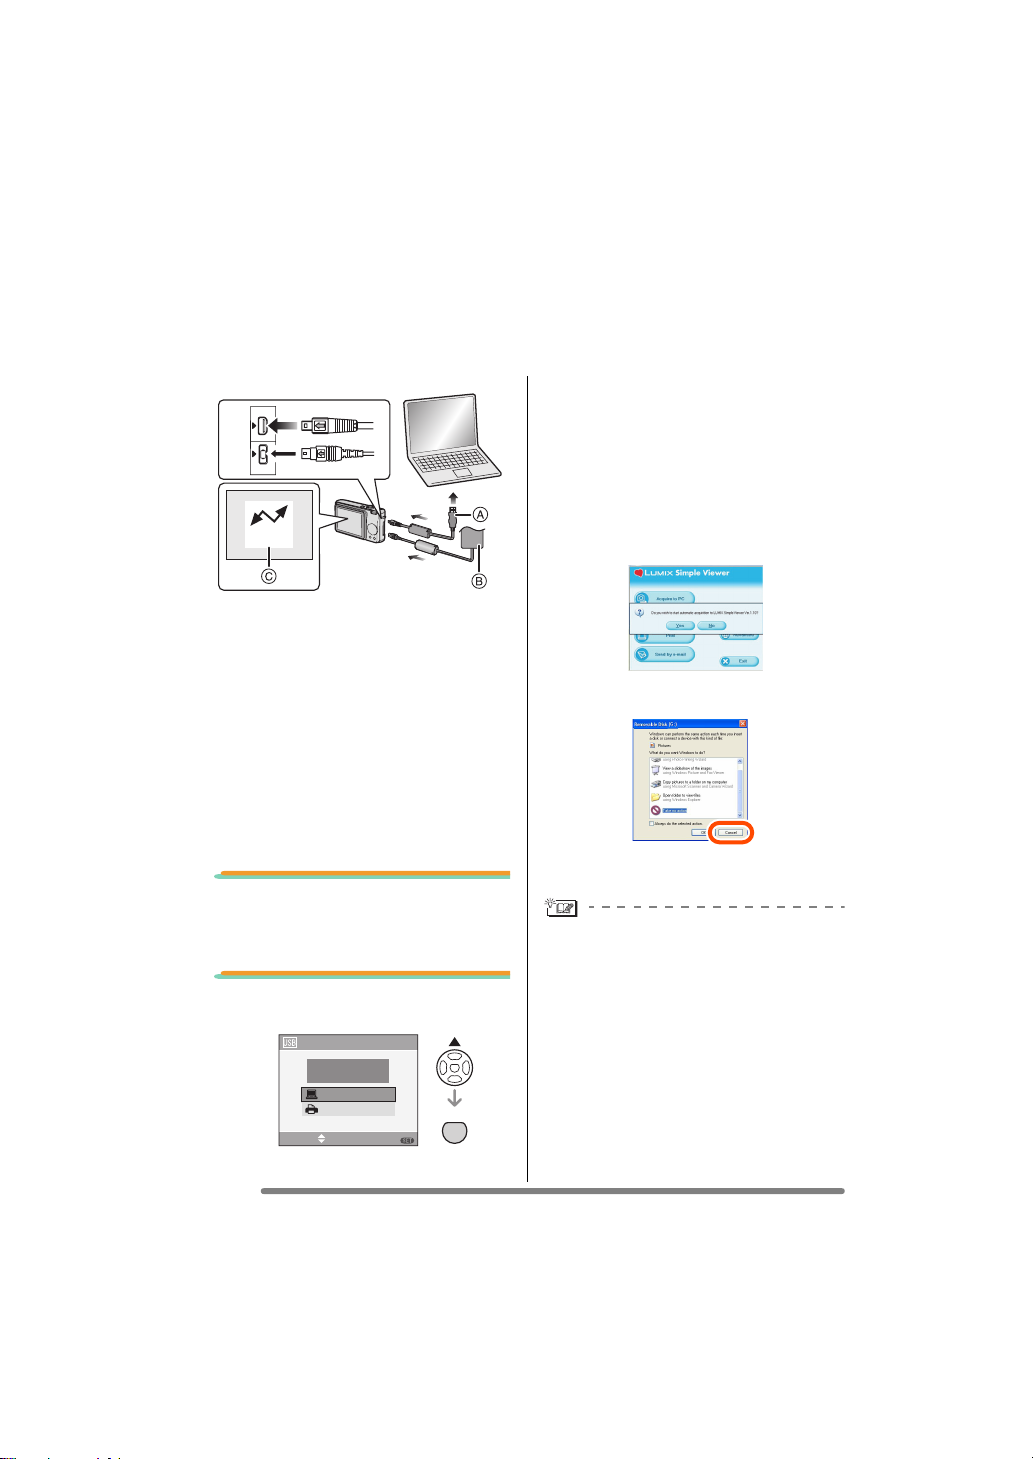
• If you set [USB MODE] in the [SETUP]
DIGITAL
AV OUT
DC IN
ACCESS
A: USB connection cable
B: AC adaptor (optional)
C: This message appears during data
transfer.
Preparations on the digital camera side
When you connect the digital camera to
the PC, use batteries with sufficient
battery power or the AC adaptors. If the
remaining battery power is exhausted
during communication, the recorded data
may be damaged.
• If you use the AC adaptor, connect it.
• Turn on the digital camera.
1. Connect the digital camera
to the PC via the supplied
USB connection cable.
2. Press 3 to select [PC] and
then press [MENU/SET].
USB MODE
PLEASE SELECT
THE USB MODE
PC
PictBridge(PTP)
SELECT SET
MENU
SET
MENU
menu to [PC] in advance, it is not
necessary to set this every time you
connect to a PC.
• When the connection is established
correctly, Simple Viewer automatically
starts to open the screen for starting
acquisition. (P9)
If Windows 98 is used, refer to P23.
• When the following screen appears, click
[Cancel] to close it.
• If Simple Viewer does not start
automatically, refer to P27.
• Do not operate the digital camera or
disconnect the USB connection cable
while transferring data in the digital
camera. The software may not function
correctly and damage the data being
transferred.
• The shape of the terminal varies
depending on the digital camera used.
For details, refer to the operating
instructions for the digital camera.
8
VQT0W47
Page 9
Using Simple Viewer
Using Simple Viewer
Acquiring pictures to the PC ( Acquire to PC)
• When you have once exited Simple Viewer or view the pictures already acquired,
double-click the short-cut icon of the LUMIX Simple Viewer on the desktop to start
Simple Viewer.
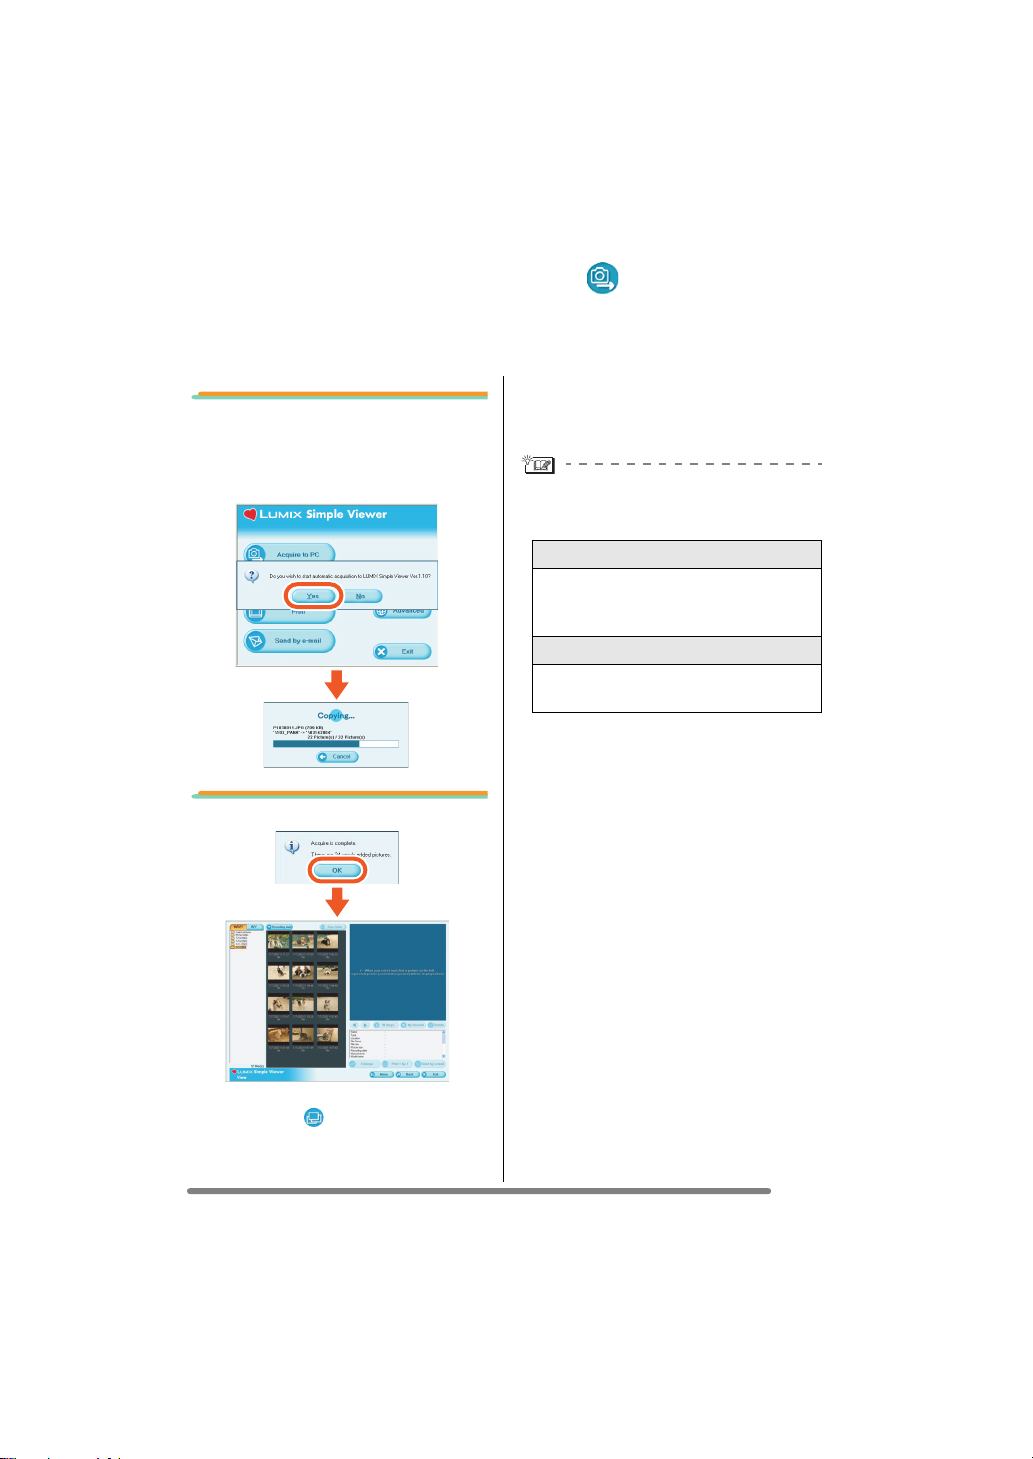
1. When the message for
inquiring whether to start
acquisition is displayed,
click [Yes].
2. Click [OK].
• When there are many pictures to acquire
or the file size of pictures is large, it may
take time to acquire them.
Acquire destination folder:
• The pictures acquired to the PC are
saved in the following folder.
Windows 2000/XP
C:\Documents and Settings\
All Users\Documents\My Pictures\
LUMIXSimpleViewer
Windows 98SE/Me
C:\My Documents\My Pictures\
LUMIXSimpleViewer
• When you wish to change the current
acquire destination folder, refer to P21.
When you click [Cancel] during
acquisition:
• Acquisition will be aborted halfway, and
the pictures already acquired will be
displayed in thumbnail view.
Pictures will be acquired from the card to
the PC and the [ View] screen will be
opened to display the acquired pictures in
thumbnail view.
9
VQT0W47
Page 10
Using Simple Viewer
Viewing pictures ( View)
• When you have once exited Simple Viewer or view the pictures already acquired,
double-click the short-cut icon of the LUMIX Simple Viewer on the desktop to start
Simple Viewer.
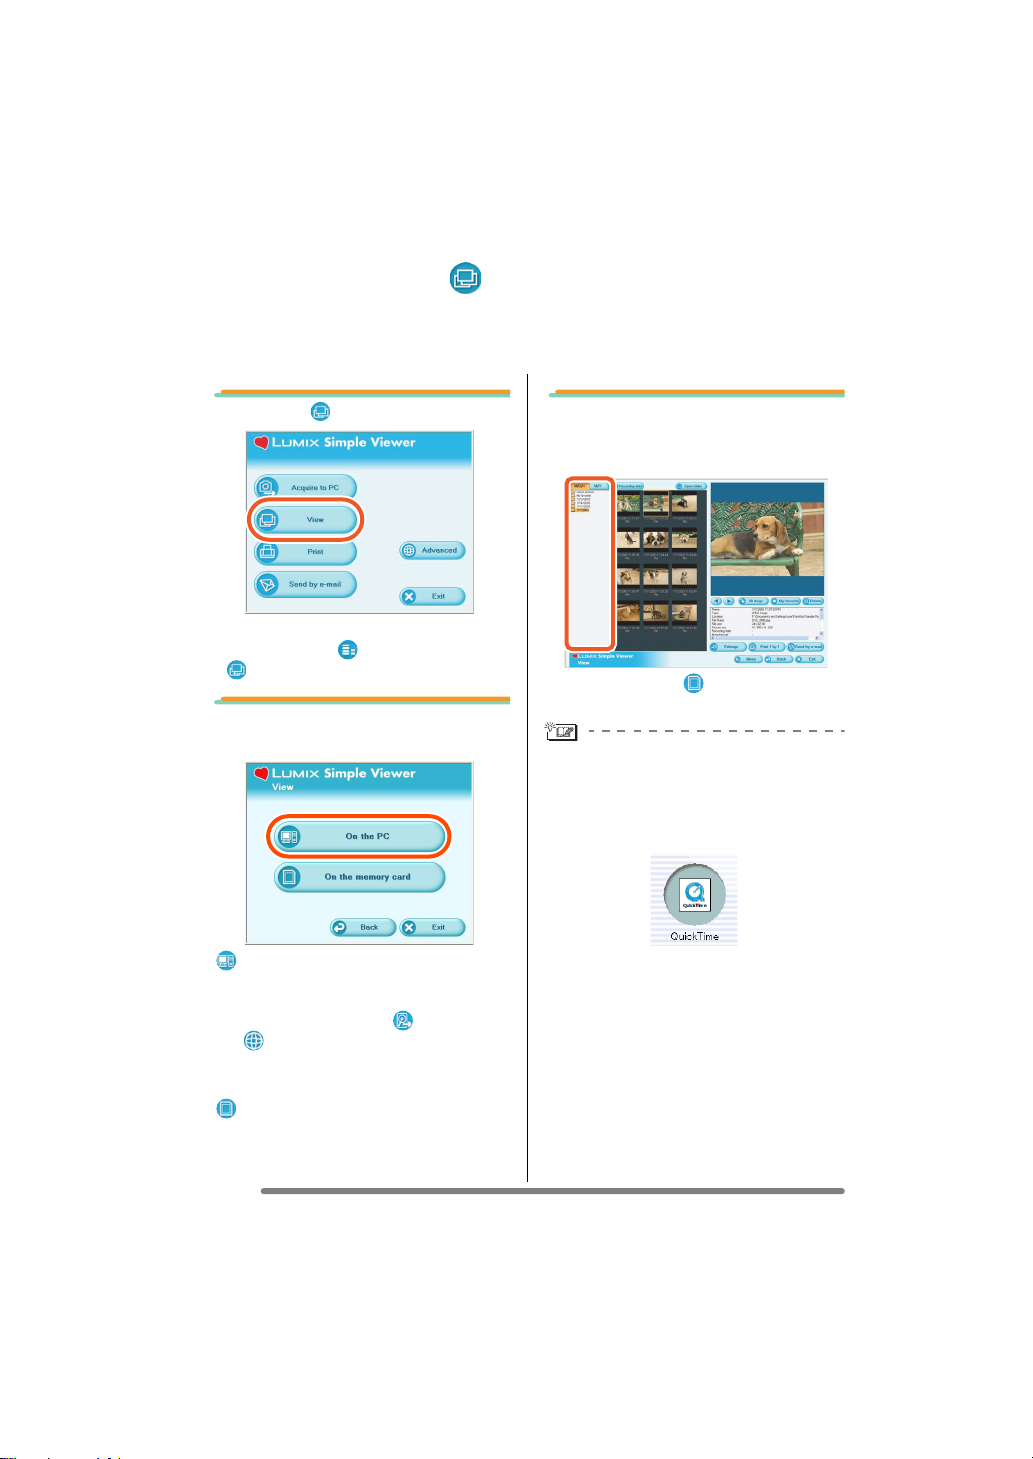
1. Select [ View].
• When the above main menu is not
displayed, click [ Menu] and then click
[View].
2. Select any location where
pictures are saved.
[On the PC]
Select this option when viewing the
pictures acquired to the PC.
• If pictures are added by [ Add pictures]
in [ Advanced], you can view pictures
stored in the PC other than the ones
acquired by Simple Viewer. (P19)
[ On the memory card]
Click this button when viewing pictures on
the Card connected using the USB
connection cable.
10
VQT0W47
3. Select any folder, and in
thumbnail view, select any
picture.
• When you select [ On the memory
card] in step 2, no folders are displayed.
To view motion pictures:
• QuickTime must be installed in the PC
used. Place the supplied CD-ROM in the
CD-ROM drive and install QuickTime
using the setup menu.
• Depending on the efficiency of your PC,
the picture or audio may be interrupted
when playing back motion pictures.
Page 11
Using Simple Viewer
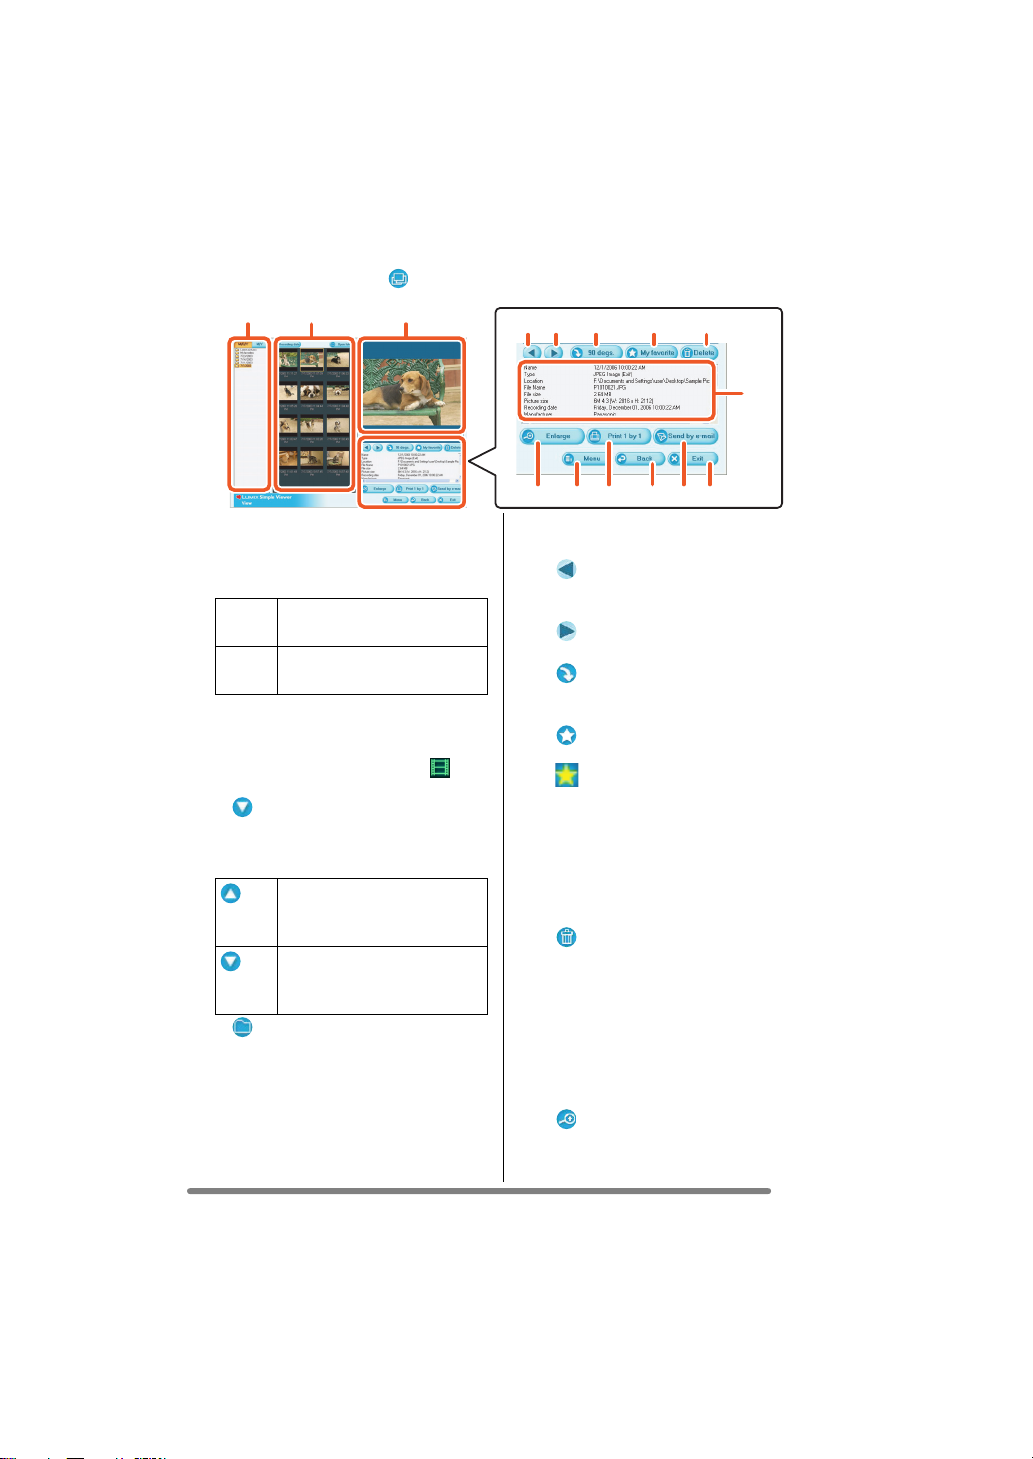
How to use the [ View] screen
12 3
1. Folder display
Folders containing acquired pictures
are displayed. Folders are created on
a date basis.
[M/D/Y] This option displays by the
day of recording.
[M/Y] This option displays by the
month of recording.
2. Thumbnail display
The pictures within a selected folder
are displayed in thumbnail view.
For motion pictures, the mark ( )
appears on the top left of its thumbnail.
• [ Recording date]
Click to change the date order of
the folder display and the thumbnail
display.
Click this button to display
pictures in descending order
of the recording date.
Click this button to display
pictures in ascending order
of the recording date.
• [ Open folder]
Click this button to open the folder
where the selected pictures are
saved.
3. Picture View
The picture selected in the thumbnail
view is displayed a little larger.
When motion picture is selected, it is
45 6 7 8
9121013 1411
automatically played back repeatedly
until another picture is selected.
4. [ ]
Click this button to select the previous
picture.
5. [ ]
Click this button to select the next picture.
6. [ 90 degs.]
Each click of this button rotates the
picture 90° clockwise.
7. [ My favorite]
When clicking this button, the mark
( ) is added to the picture, and it is
registered in Favorites. When clicking
the button again, the picture is
excluded from Favorites.
The pictures registered in Favorites
can be viewed by selecting [My
favorites] at the top of the Folder
display.
8. [ Delete]
Click this button to delete a selected
picture.
• Pictures taken in Baby mode are
9. [ Enlarge]
Click this button to enlarge a selected
picture to full screen. (P12)
15
displayed in folders created on a date
basis and other folders such as the
Baby mode folder. In this case, deleting
a picture in one of the folders deletes
the same picture in all the folders.
11
VQT0W47
Page 12

Using Simple Viewer
456721 3
10. [ Print 1 by 1]
When you click this button, the
selected picture is printed.
When you want to print multiple
pictures, click [ Print] on the main
menu. (P13)
11. [ Send by e-mail]
Click this button to attach a selected
picture to an e-mail. (P16)
12. [ Menu]
Click this button to return to the main
menu of Simple Viewer.
13. [ Back]
Click this button to return to the
previous menu. (P10)
14. [ Exit]
Click this button to exit Simple Viewer.
15. Picture information
[Name] Name of the file on
[Type] File format.
[Location] Place where acquired
[File Name]
[File size] Capacity of the file.
In addition, [Picture size], [Recording
date], [Manufacturer], [Model name],
[Shutter speed], [Aperture value], [ISO
sensitivity], [Exposure +/-], [White
balance], [Flash], [Print compensation
information], and [Recording mode]
are displayed.
Simple Viewer.
files are stored.
Name of the file on the PC.
∫ Full screen display
1. [ ]
Click this button to select the previous
picture.
2. [ ]
Click this button to select the next
picture.
3. Picture show
• [Start]
Click this button to start the picture
show. In the main menu, click
[ Advanced] >> [ Setting...] to
change the picture show duration. (P21)
• [ Stop]
Click this button to stop the picture
show.
4. Switching the display size of
pictures
• [ Fit to screen]
Enlarges or reduces the picture to
the PC screen.
• [ Full scale]
Displays the picture in its original size.
5. [ Menu]
Click this button to return to the main
menu of Simple Viewer.
6. [ Back]
Click this button to return to the
[ View] screen. (P10)
7. [ Exit]
Click this button to exit Simple Viewer.
If the operating buttons disappear:
Move the mouse and the operating buttons
appear again.
12
VQT0W47
Page 13
Using Simple Viewer
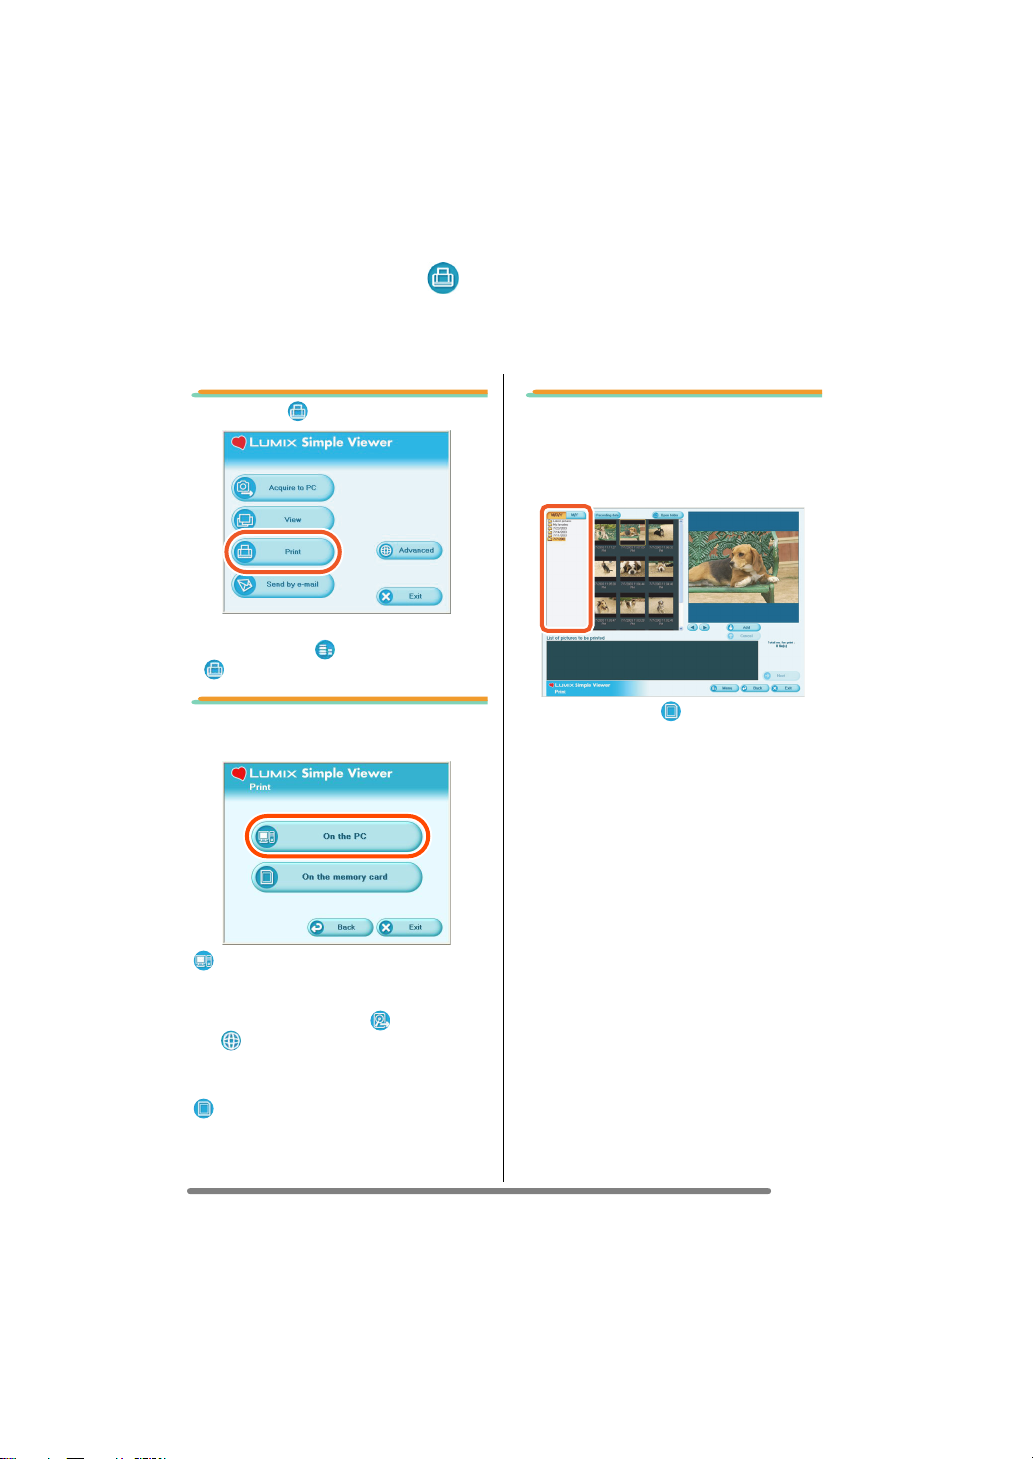
Printing pictures ( Print)
• When you have once exited Simple Viewer or view the pictures already acquired,
double-click the short-cut icon of the LUMIX Simple Viewer on the desktop to start
Simple Viewer.
1. Select [ Print].
• When the above main menu is not
displayed, click [ Menu] and then click
[ Print].
2. Select any location where
pictures are saved.
[On the PC]
Select this option when printing the
pictures acquired to the PC.
• If pictures are added by [ Add pictures]
in [ Advanced], you can print pictures
stored in the PC other than the ones
acquired by Simple Viewer. (P19)
[ On the memory card]
Click this button when printing a picture on
the Card connected using the USB
connection cable.
3. Select any folder to display
the pictures in it in
thumbnail view, and select a
one.
• When you select [ On the memory
card] in step 2, no folders are displayed.
13
VQT0W47
Page 14
Using Simple Viewer
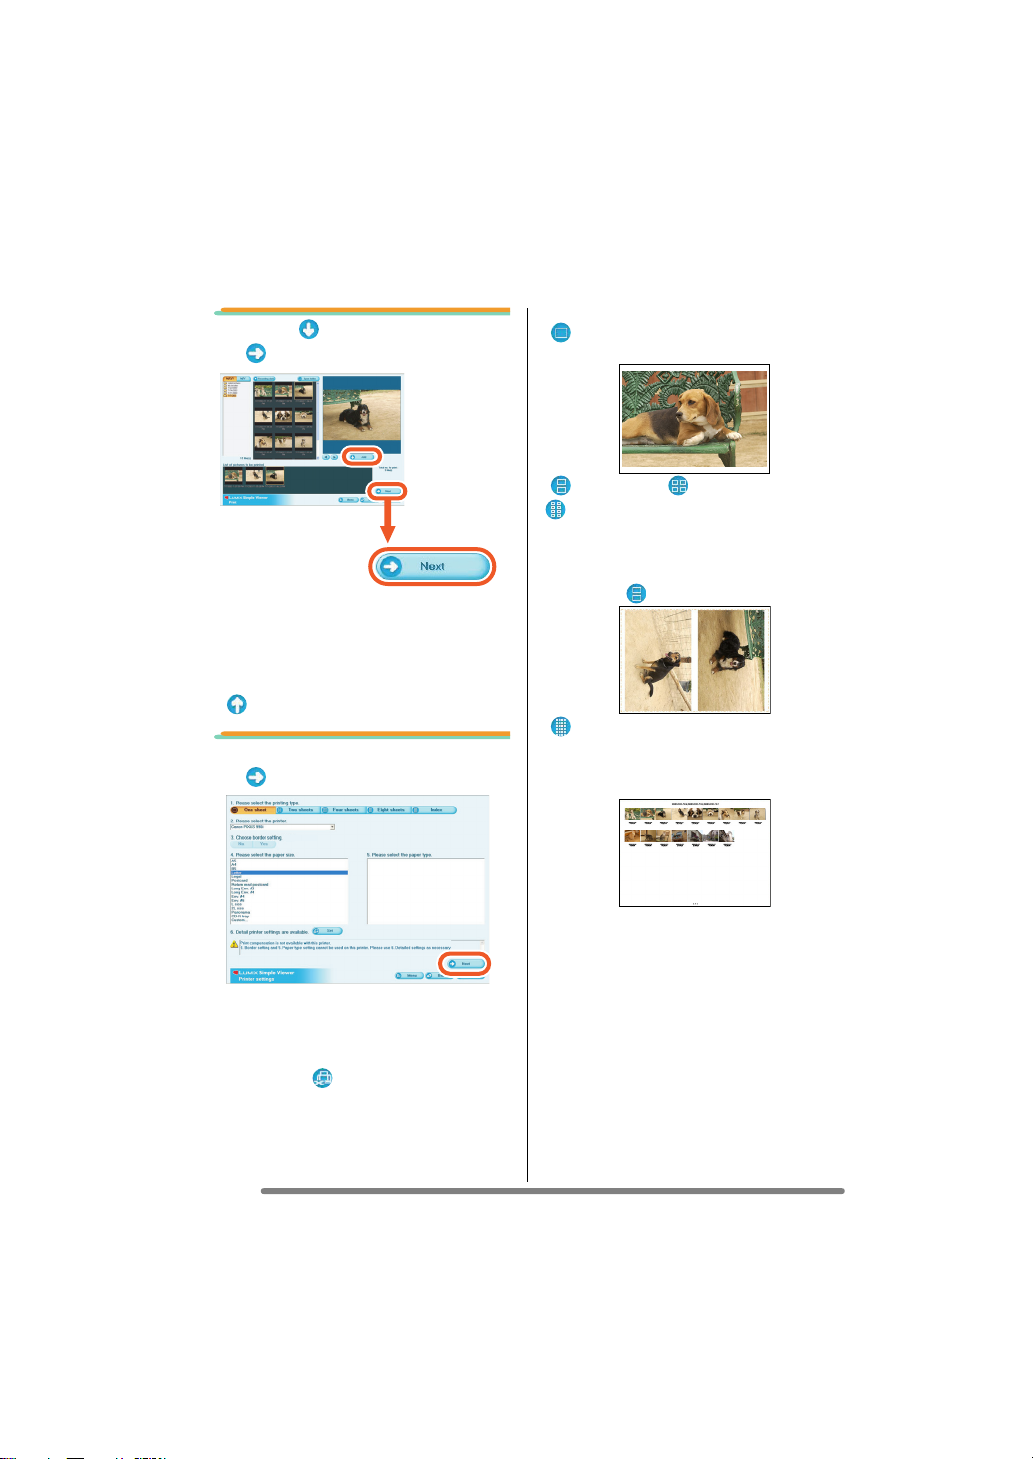
4. Click [ Add] and then click
[ Next].
• The selected picture will be added to
[List of pictures to be printed].
• To remove any picture from [List of
pictures to be printed], click it in [List of
pictures to be printed] and then click
Cancel
[
].
5. Set up printing, and click
[ Next].
[Please select the printing type]
( One sheet)
Used to print one picture on one sheet.
( Two sheets, Four sheets,
Eight sheets)
Used to print pictures on one sheet by the
number of pictures corresponding to the
mode selected.
(Example: [ Two sheets])
(Index)
The selected pictures are printed in list
form.
(Example: When 16 pictures are selected.)
• Depending on the printer you are using,
“Print without borders” cannot be
selected or the sizes and types of paper
you can use may be restricted. In such
cases, click [ Set] and then set up
printing.
14
VQT0W47
• About 36 pictures can be printed one
A4-size sheet of paper.
Page 15
Using Simple Viewer
[Please select the printer]
Set up the printer you are using.
[Choose border setting]
Select “No” or “Yes”.
[Please select the paper size]
Set the size of paper used for printing.
[Please select the paper type]
Set the type of paper used for printing.
[Detail printer settings are available]
Set up the printer in detail.
(For details, refer to the operating
instructions for the printer.)
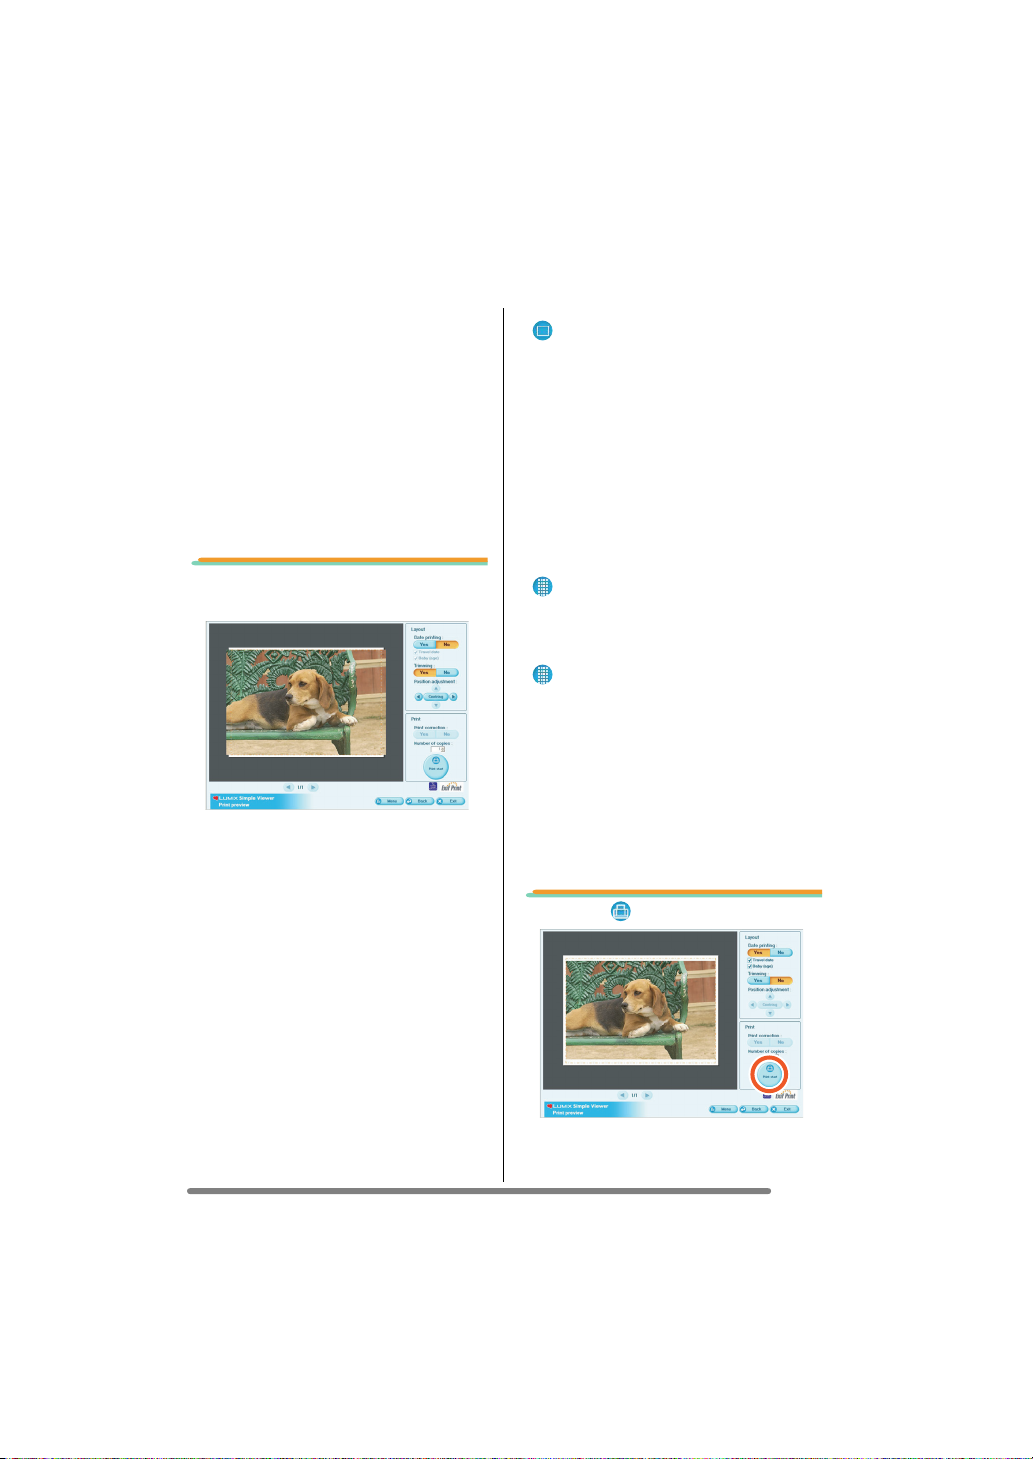
6. Check the layout, and set up
printing.
[Date printing]
Used to print the date at the right bottom
of the picture.
• If the digital camera is equipped with the
[BABY] in scene mode, set it to [WITH
AGE] and take pictures, and the pictures
are printed with the age in month/year as
well as the date of recording. If it is
equipped with a travel date function and
you set this function and take pictures,
the pictures are printed with the number
of days that have passed at the travel
destination as well as the date of
recording. (Depending on the model of
digital camera, this will differ.)
[Trimming]
([ One sheet] only)
Used to print the picture in alignment with
the paper size.
• Without trimming a picture, the entire
picture is printed. If the aspect ratio of
paper is different from that of a picture,
blank spaces are left in the upper and
lower parts or the left and right parts.
[Position adjustment]
Used to fine-adjust the printing position for
trimming.
[Title]
([ Index] only)
Used to print the name of the picture folder
(e.g., 12/05/2006) at the top of the picture.
[Picture name]
([ Index] only)
Used to print the date and time of recording
the picture at the bottom of the picture.
[Print correction]
Used to enable the print correction
function of the printer.
• This function is compatible with “PRINT
Image Matching” and “Exif Print”. Refer
to the operating instructions for your
printer.
7. Click [ Print start].
02/21/2005
02/21/2005
Printing cannot be cancelled when it is
under way.
15
VQT0W47
Page 16
Using Simple Viewer
Sending pictures by e-mail ( Send by e-mail)
• When you have once exited Simple Viewer or view the pictures already acquired,
double-click the short-cut icon of the LUMIX Simple Viewer on the desktop to start
Simple Viewer.
• Compatible e-mail programmes are Outlook
®
Express and Microsoft® Outlook® only.
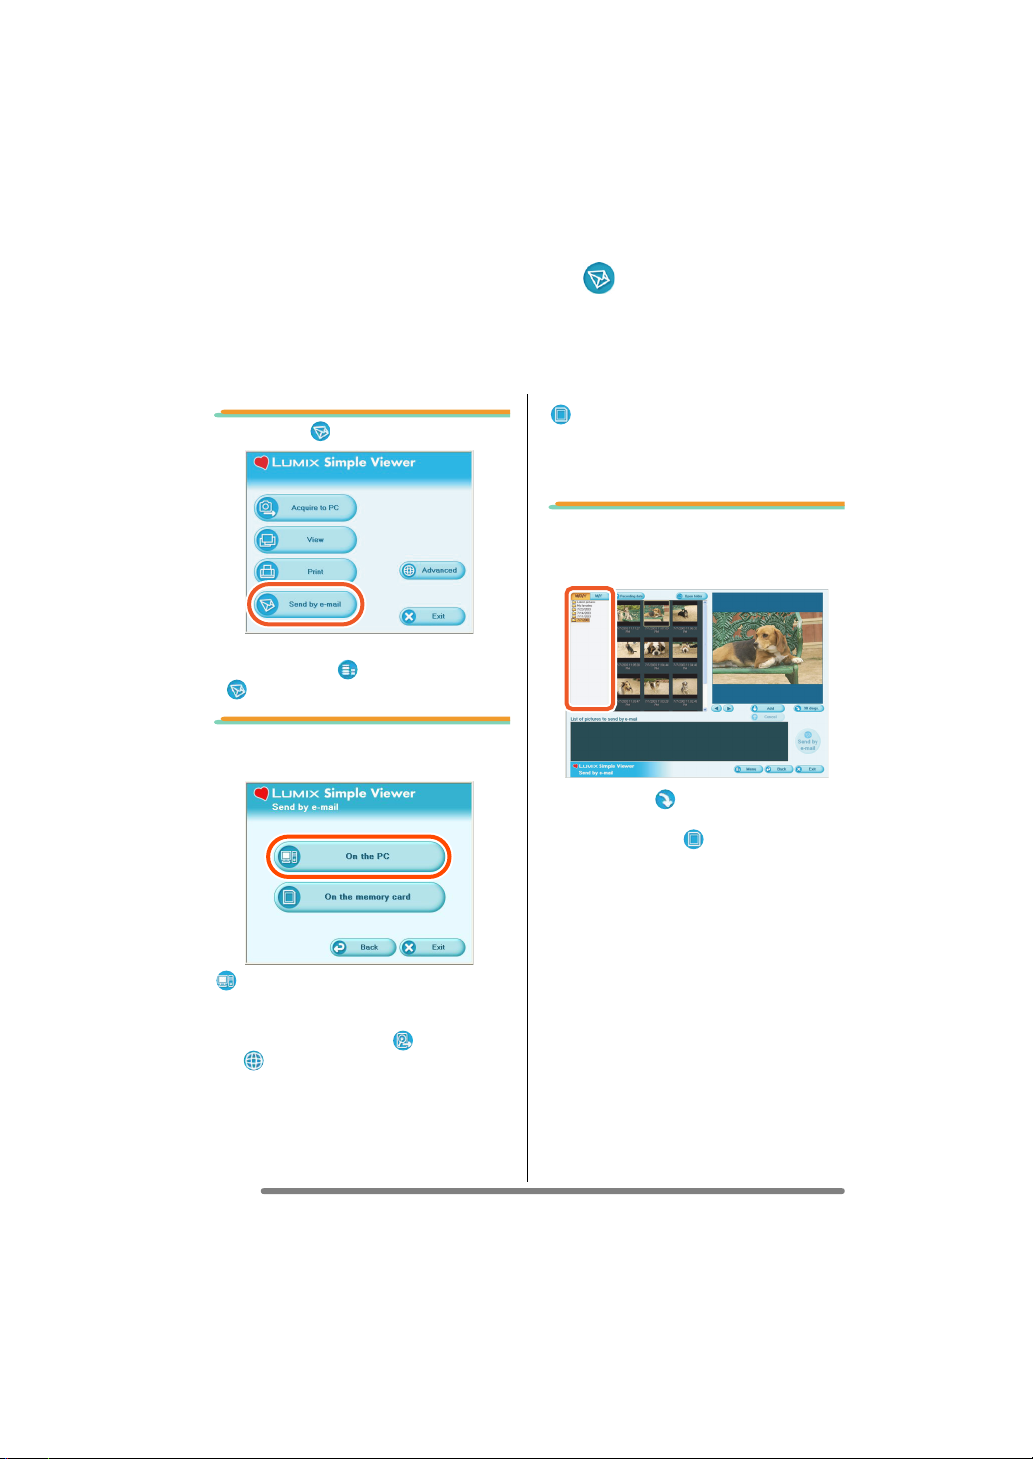
1. Select [ Send by e-mail].
• When the above main menu is not
displayed, click [ Menu] and then click
[ Send by e-mail].
2. Select any location where
pictures are saved.
[On the PC]
Select this option when sending by e-mail
the pictures acquired to the PC.
• If pictures are added by [ Add pictures]
in [ Advanced], you can attach to
e-mails pictures stored in the PC other
than the ones acquired by Simple
Viewer. (P19)
[ On the memory card]
Click this button when attaching to e-mails
pictures on the Card connected using the
USB connection cable.
3. Select any folder, and in
thumbnail view, select any
picture.
• Each click of [ 90 degs.] rotates the
picture 90° clockwise.
• When you select [ On the memory
card] in step 2, no folders are displayed.
16
VQT0W47
Page 17
Using Simple Viewer
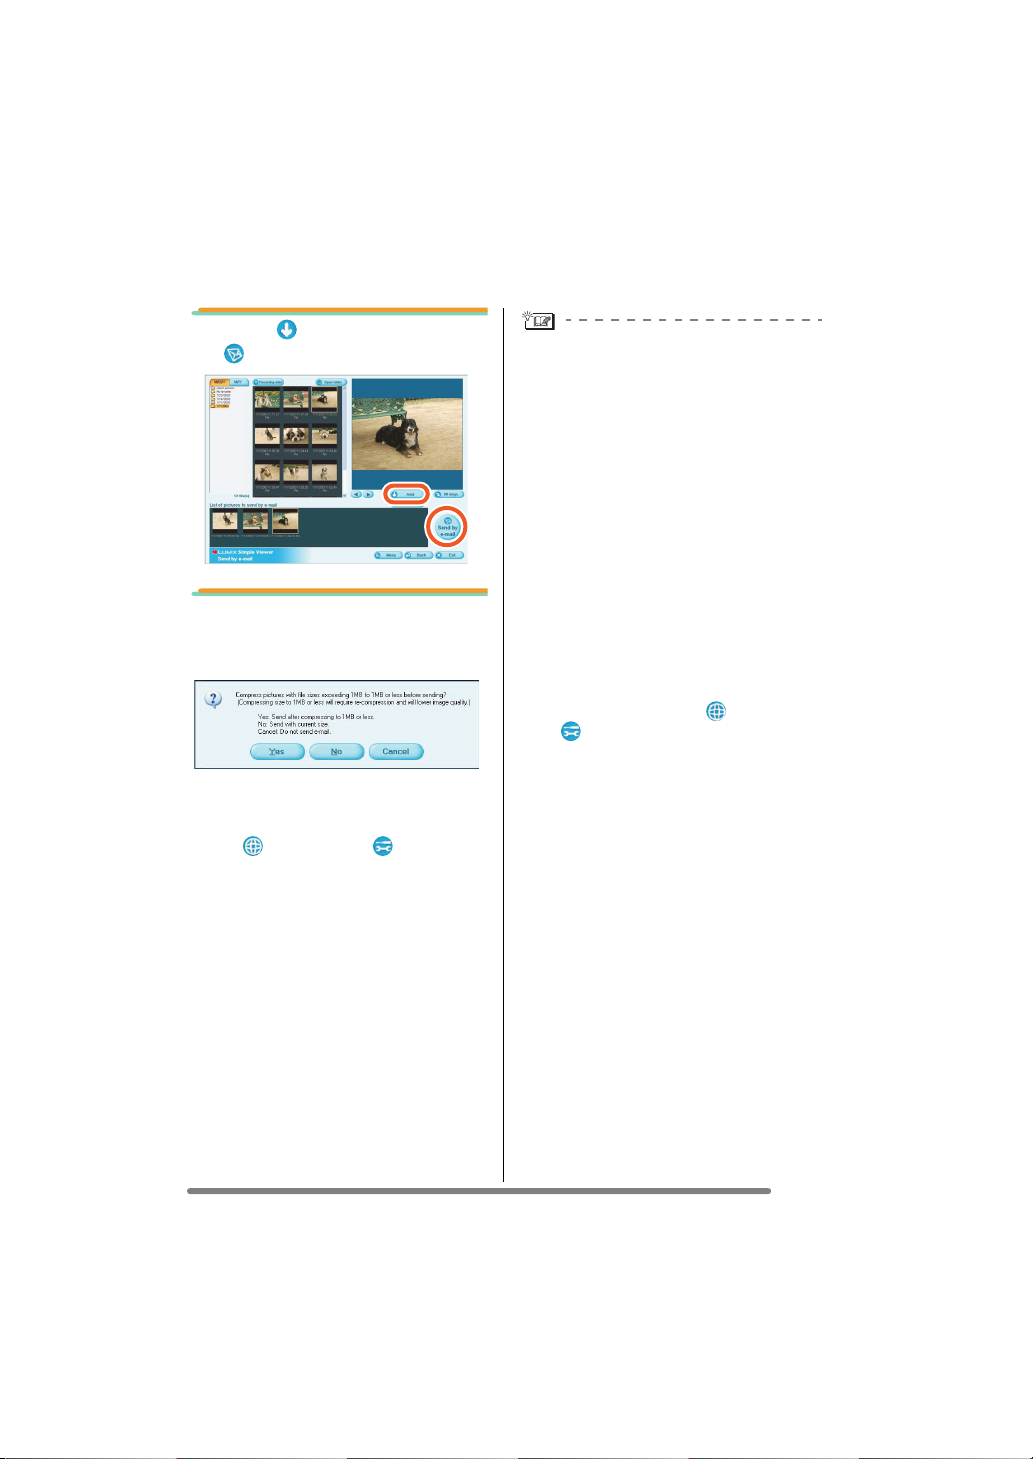
4. Click [ Add] and then click
[ Send by e-mail].
5. When the confirmation
message appears, select
[Yes], [No] or [Cancel].
• Select [Yes] to change the file size of the
picture to be attached to the maximum
file size before sending it.
Click [ Advanced] >> [ Setting...] to
change the maximum file size. (P21)
• Click [No] if you do not want to change
the file size of the picture before sending
it.
The picture is attached to an e-mail and
the e-mail programme starts automatically.
Enter an address, body text, etc. in the
e-mail and send it.
The e-mail programme does not start
automatically.
Check the settings of the standard e-mail
programme according to the following
procedures.
• The method of checking it varies
depending on the OS you are using.
1 Click [start] >> ([Setup] >>) [Control
Panel], and click [Internet Options].
2 Click the [Programs] tab, then click
[E-mail] to confirm the e-mail software
in use.
Only the following e-mail programmes are
guaranteed on operation.
• Outlook
•Microsoft
To change the maximum file size of
pictures to be attached to e-mails:
• In the main menu, click [ Advanced]
®
Express
®
>> [ Setting...]. You can change the file
size. (P21)
Outlook
®
17
VQT0W47
Page 18
Using Simple Viewer
Advanced
• You can add pictures to enable using them on Simple Viewer, write the pictures
acquired to the PC on the Card, and so on.
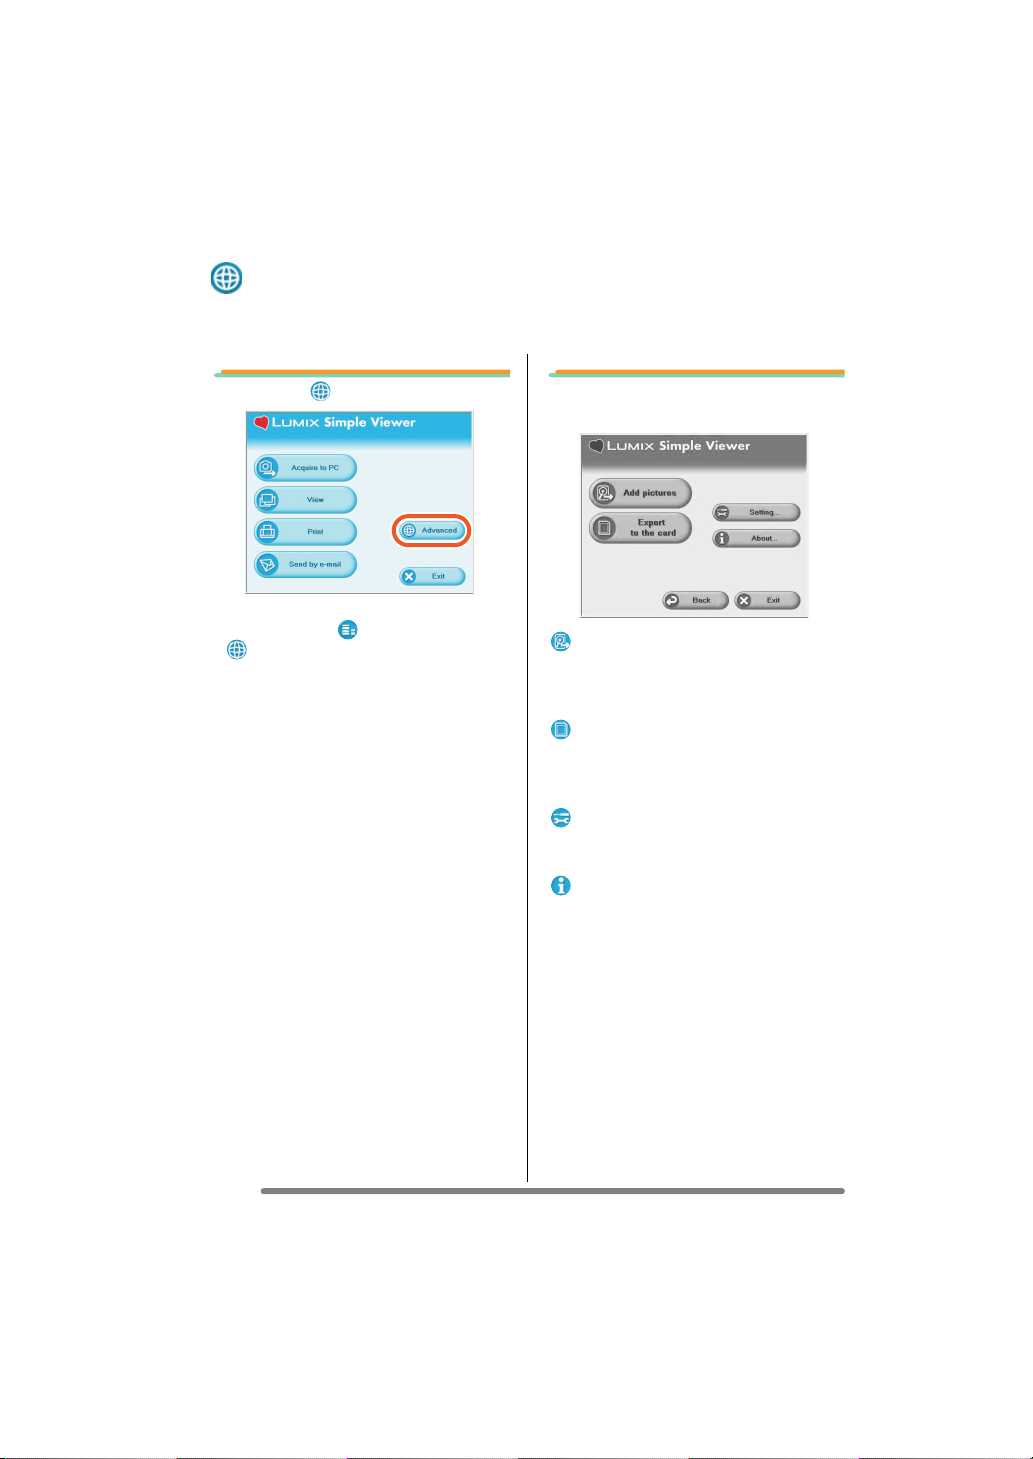
1. Select [ Advanced].
• When the above main menu is not
displayed, click [ Menu] and then click
[ Advanced].
2. Select any function to be
used.
[ Add pictures]
Click this button to register pictures
already saved in the PC so that Simple
Viewer can handle them. (P19)
[ Export to the card]
Click this button to write pictures saved in
the PC to the digital camera. (P20)
[ Setting...]
Click this button to make various settings
of Simple Viewer. (P21)
[ About...]
Click this button to display the version of
Simple Viewer.
18
VQT0W47
Page 19
Using Simple Viewer
Enabling the pictures stored in the PC to be used on
Simple Viewer ( Add pictures)
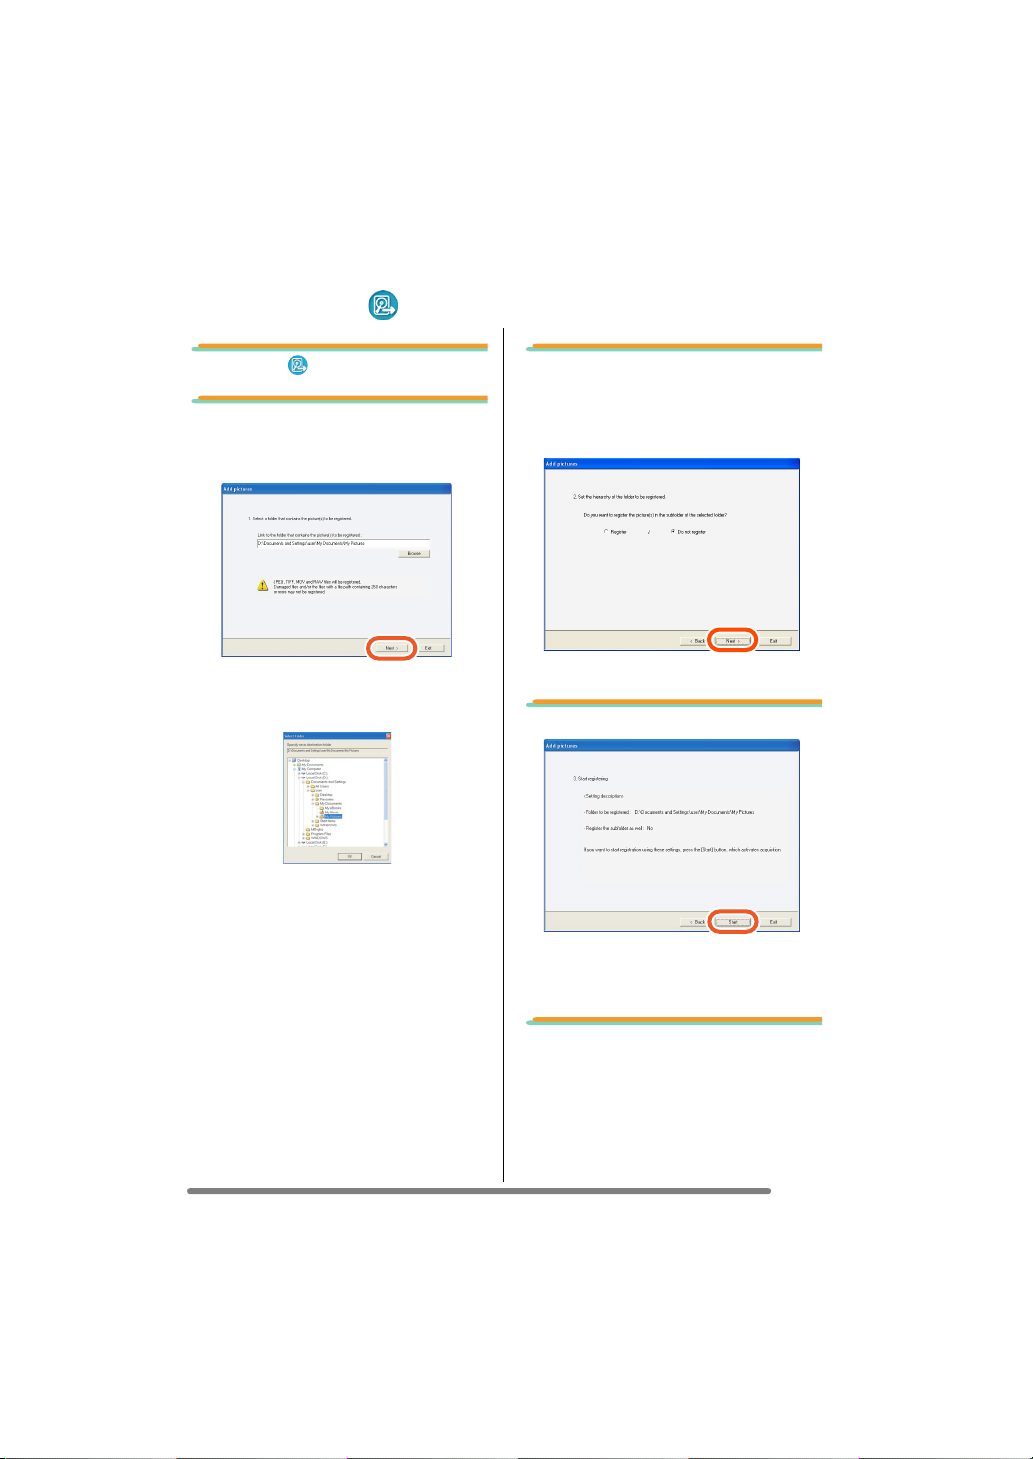
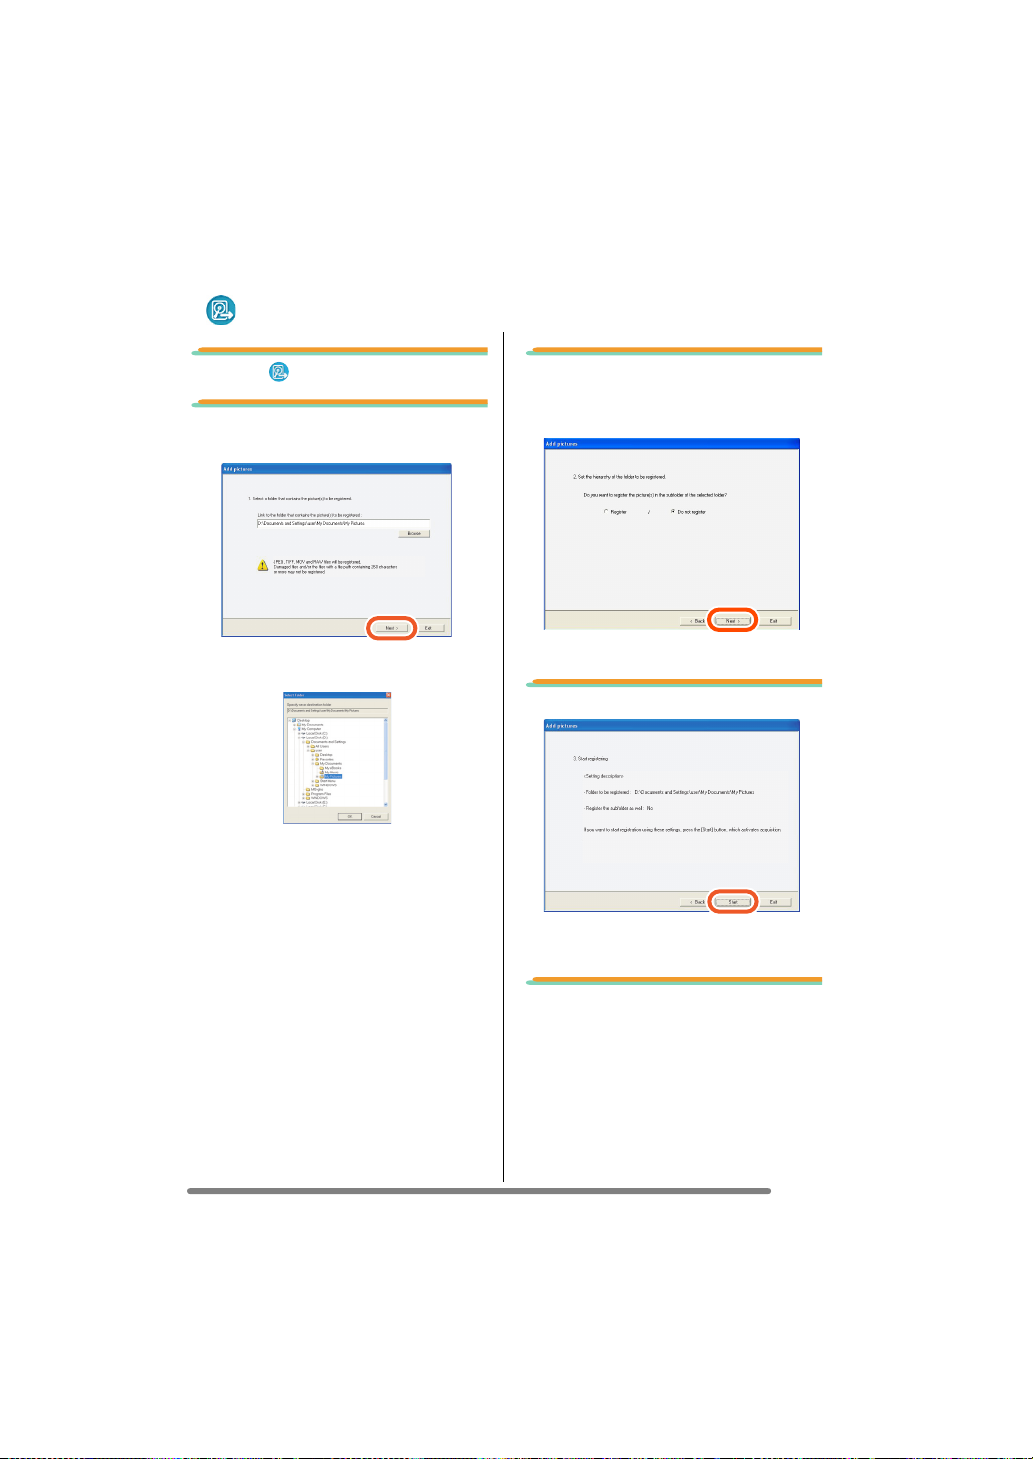
1. Select [ Add pictures].
2. Select a folder containing
pictures to add, and click
[Next].
• Click [Browse] to open the [Select
Folder] dialogue box, and select a
desired folder.
3. Specify whether or not to
add the pictures stored in
the sub-folders (folders
within the folder).
• After specifying it, click [Next].
4. Click [Start].
• When there are many pictures to add or
the file size of pictures is large, it may
take time to add them.
5. Click [OK], and then click
[Completion] to complete
the addition.
19
VQT0W47
Page 20

Using Simple Viewer
Viewing pictures on the PC with the digital camera
( Export to the card)
• Write pictures on the PC to the Card to enable them to be reproduced by the digital
camera.
1. Select [ Export to the
card].
2. Select any folder, and in
thumbnail view, select any
picture.
3. Click [ Add].
4. Click [ Write].
• Writing to the card is carried out.
• The pictures will be converted
automatically to the format that the
Panasonic digital camera can reproduce.
• Use a Card with sufficient free space. In
case of inadequate free space, a part of
the pictures is written.
• The pictures processed on the PC and
the ones recorded with digital cameras
other than the LUMIX may be displayed
coarsely.
The selected picture is added to the list at
the bottom of the screen.
• To remove any picture from the list at the
bottom of the screen, click the picture in
the list at the bottom of the screen, and
then click [
Cancel
].
20
VQT0W47
Page 21

Setting...
Using Simple Viewer
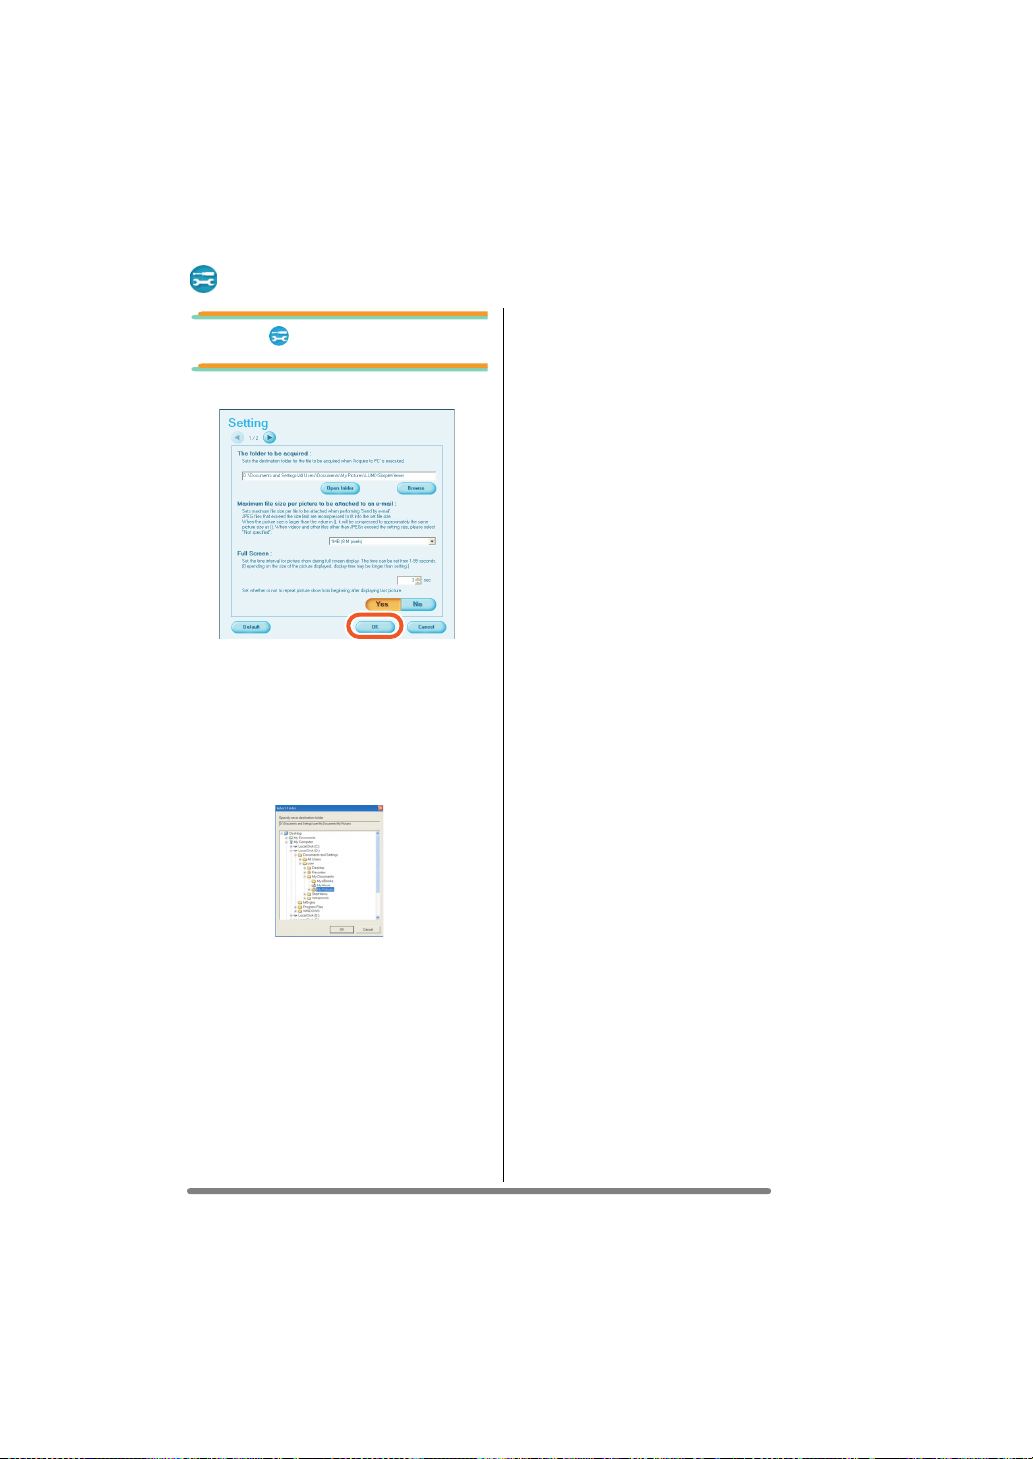
1. Select [ Setting...].
2. Set the settings and click
[OK].
[The folder to be acquired]
Select a desired folder used when
acquiring pictures from the card to the PC.
• Click [Open folder] and you can see the
pictures in the selected folder.
• Click [Browse] to open the [Select
Folder] dialogue box, and select a
desired folder.
• Even if you change the size setting, files
of large sizes cannot be sent depending
on Internet service providers.
[Full Screen]
Set the duration of the picture show and
whether or not it is repeated.
• If motion pictures are played back, the
following screen appears after playback
is finished.
[Automatic acquisition]
Specify whether to automatically start
Simple Viewer and acquire pictures when
the digital camera is connected.
[Updating for the folder list]
Click [Updating] to delete empty folders in
the Folder display.
[Default]
Clicking this button resets every setting to
the state when you purchased.
[Maximum file size per picture to be
attached to an e-mail]
Set the maximum file size of the picture to
be attached to an e-mail. (1 MB by default)
• Only the pictures with a name of
“XXXX.JPG” can be reduced in size. If
you do not change the size, set this item
to [Not specified].
21
VQT0W47
Page 22
Using Simple Viewer
After Using Simple Viewer
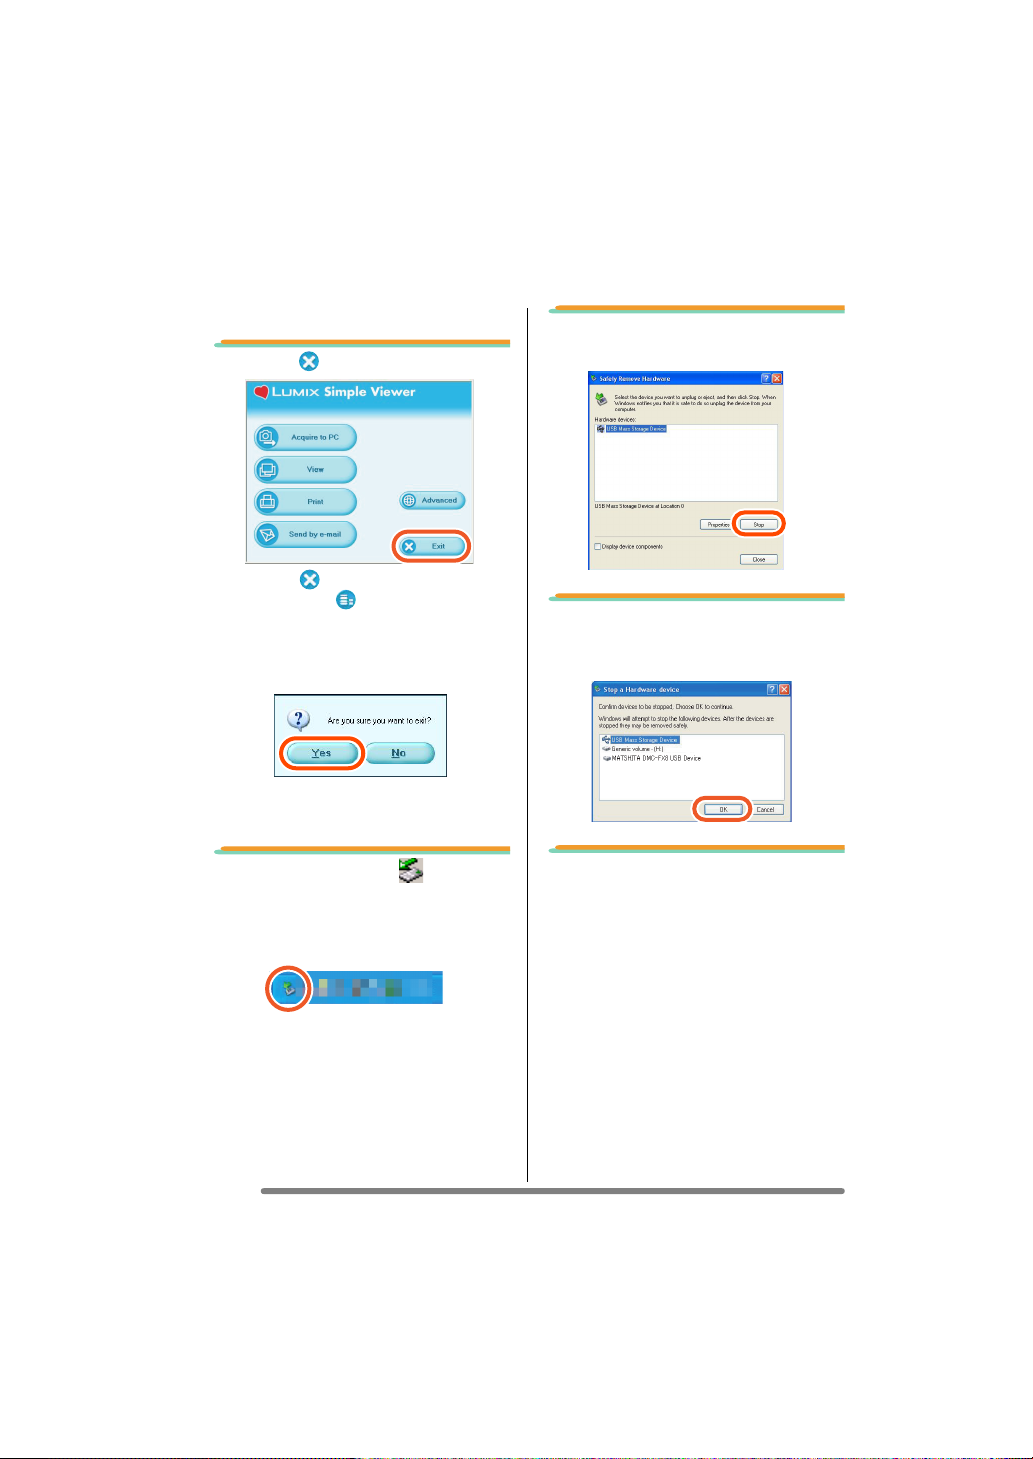
∫ To exit Simple Viewer:
1. Click [ Exit].
• When the [ Exit] button is not
displayed, click [ Menu] to return to the
main menu.
• When you try to exit on any screen other
than the main menu screen, the
confirmation message appears.
∫ To disconnect the USB
connection cable safely:
2. Select [USB Mass Storage
Device], and click [Stop].
3. Confirm that [USB Mass
Storage Device] is selected,
and click [OK].
1. Double-click the icon
displayed at the right bottom
(in the task tray) of the PC
screen.
The message for notifying hardware
removal is displayed.
22
VQT0W47
4. Click [Close].
You can remove the USB connection cable
safely.
• Depending on the OS (or OS settings)
such as Windows 98/98SE, the icon for
removing hardware safely is not
displayed in the task tray. In this case,
make sure that [ACCESS] is not shown
on the LCD monitor of the digital camera,
and then disconnect the USB connection
cable.
Page 23
Others
Others
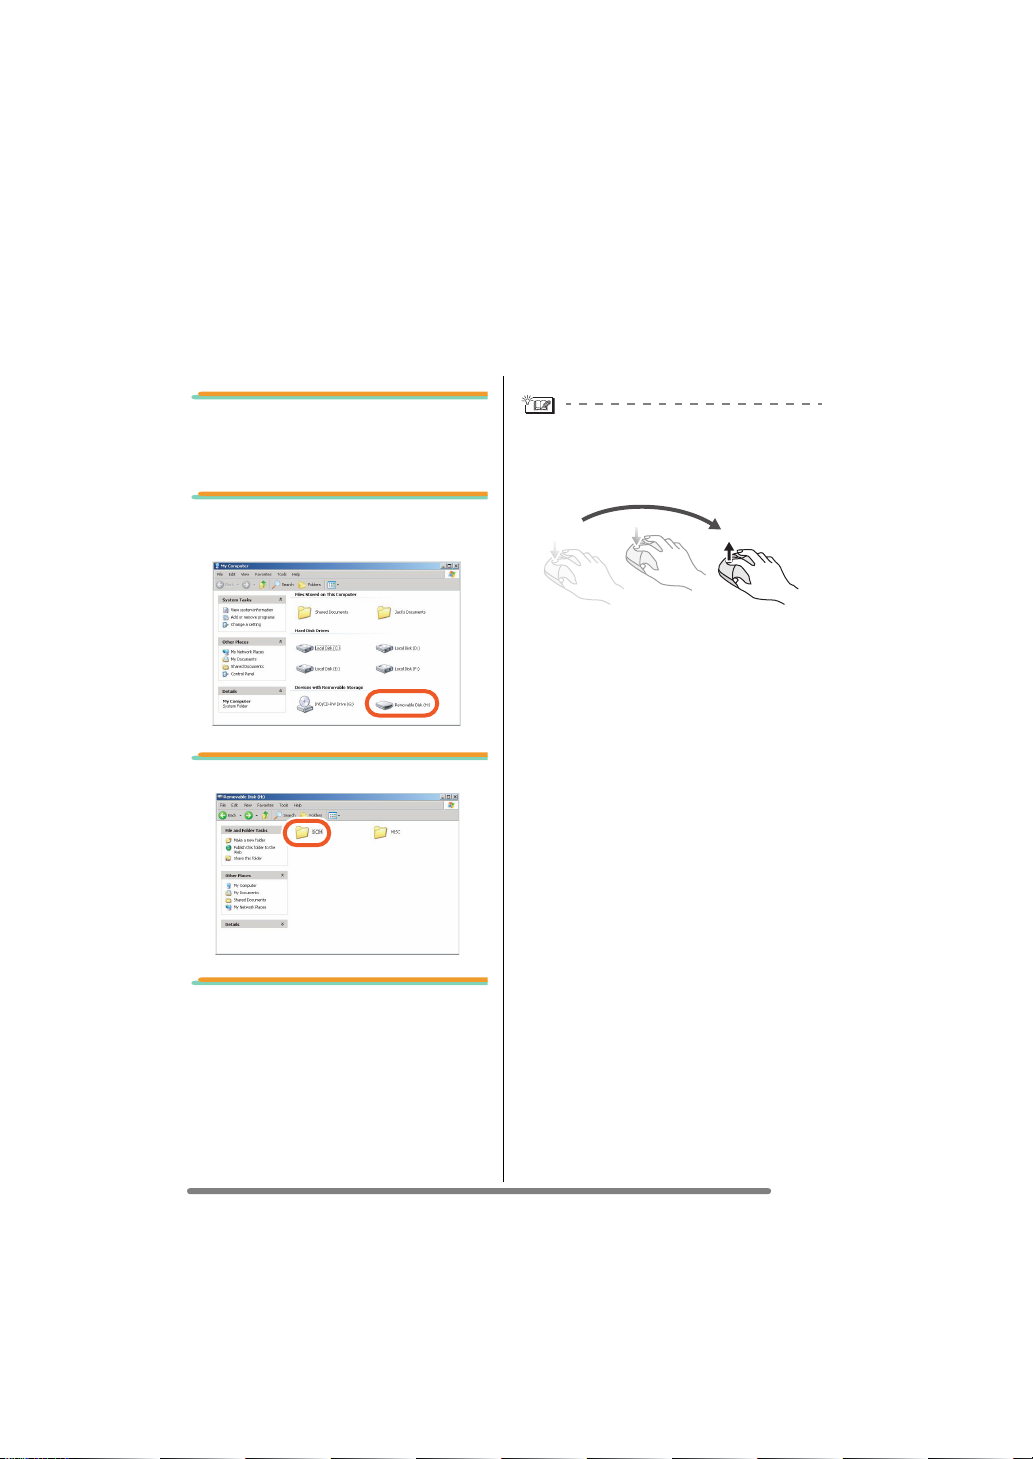
To Acquire Picture without Using Simple Viewer
• Even if you use Windows 98 on which Simple Viewer cannot run, you can acquire
pictures to your PC by connecting the digital camera and PC using the USB connection
cable.
1. Connect the digital camera
to the PC via the supplied
USB connection cable. (P8)
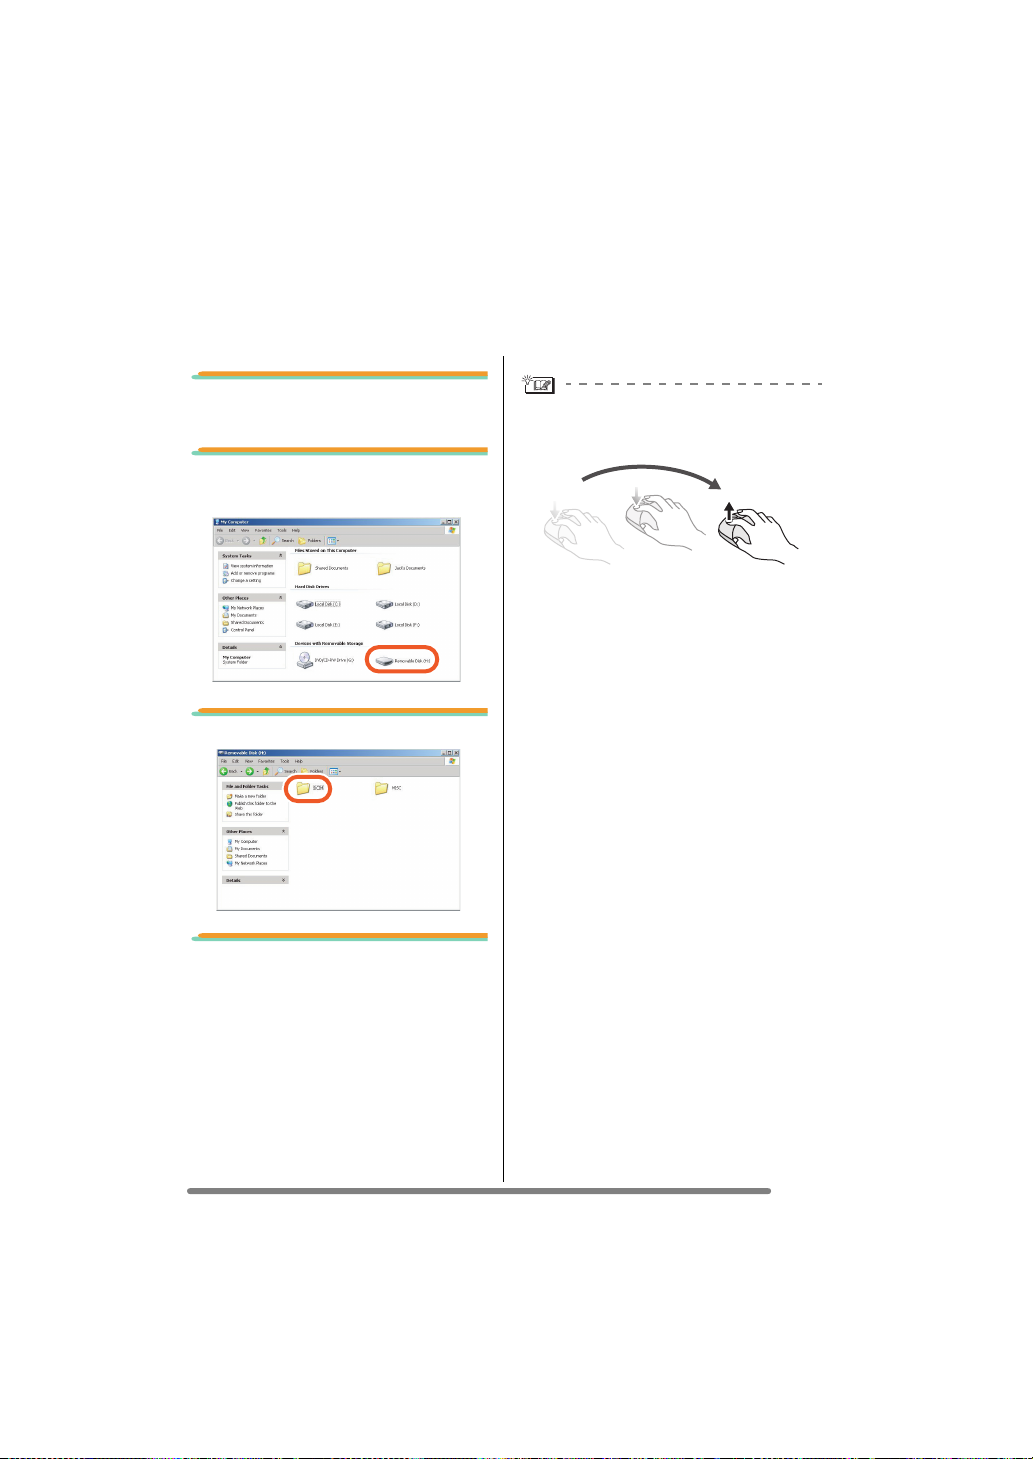
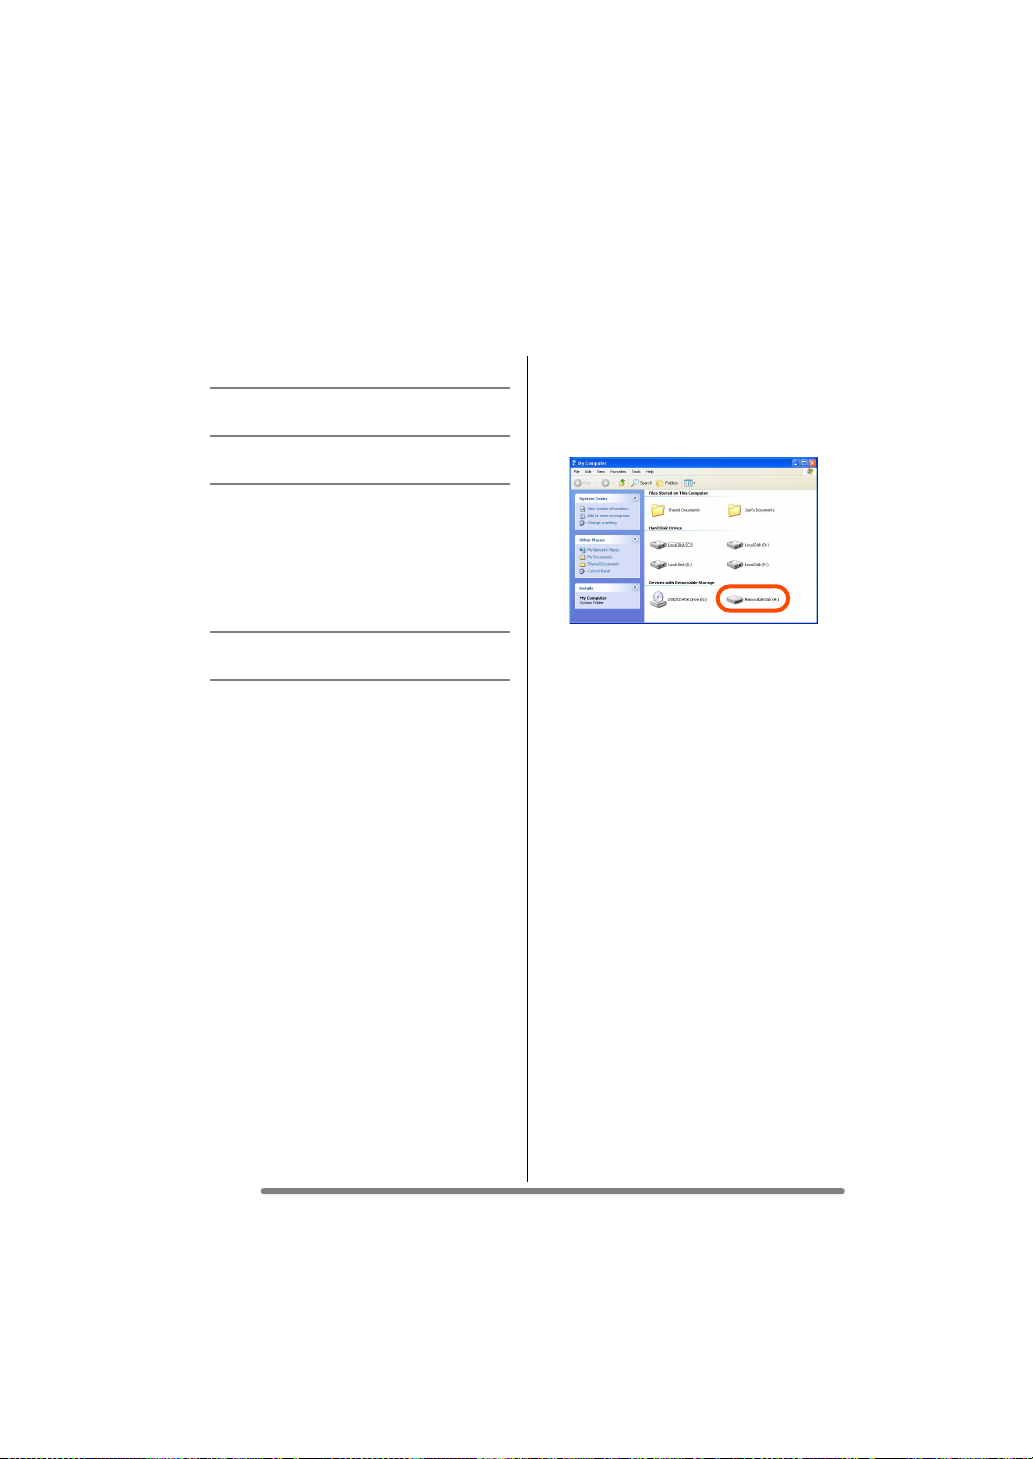
2. Double-click [Removable
Disk] in [My Computer].
3. Double-click [DCIM] folder.
What is a drag-and-drop operation?
Refers to pressing the mouse button,
moving the mouse with the mouse button
pressed, and releasing the mouse button.
To disconnect the USB connection
cable safely:
Refer to P22.
4. Using a drag-and-drop
operation, move the pictures
you want to acquire or the
folder storing those pictures
to any different folder on the
PC.
23
VQT0W47
Page 24
Others
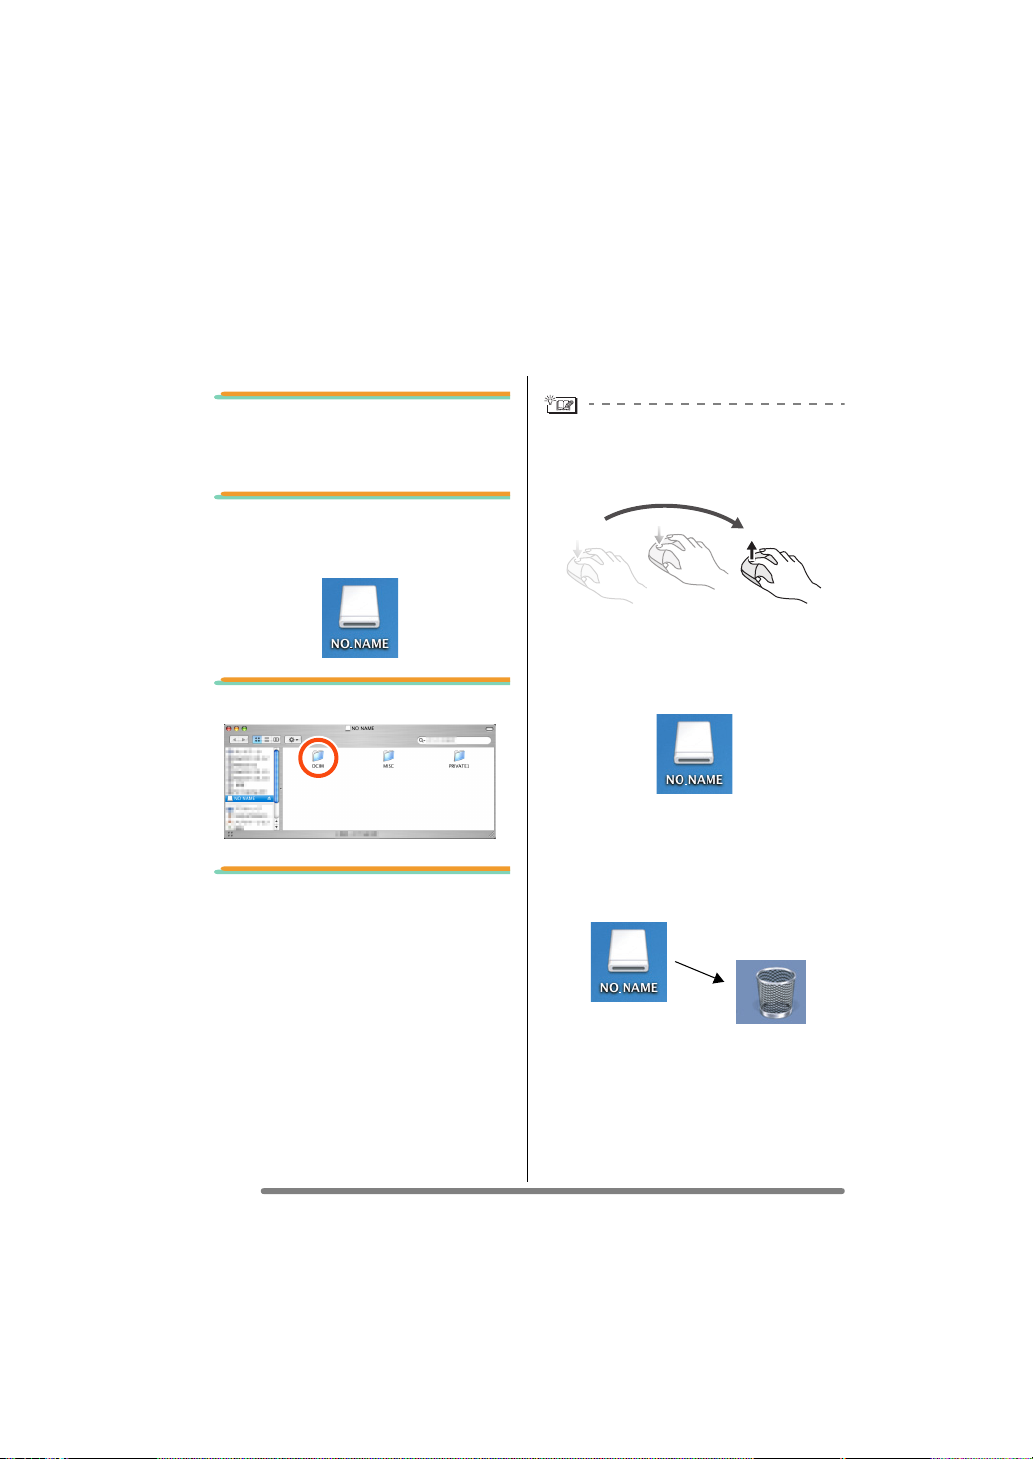
How to Use on Macintosh
• If you use Mac OS 9/OS X, you cannot use Simple Viewer, but can acquire pictures to
your PC using the USB connection cable.
• If you use Mac OS 8.x or an earlier version, refer to P27.
1. Connect the digital camera
to the PC via the supplied
USB connection cable. (P8)
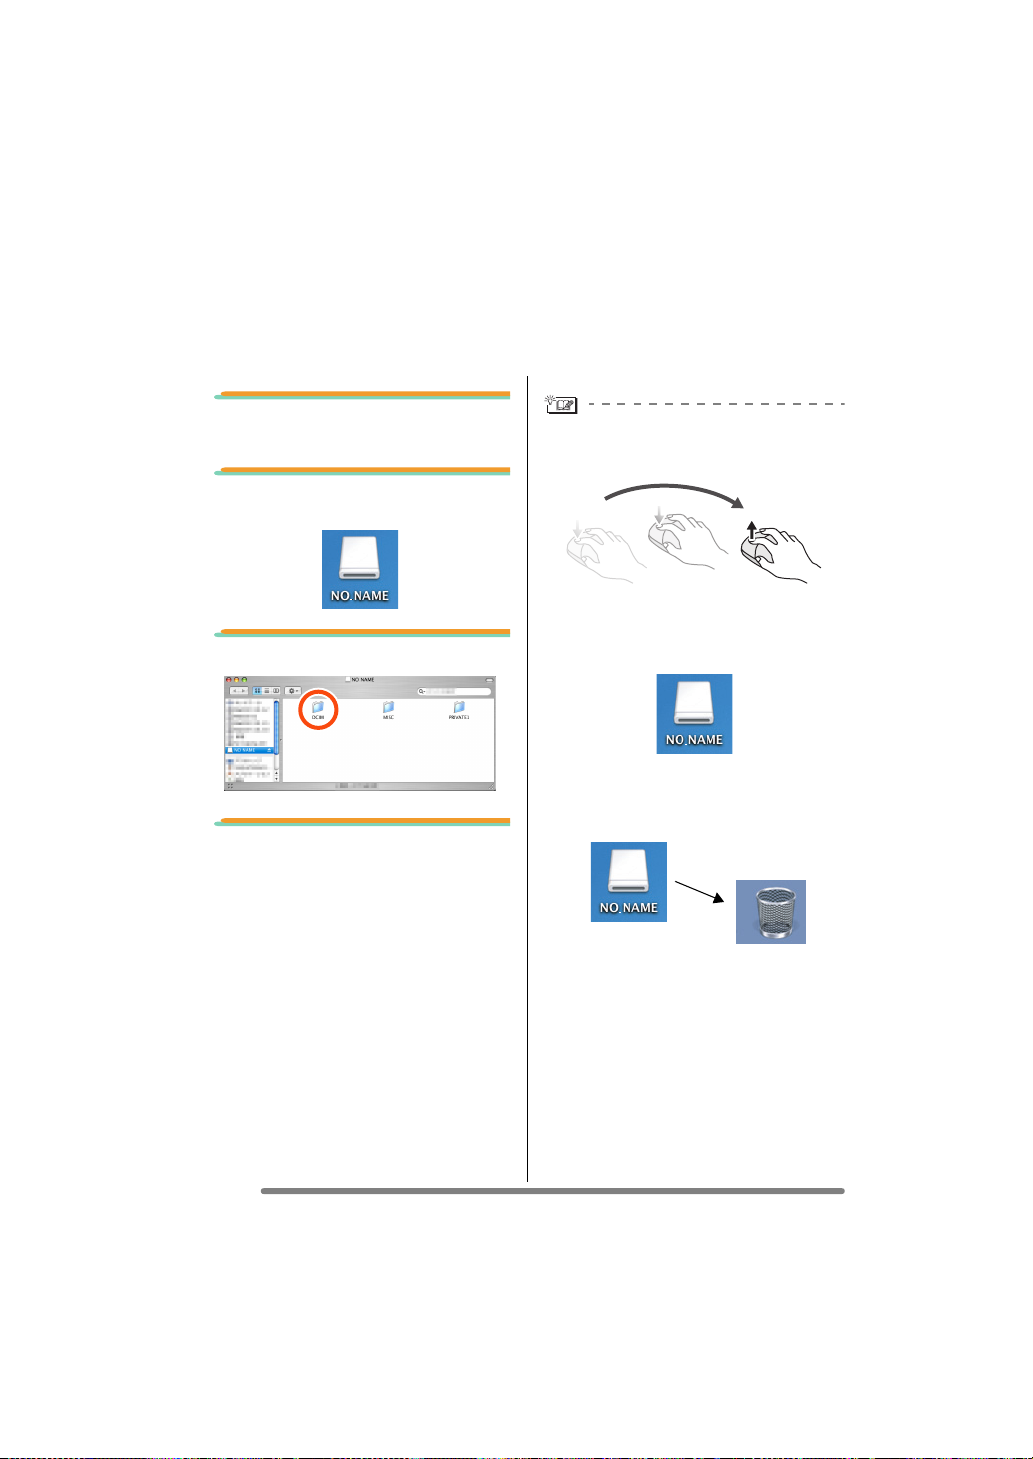
2. Double-click [NO_NAME] or
[Untitled] displayed on the
desktop.
3. Double-click [DCIM] folder.
4. Using a drag-and-drop
operation, move the pictures
you want to acquire or the
folder storing those pictures
to any different folder on the
PC.
What is a drag-and-drop operation?
Refers to pressing the mouse button,
moving the mouse with the mouse button
pressed, and releasing the mouse button.
To make sure that the digital camera is
connected correctly:
Check that the [NO_NAME] or [Untitled]
disk icon is displayed on the desktop.
To disconnect the USB connection
cable safely:
Drag the [NO_NAME] or [Untitled] disk
icon to the [Trash], and then disconnect
the USB connection cable.
24
VQT0W47
Page 25
Others
How to Remove the USB Driver and Simple
Viewer (Uninstall)
• Usually, it is unnecessary to uninstall these programmes. When these programmes go
out of order, uninstall and install them again (P6).
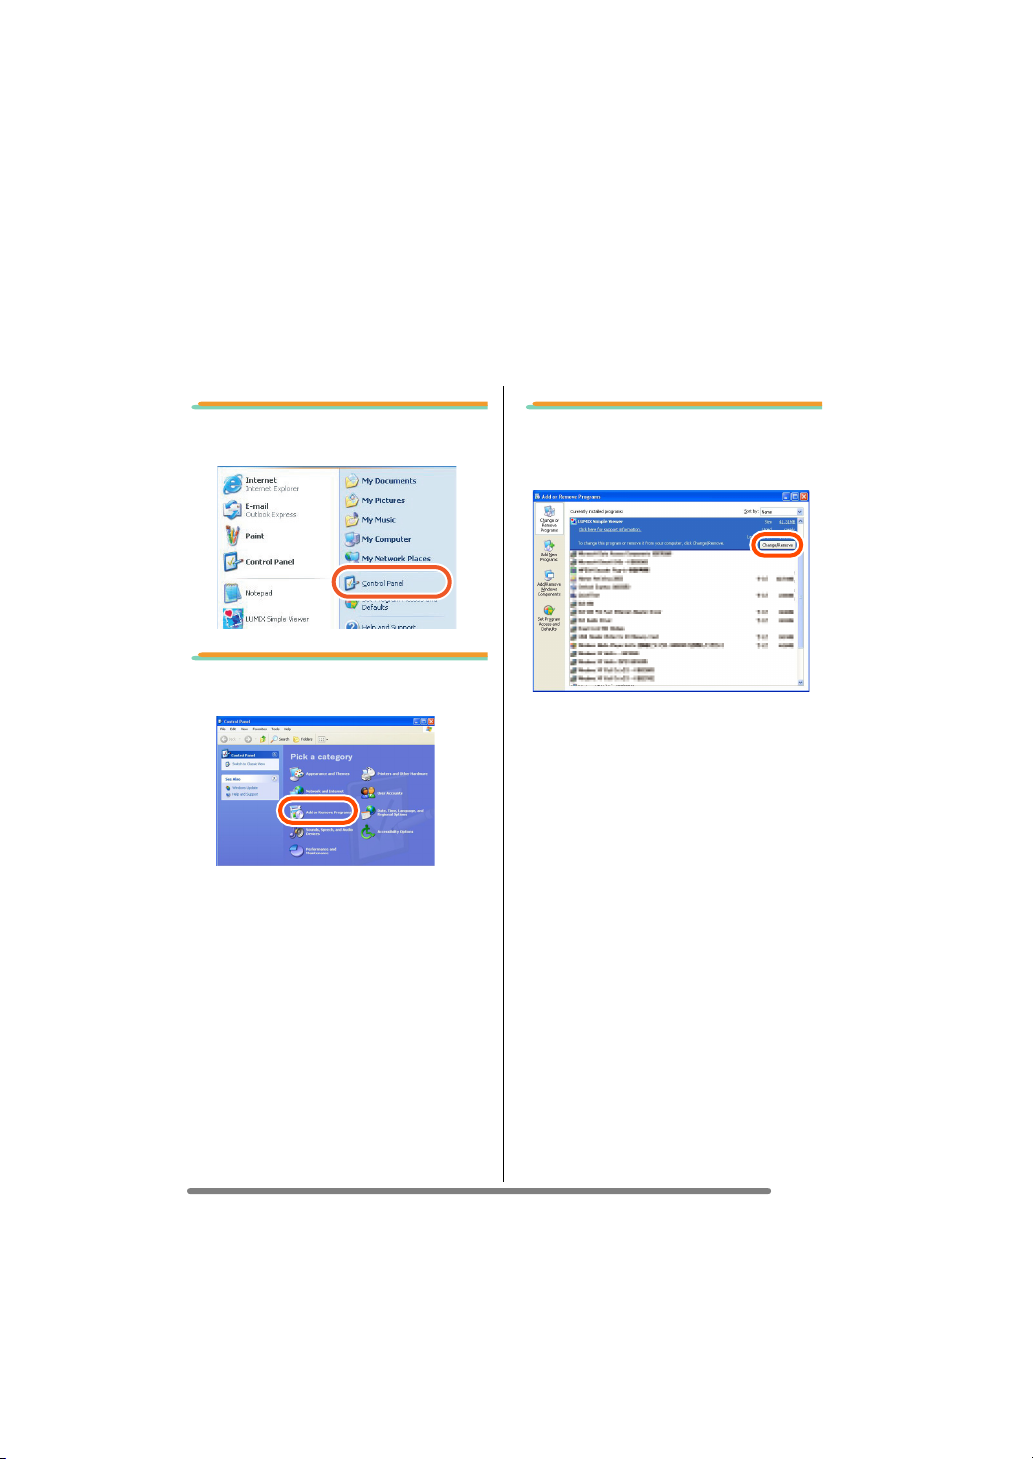
1. Click [start] >> ([Setup] >>)
[Control Panel].
2. Double-click [Add or
Remove Programs].
3. Select a software
programme to be remove,
and click [Change/Remove].
• To remove other drivers and software
programmes, repeat these step 3.
• When removing the USB driver, select
[Panasonic USB Storage Driver].
• When removing Simple Viewer, select
[LUMIX Simple Viewer].
• The procedure for uninstalling may vary
depending on the PC. For details, refer to
the operating instructions for the PC you
are using.
25
VQT0W47
Page 26

Others
When Pictures cannot be Acquired
• When pictures cannot be acquired though you connect your digital camera and PC
using the USB connection cable, use the following procedures.
∫ Check the following items
first.
Is [USB MODE] in the [SETUP] menu set
to [PC] on the digital camera side?
When Windows 98/98SE is used, install
the USB driver (P6), then connect the
cable.
If the PC in use has two or more USB
ports, connect the USB connection cable
to other USB ports in turn.
• If you connect the digital camera to a
USB port of the PC’s keyboard, normal
operation may not result.
• If you connect the digital camera using
a USB hub or USB extension cable,
normal operation is not guaranteed.
Is any Card inserted into your digital
camera? Or, are there pictures on it?
Are the pictures already acquired to the
PC?
• You are not allowed to acquire the
same pictures.
∫ Pictures cannot be acquired
even after the above checks.
Make sure that [Removable Disk] is added
in [My Computer].
• Drive letters (e.g., H:) may vary
depending on PC.
If the Removable disk is not added,
perform the following operations.
1 Click [start] >> ([Setup] >>) [Control
Panel], and double-click [System].
2 Click ([Hardware] >>) [Device
Manager], and check that [Other
Devices] is displayed.
3 If [Other Devices] is displayed, delete it.
• If it is not displayed, check the
connection. (P8)
4 Return to the original screen, and turn
off the PC.
5 Disconnect the USB connection cable
from the PC.
6 Turn on the PC to start it.
7 Install the USB driver again. (For
Windows 98/98SE only)
8 Connect the USB connection cable to
the PC.
• Check that a [Removable Disk] is
added again. If any [Removable Disk]
is not added, repeat the above steps.
26
VQT0W47
Page 27

Troubleshooting
About connection/acquisition
Question Answer
How to acquire pictures on
Windows 95, Mac OS 8.x,
or earlier versions.
Pictures cannot be acquired
from the internal memory of
the digital camera.
About Simple Viewer
Question Answer
Simple Viewer does not
start automatically.
To view acquired pictures
again after exiting Simple
Viewer.
Memory Card
• If the PC has a built-in PC card slot, use the PC card
adaptor (optional) for SD memory card to acquire
pictures.
Internal memory
(This is applicable only to digital cameras having the
internal memory.)
• Copy the pictures stored in the internal memory to the
Card and then acquire them by using the PC card
adaptor (optional) for SD memory card. For the details of
copying, refer to the operating instructions for your digital
camera.
Remove the Card from the digital camera, and reconnect it
with the PC.
Double-click the short-cut icon of the LUMIX Simple
Viewer on the desktop.
If the short-cut icon does not exist on the desktop, click
[start] >> [All programs] >> [Panasonic] >> [LUMIX Simple
Viewer] >> [LUMIX Simple Viewer].
Only when Simple Viewer does not start automatically:
• Click [ Advanced] >> [ Setting...] and set [Automatic
acquisition] to [Yes]. (If you do not wish to allow it to start
automatically, set to [No].)
Others
27
VQT0W47
Page 28

Others
About printing
Question Answer
No picture can be printed. Is the printer set up correctly? Refer to the operating
I wish to change the print
position, character size, or
character colour of the date.
The top and bottom parts or
left- and right-end parts of a
picture are trimmed.
Blank spaces are left in the
top and bottom parts or the
left- and right-end parts.
The date is not printed. If the picture was recorded with the digital camera of which
Others
Question Answer
Pictures added onto the PC
are not normally displayed.
How should I change folder
names or file names?
Although the pictures within
folders have been deleted,
the empty folders are still
displayed.
instructions for your printer.
The print position, character size, or character colour for
date printing are fixed. They cannot be changed.
Set [Trimming] to [No] on the occasion of printing.
A trimmed picture is printed with its edges trimmed off if its
aspect ratio is different from that of printing paper.
Set [Trimming] to [Yes] on the occasion of printing.
If trimming is not applied, the whole picture is printed. If the
aspect ratio of the paper is different from that of the
picture, blank spaces are left in the top and bottom parts or
the left- and right-end parts.
the clock was not set, or if it was recorded with any digital
camera other than Panasonic ones, its date may not be
printed correctly.
If you change folder names or file names, the pictures
concerned may not be displayed.
• To view on Simple Viewer the pictures associated with a
change in folder name or file name, register those
pictures by use of [ Add pictures] function. (P19)
You can change folder names or file names on the PC.
• The location where folders and files are stored can be
found at [Location] indicated in the picture information.
(P12)
• To view on Simple Viewer the pictures associated with a
change in folder name or file name, register those
pictures by use of [ Add pictures] function. (P19)
Click [ Advanced] >> [ Setting...], and click the
[Updating] button in [Updating for the folder list].
(The empty folders in the Folder display are deleted.)
28
VQT0W47
Page 29

Others (continued)
Question Answer
When acquiring motion
pictures, two identical
pictures are displayed.
Motion pictures are not
played back.
The PC has come not to
operate when plugging and
unplugging the USB
connection cable.
When you take motion pictures with the digital camera,
these are recorded as both motion pictures (MOV format)
and still pictures (JPEG format).
(When taking still pictures with audio, or files that are TIFF
or RAW format, two images are also recorded.)
To delete pictures related in this way with Simple Viewer,
delete each picture individually.
Install QuickTime. (P10)
By default, Simple Viewer starts automatically when
connecting the digital camera and PC using the USB
connection cable. (Setting at the time of purchase)
Change the setting so that Simple Viewer does not start
automatically and the situation may be improved.
• Select [ Advanced] >> [ Setting...] and set
[Automatic acquisition] to [No]. Simple Viewer comes not
to start automatically.
To start Simple Viewer manually, double-click the short-cut
icon of LUMIX Simple Viewer on the desktop.
Others
29
VQT0W47
Page 30

Others
Operating Environment
∫ USB-connectable environment
Compatible OS: Microsoft
Microsoft
Microsoft
Microsoft
Microsoft
Microsoft
and Mac OS 9.x/Mac OS X
(Windows Me/2000/XP and Mac OS 9.x/Mac OS X do not
require the USB driver to be installed.)
∫ LUMIX Simple Viewer
Compatible PC: IBM
Intel
CPU)
Compatible OS: Microsoft
Microsoft
Microsoft
Microsoft
Microsoft
Memory: 128 MB or more (256 MB or more recommended)
Display: High Colour (16 bit) or more
Desktop resolution of 800k600 pixels or more
(1024k768 or more recommended)
Hard disk: [For install] 200 MB or more
[For use] 200 MB or more
Required software: QuickTime 6.1 or later
Sound: Windows compatible sound device
Drive: CD-ROM drive (required to install this program)
Interface: USB port
(When devices are connected through USB hub or by using USB
extension cable, operation is not guaranteed.)
File format: JPEG, TIFF (still picture), RAW (pictures of this format can be
acquired or written, but cannot be displayed.)
MOV (motion picture)
• Even if the system requirements mentioned in these operating instructions are fulfilled,
some personal computers can not be used.
• Operation on an upgraded OS is not guaranteed.
30
VQT0W47
®
Windows® 98
®
Windows® 98 Second Edition
®
Windows® Millennium Edition
®
Windows® 2000 Professional
®
Windows® XP Home Edition
®
Windows® XP Professional
®
PC/AT compatible PC having Intel® Pentium® III 450 MHz,
®
Celeron® 400 MHz or higher CPU (including compatible
®
Windows® 98 Second Edition
®
Windows® Millennium Edition
®
Windows® 2000 Professional
®
Windows® XP Home Edition
®
Windows® XP Professional
Page 31

Others
• Operation on an OS other than the one pre-installed is not guaranteed.
• Multi-boot environment is not supported.
• Only available when the user is logged in as the system administrator.
• This software may not run properly on user-built computers.
• If the size of the character is set larger than the standard size on [Appearance] or
[Settings] in [Display Properties], some buttons are displayed beyond the screen and
cannot be operated. In this case, restore the font size to the normal size on [Display
Properties].
• This software can not be used on 64-bit OS.
• Microsoft and Windows are either registered trademarks or trademarks of Microsoft
Corporation in the United States and/or other countries.
• IBM and PC/AT are registered trademarks of International Business Machines
Corporation of the U.S.
• Adobe, the Adobe logo and Adobe Reader are either registered trademarks or
trademarks of Adobe Systems Incorporated in the United States and other countries.
• Intel, Pentium and Celeron
are registered trademarks or trademarks of Intel Corporation
in the United States and other countries.
• Other names of systems and products mentioned in these instructions are usually the
trademarks or registered trademarks of the manufactures who developed the system or
product concerned.
31
VQT0W47
Page 32
連接 PC,享受更多樂趣
使用隨附 CD-ROM 中的 「LUMIX Simple Viewer」,可輕鬆將圖片獲取至 PC、列印圖
片、將圖片附帶至電子郵件等。
• 在本使用說明書中,「LUMIX Simple Viewer」表示為 「Simple Viewer」。
1. 首先,安裝 Simple Viewer。
2. 將拍攝的圖片獲取至 PC。
3. 列印圖片及將圖片附帶至電子
郵件。
32
VQT0W47
Page 33

目錄
連接 PC,享受更多樂趣 ..................................................................................................32
簡介
用前必讀 ..........................................................................................................................34
關鍵術語 ....................................................................................................................34
Simple Viewer 與所有 PC 相容嗎? ..........................................................................35
安裝
安裝軟體 1 ......................................................................................................................36
安裝 USB 驅動程式 (僅適於 Windows 98/98SE) ...................................................36
安裝軟體 2 ......................................................................................................................37
安裝 Simple Viewer ...................................................................................................37
將數位相機連接至 PC ...................................................................................................... 38
使用 Simple Viewer
將圖片獲取至 PC (Acquire to PC) .................................................................................... 39
檢視圖片 (View) ............................................................................................................... 40
列印圖片 (Print) ................................................................................................................43
透過電子郵件傳送圖片 (Send by e-mail) .........................................................................46
Advanced ......................................................................................................................... 48
允許在 Simple Viewer 中使用儲存在 PC 中的圖片 (Add pictures) ............................ 49
使用數位相機檢視 PC 中的圖片 (Export to the card) ................................................50
使用 Simple Viewer 後 .....................................................................................................52
其他
不使用 Simple Viewer 獲取圖片 .......................................................................................53
如何在 Macintosh 上使用 .................................................................................................54
如何移除 USB 驅動程式與 Simple Viewer (解除安裝) ................................................. 55
無法獲取圖片時 ................................................................................................................56
疑難排解 ..........................................................................................................................57
操作環境 ..........................................................................................................................60
33
VQT0W47
Page 34

簡介
用前必讀
• 請注意,根據 PC 操作環境的不同,本使用說明書中包含的某些說明與螢幕可能與實際內
容與螢幕有所不同。
• 本使用說明書的說明如有變更,恕不另行通知。
• 未經許可,禁止重印本使用說明書的任何內容。
• 此處螢幕快照的使用符合 Microsoft Corporation 的指南。
• 本使用說明書中有關 Windows 的說明基於 Windows XP 螢幕。
• 在本使用說明書中,卡表示 SD 記憶卡,包括內建記憶體。
關鍵術語
• 在使用 PC 時您至少應該瞭解以下列出的關鍵術語。另請參閱 PC 的使用說明書 。
術語 說明
應用程式軟體 指用於字處理、表格操作、圖片編輯、電子郵件收發等各種
用途的軟體程式。
安裝 / 解除安裝 「安裝」指將軟體集成到 PC 中,並準備好以備使用,刪除
安裝的軟體稱為 「解除安裝」。
簡介
驅動器 / 驅動程式 「驅動器」指一種可以寫入檔案與讀取檔案的 PC 週邊設備
檔案 指文檔、圖片或其他資料。
資料夾 指儲存一組檔案的位置。
按一下 / 按兩下 「按一下」指按下並釋放滑鼠按鈕。
(CD-ROM 驅動器、數位相機等),操作這種驅動器的軟體
稱為 「驅動程式」。
快速連續地按兩下滑鼠按鈕稱為「按兩下」。
• 在本使用說明書中,描述均指按一下滑鼠左鍵。
• 如果無法很正常地按兩下滑鼠,請變更按一下的時間間
隔。
34
VQT0W47
Page 35

簡介
Simple Viewer 與所有 PC 相容嗎?
使用 USB 連接可以將數位相機中的圖片獲取至 PC。但是,透過 Simple Viewer,可以更
輕鬆地將圖片儲存至 PC。
∫ Windows
• 要識別 OS (PC 型號),選擇 [start] >> ([Setup] >>) [Control Panel] (>> [Performance
and Maintenance]),然後按一下 (或按兩下) [System]。 即可查看 OS。
95 及早
期版本
可以使用 Simple
Viewer 嗎?
可以使用 USB 連接電
纜將數位相機中的圖片
獲取至 PC 嗎?
需要安裝 USB 驅動程
式嗎?
應該參閱哪一頁?
¢1: 如果 PC 裝有 PC 卡槽,則可以獲取圖片。
¢2: 要瞭解如何獲取圖片,請參閱 P53。
¢1
P57
∫ Macintosh
OS 8.x 及早期版本
可以使用 Simple
Viewer 嗎?
可以使用 USB 連接電
纜將數位相機中的圖片
獲取至 PC 嗎?
需要安裝 USB 驅動程
式嗎?
應該參閱哪一頁?
¢3: 如果 PC 裝有 PC 卡槽,則可以獲取圖片。
98 98SE Me 2000 XP
— ≤
≤
≤ —
P36、38
¢2
¢3
P57 P54
P36– P37–
OS 9 OS X
—
≤
—
35
VQT0W47
Page 36
安裝
安裝
安裝軟體 1
安裝 USB 驅動程式 (僅適於 Windows 98/98SE)
• 如果使用 Windows 98/98SE,請在將數位相機連接至 PC 之前安裝 USB 驅動程式 (用
於透過 PC 操作數位相機的軟體)。
• 第二次或以後的連接不需要再安裝。
• 如果使用除 Windows 98/98SE 以外的 OS,則無需安裝。
• 在插入 CD-ROM 之前,請關閉所有正在運行的應用程式。
1. 插入 CD-ROM。
安裝功能表啟動。
2. 按一下 [USB Driver]。
3. 按一下 [Next]。
• 開始安裝 USB 驅動程式。
4. 如果螢幕顯示 [Restarting
Windows] 對話方塊,請按一
下 [OK]。
重新啟動 PC 之後,安裝 USB 驅動程式完
成。
如果安裝功能表未自動啟動:
• 按兩下桌面上的 [My Computer],按兩下
或開啟 [VFFXXXX] (機型不同,部件號
XXXX 會有所不同),然後按兩下
[InstMenu.exe]。
36
VQT0W47
Page 37
安裝
安裝軟體 2
安裝 Simple Viewer
• 第二次或以後的連接不需要再安裝。
• 在插入 CD-ROM 之前,關閉所有正在運行的應用程式。
1. 插入 CD-ROM。
安裝功能表啟動。
2. 按一下 [LUMIX Simple
Viewer]。
3. 根據螢幕顯示的訊息執行安裝
操作。
• 只有在使用 Windows 98SE 時,才有可
能需要安裝 MDAC2.8 (Microsoft Data
Access Components 2.8)。根據螢幕顯
示的訊息執行安裝操作。
• 安裝完成後第一次使用前,請務必從
[start] >> [All programs] >> [Panasonic]
>> [LUMIX Simple Viewer] 中選擇
[Readme] 以閱讀附加資訊。
• Simple Viewer 安裝在下列資料夾中。
(不可變更。)
C:\Program Files\Panasonic\
LUMIXSimpleViewer
如果安裝功能表未自動啟動:
• 按兩下桌面上的 [My Computer],按兩下
或開啟 [VFFXXXX] (機型不同,部件號
XXXX 會有所不同),然後按兩下
[InstMenu.exe]。
如果無法安裝 Simple Viewer:
• 如果使用 Windows 2000/XP,則以受限
制的帳戶使用者登入 PC 時無法安裝。 以
系統管理員帳戶使用者登入並重新安裝。
有關詳情,請參閱 PC 的使用說明書。
37
VQT0W47
Page 38

安裝
將數位相機連接至 PC
• 使用 Windows 98/98SE 時,請在連接之前安裝 USB 驅動程式 (P36)。
• 如果 PC 裝有內建 SD 記憶卡插槽,請將卡插入卡槽,即可使用 Simple Viewer 將圖片
獲取至 PC。
DIGITAL
AV OUT
DC IN
A:USB 連接電纜
B:AC 適配器 (選件)
C: 此訊息在資料傳輸過程中顯示。
數位相機的準備工作
將數位相機連接至 PC 時,請使用充飽電
的電池或 AC 適配器。如果剩餘電池電量
在通訊過程中耗盡,則可能會損壞記錄的
資料。
• 如果使用 AC 適配器,請連接。
• 開啟數位相機。
1. 使用隨附的 USB 連接電纜將
數位相機連接至 PC。
2. 按 3 選擇 [PC],然後按
[MENU/SET]。
• 正確建立連接後,Simple Viewer 自動啟
動並開啟開始獲取圖片的螢幕。 (P39)
如果使用 Windows 98,請參閱 P53。
• 下列螢幕顯示時,按一下 [Cancel] 以將
其關閉。
• 如果 Simple Viewer 未自動啟動,請參閱
P57。
• 數位相機傳輸資料時,不要操作數位相機
或斷開 USB 連接電纜。否則,本軟體可
能無法正常工作並損壞正在傳輸的資料。
• 根據所用數位相機的不同,端子的形狀會
有所不同。有關詳情,請參閱數位相機的
使用說明書。
• 如果將[設定]功能表中的[USB模式] 預先
設定為 [PC],則無需每次連接到 PC 時
都設定此項。
38
VQT0W47
Page 39

使用
使用 Simple Viewer
Simple Viewer
將圖片獲取至 PC ( Acquire to PC)
• 如果已退出 Simple Viewer 或要檢視已獲取的圖片,請按兩下桌面上的 LUMIX Simple
Viewer 捷徑圖示以啟動 Simple Viewer。
1. 螢幕顯示是否開始獲取的詢問
訊息時,按一下 [Yes]。
2. 按一下 [OK]。
獲取目標資料夾:
• 獲取至 PC 的圖片儲存在下列資料夾中。
Windows 2000/XP
C:\Documents and Settings\
All Users\Documents\My Pictures\
LUMIXSimpleViewer
Windows 98SE/Me
C:\My Documents\My Pictures\
LUMIXSimpleViewer
• 要變更當前的獲取目標資料夾,請參閱
P51。
在獲取過程中按一下 [Cancel] 時:
• 獲取將中途停止,並且已獲取的圖片會以
縮略圖視圖顯示。
圖片將從卡中獲取至 PC,隨後 [View]
螢幕開啟並以縮略圖方式顯示獲取的圖片。
• 當要獲取的圖片數量過多或圖片的檔案大
小很大時,獲取可能需要一段時間。
39
VQT0W47
Page 40

使用
Simple Viewer
檢視圖片 ( View)
• 如果已退出 Simple Viewer 或要檢視已獲取的圖片,請按兩下桌面上的 LUMIX Simple
Viewer 捷徑圖示以啟動 Simple Viewer。
1. 選擇 [ View]。
• 如果上述主功能表不顯示,請按一下
[ Menu],然後按一下 [ View]。
2. 選擇圖片儲存的位置。
[On the PC]
要檢視獲取至 PC 的圖片,選擇此選項。
• 如果透過 [ Advanced] 中的 [Add
pictures] 新增圖片,則可以檢視儲存在
PC 中不是由 Simple Viewer 獲取的圖
片。(P49)
[ On the memory card]
檢視使用 USB 連接電纜連接的卡中的圖片
時,按一下此按鈕。
3. 選擇資料夾,在縮略圖視圖中
選擇圖片。
• 在步驟 2 中選擇 [ On the memory
card] 時,不會顯示任何資料夾。
檢視動態影像:
• 所用 PC 必須安裝 QuickTime。將隨附的
CD-ROM 放入 CD-ROM 驅動器,然後使
用安裝功能表安裝 QuickTime。
• 根據 PC 效能的不同,重播動態影像時圖
片或聲音可能會中斷。
40
VQT0W47
Page 41

使用
如何使用 [ View] 螢幕
12 3
Simple Viewer
45 6 7 8
15
9121013 1411
1. 資料夾顯示
顯示包含獲取圖片的資料夾。資料夾按
日期建立。
[M/D/Y]
[M/Y]
2. 縮略圖顯示
選定資料夾中的圖片以縮略圖視圖顯
示。
對於動態影像,標記 () 顯示在其縮
略圖的左上方。
• [ Recording date]
• [ Open folder]
3. 圖片視圖
縮略圖視圖中選定的圖片以較大尺寸顯
示。
選擇動態影像時,將自動反複重播直到
選擇其他圖片為止。
4. [ ]
按一下此按鈕選擇上一個圖片。
5. [ ]
按一下此按鈕選擇下一個圖片。
此選項按拍攝日期顯示。
此選項按拍攝月份顯示。
按一下變更資料夾顯示和縮略圖顯
示的日期順序。
按一下此按鈕按拍攝日期降
序顯示圖片。
按一下此按鈕按拍攝日期昇
序顯示圖片。
按一下此按鈕開啟保存選定圖片的
資料夾。
6. [ 90 degs.]
每次按一下此按鈕,圖片均順時針旋轉
90°。
7. [ My favorite]
按一下此按鈕時,圖片上將新增標記
() ,並會在我的最愛中註冊。再次
按一下此按鈕時,圖片從我的最愛中移
除。
選擇資料夾顯示頂部的 [My favorites]
可以檢視在我的最愛中註冊的圖片。
8. [ Delete]
按一下此按鈕刪除選定的圖片。
• 在按日期建立的資料夾中和其他資
料夾 (如孩子模式資料夾)中顯示
在孩子模式下拍攝的圖片。在這種
情況下,在其中的一個資料夾中要
刪除的圖片,也要在所有的資料夾
中刪除相同的圖片。
9. [ Enlarge]
按一下此按鈕將選定的圖片放大至全螢
幕。 (P42)
10. [ Print 1 by 1]
按一下此按鈕列印選定的圖片。
要列印多個圖片時,按一下主功能表上
的 [Print]。 (P43)
41
VQT0W47
Page 42

使用
Simple Viewer
456721 3
11. [ Send by e-mail]
按一下此按鈕將選定的圖片附帶至電子
郵件。 (P46)
12. [ Menu]
按一下此按鈕返回至 Simple Viewer 主
功能表。
13. [ Back]
按一下此按鈕返回至上一個功能表。
(P40)
14. [ Exit]
按一下此按鈕退出 Simple Viewer。
15. 圖片資訊
[Name]
[Type]
[Location]
[File Name]
[File size]
此外,螢幕還會顯示 [Picture size]、
[Recording date]、[Manufacturer]、
[Model name]、[Shutter speed]、
[Aperture value]、[ISO sensitivity]、
[Exposure +/-]、[White balance]、
[Flash]、[Print compensation
information] 與 [Recording mode]。
Simple Viewer 中的檔案
名稱。
檔案格式。
獲取檔案儲存的位置。
PC 中的檔案名稱。
檔案的大小。
∫ 全螢幕顯示
1. [ ]
按一下此按鈕選擇上一個圖片。
2. [ ]
按一下此按鈕選擇下一個圖片。
3. 投影片播放
• [Start]
按一下此按鈕開始投影片播放。 在
主功能表中,單擊 [ Advanced]
>> [ Setting...] 變更投影片播放時
間。(P51)
• [ Stop]
按一下此按鈕停止投影片播放。
4. 切換圖片的顯示尺寸
• [ Fit to screen]
將圖片放大或縮小至 PC 螢幕大小。
• [ Full scale]
以原始尺寸顯示圖片。
5. [ Menu]
按一下此按鈕返回至 Simple Viewer 主
功能表。
6. [ Back]
按一下此按鈕返回至 [ View] 螢幕。
(P40)
7. [ Exit]
按一下此按鈕退出 Simple Viewer。
42
VQT0W47
如果操作按鈕不顯示:
移動滑鼠,操作按鈕會重新顯示。
Page 43

使用
Simple Viewer
列印圖片 (Print)
• 如果已退出 Simple Viewer 或要檢視已獲取的圖片,請按兩下桌面上的 LUMIX Simple
Viewer 捷徑圖示以啟動 Simple Viewer。
1. 選擇 [Print]。
• 上述主功能表不顯示時,按一下
[ Menu],然後按一下 [Print]。
2. 選擇圖片儲存的位置。
[On the PC]
列印獲取至 PC 的圖片時,選擇此選項。
• 如果透過 [ Advanced] 中的 [ Add
pictures] 新增圖片,則可以列印儲存在
PC 中不是由 Simple Viewer 獲取的圖
片。(P49)
[ On the memory card]
列印使用 USB 連接電纜連接的卡中的圖片
時,按一下此按鈕。
3. 選擇任意資料夾以縮略圖視圖
顯示其中的圖片,並選擇一個
圖片。
• 在步驟 2 中選擇 [ On the memory
card] 時,將不顯示任何資料夾。
43
VQT0W47
Page 44

使用
4. 按一下 [Add],然後按一下
[ Next]。
• 選定的圖片將新增至 [List of pictures to
be printed]。
• 要從 [List of pictures to be printed] 中移
除圖片,請在 [List of pictures to be
printed] 中按一下圖片,然後按一下
Cancel
[
]。
5. 設定列印,然後按一下
[ Next]。
Simple Viewer
[Please select the printing type]
( One sheet)
用於在一張紙上列印一個圖片。
( Two sheets, Four sheets,
Eight sheets)
用於在一張紙上列印與選定模式相應的圖
片數目。
(例如:[ Two sheets])
(Index)
選定的圖片以清單形式列印。
(例如:選擇 16 個圖片時。)
• 根據所用印表機的不同,可能無法選擇
「無邊界列印」或使用的紙張大小及類型
可能受到限制。在此情況下,按一下
[ Set] 然後設定列印。
44
VQT0W47
• 在一張 A4 大小的紙張上大約可以列印
36 個圖片。
Page 45

使用
Simple Viewer
[Please select the printer]
設定正在使用的印表機。
[Choose border setting]
選擇 「No」或 「Ye s 」。
[Please select the paper size]
設定列印的紙張尺寸。
[Please select the paper type]
設定列印的紙張類型。
[Detail printer settings are available]
詳細設定印表機。
(有關詳情,請參閱印表機的使用說明
書。)
6. 檢查佈局,然後設定列印。
[Date printing]
用於在圖片右下方列印日期。
• 如果數位相機在場景模式下設定了 [ 孩
子] ,請將它設定為 [ 顯示年齡 ] 並拍照,
則這張圖片列印出年齡月份 / 年份及拍攝
日期。如果它具有旅遊日期功能,設定此
功能並拍照,則這張圖片列印出在旅遊目
的地已過去的天數及拍攝日期。(根據數
位相機的型號不同,它也會有所不同。)
[Trimming]
(僅適於 [ One sheet])
用於按對齊紙張大小的方式列印圖片。
• 會列印整個圖片,圖片不會被剪裁。如果
紙張的高寬比與圖片的高寬比不同,則上
下或左右部分會留有空白。
[Position adjustment]
用於精細調整剪裁的列印位置。
[Title]
(僅適於 [ Index])
用於列印圖片頂部的圖片資料夾的名稱
(例如 12/05/2006)。
[Picture name]
(僅適於 [Index])
用於列印圖片底部的圖片拍攝日期與時間。
[Print correction]
用於啟用印表機的列印校正功能。
• 此功能與 「PRINT Image Matching」及
「Exif Print」相容。請參閱印表機的使用
說明書。
7. 按一下 [ Print start]。
02/21/2005
02/21/2005
正在列印時,無法取消列印。
45
VQT0W47
Page 46

使用
Simple Viewer
透過電子郵件傳送圖片 ( Send by e-mail)
• 如果已退出 Simple Viewer 或要檢視已獲取的圖片,請按兩下桌面上的 LUMIX Simple
Viewer 捷徑圖示以啟動 Simple Viewer。
• 相容的電子郵件程式僅有 Outlook
®
Express 與 Microsoft® Outlook®。
1. 選擇 [ Send by e-mail]。
• 上述主功能表不顯示時,按一下
[ Menu],然後按一下 [ Send by
e-mail]。
2. 選擇圖片儲存的位置。
[On the PC]
透過電子郵件傳送獲取至 PC 的圖片時,
選擇此選項。
• 如果透過 [ Advanced] 中的 [Add
pictures] 新增圖片,則可以將儲存在 PC
中不是由 Simple Viewer 獲取的圖片附帶
至電子郵件。(P49)
[ On the memory card]
將使用 USB 連接電纜連接的卡中的圖片附
帶至電子郵件時,按一下此按鈕。
3. 選擇資料夾,然後在縮略圖視
圖中選擇圖片。
• 每次按一下 [ 90 degs.],圖片均順時針
旋轉 90°。
• 在步驟 2 中選擇 [ On the memory
card] 時,將不顯示任何資料夾。
46
VQT0W47
Page 47

使用
Simple Viewer
4. 按一下 [Add],然後按一下
[ Send by e-mail]。
5. 當顯示確認訊息時,選擇
[Yes]、[No] 或 [Cancel]。
• 在傳送前選擇 [Yes] 變更附帶至最大檔案
大小的圖片的檔案尺寸。
按一下 [ Advanced] >> [ Setting...]
變更最大檔案大小。(P51)
• 如果在傳送前不想變更圖片的檔案尺寸,
請按一下 [No]。
圖片附帶至電子郵件,電子郵件程式自動
啟動。在電子郵件中輸入郵件地址、正文
等,然後傳送。
電子郵件程式未自動啟動。
根據以下步驟檢查標準電子郵件程式的設
定。
• 根據所用 OS 的不同,檢查方法會有所不
同。
1 按一下 [start] >> ([Setup] >>) [Control
Panel],然後按一下 [Internet
Options]。
2 按一下 [Programs] 標籤,然後按一下
[E-mail] 確認使用中的電子郵件軟體。
僅保證以下電子郵件程式的正常運行。
• Outlook
•Microsoft
要變更附帶至電子郵件的圖片的最大檔案
大小:
• 在主功能表中,按一下 [ Advanced] >>
®
Express
®
[ Setting...]。可以變更檔案大小。
(P51)
Outlook
®
47
VQT0W47
Page 48

使用
Simple Viewer
Advanced
• 您可以新增圖片以在 Simple Viewer 中使用它們,也可以將獲取至 PC 的圖片寫入卡中
等。
1. 選擇 [ Advanced]。
• 上述主功能表不顯示時,按一下
[ Menu],然後按一下 [ Advanced]。
2. 選擇要使用的功能。
[ Add pictures]
按一下此按鈕註冊已儲存在 PC 中的圖片,
以便 Simple Viewer 可以對其進行處理。
(P49)
[ Export to the card]
按一下此按鈕將儲存在 PC 中的圖片寫入
數位相機。 (P50)
[ Setting...]
按一下此按鈕進行各種 Simple Viewer 設
定。 (P51)
[ About...]
按一下此按鈕顯示 Simple Viewer 的版本。
48
VQT0W47
Page 49
使用
Simple Viewer
允許在 Simple Viewer 中使用儲存在 PC 中的圖片
( Add pictures)
1. 選擇 [ Add pictures]。
2. 選擇包含要新增圖片的資料
夾,然後按一下 [Next]。
• 按一下 [Browse] 開啟 [Select Folder] 對
話方塊,然後選擇所需的資料夾。
3. 指定是否要新增儲存在子資料
夾 (資料夾中的資料夾)中的
圖片。
• 指定之後,按一下 [Next]。
4. 按一下 [Start]。
• 當新增的圖片數量過多或圖片很大時,新
增圖片可能需要一段時間。
5. 按一下 [OK],然後按一下
[Completion] 完成新增。
VQT0W47
49
Page 50

使用
Simple Viewer
使用數位相機檢視 PC 中的圖片 ( Export to the card)
• 將 PC 中的圖片獲取至卡中,以便透過數位相機再現。
1. 選擇 [ Export to the card]。
2. 選擇資料夾,在縮略圖視圖下
選擇圖片。
3. 按一下 [Add]。
選取的圖片新增至螢幕底部的清單。
• 要從螢幕底部的清單移除圖片,請在螢幕
底部清單中按一下該圖片,然後按
Cancel
[
]。
4. 按一下 [Write]。
• 執行寫入卡的步驟。
• 圖片將自動轉換成 Panasonic 數位相機
可以再現的格式。
• 使用有足夠可用空間的卡。如果可用空間
不足,則只會寫入一部分圖片。
• 在 PC 中處理過的圖片以及透過非
LUMIX 數位相機拍攝的圖片可能顯示得
較為粗糙。
50
VQT0W47
Page 51
使用
Simple Viewer
Setting...
1. 選擇 [ Setting...]。
2. 設置設定並按一下 [OK]。
[The folder to be acquired]
從卡中獲取圖片至 PC 時選擇使用的所需
資料夾。
• 按一下 [Open folder],可以看到選定資料
夾中的圖片。
• 按一下 [Browse] 開啟 [Select Folder] 對
話方塊,選擇所需的資料夾。
[Full Screen]
設定圖片顯示的時間和是否重複播放。
• 如果重播動態影像,重播完成後出現下列
螢幕。
[Automatic acquisition]
指定在連接數位相機時是否要自動啟動
Simple Viewer 並獲取圖片。
[Updating for the folder list]
按一下 [Updating] 刪除資料夾顯示中的空
資料夾。
[Default]
按一下此按鈕將每個設定重設為購買時的
狀態。
[Maximum file size per picture to be
attached to an e-mail]
設定附帶至電子郵件的圖片的最大檔案大
小。(購買時為 1MB)
• 只有帶 「XXXX.JPG」名稱的圖片才能
減小大小。如果不變更大小,請將此項目
設定為 [Not specified]。
• 即使變更大小設定,根據網際網路服務供
應商的不同,較大的檔案也可能無法傳
送。
51
VQT0W47
Page 52

使用
Simple Viewer
使用 Simple Viewer 後
∫ 退出 Simple Viewer:
1. 按一下 [Exit]。
•[ Exit] 按鈕不顯示時,按一下
[ Menu] 返回至主功能表。
• 嘗試退出除主功能表以外的螢幕時,螢幕
會顯示確認訊息。
∫ 安全斷開 USB 連接電纜:
1. 按兩下 PC 螢幕右下方 (任務
盤)顯示的 圖示。
螢幕顯示通知硬體移除的訊息。
2. 選擇 [USB Mass Storage
Device],然後按一下 [Stop]。
3. 確認已選擇 [USB Mass
Storage Device],然後按一下
[OK]。
4. 按一下 [Close]。
即可安全移除 USB 連接電纜。
• 根據 OS (或 OS 設定)的不同,例如
Windows 98/98SE,安全移除硬體的圖
示可能不會顯示在任務盤中。在此情況
下,請確保數位相機的 LCD 顯示幕上沒
有顯示 [ 存取 ],然後斷開 USB 連接電
纜。
52
VQT0W47
Page 53
其他
其他
不使用 Simple Viewer 獲取圖片
• 即使使用無法運行 Simple Viewer 的 Windows 98,也可以透過 USB 連接電纜連接數位
相機與 PC 來獲取圖片。
1. 透過隨附的 USB 連接電纜將
數位相機連接至 PC。 (P38)
2. 按兩下 [My Computer] 中的
[Removable Disk]。
3. 按兩下 [DCIM] 資料夾。
4. 透過拖放操作,將要獲取的圖
片或儲存這些圖片的資料夾移
至 PC 中不同的資料夾。
什麼是拖放操作?
指在按住滑鼠按鈕的同時移動滑鼠,然後
釋放滑鼠按鈕。
安全斷開 USB 連接電纜:
請參閱 P52。
53
VQT0W47
Page 54
其他
如何在 Macintosh 上使用
• 如果使用 Mac OS 9/OS X,則無法使用 Simple Viewer,但是可以透過 USB 連接電纜
將圖片獲取至 PC。
• 如果使用 Mac OS 8.x 或更早版本,請參閱 P57。
1. 透過隨附的 USB 連接電纜將
數位相機連接至 PC。 (P38)
2. 按兩下桌面上的 [NO_NAME]
或 [Untitled] 。
3. 按兩下 [DCIM] 資料夾。
4. 透過拖放操作,將要獲取的圖
片或儲存這些圖片的資料夾移
至 PC 中不同的資料夾。
什麼是拖放操作?
指在按住滑鼠按鈕的同時移動滑鼠,然後
釋放滑鼠按鈕。
要確保數位相機正確連接:
檢查桌面上是否顯示 [NO_NAME] 或
[Untitled] 磁碟圖示。
安全拔開 USB 連接電纜:
將 [NO_NAME] 或 [Untitled] 磁碟圖示拖至
[Trash],然後斷開 USB 連接電纜。
54
VQT0W47
Page 55

其他
如何移除 USB 驅動程式與 Simple Viewer
(解除安裝)
• 通常是不需要解除安裝這些程式的。當這些程式出現問題時,請解除安裝並重新安裝
(P36)。
1. 按一下 [start] >> ([Setup] >>)
[Control Panel]。
2. 按兩下 [Add or Remove
Programs]。
3. 選擇要移除的軟體程式,然後
按一下 [Change/Remove]。
• 要移除其他驅動程式及軟體程式,請重覆
步驟 3。
• 移除 USB 驅動程式時,選擇 [Panasonic
USB Storage Driver]。
• 移除 Simple Viewer 時,選擇 [LUMIX
Simple Viewer]。
• 根據 PC 的不同,解除安裝步驟會有所不
同。有關詳情,請參閱所用 PC 的使用說
明書。
55
VQT0W47
Page 56
其他
無法獲取圖片時
• 如果在使用 USB 連接電纜連接數位相機與 PC 的情況下仍然無法獲取圖片,請執行下列
操作。
∫ 首先檢查下列項目。 ∫ 即使經過上述檢查,仍然無法
數位相機 [ 設定 ] 功能表中的 [USB 模式 ]
是否設定為 [PC]?
如果使用 Windows 98/98SE,請安裝
USB 驅動程式 (P36),然後連接電纜。
如果所用 PC 有兩個或多個 USB 連接埠,
依次將 USB 連接電纜連接至其他 USB 連
接埠。
• 如果將數位相機連接至 PC 鍵盤的 USB
連接埠,可能會影響正常操作。
• 如果使用 USB 集線器或 USB 延伸電
纜,則不保證能正常運行。
數位相機中是否插入了卡?或者,卡中是
否有圖片?
這些圖片已經獲取至 PC 了嗎?
• 不允許獲取相同的圖片。
獲取圖片。
確保 [My Computer] 中已新增 [Removable
Disk]。
• 根據 PC 的不同,驅動器字母 (如 H:)
會有所不同。
如果未新增可移動磁碟,請執行下列操作。
1 按一下 [star t] >> ([Setup] >>) [Control
Panel],然後按兩下 [System]。
2 按一下 ([Hardware] >>) [Device
Manager],然後檢查 [Other Devices]
是否顯示。
3 如果 [Other Devices] 顯示,請將其刪
除。
• 如果不顯示,請檢查連接。 (P38)
4 返回至原始螢幕,然後關閉 PC。
5 斷開 PC 上的 USB 連接電纜。
6 啟動 PC。
7 重新安裝 USB 驅動程式。(僅適於
Windows 98/98SE)
8 將 USB 連接電纜連接至 PC。
• 檢查是否重新新增 [Removable
Disk]。如果未新增任何 [Removable
Disk],請重覆上述步驟。
56
VQT0W47
Page 57
疑難排解
關於連接 / 獲取
問題 解答
如何在 Windows 95、
Mac OS 8.x 或早期版本中
獲取圖片。
無法從數位相機的內建記憶
體中獲取圖片。
關於 Simple Viewer
問題 解答
Simple Viewer 未自動啟動。
要在退出 Simple Viewer 後
再次檢視獲取的圖片。
記憶卡
• 如果 PC 有內建的 PC 卡槽,請使用 SD 記憶卡的 PC 適
內建記憶體
(這僅適用於帶內建記憶體的數位相機。)
• 將儲存在內建記憶體的圖片複製到卡中,然後透過 SD 記
從數位相機中取出卡,重新將它連接至 PC。
按兩下桌面上的 LUMIX Simple Viewer 捷徑圖示。
如果桌面上不存在捷徑圖示,請按一下 [start] >> [All
programs] >> [Panasonic] >> [LUMIX Simple Viewer] >>
[LUMIX Simple Viewer]。
僅在 Simple Viewer 未自動啟動時:
• 按一下 [ Advanced] >> [ Setting...],將 [Automatic
其他
配器 (選件)來獲取圖片。
憶卡的 PC 適配器 (選件)來獲取這些圖片。有關複製
的詳情,請參閱數位相機的使用說明書。
acquisition] 設定為 [Yes]。(如果不希望它自動啟動,請
將其設定為 [No]。)
57
VQT0W47
Page 58

其他
關於列印
問題 解答
不能列印任何圖片。 印表機設定是否正確?請參閱印表機的使用說明書。
我希望變更列印位置、字元
大小或日期的字元色彩。
圖片的上下或左右部分被剪裁。在列印時將 [Trimming] 設定為 [No]。
圖片的上下或左右部分會留
有空白。
未列印日期。 如果數位相機在未設定時鐘時拍攝圖片,或使用非
其他
問題 解答
新增至 PC 的圖片顯示不正常。如果變更資料夾名稱或檔案名稱,相關的圖片可能不顯示。
我應該如何變更資料夾名稱
或檔案名稱?
雖然已經刪除資料夾中的圖
片,但是空資料夾仍然會顯
示。
列印位置、字元大小或日期的字元色彩是固定的。無法變
更。
如果剪裁圖片的高寬比與打印紙張的高寬比不同時,圖片
的邊緣在列印時會被剪裁。
在列印時將 [Trimming] 設定為 [Yes]。
如果不使用剪裁,則會列印出整張圖片。如果紙張的高寬
比與圖片的高寬比不同,上下或左右部分會留有空白。
Panasonic 數位相機拍攝圖片,則可能無法正確列印圖片
的日期。
• 要用 Simple Viewer 檢視變更了資料夾名稱或檔案名稱的
圖片時,需要使用 [ Add pictures] 功能註冊這些圖片。
(P49)
您可以在 PC 中變更資料夾名稱或檔案名稱。
• 資料夾與檔案儲存的位置可以在圖片資訊中顯示的
[Location] 中找到。 (P42)
• 要用 Simple Viewer 檢視變更了資料夾名稱或檔案名稱的
圖片時,需要使用 [ Add pictures] 功能註冊這些圖片。
(P49)
按一下 [ Advanced] >> [ Setting...],然後按一下
[Updating for the folder list] 中的 [Updating] 按鈕。
(刪除資料夾顯示中的空資料夾。)
58
VQT0W47
Page 59

其他
其他 (續)
問題 解答
獲取動態影像時,螢幕顯示
兩個對等的圖片。
動態影像不重播。 安裝 QuickTime。 (P40)
插入與拔出 USB 連接電纜
時,PC 未執行操作。
使用數位相機拍攝動態影像時,會同時錄製動態影像
(MOV 格式)和靜態圖片 (JPEG 格式)。
(當錄製帶聲音的靜態影像或者TIFF 或 RAW 格式的檔案
時,也可錄製兩個影像。)
要使用 Simple Viewer 以此方法刪除相關圖片,請分別刪
除每個圖片。
通常情況下,使用 USB 連接電纜連接數位相機與 PC 時,
Simple Viewer 會自動啟動。(購買時的設定)
變更設定以使 Simple Viewer 不自動啟動並可改善這種情
形。
• 選擇 [ Advanced] >> [ Setting...],將 [Automatic
acquisition] 設定為 [No]。Simple Viewer 設定為不自動啟
動。
要手動啟動 Simple Viewer,按兩下桌面上的 LUMIX
Simple Viewer 捷徑圖示。
59
VQT0W47
Page 60

其他
操作環境
∫ 可連接 USB 的環境
®
相容 OS:
Microsoft
Microsoft
Microsoft
Microsoft
Microsoft
Microsoft
與 Mac OS 9.x/Mac OS X
(Windows Me/2000/XP 與 Mac OS 9.x/Mac OS X 不需要安裝
USB 驅動程式。)
∫ LUMIX Simple Viewer
相容 PC: 具有 Intel
更高 CPU (包括相容 CPU)的 IBM
相容 OS:
Microsoft
Microsoft
Microsoft
Microsoft
Microsoft
記憶體: 128 MB 或更高 (建議使用 256 MB 或更高)
顯示器: 高彩 (16 位)或更高
桌面區域 800k600 像素或更高
(建議使用 1024k768 或更高)
硬碟: [用於安裝 ] 200 MB 或更高
[ 用於使用 ] 200 MB 或更高
所需軟體: QuickTime 6.1 或更高版本
聲音: 與 Windows 相容的聲音設備
驅動器: CD-ROM 驅動器 (需要用於安裝)
介面: USB 連接埠
(如果使用 USB 集線器或 USB 延伸電纜連接,則不保證正常使
用。)
檔案格式: JPEG、TIFF (靜態圖片)、RAW (此格式的圖片可以獲取或寫
入,但無法顯示。)
MOV (動態影像)
• 即使滿足上述建議的系統要求,也不保證可以在所有 PC 使用此軟體。
• 不保證在升級的 OS 環境中可以運行。
• 不保證在未預裝 OS 上的操作。
• 本軟體與多重引導系統環境不相容。
60
VQT0W47
Windows® 98
®
Windows® 98 Second Edition
®
Windows® Millennium Edition
®
Windows® 2000 Professional
®
Windows® XP Home Edition
®
Windows® XP Professional
®
Pentium® III 450 MHz、Intel® Celeron® 400 MHz 或
®
Windows® 98 Second Edition
®
Windows® Millennium Edition
®
Windows® 2000 Professional
®
Windows® XP Home Edition
®
Windows® XP Professional
®
PC/AT 相容 PC
Page 61

其他
• 本軟體僅可由系統管理員帳戶使用者使用。
• 不保證本軟體在客戶組裝的 PC 上可以運行。
• 如果設定的字元大小大於 [Display Properties] 中 [Appearance] 或 [Settings] 的標準大
小,則某些按鈕的位置會超出螢幕且無法操作。在此情況下,重新將 [Display Properties]
中的字元大小設定為標準大小。
• 本軟體在 64 位的 OS 中無法使用。
• Microsoft 與 Windows 是 Microsoft Corporation 在美國及其他國家或地區的註冊商標與 /
或商標。
•IBM 與 PC/AT 是美國 International Business Machines Corporation 的註冊商標。
• Adobe、Adobe 徽標與 Adobe Reader 是 Adobe Systems Incorporated 在美國及其他國
家或地區的註冊商標與商標。
• Intel、Pentium 與 Celeron
是 Intel Corporation 在美國及其他國家或地區的註冊商標與
商標。
• 本使用說明書中提及的其他公司及產品名稱等是相應擁有者的商標或註冊商標。
Matsushita Electric Industrial Co., Ltd.
Web Site: http://www.panasonic.co.jp/global/
 Loading...