

Panasonic Lumix DMC-FX90, DMC-FX90K Owner's Manual

Owner’s Manual
for advanced features
Digital Camera
Model No. DMC-FX90
Before connecting, operating or adjusting this product,
please read the instructions completely.
VQT3S36-1

Contents
Recording
Before Use
Care of the camera ...................................5
Standard Accessories ...............................6
Names and Functions of Main Parts.........7
How to Use the Touch Panel .................... 8
Preparation
Charging the Battery.................................9
• Charging .............................................9
• Approximate operating time and
number of recordable pictures..........11
Inserting and Removing the Card
(optional)/the Batter y.................. .......... ...12
About the Built-in Memory/the Card........ 14
• Approximate number of recordable
pictures and available recording
time...................................................16
Setting Date/Time (Clock Set)................. 17
• Changing the Clock Setting ..............18
Tips for taking good pictures...................19
• Fit the strap and hold the camera
carefully............................................19
• Preventing jitter (camera shake).......19
Basic
Selecting the [Rec] Mode........................20
Taking Pictures with Your Favorite
Settings (Normal Picture Mode)..............21
Focusing..................................................22
Taking Pictures Using the Automatic
Function (Intelligent Auto Mode).............24
Recording Motio n Pictures......................27
Playing Back Pictures ([Normal Play]) ....30
• Forward or rewind the image ......... ...30
• Displaying Multiple Screens
(Multi Playb a ck)....................... .........31
• Using the Playback Zoom................. 31
Playing Back Motion Pictures..................32
• Creating Still Pictures From a Motion
Picture...............................................33
Deletin g Pi ctures................ .. ...................34
• To delete a single picture .................. 34
•
To delete multiple pictures (up to 50)
or all the pictures
Setting the Menu.....................................36
• Setting menu items...........................36
• Call up commonly used menus
with ease (Shortcut setting)..............38
About the Setup Menu ............................ 39
................................35
About the LCD Monitor............................49
Taking pictures using the touch
operation (Touch Shutter function)..........50
Match the focusing and
exposure to a desired subject using touch
operations (Touch AF/AE).......................51
Using zoom.............................................53
•
Using the Optica l Zo o m /
Using the Extended Optical Zoom (EZ)/
Using the Intelligent Zoom/
Using the Digital Zoom
• Zooming with touch operation...........55
Taking Pictures that Match the Scene
Being Recorded (Scene Mode)...............56
• [Portrait].............................................56
• [Transform]........................................57
• [Self Portrait] .....................................57
• [Scenery]...........................................57
• [Panorama Assist].............................58
• [Sports]..............................................59
• [Night Portrait]...................................59
• [Night S cenery ]..................................59
• [Handheld Night Shot].......................59
• [Food]................................................60
• [Party]................................................60
• [Candle Light]....................................60
• [Baby1]/[Baby2]...... .. .......... .. ........... ..61
• [Pet]...................................................61
• [Sunset].............................................62
• [High Sens.].......................................62
• [Hi-Speed Burst]................................62
• [Flash Burst]......................................63
• [Starry Sky]........................................63
• [Fireworks].........................................63
• [Beach]..............................................64
• [Snow]...............................................64
• [Aerial Photo].....................................64
• [Pin Hole] ...........................................64
• [Film Grain]........................................64
• [High Dynamic]......... .. .......... . .......... ..65
• [Photo Frame] ...................................65
Taking 3D pictures (3D Photo Mode)......66
Taking pictures while changing the skin
texture (Cosmetic Mode).........................67
Taking a Picture with Face Recognition
Function...................................................68
• Face Settings....................................69
Entering Text...........................................72
Using the [Rec] Mode Menu....................73
• [Flash] ...............................................73
• [Selftimer]..........................................76
• [Aspect Ratio]....................................76
• [Picture Size].....................................77
• [Quality].............................................78
• [Sensitivity]........................................79
• [White Bal a n ce]...... ..................... ......80
.........................53
- 2 -

• [AF Mode] ......................................... 82
• [Macro Mode].................................... 84
• [Quick AF] .........................................85
• [Face Recog.]....................................85
• [Exposure].........................................86
• [i.Exposure]............ .. ......... .. .......... .. ..88
• [Min. Shtr Speed] ..............................88
• [i.Reso l u ti o n] ............ .. ......... .. .......... ..89
• [Digital Zoom]....................................89
• [Burst]................................................90
• [Color Mode] .....................................90
• [AF Assist Lamp]...............................91
• [Red-Eye Removal]...........................91
• [Stabilizer].........................................92
• [Date Stamp].....................................92
• [Clock Set].........................................92
Using the [Motion Picture] Mode Menu...93
• [Rec M ode]........................................93
• [Rec Qua l i ty] .... .. .......... .. ......... .. ........94
• [Continuous AF] ................................ 9 5
• [Wind Cut] .........................................95
Playback/Editing
Various methods to playback..................96
• [Slide Show] ....... .......... .. ......... .. ........97
• [Filtering Play] ...................................99
• [Playback Album]............................100
• [Calendar] .. ..................................... 100
Using the [Playback] Mode Menu .........101
• [Title Edit]........................................101
• [Text Stamp]....................................102
• [Video Divide]..................................104
• [Resize]........................................... 105
• [Cropping] .......................................106
• [Favorite].........................................107
• [Print Set]........................................108
• [Protect]...........................................110
• [Face Rec Edit] ............................... 111
• [Copy]..............................................112
Wi-Fi
What you can do with the Wi-FiR
function..................................................119
•
Connect to your smartphone or
PC
and send images .......................119
•
Connect to the wireless access point
(broadband router) and send
the images
Wi-Fi function ........................................125
Connect with [Easy Setup]. ...................126
How to Use the [Manual Setup] Menu...128
• [Wireless settings]...........................128
• [Smartphone connection] ................132
• [Upload Size]...................................133
• [LUMIX CLUB].................................134
• [External AV device]........................136
• [Wi-Fi Pa s sw o rd]...... ..................... ..137
• [MAC Address]................................138
• [Reset Wi-Fi Settings] .....................138
• [Approved Regulations]...................138
Send image...........................................139
•
Preparation before sending images
• Select a single image and send it ...141
• Select multiple images and
send them.......................................142
.......................................122
...139
Having fun
Having Fun with Recorded Pictures......113
• [My Photo Album] ............................114
• [Beauty R etouch] ............................115
• [Art Retouc h ] ........ .. ................... .. ....117
• [Image Stamp].................................118
- 3 -

Connecting to other equipment
Playing Back Pictures on a TV
Screen...................................................144
• Playback using VIERA Link
(HDMI)............................................146
Playing back 3D pictures....................... 148
Saving the Recorded Still Pictures and
Motion Pictures .....................................150
• Copy by inserting the SD card into
the recorder....................................150
• Copy the playback image using
an AV cable ......... .. .. ..................... ..151
• Copying to a PC using
“PHOTOfunSTUDIO 6.4 HD Lite
Edition with Wi-Fi”.............. .......... ...152
Loading images on a PC.......................153
• Connecting with a USB connection
cable...............................................154
• Upload images to the WEB service
using the upload tool
“LUMIX Image Uploader”................156
Printing the Pictures..............................157
• Selecting a single picture and
printing it.........................................158
• Selecting multiple pictures and
printing them...................................158
• Print Settings................ .. ......... .. ......159
Others
Screen Display......................................161
Cautions for Use...................... .......... ...163
Message Display...................................169
Troubleshooting ....................................172
- 4 -
Before Use
Before Use
Care of the camera
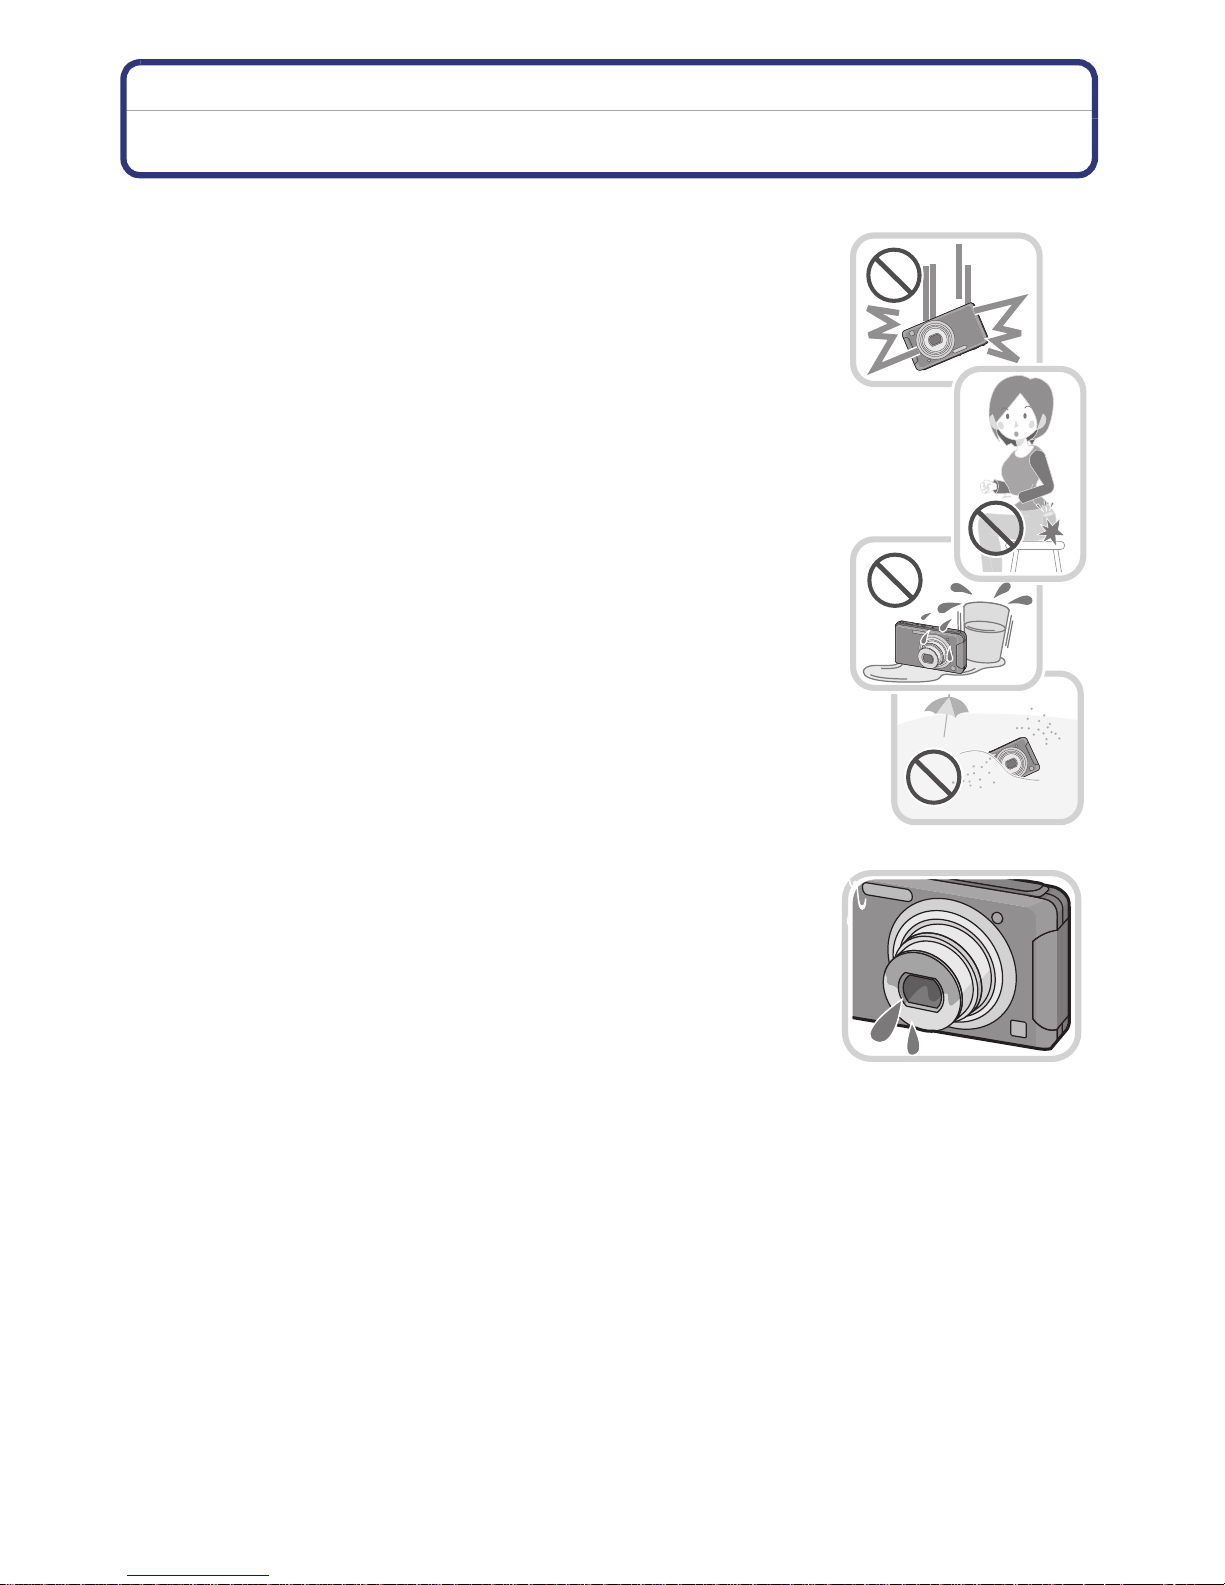
Do not subject to strong vibration, shock, or pressure.
•
The lens, LCD monitor, or external cas e may be damaged if used in
following conditions.
It may also malfunct i on or image may not be recorded.
–Drop or hit the camera.
–Sit down with the camera in your trousers pocket or fo rcefully
insert it into a full or tight bag, etc.
–Attach any items such as acc essories to the strap attached to the
camera.
–Press hard on the lens or the LCD monitor.
This camera is not dust/splash/water proof.
Avoid using the camera at location with a lot of dust, water,
sand, etc.
•
Liquid, sand and oth er foreign material may get into the space
around the le ns, but tons , etc. B e p a rti cularly ca reful s in ce it may n ot
just cause malfunctions, but it may become unrepairable.
–Places with a lot of sand or dust.
–Places where water can come into contact with this unit such as
when using it on a rainy day or on the beach.
∫ About Condensation (When the lens or the LCD monitor
is fogged up)
Condensation occurs when the ambient temperature or hu midity
•
changes. Be careful of condensation since it causes lens or LCD
monitor stains, fungus and camera malf unction.
•If condensation occurs, tur n the camera off and leave it for about
2 hours. The fog will disappear naturally when the temperature of
the camera becomes close to the ambient temp erature.
∫ This camera cannot be exported or taken to countries that have a United States
embargo imposed.
Export Administration Regulation (EAR) ap plies to this camera as it contains encryption
•
software developed in the United S tates.
- 5 -

Before Use
Standard Accessories
Check that all the accessories are supplied before using the camera.
•
The accessories and their s hape will differ de pending o n t he cou ntry or area wh ere t he camera
was purchased.
For details on the accessories, refer to Basic Owner’ s Man ual.
•Battery Pack is indicated as battery pack or battery in the text.
•Battery Charger is indicated as battery ch arger or charger in the text.
•SD Memory Card, SDHC Memory Card and SDXC Memory Card are indicated as card in the
text.
•The card is optional.
You can record or play back pictures on the built-in memory when you are not using a
card.
•If any accessories are lost, customers in the USA and Puerto Rico should contact Panasonic’s
parts dep artment at 1-800-833-9626 and customers in Can ada should cont act 1-800 -99-LUMIX
(1-800-995-8649) for further information about obtaining replacement parts.
- 6 -
Before Use
1 2 3 4
10 11 1298765
17
18
19
20
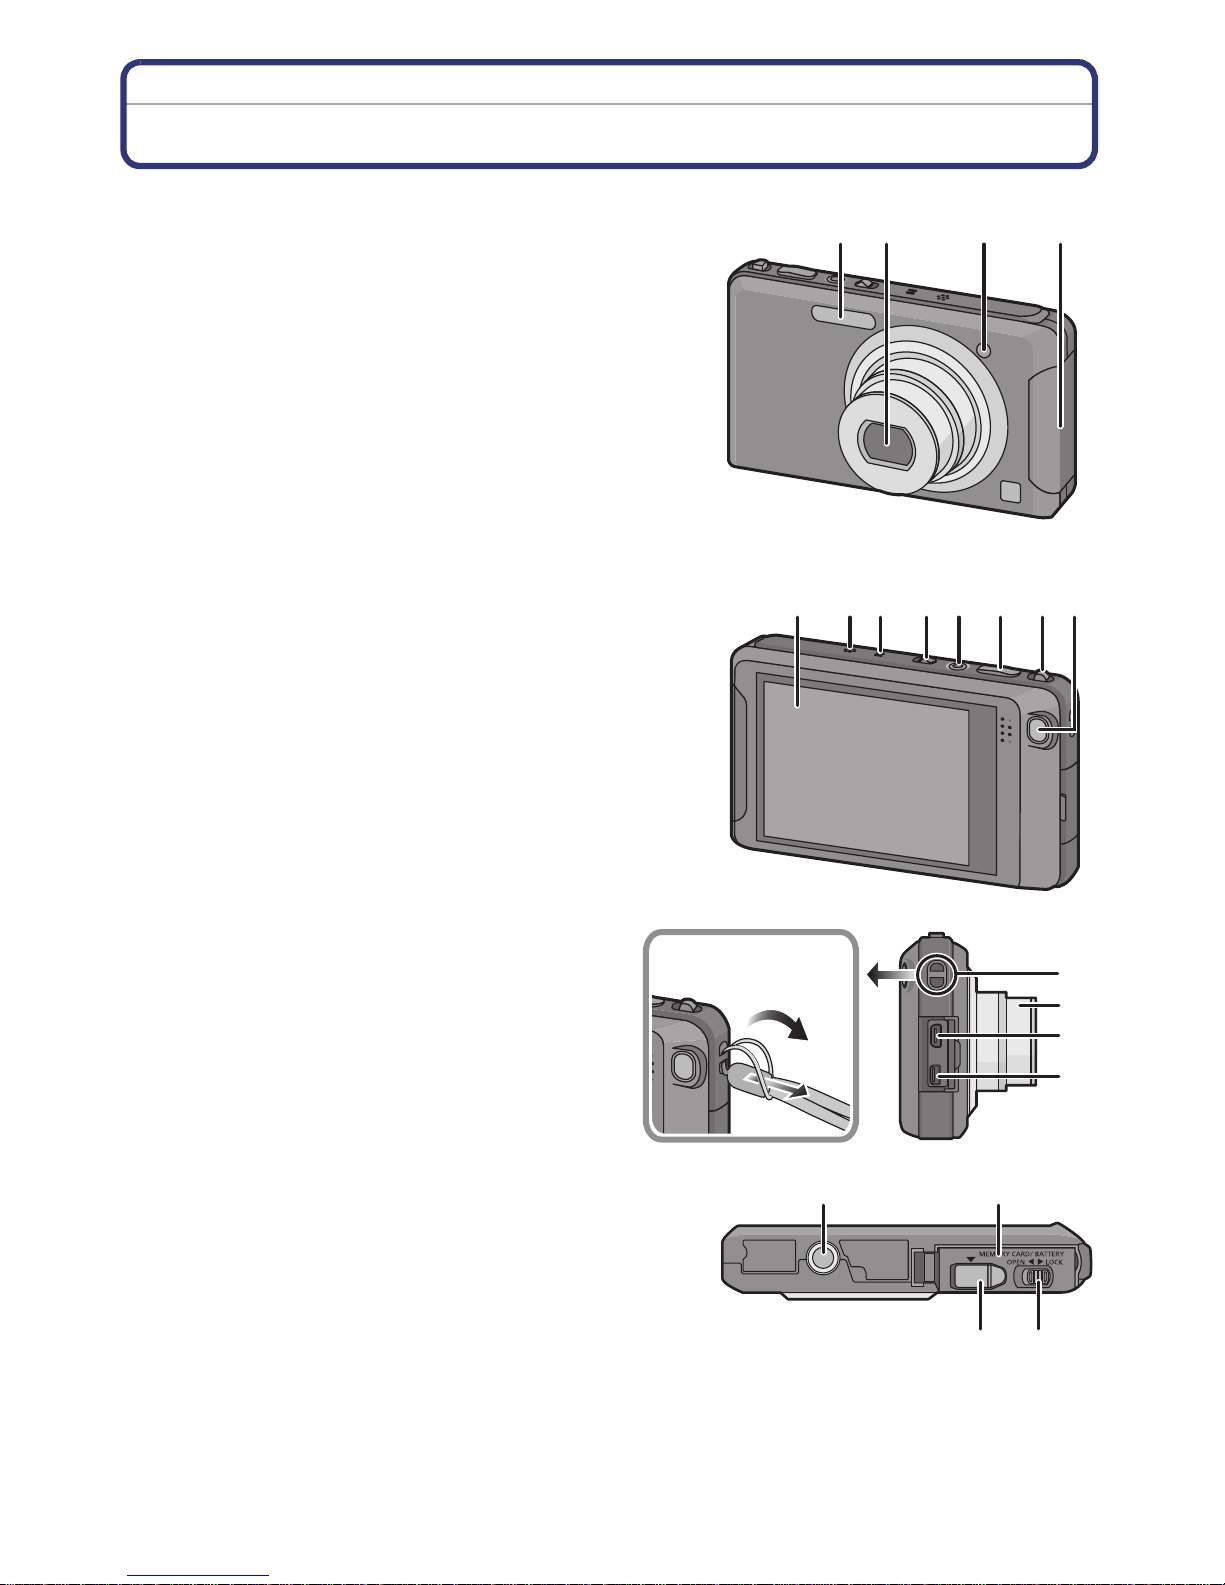
Names and Functions of Main Parts
1Flash (P73)
2 Lens (P5, 164)
3 Self-timer indicator (P76)
AF Assist Lamp (P91)
4Wi-Fi
5 Touch panel/LCD monitor (P8, 49, 161)
6 Speaker (P41)
7 Microphone
8 Camera ON/OFF switch (P17)
9 Motion picture button (P27)
10 Shutter button (P21, 24)
11 Zoom lever (P53)
12 [Wi-Fi] button (P141)
R
Transmitter (P125)
13 Strap eyelet
•
Be sure to attach the strap when using
the camera to ensure that you will not
drop it.
14 Lens barrel
15 [HDMI] socket (P144, 146)
16 [AV OUT/DIGITAL] socket (P144, 151,
154, 157)
17 Tripod receptacle
18 Card/Battery door (P12)
19 Release lever (P12)
20 DC coupler cover (P13)
•
When using an AC adaptor, ensure that
the Panasonic DC coupler (Fo r sh op
display purpose only) and AC adaptor
(optional) are us ed. For connectio n detai ls,
refer to P13.
13
14
15
16
- 7 -
Before Use
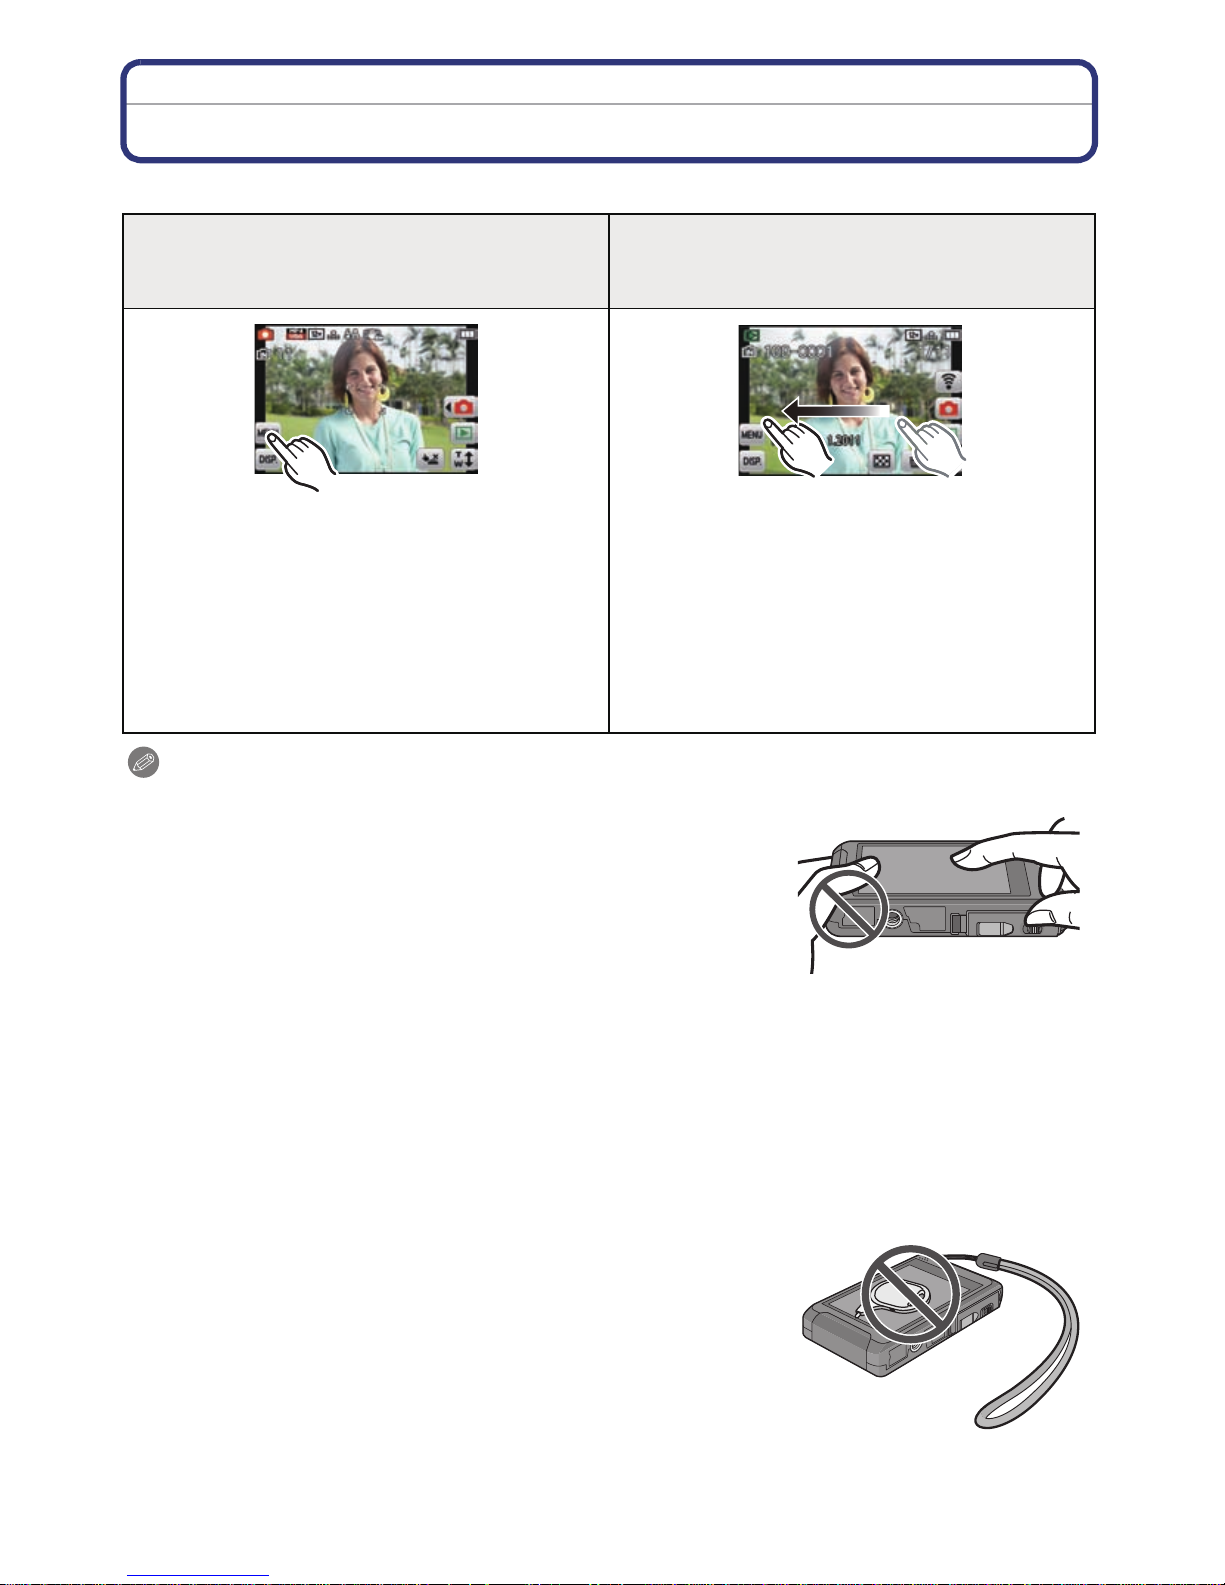
How to Use the Touch Panel
This touch panel is a type that detects pressure.
Touch the screen
To touch and release the touch panel.
Drag
A movement without releasing the touch
panel.
Use this to perform tasks such as selecting
icons or images displayed on the touch
panel.
•
It may not operate properly when multiple
icons are touched simultaneously, so try to
touch the center of the icon.
This is used when performing tasks such as
moving to the next image by dragging
horizontally, or changing the range of the
displayed image.
This can also be used to perform tasks such
as switching the screen by operating the
slide bar.
Note
•
If you use a commercially available liquid cry stal protection
sheet, please follow the instructions that accompany the
sheet. (Some liquid crystal protection sheets may impair
visibility or operability.)
•Apply a little extra pressure when touching if you have a
commercially available protection sheet affixed or if yo u feel it
is not responding well.
•Touch panel will not operate properly when the hand holding
this unit is pressing on the touch panel.
•Do not press using anything with a sharp tip or anything ha rd, except for the suppl ied stylus
pen.
•Do not operate with your fingernails .
•Do not scratch or press the LCD monitor too hard.
•Wipe the LCD monitor with dry soft cloth when it gets dirty with fing er prints and others.
•For information about the icons displayed on the touch panel, refer to “Screen Display” on
P161.
∫ About the Stylus pen
It is easier to use the stylus pen (supplied) for detailed
operation or if it is hard to operate with your fingers.
Do not place it where small children c an reach.
•
•Do not place the stylus pen on the LCD monitor when storing.
LCD monitor may break when the sty l us pen is pressed
strongly against the LCD monitor.
- 8 -
Preparation
Preparation
Charging the Battery
∫ About batteries that you can use with this unit
It has been found that counterfeit battery packs which look very similar to the
genuine product are made available to purchase in some markets. Some of these
battery packs are not adequately protected with internal protection to meet the
requirements of appropriate safety standards. There is a possibility that these
battery packs may lead to fire or explosion. Please be advised that we are not
liable for any accident or failure occurring as a result of use of a counterfeit
battery pack. To ensure that safe products are used we would recommend that a
genuine Panasonic battery pack is used.
•
Use the dedicated charger and battery.
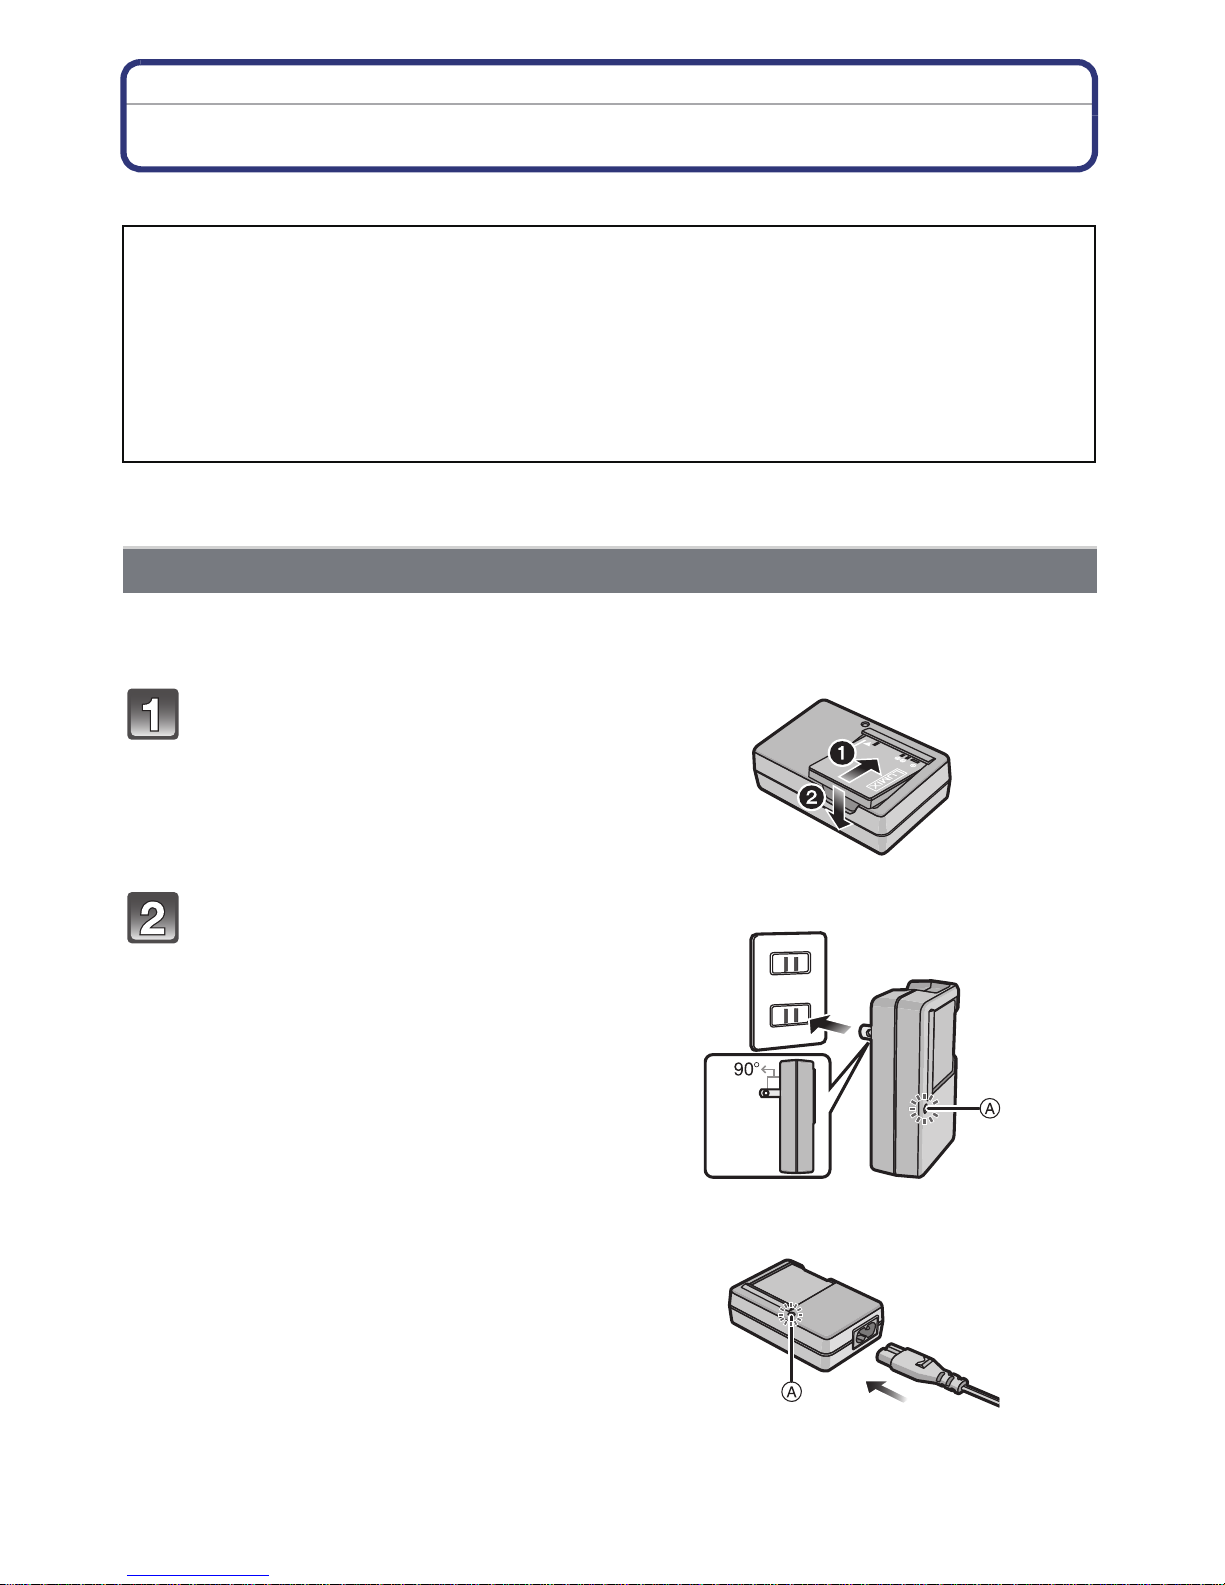
Charging
•The battery is not charged when the camera is shipped. Charge the battery before use.
•Charge the battery with the charger indoors.
Attach the battery paying
attention to the direction of the
battery.
Connect the charger to the
electrical outlet.
• The [CHARGE] indicator A lights up
and charging beg ins.
plug-in type
inlet type
- 9 -

Preparation
∫ About the [CHARGE] indicator
The [CHARGE] indicator turns on:
The [CHARGE] indicator is turned on during charging.
The [CHARGE] indicator turns off:
The [CHARGE] indicator will turn off once the charging has completed without any
problem. (Disconnect the charger from the electrical socket and detach the battery after
charging is completed.)
•
When the [CHARGE] indicator flashes
–The battery temper ature is t oo hi gh or too lo w. It is recommended to c har ge the ba tter y aga in
in an ambient temperature of between 10 oC and 30 oC (50 oF and 86 oF).
–The terminals of the charg er or the battery are dirty. In this case, wipe them with a dry cloth.
∫ Charging time
Charging time Approx. 120 min
The indicated charging time is for when t he battery has been discharged completely.
•
The charging time may vary depending on how the battery has been used. The charging
time for the battery in hot/cold environments or a battery that has not been used for long
time may be longer than normal.
∫ Battery indication
The battery indication is displayed on the LCD monitor.
The indication turns red and blinks if the remaining battery power is exhausted. Recharge the
•
battery or replace it with a fully charged battery.
Note
Do not leave any metal items (such as clips) near the contact areas of the po wer plug.
•
Otherwise, a fire and/or electric shocks may be caused by short-circuiting or the
resulting heat generated.
•The battery becomes warm after using it and during and after cha rging. The camera also
becomes warm during use. This is not a malfunction.
•The battery can be recharged even when it still ha s some c harge left, but it is not
recommended that the battery charge be frequently topped up while the battery is fully
charged. (Since characteristic swelling may occur.)
- 10 -

Preparation
Approximate operating time and number of recordable pictures
∫ Recording still pictures
Number of recordable
pictures
Recording time Approx. 100 min
Approx. 200 pictures
By CIPA standard in Normal Picture
Mode
Recording conditions by CIPA standard
•
CIPA is an abbreviation of [Camera & Imaging Products Association].
•Temperature: 23 oC (73.4 oF)/Humidity: 50%RH when LCD monitor is on.
•Using a Panasonic SD Memory Card (32 MB).
•Using the supplied battery.
•Starting recording 30 seconds after the came ra is turned on. (When the Optical Image
Stabilizer function is set to [On].)
•Recording once every 30 seconds with full flash every second rec ording.
•Changing the zoom magnification from Tele to Wide or vic e versa in every recording.
•Turning the camera off every 10 recordings and leaving it un til the temperature of the battery
decreases.
The number of recordable pictures varies depending on the recording interval time.
If the recording interval time becomes longer, the number of recordable pictures
decreases. [For example, if you were to take one picture every two minutes, then the
number of pictures would be reduced to approximately one-quarter of the number
of pictures given above (based upon one picture taken every 30 seconds).]
∫ Recordin g mot ion pictures (When us ing the LCD monitor)
[AVCHD]
(Recording with picture qua lity set
to [FSH])
Recordable time Approx. 60 min Approx. 60 min
Actual recordable tim e Approx. 30 min Approx. 30 min
•
These times are for an ambient temperature of 23oC (73.4 oF) and a humidity of 50%RH.
Please be aware that these times are approximate.
(Recording wi th picture quality set
[MP4]
to [FHD])
•Actual recordable time is the time av ailable for recording when repeating acti ons such as
switching the power supply [ON]/[OFF], starting/st opping recording, zoom operation etc.
•Maximum time to record motion pictu res cont inu ously with [AVCHD] is 29 minutes 59 se conds.
(excluding when [SH] is set)
•Maximum time to record motion pictures continuously with [MP4] is 29 minutes 59 seconds.
Also, motion picture recorded continuously in [MP4] is up to 4 GB. The maximum available
recording time continuously is displayed on the sc r een.
∫ Playback
Playback time Approx. 150 min
Note
The operating times and number of recordable pictures will differ according to the
•
environment and the operating conditions.
For example, i n the following cases, the operating times shorten and the number of recordable
pictures is reduced.
–In low-temperature environments, such as on ski slopes.
–When using [LCD Mode].
–When operations such as flas h and zoom are used repeatedly.
•When the operating time of the camera becomes extremely short even after properly charging
the battery, the life of the battery may have expired. Buy a new battery.
- 11 -
Preparation
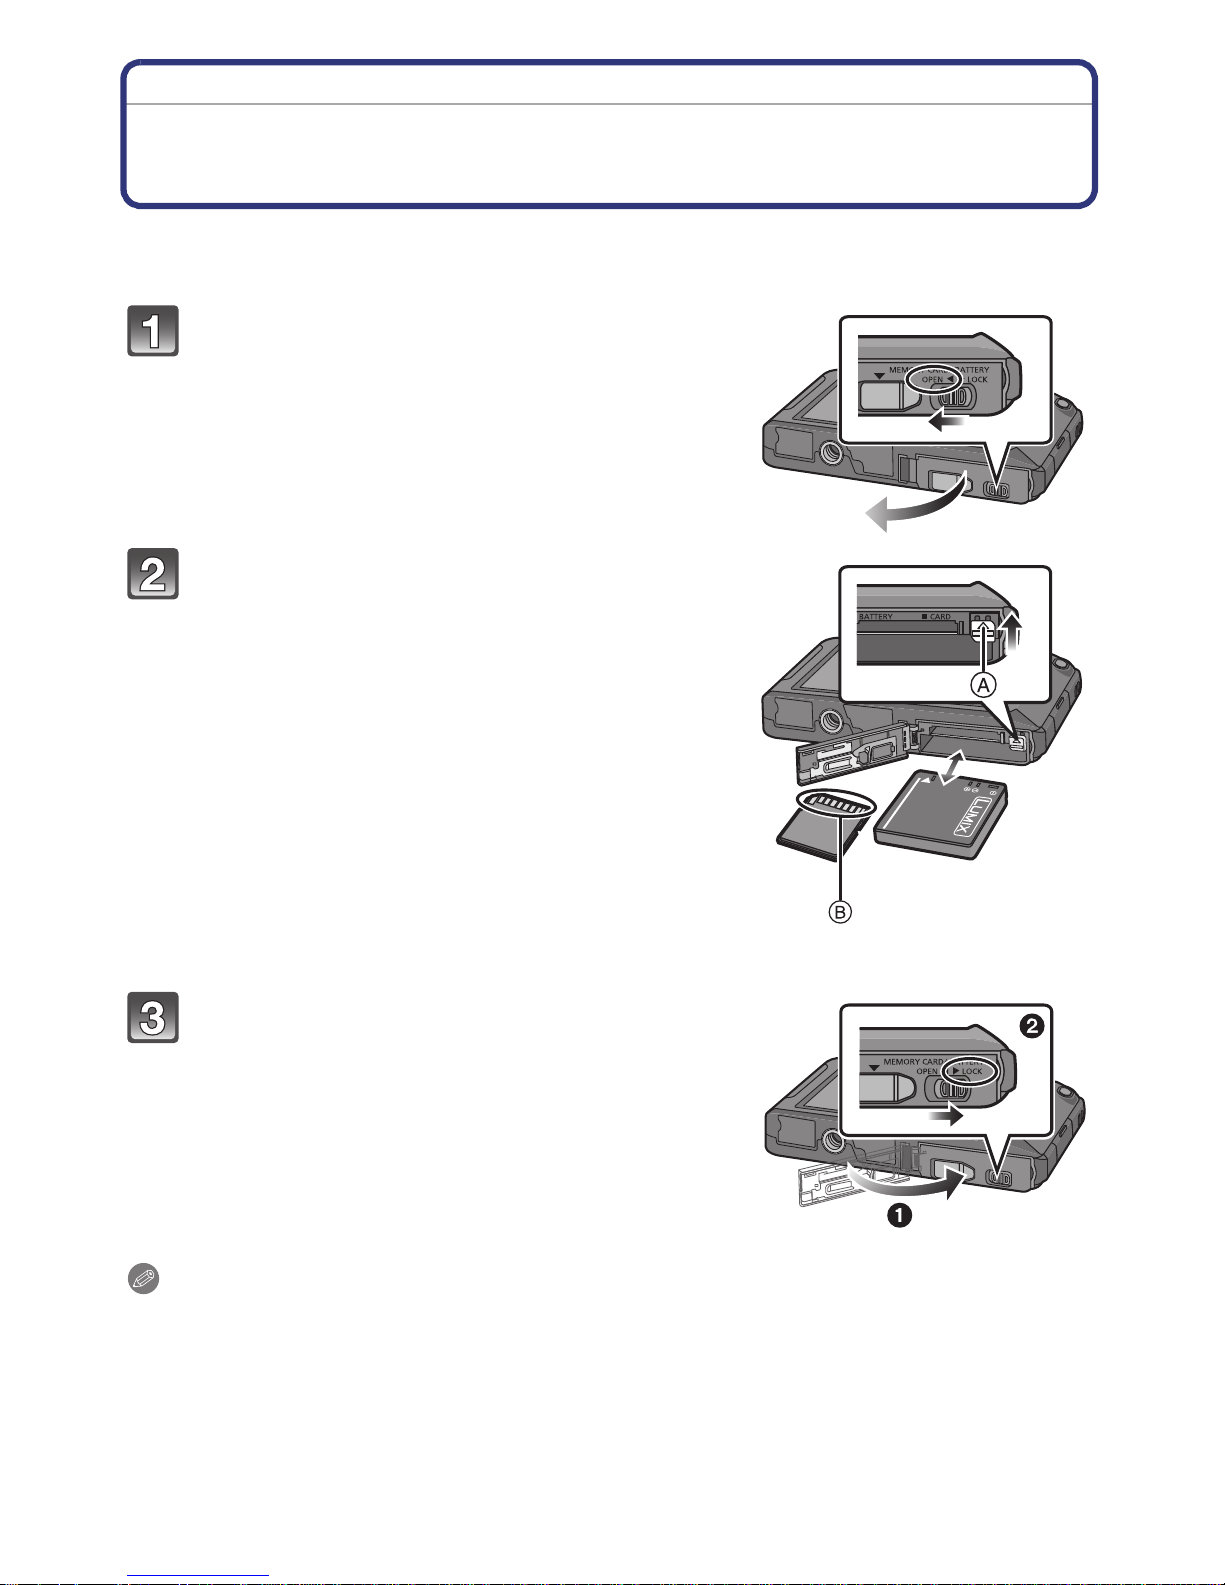
Inserting and Removing the Card (optional)/the
Battery
•Check that this unit is turned off.
•We recommend using a Panasonic card.
Slide the release lever in the direction of
the arrow and open the card/ battery door.
• Always use genuine Panasonic batteries.
• If you use other batteries, we cannot guarantee
the quality of this product.
Battery: Being careful about the battery
orientation, insert all the way until you
hear a locking sound and then check that
it is locked by lever A.
Pull the lever A in the direction of the
arrow to remove the battery.
Card: Push it securely all the way until
you hear a “click” while being careful
about the direction in which you insert it.
T o rem ove the card, push the card until it
clicks, then pull the card out upright.
B:Do not touch the connection terminals of the
card.
1:Close the card/battery door.
2:Slide the release lever in the direction
of the arrow.
Note
•
Remove the batter y aft er use. (The battery wil l be exhaus ted if le ft fo r a long peri od of ti me after
being charged.)
•Turn the camera off and wait for the “LUMIX” display on the LCD monitor to clear before
removing the c ar d or batt er y. (Otherwise, this unit may no lo nger op erate nor mally and th e ca rd
itself ma y be damaged or th e r ec o r d ed pi c t ur es may be los t .)
- 12 -
Preparation
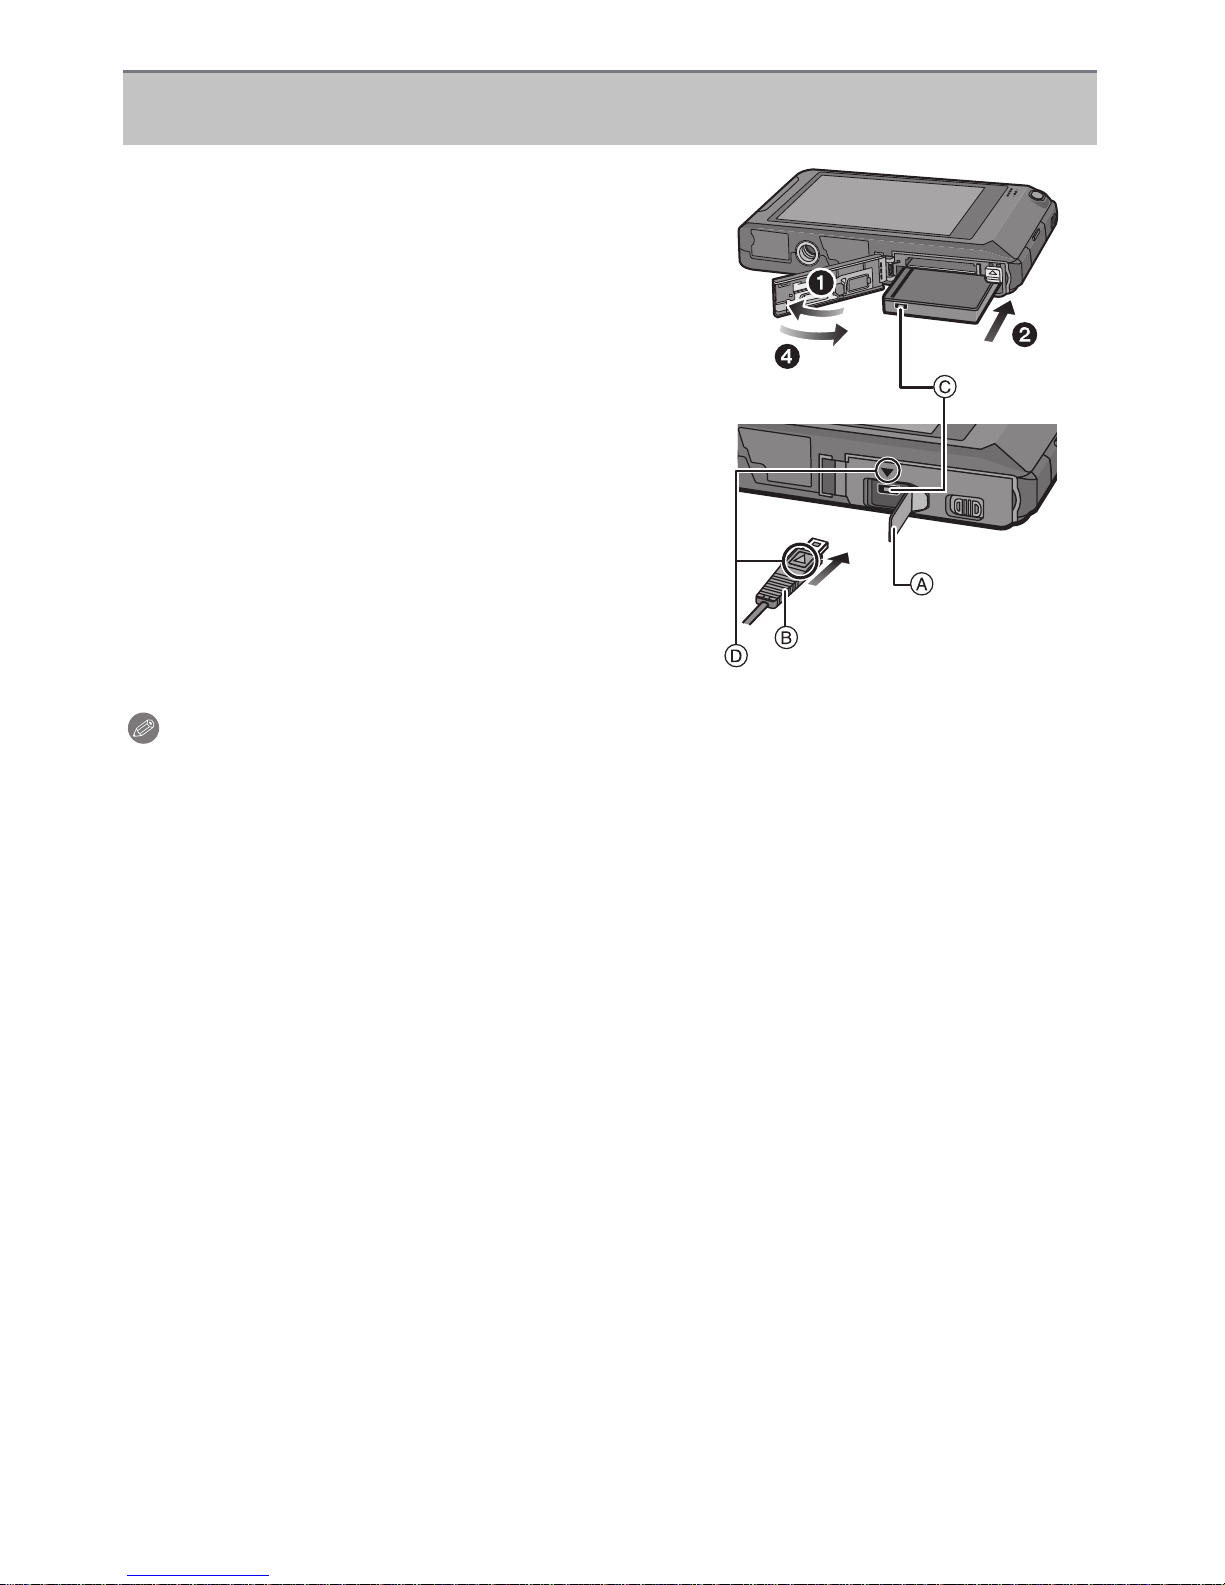
Using an AC adaptor (optional) and a DC coupler (For shop display purpose
only) instead of the battery
The AC Adaptor (optional) can only be used with
the designated Panasonic DC coupler (For shop
display purpose only). The AC adaptor (optional)
cannot be used by itself.
1 Open the card/battery door.
2 Insert the DC coupler, being careful of the
direction.
3 Open the DC coupler cover A.
•
Push open the coupler cover from the inter i or.
4 Close the card/battery door.
•
Ensure that the card/battery door is closed.
5 Plug the AC adaptor into an electrical outlet.
6 Connect the AC adaptor B to the [DC IN] socket
C of the DC coupler.
D Align the marks and insert.
•Ensure that only the AC adaptor and DC coupler for
this camera are used. Using any other equipment may
cause damage.
Note
•
Always use a genuine Panas onic AC adaptor (o ptional).
•When using an AC adaptor, use the AC cable supp lied with the AC adaptor.
•Some tripods cannot be attached when the DC coupler is connec ted.
•Make sure to unplug the AC adaptor when y ou open the card/batt ery door .
•If the AC adaptor and DC coupler are not necessary, then remove them from the digital
camera. Also, please keep the DC coupler cover c l osed.
•Also read the operating instructions for the AC adaptor and DC coupler.
- 13 -
Preparation
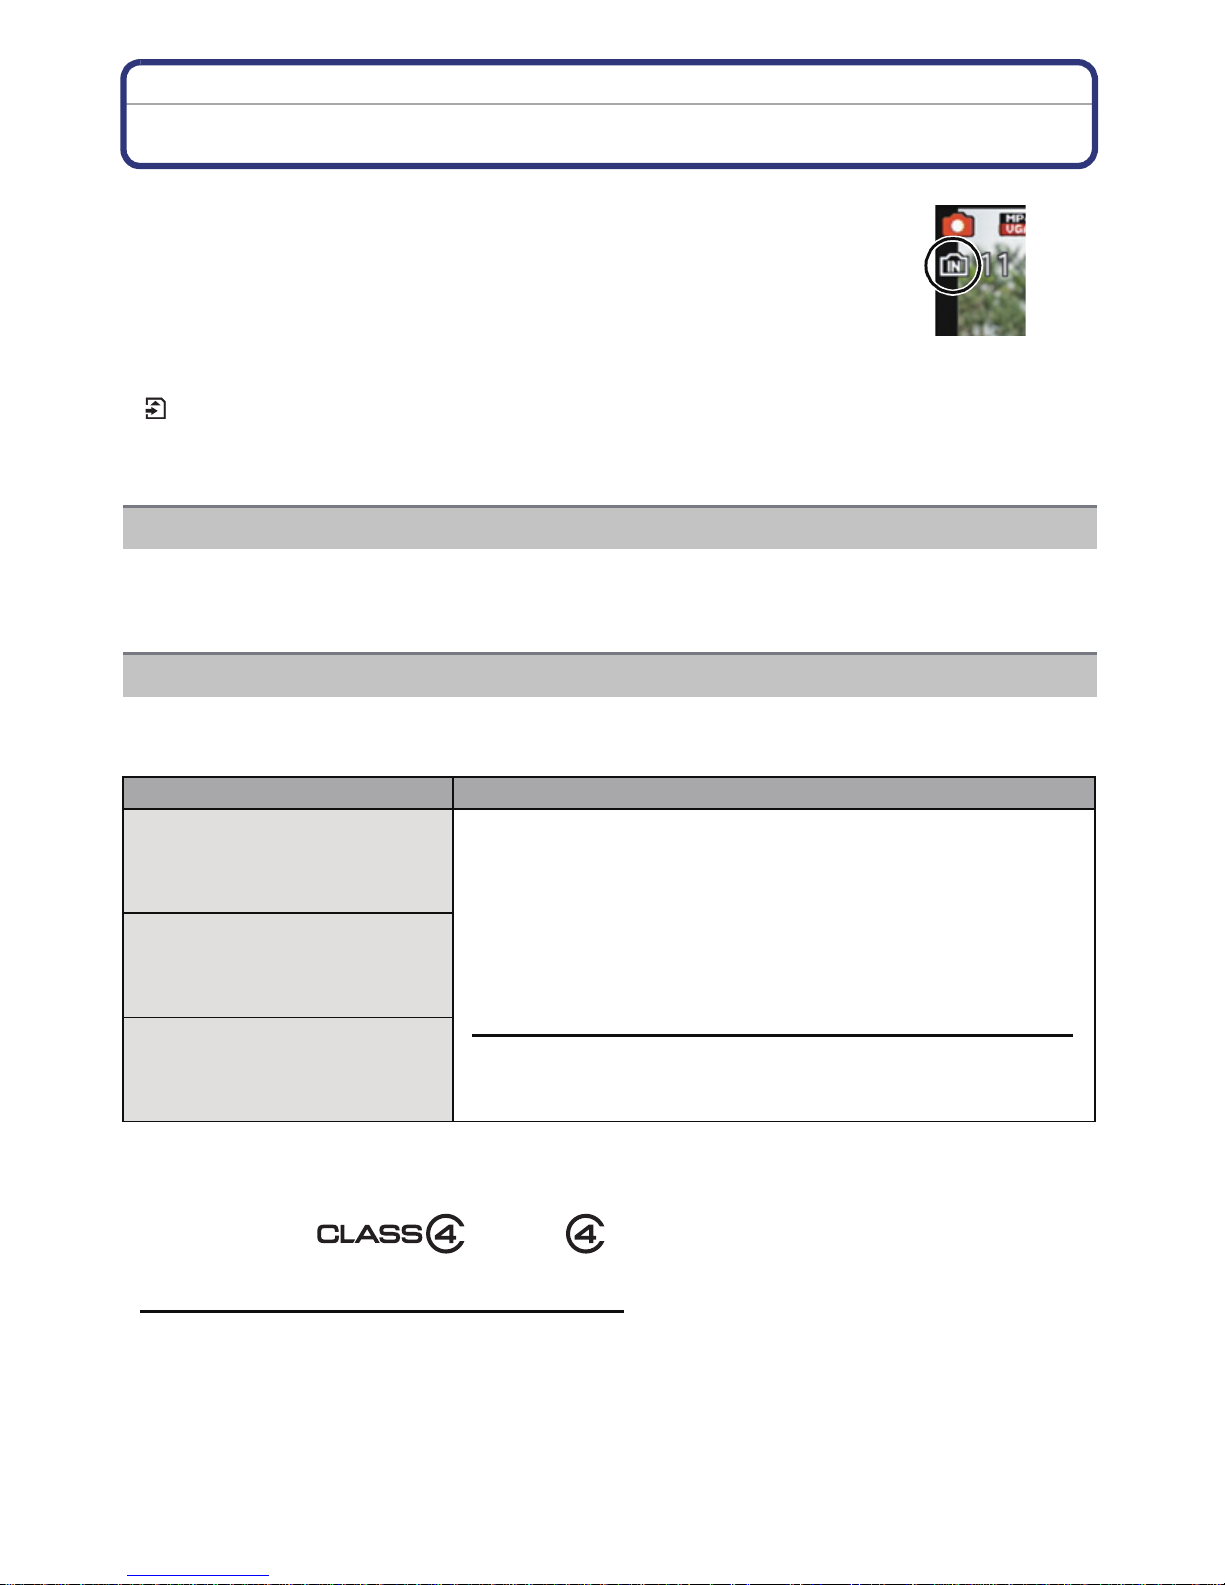
About the Built-in Memory/the Card
The following operations can be performed using this unit.
When a card has not been in serted: Pictures can be recorded on the
•
built-in memory and played back.
•When a card has been inserted: Pictures can be recorded on the card
and played back.
•When using the built-in memory
k
>ð (access indication
•When using the card
[] (access indication
¢ The access indication is displayed in red when pictures are being recorded on the built-in
memory (or the card).
Built-in Memory
•You can copy the recorded pictures t o a card. (P112)
•Memory size: Approx. 70 MB
•The access time for the built-in memory may be l onger than the access ti me for a card.
¢
)
¢
)
Card
The following cards which conform to the SD video standard can be used with this unit.
(These cards are indicated as card in the tex t.)
Remarks
SD Memory Card
(8 MB to 2 GB)
•
Use a card with SD Speed Class¢ with “Class 4” or
higher when recording motion pictu res.
•SDHC Memory Card can be used with SDHC Memory Card
or SDXC Memory Card comp atible equipment.
SDHC Memory Card
(4 GB to 32 GB)
•SDXC Memory Card can only be used with SDXC Memory
Card compatible equipment.
•Check that the PC and other equipment are compatible when
using the SDXC Memory Cards.
SDXC Memory Card
(48 GB, 64 GB)
¢ SD Speed Class is the speed standard regarding continuous writing. Check via the label on
the card, etc.
http://panasonic.net/avc/sdcard/information/SDXC.html
•Only the cards with capacity listed left can be used.
e.g.:
•Please confirm the latest informatio n on the following website.
http://panasonic.jp/support/global/cs/dsc/
(This Site is English only.)
- 14 -

Preparation
Note
Do not turn this unit off, remove its battery or card, or disconnect the AC adaptor
•
(optional) when the access indication is lit (when pictures are being written, read or
deleted, or the built-in memory or the card is being formatted). Furthermore, do not
subject the camera to vib ration, impact or static electricity.
The card or the data on the card may be damaged, and this unit may no longer operate
normally.
If operation fails due to vibration, impact or static electricity, perform the operation
again.
•Write-Protect switch A provided (When this switch is set to the [LOCK] position,
no further dat a writing , dele tion o r formatt ing is possibl e. The a bility t o write , delete
and format data is restored when the switch is returned to its original position.)
•The data on the built-in memor y or t he card may be damaged or lost due to
electromagnetic waves, static electricity or breakdown of the camera or the card.
We recommend sto ring important data on a PC etc.
•Do not format the card on your PC or other equipment. Format it on the camera
only to ensure proper operation. (P47)
•Keep the Memory Card out of reach of children to prevent swallowing.
- 15 -
Preparation
A
B
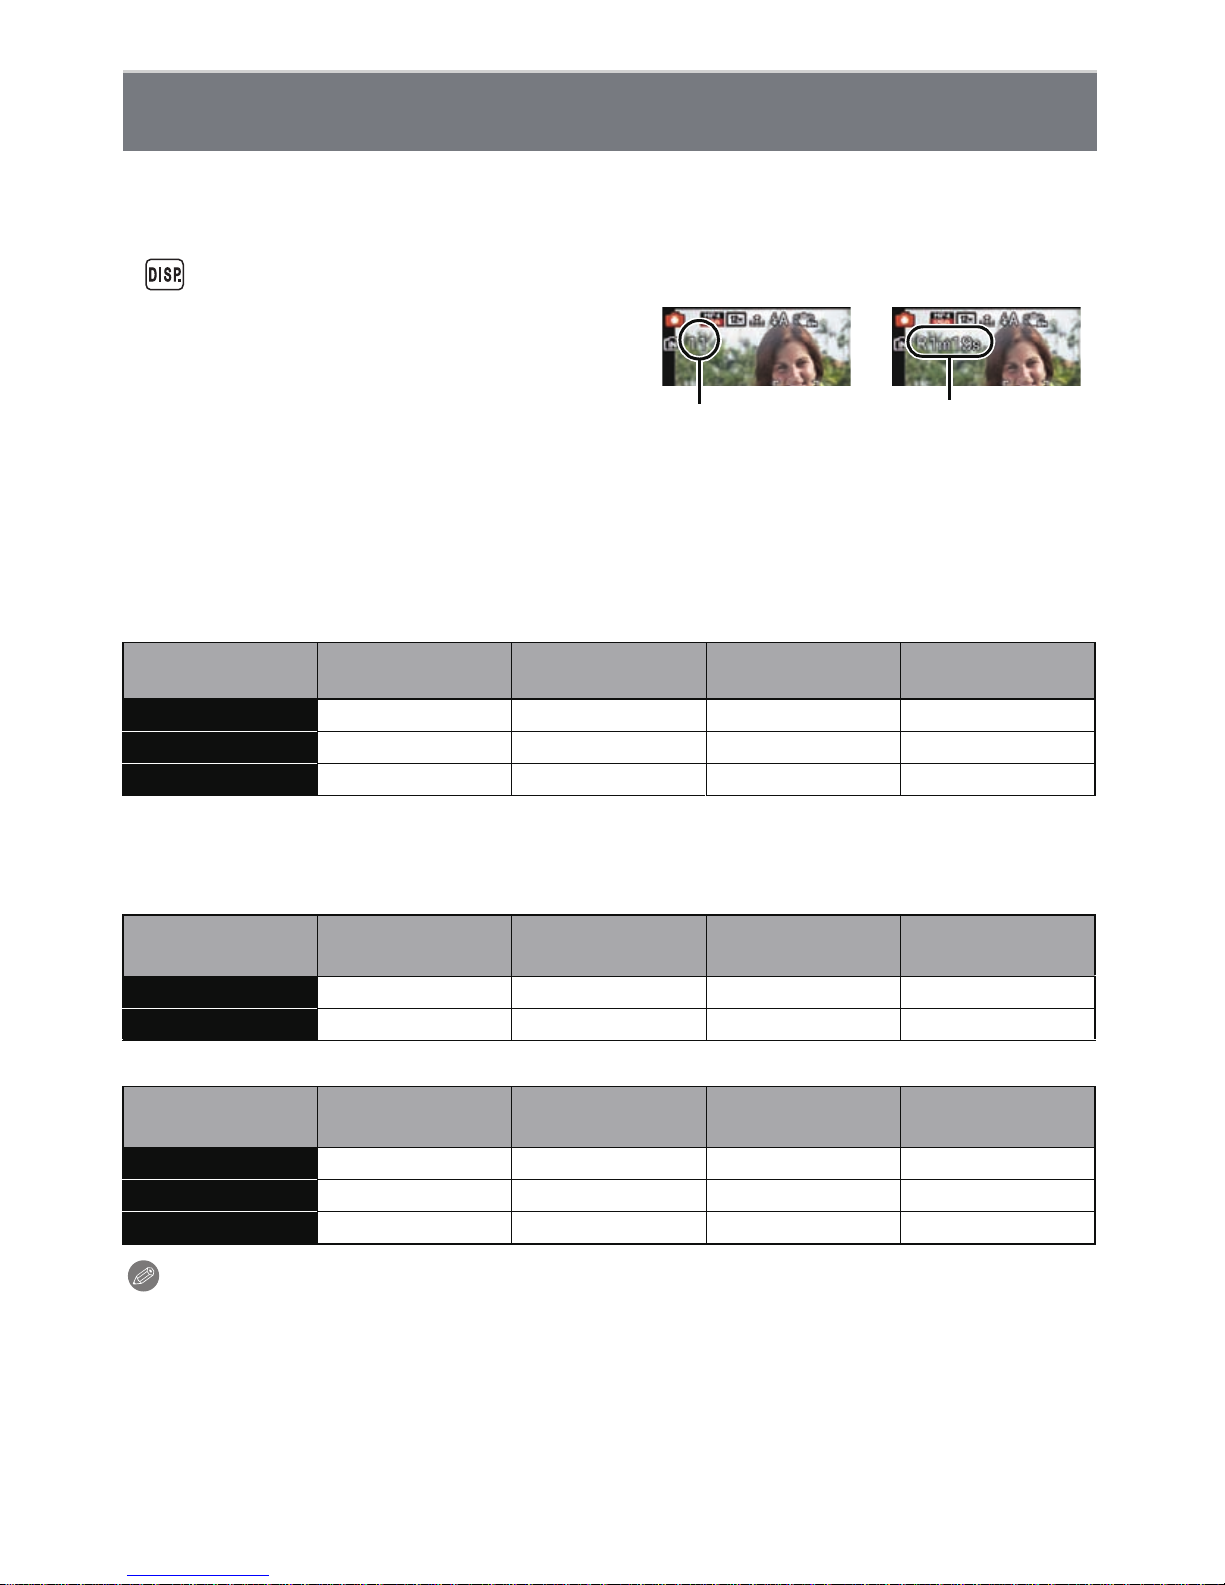
Approximate number of recordable pictures and
available recording time
∫ About the display of the number of recordable pictures and available recording
time
You can confirm the number of recordable pictures and available recording time by touching
•
[ ] several ti mes. (P49)
A Number of recordable pictures
B Available recording time
•The number of recordable pictures and the
available recordin g time are an approximation.
(These vary depending on the recording
conditions a nd the type of card.)
•The number of recordable pictures and the
available recording time varies depending on the
subjects.
∫ Number of recordable pictures
•
[i99999] is displayed if there are more than 100,000 pictures remaining.
Aspect ratio [X], Quality [A]
Picture size
12M 11 380 6260 12670
5M(EZ) 19 650 10620 21490
0.3M(EZ) 310 10050 162960 247150
Built-in Memory
(Approx. 70 MB)
2GB 32 GB 64 GB
∫ Available recording time (when recording motion pictures)
“h” is an abbreviation for hour, “m” f or minute and “s” for second.
•
[AVCHD]
Recording
quality setting
FSH j 14m00s 4h10m 8h27m
SH j 14m00s 4h10m 8h27m
Built-in Memory
(Approx. 70 MB)
2GB 32 GB 64 GB
[MP4]
Recording
quality setting
FHD j 12m18s 3h23m14s 6h51m13s
HD j 23m30s 6h28m 13h5m5s
VGA 1m19s 51m43s 14h13m55s 28h47m50s
Built-in Memory
(Approx. 70 MB)
2GB 32 GB 64 GB
Note
When selecting images to upload to the WEB service, The number of recordable pictures and
•
the available recording time that can be recorded on the card may decrease.
•Maximum time to record motion pictu res cont inu ously with [AVCHD] is 29 minutes 59 se conds.
(excluding when [SH] is set)
•Maximum time to record motion pictures continuously with [MP4] is 29 minutes 59 seconds.
Also, motion picture recorded continuously in [MP4] is up to 4 GB. The maximum available
recording time continuously is displayed on the sc r een.
- 16 -
Preparation
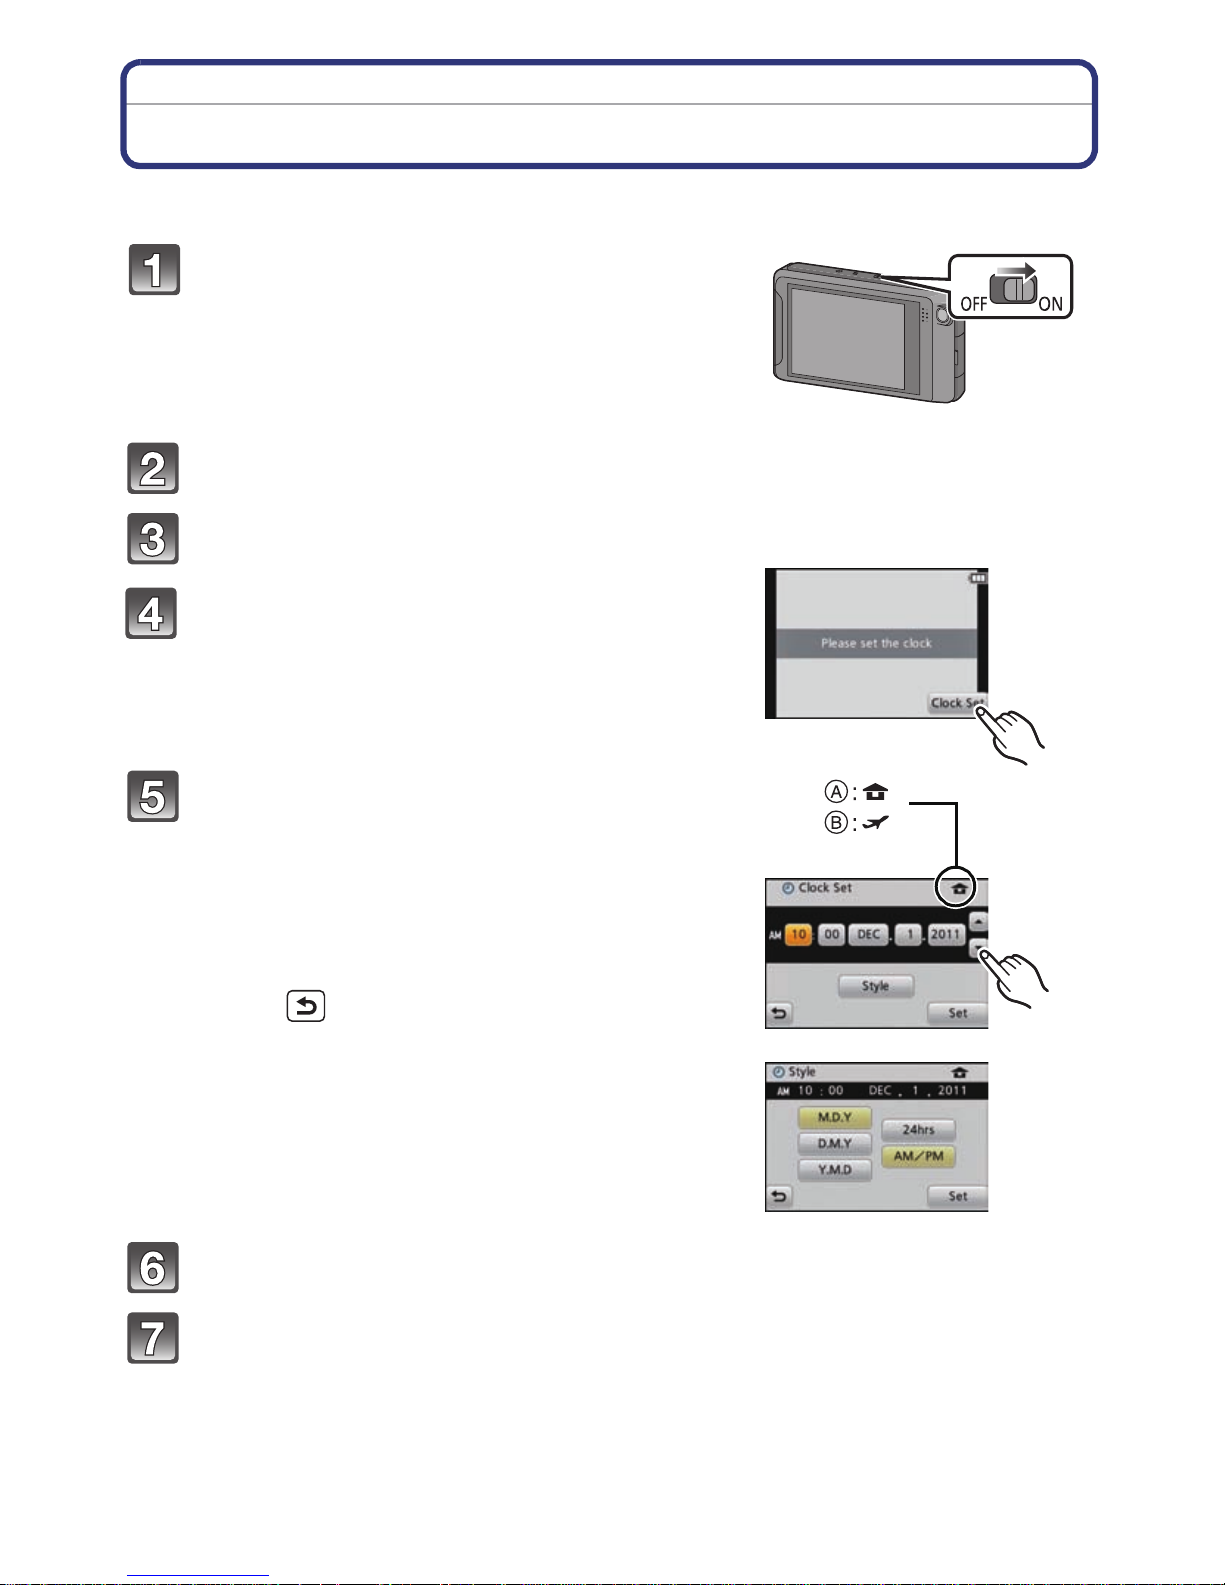
Setting Date/Time (Clock Set)
•The clock is not set when the camera is shipped.
Turn the camera on.
• If the language select screen i s not displaye d, proceed
to step
Touch [Language Set].
Select the language, and then touch [Set].
Touch [Clock Set].
4.
Touch the items you wish to set (Year/
Month/Day/Hours/Minutes), and set using
[3]/[4].
A: Time at the home area
B: Time at the travel destination
•
Y ou can c ontinue to swit ch th e sett ings by continuo usly
touching [3]/[4].
• Touch [ ] to cancel the date and time settings
without setting a date and time.
To set the displ ay order and the
time d isplay format.
Touch [Style] to display the settings scr een for setting
•
display order/time display format.
Touch [Set] to set.
Touch [Set] in the confirmation screen.
- 17 -

Preparation
Changing the Clock Setting
Select [Clock Set] in the [Rec] or [Setup] menu. (P36)
The clock can be reset as shown in steps 5 and 6.
•
•The clock setting is maintained for 3 months using the built-in clock battery even
without the battery. (Leave the charged battery in the unit for 24 hours to charge the
built-in battery. )
Note
•
If the clock is not set, the correct date cannot be printed when you order a photo studio to print
the picture, or when you stamp the date on the pictures with [Date Stamp] or [Text Stamp].
•If the clock is set, the c orr ect date c an be prin ted eve n if the da te is n ot disp layed on th e sc ree n
of the camera.
- 18 -
Preparation
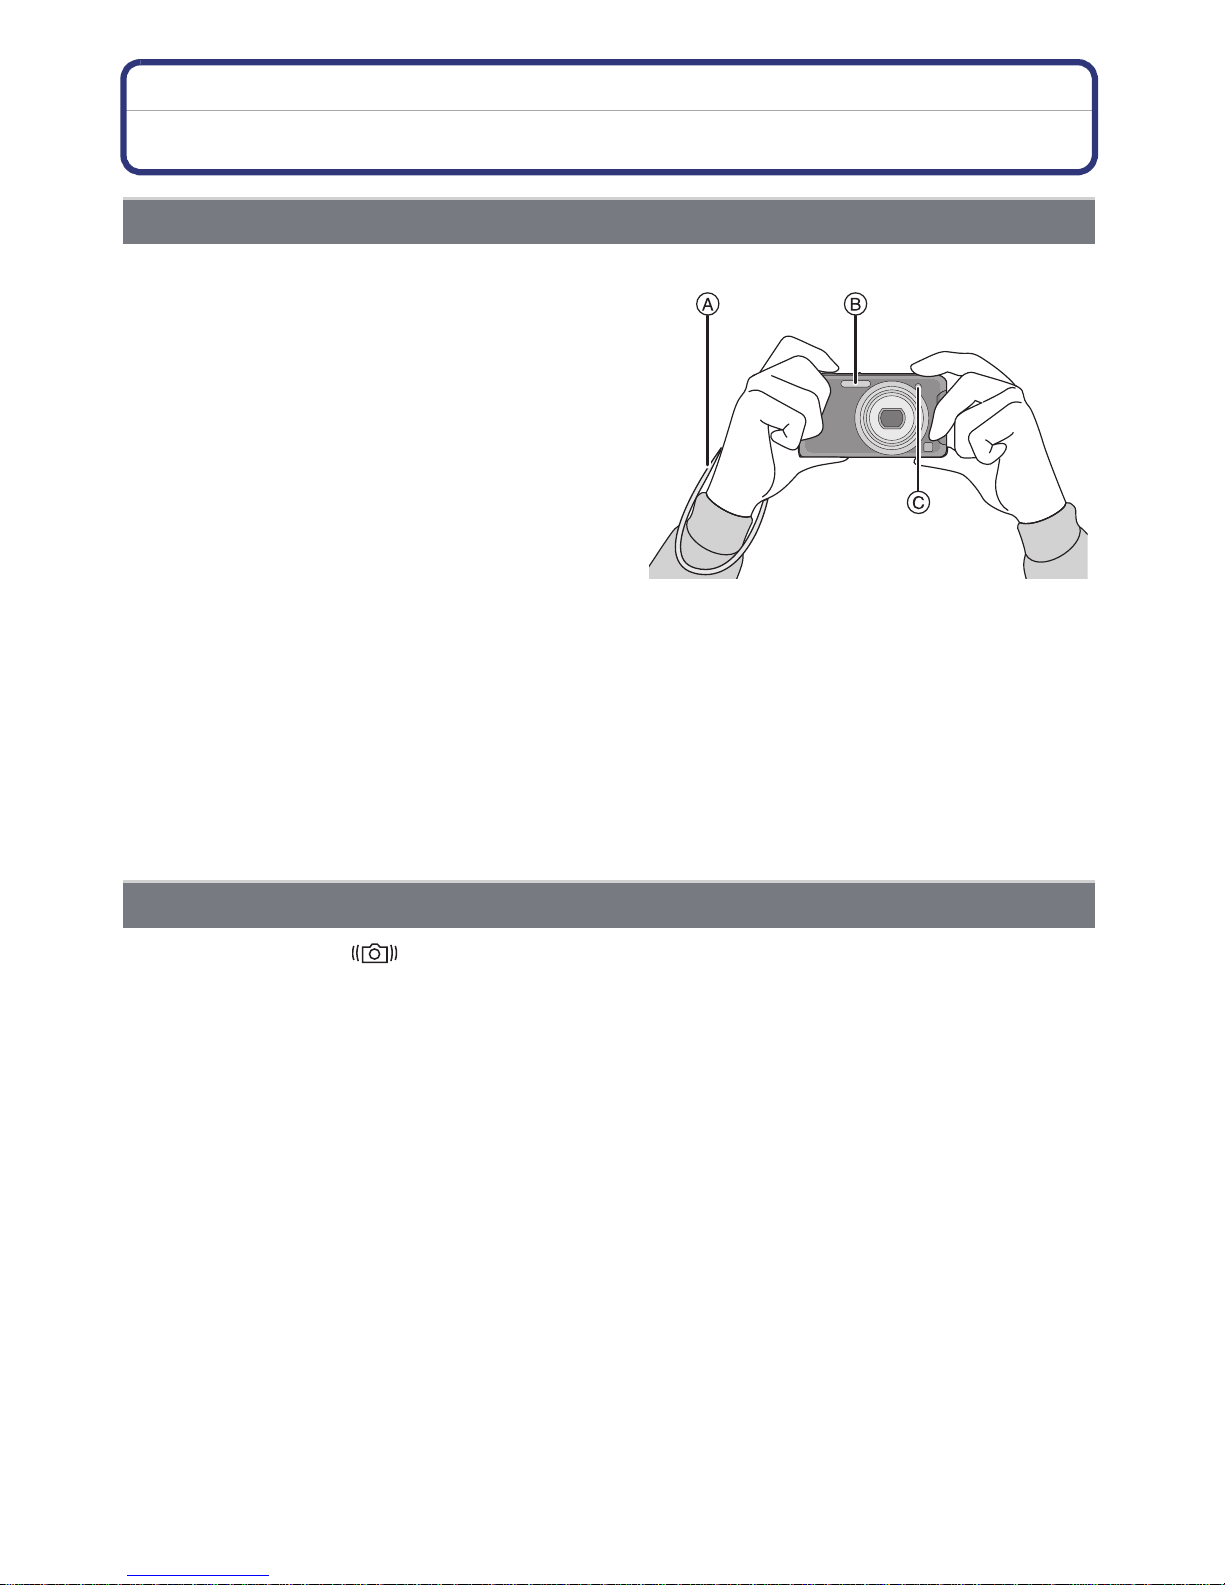
Tips for taking good pictures
Fit the strap and hold the camera carefully
Hold the camera gently with both
hands, keep your arms still at your
side and stand with your feet slightly
apart.
•To prevent dropping, be sure to attach the
supplied strap and fit it to your wrist. (P7)
•Be careful not to move the camera when you
press the shut ter button.
•B e caref ul no t to pu t you r fing ers o n the fl a sh ,
AF assist lamp, microphone, speaker or lens
etc.
A Strap
B Flash
C AF assist lamp
∫ Direction Detection Function ([Rotate Disp.])
Pictures recorded with the camera held vertically are played back vertically (rotated). (Only
when [Rotate Disp.] (P47) is set)
When the camera is held vertically and tilted up and down to recor d pi ctures, the Direction
•
Detection func tion may not work correctly.
•Motion pictures taken with the camera held vertically are not displayed vertically.
•You cannot record 3D pictures in vertic al orientation.
Preventing jitter (camera shake)
When the jitter alert [ ] appears, use [Stabilizer] (P92), a tripod or the Self-timer (P76).
Shutter speed will be slower particularly in the following cases. Keep the camera still from the
•
moment the shutte r button is pressed until the picture appears on the screen. We recommend
using a tr ipod.
–Slow sync./Red-Eye Reduction
–In [Panorama Assist], [Night Portrait], [Night Scenery], [Party], [Candle Light], [Starry Sky],
[Fireworks], [High Dynamic] in Scene Mode
–When the shutter speed is slo wed in [Min. Shtr Speed]
- 19 -
Basic
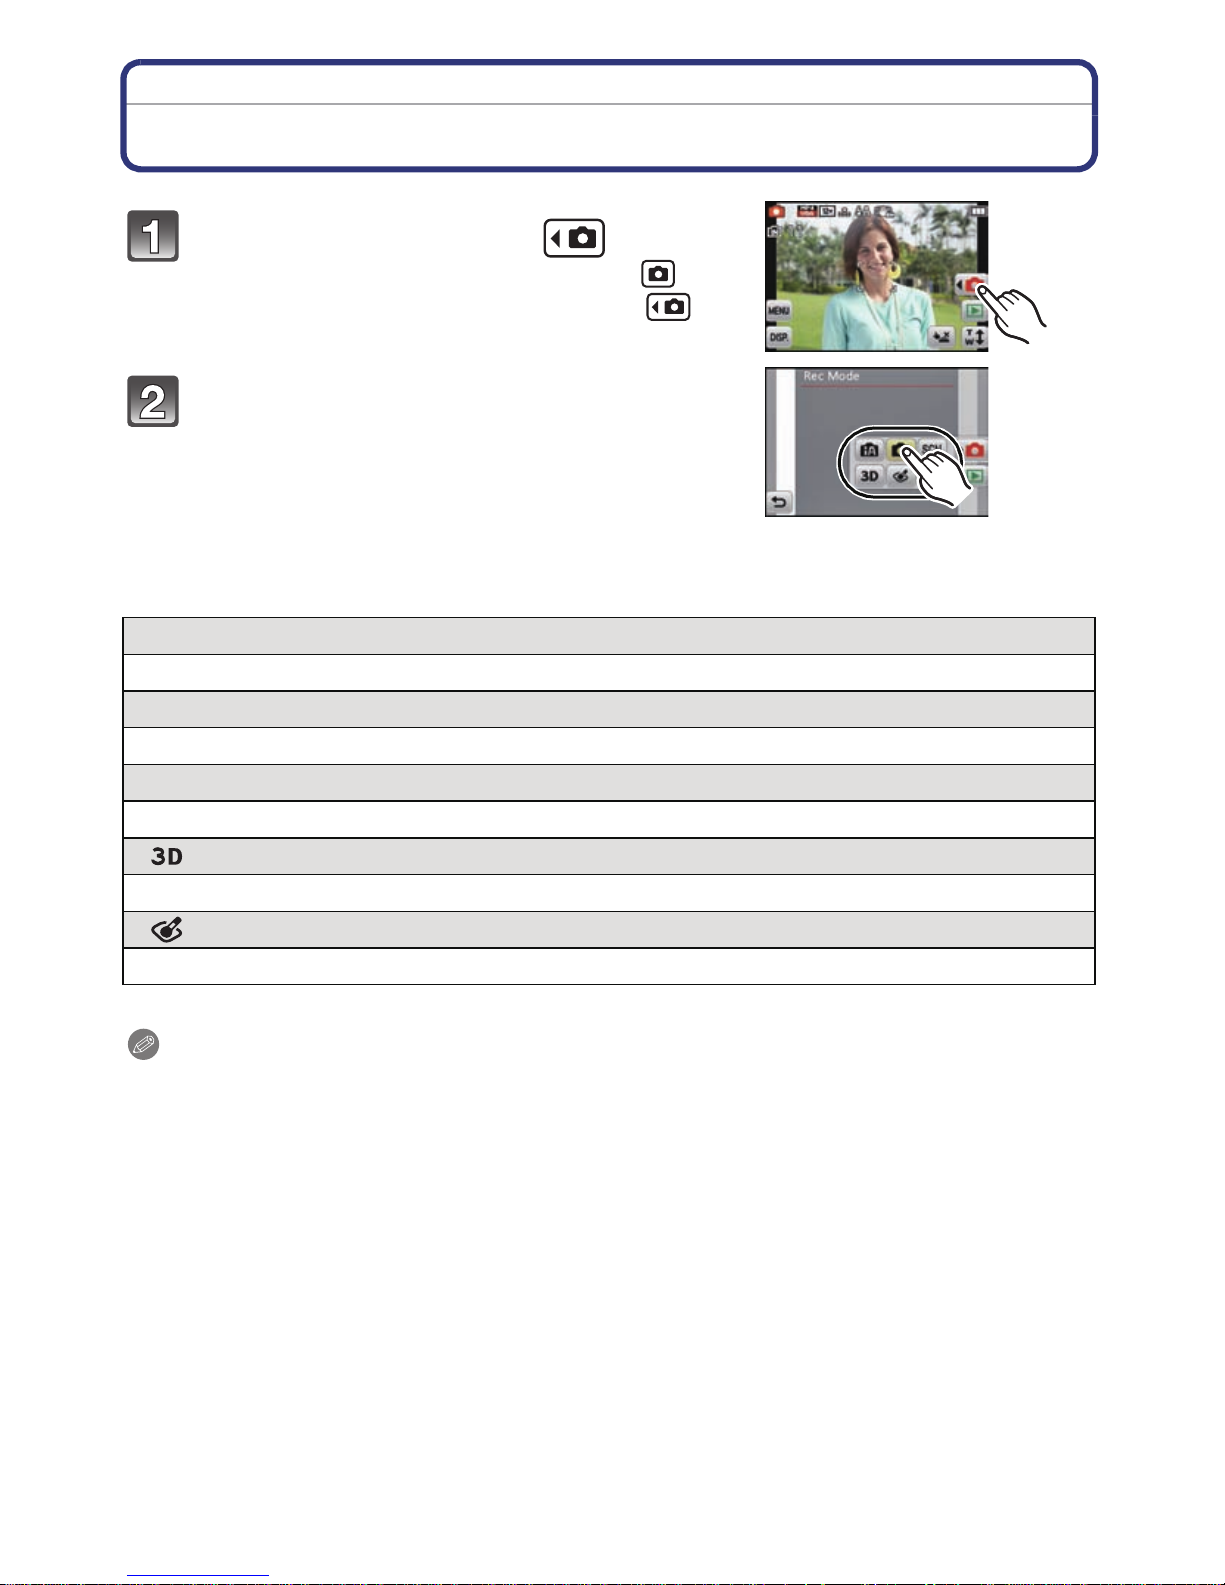
Selecting the [Rec] Mode
In Recording Mode touch [ ].
• When operating in Playback Mode, touch [ ] to
switch to Recording Mode and then touch [ ].
Touch the Recording Mode icon.
∫ List of [Rec] Modes
Basic
! Normal Picture Mode (P21)
The subjects are recorded using your own settings.
¦ Intelligent Auto Mode (P24)
The subjects are recorded using settings automatically selected by the camera.
Û Scene Mode (P56)
This allows you to take pictures that match the scene being recorded.
3D Photo Mode (P66)
Takes a 3D picture.
Cosmetic Mode (P67)
Takes a picture adjusting the skin texture.
Note
•
When the mode has been switched from [Playback] Mode to [Rec] Mode, the previously set
[Rec] Mode will be set.
- 20 -
Basic
A B
C
D
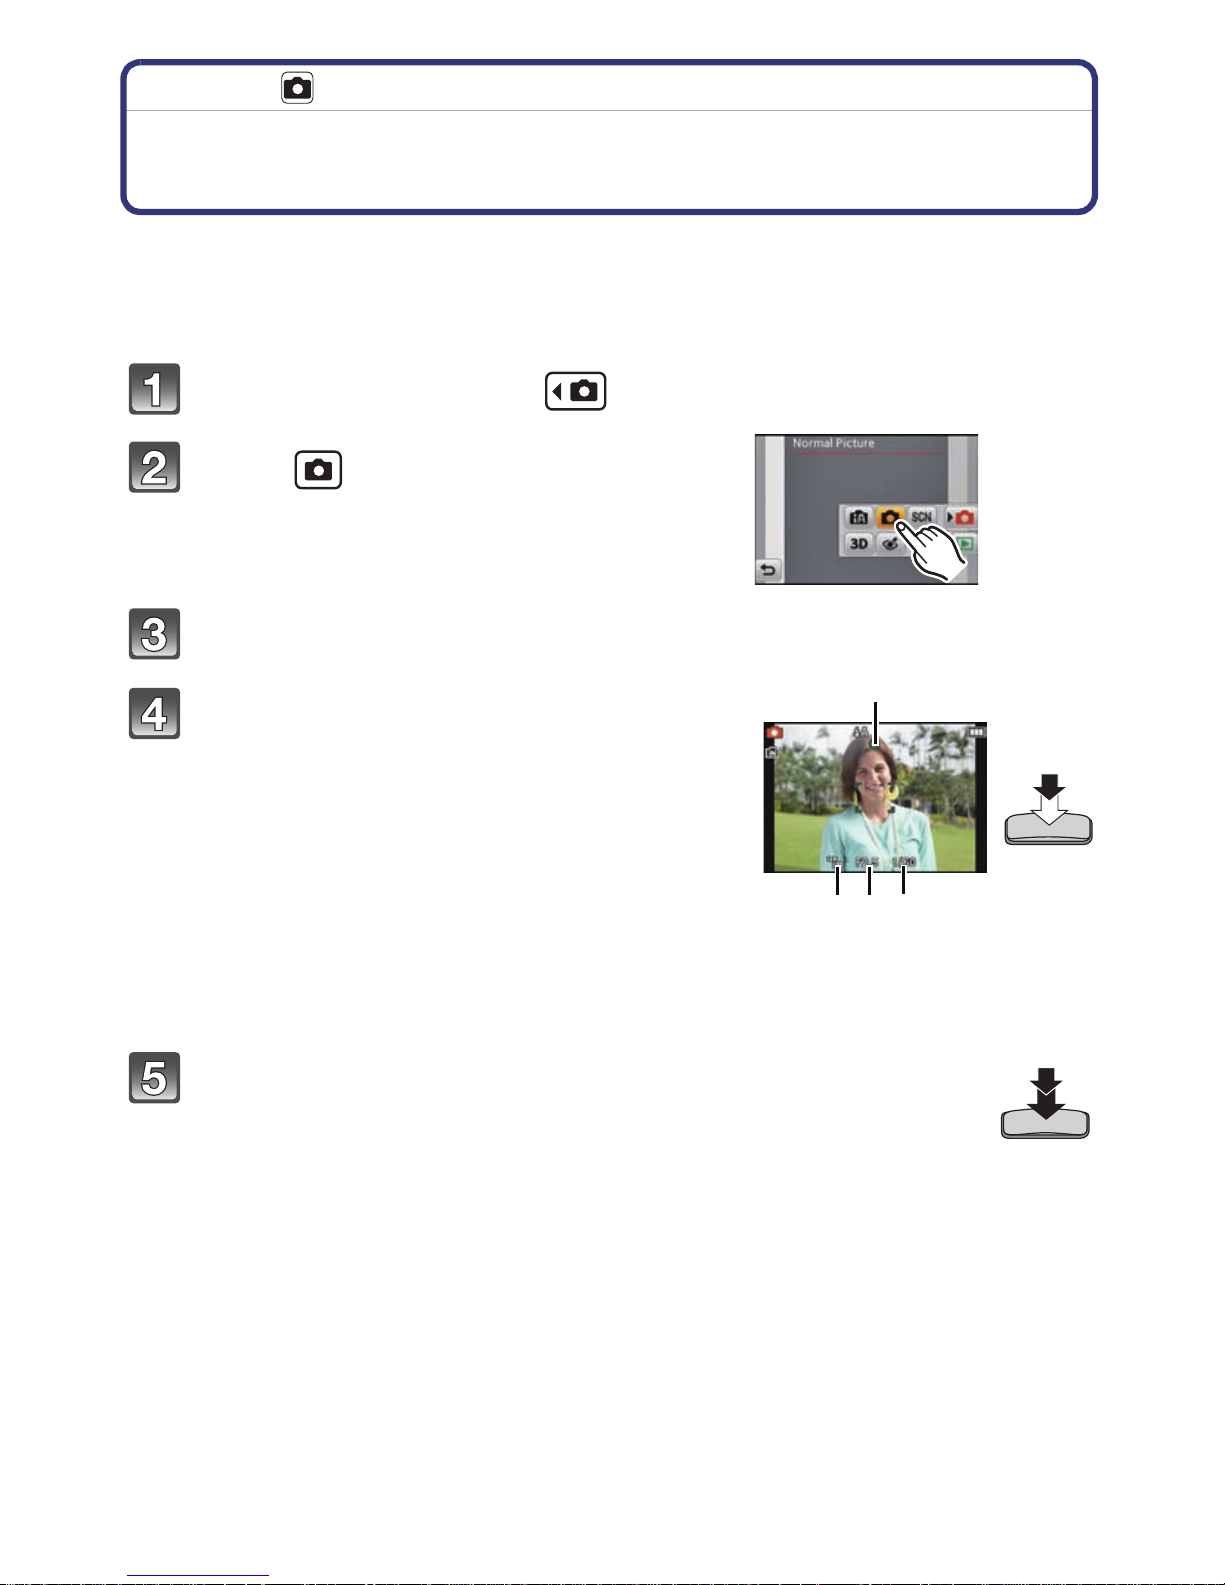
[Rec] Mode:
Taking Pictures with Your Favorite Settings
(Normal Picture Mode)
The camera automatically sets the shutter speed and the aperture value according to the
brightness of the subject.
You can take pictures with greater freedom by changing various settings in the [Rec]
menu.
In Recording Mode touch [ ].
Touch [ ].
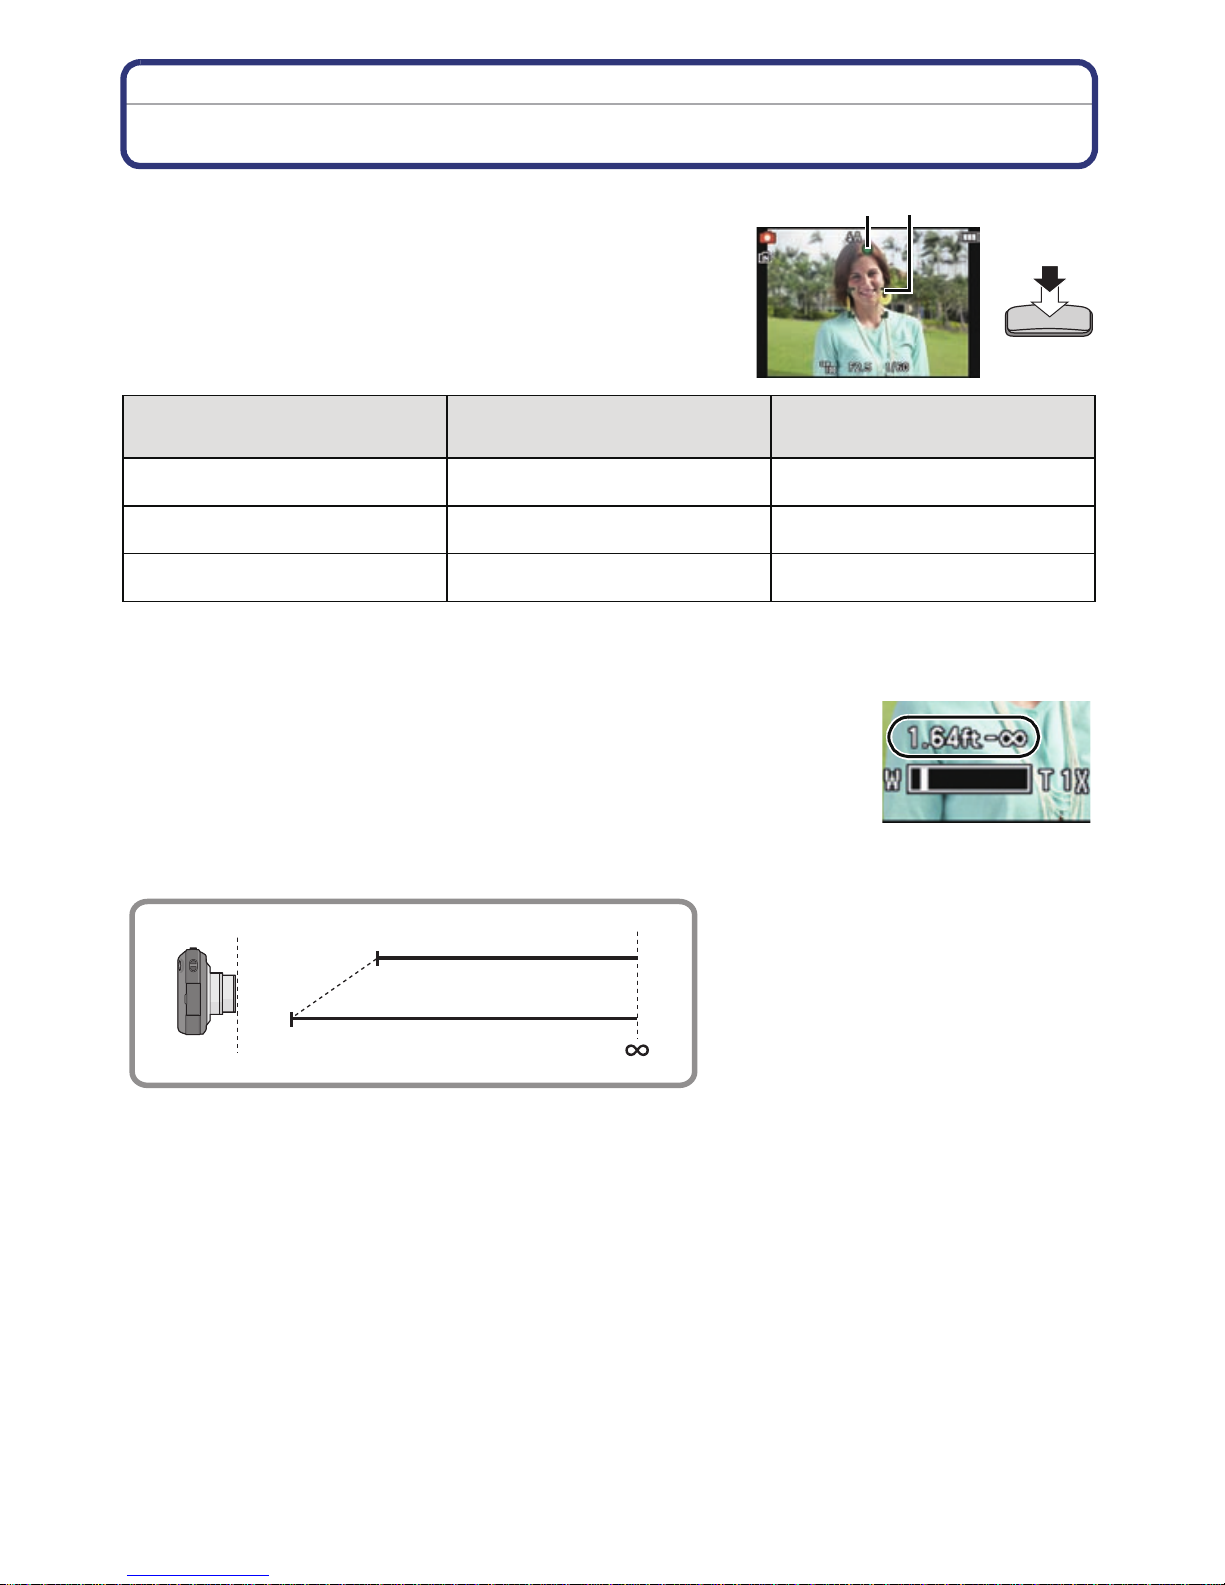
Aim the AF area at the point you want to focus on.
Press the shutter button halfway to focus.
A ISO sensitivity
B Aperture value
C Shutter speed
• The focus indication D (green) lights when the
subject is focused.
• The minimal distanc e (how close you can be to the
subject) will change depending on the zoom factor.
Please check with the rec ordable range display on
the screen. (P22)
• Aperture value and shutter speed is displayed in red
when correct exposure is not achieved. (Exclude
when using a flash)
Press the shutter button fully (push it in
further), and take the picture.
- 21 -
Basic
A
B
T
W
50 cm (1.64 feet)
1 m (3.28 feet)
Focusing
Aim the AF area at the subject, and then press
the shutter button halfway.
Focus
Focu s ind ication A On Blinks
AF area B White>Green White>Red
Sound Beeps 2 times Beeps 4 times
When the subject is focused When the subject is not
focused
•AF area is displayed larger during the dig i tal zoom or when it is dark.
∫ About focus range
The focus range is displayed when operating the zoom.
•
The focus range is displ ayed in red when it is not focu sed af ter press ing
the shutter button halfway.
The focus range may change gradually depending on the zoom
position.
e.g.: Focus range during the Normal Picture Mode
- 22 -

Basic
∫ When the subject is not in focus (such as when it is not in the center of the
composition of the picture you want to take)
1 Aim the AF area at the subject,
and then press the shutter
button halfway to fix the focus
and exposure.
2 Press and hold the shutter
button halfwa y while moving
the camera as you compose the picture.
You can repeatedly retry the acti ons in step 1 before pressing the shutter button fully.
•
∫ Subjects and recording conditions which are difficult to focus
•
Fast-moving subjects, extremely bright subjects or subjects without contrast
•When recording subjects through windows or near shiny objects
•When it is dark or when jitter occurs
•When the camera is too close to the subject or when taking a pict ure of both distant and near
subjects
- 23 -
Basic
2
1
[Rec] Mode:
Taking Pictures Using the Automatic Function
(Intelligent Auto Mode)
The camera will set the most appropriate settings to match the subject and the recording
conditions so we recommend this mode for beginners or those who want to leave the
settings to the camera and take pictures easily.
•
The following functions are activated automatically.
–Scene Detection/Backlight Compensation/Intelligent ISO sensitivity control/Auto White
Balance/Face Detection/[Quick AF]/[i.Exposure]/[i.Resolution]/[i.Zoom]/[AF Assist Lamp]/
[Red-Eye Removal]/[Stabilize r]/[Continuous AF]
•Image quality is fixed to [A].
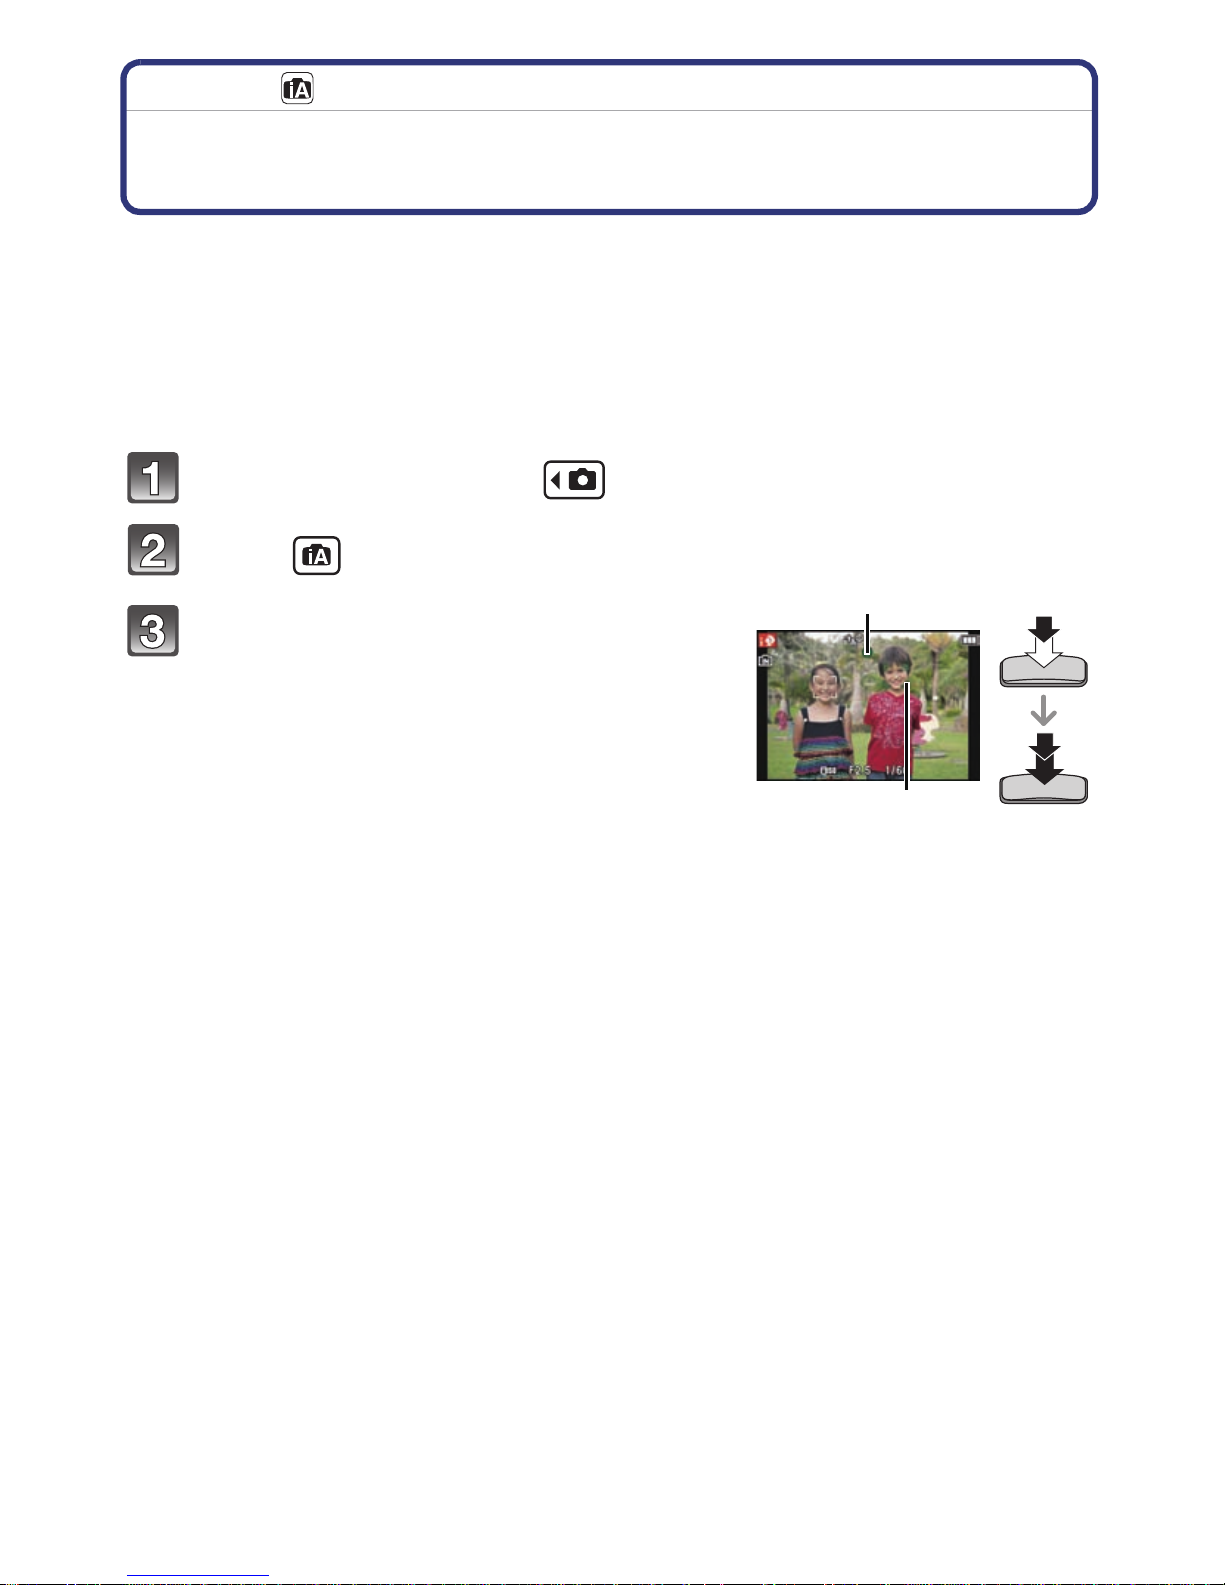
In Recording Mode touch [ ].
Touch [ ].
Press the shutter button halfway to focus
and then press it fully t o take the picture.
1 Focus indication
•
The AF area 2 is displayed around the subject’s
face by the Face Detection f unction. In othe r cases, it
is displayed at the po int on the subject which is in
focus.
• When the subject is touched, AF Tracking function
works. For details, refer to P51.
- 24 -

Basic
Changing the settings
Following menus can be set.
Menu Item
[Rec] [Flash]¢/[Selftimer]/[Picture Size]¢/[Burst]/[Color Mode]¢/
[Motion Deblur]/[Face Recog.]
[Motion Picture] [Rec Mode]/[Rec Quality]
[Setup] [Clock Set]/[World Time]/[Beep]
•
For the setting method of the menu, refer to P36.
¢ Settings may be differe nt from other [Rec] Modes.
¢
/[Language]/[Stabilizer Demo.]
•Menus specific to Intelligent Auto Mode
–Color setting of [Happy] is available in [Color Mode]. It is possible to automatically take a
picture with a higher level of brilliance for the color brightness and vividness.
–When [Motion Deblur] is set to [On], [ ] is displayed on the r ecording screen. The c amera
automatically sets an optimal shu tter speed according to the motion of the subject to reduce
blur on the subject. (In such a case, the number of pix els may be reduced.)
∫ About the flash
•
When [ ] is selected, [ ], [ ], [ ] or [ ] is set depe nding on th e ty pe of subj ect an d
brightness.
•When [ ] or [ ] is set, Digital Red-Eye Correction is enabled.
•Shutter speed will be slower during [ ] or [ ].
- 25 -
Basic
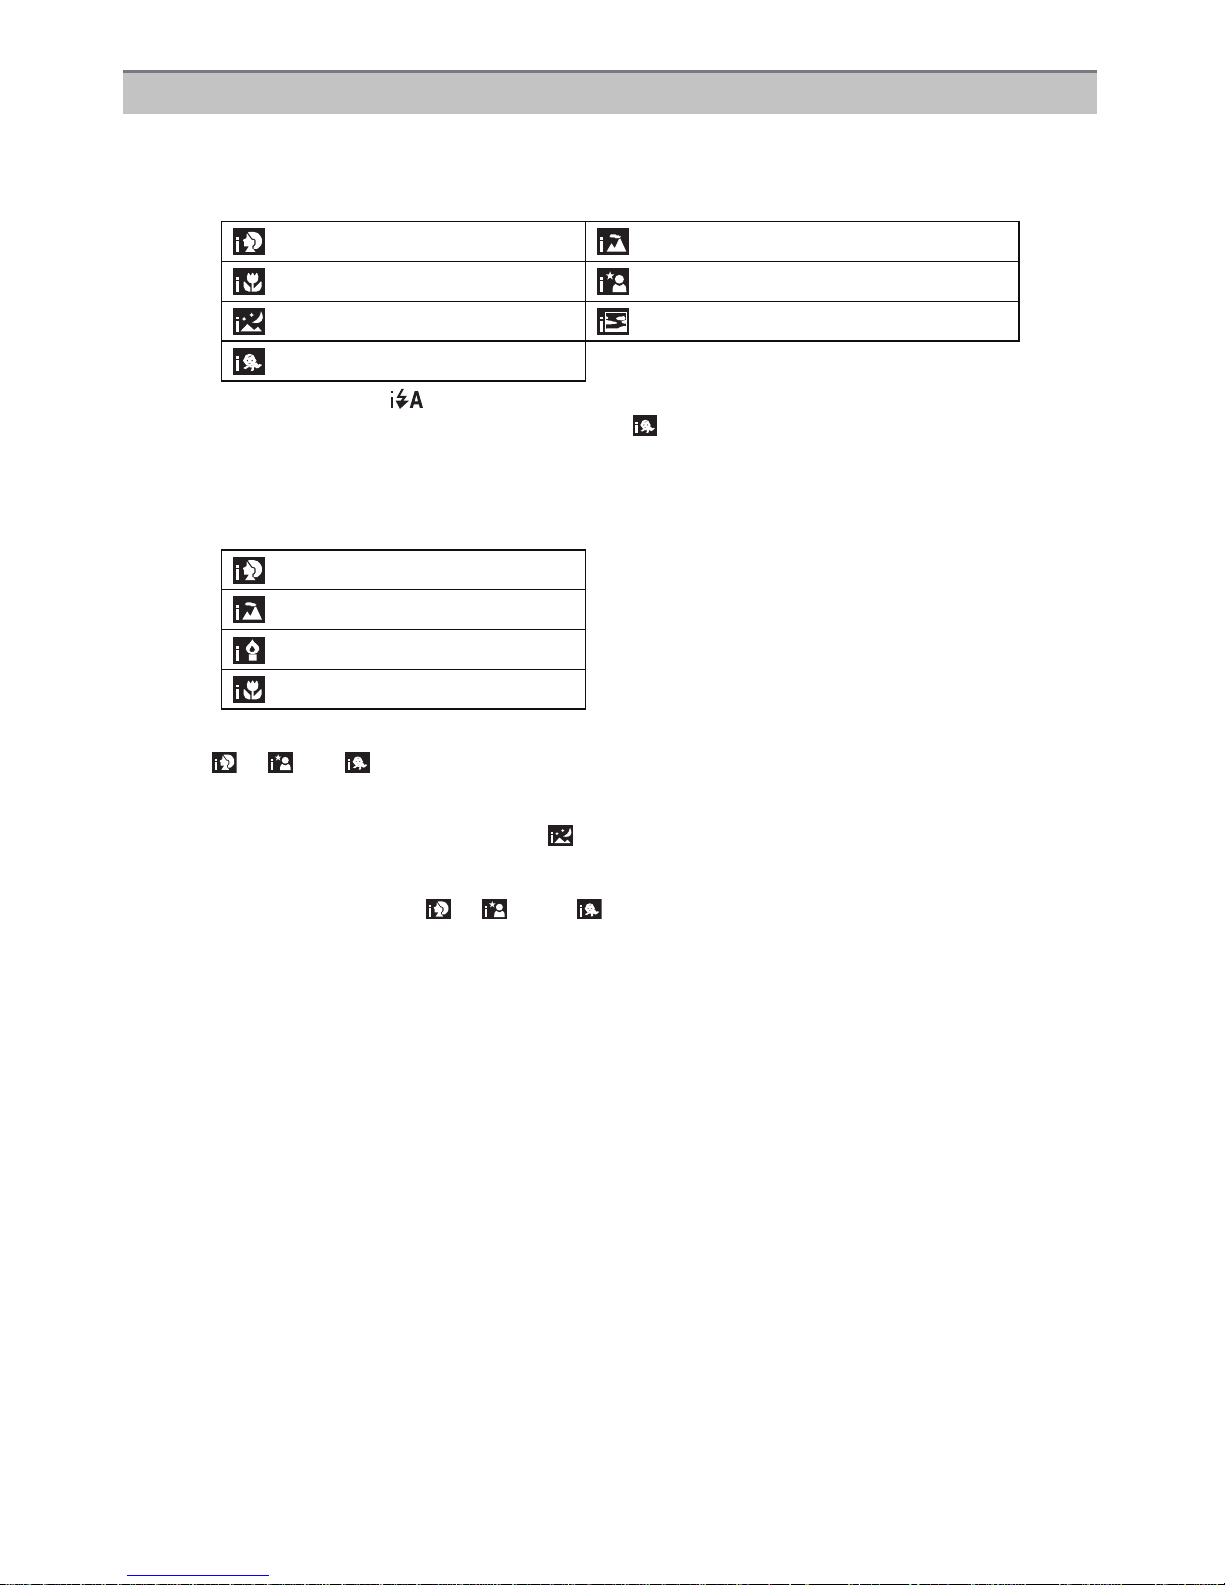
Scene Detection
When the camera identifies the optimum scene, the icon of the scene concerned is
displayed in blue for 2 seconds, after which its color changes to the usual red.
When taking pictures
¦
>
[i-Portrait] [i-Scenery]
[i-Macro] [i-Night Portrait]
1
¢
[i-Night Scenery] [i-Sunset]
2
[i-Baby]
¢
¢1 Only when [ ] is selected.
¢2 When [Face Re cog.] is set to [On], [ ] will be displayed for birthdays of
registered faces already set onl y when the face of a person 3 ye ars old or
younger is detected.
When recording motion pictures
>
¦
[i-Portrait]
[i-Scenery]
[i-Low Light]
[i-Macro]
•
[¦] is set if none of the sce nes are applicable, and the standard settings are set.
•When [ ], [ ] or [ ] is selected, the camera automatically detec ts a person’s face, and it
will adjust the focus and exposure. (F ace Detection)
•If a tripod is used, for inst ance, and th e camera has jud ged t hat c amer a shake is minimal when
the Scene Mode has been identified as [ ], the shutter speed will be set to a maximum of
8 seconds.Take care not to move the camera while taking pictures.
•When [Face Recog.] is set to [On], and the f ace s imilar t o the regi st er ed fac e is dete cted , [ R] is
displayed in the top right of [ ], [ ] and [ ].
•Due to factors such as size, contrast, motion and proximity a different mode may be identified
for the same subject.
–Subject conditions: When the face is bright or dark, the s i ze of the subject, the color of the
subject, the distance to the subject, the contrast of the subj ect, when the subject is moving
–Recording conditions: Sunset, su nrise, under low brightness cond itions, when the camera is
shaken, when zoom is used
•For the best results, it is recommended that you take pi ct ures in the appropriate Recording
Mode.
•The Backlight Compensation
–Backlight refers to when light comes from the back of a subject. In this case, the subject will
become dark, so this function compensates the backlight by brightening the whole of the
picture automatically.
- 26 -
Basic
B
A
C
Applicable modes:
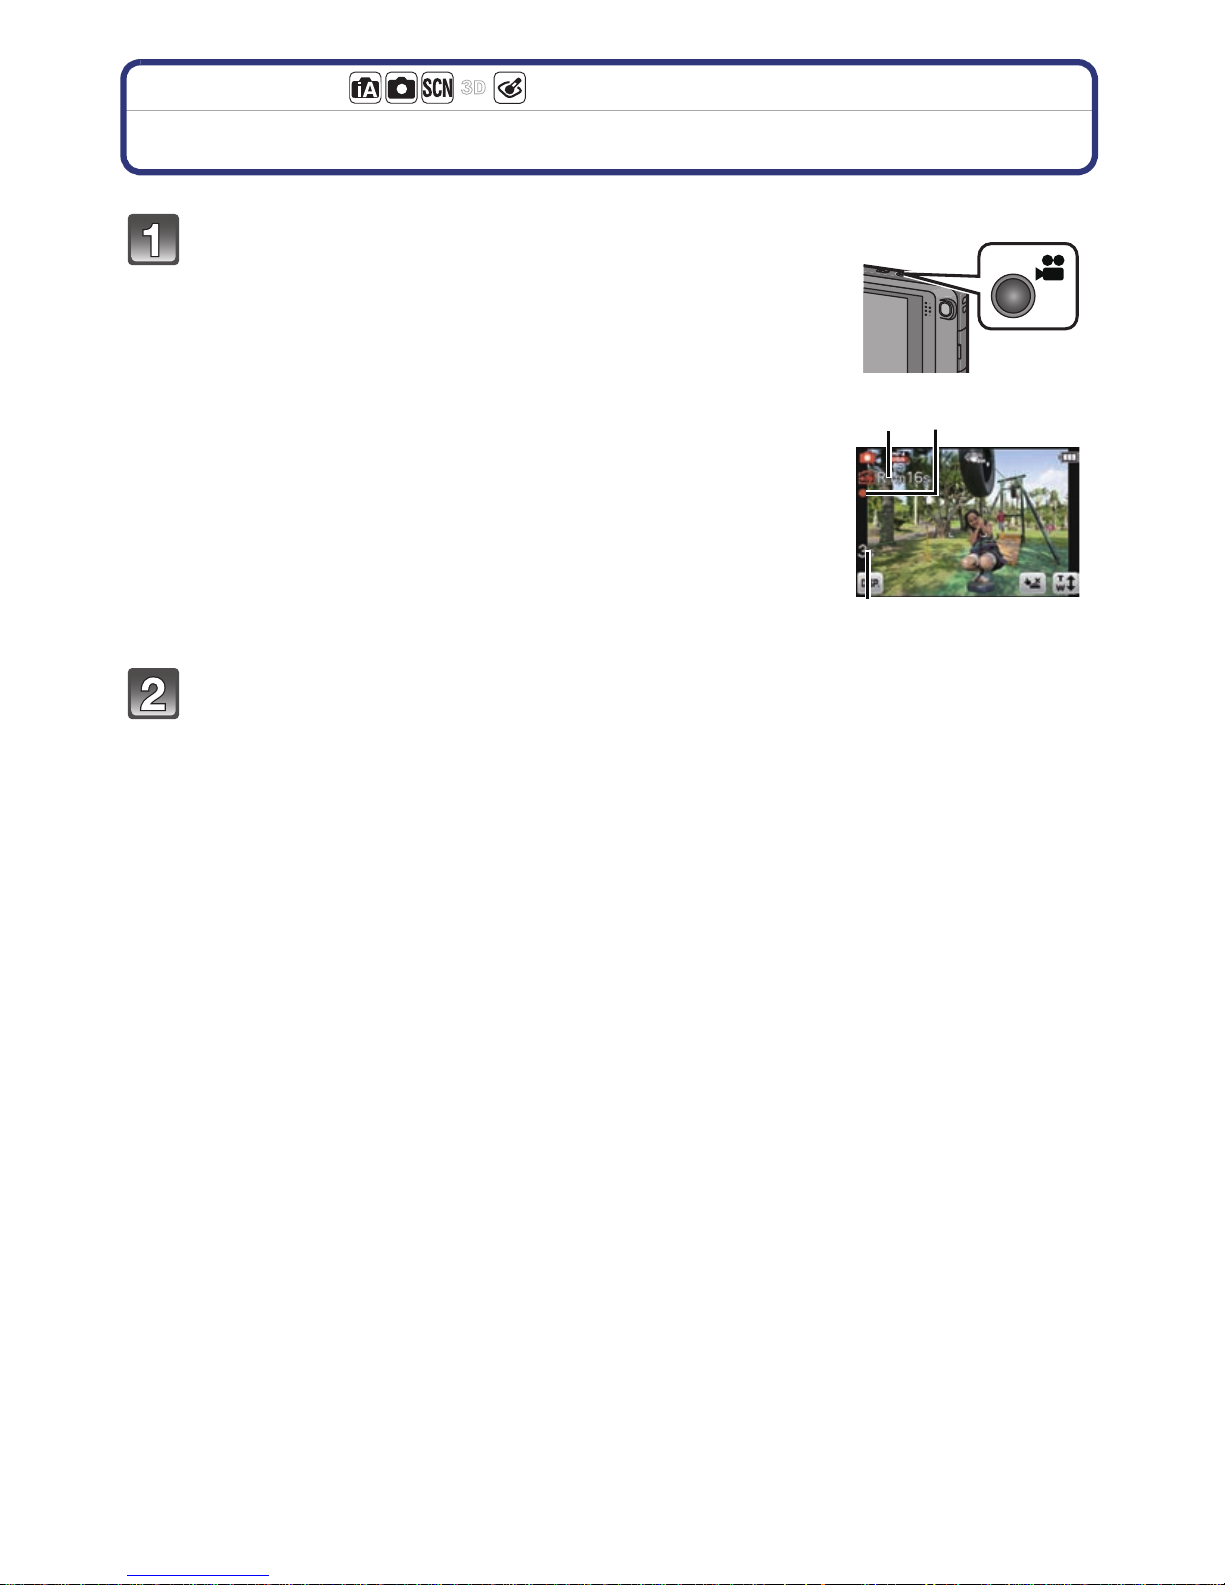
Recording Motion Pictures
Start recording by pressing the motion picture
button.
A Available recording time
B Elapsed recording time
• You can record motion pictures fitting each Recording Mode.
• Release the motion picture button right after you press it.
• The recording state indicator (red) C will flash while recording
motion pictures.
• For the setting of the [Rec Mode] and [Rec Quality], refer to
P93.
Stop the recording by pressing the motion picture button again.
- 27 -

Basic
Note
Built-in memory c an only store data as the [VGA] of [MP4].
•
•The available recording time displayed on the screen may not decrease regularly.
•Depending on the type of the card, the card access indication may appear for a wh ile after
record i n g m ot i on pi c t ur e s . T h i s is no t a m al function .
•The screen may be blacked out moment arily, or the unit may record noise due to static
electricity or electromagnetic waves etc. depending on the environment of the motion picture
recording.
•When operating the zoom in recording motion pictures, it may take time to come into focus.
•If you operate the zoom etc. while rec ording motion p ictures , the s ound of th e operat ion may be
recorded.
•Zoom speed may be slower than normal in recording motion pictures.
•If the Extended Optical Zoom was used before pressing t he motion picture but ton, recordable
area will be changed dra sti cally since these settings are canceled.
•Even if the aspect ratio setting is the same in still and motion pictures, the angle of view may
change at the start of the motion pict ure recording.
When [ Rec Area] (P43) is set to [On], angle of view during motion picture recording is
displayed.
•It is recommended to use a fully charged ba ttery or AC adaptor (optional) when recording
motion pictures .
•If while recording motion pictures using the AC adaptor (optional) and the power supply is cut
off due to a power out age or i f the AC a daptor (optio nal) is dis connec ted etc ., the motion pic ture
being recorded will no t be recorded.
•It will be recorded in following categories for certain Scene Modes. A motion picture recording
matching each scen e will be performed for the ones not listed below.
Selected Scene Mode Scene Mode while recording motion picture
[Baby1]/[Baby2] Portrait Mode
[Night Portrait], [Night Scenery],
[Handheld Night Shot],
[Starry Sky]
[Panorama Assist], [Sports], [Pet],
[Hi-Speed Burst], [Flash Burst],
[Fireworks], [Photo Frame]
Low Light Mode
Normal motion picture
∫ About the recording format for recording motion pictures
This unit can record motion pictures in either AVCHD or MP4 formats.
AVCHD:
This is a format for precise, high definition video. This format is best used when the video
will be displayed on a high definition TV, or saved to a disk and watched on a computer.
MP4:
This is a simpler video format best used when extensive editing is needed, or when
uploading videos to the internet.
∫ About the compatibility of the recorded motion pictures
Motion pictures recorded in [AVCHD] or [MP4] may be played back with poor picture or
sound quality or playback may not be possible even when played back with equipment
compatible with these formats. Also, the recording information may not be displayed
properly. In this case, use this unit.
•
For details on AVCHD and MP4 compatible devices, refer to the support sites below.
http://panasonic.jp/support/global/cs/dsc/
(This Site is English only.)
- 28 -

Basic
Recording still pictures while recording motion pictures
Sti ll pictures can be recorded even while recording a motion picture. (simultaneous
recording)
During motion picture recording, press the shutter button fully to record a still
picture.
•
The picture is saved with the following conditions.
[AVCHD] Pictur e si z e [MP4] Picture size
[FSH]/[SH] 3.5 M (16:9) [FHD]/[HD] 3.5 M (16:9)
Note
During motion picture recording, if you press the shutter button halfway, or record still pictures
•
with the touch shutter, the camera will refocus and the refocus movement will be recorded to
the motion pictur e being recor ded. To prioritize th e motion pi cture image , recording st ill pictur es
by fully pressing the shutter button, or creating still pictures after motion picture recording is
recommended. (P33)
•The touch shutter function will also work if you unintentionally touch the touch panel, so be
careful.
•Picture size and number of recordable pictures are displayed by pressing the shutter button
halfway.
•Recording of motion picture will continue after taking the still picture.
•The quality of pictures taken with s imultane ous recor ding may dif fer co mpared to n ormal [3.5M]
pictures.
•You can record up to 5 pictures per motion picture recording.
•Zooming may stop when a picture is recorded while zooming.
•Simultaneous recording is not po ssible when [VGA] in [MP4] is set .
•Operation sound of the shutter button may be recorded when a pic ture is taken during motion
picture recording.
•The flash setting is fixed to [Œ].
•When the subject has a bright part, reddish stripes may appear on the LCD monitor.
Alternatively, part or all of the LCD monitor may turn a reddish color .
- 29 -
Basic
A
B
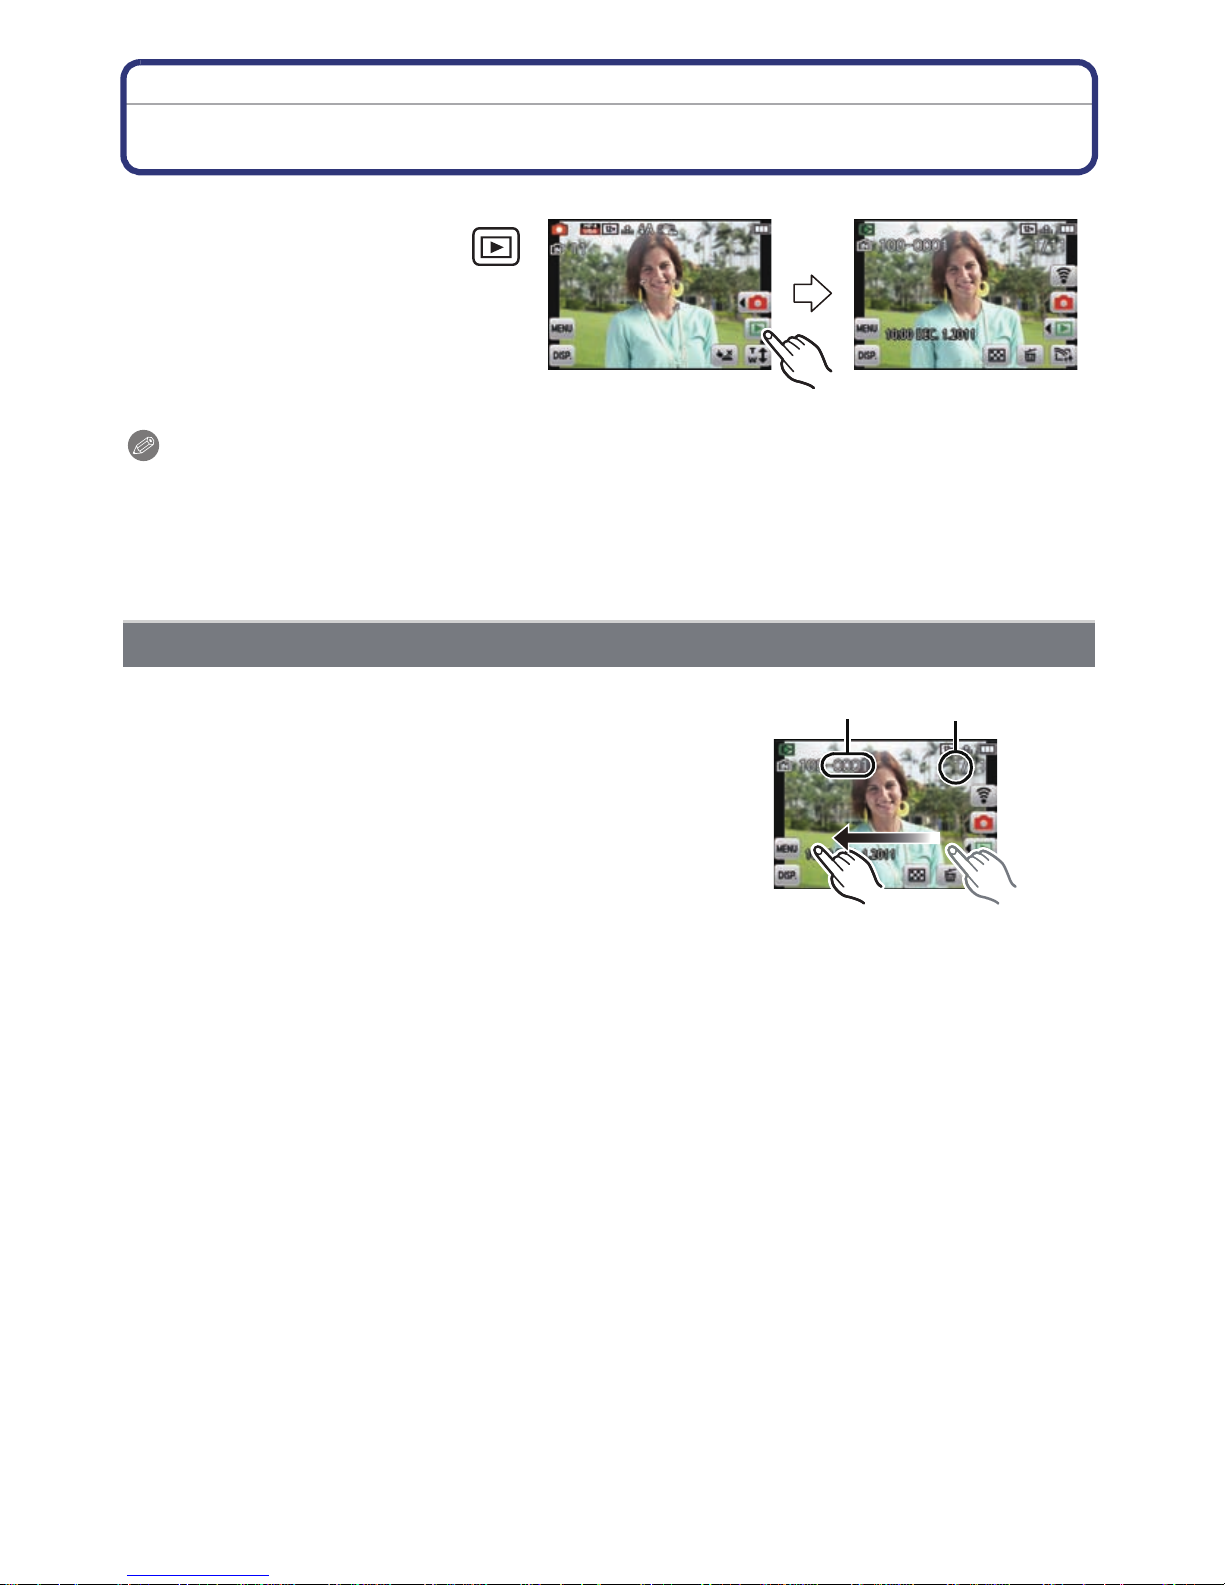
Playing Back Pictures ([Normal Play])
In Recording Mode to uch [ ].
•The display switches to normal
playback.
Note
This camera complies with the DCF standard “Design rule for Camera File system” established
•
by JEITA “Japan Electronics and Information Technology Industries Association” and with Exif
“Exchangeable Image File Format”. Files which do not comply with the DCF st andard cannot
be played back.
•Pictures recorded with other camera may not be able to playback on this unit.
•The lens barrel retracts about 15 seconds aft er switching from [Rec] Mode to [Playback] Mode.
Forward or rewind the image
Drag (P8) the screen horizontally.
–Forward: drag from righ t to left
–Rewind: drag from left to right
A File number
B Picture number
•Speed of picture forwarding/rewind ing changes de pending on
the playback status.
•You can forward or rewind pictures continuously by keeping
your finger on the left or right sides of the screen after
forwa r di n g /r ewinding a pi c t ur e .
(Pictures are displayed reduced in size.)
- 30 -
 Loading...