

Panasonic KX-TR320B User Manual

Panasonic
2-Way FRS Radio
Model No KX-TR320B/KX-TR320F
KX-TR320S/KX-TR325S
Operating Instructions
PLEASE READ BEFORE USE AND SAVE.
Contents by Section h
1 Getting Started
2 Before You Talk
3 To Communicate
4 Channel Scan
5 Special Features
6 Using the Options
KX-TR32SS
7 Things You Should Know
tor
Wor«d Wkto W«t> addra««: hupjyiaww,part—onie.com
to 0« USA or Puerto Rno
Attach your purchae« racaipt here.
For your tuture reference
Serial No.
__________________
(found on to* bottom (it ih* unit)
Name and eddreee o< dealer
For product eervtee
•Panaeomc Oervtoenieri are heaed to the ■ervKonier (^rectory
eCal l-aoo^ai i-PANA(7262) tor toe toeebon of an eutoonzad
•Parteeone'e e mei eddnt tor cuitomer nqiartea:
ooneumerproducttepeneeonic-com
tor cuatomera to toe USA or Puerto Rtoo ONLY
When you aNp the product
•Cerefuiy peck your unrt. preferabiy to tot ortotoal carton.
•Adach a Mtor. deuAnj toe symptom, to toe ouatoe of the carton.
Symptom
•Send toe uni to an eutoorued a&tvtcarmr. pnomi artd adequaiefy
inaured.
•Do r>o( tend your ur>it to the Panaaorwc Corteumer Electronics Company
Usted below or lo executrve or regional sales officas.
These locations do not repair consumer products.
Parwsonic Consumer Electronics Company.
DMelon of Matsushita Electric Corporation of America
Orto Panaaomc Way. Seceucus. New Jersey 0700«
Panasonic Saiea Company.
OMaion of MetauahKa Eioctrie of Puerto Rleo. ine.
Ava. 06 da Infermrta. Km. 9.5. San Gabnal toduetoai Park
Caroina. Puerto RICO 00965
Date of purchase
Pnnied to USA
POOX12602YA-BM FM0200NN10304^

Getting Started
1-A Location of Controls
MIC (Microphone)/SP (Speaker) Jack
(6-A, 6-B)
Display (1-B)
fLOCKi Button (5-A)
(TALK! Button
(1-G, 3-B)
[MENU] Button (1-G)
El, E) Buttons
(1-G, 2'A, 3-B)
Mam Speaker (3-B)
Flip (3-C)
Microphone (3-B)
•The Illustrations used in this manual are of the KX-TR325
Accessory (For extra orders, call 1-800-332-5368 )
□ Belt Clip one
Order No PQKE10094Z1
Antenna (1-E)
Ear Speaker (3-C)
, DC IN 4 5 V Jack
/'' (6-C)
(POWER) Button
(1-F)
[ CALL ] Button
(3-D)
[SC~>^] Button
(4-A)
(MONITOR ] Button
(3-A)
TALK/BUSY
Indicator (3-A, 3-B)
1-B Display
The flip IS open (3-C)
The scrambling function is ON
(KX-TR325 only) (5-C)
The unit IS in the VOX
mode (6-A)
The unit IS in the vibratory call
mode (KX-TR325 only) (3-E)
The key lock function is ON
5-A)
The display shows the
battery strength (1-C)
1-C Battery Installation
The unit requires 3 AA (LR6) size alkaline batteries (not included)
The battery life is about 30 hours (Based on a usage duty of 5%
receive, 5% talk, 90% standby )
O Poll down the hook and
remove the cover
e Close the cover
• Make sure that the unit is powered OFF before replacing the
batteries
Battery precautions
The batteries should be used correctly, otherwise the unit may be
damaged by battery leakage
• Do not mix different types of batteries
•Do not charge, short-circuit, disassemble or heat batteries, and do
not dispose of battenes in fire
• Remove all the batteries when replacing
Battery strength-
You can check the battery strength on the display (see below) while
the unit IS in use If the unit
beeps intermittently and “ CS
flashes on the display, replace 4^ 4—
all the batteries with new ones
• If the unit IS left on when the battery is LOW, everything, except
the flashing "CZ ” will disappear from the display Only [POWER]
can be operated to turn the unit off
• Battery life may vary depending on usage conditions and ambient
temperature
O Install (or replace) the
batteries using the correct
polarity (-+-, —)
Full
Medium
___
(flashing)
Low
d»
SCRAMBLE
VOX VIB
0 0nriM
r
The volume is set to level 2
(3-B, 3-C, 6-A, 6-B) ^
The unit IS using the operating
channel number 14 (2-A)
The unit IS using the group
code number 38 DO
VOL
(2-B)
The unit IS sending call tones
(3-D)
The unit IS using the channel
scan function (4-A)
1-D Belt Clip
You can hang the unit on your belt or pocket using the belt clip
To attach the belt clip To remove the belt
clip
ettìng Started
Section 1
El
Before You Talk
Section 2
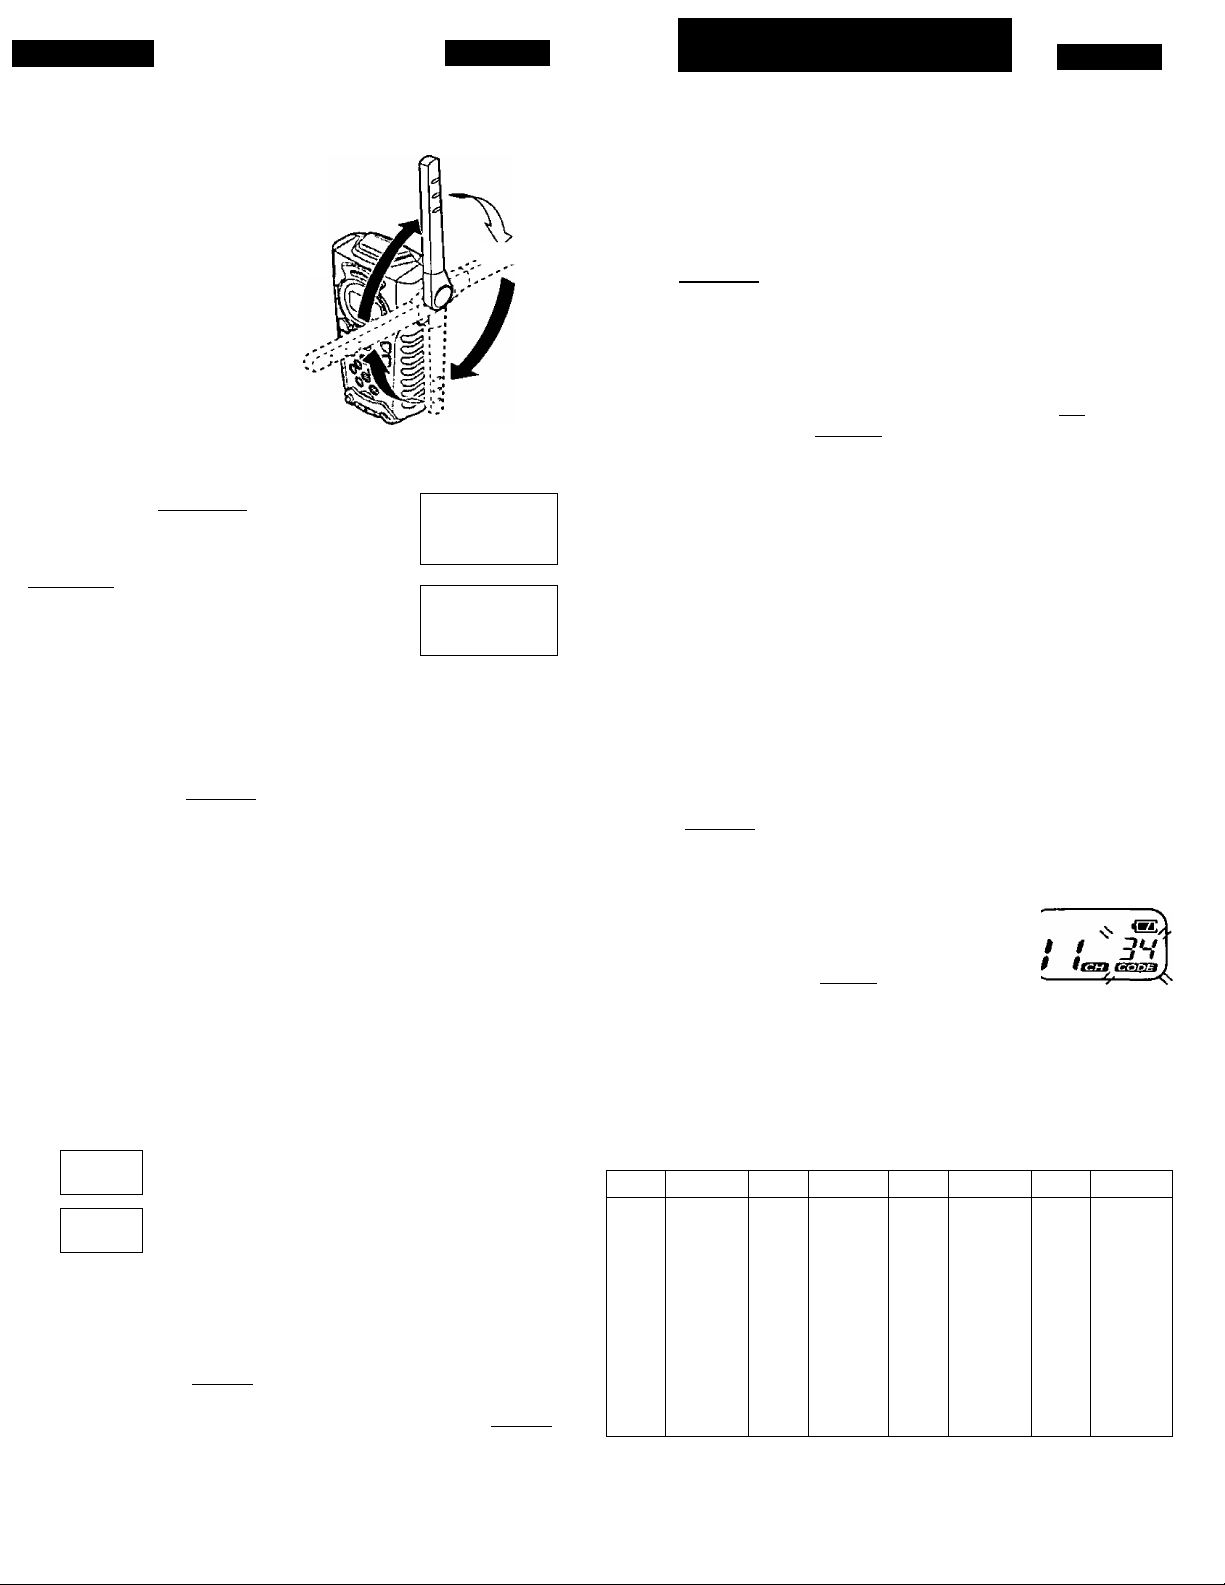
1-E Adjusting the Antenna
"he antenna rotates 360 degrees.
'ou can adjust the antenna to three
tifferent click positions.
'or best performance, the antenna
;hould be used in the vertical
losition.
1-F Turning the Power ON/OFF
0 Press and hold (POWER).
•The display will appear.
^ To turn the power off, press and hold
/ r>
$t3!B SSS3j
[POWER] until the display disappears.
_________
1-G Programming Summary
i<ou can program the following functions. See the corresponding
section number for details.
Each time you press [MENU], the display will change as
follows.
/W 38
9
VSZf
/S'
/W ^38
The display shows the current channel and
group code.
To select the operating channel, see 2-A.
To select the group code, see 2-B.
nss.
9
fiwa a
To select the VOX sensitivity, see 6-A.
The unit has 14 operating frequency channels and 38 group codes.
To talk to others, all users in your group must be using the same
channel and group code.
2-A Selecting the Operating Channel
The factory preset is “1”.
o Press i MENU ]■
•“ " and the current channel will flash
on the display.
0 Press or repeatedly until the
desired operating channel (1-14) is
displayed.
o When finished, press [TALK ] or wait for
10 seconds.
• The selected channel will not be cleared even when you turn off
the unit.
2-B Selecting the Group Code (CTCSS)
The Continuous Tone Coded Squelch System (CTCSS) allows you
to ignore (not hear) unwanted calls from other persons who are
;
using the same channel. It provides communication with silent
standby since you will only receive calls from group members using
the same group code. The unit is equipped with 38 group codes.
The factory preset is “0” (OFF),
The CTCSS does not make your conversation private. It only
allows you to not listen to unwanted conversations.
O Press [MENU] twice.
•“ lEEa" and the current group code will
flash on the display.
0 Press or repeatedly until the
desired group code (0-38) is displayed
(see below).
© When finished, press [talk ] or wait for
10 seconds.
s' '5'45
^ ^
/ /
w 9 9m zm
^ f 0
^^
r SS
SN
To change the call tones, see 3-D.
To turn on/off the vibratory call, see 3-E.
(KX-TR325 only)
oF
✓
_____
Press or (5 fo*' desired settings.
When finished, press [TALK] or wait for 10 seconds.
* You can exit the programming mode any time by pressing [TALK]
or waiting for 10 seconds.
To turn on/off the scrambling function, see
5-C. (KX-TR325 only)
To select the auto power off mode, see 5-B.
hr
/
• The selected code will not be cleared even when you turn off the
unit.
• To communicate with others without a group code, select “0”
(OFF) in step 2.
No.
34
35
36
(unit; Hz)
Freq.
192.8
203.5
210.7
218.1
225.7
233.6
241.8
250.3
OFF
CTCSS code
No. Freq.
1
67.0
2
71.9
74.4 13
3
4
77.0
79.7 15
5
82.5 16 114.8
6
85.4 17
7
88.5 18 123.0
8
91.5 19 127.3
9
10
94.8
No. Freq.
11 97.4
12
100.0
103.5
14
107.2
110.9
118.8
20 131.8
No. Freq.
21
136.5 31
22 141.3 32
23 146.2 33
24 151.4
25
26
27 167.9 37
28 173.8 38
29 179.9 0
30 186.2
156.7
162.2
 Loading...