

Page 1
KVSSM100 /KVSS1100 NETWORK SCANNER ADAPTER
QUICK SETUP GUIDE
This guide is intended for the network administrator/solutions engineer responsible for setting up the KV-SSM100/
KV-SS1100. It contains key steps to connect the adapter to a Panasonic Scanner, and then perform basic Scan to Folder
operations. For instructions on how to set up Scan to Email, Scan to Fax, Scan to Bluetooth and Scan to Printer, please
refer to the KV-SSM100/KV-SS1100 Network Scanner Adapter Administrator’s Guide.
STEP 1: PERFORM INITIAL CONFIGURATION
1. Press [Power] button to turn adapter On.
2. Press [Configure Device Now].
3. Enter Admin Password of your choice.
4. Re-enter to Confirm password.
5. Press [Enter] to save password.
Note:
n
Password must be at least six (6) characters.
n
Password is case sensitive.
n
Password can be changed after configuration.
6. Continue with Network Settings…
Network Settings
Select type of network connection:
BEFORE YOU BEGIN
Confirm the following:
Power cable is connected to adapter.
1. Connect AC adapter to DC-in jack of adapter.
2. Connect AC adapter to power cord.
3. Plug power cord into electrical outlet.
Panasonic scanner is installed.
1. Connect USB cable from scanner to adapter.
Connection method is known:
Wired: Cable is connected from adapter’s Ethernet port
to network switch/router.
Wireless: Ensure that wireless router is working
correctly and that there is no network (Ethernet) cable
attached to the adapter. Have the following information
available:
n
SSID (e.g., NETGEAR62)
n
Security Mode (Open, WEP, WPA Personal, WPA2
Personal). Note: WPA Enterprise and WPA2 Enterprise
Wi-Fi networks are not supported.
Network is configured for folder sharing.
n
Ensure that Network File and Folder Sharing settings
and permissions are established.
n
To enter FTP server addresses or UNC paths, to
manually locate shared folders, have path information
available.
n
If access to shared folders requires authentication (or
folder is on an FTP server), you must manually locate
the folders. Know your login credentials.
1. Wired Settings (default) – Adapter will obtain IP address from
DHCP server, and auto-populate remaining fields. Deselect
checkbox to manually input IP address settings. Press [Next], and
continue with Shared Folder Configuration (below).
Note: Ethernet cable must be attached to adapter from network
switch in order for IP address to be obtained.
2. Wireless Settings: Select [Wireless]. Connect to WiFi network by
pressing [Wireless Discovery]. SSID field should be automatically
populated. If not, manually input SSID. When WiFi networks
display, select/highlight network, and then press [Select]. Enter
Security Key, and press [Next], and continue with Shared Folder
Configuration…
Shared Folder Configuration
Once Network Settings are complete, the Share Management screen
appears, where you can use Network Discovery to search for public
Windows shares within the network. Note: To manually set up UNC or
FTP folder paths, use Manual Setup instructions (see page 2).
Network Discovery
1. On Share Management screen, press [Add].
2. On Add Share screen, press [Search].
Important: If no network shares are discovered, i.e., Search
screen is blank, manual setup is required, as the computer is likely
password protected, in which case you must enter the folder path
and login credentials manually. (See next page.)
3. On Network Discovery screen, select workgroup/domain and PC
where shared folders are located.
4. Press [Select Share].
5. Enter Friendly Name (required).
Note: You cannot add two shares with the same Friendly Name.
Page 2

KVSSM100 /KVSS1100 NETWORK SCANNER ADAPTER
QUICK SETUP GUIDE (CONTINUED)
6. Enter Subpath (optional).
Note: Friendly Name and Subpath will display on screen in list of
shared folders.
7. Under Security, select Use Authentication checkbox and Specify
credentials directly.
8. Enter Username and Password.
9. When finished, press [Add Share].
10. Press [Next].
11. Press [Skip] until main screen displays [Scan to Folder] button.
Note: Again, for instructions on setting up Scan to Email, Scan to
Fax, Scan to Bluetooth and Scan to Printer, please refer to the
KV-SSM100/KV-SS1100 Network Scanner Adaptor Administrator’s Guide.
MANUAL SETUP
Manual Setup of shared folders is required if:
n
You wish to add FTP network shares. FTP does not support
discovery, so you must enter the path for FTP network
shares manually.
n
Access to the computer is password-protected. You will
need to manually specify the username and password.
1. Press [Add] to add a shared folder.
Note: If Network Discovery was unsuccessful,
press [ ] to return to Add Share screen.
2. Enter FTP address or UNC Path.
Note: Valid path names for network shares are:
n
FTP: ftp://MyServer/MyShare
n
UNC: \\MyServer\MyShare\
3. Press [Configure].
4. Enter Friendly Name (required).
5. Enter Subpath (optional).
Note:
n
Friendly Name and Subpath will display on screen in
list of shares.
n
You cannot add two shares with the same name.
6. Under Security, set Use Authentication. (See 7 under
Shared Folder Configuration [top left column].)
7. Press [Add Share].
Share Management screen displays shared folder path.
8. Repeat 1-7 to add another shared folder.
9. When finished, press [Next].
10. Press [Skip] until main screen displays [Scan to Folder]
button.
11. Go to STEP 2.
12. Press [Yes] when asked, Are all settings and configurations
correct?
13. Continue with Step 2….
STEP 2: PERFORM SCAN
Once Initial Configuration is complete, perform a Scan to Folder
operation, as outlined below:
1. Place document on scanner ADF.
2. Press [Scan to Folder] button.
3. Select desired shared folder.
4. Use default Document Name or enter different name.
5. If desired, create subfolder.
6. Press [Continue].
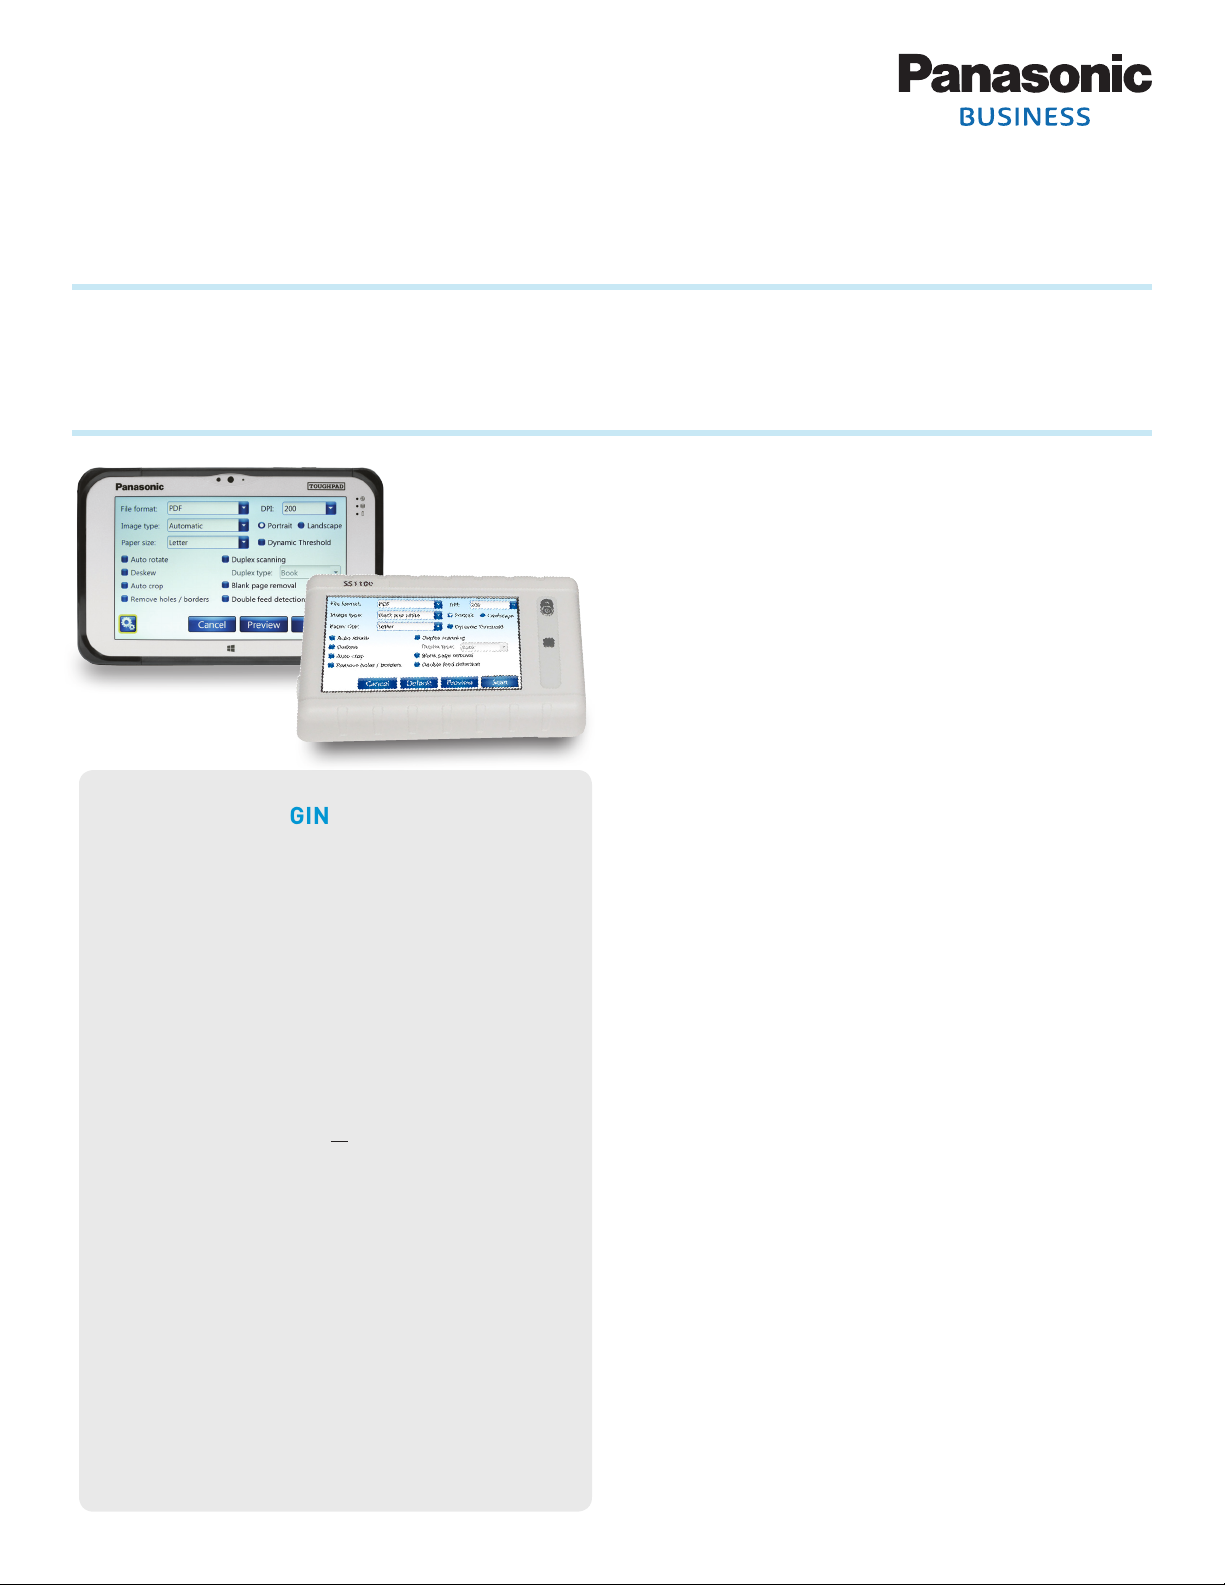
7. Select desired Scan Settings.
8. Press [Scan].
Document is scanned and saved to selected folder.
9.
To scan again, place document on scanner ADF, and press [Scan].
10. To exit, press [Cancel] > [Cancel].
©2017 Panasonic Corporation of North America. All rights reserved. KV-SSM100 / KV-SS1100 Quick Setup Guide_11/17
Notes:
_________________________________________________
_________________________________________________
_________________________________________________
_________________________________________________
_________________________________________________
_________________________________________________
_________________________________________________
_________________________________________________
CONTACT US
1.877.201.0035
us.panasonic.com/scanners
 Loading...