

Panasonic HG-C, HG-C1050-P, HG-C1030, HG-C1100-P, HG-C1050 Easy User Manual
...
HG-C measurement sensor
Please follow the procedure from step 1 to 5.
Easy user guide
1
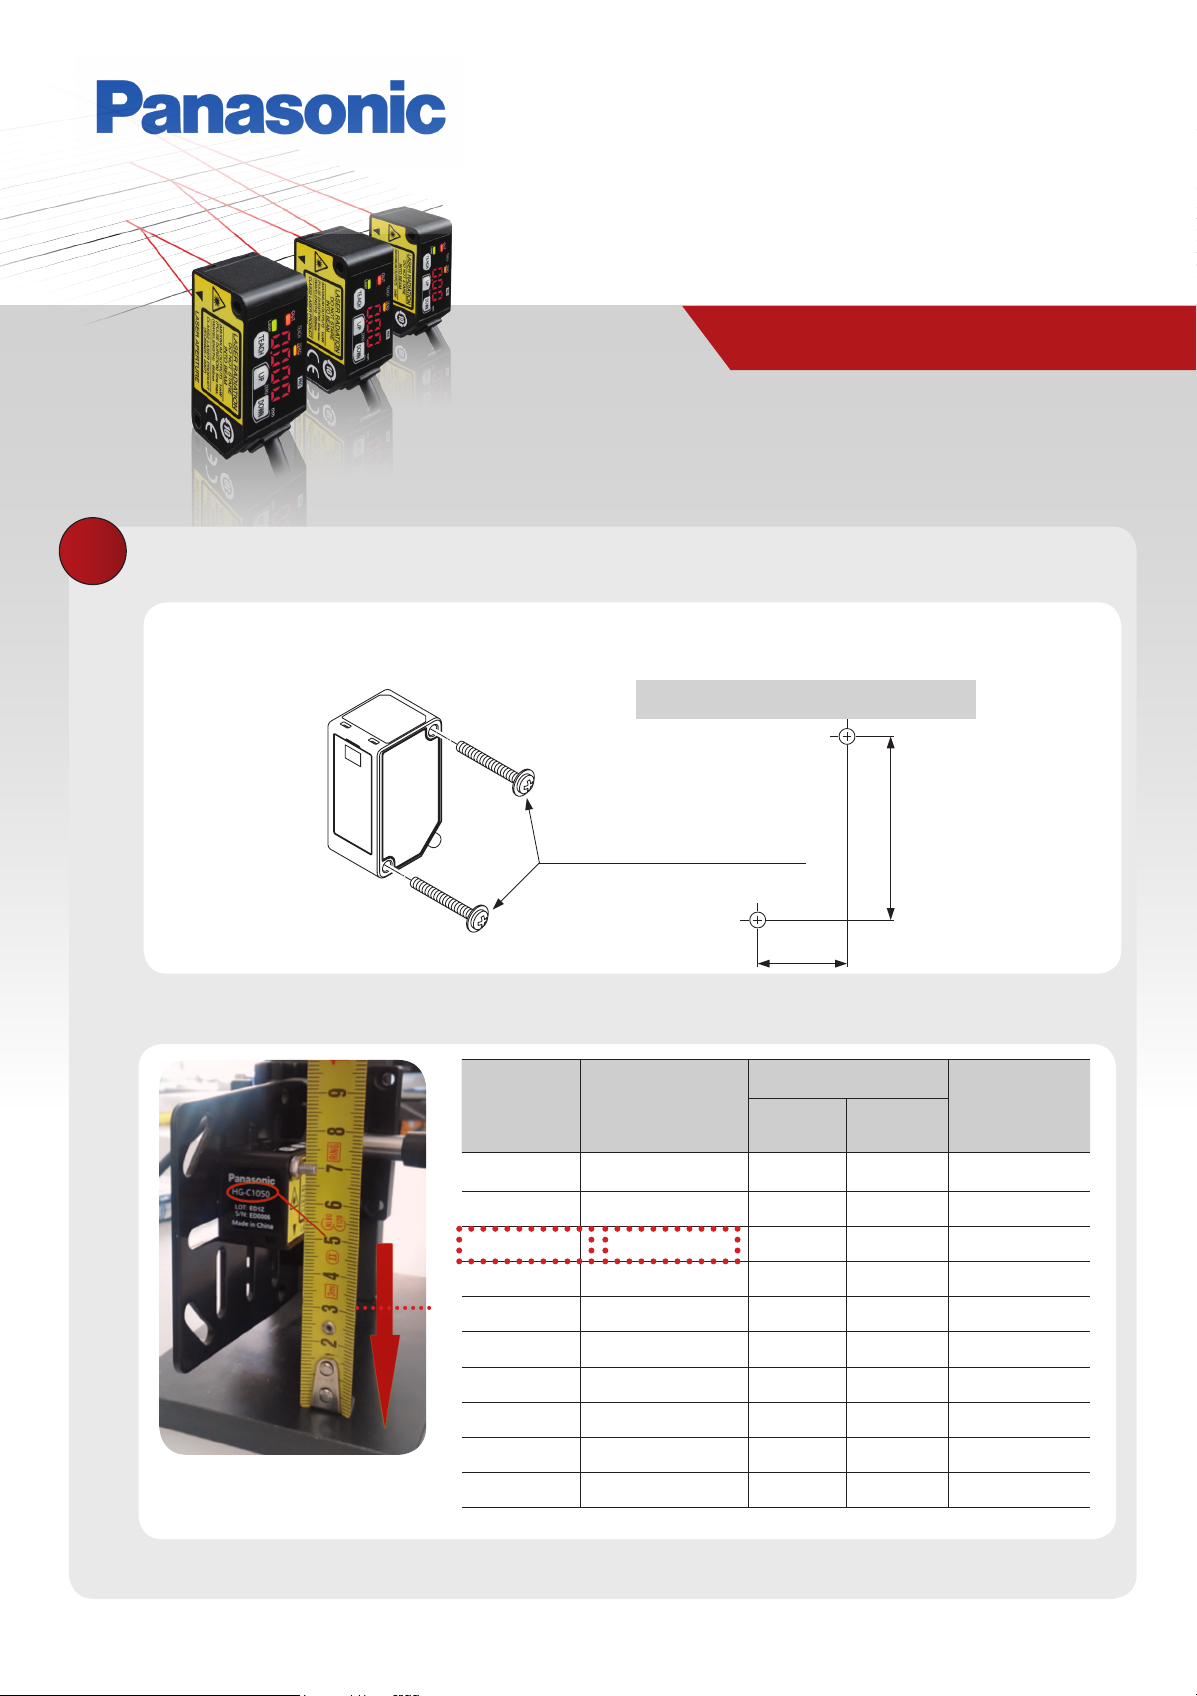
Mounting
Adjust the height of the sensor.
Mounting hole dimensions
M3 screws
(not included)
18mm
Product No.
HG-C1030-P 30±5mm 0 to +5V 4 to 20mA 2m
Measurement
center distance and
measuring range
Analog output Cable length
Voltage
output
37mm
Current
output
Example: HG-C1050-P
Adjusted height 50mm
HG-C1030 30 ±5mm 0 to +5V 4 to 20mA 2m
HG-C1050-P 50 ±15mm 0 to +5V 4 to 20mA 2m
HG-C1050 50 ±15mm 0 to +5V 4 to 20mA 2m
HG-C1100-P 100 ±35mm 0 to +5V 4 to 20mA 2m
HG-C1100 100 ±35mm 0 to +5V 4 to 20mA 2m
HG-C1200-P 200 ±80mm 0 to +5V 4 to 20mA 2m
HG-C1200 200 ±80mm 0 to +5V 4 to 20mA 2m
HG-C1400-P 400 ±200mm 0 to +5V 4 to 20mA 2m
HG-C1400 400 ±200mm 0 to +5V 4 to 20mA 2m
2
Wiring
Part description
Brown connect with 12 – 24V DC ±10%
Blue connect with 0V DC
Assign any one.
V
+
0V
External
input
Control
output
Analog voltage output (0-5 V)/
current output (4-20mA)
Analog ground (shielded)
Zero set
Teaching
Emission stop
Trigger
3
Zero set indicator (yellow)
Teaching indicator (yellow)
Output operation indicator (orange)
Laser emission indicator (green)
TEACH key
UP key
PRO mode indicator (yellow)
DOWN key
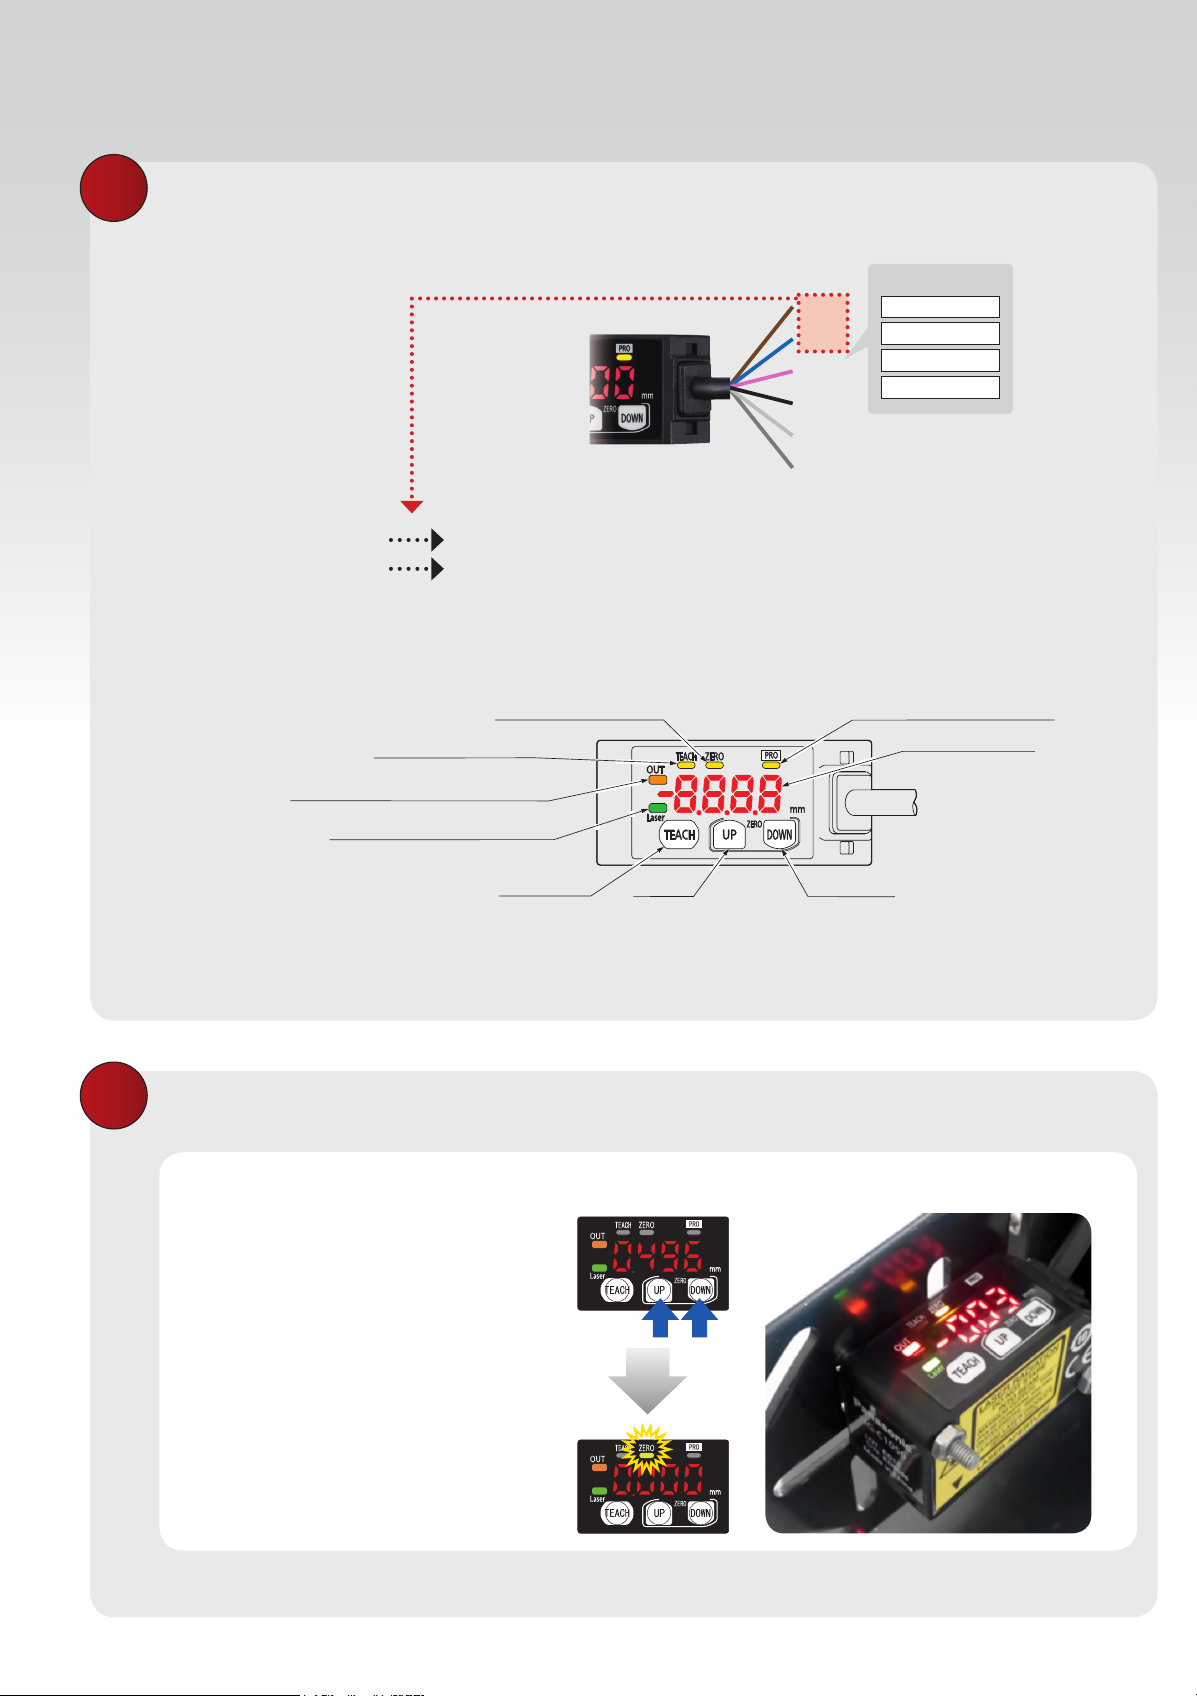
Remote zero-adjustment
Press and hold the keys UP and DOWN simultaneously for 3 seconds
Digital display (red)
 Loading...