

Panasonic Easa-Phone KX-T2365A Operating Instructions Manual

Contents
Location of Controls
.............................................
2
....................................................
Preparation
3
Manual Dialing and Receiving
.....................................
4
Automatic Dialing
...............................................
5
Storing and Dialing
..............................................
6
..........................................................
Hold
9
....................................................
Hands-free
9
Use of Other Features
...........................................
10
.................................................
Adjusting Time
11
....
Liquid Crystal Display
:
.......................................
12
Battery Installation
..............................................
13
..................................................
Wall Mounting
14
Troubleshooting Guide
...........................................
15
........................................................
Others
16
Enclosures
AA
size
batteries
................
3
Hardware
.................
1
pa
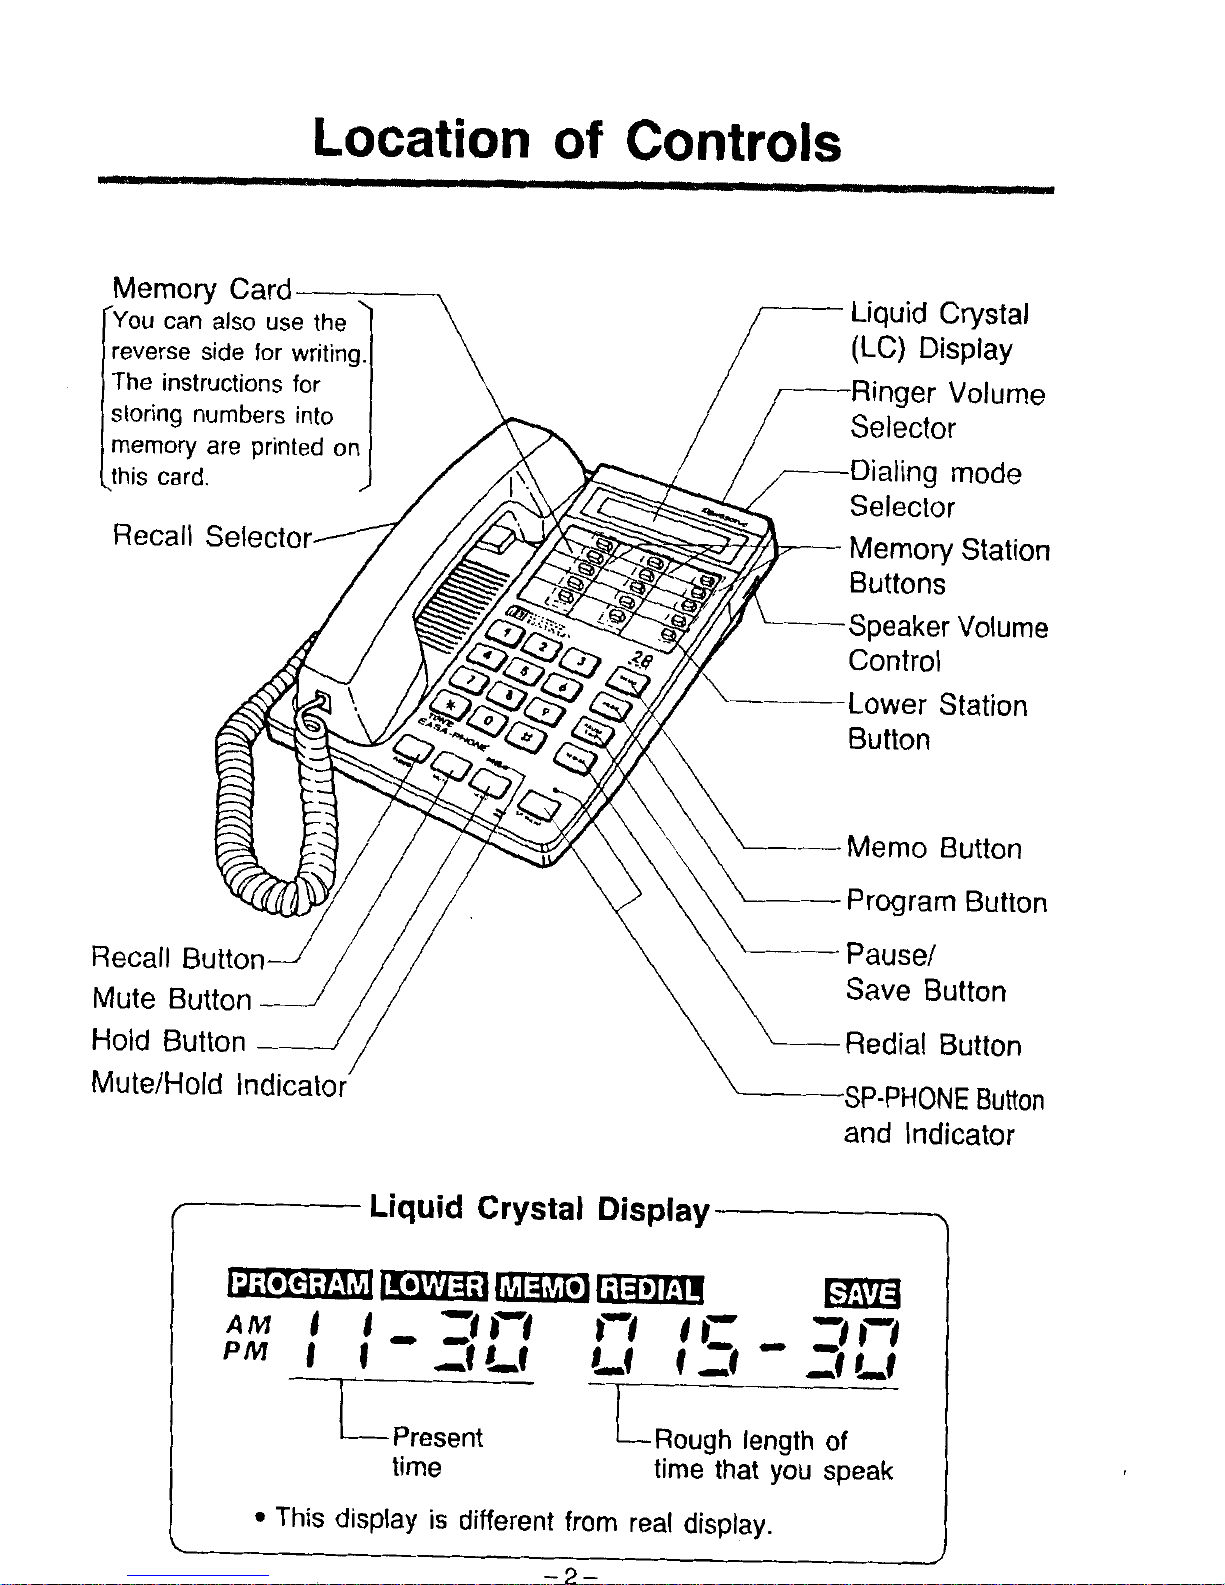
Location of Controls
I
-SP-PHONE
Button
and Indicator
f---
Liquid
Crystal Display-
I.---
Present
LROIJ~~
length of
time time that you speak
This display is different from real display.
J
-2-
preparation
Connect as shown.
m
+
TO Telephone Line
Do not use any handset other than Panasonic handset made for the model KX-T2365A.
@
Ringer Volume Selector:
Set to "HIGH".
LOW:
The ringing sound level
will
be
low.
OFF:
The telephone will not ring.
RINGER
OFF
.
HlGn
MALING MODE
PULSE . TWE
Q
Dialing Mode Selector:
Set to
"TONE".
If dialing cannot be done,
set to
"PULSE".
@
Recall Selector:
RECALL
Set to
"E RE"
or
"T
BR".
.
.
E
RE T BR
selector Ringer Volume
Selector
(depending on PBX type)
E
RE
...
for PBX earth recall facility
T BR
...
for PBX timed break register
recall facility
0
Insert the batteries (included) in the
proper order as indicated.
For further details, see page 13.
0
Select the
LC
Displays' contrast.
D
or
Push
+E
to choose the best display intensity.
:
Low intensity
Push the Program Button until the
LC
:
Middle intensity
Display shows
"
:
High intensity
----------
0
Adjust the time.
AM
17,8787
The LC Display will blink when
rT-J
all the batteries every
10
or misoperation may occur
programming, and speakerphone
(Nickel-
operation can not be done.
1
-3-
Manual
Dialing and Receiving
When the unit is unused, the Liquid Crystal Display will show the present time only.
Dialing
1
Lift the handset and
identify the dialing tone, then
the phone numbers to be
PUS^
dialed.
The
LC
Display will show the phonc
number in order of pushing the
Dialing button.
2
When the other party answers,
start talking.
The LC Display will show the
present time and the length of time
that you speak.
3
When your call is finished, hang
up the
.
Receiving
Lift
the
a
and
talk.
The
LC
Display will show the
present time and the length of time
that you speak.
Dialing
1
0
and identify the
Push
sP.WM
n
dialing tone, then the phone
Push
numbers to be dialed.
2
When your call is finished.
Bo.
Push
SP-morn
Receiving
0
and talk.
Push
SP-PHONE
The LC Display will show the same
as
"Using the Handset".
If
the batteries
are
not
installed,
speakerphone operation cannot be
done.
busy,
3
]
.
When using the handset;
PUS^
Depressing the Redial button enables
The LC Display will show
"
"
you to redial once.
and the
redialed number. Also it will
show the present
tlrne and the length
of time that you speak.
If the
MuteJHold Indicator lights when speaking, push
-4-
0
MUTE
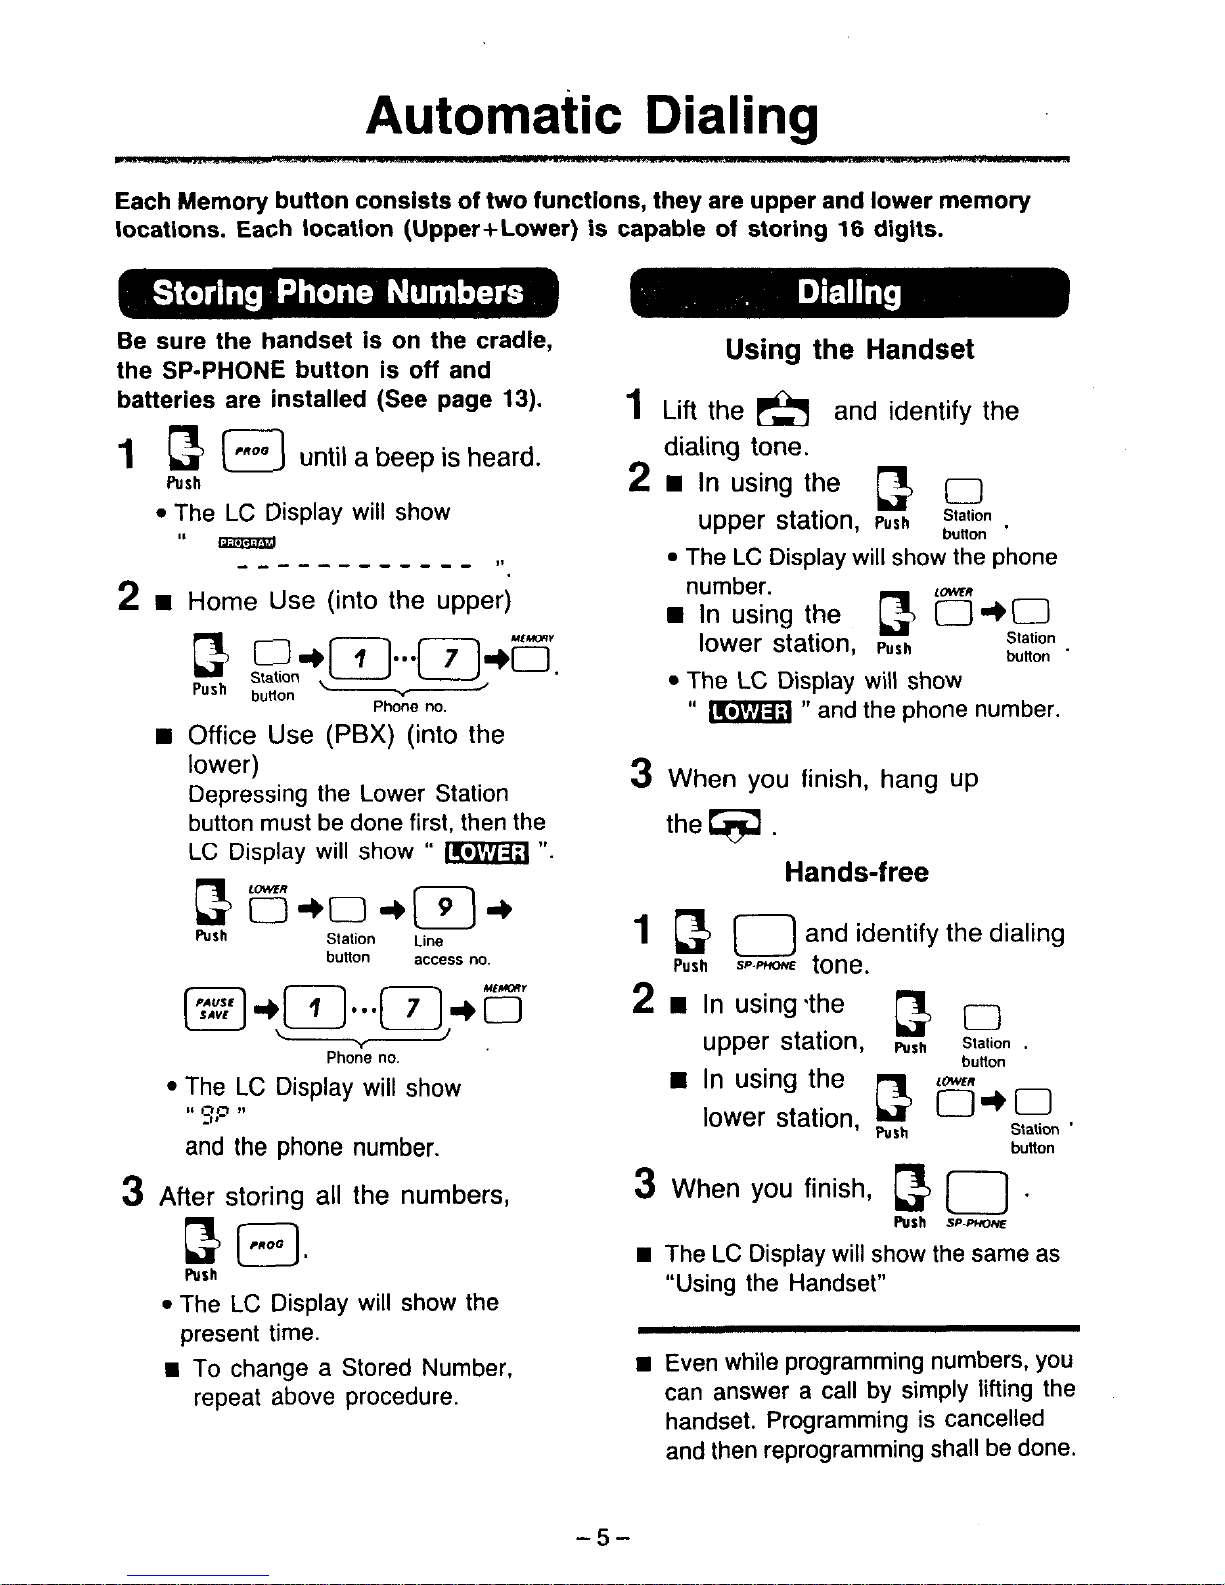
Automatic Dialing
Each Memory button consists of two functions, they are upper and lower memory
locations. Each location
(Upper+Lower) is capable of storing
16
digits.
Be sure the handset is on the cradle,
the SP-PHONE button is off and
batteries are installed (See page
13).
1
El
until a beep is heard.
Push
The LC Display will show
"
__
--________
n
2
rn
Home Use (into the upper)
UCHR"
Statlon
Push
button
-,
2
Phone no.
rn
Office Use
(PBX)
(into the
lower)
Depressing the Lower Station
button must be done first, then the
LC Display will show
"
Il(r'iI%m
".
Push
Station
Ijne
bunon access no
@+p-J...p-J+E
\
-f
J
Phone no.
The
LC
Display will show
cc
nn
tt
-1
I
and the phone number.
3
After storing all the numbers,
G.
Push
The LC Display will show the
present time.
To change a Stored Number,
repeat above procedure.
Using
the
Handset
1
Lift
the and identify the
dialing
tone.
2
rn
In
using the
t3
0
upper station,
Push
izg
.
The
LC
Display will show the phone
number.
LMR
rn
In
using the
[?.
a*=
lower station,
push
Stallon
button
'
The LC Display will show
"
"
and the phone number.
3
When you finish, hang up
the
@
.
and identify the dialing
push
sp.-
tone.
2
rn
In
using .the
B
upper station,
Push
Station
.
button
rn
In
using the
a
E+O
lower station,
,,
Statim
'
bunon
3
When you finish,
g
0
.
Push
SP-PUDM
The
LC
Display will show the same as
"Using the Handset"
Even while programming numbers, you
can answer a call by simply lifting the
handset. Programming is cancelled
and then reprogramming shall be done.
 Loading...