

Page 1

Panasonic
E60/EW60/E60E series
M0213-0
Page 2

Media player
Data information
Compatible Data format
• Compatible Data format for Media player
(USB flash memory)/DLNA
Photo
Videos
• JPEG files (DCF and EXIF standards)
Sub-sampling - 4:4:4, 4:2:2 and 4:2:0
Image resolution - 8 x 8 to 30,719 x 17,279 pixels
° MP4 files
Video codec H.264/M PEG I/M PEG2
Aud io cod ec MPEG Aud io/M P3/AAC/H E-AAC/AC3/E-AC3
• MKV files
Video codec H.264/M PEG I/M PEG2
Aud io cod ec MPEG Aud io/M P3/AAC/H E-AAC/AC3/
E-AC3/DTS core
• FLV files
Video codec H.264
Audio codec MP3/AAC
• 3GPP files
Video codec H.264
Audio codec AAC/HE-AAC
• PS files
Video codec H.264*/MPEG1/MPEG2
Audio codec MPEG Audio/M P3*/AAC*/H E-AAC*/AC3/
E-AC3*/LPCM
• TS files
Video codec H.264/M PEG I/M PEG2
Audio codec MPEG Audio/M P3*/AAC/H E-AAC/AC3/
E-AC3/DTS core*
Music • MP3 files (MP3)
• M4A files (AAC)
- Copy-protected files cannot be played back.
• FLAC files (FLAC)
• WAV files (LPCM)
* for Media player only
94 (0300701)
Page 3
• Supported Subtitles formats
• MicroDVD, SubRip, TMPlayer (.srt, .sub, .txt)
• The video file and subtitles text file are inside the same folder, and the file
names are the same except for the file extensions.
° If there are more than one subtitles text files inside the same folder, they
are displayed in the following order of priority: "srt" "sub ....txt"
95 (0300701)
Page 4
Media player
Data information
Notice
° The picture may not appear correctly on this TV depending on the recording
equipment used.
• Some files may not be played back even if they fulfill these conditions.
• Depending on how you make USB Flash Memory or the media server, files
and folders may not be displayed in the order you numbered.
• Depending on how you create the files and the structure of folders, the files
and folders may not be displayed.
° When there are many files and folders, operation may take time to
complete or some files may not be displayed or playable.
° The function cannot display still images that are not DCF formatted (i.e.
TIFF, BMP).
° Data modified with a PC may not be displayed.
° Images imported from a PC must be compatible with EXIF 2.0, 2.1 and 2.2.
° Partly degraded files might be displayed at a reduced resolution.
° All ".JPG" extension data in the USB flash memory will be read in Photo
Viewer Mode.
• The folder and file names may be different depending on the digital camera
used.
• Do not use two-byte characters or other special codes.
• Connected devices may become unusable with this TV if file or folder
names are changed.
96 (0300702)
Page 5
Convenience features
Using Apps list
Features
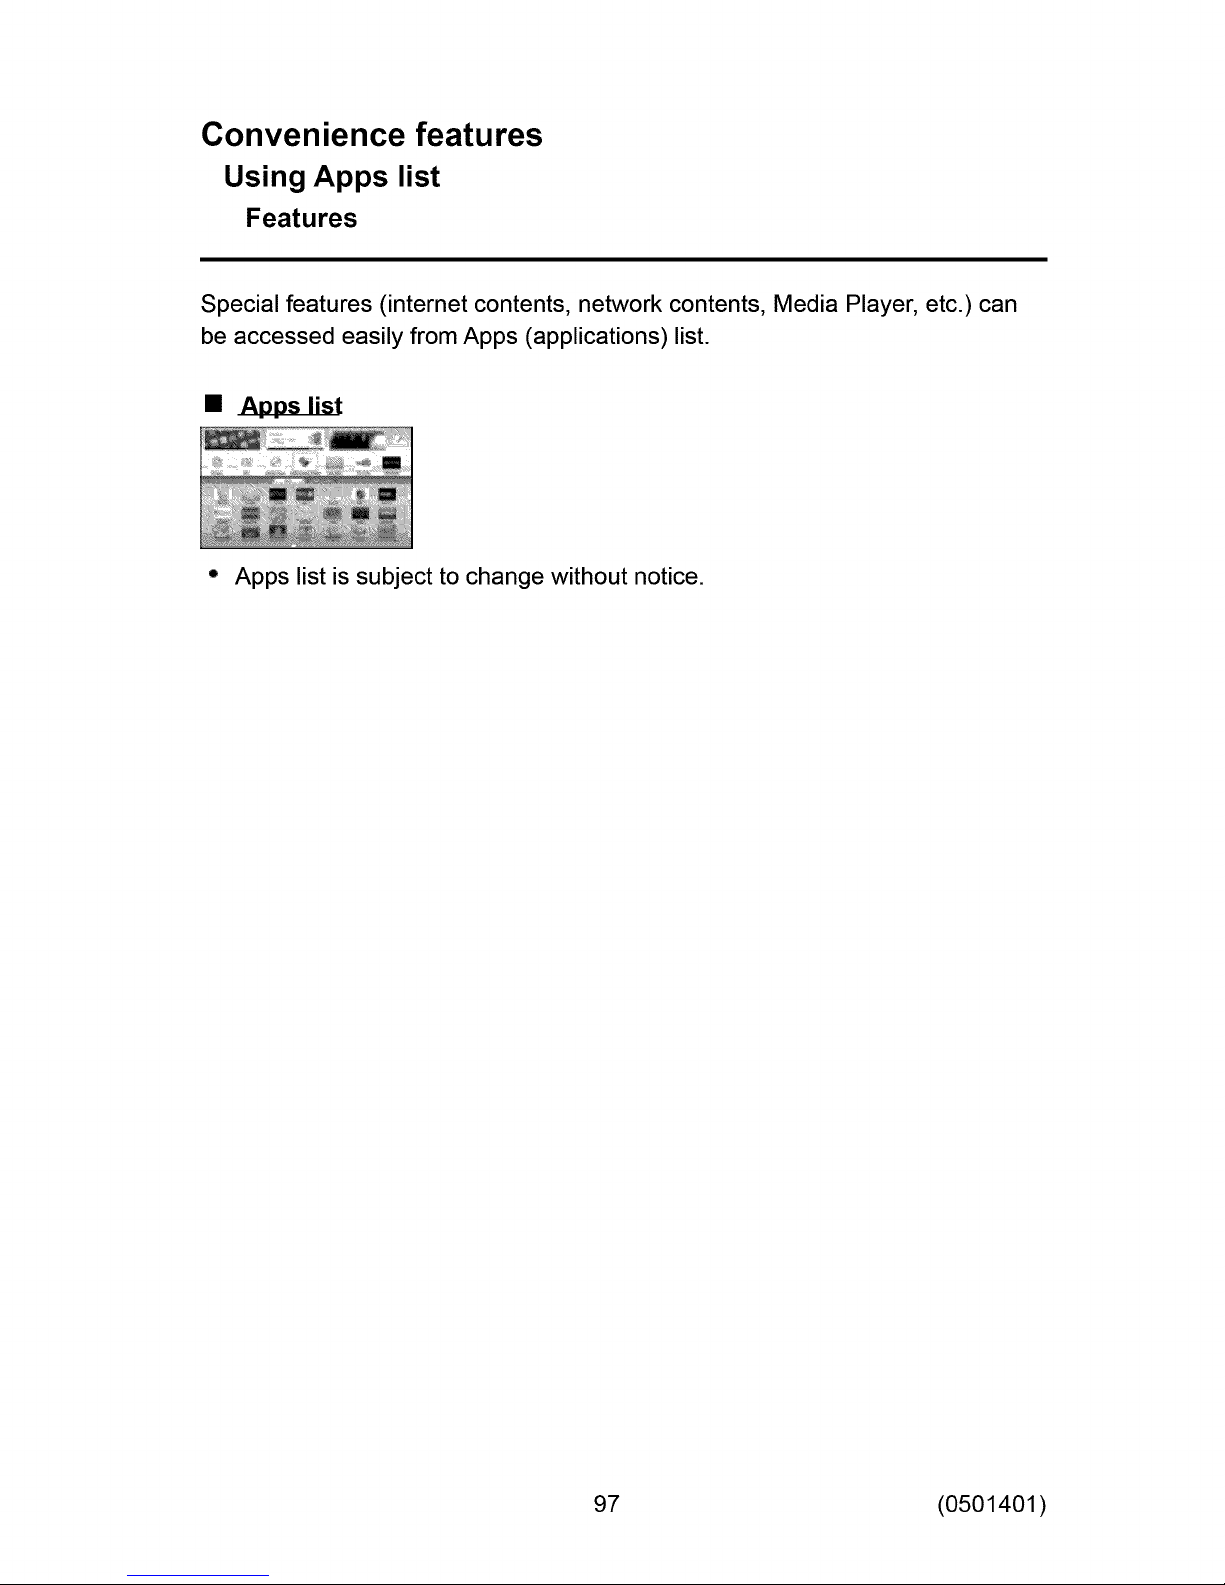
Special features (internet contents, network contents, Media Player, etc.) can
be accessed easily from Apps (applications) list.
• Apps list
° Apps list is subject to change without notice.
97 (0501401)
Page 6
Convenience features
Using Apps list
How to use
You can access special features such as internet contents, network contents,
Media Player, etc. from Apps list (applications list).
1. Display Apps list
_IAPPSI
(Example)
° To exit Apps list
2. Select an icon of the features with A/V ! _ ! _ and press @ to
access
98 (0501402)
Page 7

Convenience features
Using Apps list
Settings
You can set up Apps list manually. (For example, screen settings, account
Information, restriction, etc.)
1. Display Apps list
2. Select the setup menu on Apps list with _/V/<_ /
to access
3. Follow the on-screen instructions
° Setup items may be change without notice
and press
99 (0501403)
Page 8
Convenience features
Timer
Setting menu
The TV can automatically turn On/Off at a designated date and time.
1. Display the menu
[MENU] ÷
2. Select from menu bar
Select desired menu using A /_ from menu bar and press
3. Select the item and adjust
Select desired item using A /_ and adjust with A /
100 (0500201)
Page 9
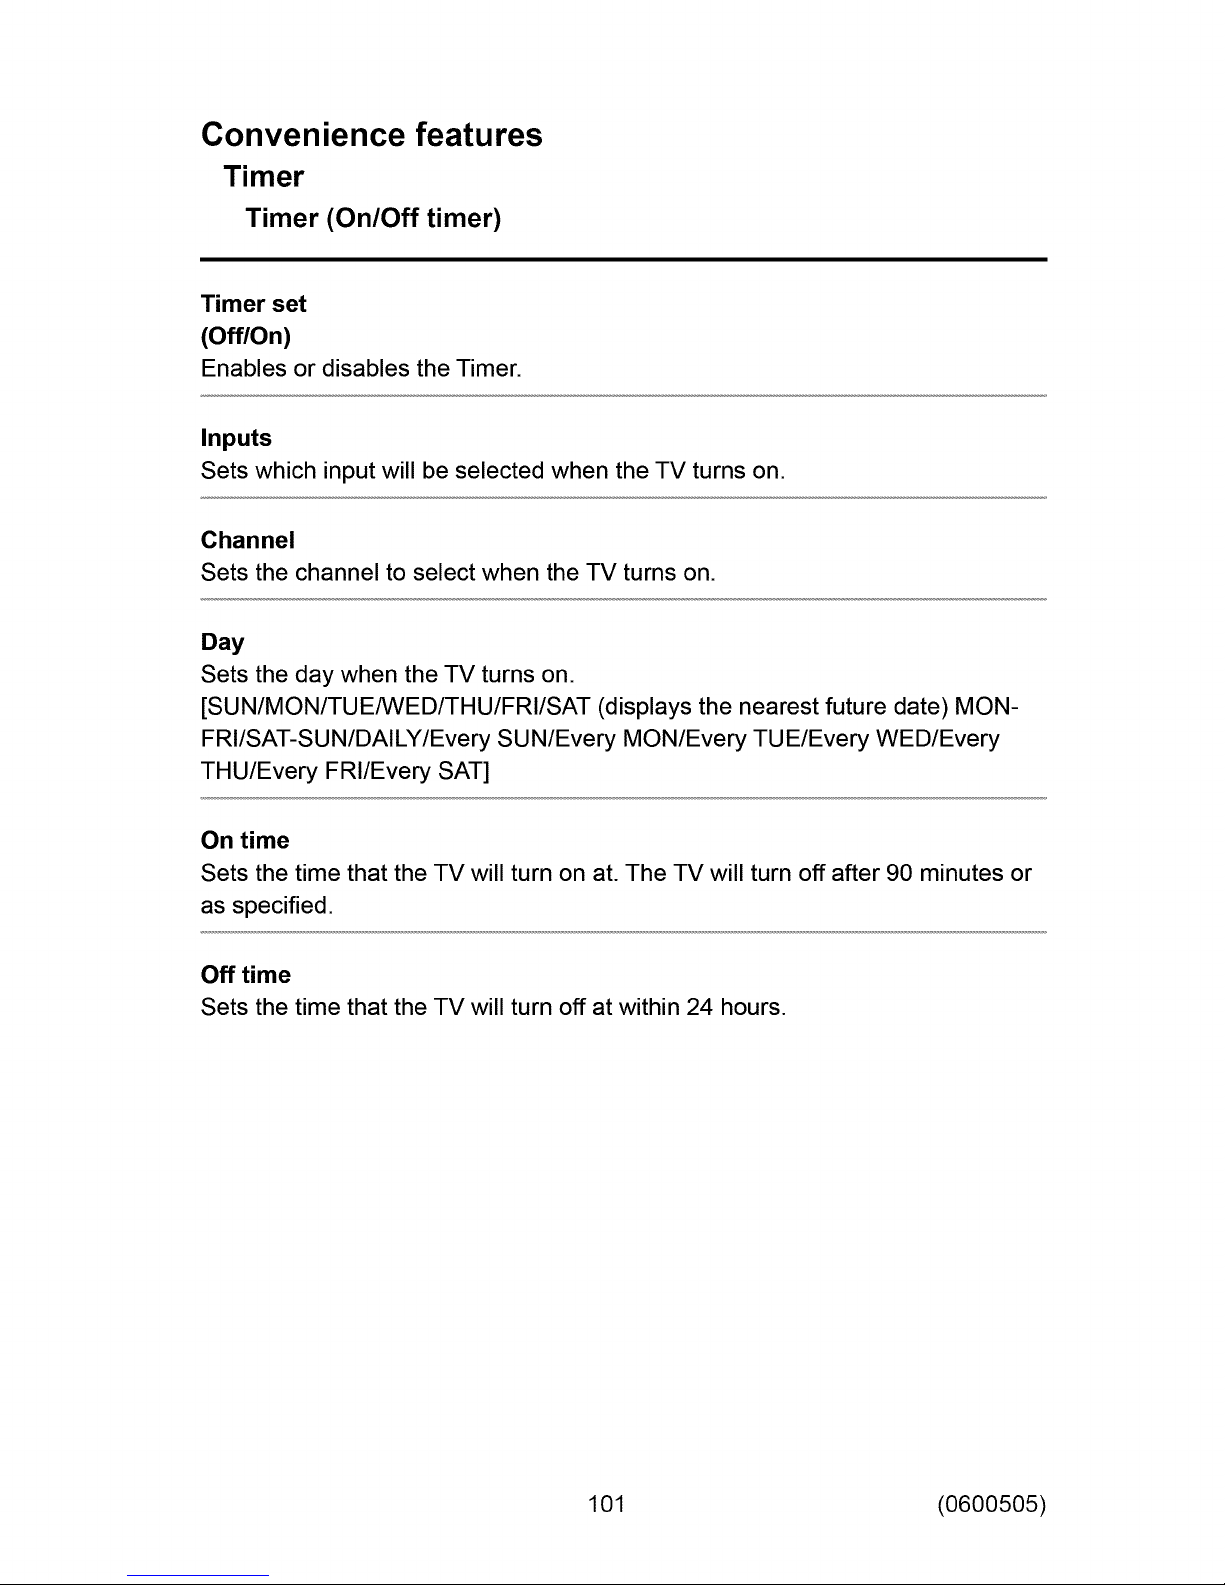
Convenience features
Timer
Timer (On/Off timer)
Timer set
(Off/On)
Enables or disables the Timer.
Inputs
Sets which input will be selected when the TV turns on.
Channel
Sets the channel to select when the TV turns on.
Day
Sets the day when the TV turns on.
[SUN/MON/TUE/WED/THU/FRI/SAT (displays the nearest future date) MON-
FRI/SAT-SU N/DAILY/Every SU N/Every MON/Every TU E/Every WED/Every
THU/Every FRI/Every SAT]
On time
Sets the time that the TV will turn on at. The TV will turn off after 90 minutes or
as specified.
Off time
Sets the time that the TV will turn off at within 24 hours.
101 (0600505)
Page 10
Convenience features
Timer
Sleep (Off timer)
Sleep (minutes)
(Off/15 minutes/30 minutes/60 minutes/90 minutes)
Selects how long the TV stays on before it automatically turns off.
102 (0600503)
Page 11
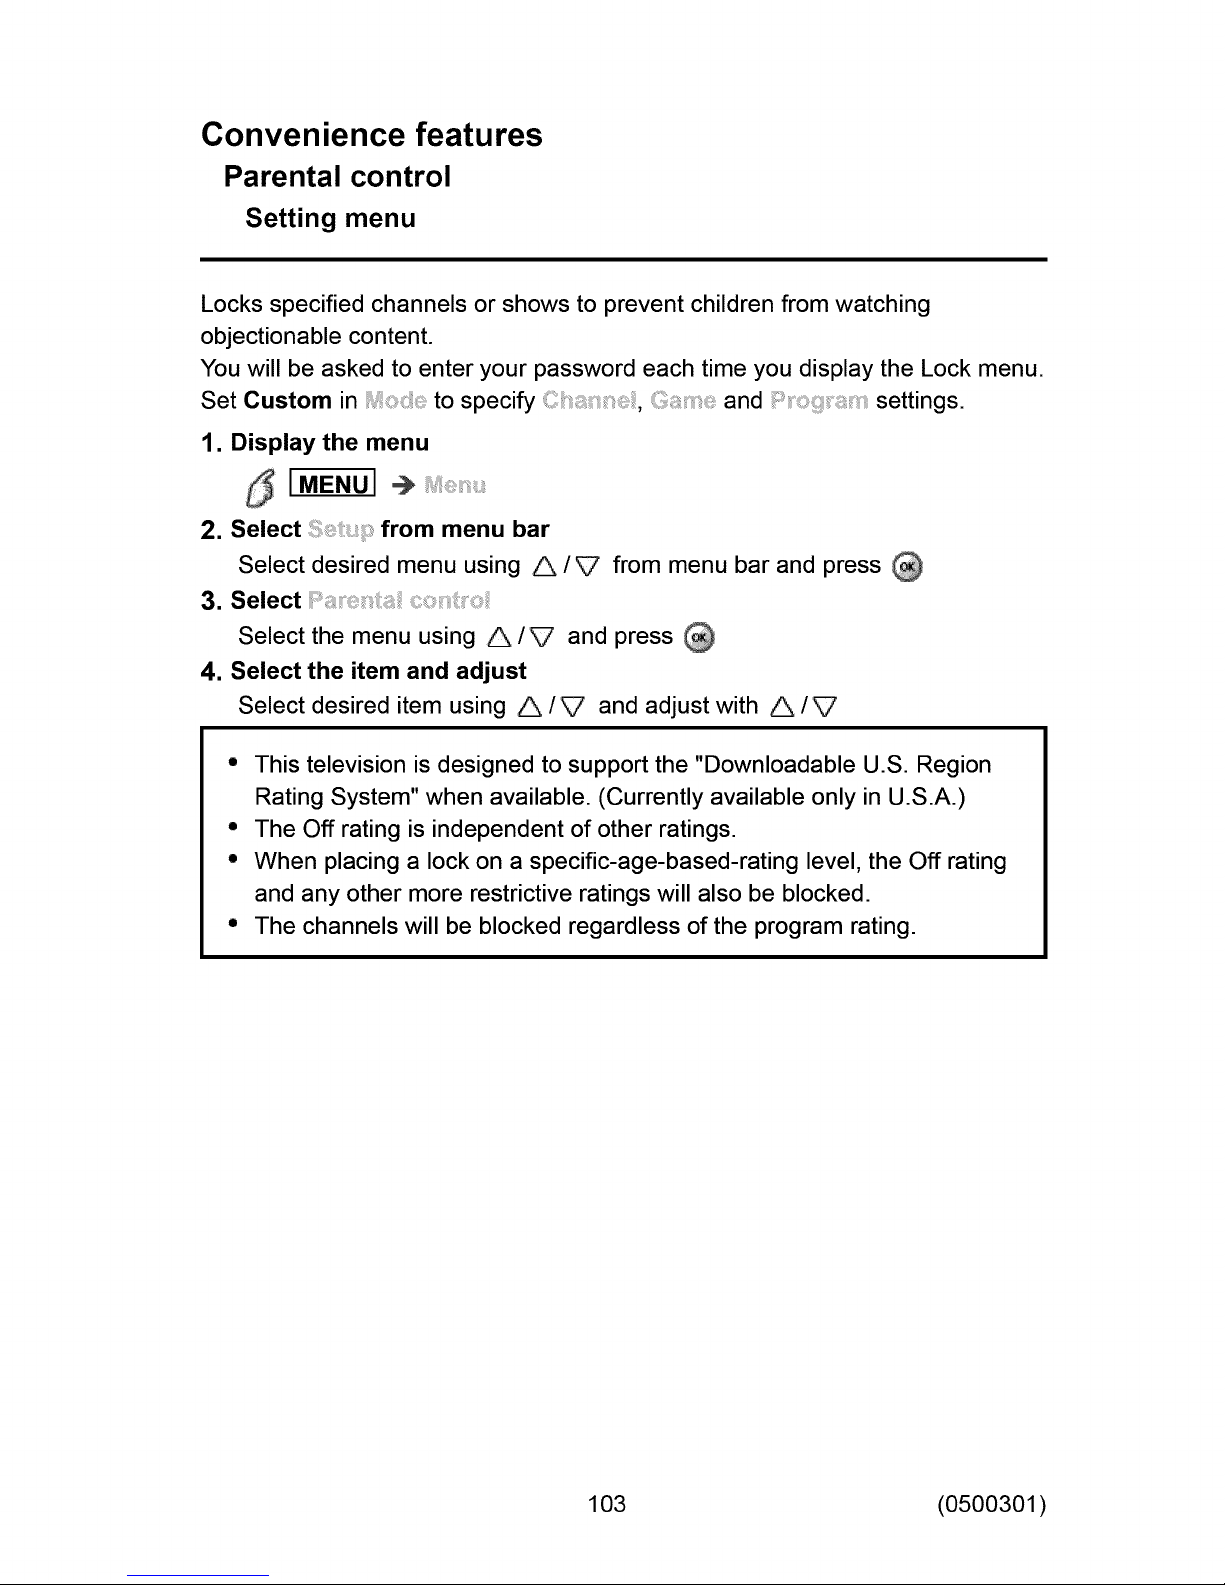
Convenience features
Parental control
Setting menu
Locks specified channels or shows to prevent children from watching
objectionable content.
You will be asked to enter your password each time you display the Lock menu.
Set Custom in to specify _ii _ _ , and settings.
1. Display the menu
[MENU] ÷
2. Select from menu bar
Select desired menu using A /_ from menu bar and press
3. Select
Select the menu using A/V and press
4. Select the item and adjust
Select desired item using A /V and adjust with A /V
• This television is designed to support the "Downloadable U.S. Region
Rating System" when available. (Currently available only in U.S.A.)
° The Off rating is independent of other ratings.
° When placing a lock on a specific-age-based-rating level, the Off rating
and any other more restrictive ratings will also be blocked.
° The channels will be blocked regardless of the program rating.
103 (0500301)
Page 12
Convenience features
Parental control
Parental control
5 IMENU]
Change password
Create a new password. Input the new 4-digit password twice.
(All settings > Setup > Password setting)
Mode
(Off/All/Custom)
Locks (All) or Unlocks (Off) all channels, programs or inputs. For Custom,
Locks specified inputs of and
Set Custom in to specify _ _ _ , and
Channel
These channels will be blocked regardless of the program ratings.
Mode
(Off/All/Custom)
Locks (All) or Unlocks (Off) all channels. For Custom, Locks specified
channels. Set-
> >
Channel 1-7
Designates channel number to be blocked at any time, regardless of its
broadcast content.
Game
(On/Off)
Restricts access to channel 3, channel 4 and all the TV's inputs.
Program
Prohibits viewing of TV content based on the rating provided by the
broadcasters.
104 (0600606)
Page 13
Mode
(On/Off)
Sets program lock status. "V-chip" technology enables restricted shows to
lock according to -IV ratings. On: Set each rating level (MPAA, U.S.-I-V,
C.E.L.R., C.F.L.R.)
MPAA
Selects U.S. movie ratings to lock.
U.S.TV
U.S. TV program ratings.
C.E.L.R.
Canadian English ratings.
C.F.L.R.
Canadian French ratings.
105 (0600606)
Page 14
Convenience features
Parental control
Password setting
You need to enter the password when you access locked channels or inputs.
_ _ (Input your 4-digit password)
* If it is your first time entering the password, enter the password twice in
order to register it.
* Make a note of your password. Do not forget it. (If you have forgotten
your password, consult your local dealer.)
* When you select a locked channel, a message will be displayed that
allows you to view the channel after you input your password.
106 (0600607)
Page 15
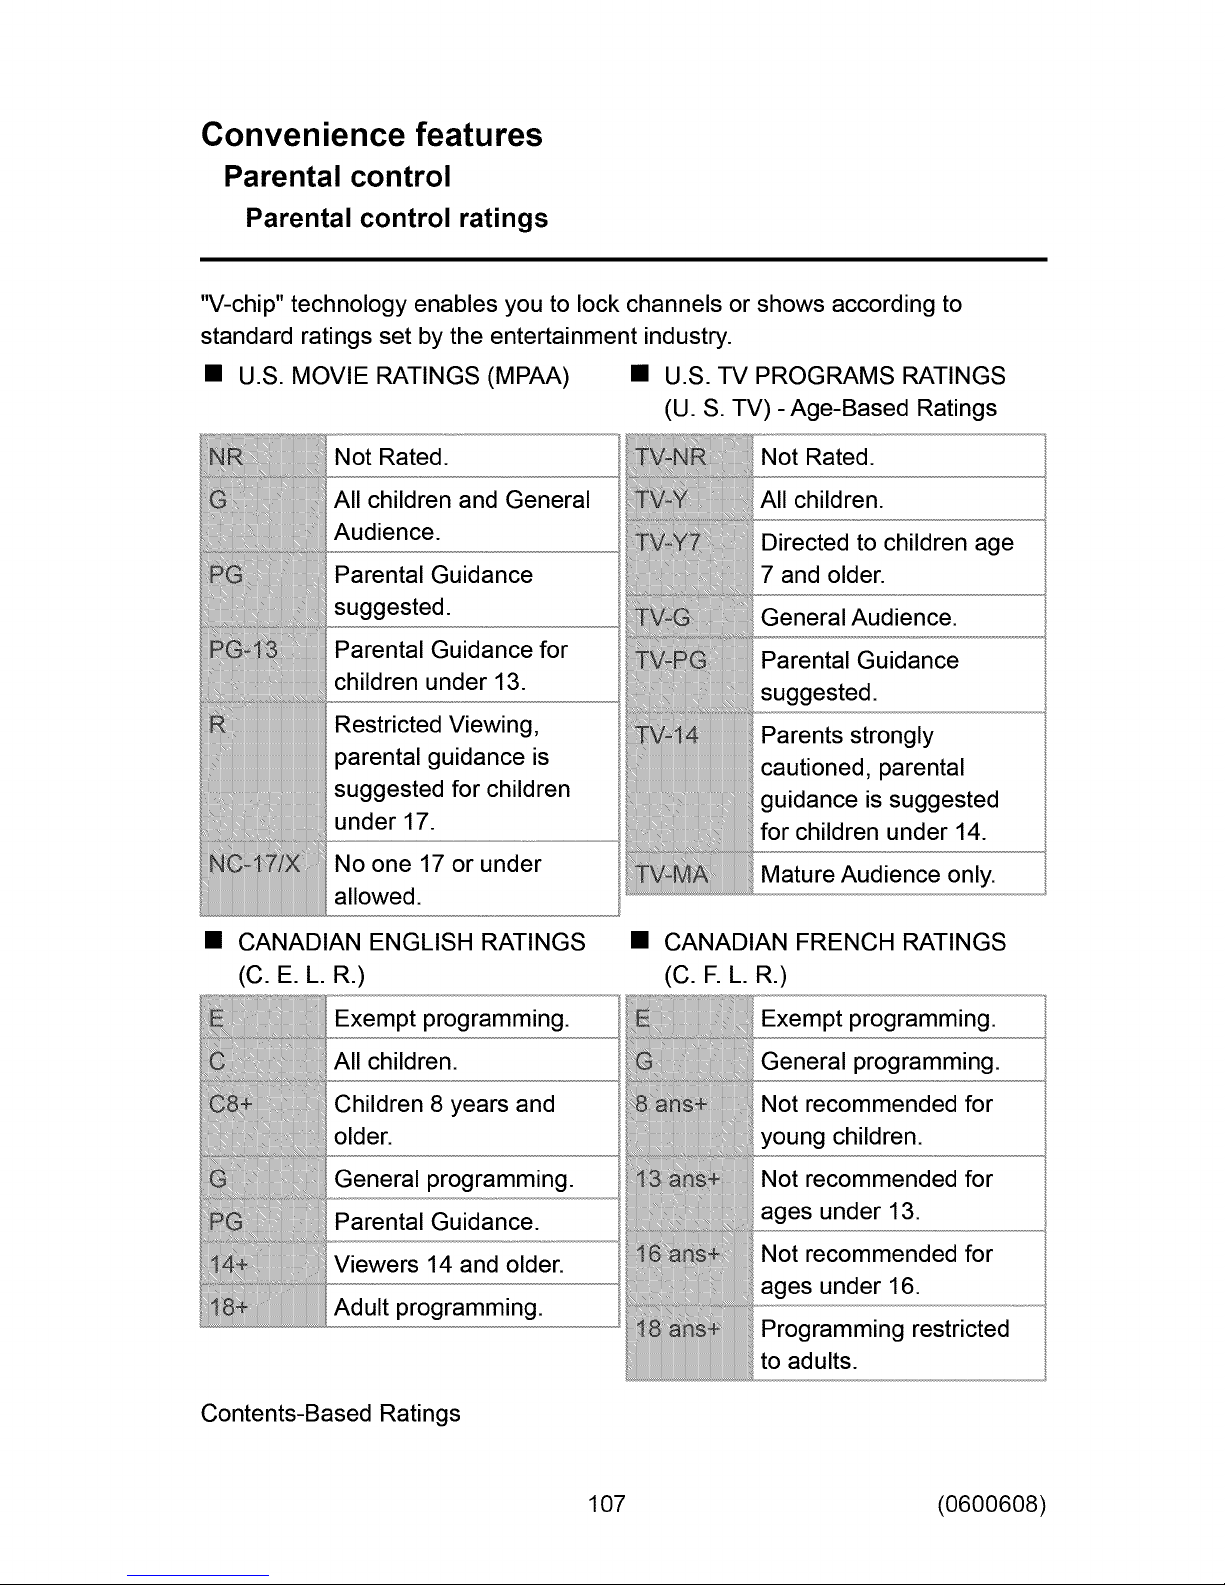
Convenience features
Parental control
Parental control ratings
"V-chip" technology enables you to lock channels or shows according to
standard ratings set by the entertainment industry.
• U.S. MOVIE RATINGS (MPAA) • U.S. TV PROGRAMS RATINGS
(U. S. TV) -Age-Based Ratings
Not Rated.
All children and General
Audience.
Parental Guidance
suggested.
Parental Guidance for
children under 13.
Restricted Viewing,
parental guidance is
suggested for children
under 17.
No one 17 or under
allowed.
CANADIAN ENGLISH RATINGS
(C. E. L. R.)
Exempt programming.
Not Rated.
All children.
Directed to children age
7 and older.
General Audience.
Parental Guidance
suggested.
Parents strongly
cautioned, parental
guidance is suggested
for children under 14.
Mature Audience only.
CANADIAN FRENCH RATINGS
(C. F. L. R.)
Exempt programming.
All children.
Children 8 years and
older.
General programming.
Parental Guidance.
Viewers 14 and older.
Adult programming.
Contents-Based Ratings
General programming.
Not recommended for
young children.
Not recommended for
ages under 13.
Not recommended for
ages under 16.
Programming restricted
to adults.
107 (0600608)
Page 16
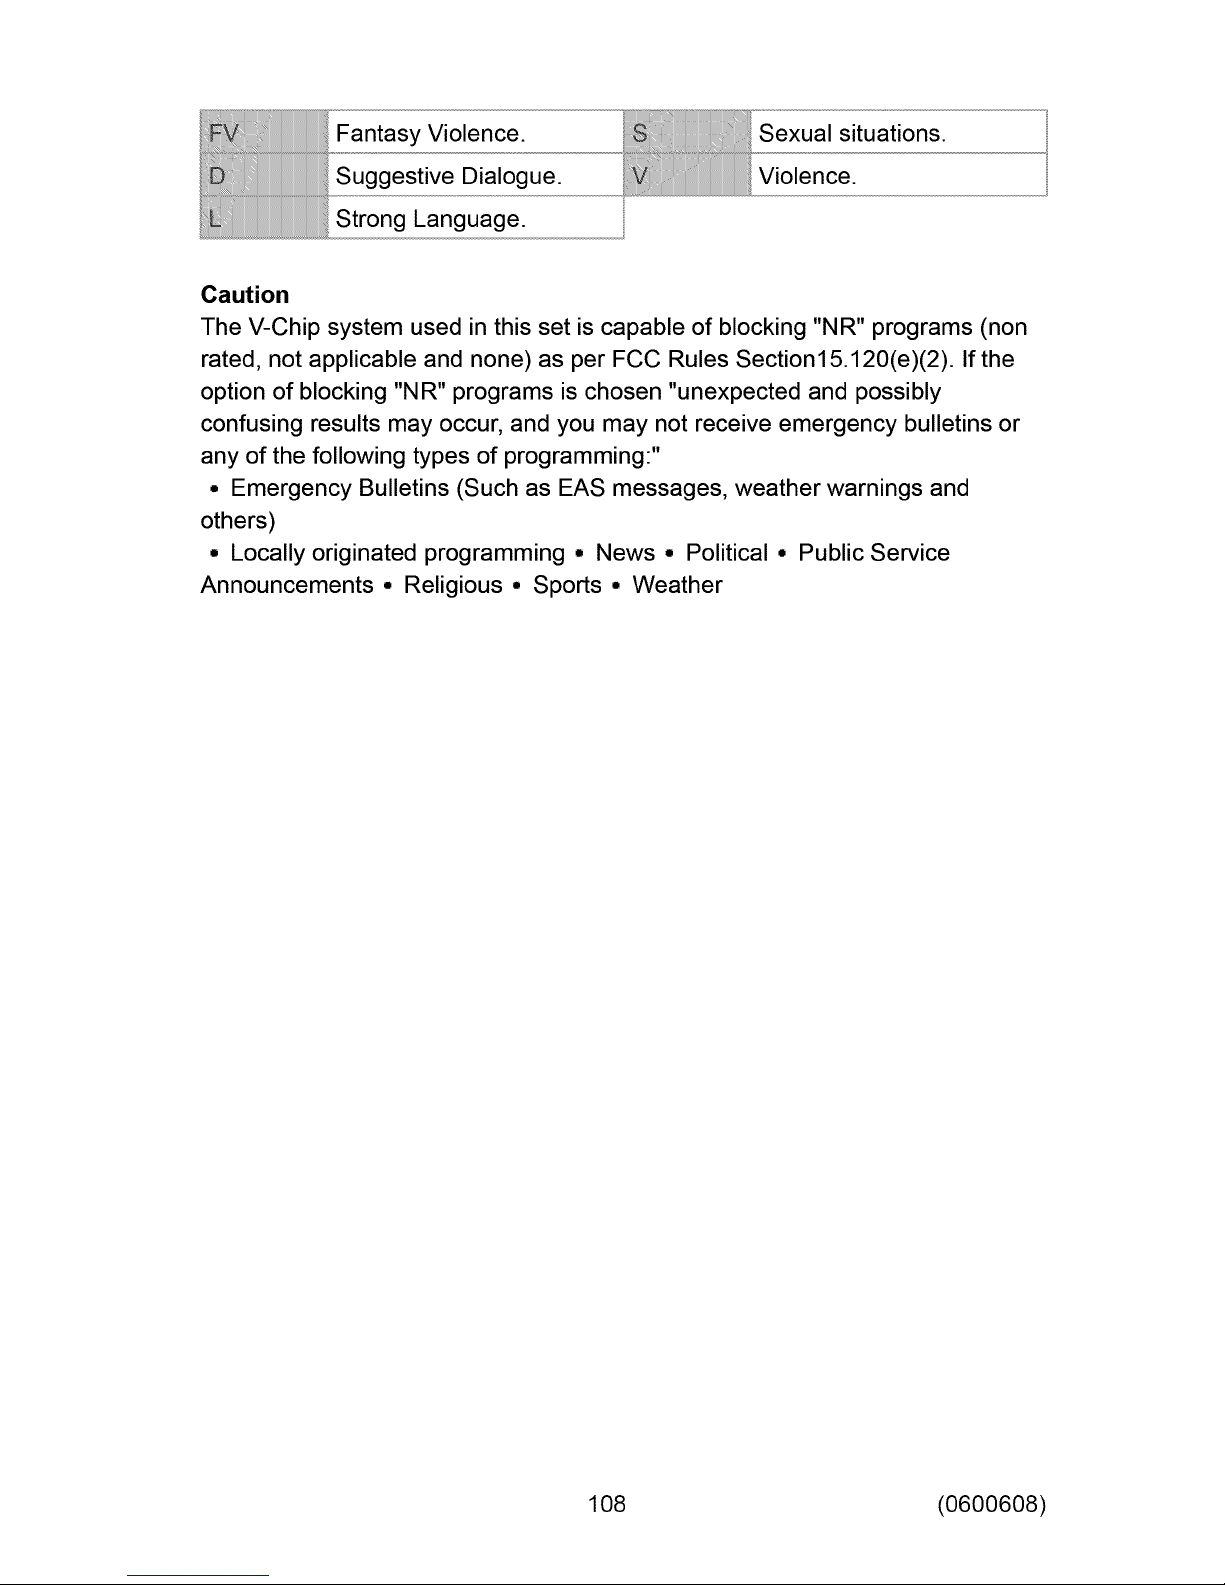
FantasyViolence.
Sexual situations.
Suggestive Dialogue.
Violence.
Strong Language.
Caution
The V-Chipsystem used in this set is capable of blocking "NR" programs (non
rated, not applicable and none) as per FCC Rules Section15.120(e)(2). If the
option of blocking "NR" programs is chosen "unexpected and possibly
confusing results mayoccur, andyou may not receive emergency bulletinsor
any of the following types of programming:"
• Emergency Bulletins (Such as EAS messages,weather warnings and
others)
° Locally originated programming ° News ° Political ° Public Service
Announcements ° Religious ° Sports ° Weather
108 (0600608)
Page 17
Convenience features
Closed caption
Setting menu
The television includes a built-in decoder that is capable of providing a text
display of the audio. The program being viewed must be transmitting the
Closed caption (CC)information.
• The settings are "Analog" or "Digital" depending on the broadcaster.
1. Display the menu
5 [ME.ul
2. Select from menu bar
Select desired menu using A/V from menu bar and press
3. Select in
Select the menu using A/V and press
4. Select the item and adjust
Select desired item using A /V and adjust with A /V
* Some functions will be disabled depending on the type of input signal.
will be grayed out if no changes are made.
109 (0500401)
Page 18

Convenience features
Closed caption
Closed caption
5 IME.u]
Mode
(Off/On/CC on mute)
On: To display Closed captions.
CC on mute: To display Closed captions when the audio is muted. (When not
using, select Off).
Analog
(CC 1-4/T1-4)
Choose the Closed caption service of Analog broadcasting.
CC1-4: Information related to pictures (Appears at the bottom of the screen)
T1-4: Textual information (Appears over the entire screen)
Digital
(Primary/Second./Service 3141516)
The Digital Closed caption menu lets you configure the way you choose to
view the digital captioning.
Digital setting
Set display settings in digital programs.
110 (0600612)
Page 19
Size
Select the text size
Font
Select the text font
Style
Select the text style (Raised, Depressed, etc.)
Foreground
Select the color of text
Foreground opacity
Select the opacity of text
Background
Select the color of text box
Background opacity
Select the opacity of text box
Outline
Select the outline color of text (Identify the setting options on the screen).
Reset to defaults
Resets all Closed caption settings to factory default settings.
111 (0600612)
Page 20
Convenience features
Closed caption
Closed caption notice
• For viewing the CC of digital broadcasting, set the aspect to FULL (If
viewing with H-FILL, JUST, ZOOM or 4:3, characters might be cut off).
° The CC can be displayed on the TV only when the receiver (such as a
Cable box or satellite receiver) has the CC set to ON within the device
itself. Check with your Cable or Satellite provider for instructions. The TV's
CC button does not operate the Satellite or Cable box's CC function.
° If the CC is set to ON on both the receiver and TV when the signal is 480i
(except for the HDMI connection), the CC may overlap on the TV.
° If a digital program is being output in analog format, the CC data will also
be output in analog format.
° If the recorder or output monitor is connected to the TV, the CC needs to be
set up on the recorder or output monitor.
112 (0600613)
Page 21
Convenience features
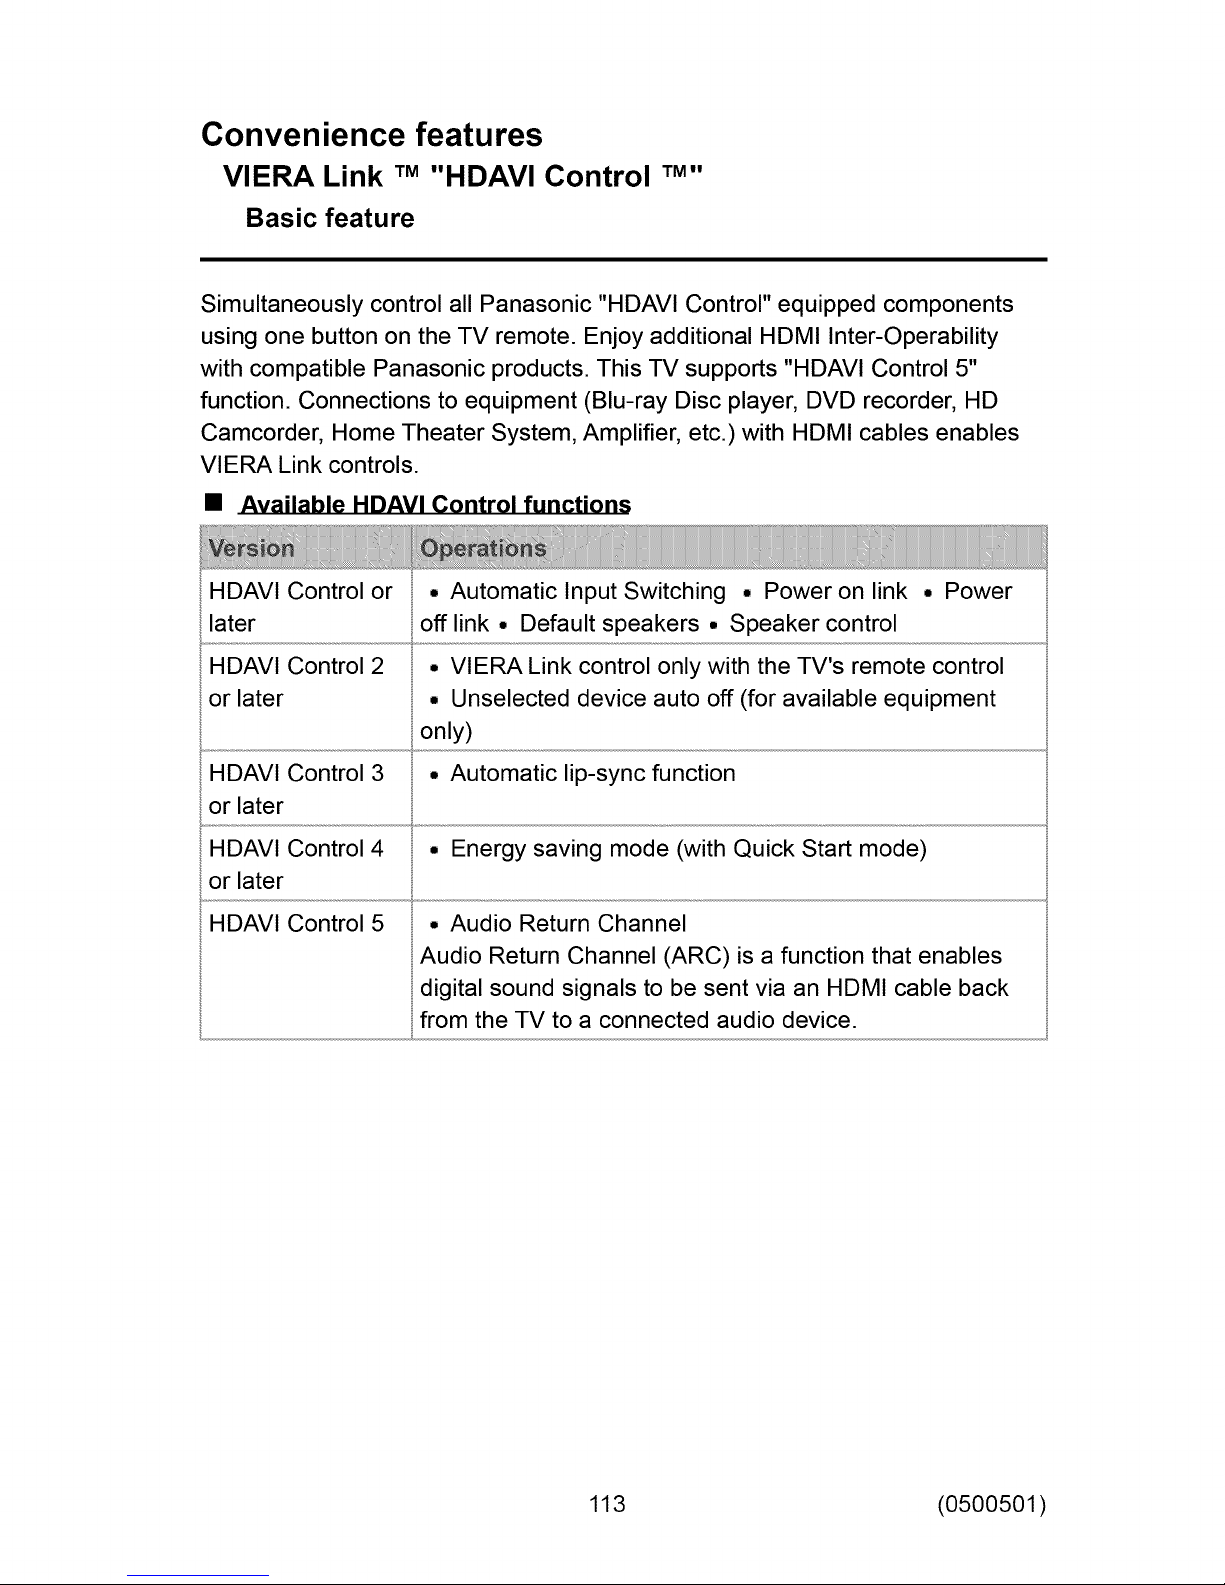
VIERA Link TM "HDAVI Control TMW'
Basic feature
Simultaneously control all Panasonic "HDAVI Control" equipped components
using one button on the TV remote. Enjoy additional HDMI Inter-Operability
with compatible Panasonic products. This TV supports "HDAVI Control 5"
function. Connections to equipment (Blu-ray Disc player, DVD recorder, HD
Camcorder, Home Theater System, Amplifier, etc.) with HDMI cables enables
VIERA Link controls.
• Available HDAVI Control functions
HDAVI Control or
later
HDAVI Control 2
or later
HDAVI Control 3 ° Automatic lip-sync function
or later
HDAVI Control 4 ° Energy saving mode (with Quick Start mode)
or later
HDAVI Control 5 ° Audio Return Channel
• Automatic Input Switching ° Power on link ° Power
off link ° Default speakers ° Speaker control
° VIERA Link control only with the TV's remote control
° Unselected device auto off (for available equipment
only)
Audio Return Channel (ARC) is a function that enables
digital sound signals to be sent via an HDMI cable back
from the TV to a connected audio device.
113 (0500501)
Page 22

Convenience features
VIERA Link TM "HDAVI Control TM"
Connecting note
• When adding new equipment...
When adding new equipment, reconnecting equipment or changing the
setup after the connection, turn the equipment on and then switch the TV
on. Set the input mode to correct HDMI terminal, and make sure that the
image is displayed correctly.
VIERA Link "HDAVI Control", is based on the control functions provided by
HDMI and industry standard known as HDMI CEC (Consumer Electronics
Control), with unique function that we have developed and added. As such, its
operation with other manufacturers' equipment that supports HDMI CEC
cannot be guaranteed. Please refer to the individual manuals for other
manufacturers' equipment supporting the VIERA Link function.
• £1D.MLcab_
This function needs an HDMI compliant (fully wired) cable. Non-HDMI-
compliant cables cannot be utilized.
" For more details on the external equipment's connections, please refer to
the operating manual for the equipment.
HDMI connections to some Panasonic equipment allow you to interface
automatically.
114 (0500502)
Page 23

° Thisfunction may not work normallydepending on the equipment
condition.
• The equipment can beoperated by other remote controls with this function
on, even if the TV is in Standby mode.
• Image or sound may not beavailable for the first few seconds when
playback starts.
° Image or sound may not beavailable for the first few seconds when input
mode is switched.
° Volume function will be displayed when adjusting the volume of the
equipment.
° Ifyou connect equipment that has"HDAVI Control2" or later function to
theTV with an HDMI cable, the sound fromthe DIGITALAUDIO OUT
terminal can beoutput as multi-channelsurround.
° "HDAVIControl 5" is the newest standardfor the HDAVIControl
compatible equipment.
Thisstandard is compatible with the conventional HDAVI equipment.
If connection (or setting) of equipment compatible with HDAVI control is
changed, switch the power ofthis unit Off and On again while the powerof
all equipment is On (so that the unit cancorrectly recognize the connected
equipment) and check that the connected equipment playback operates.
115 (0500502)
Page 24
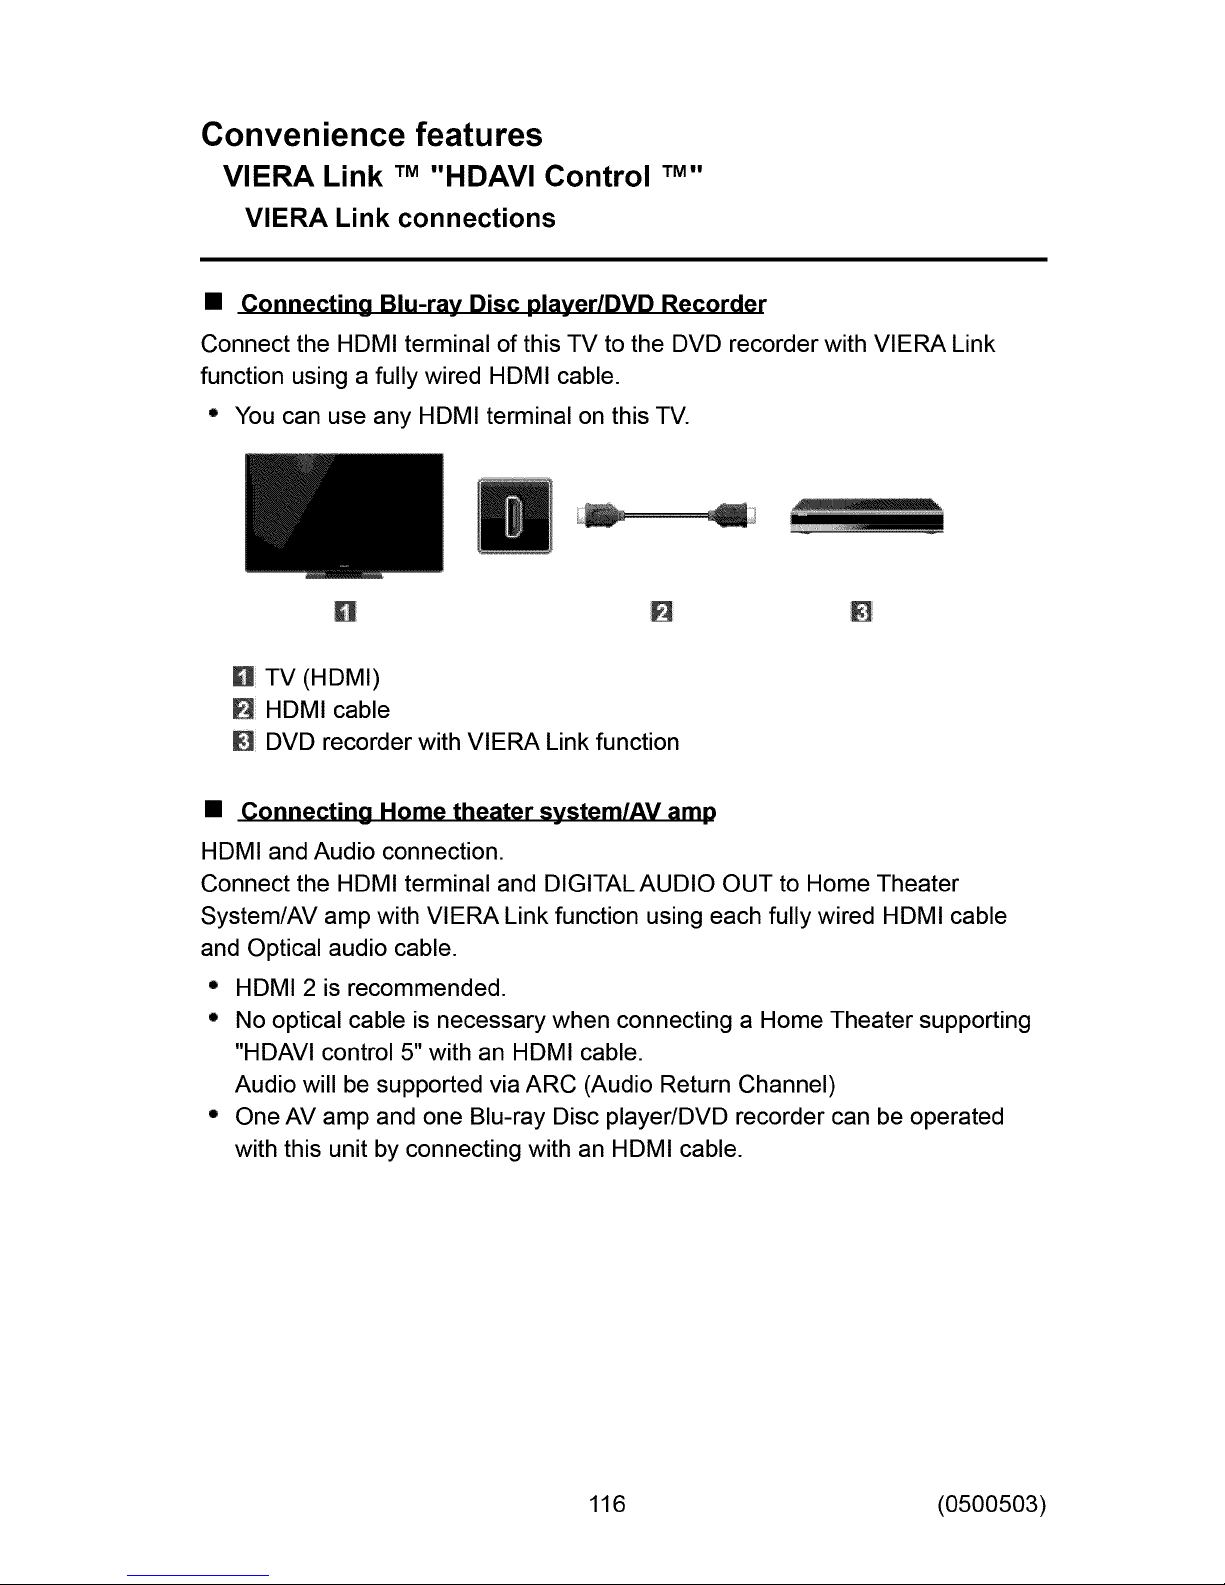
Convenience features
VIERA Link TM "HDAVI Control TMW'
VlERA Link connections
• Connecting Blu-ray Disc player/DVD Recorder
Connect the HDMI terminal of this TV to the DVD recorder with VIERA Link
function using a fully wired HDMI cable.
° You can use any HDMI terminal on this TV.
U TV (HDMI)
HDMI cable
DVD recorder with VIERA Link function
• Connecting Home theater system/AV amp
HDMI and Audio connection.
Connect the HDMI terminal and DIGITAL AUDIO OUT to Home Theater
System/AV amp with VIERA Link function using each fully wired HDMI cable
and Optical audio cable.
• HDMI 2 is recommended.
° No optical cable is necessary when connecting a Home Theater supporting
"HDAVI control 5" with an HDMI cable.
Audio will be supported via ARC (Audio Return Channel)
° One AV amp and one Blu-ray Disc player/DVD recorder can be operated
with this unit by connecting with an HDMI cable.
116 (0500503)
Page 25
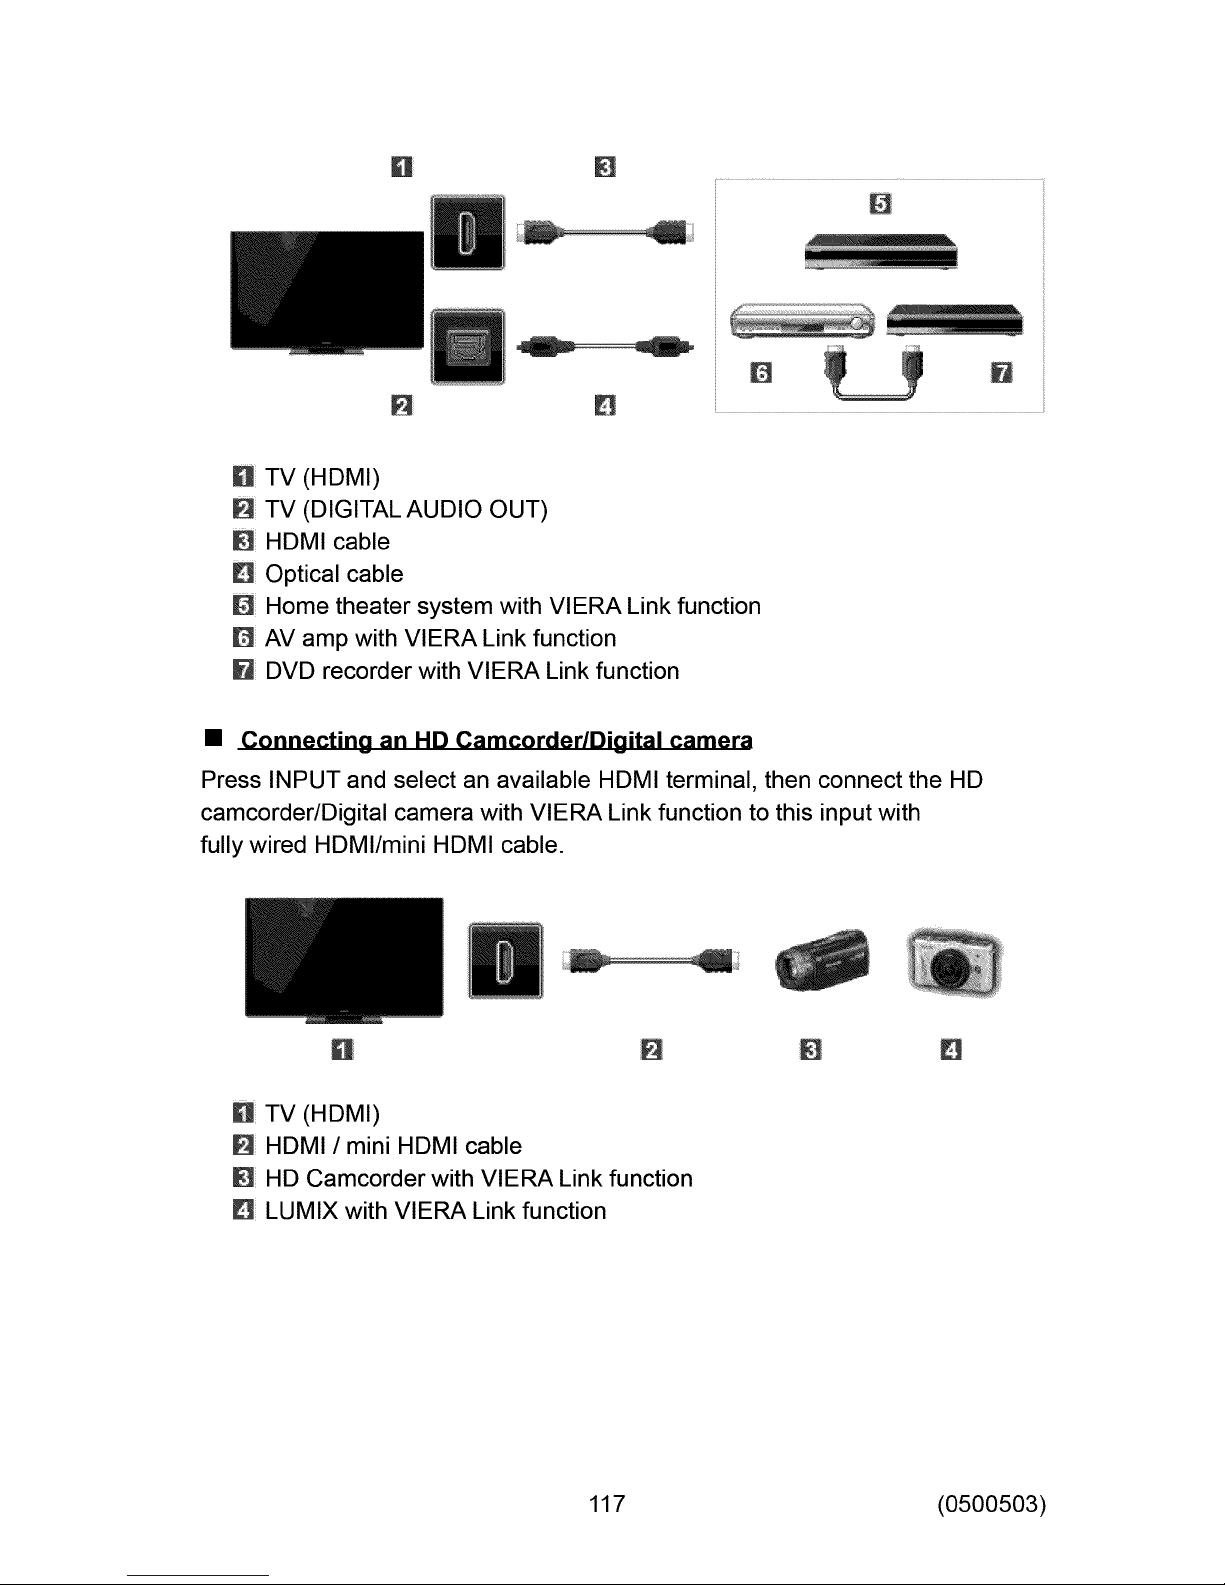
U TV (HDMI)
[] TV (DIGITALAUDIO OUT)
[] HDMIcable
[] Optical cable
[] Hometheater system with VIERALink function
[] AV amp with VIERA Link function
DVD recorder with VIERA Linkfunction
• Connectino an HD CamcorderlDioital camera
Press INPUT and select an available HDMI terminal, then connect the HD
camcorder/Digital camera with VIERA Link function to this input with
fully wired HDMI/mini HDMI cable.
U TV (HDMI)
[] HDMI / mini HDMI cable
[] HD Camcorder with VlERA Link function
[] LUMIX with VlERA Link function
w
117 (0500503)
Page 26

* Individual HDMI equipment may require additional menu settings
specific to each model. Please refer to their respective manuals.
* When audio from other equipment connected to this unit via HDMI is
output using "DIGITAL AUDIO OUT" of this unit, the system switches to
2CH audio.
(When connecting to an AV amp via HDMI, you can enjoy higher sound
quality.)
* Some devices use Mini-HDMI terminal. HDMI (type A) to Mini-HDMI
(type C) cable or adapter should be used.
118 (0500503)
Page 27
Convenience features
VIERA Link TM "HDAVI Control TM"
VlERA Link settings
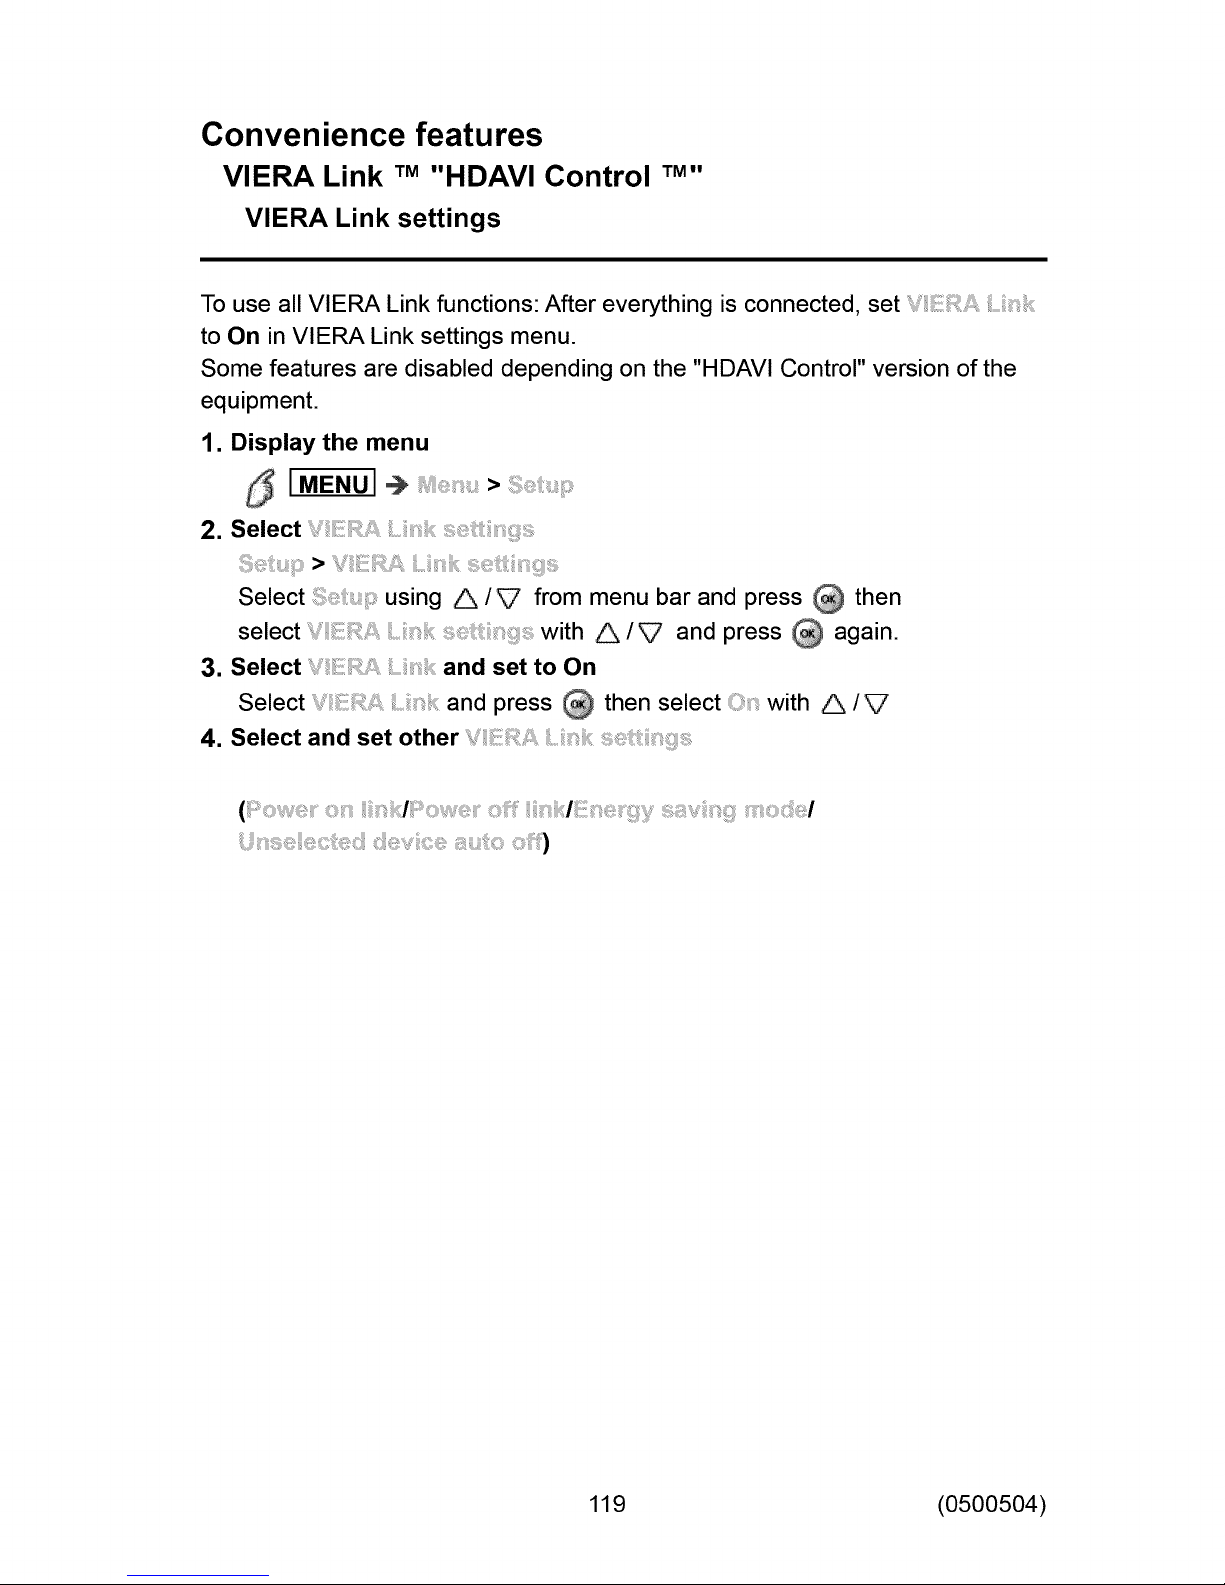
To use all VIERA Link functions: After everything is connected, set
to On in VIERA Link settings menu.
Some features are disabled depending on the "HDAVI Control" version of the
equipment.
1. Display the menu
/_ [MENU] _ >
2, Select
>
Select using A/V from menu bar and press _ then
select with A/V and press _ again.
3. Select and set to On
Select and press _ then select with A/V
4. Select and set other
+++_ + ++++ + +i+)
119 (0500504)
Page 28
Convenience features
VIERA Link TM "HDAVI Control
VIERA Link settings feature
• Automatic Input Switching
When using a Blu-ray Disc player, DVD player/recorder or Home theater
system, the TV will automatically change to the appropriate input, when
playback begins on one of those devices.
• For a Home Theater System the speakers automatically switch to the
theater system.
• Power on link
Yes: The TV is turned on automatically and switches to the appropriate HDMI
input whenever VIERA Link compatible equipment is initially turned on and the
Play mode is selected.
TM ww
• Power off link
When Yes is selected and the TV is turned off, all connected VIERA Link
compatible equipment is also automatically turned off.
• A Panasonic DVD Recorder will not turn off if it is still in Rec mode.
° The TV remains on even if the VIERA Link compatible equipment is turned
Off.
• Enerov savino mode
Quick start: When TV is turned off, all connected VIERA Link compatible
equipment is moved to ECO Standby mode* automatically under these
conditions.
• Power off link: (Yes), The connected equipment has "HDAVI Control 4 or
later (with Quick Start mode)"
• Minimum power consumption of Standby condition for the equipment.
• Unselected device auto off
On: The connected VIERA Link compatible equipment will be turned off
automatically when not in use under these conditions.
120 (0500505)
Page 29
° The connected equipment has "HDAVI Control 2 or later" (for available
equipment only)
[ Example of timing for operation ]
° When the input is switched from HDMI.
• Automatic lip-sync function
Minimizes time delay between the picture and audio when you connect to a
Panasonic theater system or Amplifier.
121 (0500505)
Page 30

Convenience features
VIERA Link TM "HDAVI Control
VIERA Link
Some features are disabled depending on the "HDAVI Control" version of the
equipment.
1. Display the menu
I APPSI _ Apps list
2. Select the item and set(_,_ _i _ _ _ ;_/_/_ i_, ; _ _/_ _ _,_)
Select the desired menu using A/V and set with A/V
Items in the VIERA Link menu may be grayed out if no compatible
equipment is connected (must be HDAVI Control 2 or later) or if the
equipment has not initiated a connection with the TV. In that case,
switch the equipment's power Off and On while the TV is On.
TM n
122 (0500506)
Page 31

Convenience features
VIERA Link TM "HDAVI Control
VIERA Link menu
• Speaker control
You can select the Home theater or TV speakers for audio output. Control the
theater speakers with the TV remote control. This function is available only
when a Panasonic Amplifier or Player theater is connected.
Select using A/V
Select Home theater or TV with A /V
Home theater: Adjustment for the equipment
VOL(+/-) and MUTE buttons are available
° The sound of the TV is muted.
° When the equipment is turned off, the TV speakers take over.
• Selecting Home theater turns the equipment on automatically if it is in
Standby mode.
TM n
rv: The TV speakers are on.
VIERA Link control only with the TV's remote control
Select using A/V
Select the desired equipment with A/V (You can select available
items only.)
(Recorder/Home theateriPlayeriCamcorderiLUMIXlOther)
° If there is more than one equipment item, a number after the name
indicates the number of items. (e.g.Recorderl/Recorder 2/Recorder 3...)
° The number of equipment items that can be connected is three for
recorders, and a total of three for Home Theater/Player/Camcorder/
LUMIX/Others.
Operate the equipment with the TV remote control, pointing it at the TV
* There is a limit to the number of HDMI connectors.
* To operate the equipment, read the manual for the equipment.
* For available TV remote control buttons, whether or not an operation is
available differs depending on the connected equipment.
• BacJLto3_
123 (0500507)
Page 32

Returnsthe inputselection of the device selectedwith the VIERA Link Control
to the TV input.
Select using A /_ and press
124 (0500507)
Page 33

Convenience features
Using Voice guidance
Voice guidance
This function provides a useful audio readout of basic features.
1. Set Voice guidance to On
I MENU] _ > > >
Select the menu using A/V and press
Then, switch to On using A/V and press
2. Set other items
Select the desired menu using A/V and press
Then, change or adjust the item using A /_ and press
125 (0100503)
Page 34

Convenience features
Using Voice guidance
Voice guidance settings
Guidance settings for the visually impaired.
Voice guidance
(Off/On)
On: Enables voice guidance of the basic features (Channel banner and input
source).
Volume
(Low/Mid/High)
Selects the volume for voice guidance.
" Gray-out when is off.
Speed
(Slow/Normal/Fast)
Adjust the readout speed of the voice guidance.
° Gray-out when is off.
User level
(Expert/Beginner)
Selects the level of complexity for voice guidance.
° Gray-out when is off.
Language
(English/Espa_ol/Fran£;ais)
126 (0600302)
Page 35

Convenience features
Control by Smartphone, etc.
Smartphone remote
You can use your smartphone as your TV's remote control.
1. Select
[MENU] -_ >
2. Select in
Select desired menu using A /V
3. Set the item
Switches to On using A/V
This function is subject to change without notice.
For more details please visit below site:
http://panasonic.net/viera/support
127 (0501201)
Page 36

Convenience features
Using USB Keyboard / Gamepad
Keyboard
The USB Keyboard requiring its driver is not supported.
• To select the language type for the keyboard
/_ [MENUI _ > > >
• Key map
Some of the keys of USB keyboards may correspond to the operation of
the remote control.
T / _ /_-/-_
Enter
Back Space
ESC
0-9
Cursor buttons
OK
Back/Return
EXIT
Numeric buttons F9
iF6
F7
F8
Channel down
Channel up
Volume down
Volume up
Red
128 (0501301)
Page 37

Convenience features
Using USB Keyboard / Gamepad
Gamepad
The Gamepad requiring its driver is not supported.
• Key map
Some of the buttons of gamepad may correspond to the operation of the
remote control.
Example:
l
4
5
6
7
8
Volume up/down
Channel up/down
MENU
OK
Back/Return
HOME
APPS
EXIT
129 (0501302)
Page 38

All settings
How to use
Setting menu
Various menus allow you to set the picture, sound, and other functions.
• Some menus are grayed out depending on the input signal or condition.
(e.g. will be grayed out if the aspect is not set to ZOOM.)
1. Display the menu
IME.ul÷
2. Select the menu from menu bar
Select desired menu using A/V from menu bar and press
3. Select the item and adjust
Select desired item using A /V
You can also access to desired menu using _ /
Adjust the item: Using _ /
Set/change the item: Using A/V
* Shows the functions that can be adjusted.
* Some functions will be disabled depending on the type of input signal.
130 (0600101)
Page 39

All settings
Picture
Basic settings
Adjust the image or picture quality.
I MENU] _ >
Picture mode
(Vivid/Standard/Home theater/Cinema/Custom)
Selects from preset picture modes for optimal viewing. Mode is saved
separately for each input.
Back light
Adjusts backlight's luminance (light intensity).
Contrast, Brightness, Color, Tint, Sharpness
Adjusts the color, brightness, etc. for each picture mode to suit your taste.
" Display range
Contrast/Color/Sharpness : 0 - 100 Brightness/Tint :-50 - +50
Color temp.
(Cool2/Cooll/Normal/Warml/Warm2)
Selects color temperature preference, from "cool" (bluish) to "warm" (reddish)
or normal.
Vivid color
(Off/On)
Enhances green and blue color reproduction, especially outdoor scenes.
A.I. picture
Enriches dark areas without affecting black level or brightness in the overall
picture.
= For HDMI input or photo of Media Player (when is set to
Vivid, Standard or Home theater)
° Set to Auto to use this function effectively.
131 (0600201)
Page 40

C.A.T.S.
(Off/On)
Contrast Automatic Tracking System (C.A.T.S.) adjusts the screen brightness
and contrast according to the room's ambient light conditions.
This ECO feature automatically dims the brightness of the screen when the
room lighting is lowered. C.A.T.S. features a built-in delay when the lighting
conditions change. The adjustment happens gradually.
If you prefer a consistent brightness, disable C.A.T.S. by:
> > scroll down to C.A.T.S. and turn it off. Or
> > Picture mode then select viewing mode such as Custom.
Note: Standard picture mode automatically sets C.A.T.S. to On.
Video NR
(Auto/High/Mid/Low/Off)
Reduces noise, commonly called snow. Leave it off when receiving a strong
signal.
MPEG NR
(Off/Weak/Medium/Strong/Auto)
Reduces noise of specific digital signals of DVD, Cable box, etc.
Motion picture setting
(Off/Weak/Mediu m/Stro ng)
Improves motion picture quality by reducing motion blur.
" Gray-out in Game mode and Skype (full screen).
132 (0600201)
Page 41

All settings
Picture
Pro settings
Adjust the picture mode in more detail.
Set , _::_:: to Custom/Cinema first.
I MENU] '_ > >
Panel brightness
(Low/Mid/High)
Selects different levels of overall panel brightness.
AGC
(0-15)
Automatic Gamma Control. Increases automatically the brightness of a dark
signal.
Black extension
(0-15)
Adjust the gradations in dark shades of the image.
Cool white effect
(0-15)
Adjusts the white temperature point toward cool.
W/B detail adjustment
W/B high R, G, B (+/-50)
Adjusts the white balance for light red/green/blue areas.
W/B low R, G, B (+/-50)
Adjusts the white balance for dark red/green/blue areas.
More detail adjustment
Adjusts more detailed White Balance items.
133 (0600202)
Page 42

Input signal level
Adjusts the IRE picture level in relation to the gain of the red, green & blue
colors.
Red, Green, Blue gain
Adjusts the red/green/blue gain value of each Input signal level.
Reset to defaults
Reset all ;_:_:_:t, : to factory defaults settings.
Reset to defaults
Reset _ adjustments to factory defaults settings.
Color detail adjustment
Red, Green, Blue hue (+/-50)
Adjusts the red/green/blue hue between light, pastel and vivid.
Red, Green, Blue saturation (+/-50)
Adjusts the difference of the red/green/blue color against its own brightness.
Red, Green, Blue luminance (+/-50)
Adjusts the luminance of red/green/blue areas.
Reset to defaults
Reset Coo, adjustments to factory defaults settings.
Gamma detail adjustment
Gamma
(I.812.012.212.412.6)
Gamma correction. Adjusts the intermediate brightness of the image.
More detail adjustment
Adjusts more detailed Gamma items.
134 (0600202)
Page 43

Input signal level
Adjusts the IRE picture level in relation to the gain of the red, green & blue
colors.
Gain
Adjusts the gain value of each Input signal level.
Reset to defaults
Reset all ;_:_:_:t, : to factory defaults settings.
Reset to defaults
Reset to factory defaults settings.
Reset to defaults
Resets all adjustments to factory default settings.
135 (0600202)
Page 44

All settings
Picture
Advanced picture
5 IMENU]
Game mode
(Off/On)
Optimizes the TV image for fast response signal when playing video games.
3:2 pulldown
(Off/On/Auto)
Reduces jaggies in film-based content by transforming 24 fps to 30 fps (non-
HDMI).
• Available for interlaced content (480i or 1080i) via analog source.
• Gray-out if is set to On.
1080p pixel direct
(Off/On)
Enables the support of a 4:4:4 digital video format signal. Use only with a 4:4:4
capable source.
Note:
> >
• Available only for HDMI 1080p input.
• Gray-out if signal is not 1080p 24/60 4:4:4.
HDMI content type
(OfflA utolP hotosl Graph ics )
Based on a HDMI content type, picture is adjusted for optimum playback
automatically. Photos/Graphics be able to select manually. Cinema/Game be
able to select manually in the , _/_ ,_ _ menu.
Auto: Switches content type automatically depending on the HDMI signal
information.
Photos: Best setting for JPEG viewing.
Graphics: Best setting for On-Screen display of connected equipment.
Auto detail settings
Selectable the effect on each content type in Auto mode.
136 (0600203)
Page 45

HDMI/DVI RGB range
(Auto/Standard (16-235)/Nonstandard)
Prevents the blown out highlights and blocked up shadows when a wide-range
signal is received. Selects between standard RGB range (16-235 bits) or non
compliance (0-255 bits).
Auto: Switches the RGB range (Standard (16-235)/Nonstandard) depending on
the HDMI signal information.
Black level
(Light/Dark)
Select Dark when details are washed out in dark areas of picture from external
source.
° Available when input is set to external source.
3D Y/C filter
(Off/On)
Minimizes rough edges (clot crawl) in the picture from a composite source.
137 (0600203)
Page 46

All settings
Picture
Screen settings
5 IMENU]
Screen format
(FulI/H-FILL/JUST/SIDECUT JUST/4:3/ZOOM/SIDECUT ZOOM)
SDsignal:Full -_ JUST -_ 4:3 --_ ZOOM
HD signal:Full -_. H-FILL --_ JUST _ SIDECUT JUST -_ 4:3 -_
ZOOM -* SIDECUTZOOM
Changes the format (aspect ratio). Lets you choose the aspect depending on
the format of received signal.
Overscan
(Off/On)
Selects the screen area displaying the image for FULL aspect.
On: Enlarges the image to hide the edge of the image.
Off: Displays the image in the original size.
Set to On if noise is generated on the edge of the screen.
H size
> >
(Size l/Size 2)
Adjusts the horizontal display range to reduce noise of both side edges of an
image.
Size 2: Adjusts the image size according to the aspect mode to reduce noise.
Aspect mode: 4:3
The width will be decreased on both sides to reduce noise.
Aspect mode: FULL/JUST/Sidecut Justl(H-FILLIZOOMISidecut Zoom)
The width will be increased on both sides to reduce noise.
Zoom adjustments
Adjusts vertical position and size when FORMAT setting is set to JUST or
Zoom.
- JUST: V-size max is 3
- ZOOM: V-size max is 15
138 (0600204)
Page 47

Screen display
(Off/On)
Turns the screen off when you select.
• The sound is active even if the screen turns off.
• Press any buttons to turn the screen on.
° This function is effective in reducing power consumption when listening to
the sound without watching the TV screen.
139 (0600204)
Page 48

All settings
Picture
Other settings
Copy adjustments
You can copy the selected Cinema or Custom settings and apply them to all
or other input.
Settings are basic picture settings and Pro settings.
Reset to defaults
Resets all picture adjustments to factory default settings except for advanced
settings.
140 (0600206)
Page 49

All settings
Sound
Basic settings
Adjust audio quality.
I MENU] _ >
Sound mode
(StandardlMusiclSpeechlUser)
Selects your favorite sound mode.
° The selected mode affects all input signals.
Standard: Provides the suitable sound quality for all types of scenes.
Music: Improves sound quality for watching music videos, etc.
Speech: Improves sound quality for watching news, drama, etc.
° In Music and Speech modes, you can adjust and settings, and
those settings will be stored for each mode.
User: Adjusts the sounds manually by using the equalizer to suit your favorite
sound quality.
° For the User mode, will appear on the Sound Menu instead of
and :,:_ ;. Select and adjust the frequency.
Bass
Increases or decreases the bass response.
° Gray-out if is set to User.
Treble
Increases or decreases the treble response.
° Gray-out if is set to User.
Equalizer
(150Hz/250Hz/500Hz/1kHz/2kHz/4kHz/8kHz/12kHz/Reset to default)
Adjusts the frequency level to suit your favorite sound quality.
141 (0600301)
Page 50

° This function is available when is set to User.
° Select the frequency and change the frequency level by using the cursor
button.
° To enhance the bass sound, raise the level of the lower frequency. To
enhance the treble sound, raise the level of the higher frequency.
° To reset the levels of each frequency to the default settings, select Reset to
defaults by using the cursor button, and then press the OK button.
Balance
Emphasizes the left/right speaker volume.
° Gray-out when using Home Theater.
142 (0600301)
Page 51

All settings
Sound
Voice guidance settings
Guidance settings for the visually impaired.
Voice guidance
(Off/On)
On: Enables voice guidance of the basic features (Channel banner and input
source).
Volume
(Low/Mid/High)
Selects the volume for voice guidance.
" Gray-out when is off.
Speed
(Slow/Normal/Fast)
Adjust the readout speed of the voice guidance.
° Gray-out when is off.
User level
(Expert/Beginner)
Selects the level of complexity for voice guidance.
° Gray-out when is off.
Language
(English/Espa_ol/Fran_ais)
143 (0600302)
Page 52

All settings
Sound
Advanced settings
Surround
(Off/On)
Enhances audio L/R response when listening to stereo. Ideal for music and
action movies.
° Gray-out when using Home Theater.
A.I. sound
(Off/On)
Equalizes overall volume levels across all channels and external inputs.
• Gray-out when using Home Theater.
Volume leveler
(+/-6)
Minimizes volume disparity after switching to external inputs.
° Gray-out when using Home Theater.
Distance to wall
(Over lft(30cm)/Up to lft(30cm))
Over lft(30cm): TV is on a stand. Keeps current setup.
Up to lft(30cm): TV is mounted. Reduces low frequency level to prevent
resonance.
Preferred audio type
(Main Audio/Hearing ImpairedNisually Impaired)
Allows setting of the accessible audio format when it's broadcast and the
language setting matches.
Digital audio out selection
(Auto/PCM)
Selects the initial setting for digital audio output signal from DIGITAL AUDIO
OUT and HDMI 2 (ARC function) terminals.
Auto: Dolby Digital Plus, Dolby Digital and HE-AAC multi-channel are output
as Dolby Digital Bit stream. MPEG is output as PCM.
PCM: Digital output signal is fixed to PCM.
144 (0600303)
Page 53

t
For video contents of Media Player / Network services.
o
ARC (Audio Return Channel): A function of digital audio output using HDMI
cable.
HDMI input (HDMIx in)
(Digital/Analog)
The default setting is Digital for the HDMI connection. (Digital input signal)
Select audio input terminal when a DVI cable is connected along with an
analog audio input signal.
Reset to defaults
Resets all Audio adjustments to factory default settings.
145 (0600303)
Page 54

All settings
Sound
DIGITAL AUDIO OUT terminal
You can enjoy your Home Theater by connecting a Dolby Digital (5.1 channel)
decoder and "Multi Channel" amplifier to the DIGITAL AUDIO OUT terminals.
• Depending on your DVD player and DVD-Audio software the copyright
protection function may operate and disable optical output.
° When an ATSC channel is selected, the output from the DIGITAL AUDIO
OUT jack will be Dolby Digital. When channel is selected, the output will be
PCM.
° When playing a movie on Movie player, when the sound has been recorded
in Dolby Digital, the output from the DIGITAL AUDIO OUT terminal will be
Dolby Digital. When the sound is recorded in other formats, the output will
be PCM.
146 (0600304)
Page 55

All settings
Network
Network settings
5 IMENU]
Network connection
Connects the TV to the home network. Searches for wireless network or
establishes wired connection.
Follow the directions on the screen to complete the network settings.
Network status
Tests the connection between the TV to the local router and the Internet.
Displays Current settings and status screen. (Network type/Wireless
settings/MAC address/IP Address etc.)
* Displayed items differ depending on the type of network connection.
VIERA remote settings
Sets a network-based remote control.
VIERA remote
(On/Off)
Enables to control the TV from the network equipment (smartphone, etc.).
>
• Sets to On to enable below settings.
Device to upload contents
Selects device to upload contents from the network equipment
(smartphone,etc.).
Network link
Settings for DLNA Server.
147 (0600401)
Page 56

DLNA server
(On/Off)
Enables use this -IV as DMS for network devices (DLNA Certified VIERA)
° Sets to On to enable below settings.
Registration Type
(Auto/Manual)
Selects the limitationof access to this -IV for each device on the home
network.
Auto: All the available device on the home network are
accessible.(maximum 16 equipment)
Manual: Sets the access limitation for each device in the Remote device
List.
Remote device list
Lists the available device on the home network.
Software update
Check if software (firmware) update for the TV is available.
Press OK to start the Software update screen. And follow directions on the
screen.
* Set first.
New software notice
(Off/On)
Selects whether or not to display a notification message when a software
(firmware) update is available for download. Follow the directions on the
screen to download.
148 (0600401)
Page 57

All settings
Timer
Setting menu
Adjusts the TV's date and time. (Needed for timer function)
I MENU] _ >
149 (0600501)
Page 58

All settings
Timer
Clock settings
Mode
(Auto/Manual)
Sets the date and time manually or automatically via Internet connection.
Date, Time
(YearlMonthlDaylHourlMinute)
Current date
Time zone
(EST/CST/MST/PST/AKST/HST/NST/AST)
Selects your time zone, to enable correct automatic date and time settings.
DST
(+1 hour/+1/2 hour/Off/Auto)
Selects if Daylight Saving Time is currently observed.
150 (0600502)
Page 59

All settings
Timer
Sleep (Off timer)
Sleep (minutes)
(Off/15 minutes/30 minutes/60 minutes/90 minutes)
Selects how long the TV stays on before it automatically turns off.
151 (0600503)
Page 60

All settings
Timer
Auto turn off settings
No activity for 4 hours
(Power TV off/Stay on)
To conserve energy, the TV automatically turns off when no operation of
remote and side panel key continues for more than 4 hours.
Not in use when "On/Off Timer" is set. "No activity for 4 hours was activated"
will be displayed for about 10 seconds when the TV is turned on for the first
time after the power was turned off by "No activity for 4 hours" feature. The on-
screen display will flash 3, 2 and 1 to indicate the last three (3) remaining
minutes prior to the shut-off.
No signal for 10 minutes
(Power TV off/Stay on)
To conserve energy, the TV automatically turns off when NO SIGNAL and NO
OPERATION continue for more than 10 minutes. Not in use when "On/Off
Timer" is set. "No signal for 10 minutes was activated" will be displayed for
about 10 seconds when the TV is turned on for the first time after the power
was turned off by "No signal for 10 minutes" feature. The on-screen display will
flash 3, 2 and 1 to indicate the last three (3) remaining minutes prior to the shut-
off.
152 (0600504)
Page 61

All settings
Timer
Timer (On/Off timer)
Timer set
(Off/On)
Enables or disables the Timer.
Inputs
Sets which input will be selected when the TV turns on.
Channel
Sets the channel to select when the TV turns on.
Day
Sets the day when the TV turns on.
[SUN/MON/TUE/WED/THU/FRI/SAT (displays the nearest future date) MON-
FRI/SAT-SU N/DAILY/Every SU N/Every MON/Every TU E/Every WED/Every
THU/Every FRI/Every SAT]
On time
Sets the time that the TV will turn on at. The TV will turn off after 90 minutes or
as specified.
Off time
Sets the time that the TV will turn off at within 24 hours.
153 (0600505)
Page 62

All settings
Setup
Setting menu
5 IME.u]
>
154 (0600601 )
Page 63

All settings
Setup
Eco navigation
Eco navigation
Set to Eco: Sets the TV to the most suitable energy-saving mode
automatically.
Optimizes the TV's various modes to save energy.
Note: The TV's brightness will adjust and adapt as the room lighting changes.
155 (0600602)
Page 64

All settings
Setup
USB device setup
USB device setup
Remove USB device safely.
156 (0600618)
Page 65

All settings
Setup
Parental control
5 IMENU]
Change password
Create a new password. Input the new 4-digit password twice.
(All settings > Setup > Password setting)
Mode
(Off/All/Custom)
Locks (All) or Unlocks (Off) all channels, programs or inputs. For Custom,
Locks specified inputs of and
Set Custom in to specify _ _ _ , and
Channel
These channels will be blocked regardless of the program ratings.
Mode
(Off/All/Custom)
Locks (All) or Unlocks (Off) all channels. For Custom, Locks specified
channels. Set-
> >
Channel 1-7
Designates channel number to be blocked at any time, regardless of its
broadcast content.
Game
(On/Off)
Restricts access to channel 3, channel 4 and all the TV's inputs.
Program
Prohibits viewing of TV content based on the rating provided by the
broadcasters.
157 (0600606)
Page 66

Mode
(On/Off)
Sets program lock status. "V-chip" technology enables restricted shows to
lock according to -IV ratings. On: Set each rating level (MPAA, U.S.-I-V,
C.E.L.R., C.F.L.R.)
MPAA
Selects U.S. movie ratings to lock.
U.S.TV
U.S. TV program ratings.
C.E.L.R.
Canadian English ratings.
C.F.L.R.
Canadian French ratings.
158 (0600606)
Page 67

All settings
Setup
Password setting
You need to enter the password when you access locked channels or inputs.
_ _ (Input your 4-digit password)
* If it is your first time entering the password, enter the password twice in
order to register it.
* Make a note of your password. Do not forget it. (If you have forgotten
your password, consult your local dealer.)
* When you select a locked channel, a message will be displayed that
allows you to view the channel after you input your password.
159 (0600607)
Page 68

All settings
Setup
Parental control ratings
"V-chip" technology enables you to lock channels or shows according to
standard ratings set by the entertainment industry.
• U.S. MOVIE RATINGS (MPAA) • U.S. TV PROGRAMS RATINGS
(U. S. TV) -Age-Based Ratings
Not Rated.
All children and General
Audience.
Parental Guidance
suggested.
Parental Guidance for
children under 13.
Restricted Viewing,
parental guidance is
suggested for children
under 17.
No one 17 or under
allowed.
CANADIAN ENGLISH RATINGS
(C. E. L. R.)
Exempt programming.
Not Rated.
All children.
Directed to children age
7 and older.
General Audience.
Parental Guidance
suggested.
Parents strongly
cautioned, parental
guidance is suggested
for children under 14.
Mature Audience only.
CANADIAN FRENCH RATINGS
(C. F. L. R.)
Exempt programming.
All children.
Children 8 years and
older.
General programming.
Parental Guidance.
Viewers 14 and older.
Adult programming.
Contents-Based Ratings
General programming.
Not recommended for
young children.
Not recommended for
ages under 13.
Not recommended for
ages under 16.
Programming restricted
to adults.
160 (0600608)
Page 69

FantasyViolence.
Sexual situations.
Suggestive Dialogue.
Violence.
Strong Language.
Caution
The V-Chipsystem used in this set is capable of blocking "NR" programs (non
rated, not applicable and none) as per FCC Rules Section15.120(e)(2). If the
option of blocking "NR" programs is chosen "unexpected and possibly
confusing results mayoccur, andyou may not receive emergency bulletinsor
any of the following types of programming:"
• Emergency Bulletins (Such as EAS messages,weather warnings and
others)
° Locally originated programming ° News ° Political ° Public Service
Announcements ° Religious ° Sports ° Weather
161 (0600608)
Page 70

All settings
Setup
ANTENNA/Cable setup
5 IME.u]
ANTENNA/Cable signal
(Cable/Antenna)
Selects signal source connected directly to the ANTENNA/Gable In terminal.
Note: When using a Gable or Satellite box, it is recommended to connect the
box to an AV IN terminal and skip this setting.
Channel surf mode
(All/Favorite/Digital only/Analog only)
Sets the mode to select the channel with the Channel up/down button.
Favorite: Only channels registered as FAVORITE.
Auto program
(All channels/Analog only/Digital only)
° Select scan type and press OK to start scanning automatically.
After the scanning is completed. Select Apply.
° All previously saved channels are erased.
> >£1,/I_III_/AIC hie
Manual program
Change the channel setting or channel display.
Edit: Edit these items.
Caption: Changes the station identifier. (maximum 7 characters available)
Favorite: Registers channels to the Favorite List from '::,:_ _ ;_; _ _:.
Add: Adds (Yes) or skips (No) channels
Apply: After the editing is completed, press OK to save the settings.
Cancel: Cancel the changes.
162 (0600609)
Page 71

Signal meter
Check the signal strength if interference isfound or freezing occurs ona digital
image.
Ifthe signal isweak, check the antenna.
Ifyou cannot figure out the problem,consult your local dealer.
Not available if "Cable" is selected in "ANTENNA/Cablesignal".
Available only for digital antenna channels.
163 (0600609)
Page 72

All settings
Setup
Language settings
5 IME.u]
Menus language
(English/Espa_ol/Fran_:ais)
Selects the screen menu language.
Preferred SAP language
(English/Spanish/French)
Selects the preferred language for hearing or visually impaired, if offered
during digital broadcast
Note: preferred language takes precedence over preferred audio type.
(Available only in the U.S.)
> >
164 (0600610)
Page 73

All settings
Setup
Display customization
5 IME.u]
Input labels
Selects the terminal and label of the external equipment. Devices connected to
external input terminals can be labeled for easier identification during the input
selection.
Label: Input name/Not used/Blu-ray/CABLE/SATELLITE/DVD/
DVD REC/DVR/GAM E/HOM E THTR/RECEIVER/M EDIA CTR/
MEDIA EXT/VCR/CAM ERA/MON ITOR/AUX/OTH ER/Customize
• When the INPUT is labeled as "Not used", then it will not appear in the
Input select menu.
• Select "Customize" to enter your own labels for the input (ex.
"Computer")
VIERA Connect Banner
> >
(On/Off)
Sets the banner display status.
165 (0600611 )
Page 74

All settings
Setup
Closed caption
5 IME.u]
Mode
(Off/On/CC on mute)
On: To display Closed captions.
CC on mute: To display Closed captions when the audio is muted. (When not
using, select Off).
Analog
(CC 1-4/T1-4)
Choose the Closed caption service of Analog broadcasting.
CCl-4: Information related to pictures (Appears at the bottom of the screen)
T1-4: Textual information (Appears over the entire screen)
Digital
(Primary/Second./Service 3/4/5/6)
The Digital Closed caption menu lets you configure the way you choose to
view the digital captioning.
> > >
Digital setting
Set display settings in digital programs.
166 (0600612)
Page 75

Size
Select the text size
Font
Select the text font
Style
Select the text style (Raised, Depressed, etc.)
Foreground
Select the color of text
Foreground opacity
Select the opacity of text
Background
Select the color of text box
Background opacity
Select the opacity of text box
Outline
Select the outline color of text (Identify the setting options on the screen).
Reset to defaults
Resets all Closed caption settings to factory default settings.
167 (0600612)
Page 76

All settings
Setup
Closed caption notice
• For viewing the CC of digital broadcasting, set the aspect to FULL (If
viewing with H-FILL, JUST, ZOOM or 4:3, characters might be cut off).
° The CC can be displayed on the TV only when the receiver (such as a
Cable box or satellite receiver) has the CC set to ON within the device
itself. Check with your Cable or Satellite provider for instructions. The TV's
CC button does not operate the Satellite or Cable box's CC function.
° If the CC is set to ON on both the receiver and TV when the signal is 480i
(except for the HDMI connection), the CC may overlap on the TV.
° If a digital program is being output in analog format, the CC data will also
be output in analog format.
° If the recorder or output monitor is connected to the TV, the CC needs to be
set up on the recorder or output monitor.
168 (0600613)
Page 77

All settings
Setup
VIERA Link settings
5 IMENU]
VIERA Link
(Off/On)
To use all VIERA Link functions, set to On after everything is connected.
Power on link
(Yes/No)
Yes: The TV is turned on automatically and switches to the appropriate HDMI
input whenever VIERA Link compatible equipment is initially turned on and the
Play mode is selected.
Power off link
(Yes/No)
When Yes is selected and the TV is turned off, all connected VIERA Link
compatible equipment is also automatically turned off. The TV remains on even
if the VIERA Link compatible equipment is turned off.
> >
Energy saving mode
(Quick start/Save)
Quick start: When TV is turned off, all connected VIERA Link compatible
equipment is moved to ECO Standby mode* automatically under these
conditions.
Power off link: (Yes). The connected equipment has "HDAVI Control 4 or later
(with Quick Start mode)"
* Minimum power consumption of Standby condition for the equipment.
Unselected device auto off
(On/Off)
On: The connected VIERA Link compatible equipment will be turned off
automatically when not in use under these conditions. The connected
equipment has "HDAVI Control 2 or later" (for available equipment only)
169 (0600614)
Page 78

All settings
Setup
System settings
5 IME.u]
Keyboard type
(U.S./Canadian French/Canadian Multilingual Standard/Spanish (Latin
America)/Spanish (Spain))
Selects the country/region of the keyboard connected to this TV.
Factory defaults
Clears all TV settings and memory to factory defaults.
License
Displays the software license information.
> >
170 (0600615)
Page 79

All settings
Setup
Other settings
5 IME.u]
Power save
(Saving/Standard)
Reduces screen brightness to lower power consumption. Eye-friendly for
viewing in a dark room.
> >
171 (0600616)
Page 80

Support / FAQ
Help menu
Using Help menu
The TV's built-in self-help resources.
1. Display the menu
S IME.ul÷
2. Select from menu bar
Select desired menu using A /V from menu bar and press
3. Select the Help menu
Select desired menu using A/V and press
This screen
Verifies proper function of the TV for picture and sound.
• Follow the instructions on the screen to complete the self test.
Displays TV's software (firmware) version.
Displays the device information of this TV.
172 (0700101)
Page 81

Support / FAQ
FAQ
Picture - Viewing
Frequently Asked Questions
For updated information, please visit Panasonic web site.
How do I view the picture from devices such as : Cable/Satellite box,
game console, Blu-ray or DVD player?
° Press the [INPUT] button on the remote to select the correct input source.
° Check that the device is turned on and functioning correctly.
Why doesn't the picture look like it is in High Definition?
° Press the _ button on the remote to confirm the type of signal being
received. HD signal should be 720p, 1080i or 1080p.
° Select a High Definition channel from your HD source (Cable, Satellite or
fiber optic service). HD channels sometimes broadcast non-HD content.
• Ensure that your HD source (HD box, Blu-ray player, etc.) is connected to
the TV with an HDMI or Component cable and set to output an HD video
signal.
173 (0700201)
Page 82

Support / FAQ
FAQ
Picture - Snowy / none
Why is there no picture or just a blue, black or snowy screen being
displayed?
° Press _MENU_ and select "Help". Then select "TV Self-test". If the test
picture shows correctly, then the problem is with the external device (ex.
Cable box, DVD player, etc.) or its connection to the TV.
• Check if the power cord is plugged in and the TV is turned on (front red
LED light should be on; not blinking)
• Press the [INPUT] button on the remote to select the correct input source.
• Ensure all connections are correct and secure. Especially check for
Component and VIDEO connection since these terminals are shared.
• When using an external video source, such as a Cable/Satellite box or DVD
player, check that the device is on and functioning correctly.
° Press _MENU_ on the TV's remote control. If the menu is displayed, then
the TV is working; recheck above steps.
Why is the picture snowy when is selected?
° When using a cable service (without a box), check that all connections are
secure.
• When using a cable or satellite box, change the connection (wiring) to
Composite, Component or HDMI.
° If you're using an antenna, then check that connections are secure. Change
the position or direction of the antenna and check the , : _:,.
174 (0700202)
Page 83

Support / FAQ
FAQ
Picture - Distortion
The picture is distorted after selecting the "AV" input. What should I do?
• Ensure that the device is connected correctly to the TV's Video/Component
green connector.
° If using VIDEO or COMPONENT:
Press [ INPUT I, scroll to AV, press _ to select Video or Component.
Why do black bars appear on the top and bottom and/or sides of the
screen?
• Change the format (aspect ratio) of the picture by pressing the LFORMATJ
button on the remote control.
° Check the aspect settings on your external video source, such as
Cable/Satellite box, DVD/Blu-ray Disc player, etc.
Note: Some content, such as film-based movies, are available in extra-wide
format. Top and bottom bars are unavoidable.
Why is the picture chaotic and/or torn and/or with a buzz in the speakers?
• Check if electrical products such as kitchen appliances, fluorescent lights or
light dimmers are nearby. They may interfere with the TV's picture.
° Try viewing a picture from another device, such as a DVD player or a game
console, to narrow down the source of the problem.
175 (0700203)
Page 84

Support / FAQ
FAQ
Picture - Continue
Why is there a black box on the screen?
" Change settings of Closed caption (CC).
Why do some small spots on the screen remain bright or dark?
• The panel is made up of a few million pixels and is produced with advanced
technology through an intricate process. Sometimes a few pixels may be
bright or dark.
• These pixels do not indicate a defective panel and will have no impact on
the performance of the TV.
Why is the picture brightness changing?
° Turn the C.A.T.S. feature off.
Press _MENU_ _ > > ....
176 (0700204)
Page 85

Support / FAQ
FAQ
Sound - None
Why is there no sound coming from the TV?
• Make sure the volume is up and I MUTEI is off.
° Check that the correct (Secondary Audio Program) is selected by
pressing the _ button on the remote control.
= If the TV is connected to a Panasonic Home Theater via HDMI cable, then
check VIERA Link controls.
= If the TV is connected to a Home Theater via optical cable, then: Check the
connection, the audio system is on, the correct input is selected.
= Check analog/digital audio settings.
177 (0700205)
Page 86

Support / FAQ
FAQ
Sound - Unusual
Why is the sound unusual, distorted, low volume or in another language?
° Check that the correct (Secondary Audio Program) is selected by
pressing the _ button on the remote control.
° Check that all connections of external equipment connected to the TV are
secure.
° When using Cable or Satellite box, check the device's audio settings.
(Example: try changing the box's Audio Range to "narrow")
Why is there a clicking, ticking or buzzing sound coming from the TV
unit?
When TV power is turned on or shut off there are electrical components
that make a click sound. This is normal operation.
Changes in the temperature and humidity of the room may cause thermal
expansion and contraction that can produce sounds. This is not a sign of
faulty operation or a malfunction.
178 (0700206)
Page 87

Support / FAQ
FAQ
Networking
How do I get Internet services of Home Screen to work on my TV?
1. You need a broadband (high speed) Internet service with a speed of no less
than 1.5 Mbps.
2. Connect the TV to the Internet through your router by an Ethernet cable or a
Panasonic Wireless LAN (built-in).
3. Start wizard, then follow the directions on the screen
to connect. If the connections still fails, then check with your Internet
service provider or router/modem manufacturer if there are firewall, content
filter or proxy settings that may block the TV from accessing the Internet.
Can I download new apps (content/services) onto my TV?
° Yes. Display Apps (application) list on the Home Screen by pressing the
APPS button, then select VIERA Connect market. VIERA Connect market
allows you to find and install the applications to Apps list.
179 (0700207)
Page 88

Support / FAQ
FAQ
Software update
How do I check for the latest software (firmware) version for my TV?
° In the main menu, select i_ :i.Select i_ __.The current
version and latest version software will be shown. If software update is
grayed out, the TV is not connected to the Internet. If a newer version is
available, update your TV. Follow the on screen instructions, do not power
off the TV until the update is complete. Be patient; firmware update may
take a while.
How do I get the software update information and download periodically?
° In the main menu, select i_ :i.Highlight _.Make
sure that setting is On.
When the TV is turned On, update message is displayed if available.
Follow the directions on the screen to download.
180 (0700208)
Page 89

Support / FAQ
FAQ
Voice guidance
How does the Voice guidance feature work?
= This function provides you with useful voice guidance for basic features.
= For more information about settings or operation of Voice guidance, please
refer to below page.
(Convenience features > Using Voice guidance)
181 (0700211)
Page 90

Support / FAQ
FAQ
Eco-Navigation (Eco-Navi)
Why does my picture look dim and/or sometimes changes brightness
levels?
° This TV is equipped with a money saving feature called Eco-Navigation or
Eco-Navi. The TV automatically dims the brightness to save energy. It also
puts the picture in "Standard" mode and enables the C.A.T.S. feature so it
will adjust the picture brightness automatically depending on the rooms
ambient lighting conditions. This mode will also turn the TV power off if no
signal is detected for 10 minutes.
• For more information about Eco navigation, please refer to below page.
(Watching TV > Useful features > Eco navigation)
182 (0700217)
Page 91

Support / FAQ
FAQ
Other
What is the easiest and best way to connect a High-Definition Cable or
Satellite box to the TV?
° Use an HDMI cable. It carries both digital video and audio signal in HD.
HDMI cable is the only cable needed to connect an HD device to the TV.
Why does the _ button not display Closed caption?
° When viewing TV via an HDMI connected device, such as a Cable or
Satellite box, CC must be enabled on the device.
° Closed caption is available only at supported TV programming.
Why does the screen and back cover of the TV get warm?
° The main unit radiates heat and some of the parts may become hot. This is
normal operation and does not affect the performance of the set.
° Ensure good ventilation.
° Do not block the ventilation holes of the TV and do not place the TV on top
of other equipment.
183 (0700218)
Page 92

Support / FAQ
FAQ
Menu - Gray-out or missing items
Why the option or available inputs or are not listed in
the menu?
• When you label an input as "Not used", then it will be hidden from the
menu. To make the input visible again:
- Press INPUT
- Press i Edit labels
- Select the input you want to unhide and re-label it.
Some menu items are grayed-out and unable to be selected. Why?
• Depending on certain modes or the selected input, some options are not
available.
184 (0700219)
Page 93

Support / FAQ
FAQ
Factory defaults
How do I reset my TV to all factory defaults and settings?
° In the main menu, select_i_, .Highlight and press _.
Enter your password (if locked). Confirmation message will be displayed.
Follow the directions on screen to reset the TV to its original factory
defaults.
185 (0700220)
Page 94

Support / FAQ
Care and Cleaning
Display panel
First, unplug the Power cord plug from the wall outlet.
The front of the display panel has been specially treated. Wipe the panel
surface gently using only a cleaning cloth or a soft, lint-free cloth.
• If the surface is particularly dirty, after cleaning up the dust, soak a soft, lint-
free cloth in diluted mild liquid dish soap (1 part mild liquid dish soap diluted
by 100 times the amount of water) and then wring the cloth to remove
excess liquid. Use this cloth to wipe the surface of the display panel, then
wipe it evenly with a dry cloth of the same type until the surface is dry.
• Do not scratch or hit the surface of the panel with fingernails or other hard
objects. Furthermore, avoid contact with volatile substances such as insect
sprays, solvents, and thinner, otherwise, the quality of the surface may be
adversely affected.
186 (0700301)
Page 95

Support / FAQ
Care and Cleaning
Cabinet
First, unplug the Power cord plug from the wall outlet.
• Cabinet
If the cabinet becomes dirty, wipe it with a soft, dry cloth.
° If the cabinet is particularly dirty, soak the cloth in a weak mild liquid dish
soap and then wring the cloth dry. Use this cloth to wipe the cabinet and
then wipe it dry with a dry cloth.
• Do not allow any mild liquid dish soap to come into direct contact with the
surface of the TV. If water droplets get inside the unit, operating problems
may result.
° Avoid contact with volatile substances such as insect sprays, solvents, and
thinner, otherwise, the quality of the cabinet surface may be adversely
affected or the coating may peel off.
° Do not let articles made from rubber or PVC be in contact with the TV for
long periods of time.
187 (0700302)
Page 96

Support / FAQ
Care and Cleaning
Pedestal / Power cord
First, unplug the Power cord plug from the wall outlet.
• Pedestal
° Cleaning
Wipe the surfaces with a soft, dry cloth. If the unit is particularly dirty, clean
it using a cloth soaked with water to which a small amount of mild liquid
dish soap has been added and then wipe with a dry cloth. Do not use
products such as solvents, thinner, or household wax for cleaning, as they
can damage the surface coating. (If using a chemically-treated cloth, follow
the instructions supplied with the cloth.)
° Do not attach sticky tape or labels, as they can make the surface of the
pedestal dirty. Do not allow long-term contact with rubber, vinyl products, or
the like. (Doing so will cause deterioration.)
• Power cord
• Wipe the plug with a dry cloth at regular intervals. (Moisture and dust can
lead to fire or electrical shock.)
188 (0700303)
 Loading...