

Panasonic E- Setup Manual

E-Series
NVR Setup Guide
Panasonic System Networks Co., Ltd.
Security Systems Business Division
V1. 7thNov 2014
V2. 30thJan 2015

<NOTICE>
This document is supplementary to the
operation manual.
The screens used in this document is taken from
K-NL-308K with firmware version3.20.
Depending on the firmware version, the screens
may differ from the actual screens.

3
Menu tree of NVR
For System related settings :
Day & Time / Display /Account /
Firmware Update / Maintenance
For Camera related settings:
Encode / Image Adjustment /
Firmware Update
SETTING
SYSTEM
REMOTE
STORAGE
EVENT
NETWORK
For Recording related settings:
Schedule / HDD Configuration /
Others
For Event related settings:
Motion Detection /
Alarm Detection / Others
For Network related settings:
IP Address / DDNS /
E-Mail / Others
SYSTEM Settings
5
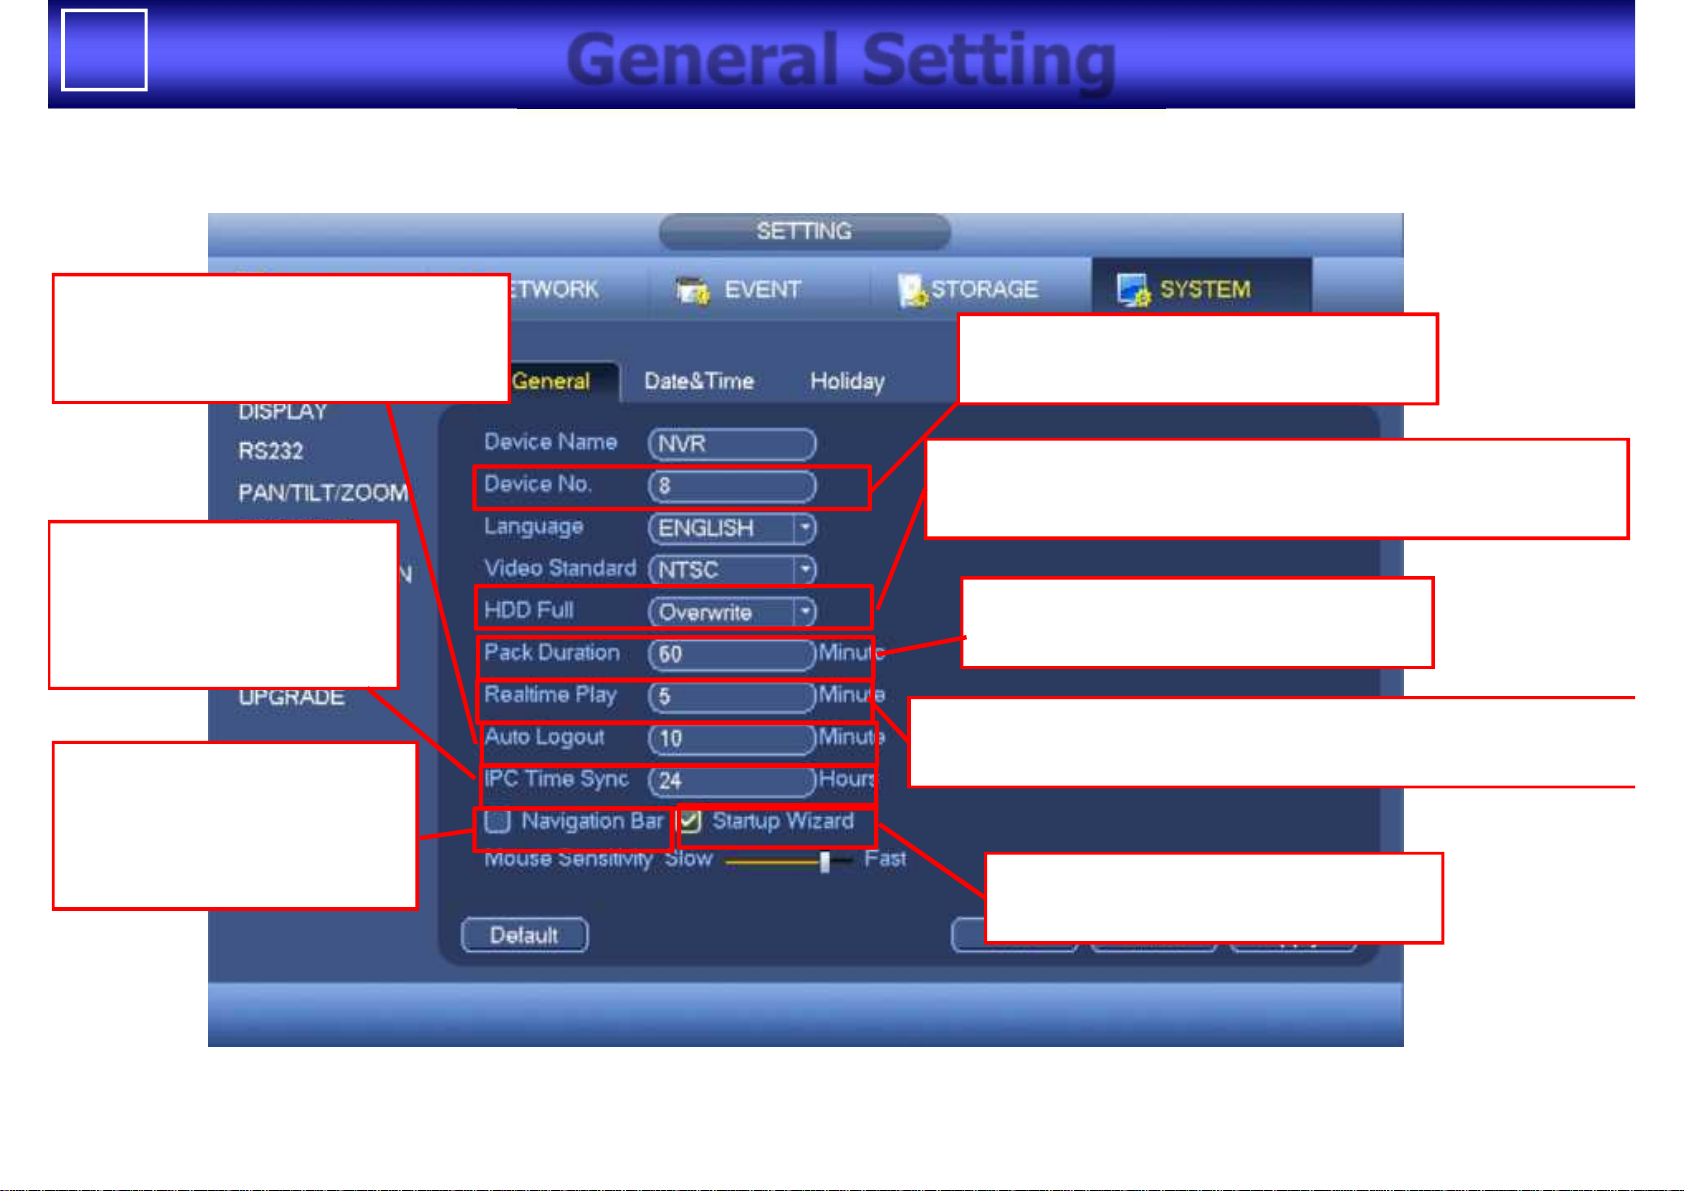
General Setting
Individual number to identify each NVR
when using remote controller
“Overwrite”: overwrite old file when all HDD storage is full
“Stop Record”: stop recording when all HDD storage is full
Time duration of one recording file
(range: 1 to 120 min. default : 60 min)
Recent time to start playback in real time playback operation
(range : 5 to 60 min default : 5 min)
Duration of no user operation
to log out automatically
(range: 0 to 60 min. default : 10 min)
Time interval to synchronize
time with camera
(range: 1 to 168 hours
default : 24 hours)
Checking this box makes
“Navigation Bar ” display
In live view window at bottom
side of display
Uncheck this box suppress to display
Setup wizard in boot up
6
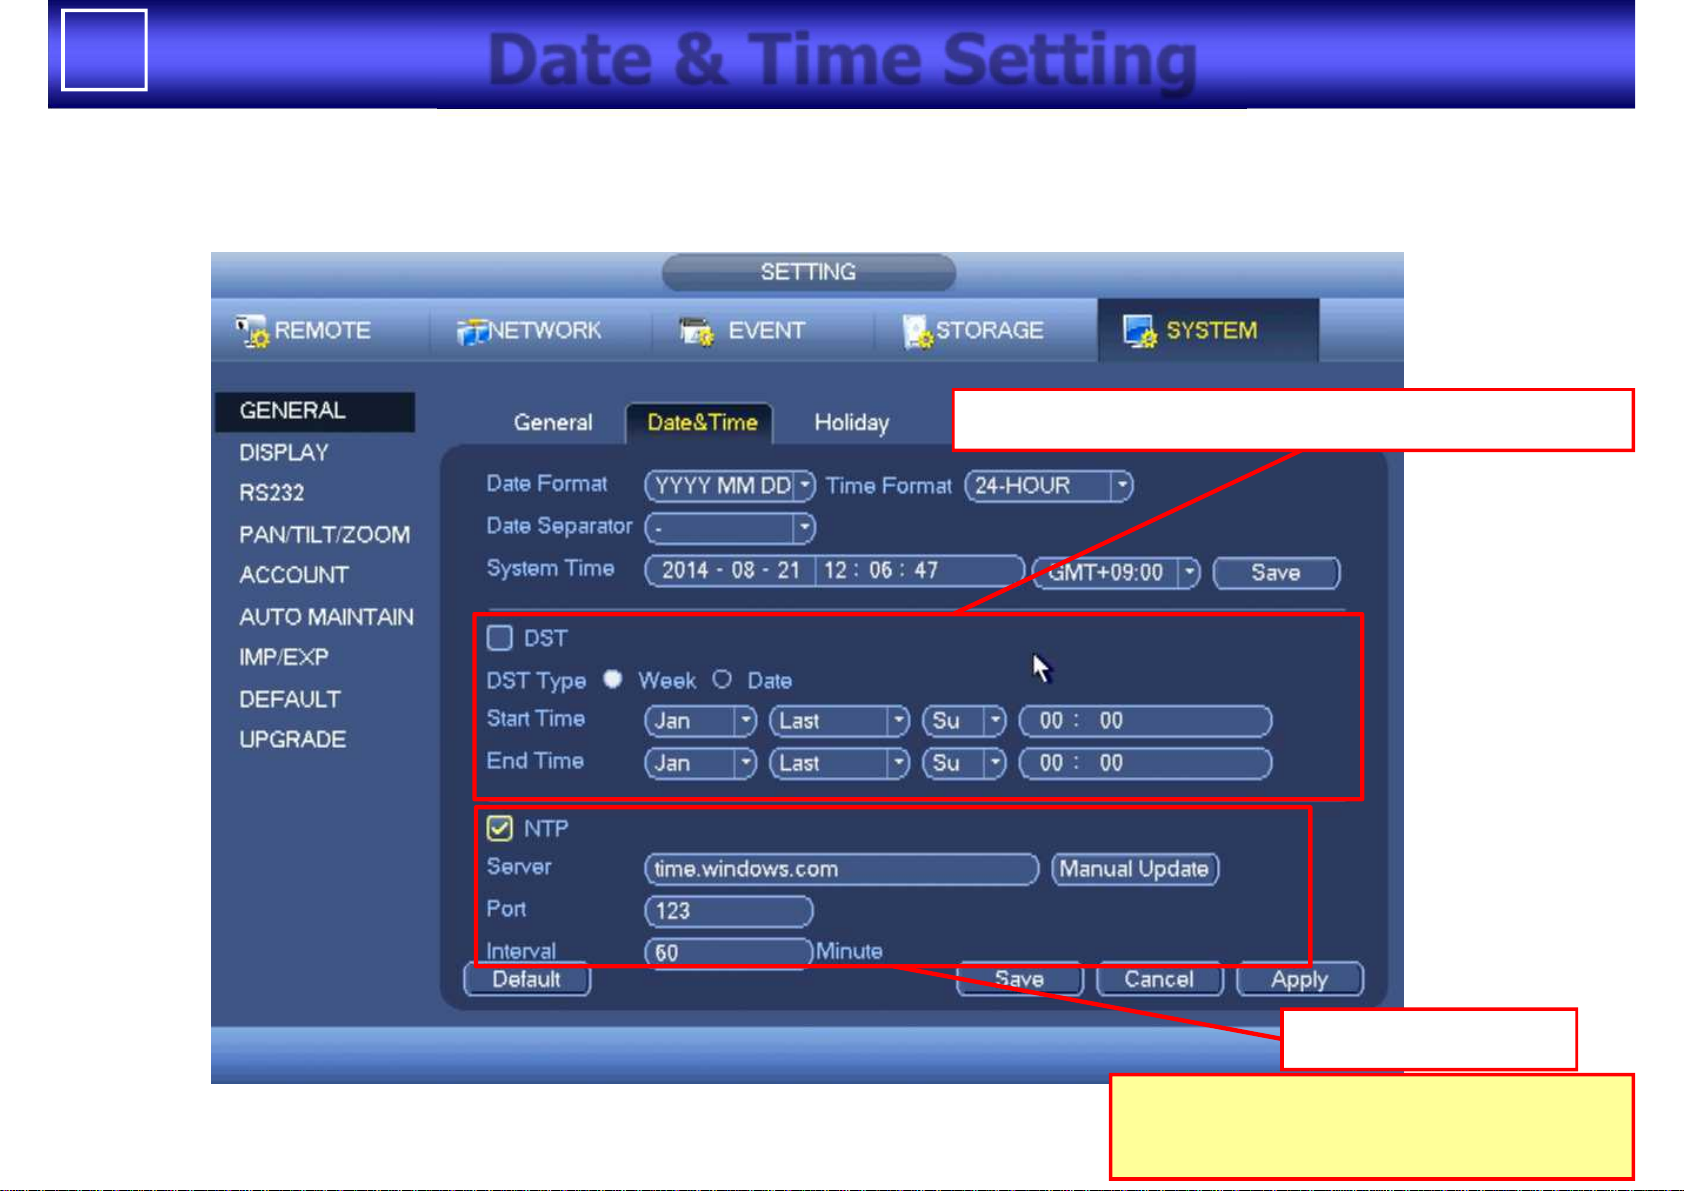
Date & Time Setting
Daylight Saving Time( Summer Time) setting
NTP server setting
If internet connection is available,
recommend to set NTP server
7
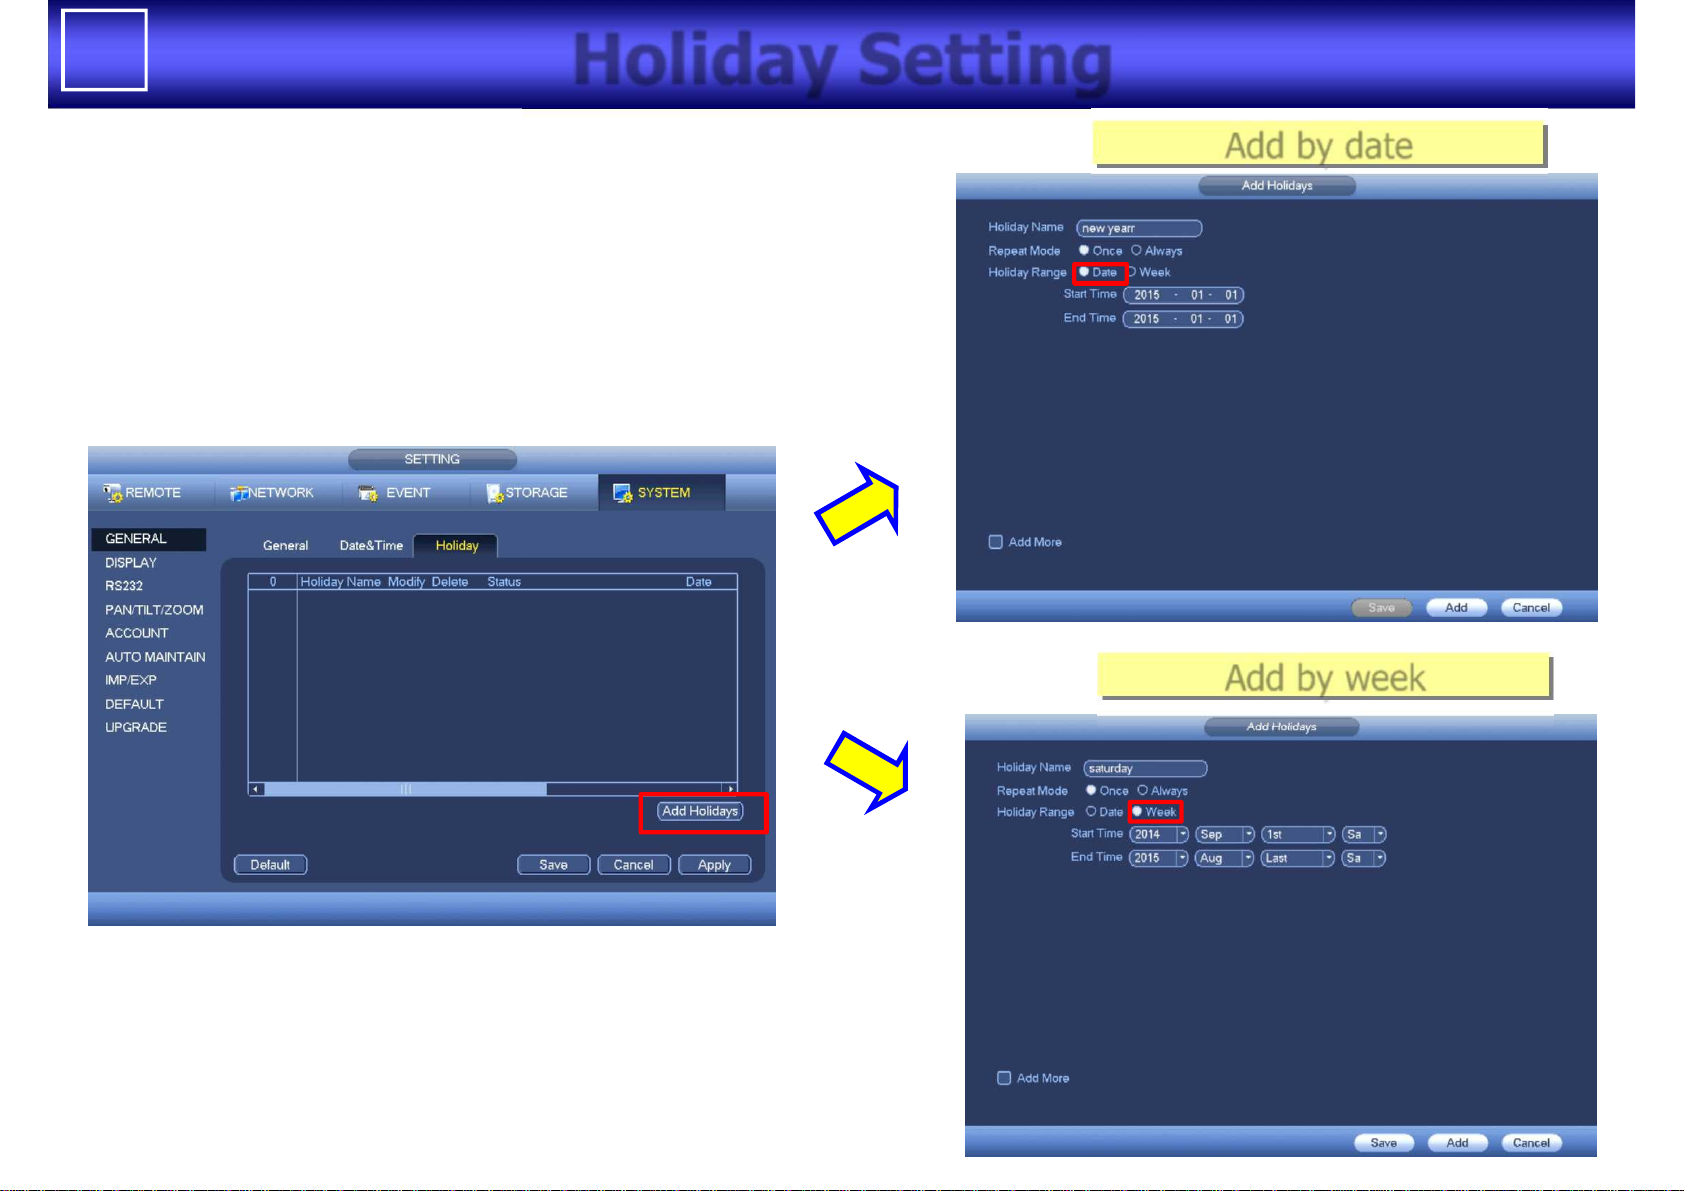
Holiday Setting
Add by date
Add by week
8
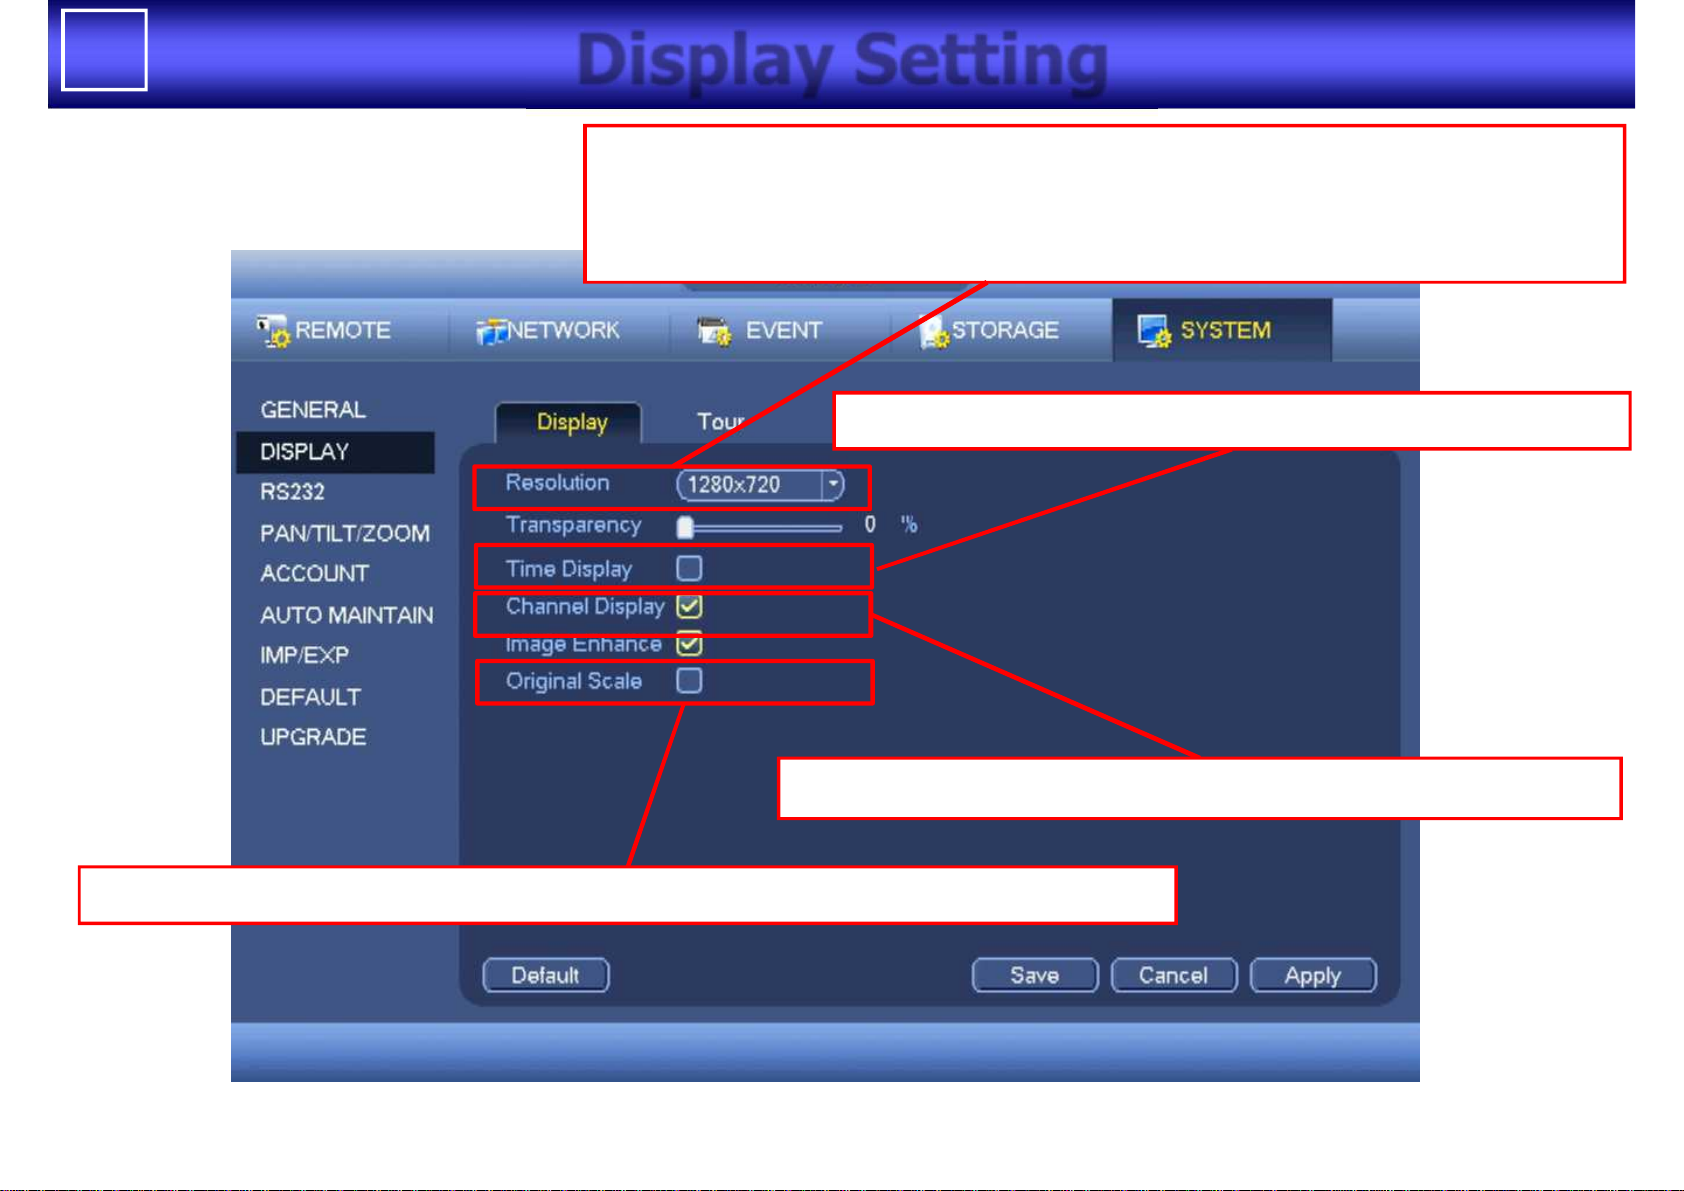
Display Setting
Resolution setting for Display Monitor(HDMI / VGA)
Choose one of following option to match display supported resolution
1280x1024(default) / 1280 x 720 / 1920 x 1080/ 1024 x 768
Check when display for time information is required
Check when keeping aspect ratio of camera resolution setting is required
Check when display for channel information is required
9
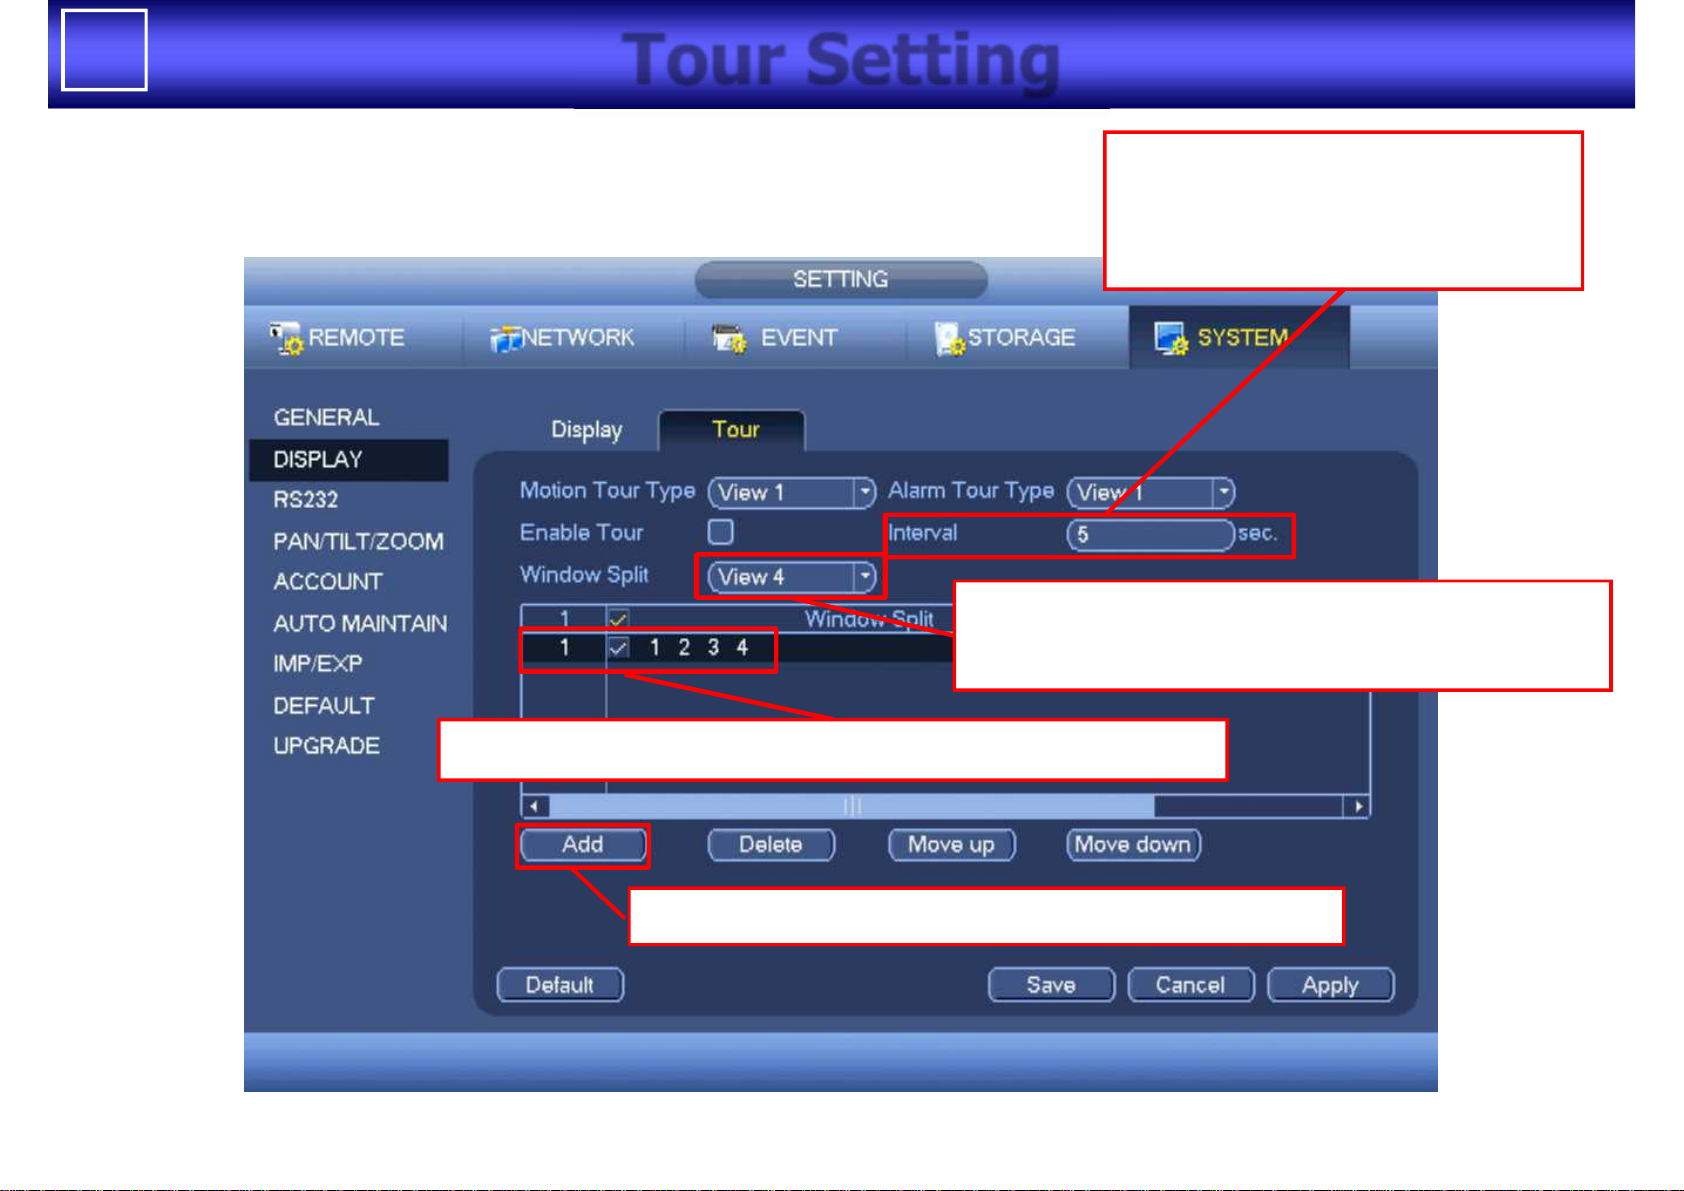
Tour Setting
Can set interval time between
the sequential displays
(range : 5 sec – 120 sec)
Check window split patterns to display sequentially
Can add new channels to display sequentially
Can select window split types(view1/4/8/9)
to check camera to display below area
10
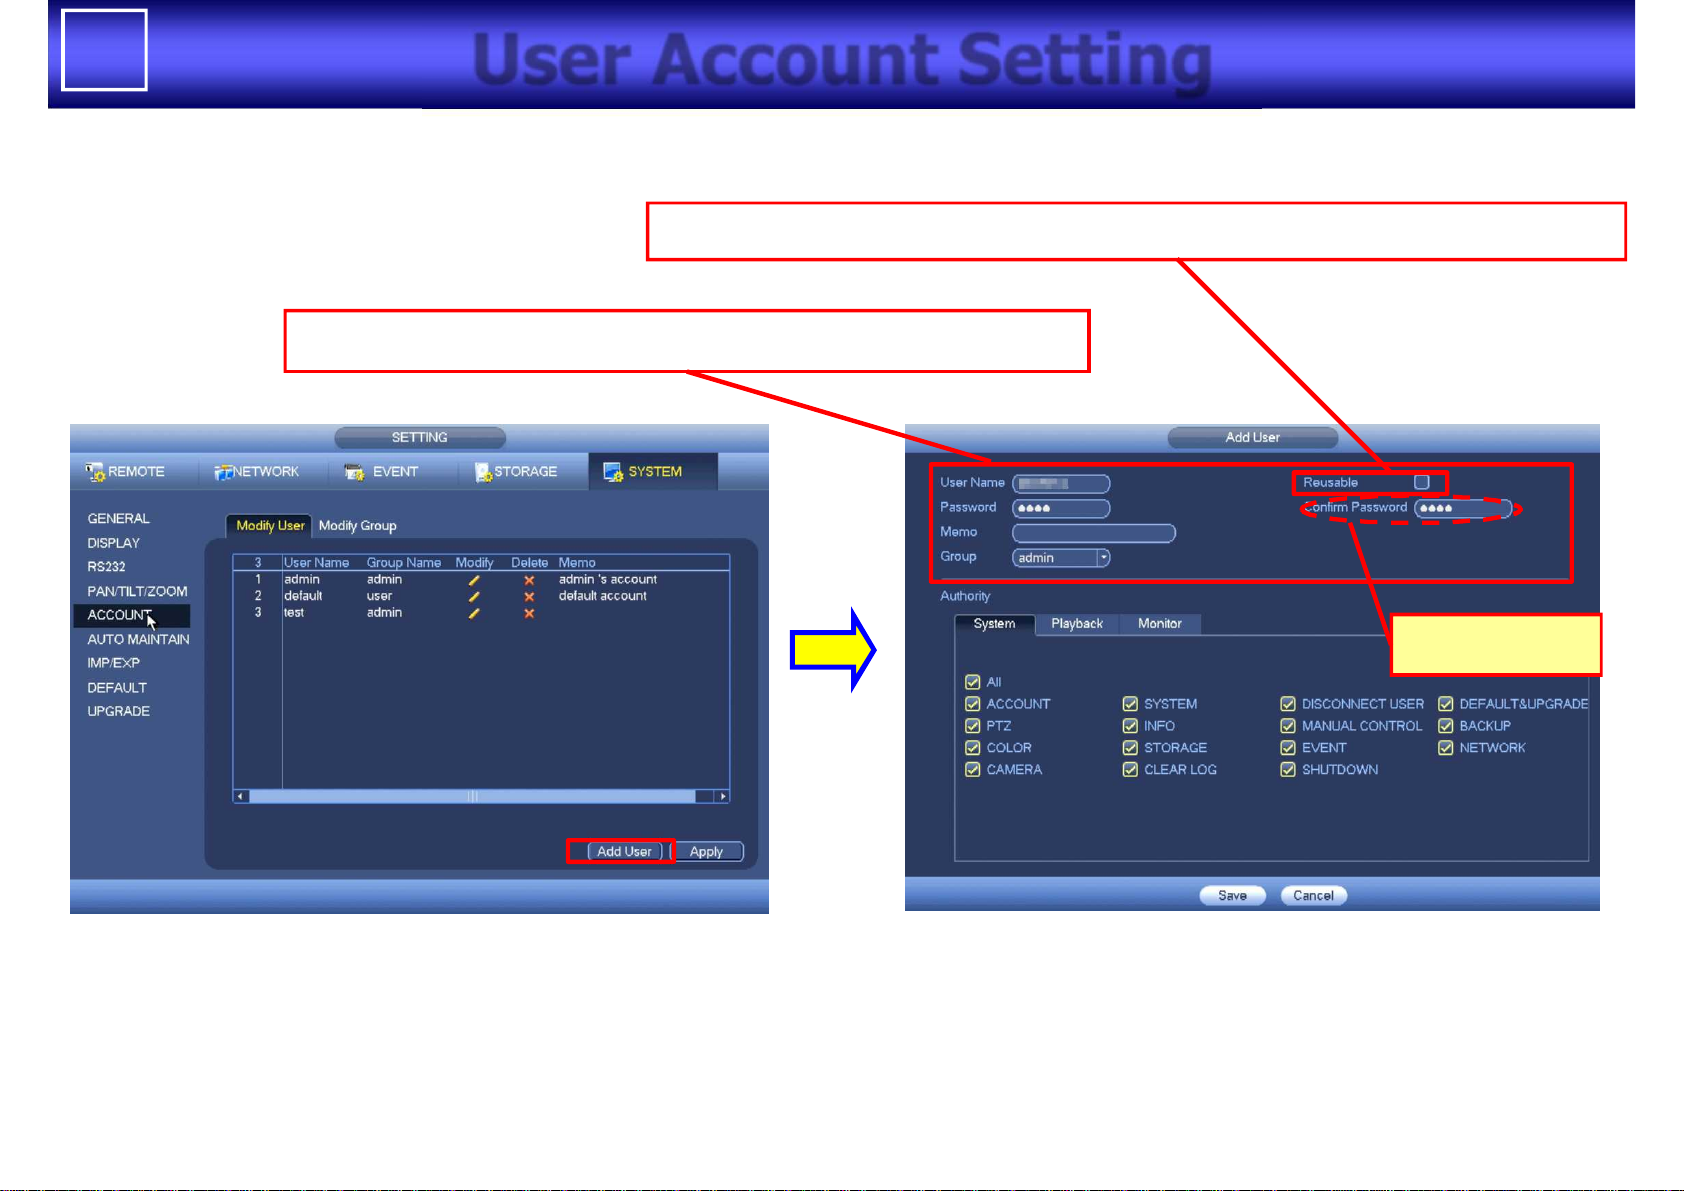
User Account Setting
Input “User Name” , “Password”, and select “Group”
Don’t forget !
Check when multiple user access using same account is allowed
11
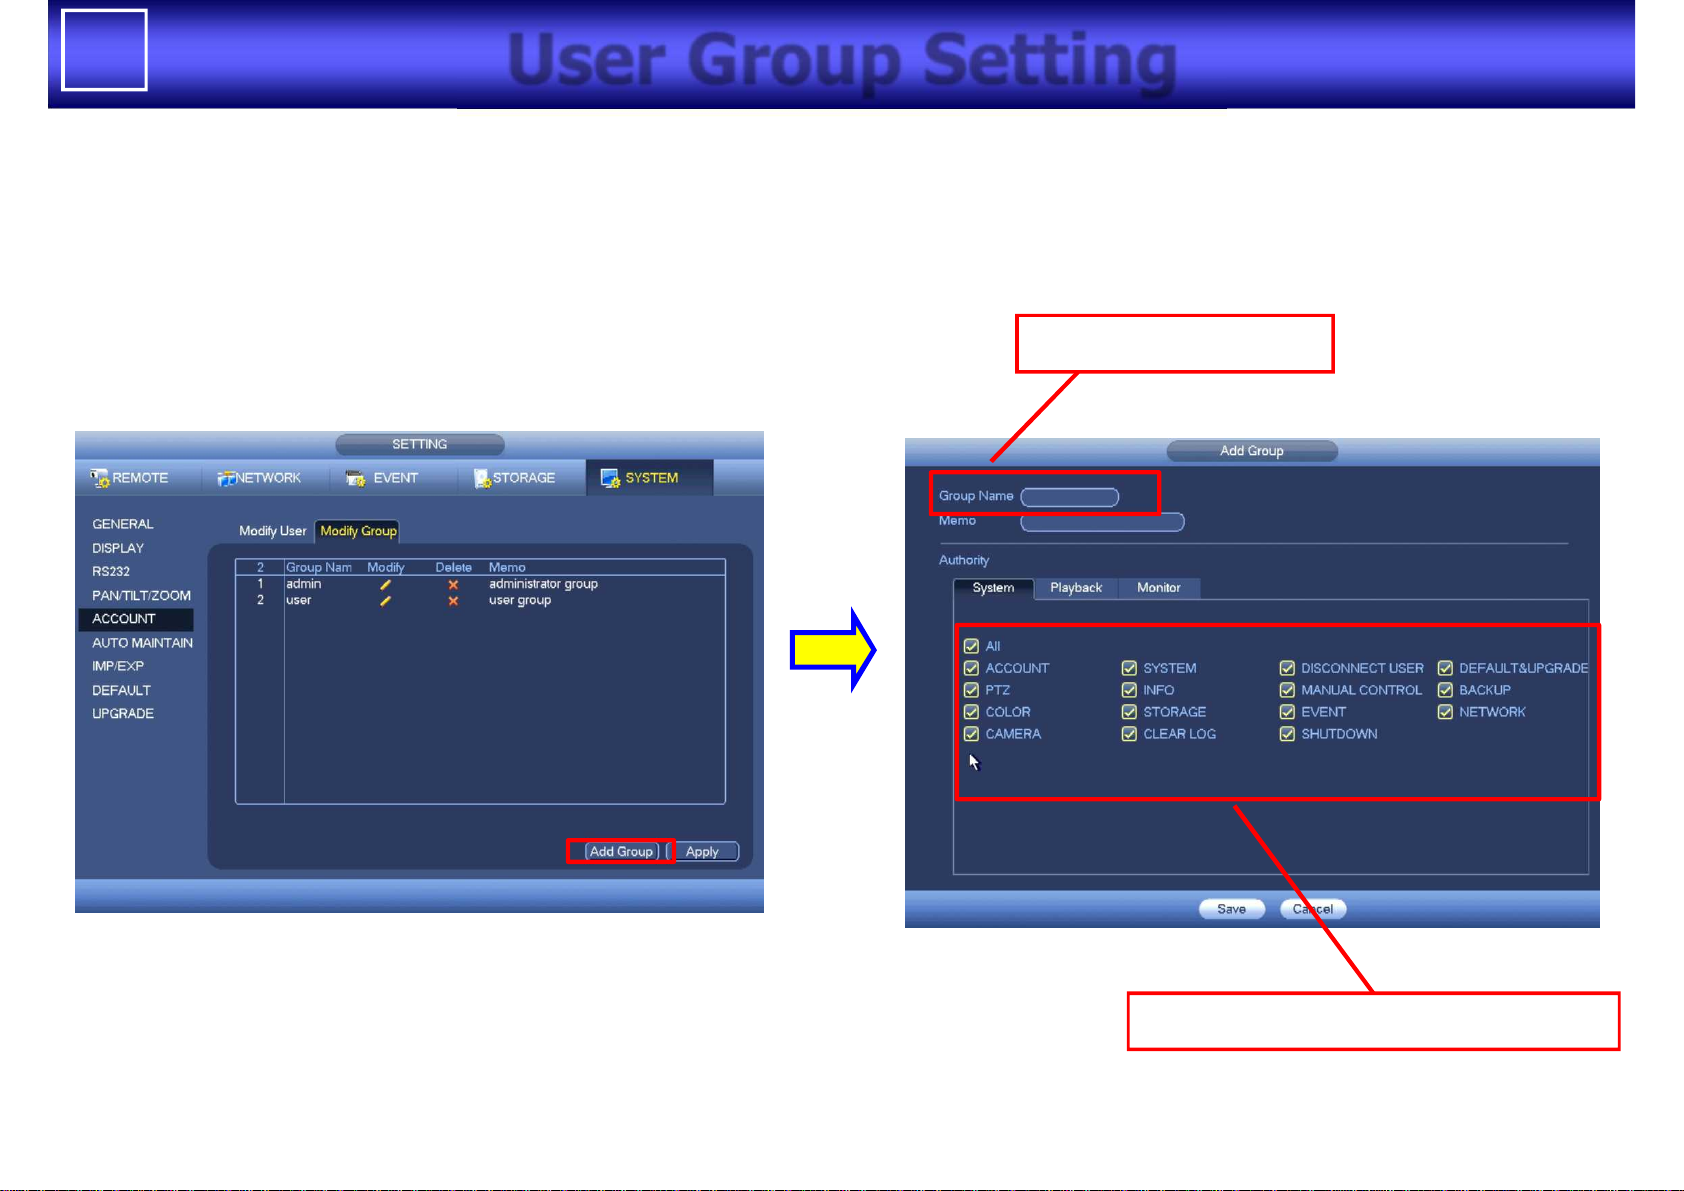
User Group Setting
Input “Group Name”
Check allowed items to change
12
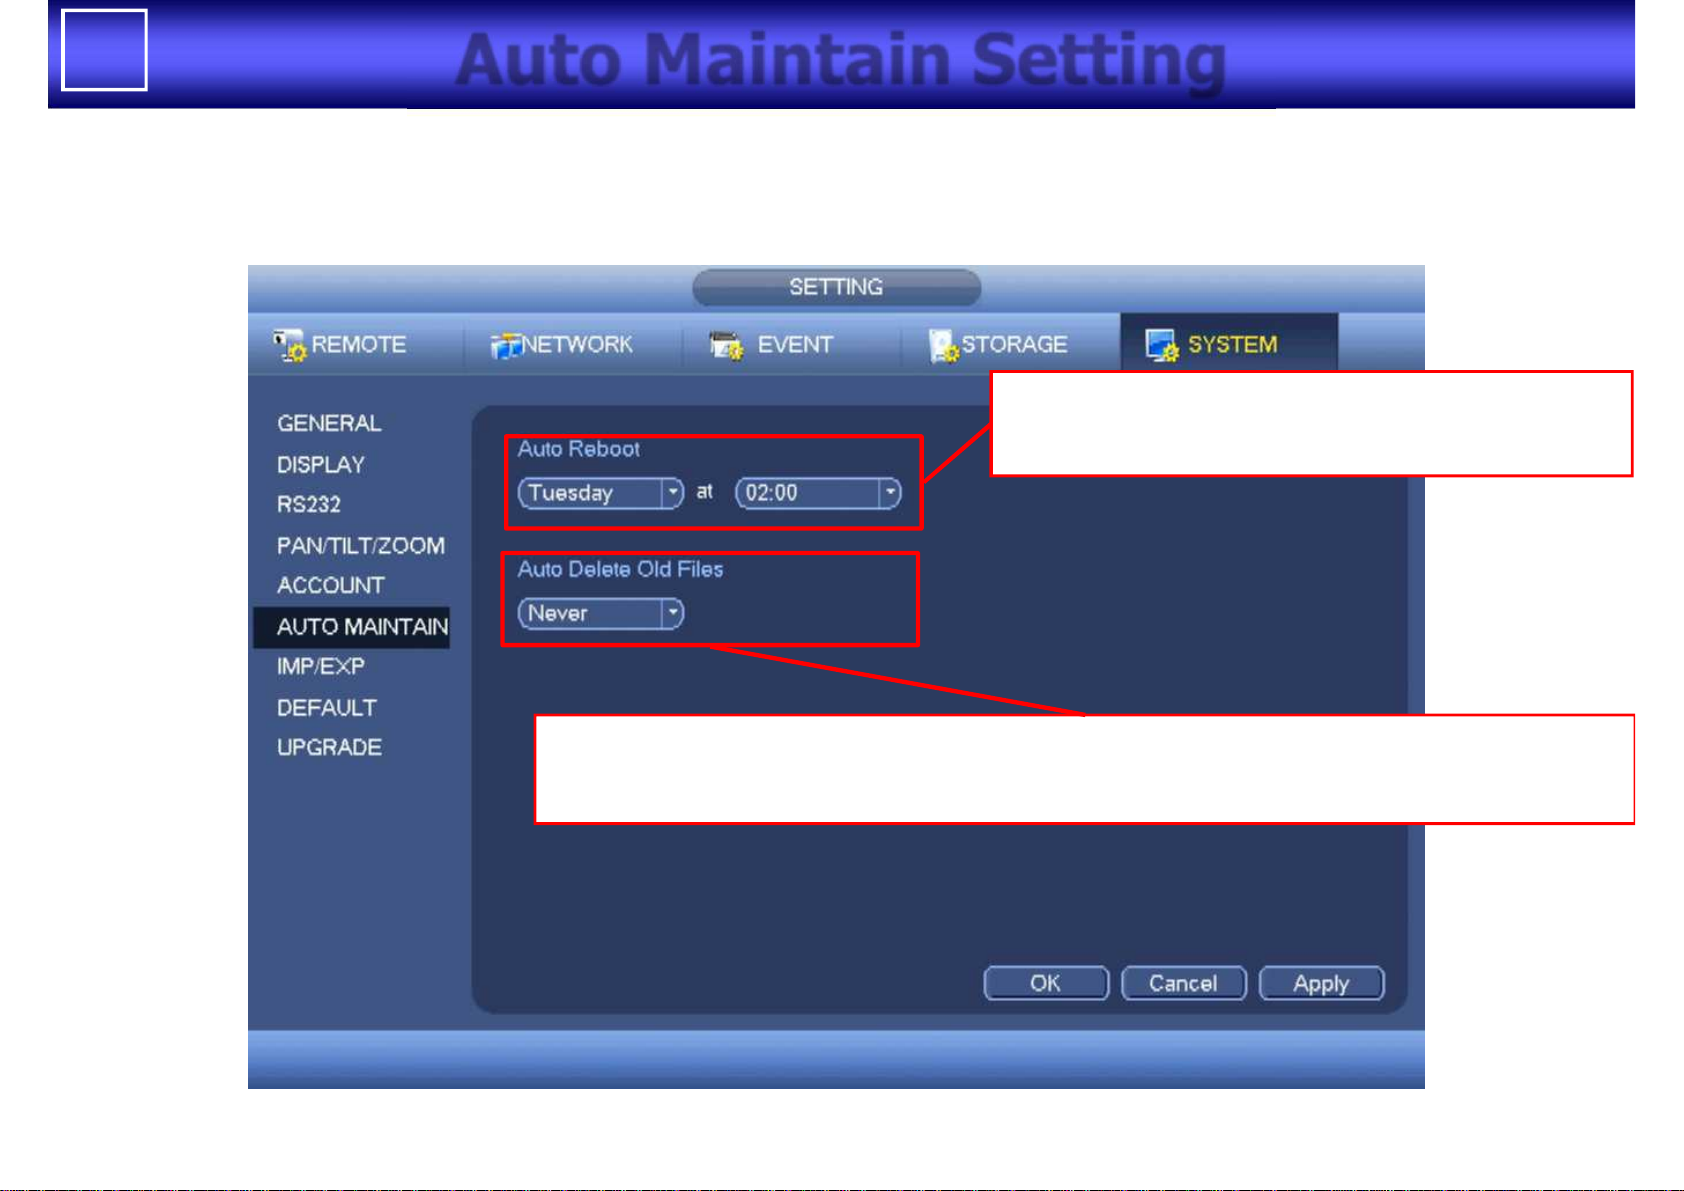
Auto Maintain Setting
Set whether reboot weekly at certain time
or never reboot
Set whether delete old files recorded before specified days automatically
or never delete old files (range : Never, 1 – 31 days)
13
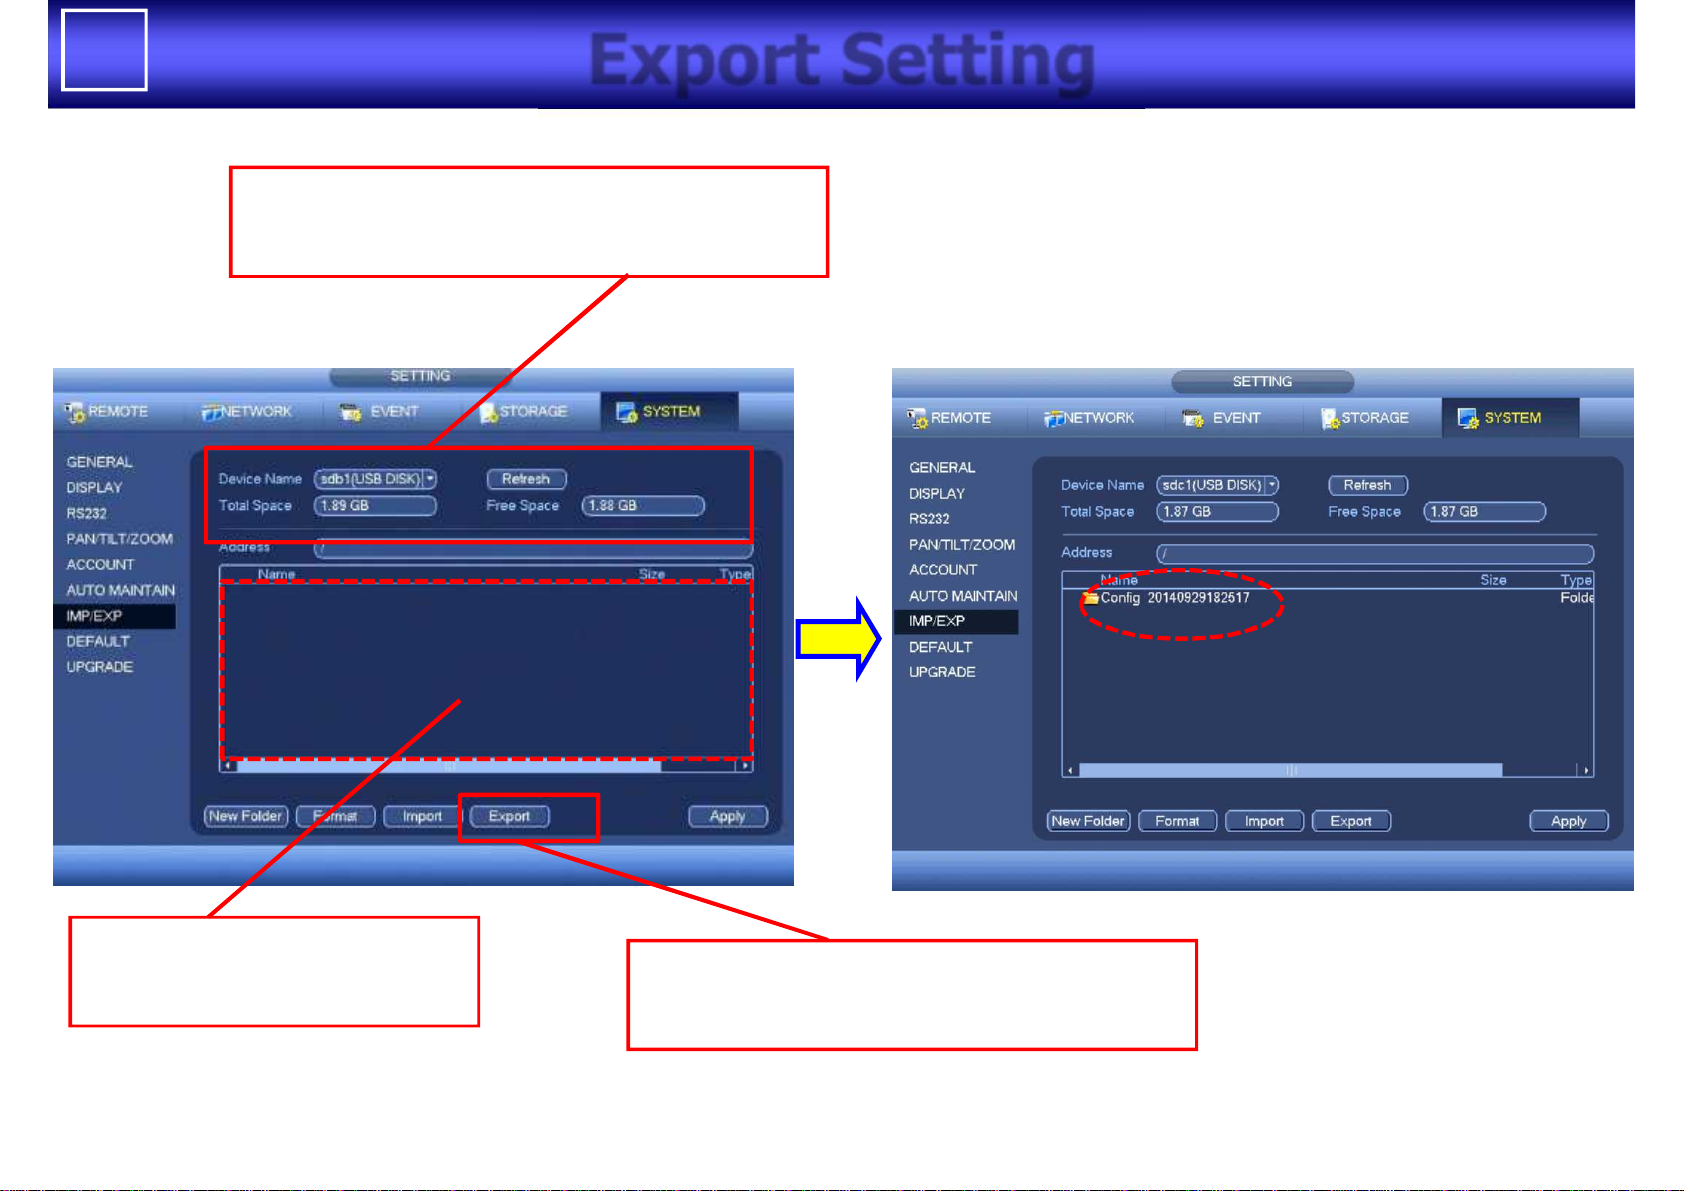
Export Setting
After insertion of USB memory,
memory space information is displayed
Click this button, then
“Config_xxxx(Date/Time)” is created.
Select appropriate folder
in the USB memory
14
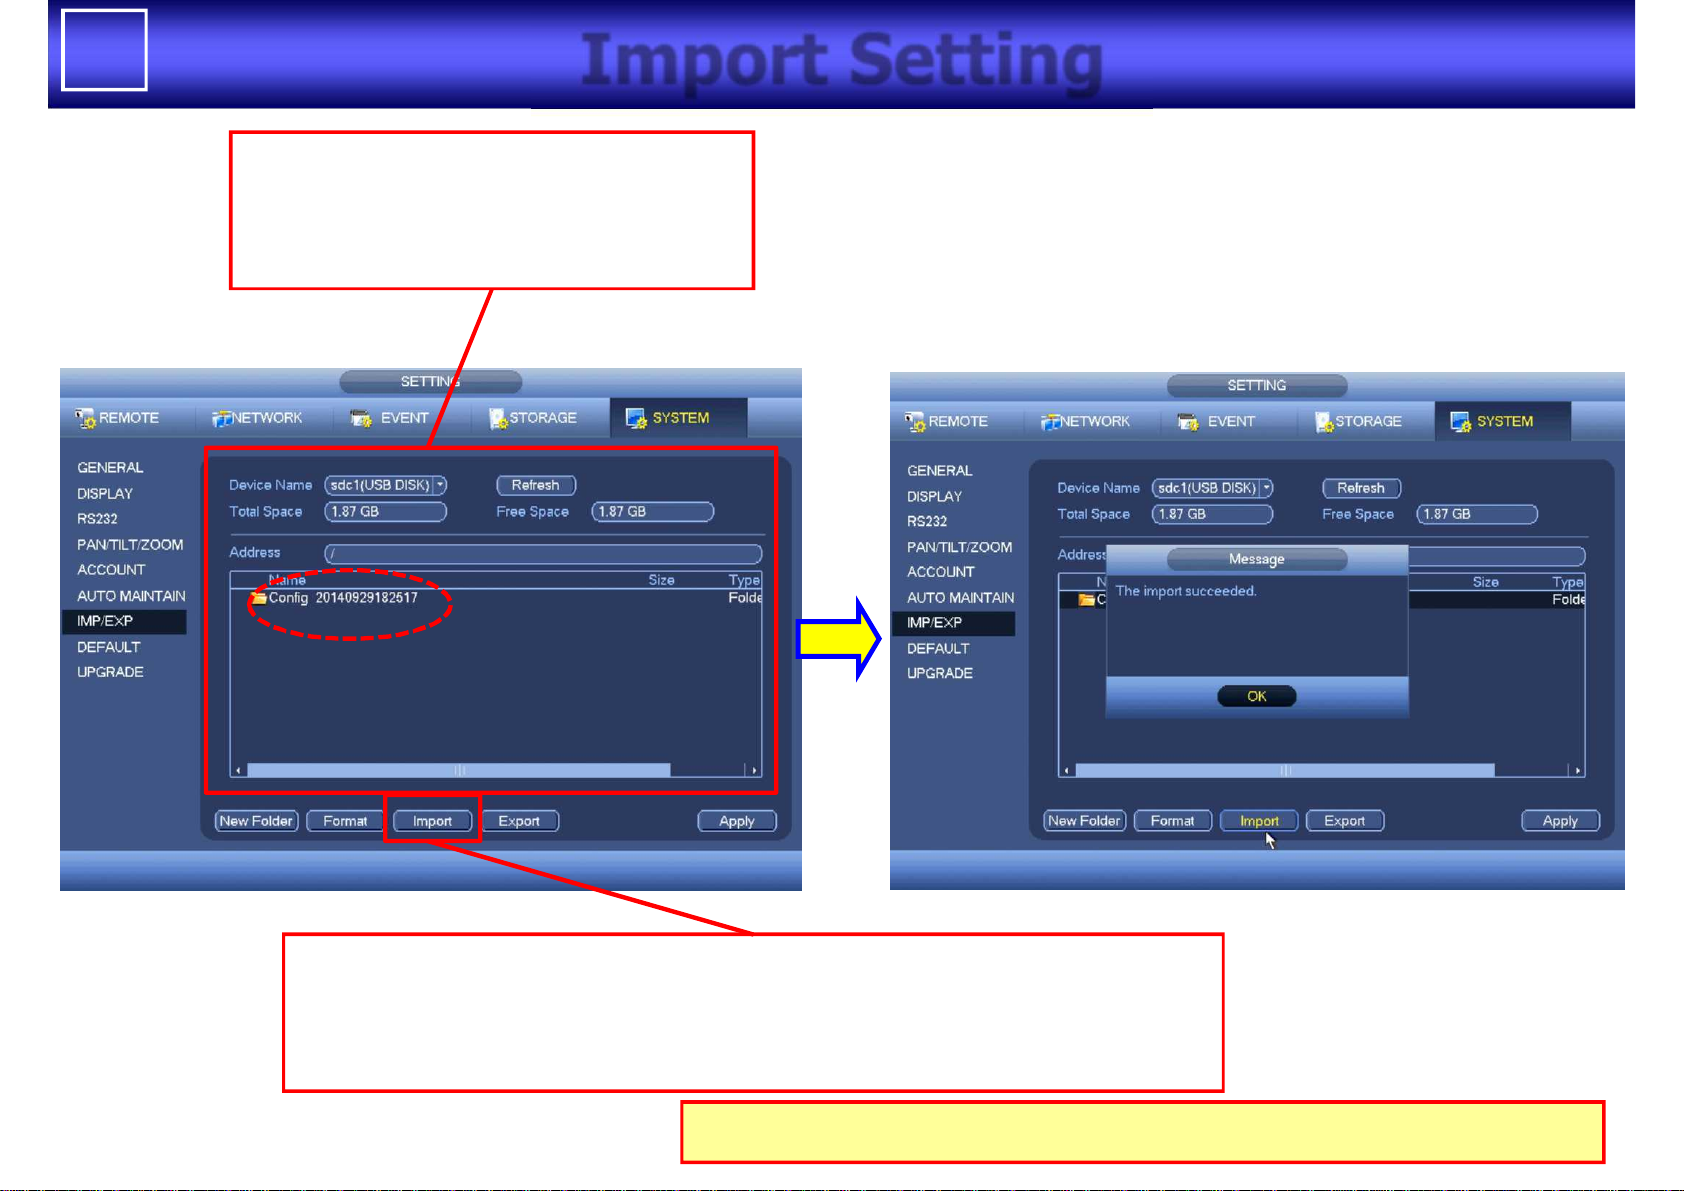
Import Setting
Select the folder “Config_xxxx(Date/Time)” folder
where configuration files are included, Then click this button.
After import is executed successfully, the system will reboot
After insertion of USB memory,
memory space information, and
folder/file information is displayed
After import is executed, all settings are changed immediately
15
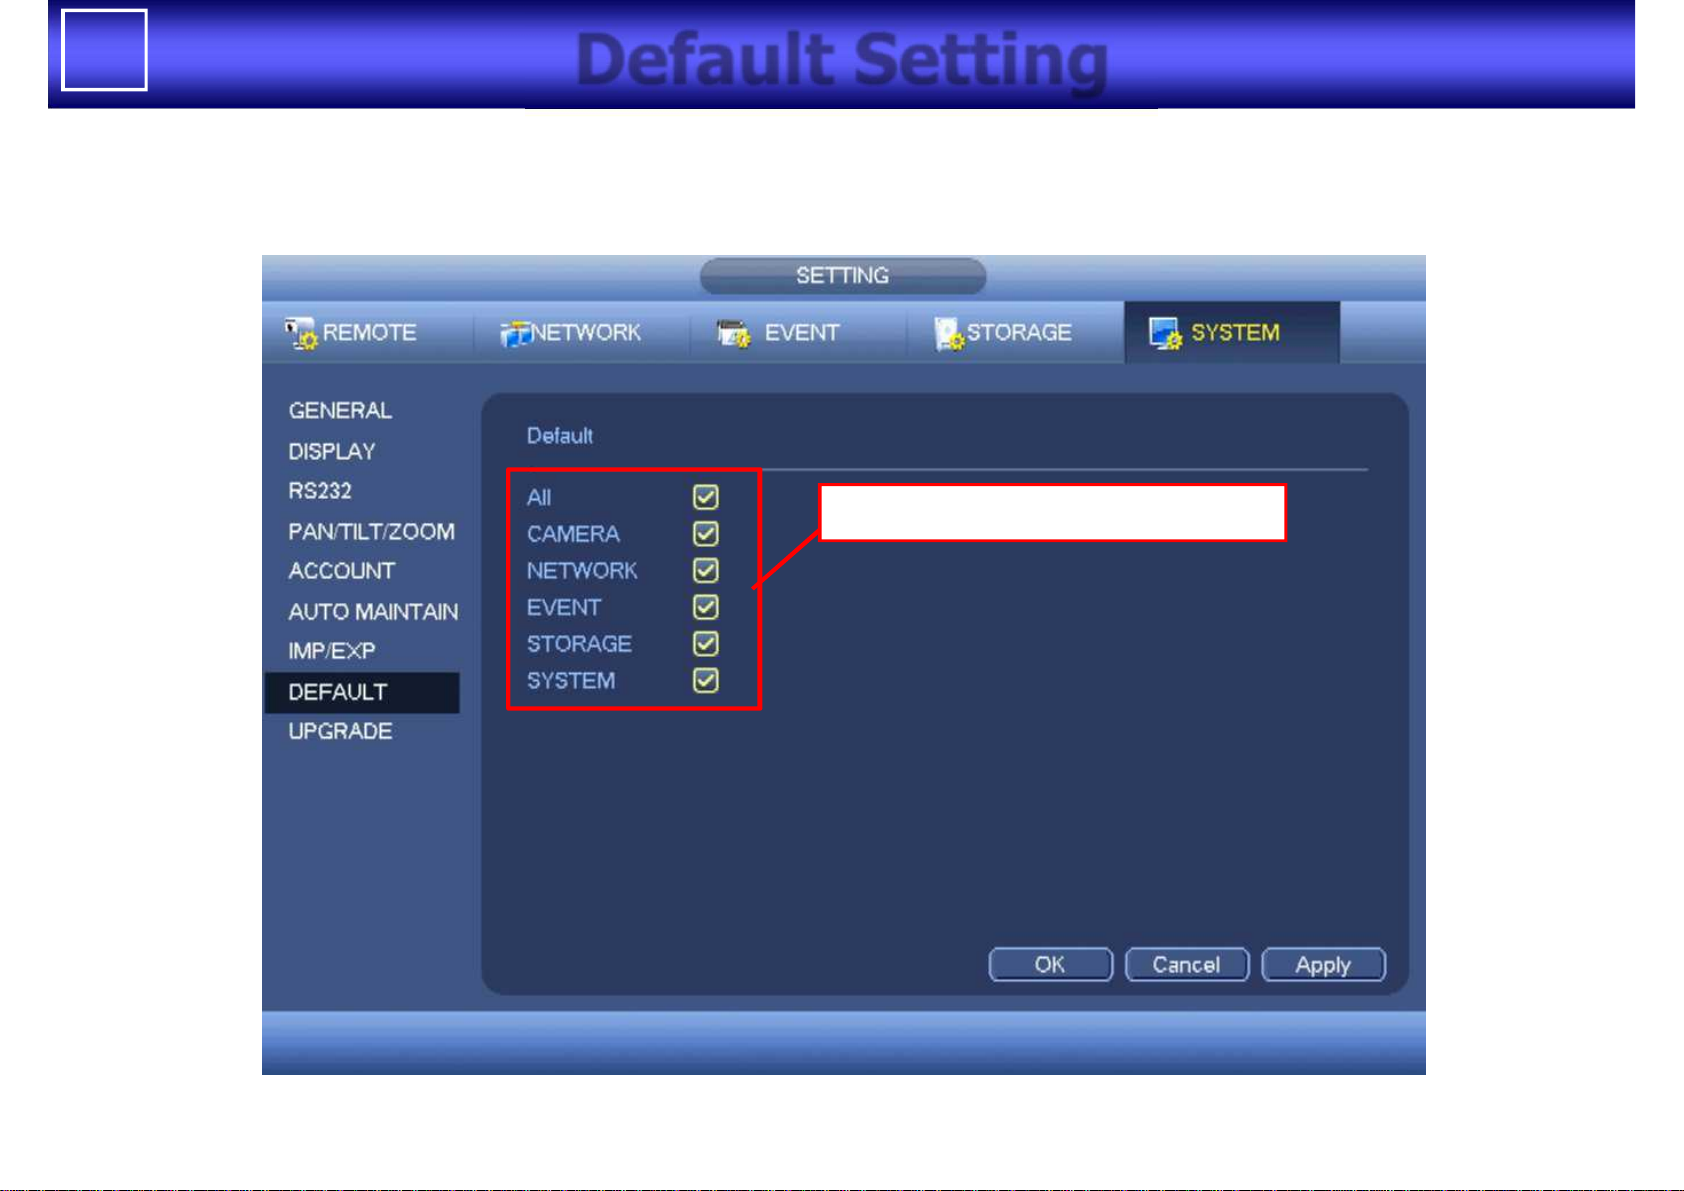
Default Setting
Can select settings to default
16
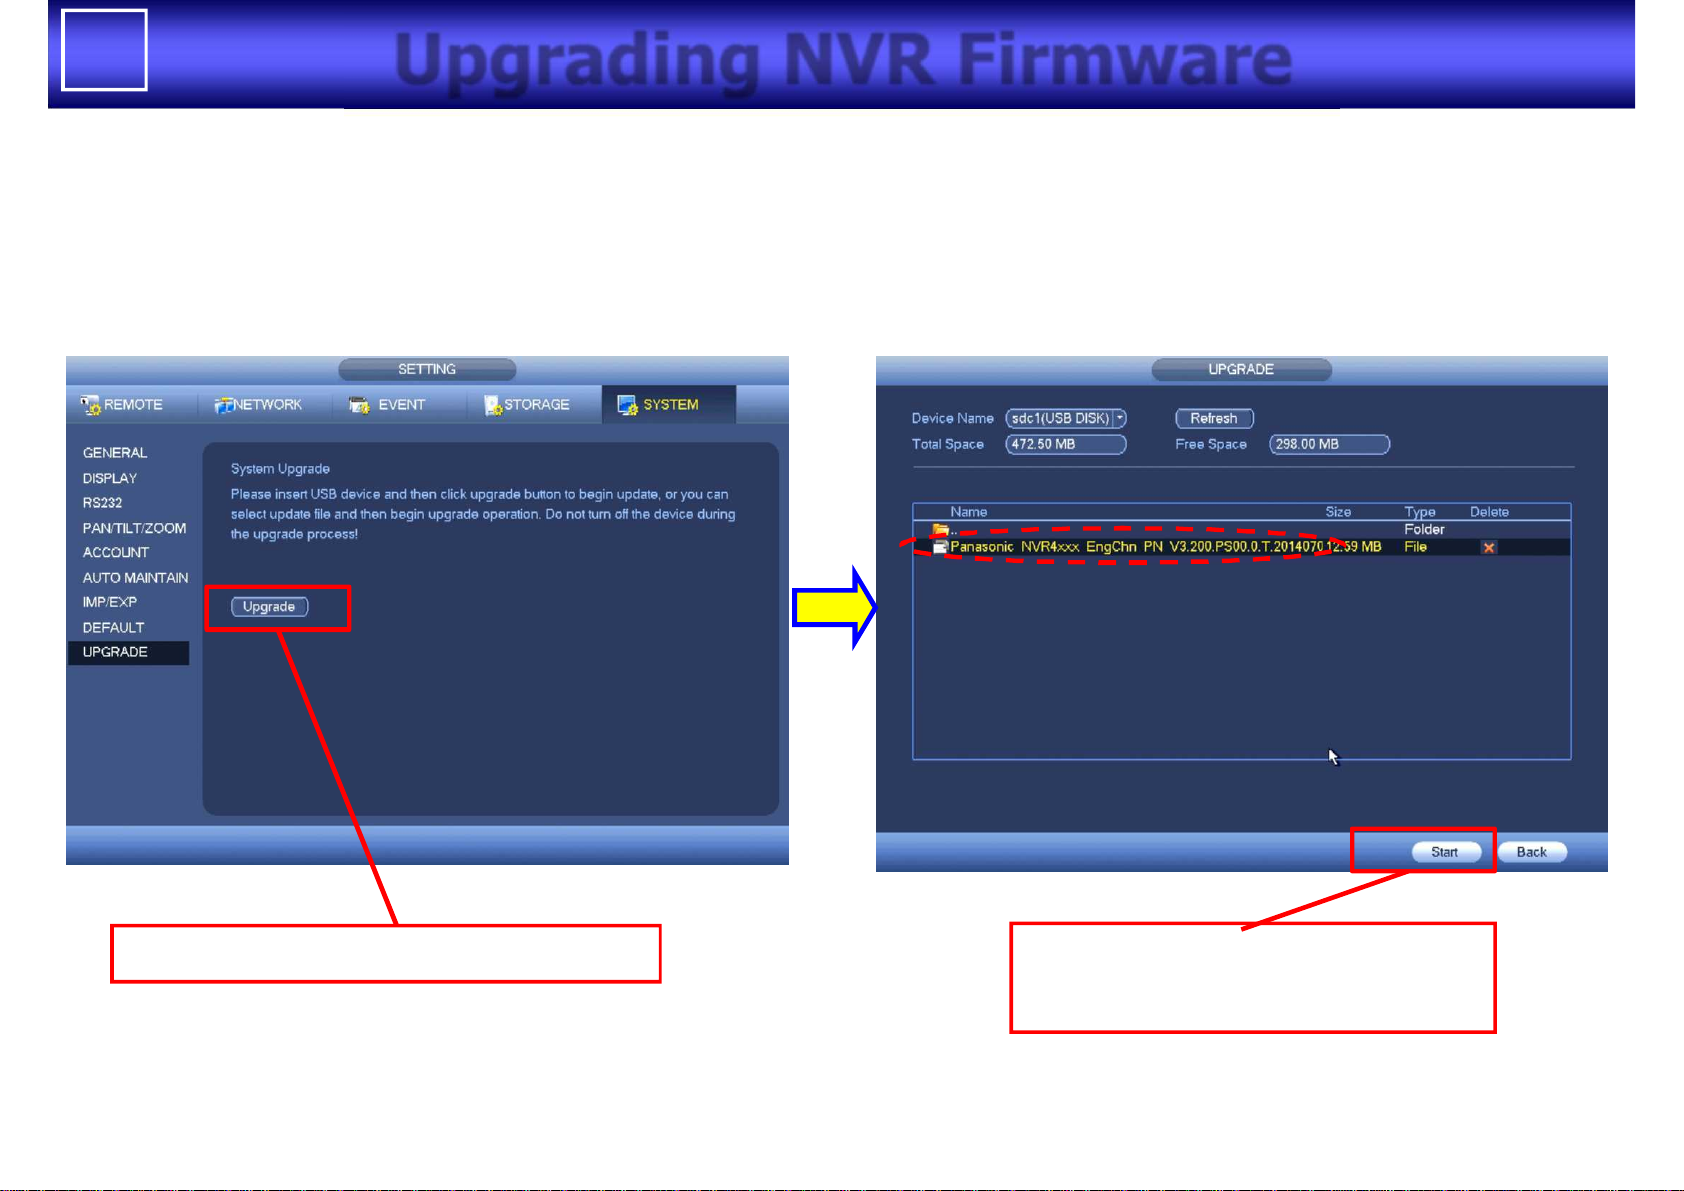
Upgrading NVR Firmware
Click after insertion of USB memory
Select . bin file and click start.
Then, firmware will be updated.
 Loading...