

Panasonic DMC-CM1 Lumix Basic Operating Instructions Manual

Basic Operating Instructions
GN
Digital Camera
Model No. DMC-CM1
Please read these instructions carefully before using this product, and
save this manual for future use.
More detailed operating instructions are available in
“Operating Instructions for advanced features (PDF format)”.
To read it, download it from the website.
http://panasonic.jp/support/dsc/oi/index.html?model=
DMC-CM1&dest=GN
≥ Click the desired language.
≥ You will need Adobe Reader to browse or print the
Operating Instructions (PDF format).
You can download and install a version of Adobe Reader
that you can use with your OS from the following website. (As of March 2015)
http://www.adobe.com/products/acrobat/readstep2.html
SQT0882
F0315MR0
Dear Customer,
We would like to take this opportunity to thank you for purchasing this Panasonic
Digital Camera. Please read these Operating Instructions carefully and keep them
handy for future reference. Please note that the actual controls and components,
menu items, etc. of your Digital Camera may look somewhat different from those
shown in the illustrations in these Operating Instructions.
Carefully observe copyright laws.
≥ Recording of pre-recorded tapes or discs or other published or broadcast material for
purposes other than your own private use may infringe copyright laws. Even for the purpose
of private use, recording of certain material may be restricted.
Information for Your Safety
WARNING:
To reduce the risk of fire, electric shock or product damage,
≥ Do not expose this unit to rain, moisture, dripping or splashing.
≥ Use only the recommended accessories.
≥ Do not remove covers.
≥ Do not repair this unit by yourself. Refer servicing to qualified service personnel.
The socket outlet shall be installed near the equipment and shall be easily
accessible.
∫ Product identification marking
Product Location
Digital Camera In the card slot cover
AC Adaptor Bottom
2
SQT0882 (ENG)

The usage of wireless LAN may be restricted depending on the country of use.
Check any relevant laws and regulations in the country or the region before
use.
∫ About the AC adaptor
CAUTION!
To reduce the risk of fire, electric shock or product damage,
≥ Do not install or place this unit in a bookcase, built-in cabinet or in another
confined space. Ensure this unit is well ventilated.
≥ The unit is in the standby condition when the AC adaptor is connected. The primary
circuit is always “live” as long as the AC adaptor is connected to an electrical outlet.
∫ About the battery
≥ Do not heat or expose to flame.
≥ Do not leave the unit (including built-in battery) in a car exposed to direct sunlight for a
long period of time with doors and windows closed.
(ENG) SQT0882
3
Regulatory information
∫ This product and your health
This product, like other radio devices, emits radio frequency electromagnetic energy.
Because this product operates within the guidelines found in radio frequency safety
standards and recommendations, we believe this product is safe for use by consumers.
These standards and recommendations reflect the consensus of the scientific
community and result from deliberations of panels and committees of scientists who
continually review and interpret the extensive research literature.
In some situations or environments, the use of this product may be restricted by the
proprietor of the building or responsible representatives of the organization.
These situations may for example include:
≥ Using this product on board of airplanes, or
≥ In any other environment where the risk of interference to other devices or services is
perceived or identified as harmful.
If you are uncertain of the policy that applies on the use of wireless devices in a specific
organization or environment (e.g. airports), you are encouraged to ask for authorisation
to use this product prior to turning on the product.
∫ Information to the user
We are not responsible for any radio or television interference caused by unauthorised
modification of this product.
The correction of interference caused by such unauthorised modification will be the
responsibility of the user.
We and our authorised resellers or distributors are not liable for damage or violation of
government regulations that may arise from failing to comply with these guidelines.
-If you see this symbol-
Disposal of Old Equipment and
Batteries
Only for European Union and countries
with recycle systems
These symbols are only valid in the
European Union and countries with recycle
systems.
If you wish to discard this product, please
contact your local authorities or dealer and
4
SQT0882 (ENG)
ask for the correct method of disposal.

Additional safety precautions
∫ Posted facilities
Turn off the product when in hospitals, health care facilities, or any facility where posted
notices require you to do so.
Hospitals and health care facilities may be using equipment that could be sensitive to
external RF energy.
∫ Pacemakers
≥ Medical device manufacturers recommend a minimum separation of 15 cm between a
wireless device and an implanted medical device, such as a pacemaker or implanted
cardioverter defibrillator, to avoid potential interference with the medical device.
≥ Persons with pacemakers:
– Should ALWAYS keep this product more than 15 cm from their pacemaker when this
product is turned ON;
– Should use the ear opposite the pacemaker to minimise the potential for
interference;
– Should not carry this product in a breast pocket;
– Should turn off the product immediately if there is any reason to suspect that
interference is taking place.
∫ Hearing aids
Some digital wireless products may interfere with some hearing aids.
In the event of such interference, consult the manufacturer of your hearing aid to discuss
alternatives.
∫ Other medical devices
If you use any other personal medical device, consult the manufacturer of your device to
determine if it is adequately shielded from external RF energy.
Your physician may be able to assist you in obtaining this information.
∫ Aircraft
Turn off the product after boarding an aircraft, when instructed by flight staff.
Obey instructions from flight staff regarding the use of the product in flight.
Using this product in an aircraft may be hazardous to the aircraft’s operation and disrupt
wireless communication, and may also be illegal.
(ENG) SQT0882
5

∫ Potentially explosive atmosphere
≥ Turn off the product in areas where a potentially explosive atmosphere exists and obey
all signs and instructions.
Sparks in such areas could cause an explosion or fire resulting in injury or even death.
≥ Areas with potentially explosive atmosphere may include fueling areas, chemical
plants, below deck on boats, fuel or chemical transfer or storage facilities, vehicles
using petroleum or natural gas, or areas where the atmosphere contains particles such
as grain, dust, or metallic powders, and any other area where you would normally be
advised to turn off your vehicle engine.
∫ Electronic devices
This product receives and transmits radio frequency signals while switched on.
Most electronic equipment is shielded from RF signals. However, certain electronic
equipment may not be shielded against the RF signals from this product. Therefore, the
use must be restricted in certain situations to avoid interference.
∫ Driving
≥ Give full attention to driving.
Driving safely is your first responsibility.
≥ Pull off the road and park before placing or answering a call.
It is unsafe to operate the product while driving.
≥ Check the laws and regulations in the areas where you drive, and always obey them.
≥ Only qualified personnel should install the product in a vehicle.
Check regularly that the product is securely mounted in your vehicle and operating
properly.
≥ Do not place or install the product in the area over the air bag or in the air bag
deployment area.
If the air bag inflates, serious injury and/or damage could result.
≥ RF signals may affect improperly installed or inadequately shielded electronic systems
in motor vehicles.
Consult the manufacturer (or its representative) of the vehicle and any equipment that
has been added to the vehicle regarding the use of mobile products.
≥ Use hands-free operation, if available and legally permitted.
∫ Emergency communications
Never rely solely on a mobile product for essential or emergency communications.
Network connections can be affected by remaining battery level, radio signals, service
networks, and other conditions, and as a result, emergency communications cannot be
guaranteed in all conditions.
6
SQT0882 (ENG)

∫ Antenna
≥ Do not replace the antenna.
Unauthorised antennas, modifications, or attachments could damage the product.
≥ Do not touch or cover the antenna area while the product is on.
Call quality, power levels, and the overall performance of the product may be affected.
∫ Intended use
≥ This product is not intended for use as, or as part of, nuclear equipment/systems, air
traffic control equipment/systems, aircraft cockpit equipment/systems, medical devices
or accessories, lifesupport systems or other equipment/devices/systems that are
involved with ensuring human life or safety.
Panasonic will not be responsible for any liability resulting from the use of this product
arising out of the foregoing uses.
≥ Panasonic cannot guarantee any specifications, technologies, reliability, safety (e.g.,
Flammability/Smoke/Toxicity/Radio Frequency Emission, etc.) requirements related to
aviation standards and medical equipment standards that differ from the specifications
of our COTS (Commercial-Off-The-Shelf) products.
≥ This product is not intended for use in medical equipment including life-support
systems, air traffic control systems, or other equipment, devices or systems that are
involved with ensuring human life or safety.
Panasonic cannot be held responsible in any way for any damages or loss resulting
from the use of this unit in these types of equipment, devices or systems, etc.
(ENG) SQT0882
7
Contents
Email/Web browser/Phone
Information for Your Safety................ 2
Regulatory information ...................... 4
Additional safety precautions ............ 5
Preparation
Standard Accessories........................ 9
Names and Functions of
Main Parts ....................................... 10
Inserting/Removing the microSIM
card (optional) ................................. 12
About the Built-in Memory/
the microSD Card (optional)............ 14
Charging.......................................... 16
Basic
Turning the unit on/off ..................... 17
Using the touch screen ................... 18
Home screen ................................... 19
People..............................................36
Email/Gmail™..................................37
Launching the web browser.............39
Phone ..............................................40
Others
Troubleshooting ...............................42
System updates ...............................44
Cautions for Use ..............................45
SAR (Specific Absorption Rates) .....51
Specifications...................................52
Limited Warranty
(ONLY FOR AUSTRALIA) ...............57
∫ About the symbols in the text
: Indicates a general notification.
Status bar ........................................ 20
Using apps ...................................... 21
Entering Text ................................... 23
Android™ default settings ............... 24
Connecting to networks
Connecting to mobile networks ....... 25
Connecting to Wi-Fi
®
networks........ 26
Camera
Launching the camera..................... 27
Viewing Recording screens............. 27
Selecting the Recording Mode ........ 29
Taking a Still picture ........................ 30
Recording Motion Picture ................ 34
Viewing pictures and
motion pictures................................ 35
In these operating instructions,
steps for setting a menu item are
described as follows.
From the Home screen >
[] > [].
8
SQT0882 (ENG)
Preparation
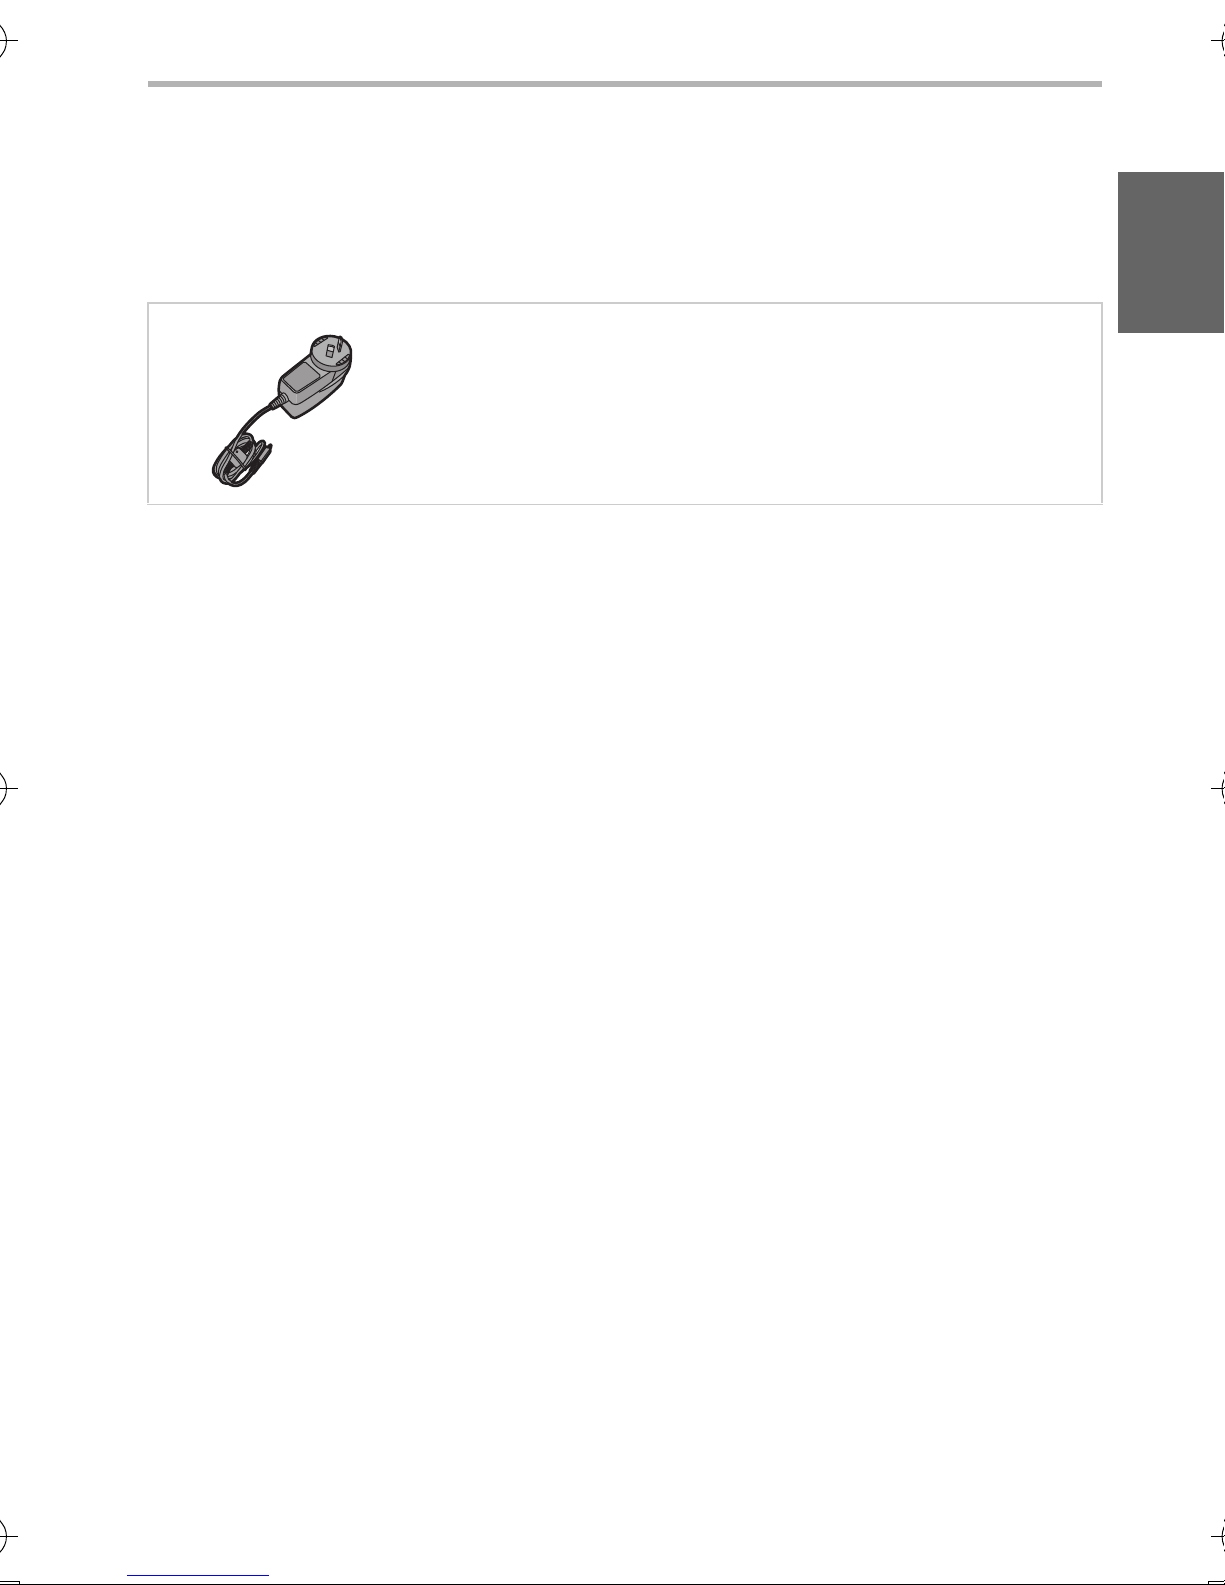
Standard Accessories
Check that all the accessories are supplied before using this unit.
Product numbers correct as of March 2015. These may be subject to change.
AC Adaptor
VSK0828
≥ microSD Memory Card, microSDHC Memory Card and microSDXC Memory Card are
indicated as microSD card in the text.
≥ microSIM card and microSD card are optional.
≥ Consult the dealer or Panasonic if you lose the supplied accessories. (You can purchase the
accessories separately.)
(ENG) SQT0882
9

Preparation
1
7810
2345
6
11
13 14 15
12
19
20 21
16
22
17
18
9
1 Shutter button (P30)
2 Camera selector switch (P27)
3 Flash/AF Assist Lamp
4 [ ] button (P17)
5 [ ]/[ ] buttons
6Speaker
7 NFC antenna
8 Control ring (P31)
9 Lens front ring (Diameter: 37 mm)
10 Outward facing camera (P27)
11 Microphone
12 microUSB terminal (P16)
13
Ringtone lamp/Charging lamp
(P16)
14
Light sensor/Proximity sensor
Do not cover the sensor area with
your hand or paste stickers over it in
order to prevent incorrect operation of
the sensor.
15 Display (P18)
16 Earpiece
17 Earphone terminal (P11)
18 Inward facing camera
19 microSIM card slot (P12)
20 microSD card slot (P15)
21
Nameplate
Stowable nameplate.
Contains information such as the
mobile identification number.
22 Mouthpiece/Microphone
Names and Functions of Main Parts
10
SQT0882 (ENG)
Preparation
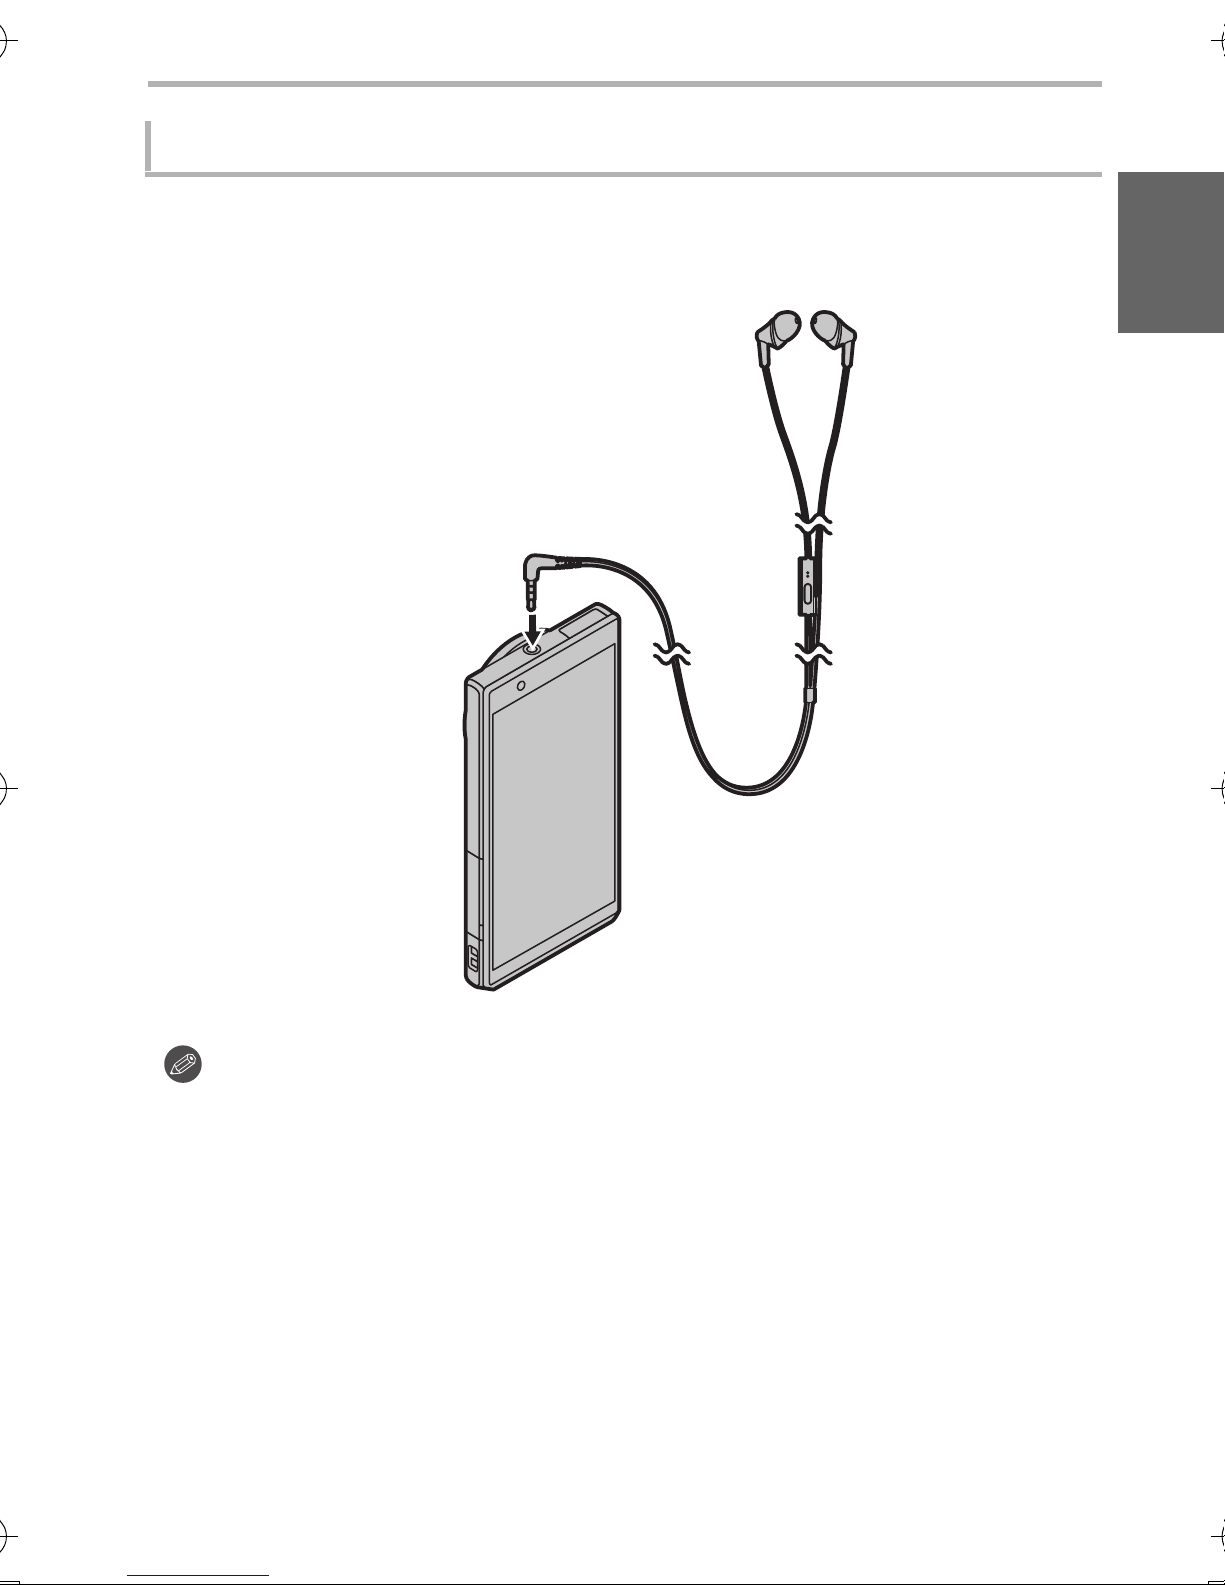
Stereo headset (optional)
You can use a headset (optional) to listen to music or watch videos.
If the headset (optional) has a microphone, you can also use it to talk on the
phone.
≥ Check that the headset (optional) plug is completely inserted into the earphone
terminal.
≥ Excessive sound pressure from earphones and headphones can cause hearing loss.
≥ To prevent possible hearing damage, do not listen at high volume levels for long
periods.
≥ Being unable to hear sounds in your environment may lead to accidents.
(ENG) SQT0882
11

Preparation
Inserting/Removing the microSIM card
(optional)
A microSIM card is an integrated circuit that stores the customer’s phone number
and other information.
Calls and messages (SMS) cannot be sent or received unless the microSIM card
is inserted.
If you have inserted/removed the microSIM card, do not deliberately touch or
damage the IC terminals.
Open the card slot cover with the control ring face of this unit
1
facing upwards.
Hold the hooks of the tray with your fingertips and pull it out
2
horizontally.
Mount the microSIM card on the tray C with the IC face A on
3
top.
≥ Take note of the notch B on the microSIM card and mount it in the correct direction.
Check the orientation of this unit and insert the tray
4
horizontally into the slot of the microSIM card.
Close the card slot cover.
5
12
SQT0882 (ENG)
≥ Keep the microSIM Card out of reach of children to prevent swallowing.
≥ Keep the microSIM Card Tray out of reach of children to prevent swallowing.
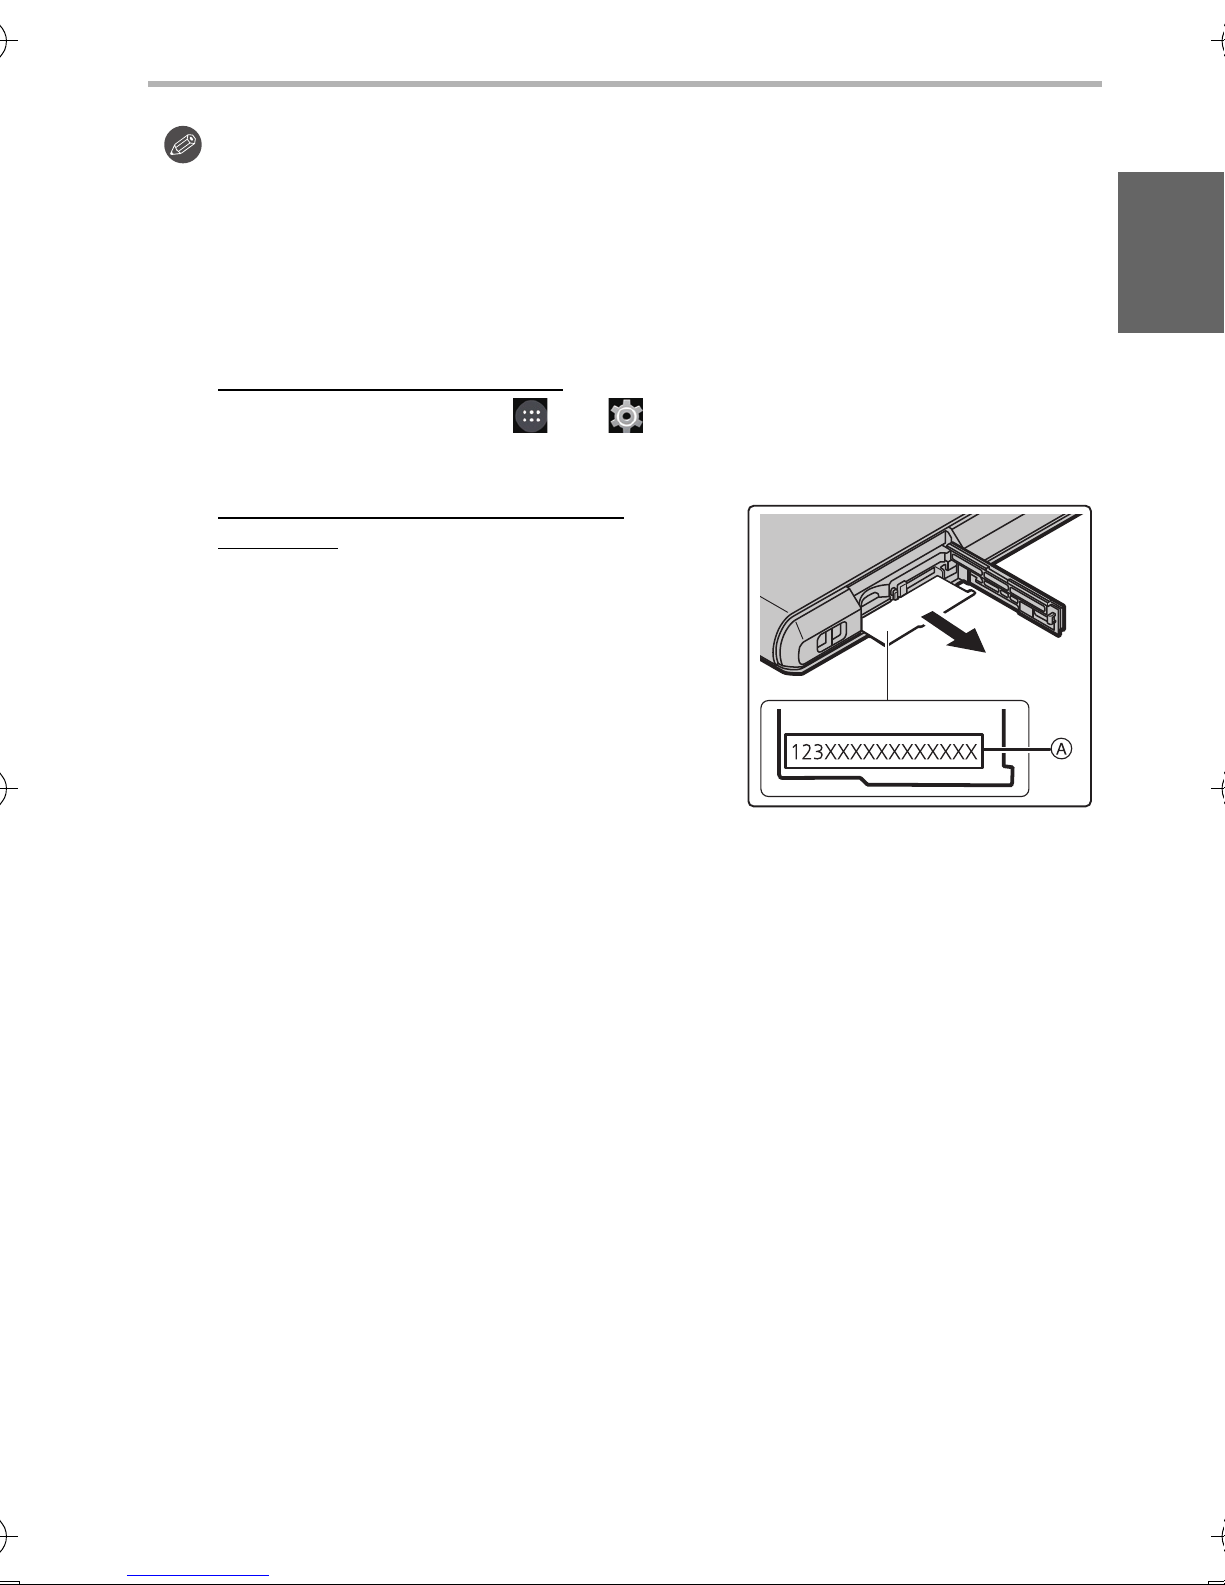
∫ About the mobile identification number
This unit has a specific mobile identification number A.
The mobile identification number is verified as follows.
To verify the number on-screen:
1 From the Home screen > [ ] > [ ].
2 [About phone] > [Status] > check the [IMEI] item.
To verify the number by checking the
nameplate:
1 Open the card slot cover.
2 Remove the microSIM card tray.
Preparation
3 Pull the nameplate towards you.
≥ Be careful as the nameplate may be damaged
if it is pulled too hard.
(ENG) SQT0882
13
Preparation
About the Built-in Memory/the microSD
Card (optional)
About Built-in Memory
≥ Memory size: Approx. 10 GB
≥ The access time for the built-in memory may be longer than the access time for a
microSD card.
≥ You can copy the recorded pictures to a microSD card. (P35)
About microSD cards that can be used with this unit
The following microSD cards which conform to the SD standard can be used
with this unit.
(These cards are indicated as microSD card in the text.)
≥ microSD Memory Card (64 MB to 2 GB)
≥ microSDHC Memory Card (4 GB to 32 GB)
≥ microSDXC Memory Card (64 GB to 128 GB)
≥ Check the corresponding manufacturer, capacity and other latest compatibility
information from the following support site.
http://panasonic.jp/support/global/cs/dsc/
(This Site is English only.)
Note that this does not guarantee compatibility with all operations.
≥ microSDHC Memory Cards and microSDXC Memory Cards can be used only with
their compatible devices.
≥ A message prompting to format the microSD card may be displayed when connecting
the microSD card to other devices, but do not format.
14
SQT0882 (ENG)
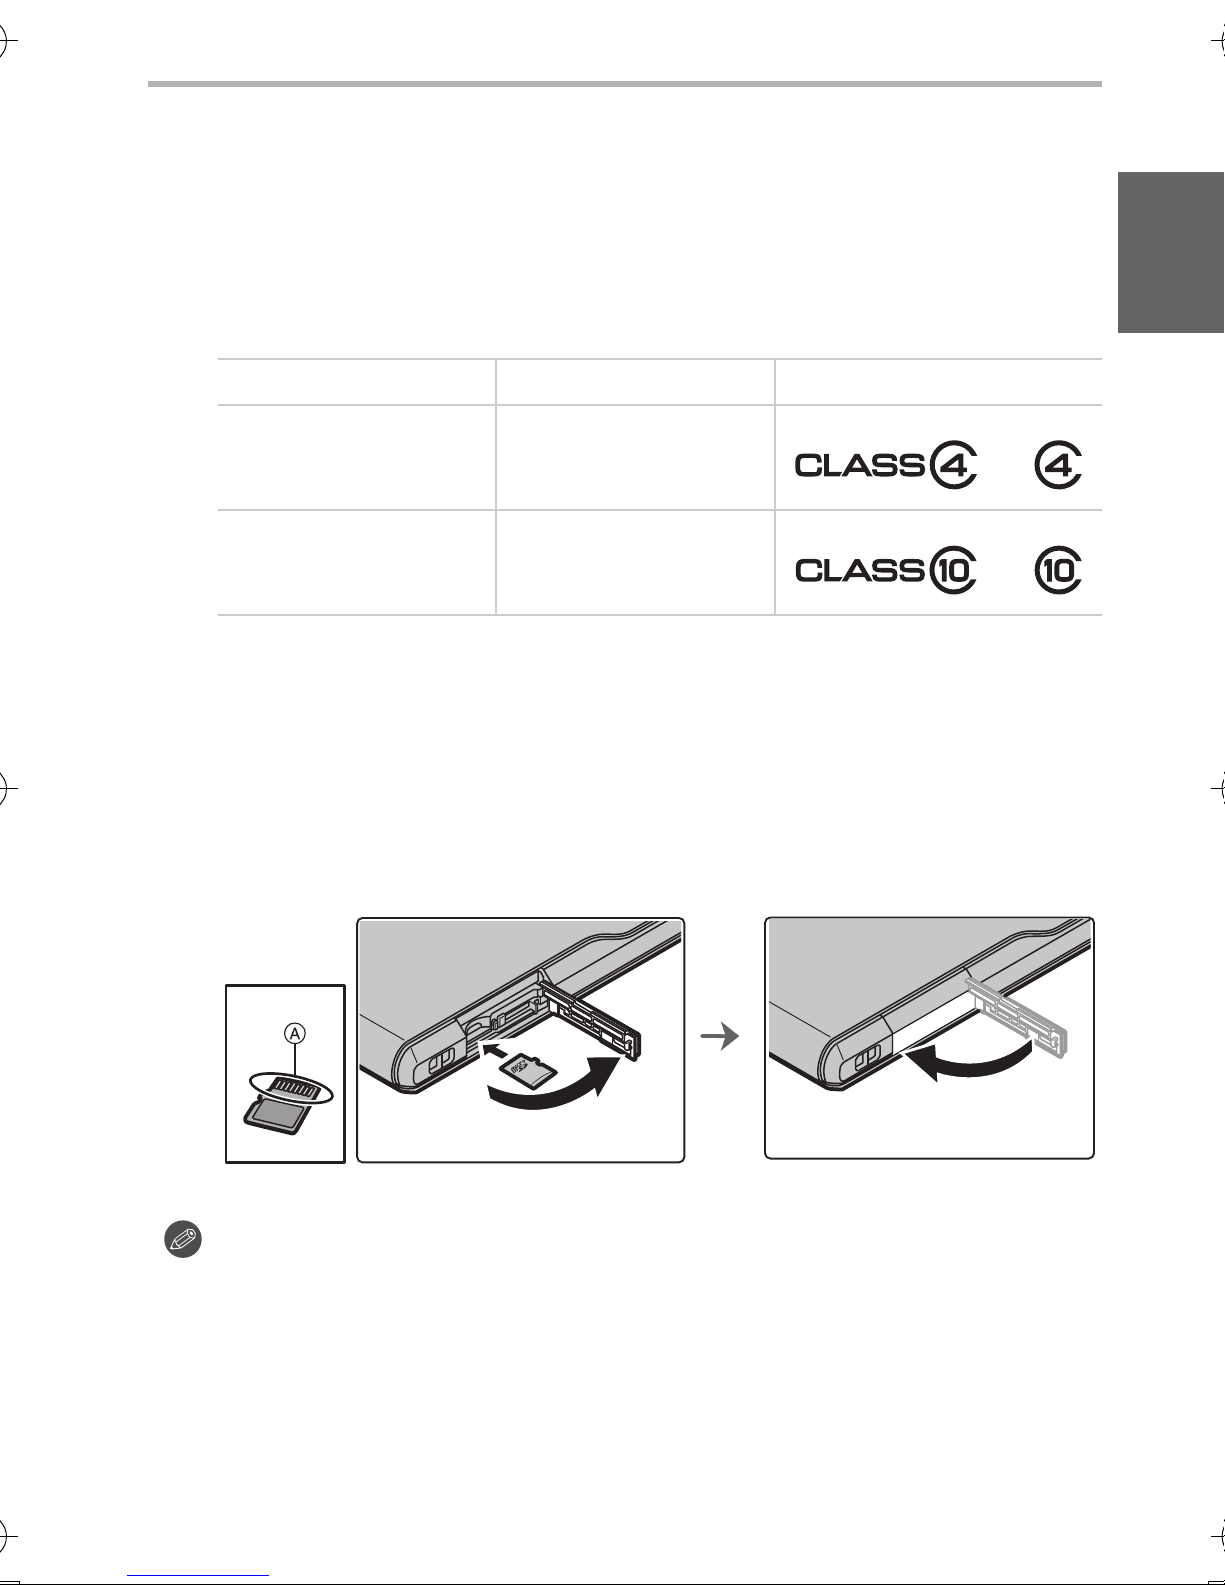
∫ About the motion picture recording and SD speed class
According to the [Rec Quality] (P34) of a motion picture, the required microSD card
differs. Use a microSD card that meets the following rating of the SD Speed Class.
≥ SD Speed Class is the speed standard regarding continuous writing. Check via the
label on the microSD card, etc.
≥ The SD speed class represents the level of performance of microSD cards. The SD
speed class does not serve as a guarantee of performance for all operations.
[Rec Quality] SD Speed class Label example
FHD/HD/VGA/1:1 Class 4 or higher
4K Class 10
Preparation
∫ Inserting/Removing the microSD card
Open the card slot cover, ensure that the connection terminal of the microSD card
1
is facing down, and insert it firmly in the correct direction until it makes a “click”
sound.
A Do not touch the connection terminals of the microSD card.
≥ To remove, push in the card until it makes a “click” sound and then pull it out straight.
2 Close the card slot cover.
≥ The data on the built-in memory or the microSD card may be damaged or lost due to
electromagnetic waves, static electricity or breakdown of this unit or the microSD card.
We recommend storing important data on a PC etc.
≥ Keep the microSD Card out of reach of children to prevent swallowing.
(ENG) SQT0882
15
Preparation
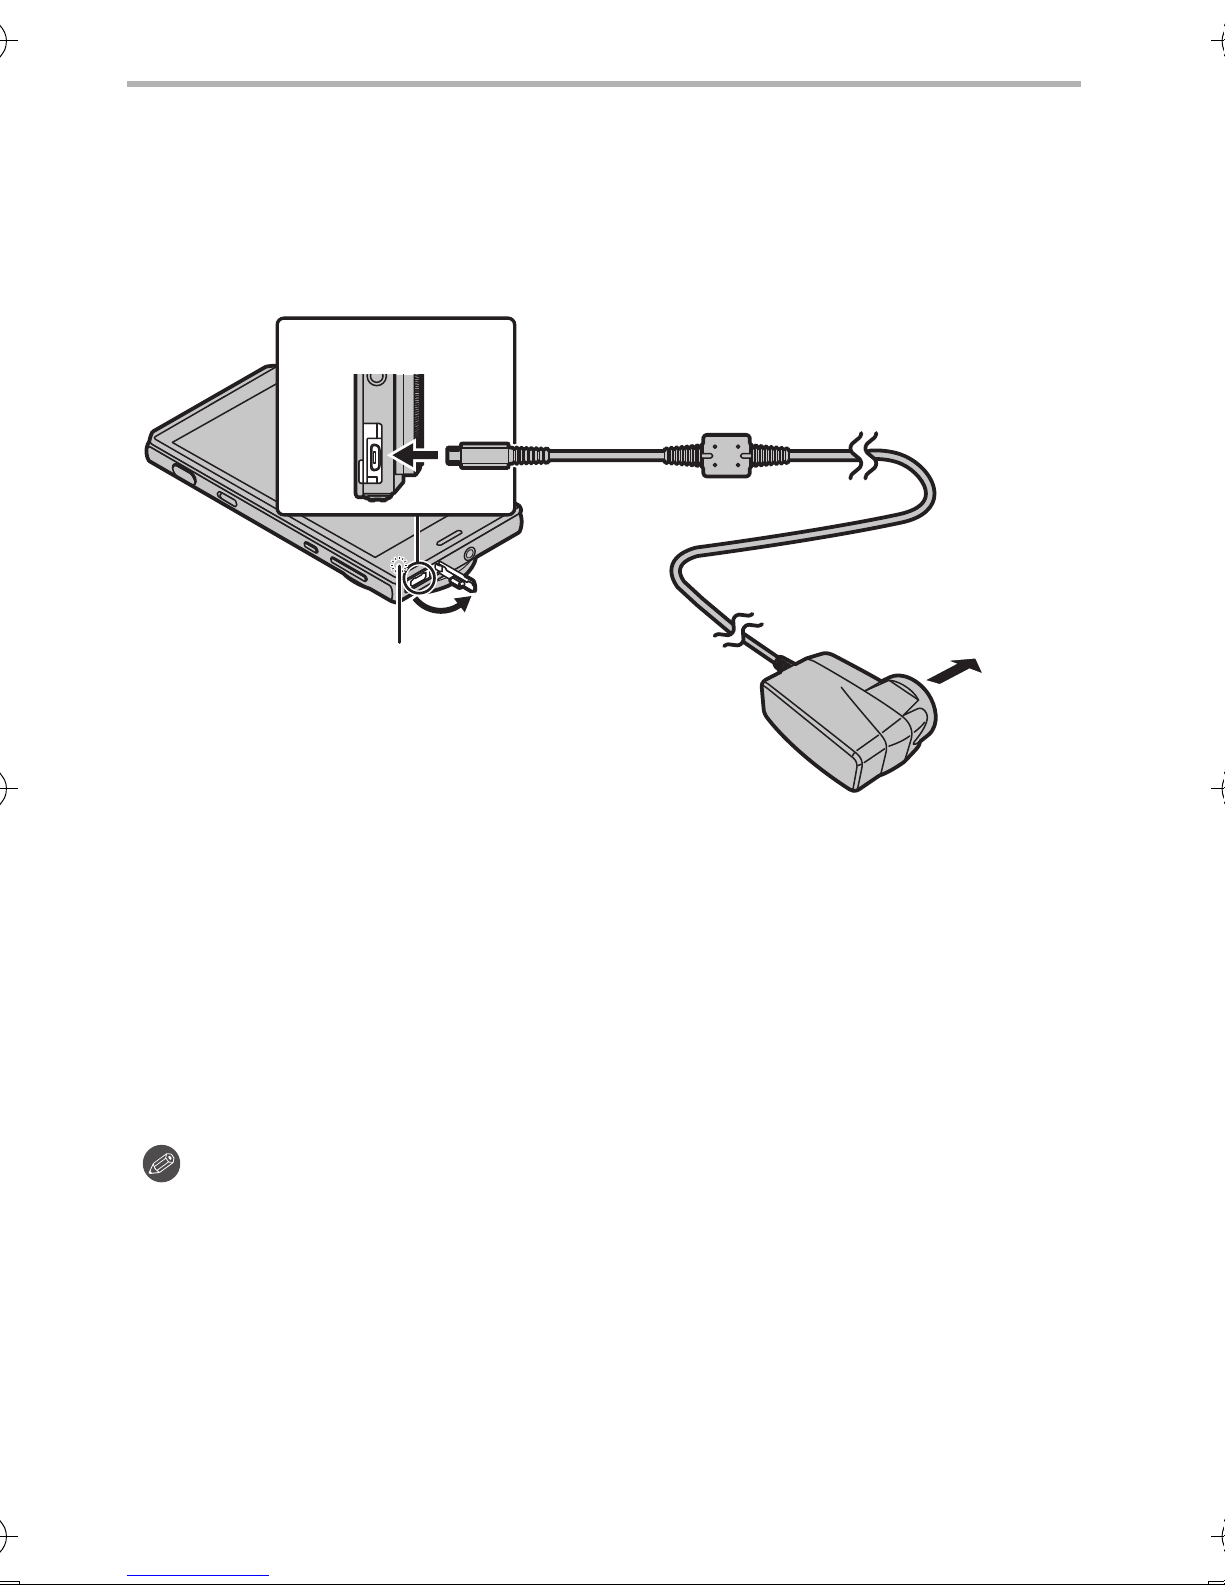
To power outlet
AC adaptor
microUSB terminal
Charging lamp
On: Charging.
Off: Charging has completed.
Charging
Connect the unit and AC adaptor to charge.
≥ The battery is not charged when this unit is shipped. Charge the battery before use.
≥ For details on charging time, refer to P52.
Open the microUSB terminal cover, check the direction of the AC
1
adaptor cable terminal, and insert it into the microUSB terminal.
Insert the AC adaptor power plug into the power outlet.
2
∫ When charging is complete
Remove the AC adaptor power plug from the power outlet.
1
2 Remove the AC adaptor cable terminal from the unit.
≥ The unit and AC adaptor may become warm while charging, however this is not
a malfunction.
≥ Remove the AC adaptor from the power outlet after completely charging the
battery in order to save power and maintain battery performance.
≥ The shape of the AC adaptor power plug and power outlet may differ depending on
each country/region.
≥ Do not use any other AC adaptors except the supplied one.
Do not leave any metal items (such as clips) near the contact areas of the power plug.
≥
≥ When you start charging an empty battery, the charging lamp may flash. This is not a
malfunction. The charging lamp stops flashing and lights up after the battery is
charged for a while.
16
SQT0882 (ENG)

Turning the unit on/off
A
Turn on the unit by pressing [ ] for
2 seconds or more.
≥ The lock screen will be displayed after a short time.
≥ The default settings screen will be displayed when you turn the
unit on for the first time. (P24)
≥ Press [ ] to enter/release sleep mode, when the unit is turned
on.
Basic
∫ To turn the unit off
Press [ ] for 1 second or more > [Power off] > [OK].
∫ To restart
Press [ ] for 1 second or more > [Reboot] > [OK].
Release the lock screen
Slide [ ] until the guide (white line
on the outer circumference) A.
≥ If the [Screen lock] settings have been changed,
use the method configured to release the lock.
(ENG) SQT0882
17

Basic
Using the touch screen
The unit features a touch screen, which you can operate by touching directly with
your fingers.
≥ Peel off the sheet pasted to the touch screen when first bought before use.
≥ The touch screen is designed to be lightly touched with a finger.
Do not press the touch screen strongly with your finger or press objects with sharp tips (claws/
ball point pens/pins etc.) against it.
≥ The touch screen may not work even when touched in the following cases. Please note that
they may also result in incorrect operations.
– Operating with gloves on your hand
– Operating with your fingertips
– Operating with foreign objects on top of the operating surface
– Operating with a protective sheet, seal, etc. pasted on top
– Operating with the touch screen wet
– Operating with your fingers wet with sweat or water
Tapping
Tap an item or icon to select
it.
Tapping and holding
Tap an item or icon without
releasing your finger.
Use this to display a context
menu.
Dragging
Tap an item or icon without
releasing your finger and
slide it.
Double-tapping
Tap the touch screen
quickly two times when you
want to zoom in and out of
webpages, etc.
Flicking
Moving your finger quickly
across the touch screen will
move back and forth
through numerous pictures.
Scrolling
Flick/drag your finger
around the screen to
display a hidden area.
Pinching
When displaying a webpage
or picture, use two fingers
to push the screen apart
and zoom in (pinch out), or
bring them together to zoom
out (pinch in).
18
SQT0882 (ENG)
∫ Switching between vertical
and horizontal viewing modes
The unit switches the screen between
vertical and horizontal viewing modes
depending on its motion sensor that
can detect the unit’s direction and
movement.
 Loading...