

Panasonic CS-E12QD3RW, CS-E18QD3RW, CU-E12QD3R, CU-E18QD3R, CU-4E23QBR Operating Instructions Manual
...Page 1
English
F569674
Operating Instructions
Air Conditioner
Model No.
Indoor Unit
CS-E12QD3RW
CS-E18QD3RW
Single Split
Outdoor Unit
CU-E12QD3R
CU-E18QD3R
Multi Split
Outdoor Unit
CU-4E23QBR
CU-4E27QBR
CU-5E34QBR
Operating Instructions
Air Conditioner
Thank you for purchasing Panasonic Air Conditioner.
Installation instructions attached.
Before operating the unit, read these operating
instructions thoroughly and keep them for future
reference.
Page 2
2
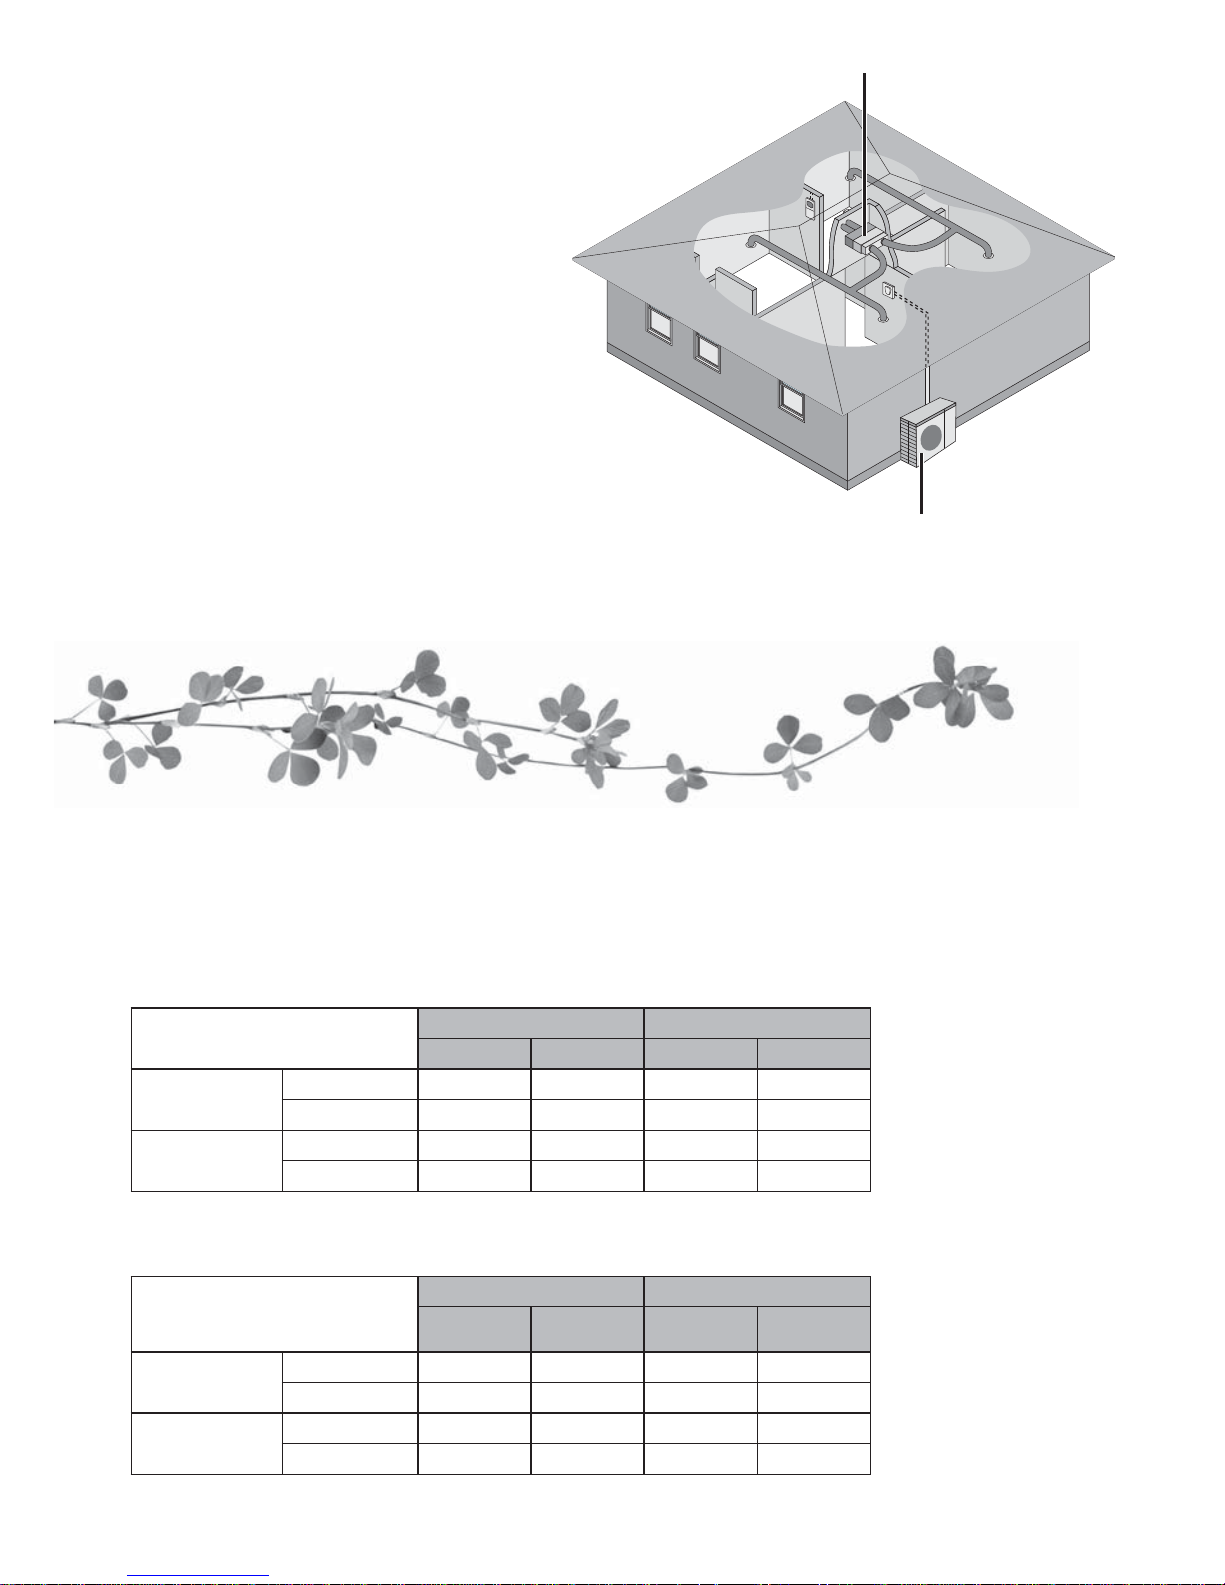
Multi air conditioner system
Multi air conditioner systems save space by
letting you connect multiple indoor units to a
single outdoor unit.
• For complete product features, please refer
catalogue.
Indoor units
Outdoor unit
Indoor units
• It is possible to operate the indoor units
individually or simultaneously. The priority
of operation is placed on the fi rst unit that
turned on.
• During operation, HEAT and COOL modes
cannot activate at the same time for different
indoor units.
• The power indicator blinks to indicate the
indoor unit is standing by for a different
operation mode.
Operation conditions
Use this air conditioner under the following temperature range.
DBT : Dry bulb temperature
WBT : Wet bulb temperature
CU-E12QD3R
CU-E18QD3R
Indoor Outdoor
DBT WBT DBT WBT
COOL
Max. 32 23 46 26
Min. 16 11 5 -
HEAT
Max. 30 - 24 18
Min. 16 - -15 -
°C (temperature)
Multi split outdoor unit
CU-4E23QBR
CU-4E27QBR
CU-5E34QBR
Indoor Outdoor
DBT WBT DBT WBT
COOL
Max. 32 23 46 26
Min. 16 11 -10 -
HEAT
Max. 30 - 24 18
Min. 16 - -15 -16
°C (temperature)
Page 3
3
English
Quick guide
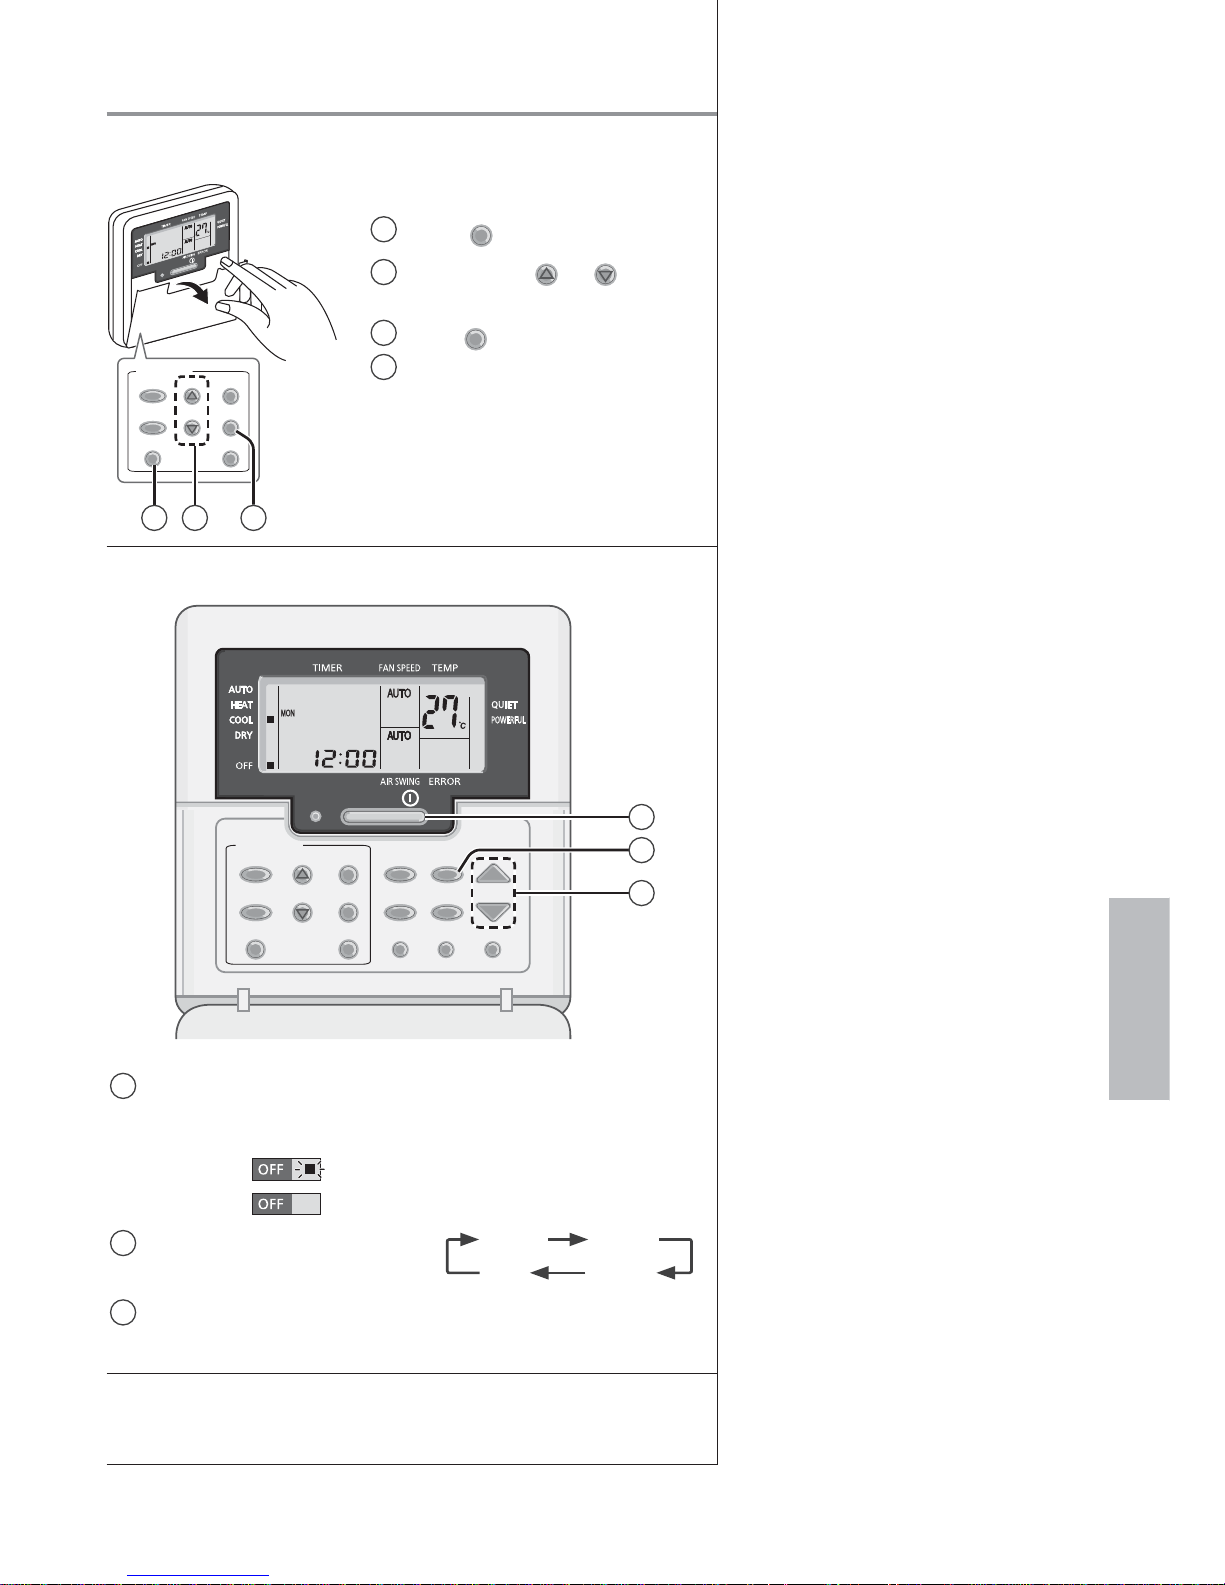
Remote control preparation
OFF
/
ON
TIMER/CLOCK
MODE
OFF/ON
CANCELCLOCK
SET
SELECTUP
DOWN
31 2
Open the cover to use the buttons
1
Press
CLOCK
2
Press
TIMER
UP or
DOWN
to
select current day
3
Press
SET
to confi rm
4
Repeat steps 2 and 3 to set
the current time
Basic operation
OFF
/
ON
TEMP
TIMER/CLOCK
MODE
QUIET/
POWERFUL
FAN SPEED
MODE
CHECK RESET
AIR SWING
OFF/ON
CANCELCLOCK
SET
SELECTUP
DOWN
AC RC
3
1
2
1
Start/stop the operation
• Please note that the OFF indication is
as follows:
To start:
To stop:
2
Select the desired mode
DRY
AUTO HEAT
COOL
3
Select the desired temperature
• Selection range: 16 °C ~ 30 °C.
The illustrations in this manual are for explanation purposes
only and may differ from the actual unit. They are subject to
change without notice for future improvement.
Table of contents
Safety precautions ...................4-5
How to use...............................6-7
Information...............................6-7
To set the timer ........................7-8
Troubleshooting .......................... 9
Page 4
4
Safety precautions
To prevent personal injury, injury to others
or property damage, please comply with the
following:
Incorrect operation due to failure to follow
instructions below may cause harm or damage,
the seriousness of which is classifi ed as below:
WARNING
This sign warns of
death or serious
injury.
CAUTION
This sign warns of
injury or damage to
property.
The instructions to be followed are classifi ed by
the following symbols:
This symbol denotes an
action that is PROHIBITED.
These symbols denote
actions COMPULSORY.
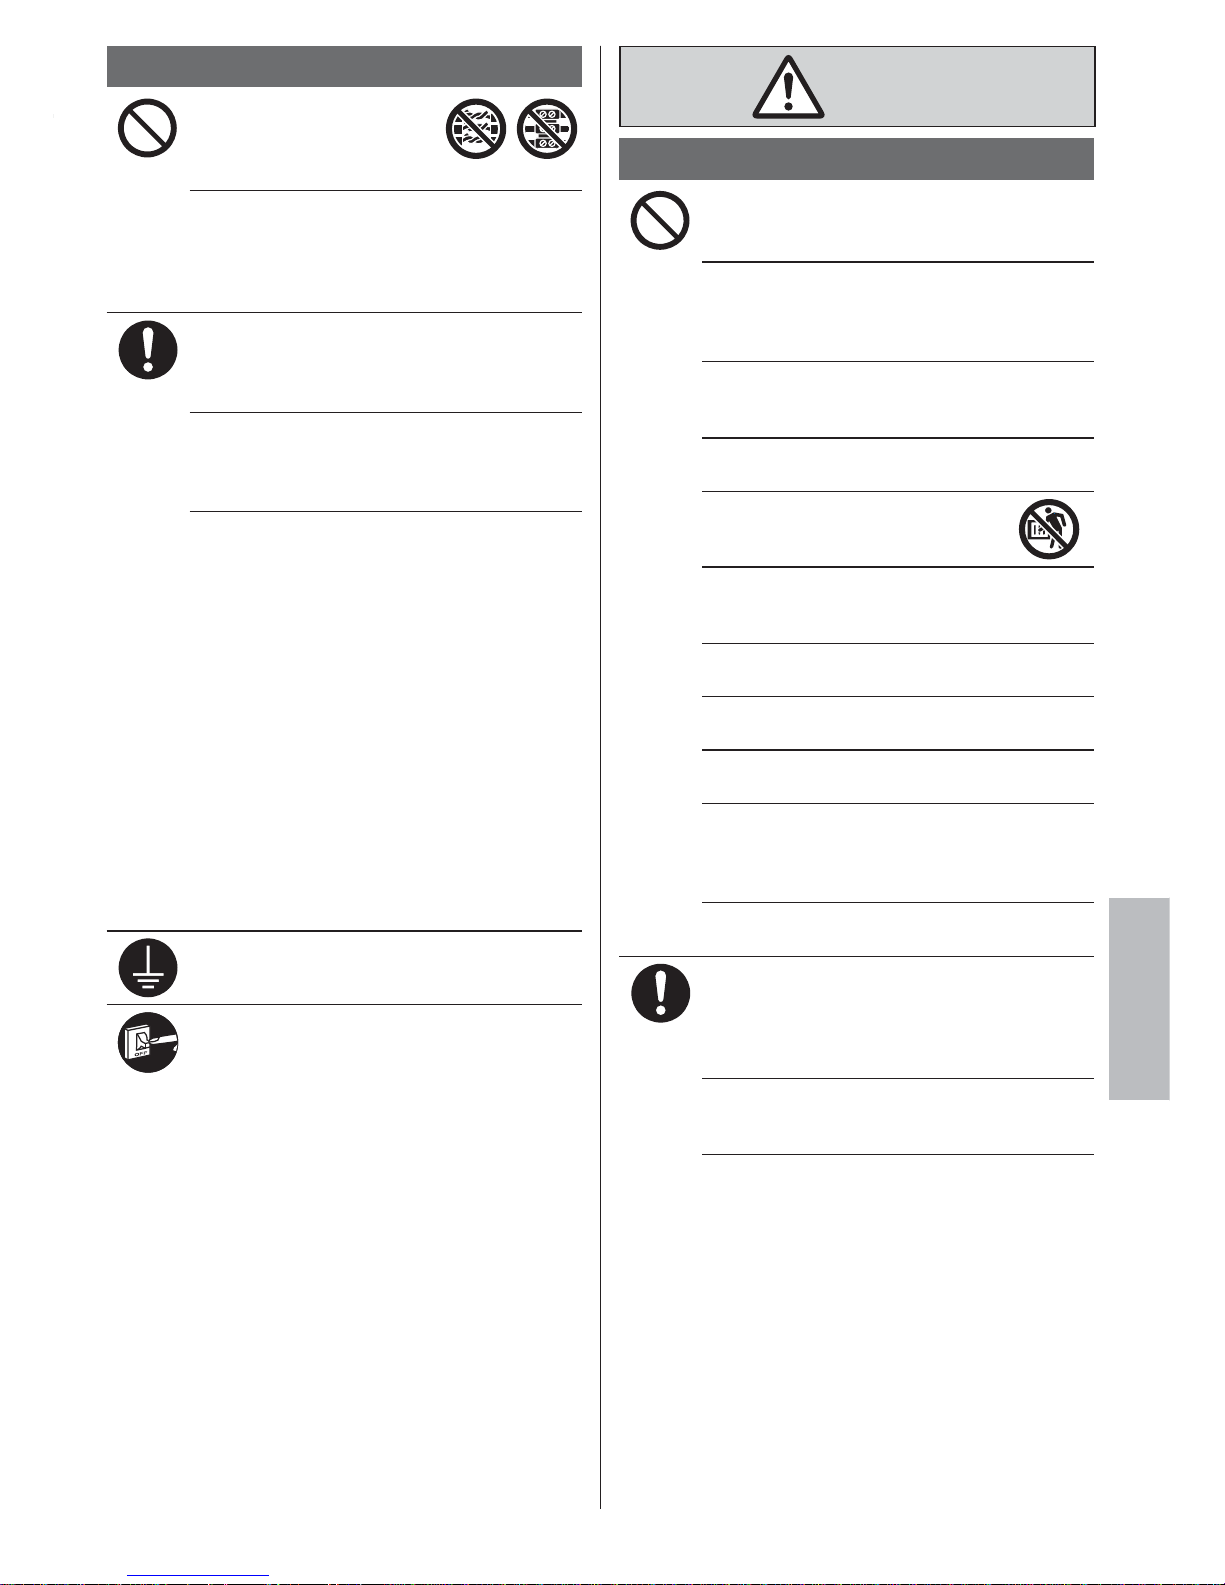
WARNING
Indoor unit and outdoor unit
This appliance is not intended for use by
persons (including children) with reduced
physical, sensory or mental capabilities, or lack
of experience and knowledge, unless they have
been given supervision or instruction concerning
use of the appliance by a person responsible for
their safety. Children should be supervised to
ensure that they do not play with the appliance.
Please consult authorised dealer or specialist to
clean the internal parts, repair, install, remove
and reinstall the unit. Improper installation and
handling will cause leakage, electric shock or fi re.
Confi rm with authorised dealer or specialist on
usage of any specifi ed refrigerant type.
Using refrigerant type other than the specifi ed
may cause product damage, burst and injury etc.
Do not install the unit in a potentially explosive
or fl ammable atmosphere. Failure to do so could
result in fi re.
Do not insert your fi ngers or other
objects into the air conditioner indoor or
outdoor unit, rotating parts may cause
injury.
Do not touch the outdoor unit during lightning, it
may cause electric shock.
Do not expose yourself directly to cold air for a
long period to avoid excess cooling.
Do not sit or step on the unit, you may
fall down accidentally.
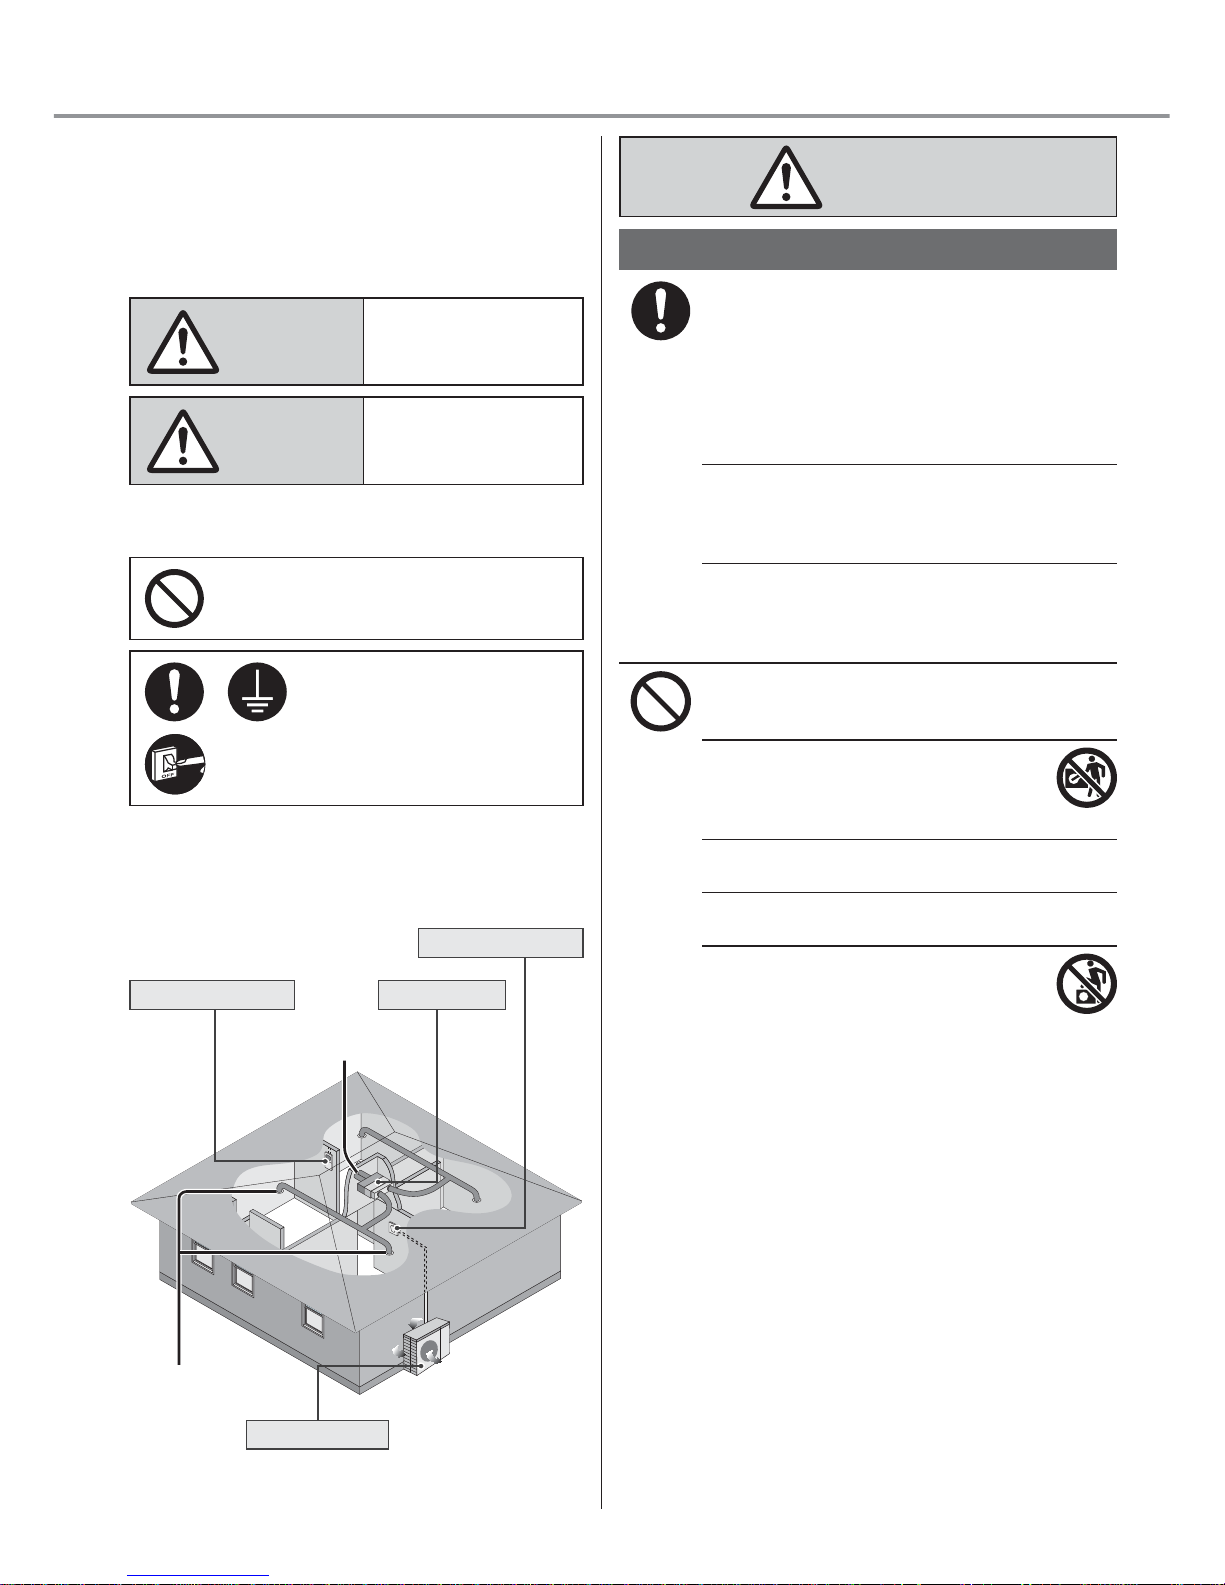
Air inlet
Air inlet
Air outlet
Air outlet
Remote control
Outdoor unit
Power supply
Indoor unit
Air inlet vent
Air outlet vent
Page 5
5
English
Power supply
Do not use a modifi ed cord,
joint cord, extension cord or
unspecifi ed cord to prevent
overheating and fi re.
To prevent overheating, fi re or electric shock:
•
Do not share the same power outlet with
other equipment.
•
Do not operate with wet hands.
•
Do not over bend the power supply cord.
If the supply cord is damaged, it must be
replaced by the manufacturer, service agent
or similarly qualifi ed persons in order to avoid
a hazard.
It is strongly recommended to be installed
with Earth Leakage Circuit Breaker (ELCB)
or Residual Current Device (RCD) to prevent
electric shock or fi re.
Stop using the product if any abnormality/
failure occurs and disconnect the power plug
or turn off the power switch and breaker.
(Risk of smoke/fi re/electric shock) Examples
of abnormality/failure
•
The ELCB trips frequently.
•
Burning smell is observed.
•
Abnormal noise or vibration of the unit is
observed.
•
Water leaks from the indoor unit.
•
Power cord or plug becomes abnormally hot.
•
Fan speed cannot be controlled.
•
The unit stops running immediately even if it
is switched on for operation.
•
The fan does not stop even if the operation
is stopped.
Contact your local dealer immediately for
maintenance/repair.
This equipment must be earthed to prevent
electrical shock or fi re.
Prevent electric shock by switching off the
power supply:
- Before cleaning or servicing,
- When extended non-use, or
- During abnormally strong lightning activity.
CAUTION
Indoor unit and outdoor unit
Do not wash the indoor unit with water,
benzine, thinner or scouring powder to
avoid damage or corrosion at the unit.
Do not use for preservation of precise
equipment, food, animals, plants, artwork
or other objects. This may cause quality
deterioration, etc.
Do not use any combustible equipment
in front of the airfl ow outlet to avoid fi re
propagation.
Do not expose plants or pet directly to airfl ow
to avoid injury, etc.
Do not touch the sharp aluminium
fi n, sharp parts may cause injury.
Do not switch ON the indoor unit when waxing
the fl oor. After waxing, aerate the room
properly before operating the unit.
Do not install the unit in oily and smoky areas
to prevent damage to the unit.
Do not dismantle the unit for cleaning purpose
to avoid injury.
Do not step onto an unstable bench when
cleaning the unit to avoid injury.
Do not place a vase or water container on the
unit. Water may enter the unit and degrade
the insulation. This may cause an electric
shock.
Do not open window or door for long time
during COOL/DRY mode operation.
Prevent water leakage by ensuring drainage
pipe is:
- Connected properly,
- Kept clear of gutters and containers, or
- Not immersed in water
After a long period of use or use with any
combustible equipment, aerate the room
regularly.
After a long period of use, make sure the
installation rack does not deteriorate to
prevent the unit from falling down.
Safety precautions
Page 6
6
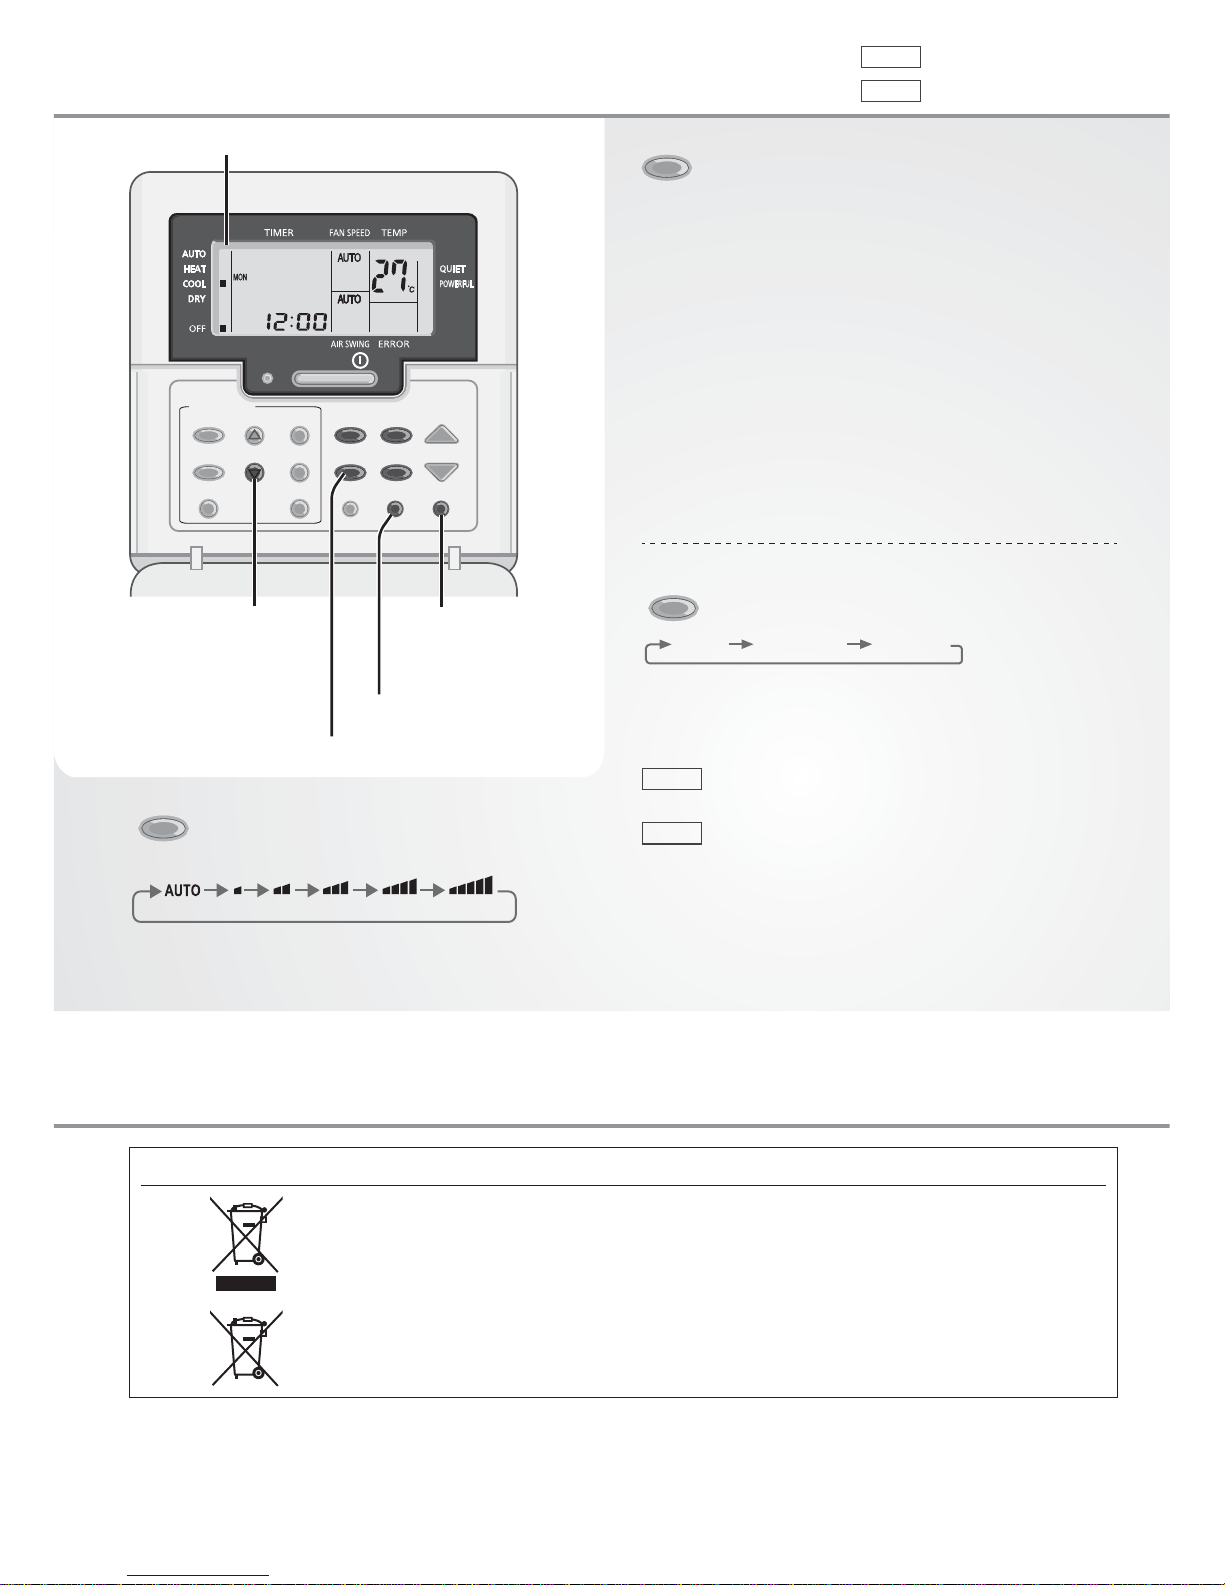
FAN SPEED
To select fan speed
(Remote control display)
• For AUTO, the indoor fan speed is automatically
adjusted according to the operation mode.
How to use
MODE
To select operation mode
AUTO - For your convenience
• Unit selects operation mode every 10 minutes
according to setting temperature and room
temperature.
HEAT - To enjoy warm air
• Unit takes a while to warm up.
COOL - To enjoy cool air
• Use curtains to screen off sunlight and outdoor
heat to reduce power consumption during COOL
mode.
DRY - To dehumidify the environment
• Unit operates at low fan speed to give a gentle
cooling operation.
QUIET/
POWERFU
L
To switch between
quiet & powerful
QUIET POWERFUL NORMAL
QUIET: To enjoy quiet operation
• This operation reduces airfl ow noise.
POWERFUL: To reach temperature quickly
Single
• This operation stops automatically after
20 minutes.
Multi
• Press the button again or turn OFF the
unit to stop this operation.
Can be activated in all modes and can be
cancelled by pressing the respective button again.
OFF
/
ON
TEMP
TIMER/CLOCK
MODE
QUIET/
POWERFUL
FAN SPEED
MODE
CHECK RESET
AIR SWING
OFF/ON
CANCELCLOCK
SET
SELECTUP
DOWN
AC RC
Remote control display
Press and hold
for approximately
10 seconds to show
temperature setting
in °C or °F.
Press to restore the
remote control to
default setting.
Not used in normal
operations.
Not applicable
Information
Single
Single split system
Multi
Multi split system
Information for Users on Collection and Disposal of Old Equipment
[Information on Disposal in other Countries outside the European Union]
These symbols are only valid in the European Union. If you wish to discard
these items, please contact your local authorities or dealer and ask for the
correct method of disposal.
Page 7
NON SERVICEABLE CRITERIAS
TURN OFF POWER SUPPLY then please consult
authorised dealer under the following conditions:
• Abnormal noise during operation.
• Water/foreign particles have entered the remote
control.
• Water leaks from Indoor unit.
• Circuit breaker switches off frequently.
• Power cord becomes unnaturally warm.
• Switches or buttons are not functioning properly.
7
English
To set the timer
Daily timer setting
To turn ON or OFF the unit at a preset time.
TIMER/CLOCK
CANCELCLOCK
SELECT
MODE
OFF/ON
SET
U
P
D
OWN
3
4
1
2
1
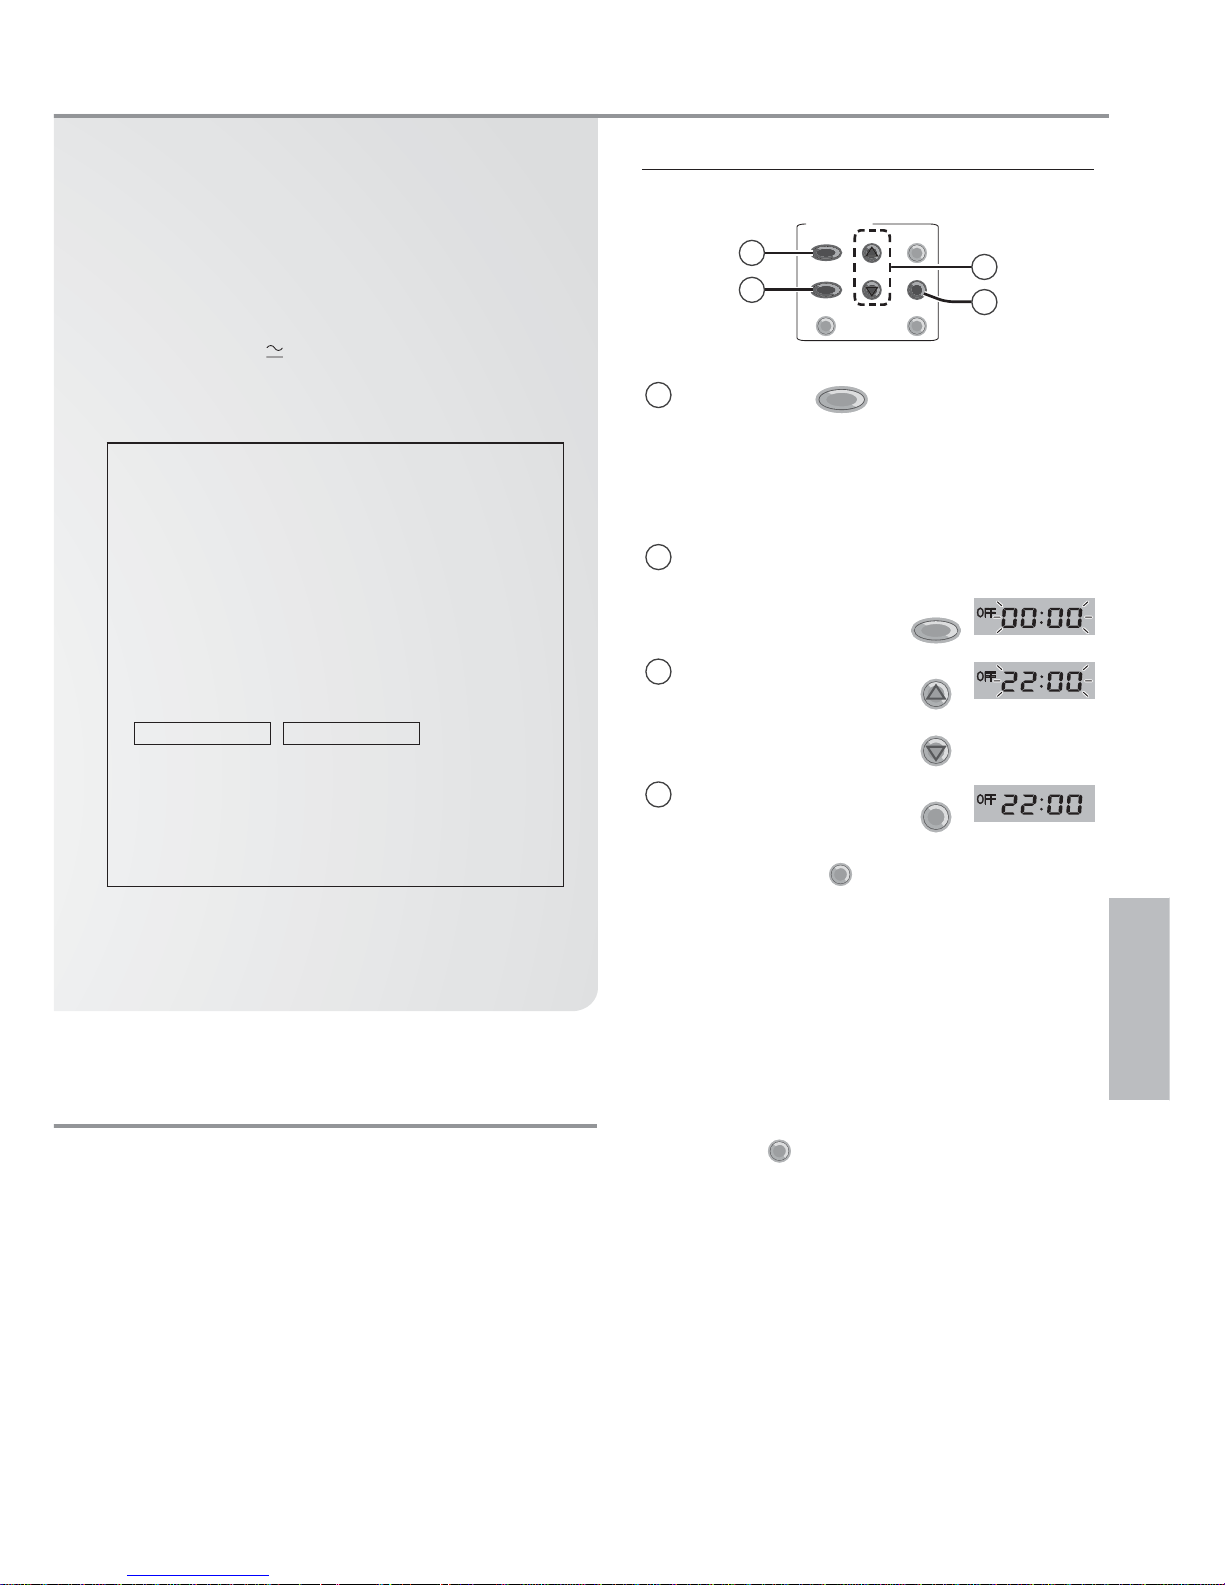
Press TIMER
MODE
to enter timer mode
• Press once to change the display from
clock to timer or vice-versa.
• Press for 4 seconds to change the display
from daily timer to weekly timer or viceversa.
2
Select ON or OFF
timer
Example:
OFF at 22:00
OFF/ON
3
Set the time
UP
DOWN
4
Confi rm
SET
• To cancel, press
CANCEL
.
• When ON timer is set, the unit may start early
before the actual set time in order to achieve
the desired temperature on time.
• Timer operation is based on the clock set in
the remote control and repeats daily once set.
• The timer closest to the current time will be
activated fi rst.
• If timer is cancelled manually or due to power
failure, you can restore the previous setting
by pressing
SET
.
How to use / Information / To set the timer
To ensure optimal performance of the unit,
cleaning has to be carried out at regular
intervals. Please consult authorised dealer.
• Switch off the power supply before cleaning.
• Do not touch the aluminium fi n, sharp parts
may cause injury.
• Do not use benzine, thinner or scouring
powder.
• Use only soap (
pH 7) or neutral household
detergent.
• Do not use water hotter than 40 °C.
For seasonal inspection after extended
non-use
• No obstruction at air inlet and air outlet
vents.
• These units are mounted inside the ceiling.
It uses external air intake vent and air
outlet vent to operate. Please consult your
nearest dealer for seasonal inspection.
• After 15 minutes of operation, it is normal to
have the following temperature difference
between air inlet and air outlet vents:
COOL: ≥ 8 °C HEAT: ≥ 14 °C
For extended non-use
• Activate HEAT mode for 2~3 hours to
remove moisture left in the internal parts
thoroughly to prevent mould growth.
• Turn off the power supply.
Page 8
8
To set the timer
Weekly timer setting
Promotes energy saving by allowing you to set
up to 6 programmes in any given day.
TIMER/CLOCK
CANCELCLOCK
SELECT
MODE
OFF/ON
SET
U
P
D
OWN
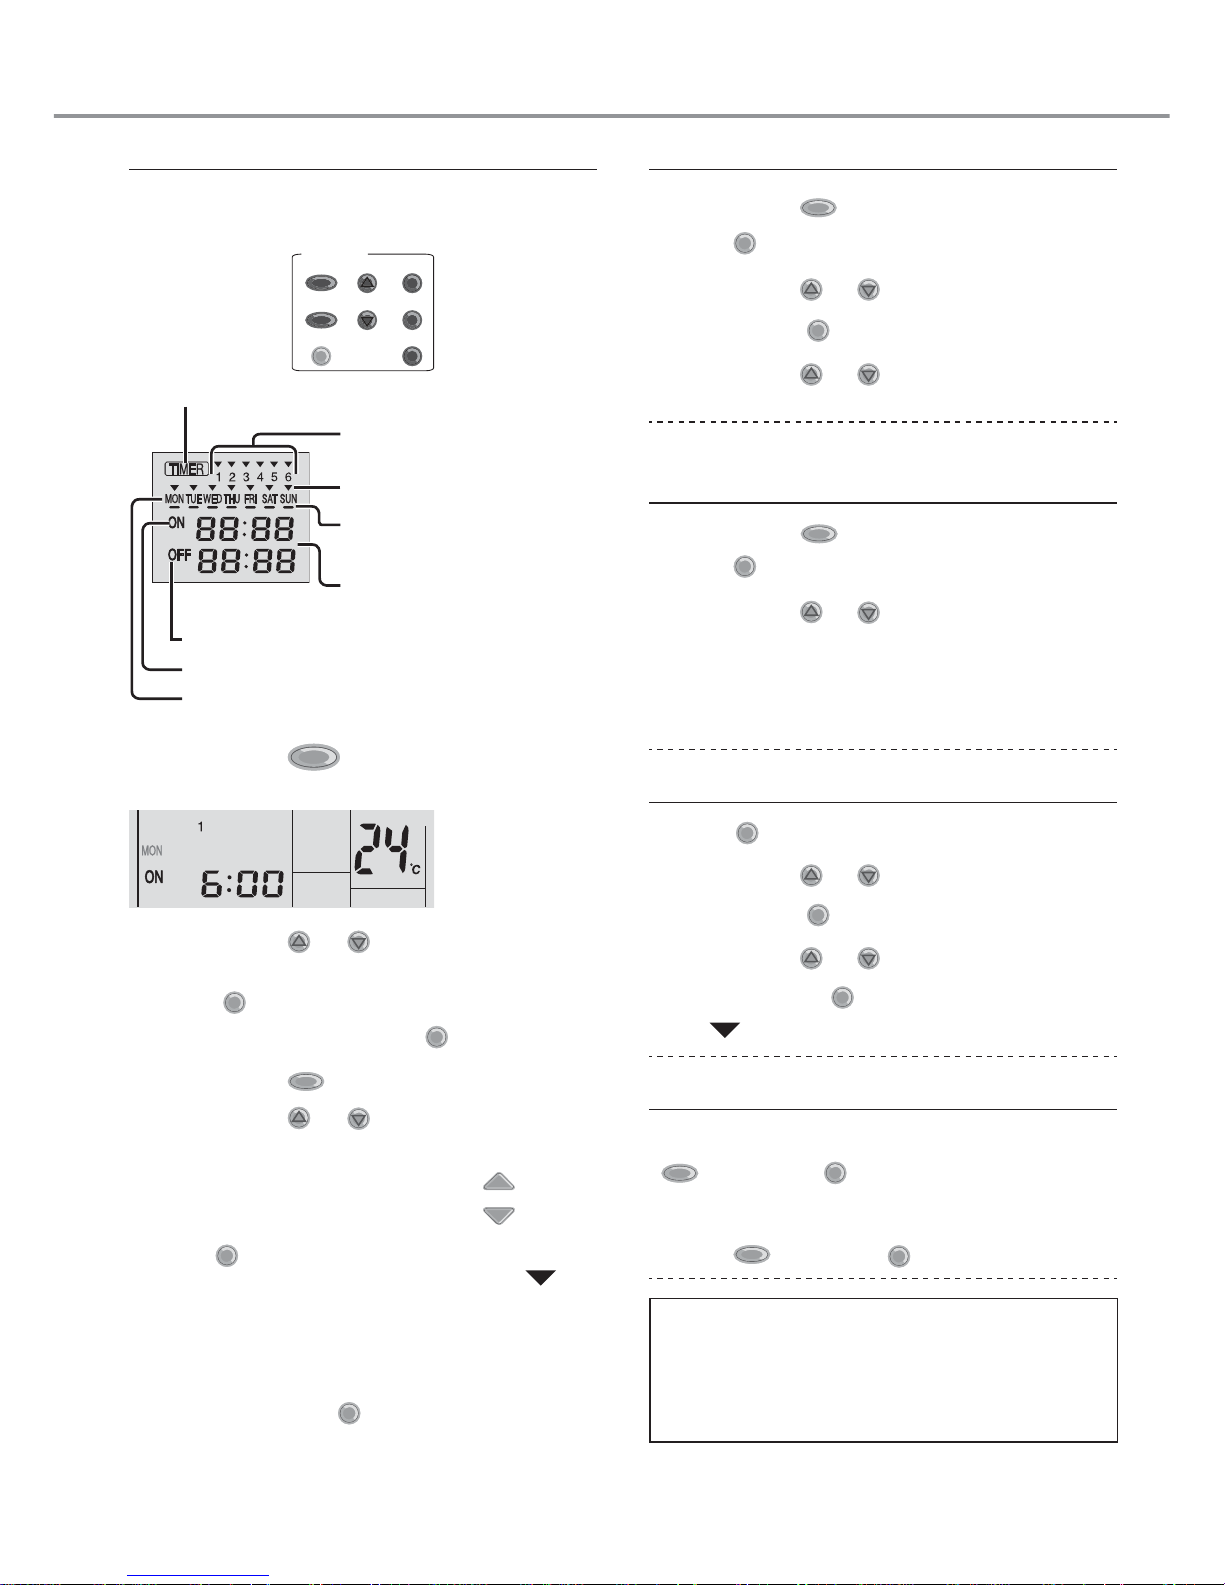
Lights up if Timer operation is selected
Programme number in a
day (1 ~ 6)
Time to be selected
(10 minutes step)
ON Timer
OFF Timer
Day to be selected
Indicates the selected day
Indicates the next timer
operation day
1. Press TIMER
MODE
for 4 seconds to change
display to weekly timer.
2. Press TIMER UP or
DOWN
to select your
desired day.
3. Press
SELECT
to confi rm your selection.
4. “1” will be blinking, press
SELECT
to set
programme 1.
5. Press TIMER
OFF/ON
to select ON or OFF timer.
6. Press TIMER
UP
or
DOWN
to select your
desired time.
If you want to set the timer together with
your desired temperature, press
TEMP
to
select the temperature.
7. Press
SET
to confi rm programme 1. The
selected day will be highlighted with .
• After 2 seconds, the display will move to the
next programme. Repeat steps 4 to 7 to set
programmes 2 to 6.
• During timer setup, if no button is pressed within
30 seconds, or if the
SET
button is pressed, the
setting at that moment is confi rmed and timer
setup is ended.
To check current timer programme
1. Press TIMER
MODE
to enter timer mode and
press
SELECT
to enter day setting.
2. Press TIMER
UP
or
DOWN
until your desired day is
shown, press
SELECT
to confi rm your selection.
3. Press TIMER
UP
or
DOWN
to check the set
programmes.
To modify current timer programme or
add new timer programme
1. Press TIMER
MODE
to enter timer mode and
press
SELECT
to enter day setting.
2. Press TIMER
UP
or
DOWN
until your desired day is
shown.
3. Perform steps 4 to 7 of “Weekly timer setting”
to modify existing timer programme, or add any
timer programme.
To cancel current timer programme
1. Press
SELECT
to enter day.
2. Press TIMER
UP
or
DOWN
until your desired day is
shown, press
SELECT
to enter programme setting.
3. Press TIMER
UP
or
DOWN
until your desired day
is shown. Press
CANCE
L
to cancel the programme
and will disappear.
To disable/enable Weekly Timer
• To disable weekly timer setting, press TIMER
MODE
, then press
CANCEL
.
• To enable previous weekly timer setting, press
TIMER
MODE
, then press
SET
.
Note
• Daily timer and weekly timer could not be set
at the same time.
• Same timer programme cannot be set in the
same day.
Page 9
9
English To set the timer / Troubleshooting
The following symptoms do not indicate malfunction.
Symptom Cause
Mist emerges from indoor unit. • Condensation effect due to cooling process.
Water fl owing sound during operation. • Refrigerant fl ow inside the unit.
The room has a peculiar odour. • This may be due to damp smell emitted by the wall,
carpet, furniture or clothing.
Indoor fan stops occasionally during automatic
fan speed setting.
• This helps to remove the surrounding odour.
Operation is delayed a few minutes after
restarting.
• The delay is a protection to the unit’s compressor.
Outdoor unit emits water/steam. • Condensation or evaporation occurs on pipes.
TIMER indicator is always on. • The timer setting repeats daily once set.
Power indicator blinks during operation and the
indoor fan is stopped.
• The unit is in defrost mode, and the melted frost is
drained from the outdoor unit.
Indoor fan stops occasionally during heating
operation.
• To avoid unintended cooling effect.
POWER indicator blinks before the unit is
switched on.
• This is a preliminary step in preparation for the
operation when the ON timer has been set.
Cracking sound during operation. • Changes of temperature caused the expansion/
contraction of the unit.
Check the following before calling for servicing.
Symptom Check
Operation in HEAT/COOL mode is not working
effi ciently.
• Set the temperature correctly.
• Close all doors and windows.
•
Clear any obstruction at the air inlet and air outlet vents.
Noisy during operation. • Check if the unit has been installed at an incline.
The unit does not work. • Check if the circuit breaker is tripped.
• Check if timers have been set.
The following symptoms indicate malfunction.
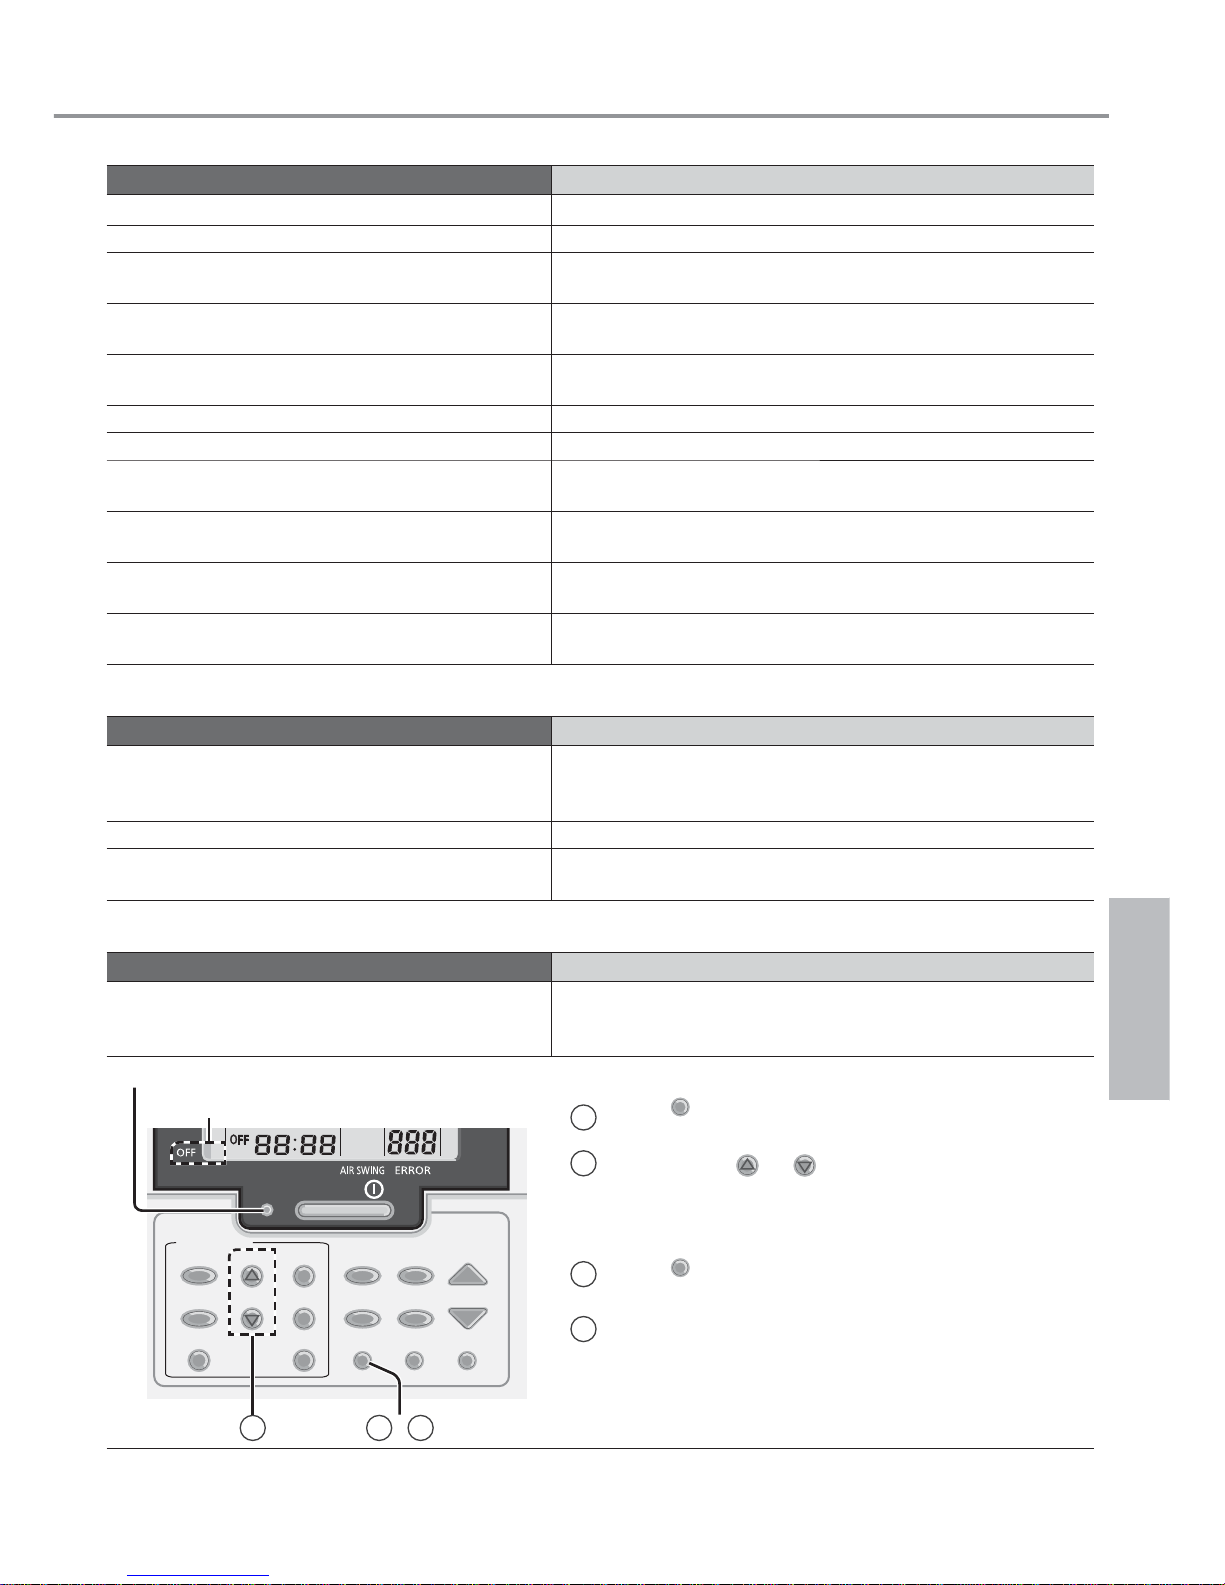
Symptom Check
At remote control, OFF indicator does not
shown on remote control display but operation
LED OFF.
•
Use remote control to retrieve error code as follows.
OFF
/
ON
TEMP
TIMER/CLOCK
MODE
QUIET/
POWERFUL
FAN SPEED
MODE
CHECK RESET
AIR SWING
OFF/ON
CANCELCLOCK
SET
SELECTUP
DOWN
AC RC
OFF Indicator
Operation LED
3/12
Ensure the operation LED is in OFF condition.
1
Press
CHECK
for 5 seconds
2
Press TIMER
UP
or
DOWN
• If error code and abnormality can be
identifi ed, the operation LED will be ON
continuously, then jot down the error code.
3
Press
CHECK
again for 5 seconds to quit
checking
4
Reveal the error code to authorised dealer
Troubleshooting
Page 10

Memo
Page 11

Memo
Page 12

F569674
SS0214-0
Printed in Malaysia
Panasonic Corporation
Website: http://panasonic.net/
© Panasonic Corporation 2014
 Loading...