

Page 1

Order No: PAPAMY1701023CE
Indoor Unit Outdoor Unit
CS-Z20TKEW
CS-Z25TKEW
CS-Z35TKEW
CS-Z42TKEW
CS-Z50TKEW
CS-Z71TKEW
CS-XZ20TKEW
CS-XZ25TKEW
CS-XZ35TKEW
CS-XZ50TKEW
CU-Z20TKE
CU-Z25TKE
CU-Z35TKE
CU-Z42TKE
CU-Z50TKE
CU-Z71TKE
CU-Z20TKE
CU-Z25TKE
CU-Z35TKE
CU-Z50TKE
Destination
Europe
Turkey
This service information is designed for experienced repair technicians only and is not designed for use by the general public.
It does not contain warnings or cautions to advise non-technical individuals of potential dangers in attempting to service a product.
Products powered by electricity should be serviced or repaired only by experienced professional technicians. Any attempt to service
or repair the products dealt with in this service information by anyone else could result in serious injury or death.
WARNING
IMPORTANT SAFETY NOTICE
There are special components used in this equipment which are important for safety. These parts are marked by in the Schematic
Diagrams, Circuit Board Diagrams, Exploded Views and Replacement Parts List. It is essential that these critical parts should be replaced
with manufacturer’s specified parts to prevent shock, fire or other hazards. Do not modify the original design without permission of
manufacturer.
PRECAUTION OF LOW TEMPERATURE
In order to avoid frostbite, be assured of no refrigerant leakage during the installation or repairing of refrigerant circuit.
R32 REFRIGERANT – This Air Conditioner contains and operates with refrigerant R32.
THIS PRODUCT MUST ONLY BE INSTALLED OR SERVICED BY QUALIFIED PERSONNEL.
Refer to Commonwealth, State, Territory and local legislation, regulations, codes, installation & operation manuals, before the
installation, maintenance and/or service of this product.
CAUTION
© Panasonic Corporation 2017.
Page 2

CAUTION
Before performing any of the electrical installation works, please verify on which of the intended connection use. Gen erally
there are 2 types of indoor-outdoor connections:
A Single Connection (Single Indoor Unit connects with Single Outdoor Unit)
○
B Multiple Connection (Multiple Indoor Unit connect with Single Outdoor Unit)
○
Both connections have different connecting methods. Any mismatch connections will result in malfunctions.
The following illustration demonstrates the correct electrical works for both type.
A (Single Connection)
○
Terminals on the outdoor unit
Colour of wires (connection cable)
Terminals on the indoor unit
(Power supply cord)
Terminals on the isolating devices
(Disconnecting means)
Please refer to the provided Installation Instructions for the detailed procedures for connecting cables to Indoor Unit.
L 1 N
(L) (N)
32S1
32S1
Terminals on the outdoor unit
Colour of wires (connection cable)
Terminals on the indoor unit
(Power supply cord)
Terminals on the isolating devices
(Disconnecting means)
B (Multiple Connection)
○
L 1 N S1
Connection for multi inverter model
*
(Outdoor power supply)
123
23
2
Page 3

TABLE OF CONTENTS
PAGE PAGE
1. Safety Precautions ............................................. 5
2. Precaution for Using R32 Refrigerant .............. 8
3. Specifications ................................................... 12
4. Features ............................................................ 23
5. Location of Controls and Components .......... 24
5.1 Indoor Unit .................................................. 24
5.2 Outdoor Unit ............................................... 24
5.3 Remote Control .......................................... 24
6. Dimensions ....................................................... 25
6.1 Indoor Unit .................................................. 25
6.2 Outdoor Unit ............................................... 27
7. Refrigeration Cycle Diagram ........................... 29
7.1 CS-Z20TKEW CU-Z20TKE
CS-Z25TKEW CU-Z25TKE
CS-Z35TKEW CU-Z35TKE
CS-Z42TKEW CU-Z42TKE
CS-XZ20TKEW CU-Z20TKE
CS-XZ25TKEW CU-Z25TKE
CS-XZ35TKEW CU-Z35TKE ..................... 29
7.2 CS-Z50TKEW CU-Z50TKE
CS-Z71TKEW CU-Z71TKE
CS-XZ50TKEW CU-Z50TKE ..................... 30
8. Block Diagram .................................................. 31
8.1 CS-Z20TKEW CU-Z20TKE
CS-XZ20TKEW CU-Z20TKE ..................... 31
8.2 CS-Z25TKEW CU-Z25TKE
CS-Z35TKEW CU-Z35TKE
CS-Z50TKEW CU-Z50TKE
CS-Z71TKEW CU-Z71TKE
CS-XZ25TKEW CU-Z25TKE
CS-XZ35TKEW CU-Z35TKE
CS-XZ50TKEW CU-Z50TKE ..................... 32
8.3 CS-Z42TKEW CU-Z42TKE ........................ 33
9. Wiring Connection Diagram ............................ 34
9.1 Indoor Unit .................................................. 34
9.2 Outdoor Unit ............................................... 35
10. Electronic Circuit Diagram .............................. 38
10.1 Indoor Unit .................................................. 38
10.2 Outdoor Unit ............................................... 39
11. Printed Circuit Board ....................................... 42
11.1 Indoor Unit .................................................. 42
11.2 Outdoor Unit ............................................... 46
12. Installation Instruction ..................................... 49
12.1 Select the Best Location ............................ 49
12.2 Indoor Unit .................................................. 50
12.3 Outdoor Unit ............................................... 57
13. Installation and Servicing Air Conditioner
using R32 .......................................................... 61
13.1 About R32 Refrigerant ............................... 61
13.2 Characteristics of R32 Refrigerant ............. 61
13.3 Refrigerant piping installation • Tools u s ed
in services .................................................. 63
13.4 New installation, Relocation, Repairing of
Refrigerant Cycle System The
Procedures ................................................. 67
13.5 Piping installation of R32 ............................ 68
13.6 Installation, Relocation, and Service .......... 69
13.7 Repairing of refrigerant cycle / Brazing
point ............................................................ 73
13.8 <Reference> Analysis method for no error
code, no cooling / no warming ................... 79
14. Operation Control ............................................. 81
14.1 Basic Function ............................................ 81
14.2 Indoor Fan Motor Operation ....................... 82
14.3 Outdoor Fan Motor Operation .................... 83
14.4 Airflow Direction ......................................... 84
14.5 Quiet Operation (Cooling Mode/Cooling
Area of Dry Mode) ...................................... 87
14.6 Quiet Operation (Heating) .......................... 87
14.7 Powerful Mode Operation .......................... 87
14.8 Timer Control .............................................. 88
14.9 Sleep Mode Operation ............................... 88
14.10 Auto Restart Control ................................... 88
14.11 Indication Panel .......................................... 89
14.12 nanoe Operation ......................................... 89
14.13 Mild Dry Cooling Operation ........................ 91
14.14 ECONAVI Operation .................................. 91
15. Operation Control (For Multi Split
Connection) ...................................................... 99
15.1 Cooling operation ....................................... 99
15.2 Soft Dry Operation ...................................... 99
15.3 Heating Operation ...................................... 99
15.4 Automatic Operation ................................ 100
15.5 Indoor Fan Motor Operation ..................... 100
15.6 Powerful Mode Operation ........................ 100
15.7 Auto Restart Control ................................. 100
15.8 Indication Panel ........................................ 100
15.9 Mild Dry Cooling Operation ...................... 100
16. Protection Control .......................................... 101
16.1 Protection Control for All Operations ........ 101
16.2 Protection Control for Cooling & Soft Dry
Operation .................................................. 103
16.3 Protection Control for Heating
Operation .................................................. 104
17. Servicing Mode ............................................... 106
17.1 Auto OFF/ON Button ................................ 106
17.2 Heat Only Operation ................................ 107
17.3 Remote Control Button ............................. 108
18. Troubleshooting Guide .................................. 111
18.1 Refrigeration Cycle System ...................... 111
18.2 Breakdown Self Diagnosis Function ........ 113
18.3 Error Codes Table .................................... 114
18.4 Self-diagnosis Method .............................. 116
3
Page 4

19.
Disassembly and Assembly Instructions ....144
19.1 CS-Z20TKEW CS-Z25TKEW
CS-Z35TKEW CS-Z42TKEW
CS-XZ20TKEW CS-XZ25TKEW
CS-XZ35TKEW ........................................144
19.2 CS-Z50TKEW CS-Z71TKEW
CS-XZ50TKEW ........................................151
19.3 Outdoor Electronic Controller Removal
Procedure .................................................158
20. Technical Data ................................................161
20.1 Cool Mode Performance Data ..................161
20.2 Heat Mode Performance Data ..................163
21. Service Data ....................................................165
21.1 Cool Mode Outdoor Air Temperature
Characteristic ............................................165
21.2 Heat Mode Outdoor Air Temperature
Characteristic ............................................171
21.3 Piping Length Correction Factor ...............177
22. Exploded View and Replacement Parts
List ...................................................................179
22.1 Indoor Unit ................................................179
22.2 Outdoor Unit .............................................189
4
Page 5

1. Safety Precautions
Read the following “SAFETY PRECAUTIONS” carefully before perform any servicing.
Electrical work must be installed or serviced by a licensed electrician. Be sure to use the correct rating of the
power plug and main circuit for the model installed.
The caution items stated here must be followed because these important contents are related to safety. The
meaning of each indication used is as below. Incorrect installation or servicing due to ignoring of the instruction
will cause harm or damage, and the seriousness is classified by the following indications.
WARNING
CAUTION
The items to be followed are classified by the symbols:
Explanation of symbols displayed on the indoor unit or outdoor unit.
WARNING
CAUTION
CAUTION
CAUTION
Carry out test run to confirm that no abnormality occurs after the servicing. Then, explain to user the operation,
care and maintenance as stated in instructions. Please remind the customer to keep the operating instructi ons for
future reference.
This indication shows the possibility of causing death or serious injury.
This indication shows the possibility of causing injury or damage to properties.
This symbol denotes item that is PROHIBITTED from doing.
This symbol shows that this equipment uses a flammable refrigerant.
If the refrigerant is leaked, together with an external ignition source, there is a possibility of ignition.
This symbol shows that the Operation Manual should be read carefully.
This symbol shows that a service personnel should be handling this equipment with reference to the
Installation Manual.
This symbol shows that there is information included in the Operation Manual and/or Installation Manual.
WARNING
Do not use means to accelerate the defrosting process or to clean, other than those recommended by the manufacturer. Any
1.
unfit method or using incompatible material may cause product damage, burst and serious injury.
Do not install outdoor unit near handrail of veranda. When installing air-conditioner unit on veranda of a high rise building, child
2.
may climb up to outdoor unit and cross over the handrail causing an accident.
Do not use unspecified cord, modified cord, joint cord or extension cord for power supply cord. Do not share the single outlet
3.
with other electrical appliances.
Poor contact, poor insulation or over current will cause electrical shock or fire.
The appliance shall be stored in a well ventilated room with floor area larger than A min (m
continuously operating ignition sources.
4.
Keep away from open flames, any operating gas appliances or any operating electric heater. Else, it may explode and cause
injury or death.
5. Do not tie up the power supply cord into a bundle by band. Abnormal temperature rise on power supply cord may happen.
6. Do not insert your fingers or other objects into the unit, high speed rotating fan may cause injury.
7. Do not sit or step on the unit, you may fall down accidentally.
The appliance shall be installed, and/or operated in a room with floor area larger than A min (m
8.
from ignition sources, such as heat/sparks/open flame, or, hazardous areas, such as gas appliances, gas cooking, reticulated
gas supply systems, or electric cooking appliances, etc.
9. Keep plastic bag (packaging material) away from small children, it may cling to nose and mouth and prevent breathing.
When installing or relocating air conditioner, do not let any substance other than the specified refrigerant, eg. air etc mix into
10.
refrigeration cycle (piping).
Mixing of air etc. will cause abnormal high pressure in refrigeration cycle and result in explosion, injury etc.
Do not pierce or burn as the appliance is pressurized. Do not expose the appliance to heat, flame, sparks, or other sources of
11.
ignition.
Else, it may explode and cause injury or death.
12. Do not add or replace refrigerant other than specified type. It may cause product damage, burst and injury etc.
2
) [refer Table A] and without any
2
) [refer Table A] and keep away
5
Page 6

WARNING
Do not perform flare connection inside a building or dwelling or room, when joining the heat exchanger of indoor unit with
interconnecting piping. Refrigerant connection inside a building or dwelling or room must be made by brazing or welding. Joint
13.
connection of indoor unit by flaring method can only be made at outdoor or at outside of a building or dwelling or room. Flare
connection may cause gas leak and flammable atmosphere.
For R32 model, use piping, flare nut and tools which is specified for R32 refrigerant. Using of existing (R22) piping, flare nut and
14.
15.
16.
17.
18.
19.
20.
21.
22.
23.
24.
25.
26.
tools may cause abnormally high pressure in the refrigerant cycle (piping), and possibly result in explosion and injury.
Thickness or copper pipes used with R32 must be more than 0.8 mm. Never use copper pipes thinner than 0.8 mm.
It is desirable that the amount of residual oil less than 40 mg/10 m.
Engage authorized dealer or specialist for installation and servicing. If installation or servicing done by the user is defective, it will cause
water leakage, electrical shock or fire.
For refrigeration system work, Install according to this installation instructions strictly. If installation is defective, it will cause water
leakage, electrical shock or fire.
Use the attached accessories parts and specified parts for installation and servicing. Otherwise, it will cause the set to fall, water
leakage, fire or electrical shock.
Install at a strong and firm location which is able to withstand weight of the set. If the strength is not enough or installation is not properly
done, the set will drop and cause injury.
For electrical work, follow the national regulation, legistration and this installation instructions. An independent circuit and single outlet
must be used. If electrical circuit capacity is not enough or defect found in the electrical work, it will cause electrical shock or fire.
Do not use joint cable for indoor/outdoor connection cable. Use the specified indoor/outdoor connection cable, refer to instruction
CONNECT THE CABLE TO THE INDOOR UNIT and connect tightly for indoor/outdoor connection. Clamp the cable so that no external
force will have impact on the terminal.
If connection or fixing is not perfect, it will cause heat up or fire at the connection.
Wire routing must be properly arranged so that control board cover is fixed properly. If control board cover is not fixed perfectly, it will
cause heat-up or fire at connection point of terminal, fire or electrical shock.
This equipment is strongly recommended to be installed with Earth Leakage Circuit Breaker (ELCB) or Residual Current Device (RCD),
with sensitivity of 30mA at 0.1 sec or less. Otherwise, it may cause electrical shock and fire in case of equipment breakdown or
insulation breakdown.
During installation, install the refrigerant piping properly before running the compressor. Operation of compressor without fixing
refrigeration piping and valves at opened position will cause suck-in of air, abnormal high pressure in refrigeration cycle and result in
explosion, injury etc.
During pump down operation, stop the compressor before removing the refrigeration piping. Removal of refrigeration piping while
compressor is operating and valves are opened will cause suck-in of air, abnormal high pressure in refrigeration cycle and result in
explosion, injury etc.
Tighten the flare nut with torque wrench according to specified method. If the flare nut is over-tightened, after a long period, the flare
may break and cause refrigerant gas leakage.
After completion of installation or service, confirm there is no leakage of refrigerant gas. It may generate toxic gas when the refrigerant
contacts with fire.
27. Ventilate if there is refrigerant gas leakage during operation. It may cause toxic gas when the refrigerant contacts with fire.
28. Be aware that refrigerants may not contain an odour.
This equipment must be properly earthed. Earth line must not be connected to gas pipe, water pipe, earth of lightning rod and
29.
telephone. Otherwise, it may cause electrical shock in case of equipment breakdown or insulation breakdown.
30. Do not modify the machine, part, material during repairing service.
31. If wiring unit is supplied as repairing part, do not repair or connect the wire even only partial wire break. Exchange the whole wiring unit.
32. Do not wrench the fasten terminal. Pull it out or insert it straightly.
33. Must not use other parts except original parts describe in catalog and manual.
CAUTION
Do not install the unit in a place where leakage of flammable gas may occur. In case gas leaks and accumulates at surrounding
1.
of the unit, it may cause fire.
2. Prevent liquid or vapor from entering sumps or sewers since vapor is heavier than air and may form suffocating atmospheres.
Do not release refrigerant during piping work for installation, servicing, reinstallation and during repairing a refrigerant parts.
3.
Take care of the liquid refrigerant, it may cause frostbite.
4. Do not install this appliance in a laundry room or other location where water may drip from the ceiling, etc.
6
Page 7

CAUTION
5. Do not touch the sharp aluminium fin, sharp parts may cause injury.
Carry out drainage piping as mentioned in installation instructions. If drainage is not perfect, water may enter the room and damage the
6.
furniture.
Select an installation location which is easy for maintenance.
7.
Incorrect installation, service or repair of this air conditioner may increase the risk of rupture and this may result in loss damage or injury
and/or property.
Power supply connection to the room air conditioner.
Use power supply cord 3 × 1.5 mm
Connect the power supply cord of the air conditioner to the mains using one of the following method.
Power supply point should be in easily accessible place for power disconnection in case of emergency.
In some countries, permanent connection of this air conditioner to the power supply is prohibited.
8.
1) Power supply connection to the receptacle using power plug.
Use an approved 15/16A (3/4 ~ 1.75HP), 16A (2.0HP), 20A (2.5HP) power plug with earth pin for the connection to the socket.
2) Power supply connection to a circuit breaker for the permanent connection.
Use an approved 16A (3/4 ~ 2.25HP), 20A (2.5HP) circuit breaker for the permanent connection. It must be a double pole switch with
a minimum 3.0 mm contact gap.
9. Installation or servicing work: It may need two people to carry out the installation or servicing work.
Pb free solder has a higher melting point than standard solder; typically the melting point is 50°F – 70°F (30°C – 40°C) higher.
Please use a high temperature solder iron. In case of the soldering iron with temperature control, please set it to 700 ± 20°F
10
(370 ± 10°C).
Pb free solder will tend to splash when heated too high (about 1100°F / 600°C).
Do not touch the sharp aluminum fins or edges of metal parts.
11.
If you are required to handle sharp parts during installation or servicing, please wear hand glove.
Sharp parts may cause injury.
Tighten the flare nut with torque wrench according to specified method. If the flare nut is over-tightened, after a long period, the flare may
12.
break and cause refrigerant gas leakage.
13. Do not touch outdoor unit air inlet and aluminium fin. It may cause injury.
2
(3/4 ~ 1.75HP), 3 × 2.5 mm2 (2.0 ~ 2.5HP) type designation 60245 IEC 57 or heavier cord.
7
Page 8

2. Precaution for Using R32 Refrigerant
The basic installation work procedures are the same as conventional refrigerant (R410A, R22) models.
However, pay careful attention to the following points:
WARNING
Since the working pressure is higher than that of refrigerant R22 models, some of the piping and installation and service tools are
special.
(See “2.1. Special tools for R32 (R410A)”.)
1.
Especially, when replacing a refrigerant R22 model with a new refrigerant R32 model, always replace the conventional piping and flare
nuts with the R32 and R410A piping and flare nuts on the outdoor unit side.
For R32 and R410A, the same flare nut on the outdoor unit side and pipe can be used.
Models that use refrigerant R32 and R410A have a different charging port thread diameter to prevent erroneous charging with refrigerant
2.
R22 and for safety.
Therefore, check beforehand. [The charging port thread diameter for R32 and R410A is 12.7 mm (1/2 inch).]
Be more careful than R22 so that foreign matter (oil, water, etc.) does not enter the piping.
3.
Also, when storing the piping, securely seal the opening by pinching, taping, etc. (Handling of R32 is similar to R410A.)
CAUTION
Installation (Space)
Must ensure the installation of pipe-work shall be kept to a minimum. Avoid use dented pipe and do not allow acute bending.
Must ensure that pipe-work shall be protected from physical damage.
Must comply with national gas regulations, state municipal rules and legislation. Notify relevant authorities in accordance with all
applicable regulations.
Must ensure mechanical connections be accessible for maintenance purposes.
1.
In cases that require mechanical ventilation, ventilation openings shall be kept clear of obstruction.
When disposal of the product, do follow to the precautions in #12 and comply with national regulations.
Always contact to local municipal offices for proper handling.
Interconnecting refrigerant pipewo rk, i.e. pipework external to the unitary components, should be marked with a Class label (see
Figure 9.1 of Code of Practice) every two metres where the pipework is visible. This includes pipework located in a ceiling space or
any void which a person may access for maintenance or repair work within that space.
Servicing
2-1. Service personnel
Any qualified person who is involved with working on or breaking into a refrigerant circuit should hold a current valid certificate from
an industry-accredited assessment authority, which authorizes their competence to handle refrigerants safely in accordance with an
industry recognised assessment specification.
Servicing shall only be performed as recommended by the equipment manufacturer. Maintenance and repair requiring the
assistance of other skilled personnel shall be carried out under the supervision of the person competent in the use of flammable
refrigerants.
Servicing shall be performed only as recommended by the manufacturer.
2-2. Work
Prior to beginning work on systems containing flammable refrigerants, safety checks are necessary to ensure that the risk of
ignition is minimised.
For repair to the refrigerating system, the precautions in #2-2 to #2-8 must be followed before conducting work on the system.
Work shall be undertaken under a controlled procedure so as to minimize the risk of a flammable gas or vapor being present while
the work is being performed.
All maintenance staff and others working in the local area shall be instructed and supervised on the nature of work being carried
2.
out.
Avoid working in confined spaces.
Wear appropriate protective equipment, including respiratory protection, as conditions warrant.
Ensure that the conditions within the area h ave been made safe by limit of use of any flammable material. Keep all sources of
ignition and hot metal surfaces away.
2-3. Checking for presence of refrigerant
The area shall be checked with an appropriate refrigerant detector prior to and during work, to ensure the technician is aware of
potentially flammable atmospheres.
Ensure that the leak detection equipment being used is suitable for use with flammable refrigerants, i.e. non sparking, adequately
sealed or intrinsically safe.
In case of leakage/spillage happened, immediately ventilate area and stay upwind and away from spill/release.
In case of leakage/spillage happened, do notify persons downwind of the leaking/spill, isolate immediate hazard area and keep
unauthorized personnel out.
2-4. Presence of fire extinguisher
If any hot work is to be conducted on the refrigeration equipment or any associated parts, appropriate fire extinguishing equipment
shall be available at hand.
Have a dry powder or CO
fire extinguisher adjacent to the charging area.
2
8
Page 9

CAUTION
2-5. No ignition sources
No person carrying out work in relation to a refriger ation system which involves exposing any pipe work that contains or has
contained flammable refrigerant shall use any sources of ignition in such a manner that it may lead to the risk of fire or explosion.
He/She must not be smoking when carrying out such work.
All possible ignition sources, including cigarette smoking, should be kept sufficiently far away from the site of installation, repairing,
removing and disposal, during which flammable refrigerant can possibly be released to the surrounding space.
Prior to work taking place, the area around t he equipment is to be surveyed to make sure that there are no flammable hazards or
ignition risks.
“No Smoking” signs shall be displayed.
2-6. Ventilated area
Ensure that the area is in the open or that it is adequately ventilated before breaking into the system or conducting any hot work.
A degree of ventilation shall continue during the period that the work is carried out.
The ventilation should safely disperse any released refrigerant and preferably expel it externally into the atmosphere.
2-7. Checks to the refrigeration equipment
Where electrical components are being changed, they shall be fit for the purpose and to the correct specification.
At all times the manufacturer’s maintenance and service guidelines shall be followed.
If in doubt consult the manufacturer’s technical department for assistance.
The following checks shall be applied to installations using flammable refrigerants.
3.
- The charge size is in accordance with the room size within which the refrigerant containing parts are installed.
- The ventilation machinery and outlets are operating adequately and are not obstructed.
- If an indirect refrigerating circuit is being used, the secondary circuit shall be checked for the presence of refrigerant.
- Marking to the equipment continues to be visible and legible. Markings and signs that are illegible shall be corrected.
- Refrigeration pipe or components are installed in a position where they are unlikely to be exposed to any substance
which may corrode refrigerant containing components, unless the components are constructed of materials which are
inherently resistant to being corroded or are properly protected against being so corroded.
2-8. Checks to electrical devices
Repair and maintenance to electrical components shall include initial safety checks and component inspection procedures.
Initial safety checks shall include but not limit to:-
- That capacitors are discharged: this shall be done in a safe manner to avoid possibility of sparking.
- That there is no live electrical components and wiring are exposed while charging, recovering or purging the system.
- That there is continuity of earth bonding.
At all times the manufacturer’s maintenance and service guidelines shall be followed.
If in doubt consult the manufacturer’s technical department for assistance.
If a fault exists that could compromise safety, then no electrical supply shall be connected to the circuit until it is satisfactorily dealt
with.
If the fault cannot be corrected immediately but it is necessary to continue operation, an adequate temporary solution shall be used.
The owner of the equipment must be informed or reported so all parties are advised thereinafter.
Repairs to sealed components
During repairs to sealed components, all electrical supplies shall be disconnected from the equipment being worked upon prior to
any removal of sealed covers, etc.
If it is absolutely necessary to have an electrical supply to equipment during servicing, then a permanently operating form of leak
detection shall be located at the most critical point to warn of a potentially hazardous situation.
Particular attention shall be paid to the following to ensure that by working on electrical components, the casing is not altered in
such a way that the level of protection is affected. This shall include damage to cables, excessive number of connections, terminals
not made to original specification, damage to seals, incorrect fitting of glands, etc.
Ensure that apparatus is mounted securely.
Ensure that seals or sealing materials have not degraded such that they no longer serve the purpose of preventing the ingress of
flammable atmospheres.
Replacement parts shall be in accordance with the manufacturer’s specifications.
NOTE:
The use of silicon sealant may inhibit the effectiveness of some types of leak detection equipment.
Intrinsically safe components do not have to be isolated prior to working on them.
Repair to intrinsically safe components
Do not apply any permanent ind uctive or capacitance loads to the circuit without ensuring that this will not exceed the permissible
4.
5.
6.
voltage and current permitted for the equipment in use.
Intrinsically safe components are the only types that can be worked on while live in the presence of a flammable atmosphere.
The test apparatus shall be at the correct rating.
Replace components only with parts specified by the manufacture r. Unspecified parts by manufacturer may result ignition of
refrigerant in the atmosphere from a leak.
Cabling
Check that cabling will not be subject to wear, corrosion, excessive pressure, vibration, sharp edges or any other adverse
environmental effects.
The check shall also take into account the effects of aging or continual vibration from sources such as compressors or fans.
Detection of flammable refrigerants
Under no circumstances shall potential sources of ignition be used in the searching or detection of refrigerant leaks.
A halide torch (or any other detector using a naked flame) shall not be used.
9
Page 10

CAUTION
Leak detection methods
Electronic leak detectors shall be used to detect flammable refrigerants, but the sensitivity may not be adequate, or may need re-
calibration.
(Detection equipment shall be calibrated in a refrigerant-free area.)
Ensure that the detector is not a potential source of ignition and is suitable for the refrigerant used.
Leak detection equipment shall be set at a percentage of the LFL of the refrigerant and shall be calibrated to the refrigerant
7.
8.
9.
10.
employed and the appropriate percentage of gas (25 % maximum) is confirmed.
Leak detection fluids are suitable for use with most refrigerants but the use of detergents containing chlorine shall be avoided as the
chlorine may react with the refrigerant and corrode the copper pipe-work.
If a leak is suspected, all naked flames shall be removed/extinguished.
If a leakage of refrigerant is found which requires brazing, all of the refrigerant shall be recovered from the system, or isolated (by
means of shut off valves) in a part of the system remote from the leak. Oxygen free nitrogen (OFN) shall then be purged through
the system both before and during the brazing process.
Removal and evacuation
When breaking into the refrigerant circuit to make repairs – or for any other purpose – conventional procedures shall be used.
However, it is important that best practice is followed since flammability is a consideration.
The following procedure shall be adhered to:
• remove refrigerant -> • purge the circuit with inert gas -> • evacuate -> • purge again with inert gas ->
• open the circuit by cutting or brazing
The refrigerant charge shall be recovered into the correct recovery cylinders.
The system shall be “flushed” with OFN to render the unit safe.
This process may need to be repeated several times.
Compressed air or oxygen shall not be used for this task.
Flushing shall be achieved by breaking the vacuum in the system with OFN and continuing to fill until the working pressure is
achieved, then venting to atmosphere, and finally pulling down to a vacuum.
This process shall be repeated until no refrigerant is within the system.
When the final OFN charge is used, the system shall be vented down to atmospheric pressure to enable work to take place.
This operation is absolutely vital if brazing operations on the pipe work are to take place.
Ensure that the outlet for the vacuum pump is not close to any ignition sources and there is ventilation available.
Charging procedures
In addition to conventional charging procedures, the following requirements shall be followed.
- Ensure that contamination of different refrigerants does not occur when using charging equipment.
- Hoses or lines shall be as short as possible to minimize the amount of refrigerant contained in them.
- Cylinders shall be kept upright.
- Ensure that the refrigeration system is earthed prior to charging the system with refrigerant.
- Label the system when charging is complete (if not already).
- Extreme care shall be taken not to over fill the refrigeration system.
Prior to recharging the system it shall be pressure tested with OFN (refer to #7).
The system shall be leak tested on completion of charging but prior to commissioning.
A follow up leak test shall be carried out prior to leaving the site.
Electrostatic charge may accumulate and create a hazardous condition when charging and discharging the refrigerant.
To avoid fire or explosion, dissipate static electricity during transfer by grounding and bonding containers and equipment before
charging/discharging.
Decommissioning
Before carrying out this procedure, it is essential that the technician is completely familiar with the equipment and all its details.
It is recommended good practice that all refrigerants are recovered safely.
Prior to the task being carried out, an oil and refrigerant sample shall be taken in case analysis is required prior to re-use of
reclaimed refrigerant.
It is essential that electrical power is available before the task is commenced.
a)
Become familiar with the equipment and its operation.
b)
Isolate system electrically.
c)
Before attempting the procedure ensure that:
• mechanical handling equipment is available, if required, for handling refrigerant cylinders;
• all personal protective equipment is available and being used correctly;
• the recovery process is supervised at all times by a competent person;
• recovery equipment and cylinders conform to the appropriate standards.
d)
Pump down refrigerant system, if possible.
e)
If a vacuum is not possible, make a manifold so that refrigerant can be removed from various parts of the system.
f)
Make sure that cylinder is situated on the scales before recovery takes place.
Start the recovery machine and operate in accordance with manufacturer’s instructions.
g)
h)
Do not over fill cylinders. (No more than 80 % volume liquid charge).
i)
Do not exceed the maximum working pressure of the cylinder, even temporarily.
When the cylinders have been filled correctly and the process completed, make sure that the cylinders and the
j)
equipment are removed from site promptly and all isolation valves on the equipment are closed off.
k)
Recovered refrigerant shall not be charged into another refrigeration system unless it has been cleaned and checked.
Electrostatic charge may accumulate and create a hazardous condition when charging or discharging the refrigerant.
To avoid fire or explosion, dissipate static electricity during transfer by grounding and bonding containers and equipment before
charging/discharging.
10
Page 11

CAUTION
Labelling
Equipment shall be labelled stating that it has been de-commissioned and emptied of refrigerant.
11.
The label shall be dated and signed.
Ensure that there are labels on the equipment stating the equipment contains flammable refrigerant.
Recovery
When removing refrigerant from a system, either for servicing or decommissioning, it is recommended good practice that all
refrigerants are removed safely.
When transferring refrigerant into cylinders, ensure that only appropriate refrigerant recovery cylinders are employed.
Ensure that the correct number of cylinders for holding the total system charge are available.
All cylinders to be used are designated for the recovered refrigerant and labelled for that refrigerant (i.e. special cylinders for the
recovery of refrigerant).
Cylinders shall be complete with pressure relief valve and associated shut-off valves in good working order.
Recovery cylinders are evacuated and, if possible, cooled before recovery occurs.
The recovery equipment shall be in good working order with a se t of instructions concerning the equipment that is at hand and shall
be suitable for the recovery of flammable refrigerants.
In addition, a set of calibrated weighing scales shall be available and in good working order.
12.
Hoses shall be complete with leak-free disconnect couplings and in good condition.
Before using the recovery machine, check that it is in satisfactory working order, has been properly maintained and that any
associated electrical components are sealed to prevent ignition in the event of a refrigerant release.
Consult manufacturer if in doubt.
The recovered refrigerant shall be returned to the refrigerant supplier in the correct recovery cylinder, and the relevant Waste
Transfer Note arranged.
Do not mix refrigerants in recovery units and especially not in cylinders.
If compressors or compressor oils are to be removed, ensure that they have been evacuated to an acceptable level to make certain
that flammable refrigerant does not remain within the lubricant.
The evacuation process shall be carried out prior to returning the compressor to the suppliers.
Only electric heating to the compressor body shall be employed to accelerate this process.
When oil is drained from a system, it shall be carried out safely.
11
Page 12

3. Specifications
Model
Performance Test Condition EUROVENT EUROVENT
Power Supply
Min. Mid. Max. Min. Mid. Max.
Capacity
Running Current A – 2.15 – – 2.45 –
Input Power W 240 450 555 240 520 790
Annual Consumption kWh – 225 – – 260 –
EER
Cooling
ErP
Indoor Noise (H / L / QLo)
Outdoor Noise (H / L)
Heating
ErP
Indoor Noise (H / L / QLo)
Outdoor Noise (H / L)
Low Temp. : Capacity (kW) / I.Power (W) / COP 2.90 / 870 / 3.33 3.62 / 1.12k / 3.23
Extr Low Temp. : Capacity (kW) / I.Power (W) / COP 2.38 / 880 / 2.70 2.95 / 1.15k / 2.57
Max Current (A) / Max Input Power (W) 4.40 / 990 5.6 / 1.26k
Pdesign kW 2.1 2.5
SEER (W/W) 7.5 8.5
Annual
Consumption
Class A++ A+++
Power Factor % – 91 – – 92 –
Capacity
Running Current A – 2.80 – – 3.25 –
Input Power W 180 620 990 180 710 1.26k
COP
Pdesign kW 2.1 2.7
Tbivalent °C -10 -10
SCOP (W/W) 4.7 5.1
Annual
Consumption
Class A++ A+++
Power Factor % – 96 – – 95 –
Starting Current (A) 2.80 3.25
Indoor CS-Z20TKEW / CS-XZ20TKEW CS-Z25TKEW / CS-XZ25TKEW
Outdoor CU-Z20TKE CU-Z25TKE
Phase, Hz Single, 50 Single, 50
V 230 230
kW 0.75 2.05 2.40 0.85 2.50 3.20
BTU/h 2560 6990 8180 2900 8530 10900
Kcal/h 650 1760 2060 730 2150 2750
W/W 3.13 4.56 4.32 3.54 4.81 4.05
BTU/hW 10.67 15.53 14.74 12.08 16.40 13.80
Kcal/hW 2.71 3.91 3.71 3.04 4.13 3.48
kWh 98 103
dB-A 37 / 24 / 19 39 / 25 / 19
Power Level dB 53 / – 55 / –
dB-A 45 / – 46 / –
Power Level dB 60 / – 61 / –
kW 0.70 2.80 4.00 0.80 3.40 5.00
BTU/h 2390 9550 13600 2730 11600 17100
Kcal/h 600 2410 3440 690 2920 4300
W/W 3.89 4.52 4.04 4.44 4.79 3.97
BTU/hW 13.28 15.40 13.74 15.17 16.34 13.57
Kcal/hW 3.33 3.89 3.47 3.83 4.11 3.41
kWh 626 741
dB-A 38 / 25 / 19 41 / 27 / 19
Power Level dB 54 / – 57 / –
dB-A 46 / – 47 / –
Power Level dB 61 / – 62 / –
12
Page 13

Model
Indoor CS-Z20TKEW / CS-XZ20TKEW CS-Z25TKEW / CS-XZ25TKEW
Outdoor CU-Z20TKE CU-Z25TKE
Type Hermetic Motor (Rotary) Hermetic Motor (Rotary)
Compressor
Motor Type Brushless (6 poles) Brushless (4 poles)
Output Power W 650 700
Type Cross-Flow Fan Cross-Flow Fan
Material ASG20K1 ASG20K1
Motor Type DC / Transistor (8-poles) DC / Transistor (8-poles)
Input Power W 44.9 44.9
Output Power W 40 40
Cool rpm 610 600
Heat rpm 610 620
Cool rpm 700 720
Lo
Heat rpm 780 860
Cool rpm 880 930
Heat rpm 960 1080
Cool rpm 1060 1140
Hi
Heat rpm 1140 1300
Cool rpm 1090 1190
Heat rpm 1170 1350
Indoor Fan
Speed
QLo
Me
SHi
Type Propeller Fan Propeller Fan
Material PP PP
Motor Type DC (8-poles) DC (8-poles)
Input Power W – –
Outdoor Fan
Output Power W 40 40
Speed Hi
Cool rpm 780 820
Heat rpm 700 780
Moisture Removal L/h (Pt/h) 1.3 (2.7) 1.5 (3.2)
3
/min (ft3/min) 5.06 (179) 4.84 (171)
3
/min (ft3/min) 6.03 (213) 5.98 (211)
3
/min (ft3/min) 7.98 (282) 7.97 (281)
3
/min (ft3/min) 9.90 (350) 10.00 (355)
3
/min (ft3/min) 10.24 (362) 10.44 (369)
3
/min (ft3/min) 26.9 (950) 28.7 (1015)
Indoor
Airflow
Outdoor
Airflow
QLo
Lo
Me
Hi
SHi
Hi
Cool m
Heat m3/min (ft3/min) 5.06 (179) 5.03 (178)
Cool m
Heat m3/min (ft3/min) 6.90 (244) 7.31 (258)
Cool m
Heat m3/min (ft3/min) 8.84 (312) 9.40 (332)
Cool m
Heat m3/min (ft3/min) 10.80 (380) 11.50 (405)
Cool m
Heat m3/min (ft3/min) 11.11 (392) 11.96 (422)
Cool m
Heat m3/min (ft3/min) 26.9 (950) 28.7 (1015)
Control Device Expansion Valve Expansion Valve
Refrigeration
Cycle
Refrigerant Oil cm3 FW50S (320) FW50S (320)
Refrigerant Type g (oz) R32, 760 (26.8) R32, 850 (30.0)
GWP 675 675
F-Gas
CO2eq (ton)
(Precharged Amount /
0.513 / 0.564 0.574 / 0.624
Maximum Charged Amount)
Height (I/D / O/D) mm (inch) 295 (11-5/8) / 542 (21-11/32) 295 (11-5/8) / 542 (21-11/32)
Dimension
Width (I/D / O/D) mm (inch) 919 (36-3/16) / 780 (30-23/32) 919 (36-3/16) / 780 (30-23/32)
Depth (I/D / O/D) mm (inch) 194 (7-21/32) / 289 (11-13/32) 194 (7-21/32) / 289 (11-13/32)
Weight Net (I/D / O/D) kg (lb) 9 (20) / 30 (66) 10 (22) / 31 (68)
13
Page 14

Model
Pipe Diameter (Liquid / Gas) mm (inch) 6.35 (1/4) / 9.52 (3/8) 6.35 (1/4) / 9.52 (3/8)
Standard length m (ft) 5.0 (16.4) 5.0 (16.4)
Length range (min – max) m (ft) 3 (9.8) ~ 15 (49.2) 3 (9.8) ~ 15 (49.2)
I/D & O/D Height different m (ft) 15.0 (49.2) 15.0 (49.2)
Piping
Additional Gas Amount g/m (oz/ft) 10 (0.1) 10 (0.1)
Length for Additional Gas m (ft) 7.5 (24.6) 7.5 (24.6)
Drain Hose
Indoor Heat
Exchanger
Outdoor
Heat
Exchanger
Air Filter
Power Supply Cord A Nil Nil
Indoor
Operation
Range
Outdoor
Operation
Range
1. Cooling capacities are based on indoor temperature of 27°C Dry Bulb (80.6°F Dry Bulb), 19.0°C Wet Bulb (66.2°F Wet Bulb) and outdoor air
temperature of 35°C DRY BULB (95°F Dry Bulb), 24°C Wet Bulb (75.2°F Wet Bulb).
2. Heating capacities are based on indoor temperature of 20°C Dry Bulb (68°F Dry Bulb) and outdoor air temperature of 7°C Dry Bulb (44.6°F
Dry Bulb), 6°C Wet Bulb (42.8°F Wet Bulb).
3. Heating low temperature capacity, Input Power and COP measured at 230 V, indoor temperature 20°C, outdoor 2/1°C.
4. Heating extreme low temperature capacity, Input Power and COP measured at 230 V, indoor temperature 20°C, outdoor -7/-8°C.
5. Standby power consumption ≤10.0w (when switched OFF by remote control, except under self protection control).
6. Specifications are subjected to change without prior notice for further improvement.
Inner Diameter mm 16.7 16.7
Length mm 650 650
Fin Material Aluminium (Pre Coat) Aluminium (Pre Coat)
Fin Type Slit Fin Slit Fin
Row × Stage × FPI 2 × 15 × 21 2 × 15 × 21
Size (W × H × L) mm 610 × 315 × 25.4 610 × 315 × 25.4
Fin Material Aluminium Aluminium
Fin Type Corrugated Fin Corrugated Fin
Row × Stage × FPI 2 × 24 × 17 2 × 24 × 19
Size (W × H × L) mm 36.4 × 504 × 713:684 36.4 × 504 × 824.2:793.7
Material Polypropelene Polypropelene
Type One-touch One-touch
Power Supply Indoor Indoor
Thermostat Electronic Contol Electronic Contol
Protection Device Electronic Contol Electronic Contol
Dry Bulb Wet Bulb Dry Bulb Wet Bulb
Cooling
Heating
Cooling
Heating
Indoor CS-Z20TKEW / CS-XZ20TKEW CS-Z25TKEW / CS-XZ25TKEW
Outdoor CU-Z20TKE CU-Z25TKE
Maximum °C 32 23 32 23
Minimum °C 16 11 16 11
Maximum °C 30 – 30 –
Minimum °C 16 – 16 –
Maximum °C 43 26 43 26
Minimum °C -10 – -10 –
Maximum °C 24 18 24 18
Minimum °C -15 -16 -15 -16
14
Page 15

Model
Performance Test Condition EUROVENT EUROVENT
Power Supply
Min. Mid. Max. Min. Mid. Max.
Capacity
Running Current A – 3.85 – – 5.50 –
Input Power W 240 830 1.05k 260 1.24k 1.57k
Annual Consumption kWh – 415 – – 620 –
EER
Cooling
ErP
Indoor Noise (H / L / QLo)
Outdoor Noise (H / L)
Running Current A – 4.20 – – 6.40 –
Heating
ErP
Indoor Noise (H / L / QLo)
Outdoor Noise (H / L)
Low Temp. : Capacity (kW) / I.Power (W) / COP 4.20 / 1.33k / 3.16 4.93 / 1.72k / 2.87
Extr Low Temp. : Capacity (kW) / I.Power (W) / COP 3.40 / 1.38k / 2.46 4.11 / 1.73k / 2.38
Max Current (A) / Max Input Power (W) 7.8 / 1.50k 8.5 / 1.94k
Pdesign kW 3.5 4.2
SEER (W/W) 8.5 6.9
Annual
Consumption
Class A+++ A++
Power Factor % – 94 – – 98 –
Capacity
Input Power W 180 900 1.50k 190 1.44k 1.94k
COP
Pdesign kW 3.2 3.6
Tbivalent °C -10 -10
SCOP (W/W) 5.1 4.0
Annual
Consumption
Class A+++ A+
Power Factor % – 93 – – 98 –
Starting Current (A) 4.20 6.40
Indoor CS-Z35TKEW / CS-XZ35TKEW CS-Z42TKEW
Outdoor CU-Z35TKE CU-Z42TKE
Phase, Hz Single, 50 Single, 50
V 230 230
kW 0.85 3.50 4.00 0.85 4.20 5.00
BTU/h 2900 11900 13600 2900 14300 17100
Kcal/h 730 3010 3440 730 3610 4300
W/W 3.54 4.22 3.81 3.27 3.39 3.18
BTU/hW 12.08 14.34 12.95 11.15 11.53 10.89
Kcal/hW 3.04 3.63 3.28 2.81 2.91 2.74
kWh 144 213
dB-A 42 / 28 / 19 43 / 31 / 25
Power Level dB 58 / – 59 / –
dB-A 48 / – 49 / –
Power Level dB 63 / – 64 / –
kW 0.80 4.00 5.80 0.80 5.30 6.80
BTU/h 2730 13600 19800 2730 18100 23200
Kcal/h 690 3440 4990 690 4560 5850
W/W 4.44 4.44 3.87 4.21 3.68 3.51
BTU/hW 15.17 15.11 13.20 14.37 12.57 11.96
Kcal/hW 3.83 3.82 3.33 3.63 3.17 3.02
kWh 878 1260
dB-A 43 / 33 / 19 43 / 35 / 29
Power Level dB 59 / – 59 / –
dB-A 50 / – 51 / –
Power Level dB 65 / – 66 / –
15
Page 16

Model
Indoor CS-Z35TKEW / CS-XZ35TKEW CS-Z42TKEW
Outdoor CU-Z35TKE CU-Z42TKE
Type Hermetic Motor (Rotary) Hermetic Motor (Rotary)
Compressor
Motor Type Brushless (4 poles) Brushless (6 poles)
Output Power W 700 700
Type Cross-Flow Fan Cros s-Fl o w Fan
Material ASG20K1 ASG20K1
Motor Type DC / Transistor (8-poles) DC / Transistor (8-poles)
Input Power W 44.9 44.9
Output Power W 40 40
Cool rpm 600 720
Heat rpm 620 890
Cool rpm 800 870
Lo
Heat rpm 1020 1080
Cool rpm 1010 1070
Heat rpm 1210 1220
Cool rpm 1220 1270
Hi
Heat rpm 1400 1370
Cool rpm 1270 1320
Heat rpm 1450 1420
Indoor Fan
Speed
QLo
Me
SHi
Type Propeller Fan Propeller Fan
Material PP PP
Motor Type DC (8-poles) DC (8-poles)
Input Power W – –
Output Power W 40 40
Outdoor Fan
Speed Hi
Cool rpm 870 900
Heat rpm 890 910
Moisture Removal L/h (Pt/h) 2.0 (4.2) 2.4 (5.1)
3
/min (ft3/min) 4.84 (171) 5.98 (211)
3
/min (ft3/min) 6.74 (238) 7.40 (261)
3
/min (ft3/min) 8.73 (308) 9.30 (328)
3
/min (ft3/min) 10.70 (380) 11.20 (395)
3
/min (ft3/min) 11.20 (396) 11.68 (412)
3
/min (ft3/min) 34.4 (1215) 33.3 (1175)
Indoor
Airflow
Outdoor
Airflow
QLo
Lo
Me
Hi
SHi
Hi
Cool m
Heat m3/min (ft3/min) 5.03 (178) 7.59 (268)
Cool m
Heat m3/min (ft3/min) 8.83 (312) 9.40 (332)
Cool m
Heat m3/min (ft3/min) 10.63 (375) 10.73 (379)
Cool m
Heat m3/min (ft3/min) 12.40 (440) 12.30 (435)
Cool m
Heat m3/min (ft3/min) 12.91 (456) 12.63 (446)
Cool m
Heat m3/min (ft3/min) 35.6 (1255) 33.7 (1190)
Control Device Expansion Valve Expansion Valve
Refrigeration
Cycle
Refrigerant Oil cm3 FW50S (320) FW50S (320)
Refrigerant Type g (oz) R32, 910 (32.1) R32, 870 (30.7)
GWP 675 675
F-Gas
CO2eq (ton)
(Precharged Amount /
0.614 / 0.665 0.587 / 0.638
Maximum Charged Amount)
Height (I/D / O/D) mm (inch) 295 (11-5/8) / 619 (24-3/8) 295 (11-5/8) / 619 (24-3/8)
Dimension
Width (I/D / O/D) mm (inch) 919 (36-3/16) / 824 (32-15/32) 919 (36-3/16) / 824 (32-15/32)
Depth (I/D / O/D) mm (inch) 194 (7-21/32) / 299 (11-25/32) 194 (7-21/32) / 299 (11-25/32)
Weight Net (I/D / O/D) kg (lb) 10 (22) / 34 (75) 10 (22) / 32 (71)
16
Page 17

Model
Pipe Diameter (Liquid / Gas) mm (inch) 6.35 (1/4) / 9.52 (3/8) 6.35 (1/4) / 12.70 (1/2)
Standard length m (ft) 5.0 (16.4) 5.0 (16.4)
Length range (min – max) m (ft) 3 (9.8) ~ 15 (49.2) 3 (9.8) ~ 15 (49.2)
I/D & O/D Height different m (ft) 15.0 (49.2) 15.0 (49.2)
Piping
Additional Gas Amount g/m (oz/ft) 10 (0.1) 10 (0.1)
Length for Additional Gas m (ft) 7.5 (24.6) 7.5 (24.6)
Drain Hose
Indoor Heat
Exchanger
Outdoor
Heat
Exchanger
Air Filter
Power Supply Cord A Nil Nil
Indoor
Operation
Range
Outdoor
Operation
Range
1. Cooling capacities are based on indoor temperature of 27°C Dry Bulb (80.6°F Dry Bulb), 19.0°C Wet Bulb (66.2°F Wet Bulb) and outdoor air
temperature of 35°C DRY BULB (95°F Dry Bulb), 24°C Wet Bulb (75.2°F Wet Bulb).
2. Heating capacities are based on indoor temperature of 20°C Dry Bulb (68°F Dry Bulb) and outdoor air temperature of 7°C Dry Bulb (44.6°F
Dry Bulb), 6°C Wet Bulb (42.8°F Wet Bulb).
3. Heating low temperature capacity, Input Power and COP measured at 230 V, indoor temperature 20°C, outdoor 2/1°C.
4. Heating extreme low temperature capacity, Input Power and COP measured at 230 V, indoor temperature 20°C, outdoor -7/-8°C.
5. Standby power consumption ≤10.0w (when switched OFF by remote control, except under self protection control).
6. Specifications are subjected to change without prior notice for further improvement.
Inner Diameter mm 16.7 16.7
Length mm 650 650
Fin Material Aluminium (Pre Coat) Aluminium (Pre Coat)
Fin Type Slit Fin Slit Fin
Row × Stage × FPI 2 × 15 × 21 2 × 15 × 21
Size (W × H × L) mm 610 × 315 × 25.4 610 × 315 × 25.4
Fin Material Aluminium Aluminium
Fin Type Corrugated Fin Corrugated Fin
Row × Stage × FPI 2 × 28 × 17 2 × 28 × 17
Size (W × H × L) mm 36.38 × 588 × 856.3:827.7 36.38 × 588 × 606.6
Material Polypropelene Polypropelene
Type One-touch One-touch
Power Supply Indoor Indoor
Thermostat Electronic Contol Electronic Contol
Protection Device Electronic Contol Electronic Contol
Dry Bulb Wet Bulb Dry Bulb Wet Bulb
Cooling
Heating
Cooling
Heating
Indoor CS-Z35TKEW / CS-XZ35TKEW CS-Z42TKEW
Outdoor CU-Z35TKE CU-Z42TKE
Maximum °C 32 23 32 23
Minimum °C 16 11 16 11
Maximum °C 30 – 30 –
Minimum °C 16 – 16 –
Maximum °C 43 26 43 26
Minimum °C -10 – -10 –
Maximum °C 24 18 24 18
Minimum °C -15 -16 -15 -16
17
Page 18

Model
Performance Test Condition EUROVENT EUROVENT
Power Supply
Min. Mid. Max. Min. Mid. Max.
Capacity
Running Current A – 6.30 – – 9.70 –
Input Power W 280 1.41k 1.95k 420 2.17k 2.90k
Annual Consumption kWh – 705 – – 1085 –
EER
Cooling
ErP
Indoor Noise (H / L / QLo)
Outdoor Noise (H / L)
Heating
ErP
Indoor Noise (H / L / QLo)
Outdoor Noise (H / L)
Low Temp. : Capacity (kW) / I.Power (W) / COP 5.80 / 2.24k / 2.59 7.39 / 2.52k / 2.93
Extr Low Temp. : Capacity (kW) / I.Power (W) / COP 4.80 / 2.10k / 2.29 6.31 / 2.50k / 2.52
Max Current (A) / Max Input Power (W) 11.1 / 2.53k 15.6 / 3.38k
Pdesign kW 5.0 7.1
SEER (W/W) 7.9 6.5
Annual
Consumption
Class A++ A++
Power Factor % – 97 – – 97 –
Capacity
Running Current A – 6.50 – – 10.30 –
Input Power W 340 1.44k 2.53k 400 2.35k 2.95k
COP
Pdesign kW 4.2 5.5
Tbivalent °C -10 -10
SCOP (W/W) 4.7 4.2
Annual
Consumption
Class A++ A+
Power Factor % – 96 – – 99 –
Starting Current (A) 6.50 10.30
Indoor CS-Z50TKEW / CS-XZ50TKEW CS-Z71TKEW
Outdoor CU-Z50TKE CU-Z71TKE
Phase, Hz Single, 50 Single, 50
V 230 230
kW 0.98 5.00 6.00 0.98 7.10 8.50
BTU/h 3340 17100 20500 3340 24200 29000
Kcal/h 840 4300 5160 840 6110 7310
W/W 3.50 3.55 3.08 2.33 3.27 2.93
BTU/hW 11.93 12.13 10.51 7.95 11.15 10.00
Kcal/hW 3.00 3.05 2.65 2.00 2.82 2.52
kWh 222 382
dB-A 44 / 37 / 30 47 / 38 / 30
Power Level dB 60 / – 63 / –
dB-A 47 / – 52 / –
Power Level dB 62 / – 66 / –
kW 0.98 5.80 8.00 0.98 8.60 10.20
BTU/h 3340 19800 27300 3340 29300 34800
Kcal/h 840 4990 6880 840 7400 8770
W/W 2.88 4.03 3.16 2.45 3.66 3.46
BTU/hW 9.82 13.75 10.79 8.35 12.47 11.80
Kcal/hW 2.47 3.47 2.72 2.10 3.15 2.97
kWh 1251 1833
dB-A 44 / 37 / 30 47 / 38 / 30
Power Level dB 60 / – 63 / –
dB-A 47 / – 54 / –
Power Level dB 62 / – 68 / –
18
Page 19

Model
Indoor CS-Z50TKEW / CS-XZ50TKEW CS-Z71TKEW
Outdoor CU-Z50TKE CU-Z71TKE
Type Hermetic Motor (Rotary) Hermetic Motor (Rotary)
Compressor
Motor Type Brushless (4 poles) Brushless (4 poles)
Output Power W 900 1.70k
Type Cross-Flow Fan Cross-Flow Fan
Material ASG33 ASG33
Motor Type DC / Transistor (8-poles) DC / Transistor (8-poles)
Input Power W 89.0 105.0
Output Power W 40 40
Cool rpm 730 800
Heat rpm 760 800
Cool rpm 900 950
Lo
Heat rpm 950 980
Cool rpm 1000 1080
Heat rpm 1080 1140
Cool rpm 1100 1210
Hi
Heat rpm 1210 1300
Cool rpm 1150 1320
Heat rpm 1260 1400
Indoor Fan
Speed
QLo
Me
SHi
Type Propeller Fan Propeller Fan
Material PP PP
Motor Type DC (8-poles) DC (8-poles)
Input Power W – –
Outdoor Fan
Output Power W 40 40
Speed Hi
Cool rpm 720 820
Heat rpm 700 880
Moisture Removal L/h (Pt/h) 2.8 (5.9) 4.1 (8.7)
3
/min (ft3/min) 11.89 (420) 12.09 (427)
3
/min (ft3/min) 15.24 (538) 14.91 (527)
3
/min (ft3/min) 17.21 (608) 17.35 (613)
3
/min (ft3/min) 19.20 (680) 19.80 (700)
3
/min (ft3/min) 20.17 (712) 21.87 (772)
3
/min (ft3/min) 39.7 (1400) 44.70 (1580)
Indoor
Airflow
Outdoor
Airflow
QLo
Lo
Me
Hi
SHi
Hi
Cool m
Heat m3/min (ft3/min) 12.48 (441) 12.09 (427)
Cool m
Heat m3/min (ft3/min) 16.23 (573) 15.47 (546)
Cool m
Heat m3/min (ft3/min) 18.79 (664) 18.48 (653)
Cool m
Heat m3/min (ft3/min) 21.30 (750) 21.50 (760)
Cool m
Heat m3/min (ft3/min) 22.33 (789) 23.37 (825)
Cool m
Heat m3/min (ft3/min) 38.6 (1365) 45.80 (1615)
Control Device Expansion Valve Expansion Valve
Refrigeration
Cycle
Refrigerant Oil cm3 FW50S (450) FW50S (800)
Refrigerant Type g (oz) R32, 1.11k (39.2) R32, 1.37k (48.4)
GWP 675 675
F-Gas
CO2eq (ton)
(Precharged Amount /
0.749 / 0.876 0.925 / 1.262
Maximum Charged Amount)
Height (I/D / O/D) mm (inch) 302 (11-29/32) / 695 (27-3/8) 302 (11-29/32) / 695 (27-3/8)
Dimension
Width (I/D / O/D) mm (inch) 1120 (44-1/8) / 875 (34-15/32) 1120 (44-1/8) / 875 (34-15/32)
Depth (I/D / O/D) mm (inch) 236 (9-5/16) / 320 (12-5/8) 236 (9-5/16) / 320 (12-5/8)
Weight Net (I/D / O/D) kg (lb) 12 (26) / 42 (93) 13 (29) / 49 (108)
19
Page 20

Model
Pipe Diameter (Liquid / Gas) mm (inch) 6.35 (1/4) / 12.70 (1/2) 6.35 (1/4) / 15.88 (5/8)
Standard length m (ft) 5.0 (16.4) 5.0 (16.4)
Length range (min – max) m (ft) 3 (9.8) ~ 20 (65.6) 3 (9.8) ~ 30 (98.4)
I/D & O/D Height different m (ft) 15.0 (49.2) 20.0 (65.6)
Piping
Additional Gas Amount g/m (oz/ft) 15 (0.2) 25 (0.3)
Length for Additional Gas m (ft) 7.5 (24.6) 10.0 (32.8)
Drain Hose
Indoor Heat
Exchanger
Outdoor
Heat
Exchanger
Air Filter
Power Supply Cord A Nil Nil
Indoor
Operation
Range
Outdoor
Operation
Range
1. Cooling capacities are based on indoor temperature of 27°C Dry Bulb (80.6°F Dry Bulb), 19.0°C Wet Bulb (66.2°F Wet Bulb) and outdoor air
temperature of 35°C DRY BULB (95°F Dry Bulb), 24°C Wet Bulb (75.2°F Wet Bulb).
2. Heating capacities are based on indoor temperature of 20°C Dry Bulb (68°F Dry Bulb) and outdoor air temperature of 7°C Dry Bulb (44.6°F
Dry Bulb), 6°C Wet Bulb (42.8°F Wet Bulb).
3. Heating low temperature capacity, Input Power and COP measured at 230 V, indoor temperature 20°C, outdoor 2/1°C.
4. Heating extreme low temperature capacity, Input Power and COP measured at 230 V, indoor temperature 20°C, outdoor -7/-8°C.
5. Standby power consumption ≤10.0w (when switched OFF by remote control, except under self protection control).
6. Specifications are subjected to change without prior notice for further improvement.
Inner Diameter mm 16.7 16.7
Length mm 650 650
Fin Material Aluminium (Pre Coat) Aluminium (Pre Coat)
Fin Type Slit Fin Slit Fin
Row × Stage × FPI 2 × 17 × 21 2 × 17 × 21
Size (W × H × L) mm 836.5 × 357 × 25.4 836.5 × 357 × 25.4
Fin Material Aluminium Aluminium
Fin Type Corrugated Fin (Pre Coat) Corrugated Fin (Pre Coat)
Row × Stage × FPI 2 × 31 × 19 2 × 31 × 19
Size (W × H × L) mm 36.4 × 651 × 854.5:824.5 36.4 × 651 × 904.5:874.5
Material Polypropelene Polypropelene
Type One-touch One-touch
Power Supply Indoor Indoor
Thermostat Electronic Contol Electronic Contol
Protection Device Electronic Contol Electronic Contol
Dry Bulb Wet Bulb Dry Bulb Wet Bulb
Cooling
Heating
Cooling
Heating
Indoor CS-Z50TKEW / CS-XZ50TKEW CS-Z71TKEW
Outdoor CU-Z50TKE CU-Z71TKE
Maximum °C 32 23 32 23
Minimum °C 16 11 16 11
Maximum °C 30 – 30 –
Minimum °C 16 – 16 –
Maximum °C 43 26 43 26
Minimum °C -10 – -10 –
Maximum °C 24 18 24 18
Minimum °C -15 -16 -15 -16
20
Page 21

Multi Split Combination Possibility:
o A single outdoor unit enables air conditioning of up to two separate rooms for CU-2E12SBE, CU-2E15SBE,
CU-2E18SBE.
o A single outdoor unit enables air conditioning of up to three separate rooms for CU-3E23SBE, CU-3E18PBE.
CONNECTABLE INDOOR UNIT CU-2E12SBE CU-2E15SBE CU-2E18SBE CU-3E23SBE CU-3E18PBE
ROOM A B A B A B A B C A B C
1.6kW CS-MZ16TKE ● ● ● ● ● ● ● ● ● ● ● ●
2.0kW
2.5kW
3.5kW
Wall
4.2kW CS-Z42TKEW – – – – ● ● ● ● ● ● ● ●
5.0kW
7.1kW CS-Z71TKEW – – – – – – – – – – – –
Capacity range of connectable units
1 room maximum pipe length (m) 20 20 20 25 25
Allowable elevation (m) 10 10 10 15 15
Total allowable pipe length (m) 30 30 30 60 50
Total pipe length for maximum
Pipe length
Remarks for CU-2E12SBE / CU-2E15SBE / CU-2E18SBE
1. The total nominal cooling capacity of indoor unit that will be connected to outdoor unit must be within connectable capacity range of indoor
Remarks for CU-3E23SBE
1. The total nominal cooling capacity of indoor unit that will be connected to outdoor unit must be within connectable capacity range of indoor
chargeless length (m)
Additional gas amount over
chargeless length (g/m)
unit. (as shown in the table above)
Example: The indoor units’ combination below is possible to connect to CU-2E15SBE. (Total nominal capacity of indoor units is between
3.2kW to 5.6kW)
1) Two CS-Z20TKEW only. (Total nominal cooling capacity is 4.0kW)
unit. (as shown in the table above)
Example: The indoor units’ combination below is possible to connect to CU-3E23SBE. (Total nominal capacity of indoor units is between
4.8kW to 10.0kW)
1) Two CS-Z25TKEW only. (Total nominal cooling capacity is 5.0kW)
CS-Z20TKEW
CS-XZ20TKEW
CS-Z25TKEW
CS-XZ25TKEW
CS-Z35TKEW
CS-XZ35TKEW
CS-Z50TKEW
CS-XZ50TKEW
● ● ● ● ● ● ● ● ● ● ● ●
● ● ● ● ● ● ● ● ● ● ● ●
● ● ● ● ● ● ● ● ● ● ● ●
– – – – ● ● ● ● ● ● ● ●
From 3.2kW to
5.6kW
20 20 20 30 30
15 15 15 20 20
From 3.2kW to
5.6kW
From 3.2kW to
7.5kW
From 4.8kW to 10.0kW From 4.8kW to 9.0kW
Note: “●” : Available
21
Page 22

Multi Split Combination Possibility:
o A single outdoor unit enables air conditioning of up to four separate rooms for CU-4E23PBE, CU-4E27PBE.
o A single outdoor unit enables air conditioning of up to five separate rooms for CU-5E34PBE.
CONNECTABLE INDOOR UNIT CU-4E23PBE CU-4E27PBE CU-5E34PBE
ROOM A B C D A B C D A B C D E
1.6kW CS-MZ16TKE ● ● ● ● ● ● ● ● ● ● ● ● ●
2.0kW
2.5kW
3.5kW
Wall
4.2kW CS-Z42TKEW ● ● ● ● ● ● ● ● ● ● ● ● ●
5.0kW
7.1kW CS-Z71TKEW – – – – ● ● ● ● ● ● ● ● ●
Capacity range of connectable units From 4.8kW to 11.0kW From 4.8kW to 13.6kW From 4.8kW to 17.5kW
1 room maximum pipe length (m) 25 25 25
Allowable elevation (m) 15 15 15
Total allowable pipe length (m) 70 70 80
Total pipe length for maximum
Pipe length
Remarks for CU-4E23PBE / CU-4E27PBE / CU-5E34PBE
1. The total nominal cooling capacity of indoor unit that will be connected to outdoor unit must be within connectable capacity range of indoor
chargeless length (m)
Additional gas amount over
chargeless length (g/m)
unit. (as shown in the table above)
Example: The indoor units’ combination below is possible to connect to CU-4E27PBE. (Total nominal capacity of indoor units is between
4.5kW to 13.6kW)
1) Two CS-Z25TKEW only. (Total nominal cooling capacity is 5.0kW)
CS-Z20TKEW
CS-XZ20TKEW
CS-Z25TKEW
CS-XZ25TKEW
CS-Z35TKEW
CS-XZ35TKEW
CS-Z50TKEW
CS-XZ50TKEW
● ● ● ● ● ● ● ● ● ● ● ● ●
● ● ● ● ● ● ● ● ● ● ● ● ●
● ● ● ● ● ● ● ● ● ● ● ● ●
● ● ● ● ● ● ● ● ● ● ● ● ●
40 45 45
20 20 20
Note: “●” : Available
22
Page 23

4. Features
Inverter Technology
o Wider output power range
o Energy saving
o Quick Cooling
o Quick Heating
o More precise temperature control
Environment Protection
o Non-ozone depletion substances refrigerant (R32)
Long Installation Piping
o Long piping up to 15 meters (0.75 ~ 1.75HP), 20 meters (2.0HP) and 30 meters (2.5HP) during single split
connection only
Easy to use remote control
Quality Improvement
o Random auto restart after power failure for safety restart operation
o Gas leakage protection
o Prevent compressor reverse cycle
o Inner protector to protect compressor
o Noise prevention during soft dry operation
Operation Improvement
o Quiet mode to reduce the indoor unit operating sound
o Powerful mode to reach the desired room temperature quickly
o 24-hour timer setting
Serviceability Feature
o Activation and Deactivation Method for Heating Only Mode
o Breakdown Self Diagnosis function
23
Page 24

5. Location of Controls and Components
5.1 Indoor Unit
Horizontal airflow direction louver
Do not adjust by hand.
Human activity
sensor
Vertical airflow direction louver
Do not adjust by hand.
5.2 Outdoor Unit
Front panel
Air Filters
Aluminium fin
Indicator
POWER
TIMER
ECONAVI
nanoe
(White)
(White)
(White)
(White)
Auto OFF/ON button
Use when remote control is misplaced
or a malfunction occurs.
Sunlight Sensor and
Remote Control Receiver
5.3 Remote Control
ECONAVI operation
Temperature setting
Sleep mode operation
Remote control
display
Operation mode
Powerful/Quiet
operation
Check
Transmitter
OFF/ON
nanoe operation
Mild dry operation
Airflow direction
selection
Fan speed selection
Timer setting
Clock setting
24
Page 25

6. Dimensions
6.1 Indoor Unit
6.1.1 CS-Z20TKEW CS-Z25TKEW CS-Z35TKEW CS-Z42TKEW
CS-XZ20TKEW CS-XZ25TKEW CS-XZ35TKEW
<Top View>
(194)
<Side View> <Side View>
Air intake
direction
<Front View>
919
295
Left piping
hole
Air outlet
direction
2 ±0.5
<Bottom View>
<Rear View>
Gas side
Liquid side
2 ±0.5
Right piping
<Remote Control>
6060
139149
160
194
hole
59
61
45
22
Installation
plate
Indoor unit
external
dimensions
line
<Remote Control Holder>
87
(41-61)410
Relative position between the indoor unit and the installation plate <Front View>
496.6
460460
Left
piping
hole
128
PIPE
HOLE
CENTER
128mm TO
PIPE HOLE
CENTER
B
95
43
C
PIPE
HOLE
CENTER
A
128mm TO
PIPE HOLE
CENTER
128
266 266
Right
piping
hole
16.4
264.6
25
64
Unit: mm
Page 26

6.1.2 CS-Z50TKEW CS-Z71TKEW CS-XZ50TKEW
<Top View>
<Side View> <Side View>
Air intake
direction
60
42.6
Left piping
hole
Air outlet
direction
<Front View>
1120
1-21-2
<Bottom View>
135
60
<Rear View>
Liquid side
Gas side
60
135
236
Right piping
hole
42.6
<Remote Control>
59
160
302
60
22
(41-61)
410
Relative position between the indoor unit and the installation plate <Front View>
Installation
plate
Indoor unit
external
dimensions
line
741.4
560 560
Left
piping
hole
266
320
270
128
128
128
266
Right
piping
hole
16.5
264.3
<Remote Control Holder>
87
64
Unit: mm
26
Page 27

6.2 Outdoor Unit
6.2.1 CU-Z20TKE CU-Z25TKE
Space necessary for
installation
100 mm
<Top View>
22
(104.7)
780
570.3
67.6
60.5104.9
100 mm
1000 mm
Anchor Bolt Pitch
×
570
320
<Side View>
<Front View>
Unit: mm
6.2.2 CU-Z35TKE CU-Z42TKE
<Top View>
Space necessary for
installation
100 mm
100 mm
1000 mm
22 (124) (62.6)
824 68.7
540 160
85.5
155.2 34.3
2-way valve at Liquid side
(High Pressure)
3-way valve at Gas side
(Low Pressure)
<Side View>
542
(18)
69.5 61.6
32
97
167
330
28939
Anchor Bolt Pitch
Unit : mm
330 × 540
<Side View>
<Front View><Side View>
62
69
(20)
3-way valve at Gas side
(Low Pressure)
2-way valve at Liquid si de
(High Pressure)
37 299
619
27
Page 28

6.2.3 CU-Z50TKE CU-Z71TKE
Space necessary for
installation
100 mm
100 mm
<Top View>
(131)
875
61334.7
72
131
3582
Unit: mm
1000 mm
Anchor Bolt Pitch
360.5 × 613
<Side View>
7.7
<Front View>
360.5
2-way valve at Liquid side
(High Pressure)
3-way valve at Gas side
(Low Pressure)
45
695
7570.5
(25)
<Side View>
320
386
28
Page 29

7. Refrigeration Cycle Diagram
7.1 CS-Z20TKEW CU-Z20TKE CS-Z25TKEW CU-Z25TKE
CS-Z35TKEW CU-Z35TKE CS-Z42TKEW CU-Z42TKE
CS-XZ20TKEW CU-Z20TKE CS-XZ25TKEW CU-Z25TKE
CS-XZ35TKEW CU-Z35TKE
INDOOR OUTDOOR
INTAKE
AIR
TEMP.
SENSOR
HEAT EXCHANGER
(EVAPORATOR)
PIPE
TEMP.
SENSOR 2
PIPE
TEMP.
SENSOR 1
LIQUID
SIDE
2-WAY
VALV E
GAS
SIDE
MUFFLER
EXPANSION
VALV E
STRAINER
AIR
TEMP.
SENSOR
CONDENSER
PIPE
TEMP.
SENSOR
3-WAY
VALV E
COOLING
HEATING
4-WAYS VALVE
MUFFLER
TAN K
SENSOR
COMPRESSOR
29
Page 30

7.2 CS-Z50TKEW CU-Z50TKE CS-Z71TKEW CU-Z71TKE
CS-XZ50TKEW CU-Z50TKE
INDOOR OUTDOOR
INTAKE
AIR
TEMP.
SENSOR
HEAT EXCHANGER
(EVAPORATOR)
PIPE
TEMP.
SENSOR 2
PIPE
TEMP.
SENSOR 1
LIQUID
SIDE
2-WAY
VALV E
GAS
SIDE
3-WAY
VALV E
MUFFLER
(Z71TKE only)
4-WAYS VALVE
EXPANSION
VALV E
STRAINER
PROCESS
PIPE
TEMP.
SENSOR
TUBE
CONDENSER
RECEIVER
AIR
TEMP.
SENSOR
COOLING
HEATING
TAN K
SENSOR
COMPRESSOR
30
Page 31
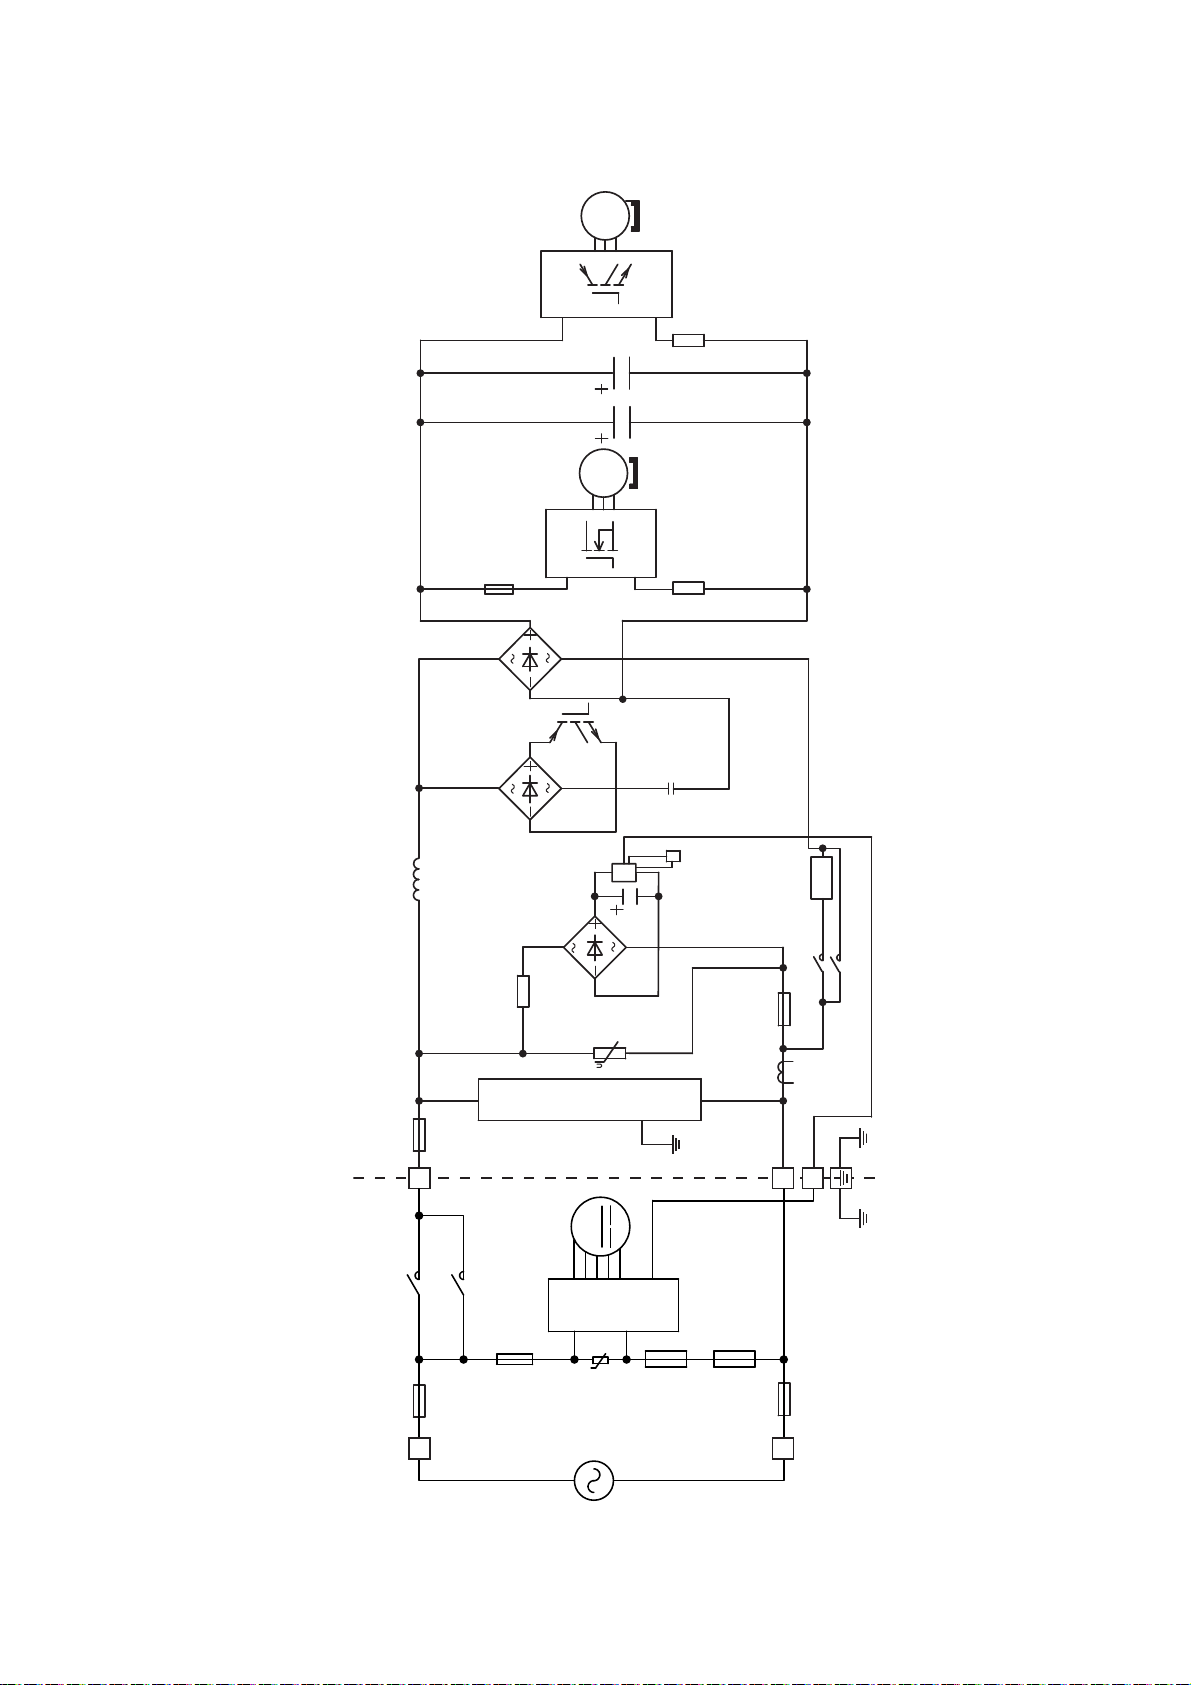
8. Block Diagram
8.1 CS-Z20TKEW CU-Z20TKE CS-XZ20TKEW CU-Z20TKE
3 ~
MS
3 ~
MS
IC19
FUSE101
REACTOR
FUSE103
S1
(INDOOR UNIT) (OUTDOOR UNIT)
RY-PWR
RY-PWR2
TH1
NTC
FUSE301
C103
SC
NOISE FILTER
4-WAYS
VALV E
PTC
RY-AC
FUSE104
CT101
2
PTC1
RY-PWR
3
M
SC
TEMP. FUSE
U
TEMP. FUSE
FUSE501
L1
PHASE
SINGLE
31
FUSE500
N
POWER
SUPPLY
Page 32
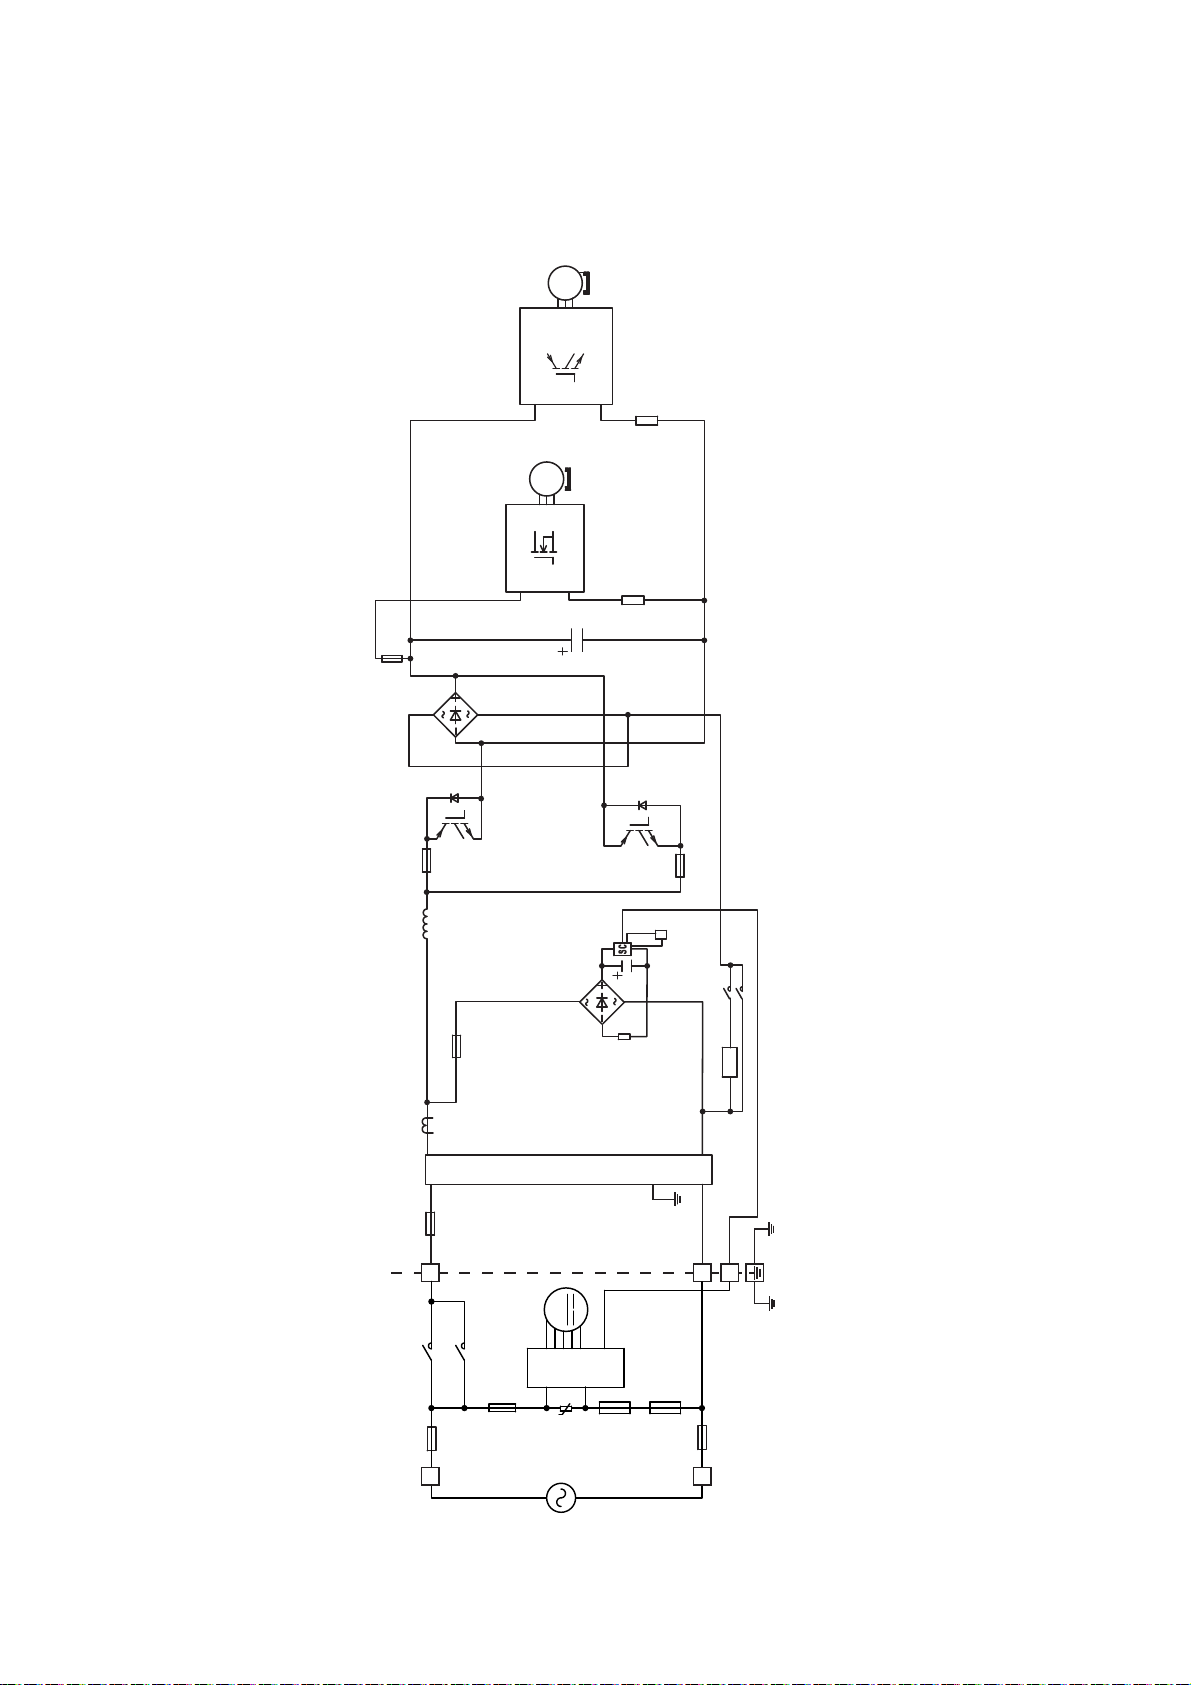
8.2 CS-Z25TKEW CU-Z25TKE CS-Z35TKEW CU-Z35TKE
CS-Z50TKEW CU-Z50TKE CS-Z71TKEW CU-Z71TKE
CS-XZ25TKEW CU-Z25TKE CS-XZ35TKEW CU-Z35TKE
CS-XZ50TKEW CU-Z50TKE
3 ~
MS
COMPRESSOR
Q1
3 ~
MS
FAN MOTOR
IC19
FUSE3
FUSE6
REACTOR
FUSE8
SEN1
FUSE1
(OUTDOOR UNIT)
S1
RY-PWR
RY-PWR2
(INDOOR UNIT)
FUSE301
FUSE5
4-WAY
VALV E
RY-PWR
RY-AC
TH1
NTC
PTC
PTC2
NOISE FILTER
3
2
M
SC
TEMP. FUSE
U
TEMP. FUSE
L1
FUSE501
PHASE
SINGLE
32
FUSE500
N
POWER
SUPPLY
Page 33
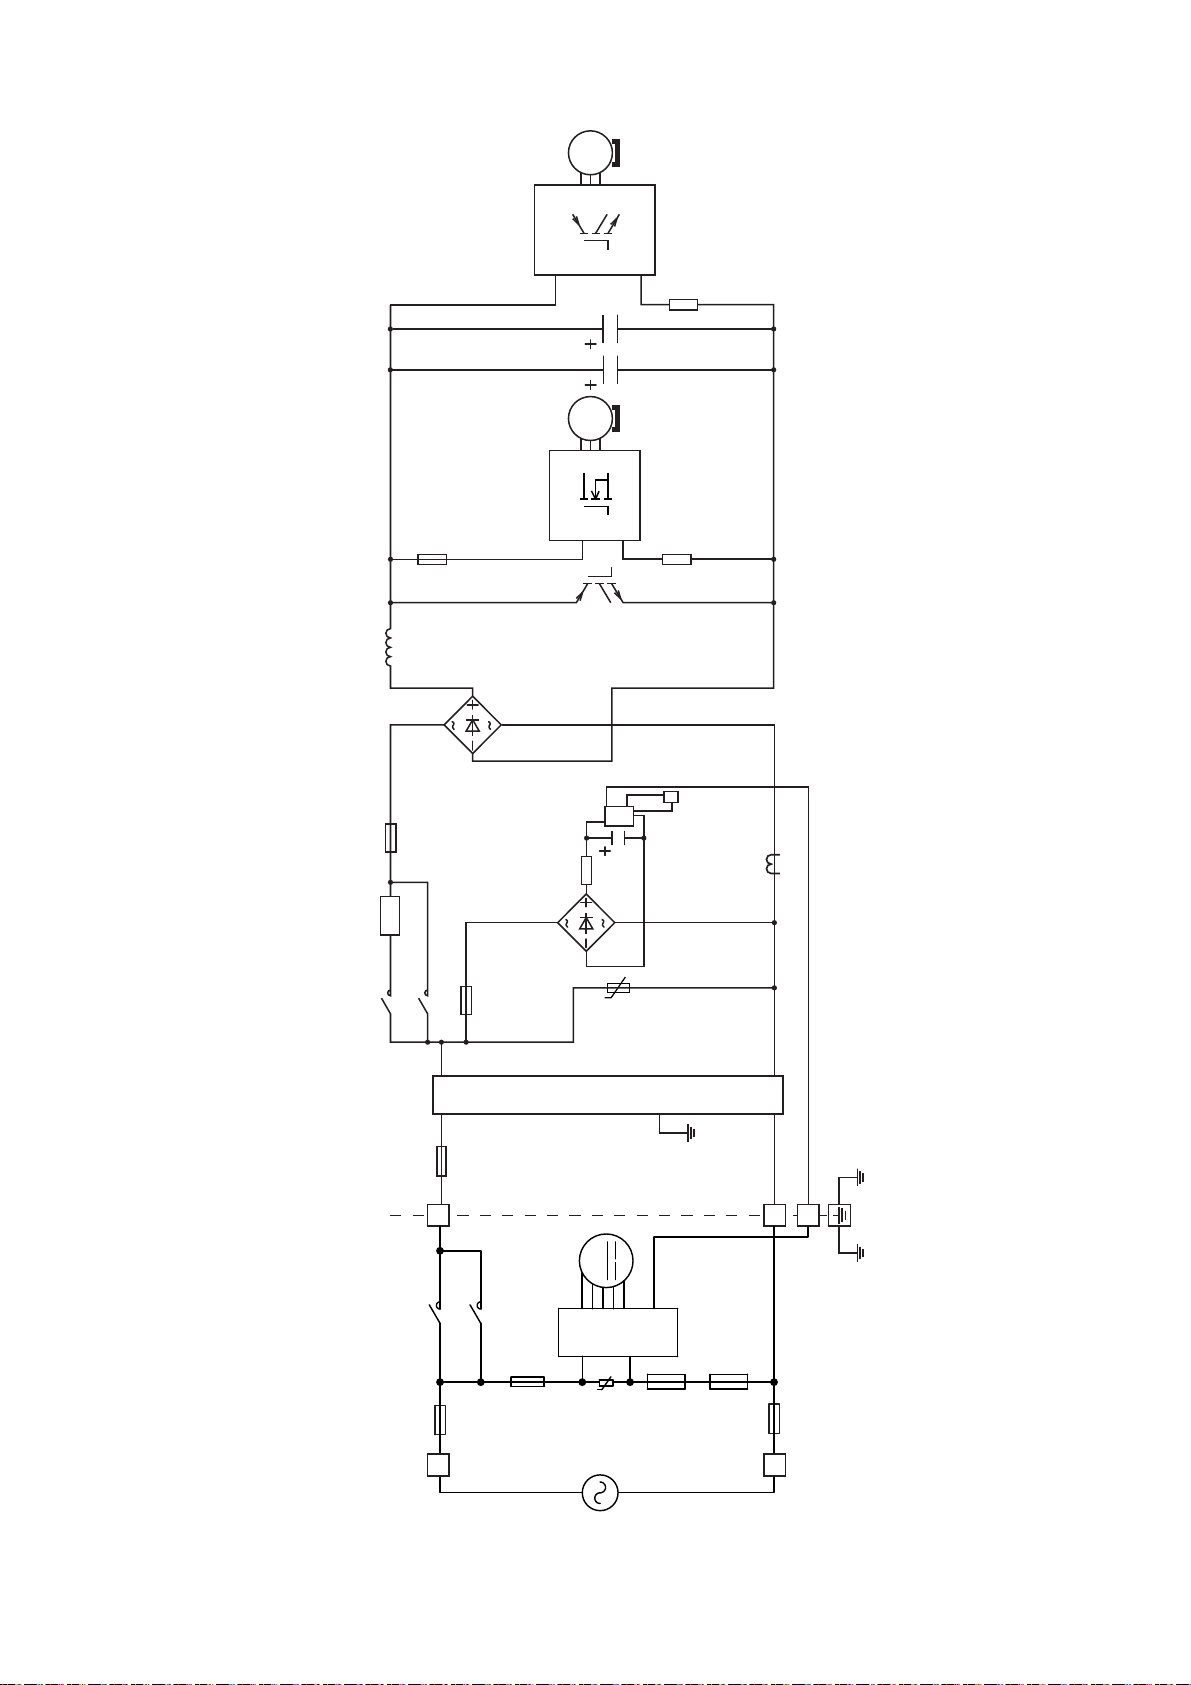
8.3 CS-Z42TKEW CU-Z42TKE
FUSE103
IC19
MS
MS
3 ~
3 ~
REACTOR
FUSE104
PTC
PTC1
RY-AC
RY-PWR
FUSE101
(OUTDOOR UNIT)
S1
FUSE102
NTC
TH3
SC
U
VALV E
4-WAYS
CT102
NOISE FILTER
2
3
RY-PWR
RY-PWR2
(INDOOR UNIT)
FUSE501
L1
FUSE301
M
U
PHASE
SINGLE
33
POWER
SC
SUPPLY
TEMP. FUSE
TEMP. FUSE
FUSE500
N
Page 34
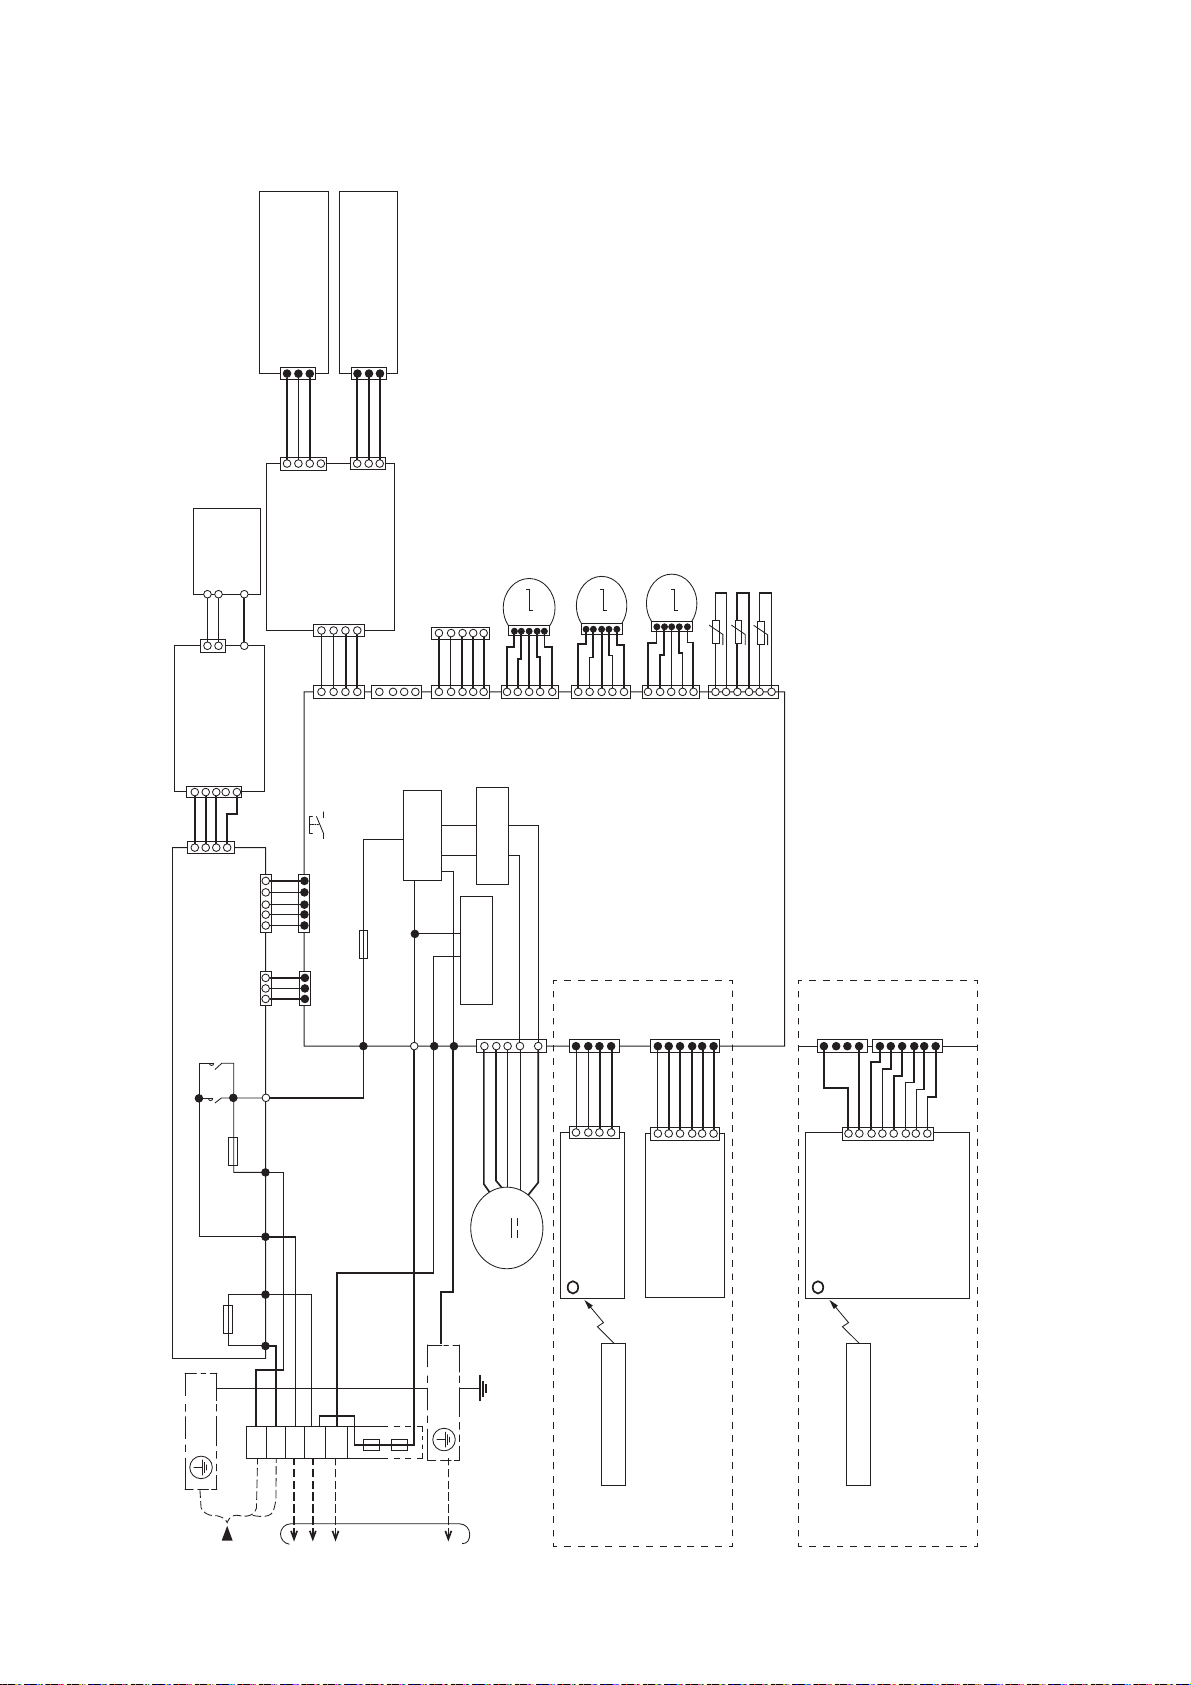
9. Wiring Connection Diagram
9.1 Indoor Unit
ELECTRONIC
ELECTRONIC
CONTROLLER
CONTROLLER
(ECO SENSOR)
(ECO SENSOR)
(YLW)
CN-SENS2
11
W
W
W
4
(YLW)
CN-SENS2
NANOE
GENERATOR
ELECTRONIC
BL
W
W
2
1
CN2
(WHT)
POWER SUPPLY
HIGH VOLTAGE
CN1
(WHT)
3
5
1
P
B
W
BL
1
4
(GRN)
CN-NANO
(WHT)
CN-DATA 2
31 5
(WHT)
1
CN-DATA 1
ELECTRONIC CONTROLLER (SUB)
RY-PWR2
AC306
(BLACK)
CN-MSENS
1
CONTROLLER
(COMPARATOR)
Y
O
4
CN-MSENS
SW01
5
W
W
W
W
(YLW)
W
CN-DATA 2
1
W
W
W
13
CN-DATA 1
R
(BLU)
(YLW)
RY-PWR
ACL501
(BROWN)
FUSE501
20A 250V
AC302
(YELLOW)
(YLW)
CN-SENS1
133
WWW
1
3
(WHT)
CN-SENS1
(BLU)
4
BR
4
1
FUSE301
T3.15A L250V
AC306 (BLK)
BLACK
1
(WHT)
CN-RMT
NOISE FILTER
AC304 (RED)
AC303 (WHT)
R
W
5
W
GR
BR
5
CN-CNT
CIRCUIT
G301 (GRN)
G
G
REMARKS
B: BLUE
P: PINK
BR: BROWN
O: ORANGE
UP DOWN LOUVER
MOTOR (OUTER)
M
1
1
Y
Y
P
R
O
BR
1
1
(WHT)
(WHT)
CN-STM1
CIRCUIT
RECTIFICATION
CIRCUIT
COMMUNICATION
CN-FM (WHT)
765
4
1
BRY
W
BL
M
BL: BLACK
G/GRN: GREEN
Y/YLW: YELLOW
W/WHT: WHITE
R: RED
LEFT RIGHT
LOUVER MOTOR
M
1
5
P
Y
R
O
BR
5
1
(YLW)
CN-STM2
(YLW)
4
CN-RCV
1
WWW
W
4
1
(WHT)
CN-RCV
Y/G: YELLOW/GREEN
GR: GRAY
UP DOWN LOUVER
MOTOR (INNER)
PIPING TEMPERATURE SENSOR 2 (THERMISTOR)
PIPING TEMPERATURE SENSOR 1 (THERMISTOR)
M
1
R
O
BR
1
CN-STM3
1
WWWWW
1
5
P
Y
5
(BLU)
(YLW)
CN-DISP
(WHT)
CN-DISP
tº
tº
6
CN-TH
66
W
5
5
SUCTION TEMPERATURE SENSOR (THERMISTOR)
tº
1
(RED)
ELECTRONIC CONTROLLER (MAIN)
(YLW)
CN-RCV
1
1
4
1
WWWWWWW
CN-DISP
(YLW)
CN-DISP
W
8
(WHT)
6
(WHITE)
(GRAY)
FUSE500
20A 250V
Y/G
BR
TERMINAL
GROUNDING
BOARD
TERMINAL
ACN502
ACN501
Y
GR
N
L1
S1
POWER SUPPLY
LIGHT SENSOR
ELECTRONIC
CONTROLLER
(RECEIVER)
(DISPLAY)
ELECTRONIC
CONTROLLER
LIGHT SENSOR
DISPLAY)
(RECEIVER &
ELECTRONIC
CONTROLLER
FAN MOTOR
W
2
3
TEMP. FUSE
102ºC 3A
TEMP. FUSE
Y/G
TERMINAL
GROUNDING
EVAPORATOR
102ºC 3A
TO OUTDOOR UNIT
REMOTE CONTROLLER
(FOR Z20/25/35/42TKEW & XZ20/25/35TKEW ONLY)
(FOR Z50/71TKEW & XZ50TKEW ONLY)
REMOTE CONTROLLER
34
Page 35
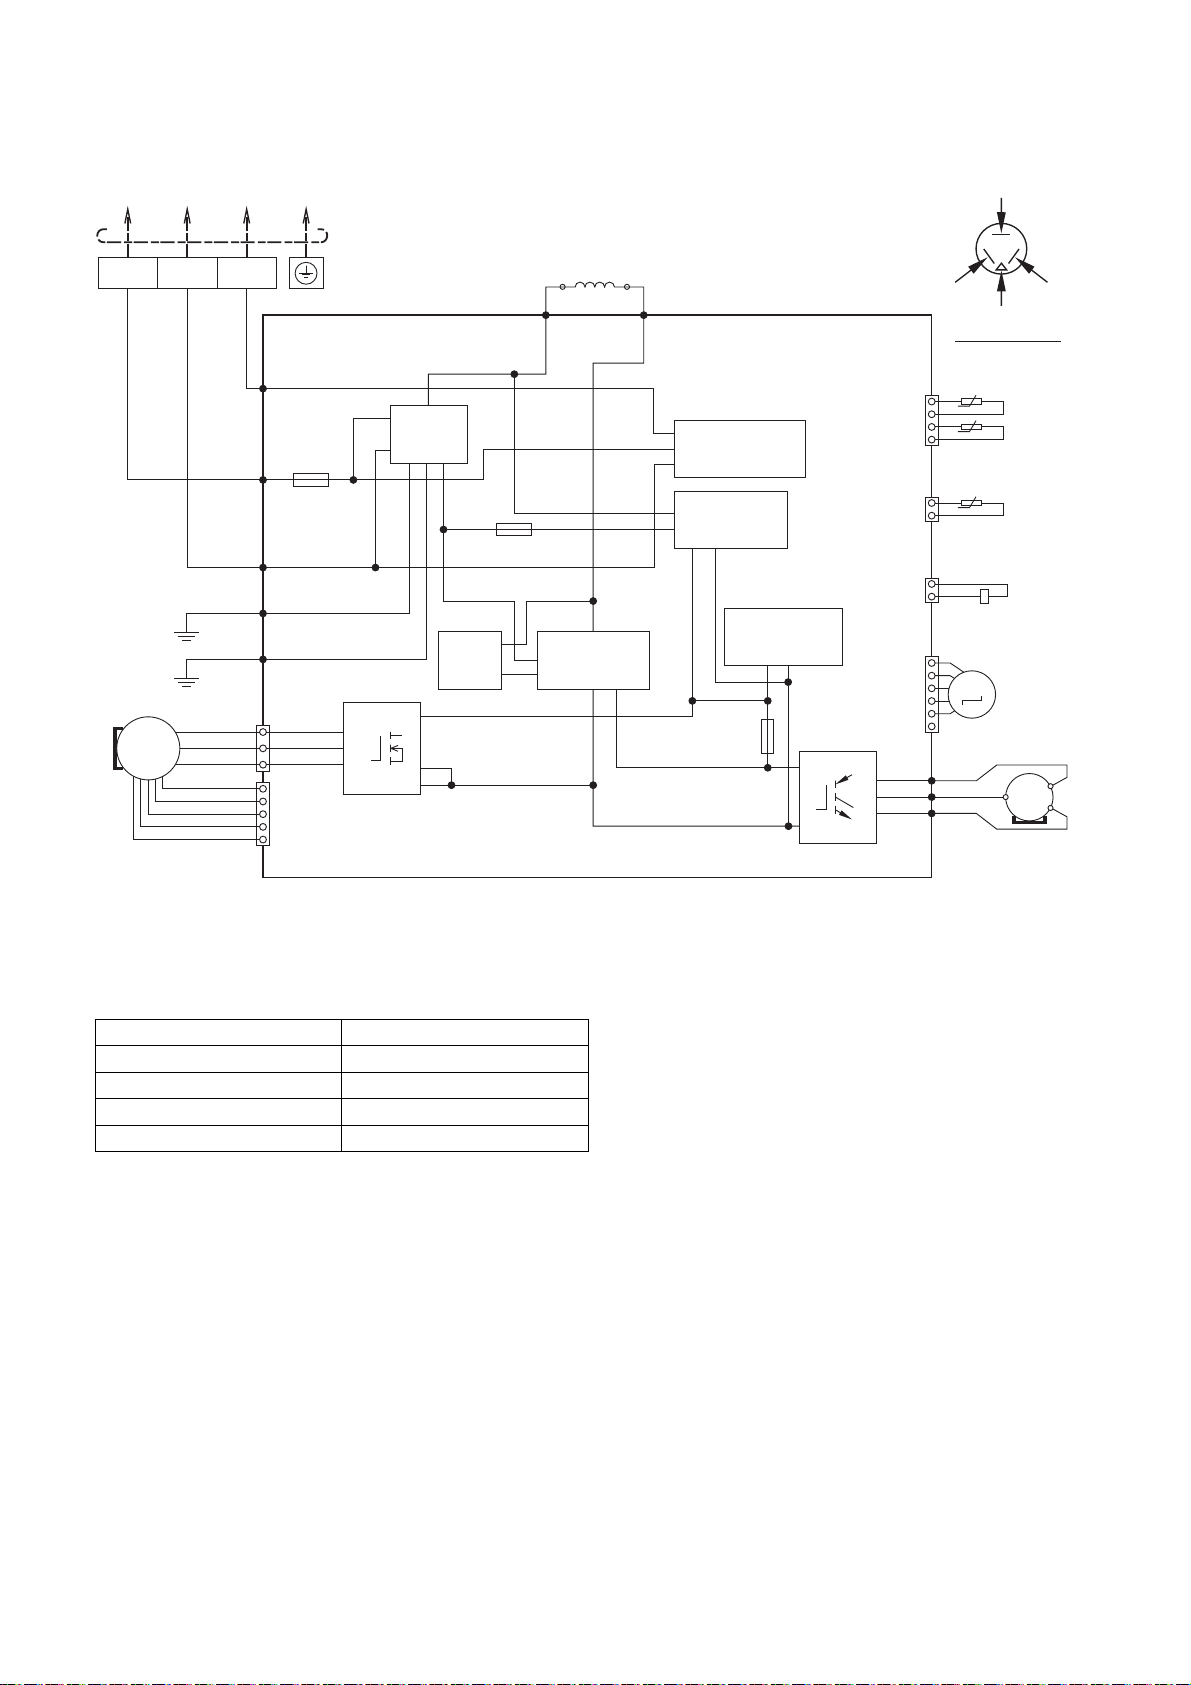
9.2 Outdoor Unit
9.2.1 CU-Z20TKE
TO INDOOR UNIT
YELLOW
FAN MOTOR
MS
3 ~
RED
WHT
GRN
GRN
BLK
DATA
(RED)
AC-BLK
(BLK)
FUSE103
(20A 250V)
AC-WHT
(WHT)
FG1
(GRN)
FG2
(GRN)
CN-MTR2
(WHT)
CN-MTR1
(WHT)
TERMINAL
BOARD
W
U
V
IC19
CIRCUIT
32S1
1
3
5
1
5
ELECTRONIC CONTROLLER
NOISE
FILTER
10
14
16
T3.15A L250V
PFC
CIRCUIT
GRY
RAT2
(GRY)
FUSE104
REACTOR
RECTIFICATION
CIRCUIT
GRY
RAT1
(GRY)
COMMUNICATION
RECTIFICATION
CIRCUIT
FUSE101
T3.15A L250V
CIRCUIT
SWITCHING
POWER
SUPPLY CIRCUIT
BLUE
TRADE MARK
COMP. TERMINAL
OUTDOOR AIR TEMP.
SENSOR (THERMISTOR)
0
1
CN-TH1
(WHT)
CN-TANK
(WHT)
CN-HOT
(WHT)
CN-STM
(WHT)
P
N
Q1
U
V
W
U (RED)
V (BLU)
W (YLW)
t
0
t
4
PIPING TEMP. SENSOR
(THERMISTOR)
0
1
t
3
COMP. TEMPERATURE
SENSOR (THERMISTOR)
YLW
1
3
YLW
ELECTRO-MAGNETIC
COIL (4-WAYS VALVE)
1
M
6
RED
BLU
YLW
COMPRESSOR
RED
ELECTRO-MAGNETIC
COIL
(EXPANSION VALVE)
MS
3 ~
REMARKS
BLUE: (BLU) BLACK: (BLK) WHITE: (WHT) RED: (RED)
YELLOW: (YLW) GRAY: (GRY) GREEN: (GRN) ORANGE: (ORG)
Resistance of Compressor Windings
MODEL CU-Z20TKE
CONNECTION 9RS092XAA21 (Ω)
U-V 1.152
U-W 1.152
V-W 1.152
Note: Resistance at 20°C of ambient temperature.
35
Page 36
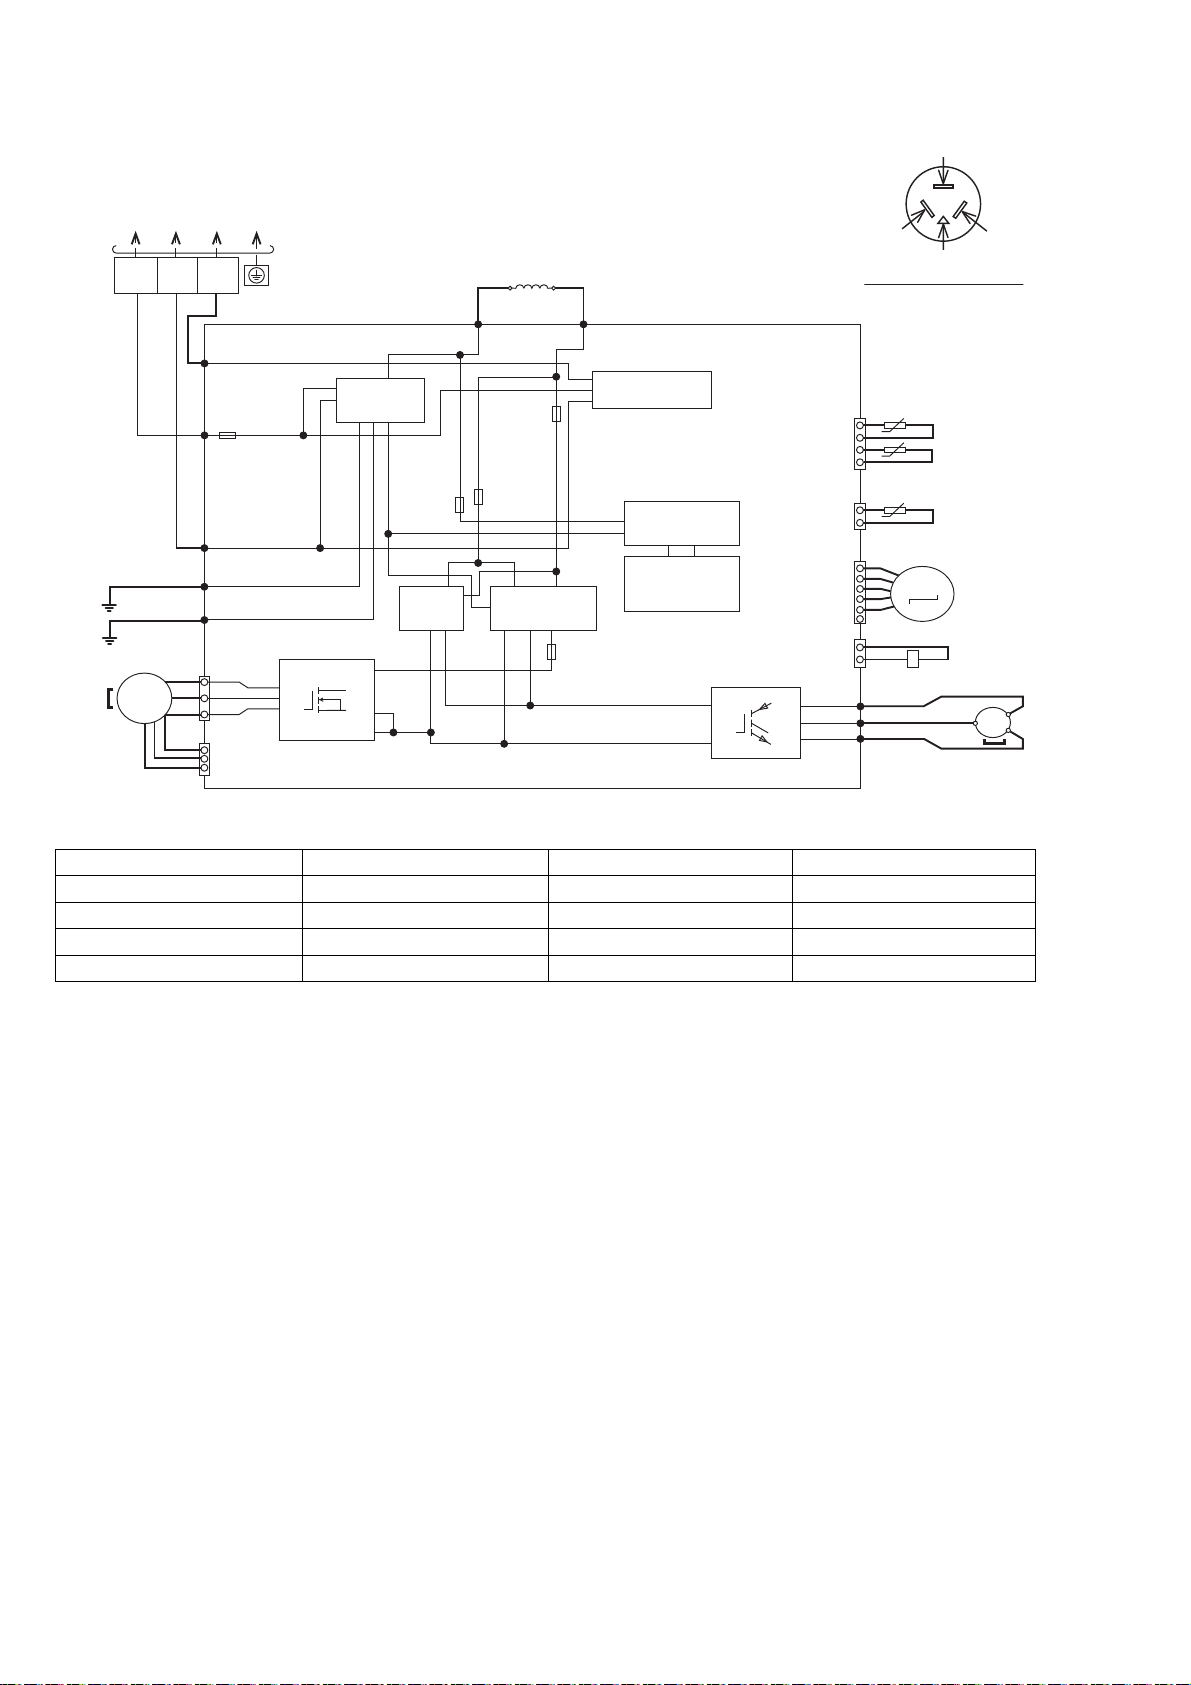
9.2.2 CU-Z25TKE CU-Z35TKE CU-Z 50TKE CU-Z71TKE
REMARKS
BLU: BLUE
TO INDOOR UNIT
FAN
MOTOR
S1 2 3
RED
BLK
WHT
GRN
GRN
MS
3~
TERMINAL
BOARD
DATA
(RED)
AC-BLK
(BLK)
FUSE 1
FOR Z25/35TK
(20A 250V)
FOR Z50/71TK
(25A 250V)
AC-WHT
(WHT)
FG1 (GRN)
FG2 (GRN)
CN-MTR2
(WHT)
1
3
5
1
CN-MTR1
(RED)
3
W
U
V
NOISE FILTER
CIRCUIT
FUSE 8
T3.15A
L250V
PFC
CIRCUIT
10
14
16
IC19
ELECTRONIC CONTROLLER
REACTOR
GRY GRY
RAT2
(GRY)
FUSE 5
(20A 250V)
FUSE 6
(20A 250V)
RECTIFICATION
CIRCUIT
Resistance of Compressor Windings
MODEL CU-Z25TKE / CU-Z35TKE CU-Z50TKE CU-Z71TKE
CONNECTION 9RS102XGA21 (Ω) 9RD132XAA21 (Ω) 9KD240XBA21 (Ω)
U-V 1.741 1.897 0.720
U-W 1.765 1.907 0.726
V-W 1.711 1.882 0.708
Note: Resistance at 20°C of ambient temperature.
RAT1
(GRY)
COMMUNICATION
FUSE 3
T3.15A L250V
BLK: BLACK
WHT: WHITE
RED: RED
YLW: YELLOW
GRY: GRAY
GRN: GREEN
CIRCUIT
RECTIFICATION
CIRCUIT
SWITCHING
POWER
SUPPLY CIRCUIT
P
N
Q1
YELLOW
(YLW) OR (C)
BLUE
(BLU)
OR (R)
(TRADEMARK)
COMPERSSOR TERMINAL
THE PARENTHESIZED LETTERS IS
INDICATED ON TERMINAL COVER
OUTDOOR AIR TEMP. SENSOR
(THERMISTOR)
1
CN-TH1
(WHT)
CN-TANK
(WHT)
CN-STM1
(WHT)
CN-HOT
(WHT)
U (RED)
U
V (BLU)
V
W (YLW)
W
tº
tº
4
PIPING TEMP. SENSOR
(THERMISTOR)
1
tº
3
COMPRESSOR TEMP.
SENSOR (THERMISTOR)
1
M
6
YLW
1
3
YLW
RED
BLU
YLW
RED
(RED)
OR (S)
ELECTRO-MAGNETIC COIL
(EXPANSION VALVE)
ELECTRO-MAGNETIC
COIL
(4-WAY VALVE)
MS
3~
COMPRESSOR
36
Page 37
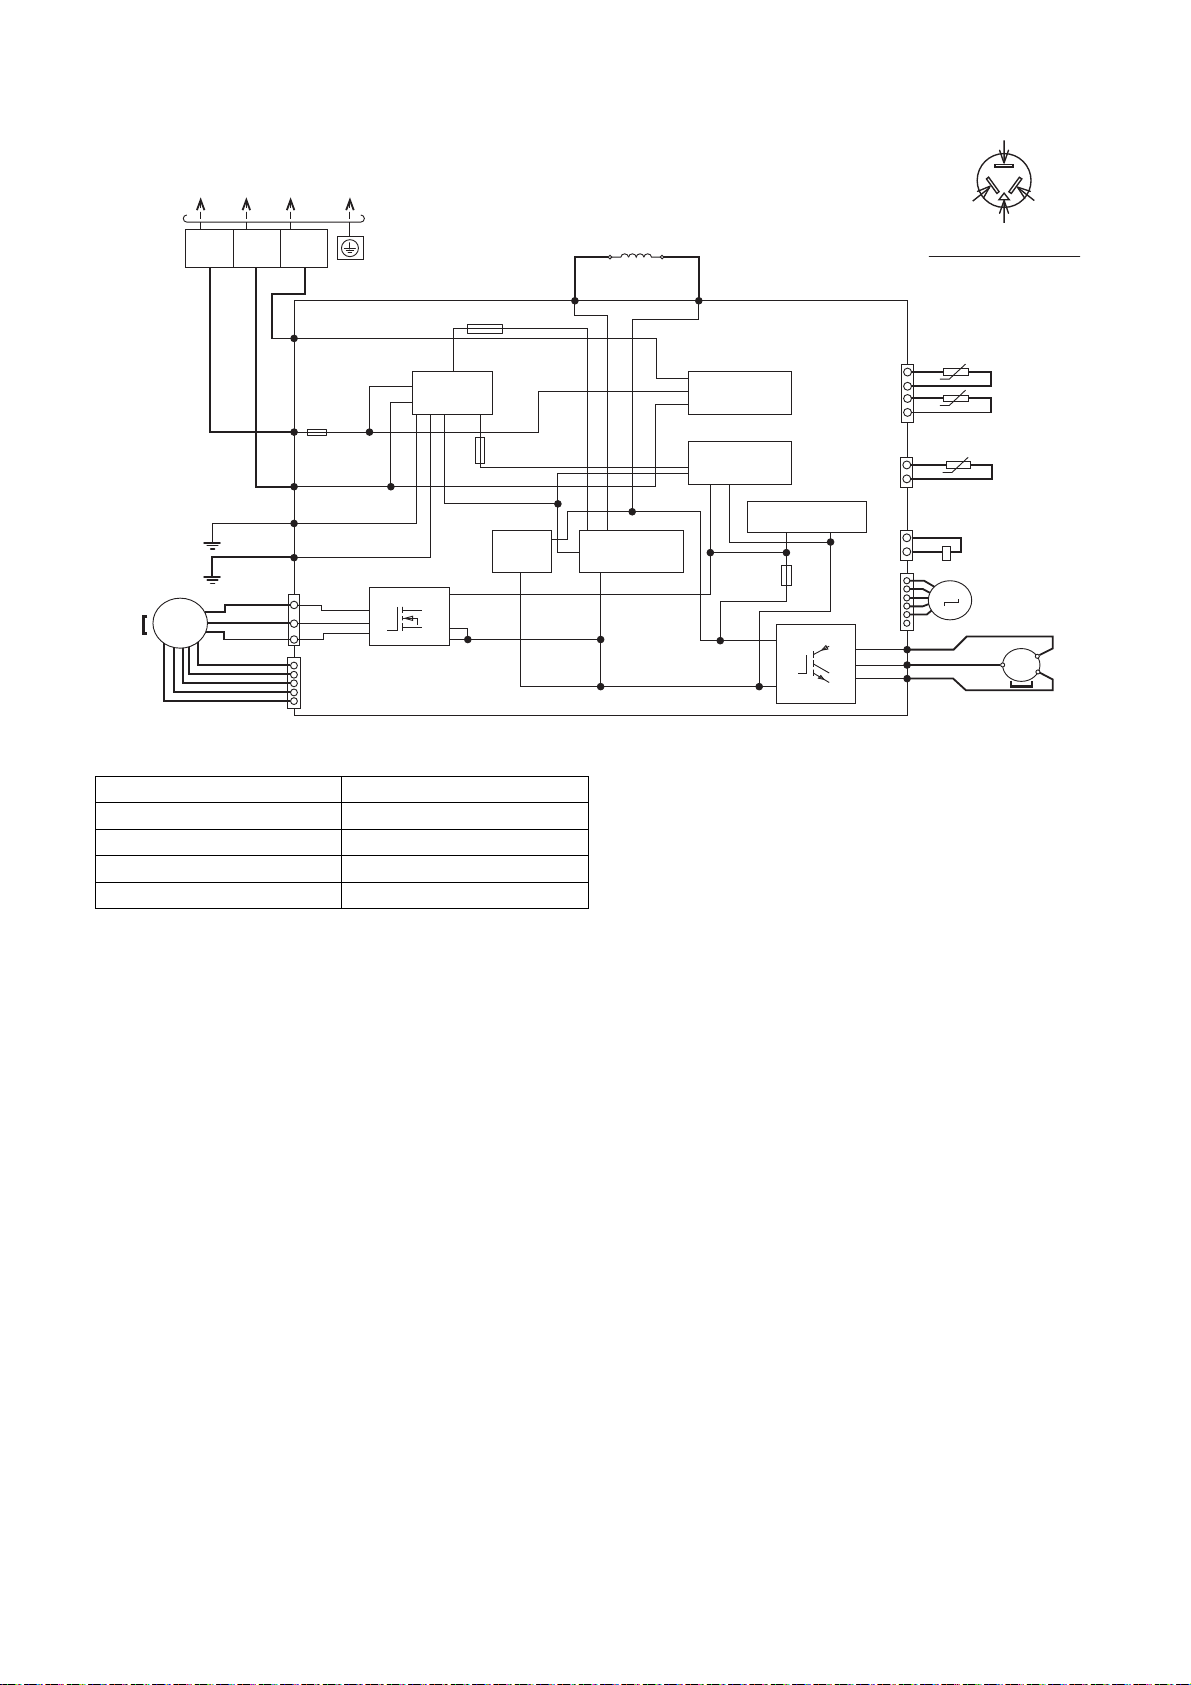
9.2.3 CU-Z42TKE
TO INDOOR UNIT
TERMINAL
BOARD
NOISE FILTER
CIRCUIT
IC20
10
14
16
W
U
CN-MTR2
(WHT)
V
(WHT)
ELECTRONIC CONTROLLER
FUSE104
(15A 250V)
T3.15A L250V
FUSE102
PFC
CIRCUIT
GRY
RAT2
(GRY)
FAN
MOTOR
S1 2 3
BLK
MS
3~
WHT
GRN
GRN
RED
1
3
5
DATA
(RED)
AC-BLK
(BLK)
FUSE101
(20A 250V)
AC-WHT
(WHT)
FG 1
(GRN)
FG 2
(GRN)
1
CN-MTR1
5
Resistance of Compressor Windings
MODEL CU-Z42TKE
CONNECTION 9RS102XEA21 (Ω)
U-V 1.211
U-W 1.211
V-W 1.211
Note: Resistance at 20°C of ambient temperature.
REACTOR
RECTIFICATION
CIRCUIT
REMARKS
BLU: BLUE
BLK: BLACK
WHT: WHITE
RED: RED
YLW: YELLOW
GRY: GRAY
GRN: GREEN
ORG: ORANGE
GRY
RAT1
(GRY)
COMMUNICATION
CIRCUIT
RECTIFICATION
CIRCUIT
SWITCHING POWER
SUPPLY CIRCUIT
FUSE103
T3.15A L250V
YELLOW (YEL)
BLUE (BLU)
(TRADEMARK)
COMPERSSOR TERMINAL
THE PARENTHESIZED LETTERS IS
INDICATED ON TERMINAL COVER.
1
CN-TH
(WHT)
CN-TANK
(WHT)
CN-HOT
(WHT)
CN-STM
(WHT)
Q1
P
N
U
V
W
U (RED)
V (BLU)
W (YLW)
tº
tº
4
1
tº
3
YLW
1
3
1
6
ELECTRO-MAGNETIC
COIL
YLW
(4-WAYS VALVE)
M
RED
BLU
YLW
ELECTRO-MAGNETIC COIL
(EXPANSION VALVE)
COMPRESSOR
RED (RED)
OUTDOOR AIR TEMP.
SENSOR (THERMISTOR)
PIPING TEMP. SENSOR
(THERMISTOR)
COMP. TEMPERATURE
SENSOR
(THERMISTOR)
MS
3~
37
Page 38
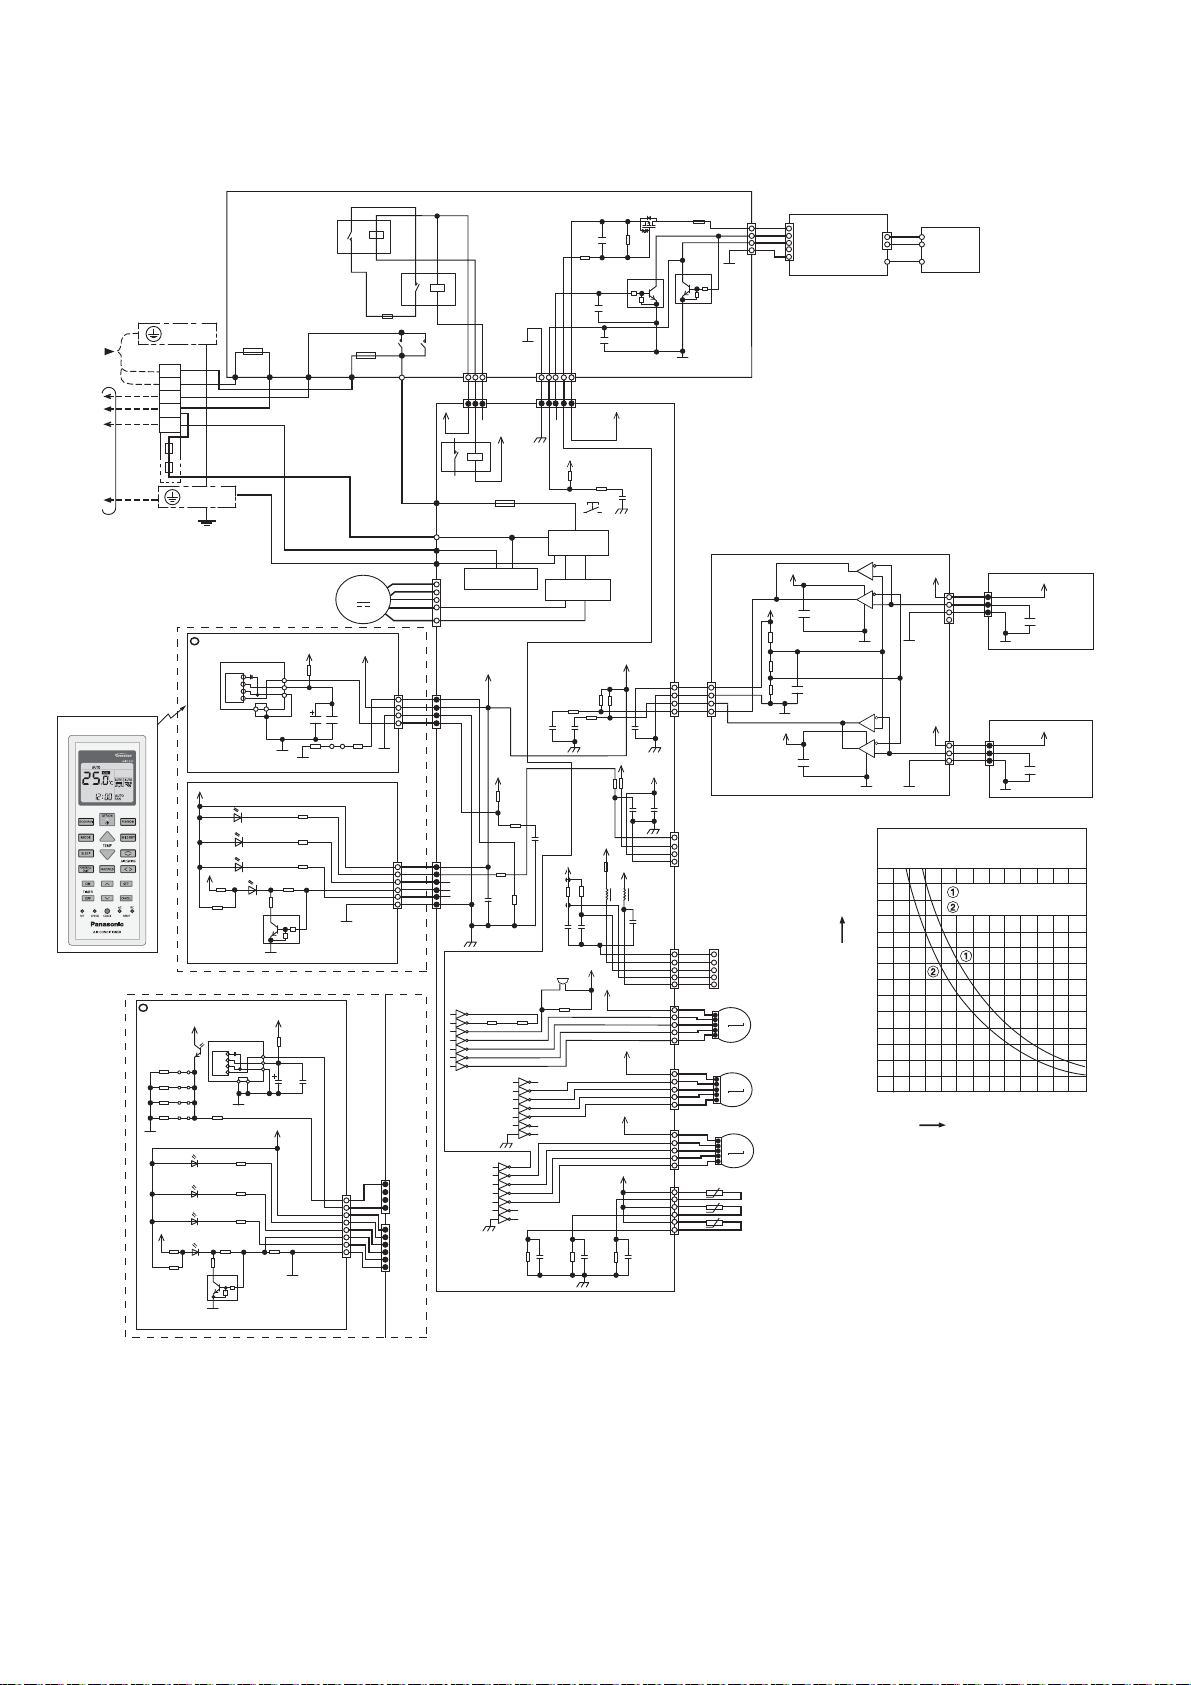
10. Electronic Circuit Diagram
10.1 Indoor Unit
POWER SUPPLY
TEMP. FUSE
102ºC 3A
TEMP. FUSE
102ºC 3A
TO OUTDOOR UNIT
REMOTE CONTROLLER
(FOR Z50/71TKEW & XZ50TKEW ONLY)
GROUNDING
TERMINAL
TERMINAL
BOARD
L1
N
S1
2
3
GROUNDING
TERMINAL
EVAPORATOR
(FOR Z20/25/35/42TKEW &
XZ20/25/35TKEW ONLY)
LIGHT SENSOR
SEN201
JP401
R410
JP402
R411
JP403
R412
JP404
R413
GND-A
AK
LED201
AK
LED202
AK
13V
LED203
R221
AK
LED204
R222
ELECTRONIC
CONTROLLER
(RECEIVER &
DISPLAY)
Y/G
BR
GR
Y
W
Y/G
LIGHT SENSOR
ELECTRONIC
CONTROLLER
(RECEIVER)
5V
13V
R221
R222 0
ELECTRONIC
CONTROLLER
(DISPLAY)
5V
C
E
R414
R204
R214
C
Q1
E
GND-A
20A 250V
FUSE500
(GRAY)
ACN501
IC201
GP1UM262R
GND
AK
LED201 White
AK
LED202 White
AK
LED203 White
AK
LED204
White
IC401
VOUT
VCC
GND
45
GND-A
R201
R202
R203
B
Q1
45
GND-A
1
2
3
R223
(WHITE)
ACN502
FAN MOTOR
R209
1
Vout
2
Vcc
3
GND
GND
GND-A
R204 1k
R214
C
E
5V
R409
47
C401
47u
6.3V
KRE
5V
GND-A
47
KRE
C201
47u
6.3V
GND-A
R201 1k
R202 1k
R203 1k
5V_
B
RY-PWR
R213
C402
0.01u
16V
B1
(YELLOW)
AC302
JP204
5V
Power
Timer
nanoe
econavi
GND
CN-DISP
(WHT)
43
KB
C202
0.01u
16V
R214
5V
Power
Timer
nanoe/nanoe-G
econavi
gnd
GND-A
1
8
20A 250V
FUSE501
(BROWN)
ACL501
M
5V_
1.0k
1%
CN-DISP
W
W
W
W
W
W
W
W
RY-PWR2
TH303
1
CN-RCV
(WHT)
GND-A
(WHT)
NTC
RY-PWR
4
1
1
6
1
4
1
6
2
(BLACK)
BLACK
CN-RCV
(YLW)
CN-DISP
(YLW)
AC306
W
Y
B
W
BL
R
W
W
W
W
W
W
W
W
W
W
R
G
23
ELECTRONIC CONTROLLER (SUB)
RY-PWR2
CN-DATA 1
(WHT)
3
1
WWW
12V
CN-DATA 1
3
1
(YLW)
12V
43
RY-PWR
AC306 (BLK)
FUSE301
T3.15A L250V
AC303 (WHT)
AC304 (RED)
G301 (GRN)
COMMUNICATION
7
CIRCUIT
6
CN-FM (WHT)
5
4
1
5V
CN-RCV
(YLW)
1
4
5V
R89
NONE
R40
0
JR4
1
0
R58
C3
0.1u
1%
16V
6
B1
CN-DISP
(YLW)
IC05
116
IC05
R46
R47
2
15
IC05
68 1/2W 68 1/2W
14
3
IC05
13
4
IC05
12
5
IC05
11
6
IC05
10
7
IC05
116
2
3
4
5
6
7
IC06
116
IC06
2
15
IC06
14
3
IC06
13
4
IC06
12
5
IC06
11
6
IC06
10
7
IC06
R62
15k
1%
IC03
ELECTRONIC CONTROLLER (MAIN)
1M
IC03
IC03
IC03
IC03
IC03
IC03
IC03
G7
15
WWWWW
1
G7
5V
R112
10k
NOISE FILTER
CIRCUIT
RECTIFICATION
CIRCUIT
R78
1k
C41
C44
1000p
1000p
C14
1000p
50V
B1
5V
R90
10k
C52
1000p
50V
B1
BZ01
A48PKM17EPP
1
2
R30
1k
15
14
13
12
11
10
R61
C25
20k
1u
1%
16V
B3
C65
0.1u
25V
B1
R109
33k
C66
1000p
50V
JB
C67
1000p
50V
JB
CN-DATA 2
(WHT)
5
CN-DATA 2
(YLW)
SW01
R77
10k
R75
1k
F301
32V
500mA
R82
10k
C51
1000p
50V
B1
5V
C27
1u
16V
B3
F303
32V
Q18
S
R108
33k
Q21
4.7k
B
10K
50V
100mA
12V
R113
1k
C67
1000p
50V
5V
CN-MSENS
(BLU)
R74
10k
C40
0.1u
5V
R37
R54
10k
270
C45
12V
CN-RMT
5V
(WHT)
L6 L5
C57
CN-CNT
(WHT)
12V
CN-STM1
(WHT)
12V
CN-STM2
(YLW)
12V
CN-STM3
(BLU)
5V
CN-TH
(RED)
C28
R63
1u
20k
16V
1%
B3
CN-NANO
500mA
(GRN)
4
D
G
Q20
C
C
4.7k
10K
E
E
G7
Y
4
O
R
BR
1
G2
5V
C49
4
1
5
GR
W
BR
G
Y
1
1
BR
R
O
Y
P
5
BR
1
R
O
Y
P
5
1
BR
R
O
Y
P
5
6
tº
tº
tº
1
P
1
B
CN1
W
3
BL
(WHT)
1
G7
B
50V
100mA
ELECTRONIC
CONTROLLER
(COMPARATOR)
CN-MSENS
(BLU)
1
4
5
5V_3
KB
5V_3
C404
0.1u
NJM2903M (TE1)
25V
R401
27.0k
1%
R402
10.0k
1%
KB
R403
C402
13.0k
0.1u
1%
25V
G2
5V_3
KB
C403
0.1u
NJM2903M (TE1)
25V
5
1
1
UP DOWN LOUVER
M
MOTOR (OUTER)
5
1
LEFT RIGHT
M
LOUVER MOTOR
5
1
M
UP DOWN LOUVER
MOTOR (INNER)
5
PIPING TEMPERATURE SENSOR 2 (THERMISTOR)
PIPING TEMPERATURE SENSOR 1 (THERMISTOR)
SUCTION TEMPERATURE SENSOR (THERMISTOR)
1
W
CN2
(WHT)
HIGH VOLTAGE
POWER SUPPLY
6
7
IC402
5
VCC
2
8
1
IC402
4
3
GND
G2
7
IC401
VCC
8
1
IC401
4
3
GND
G2
NANOE
BL
2
GENERATOR
W
5V_3
W
W
W
4
CN-SENS2
(YLW)
G2
6
5V_3
5
2
CN-SENS1
G2
(WHT)
1
W
W
W
3
Sensor (Thermistor)
70
60
50
40
30
20
Resistance (kΩ)
10
0
Characteristics
Pipe temp. Sensor
Intake Air Temp. Sensor
-10 0 10 20 30 40 50
Temperature (°C)
CN-SENS2
(YLW)
11
C410
1000p
3
50V
KB
G2
CN-SENS1
(YLW)
1
C410
1000p
3
50V
KB
G2
5V_3
ELECTRONIC
CONTROLLER
(ECO SENSOR)
5V_3
ELECTRONIC
CONTROLLER
(ECO SENSOR)
38
Page 39
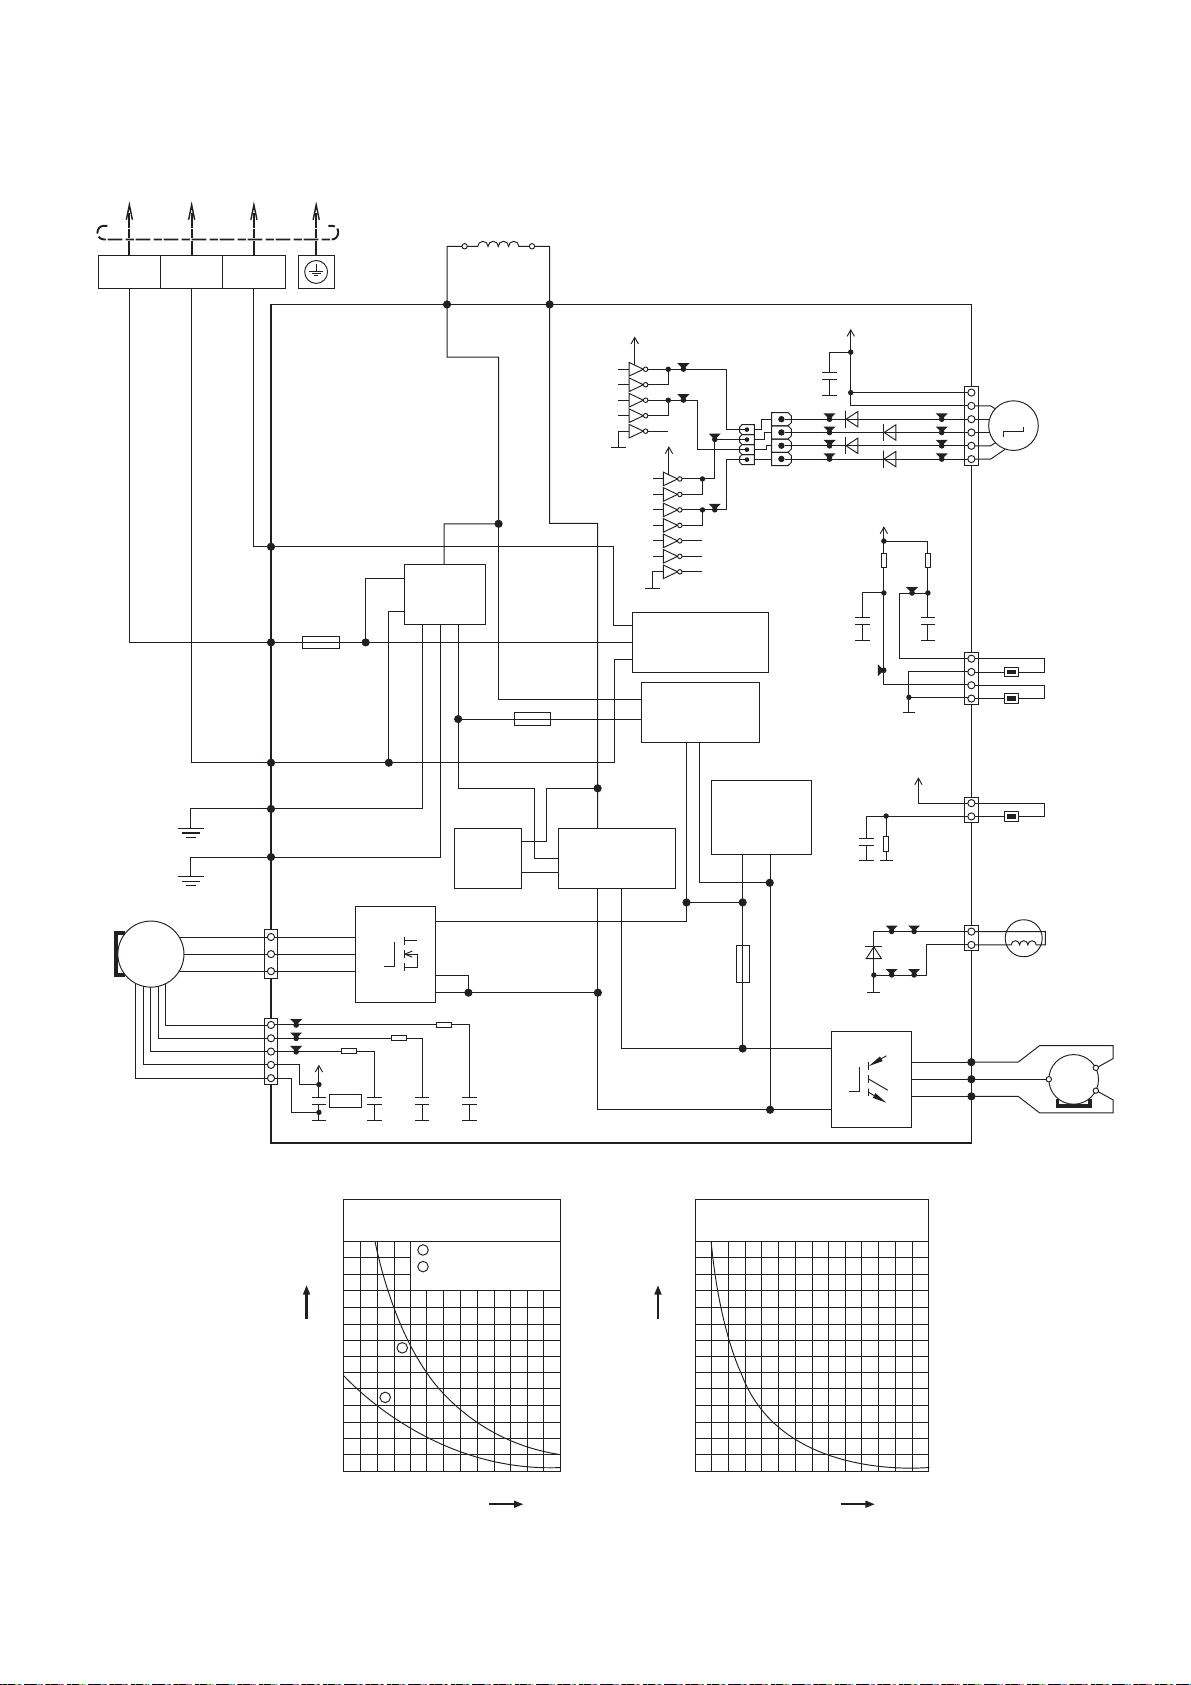
10.2 Outdoor Unit
10.2.1 CU-Z20TKE
TO INDOOR UNIT
REACTOR
BLK
FAN MOTOR
MS
3 ~
WHT
RED
GRN
GRN
32S1
1
3
5
DATA
(RED)
AC-BLK
(BLK)
FUSE103
(20A 250V)
AC-WHT
(WHT)
FG1
(GRN)
FG2
(GRN)
CN-MTR2
(WHT)
CN-MTR1
1
402
2
403
3
404
4
5V
5
+
TERMINAL
BOARD
GRY
RAT2
(GRY)
ELECTRONIC
CONTROLLER
NOISE
FILTER
CIRCUIT
IC19
10
W
U
V
14
16
R312
R313
1k
1k
C186
0.01µ
*C178
50V
G2
G2G2
R311
1k
C188
0.01µ
50V
FUSE104
T3.15A L250V
PFC
CIRCUIT
C187
0.01µ
50V
G2
GRY
RAT1
(GRY)
13V
VCC
1
2
3
IC4
4
5
G2
RECTIFICATION
CIRCUIT
168
9
16
15
170
14
13
12
169
13V
VCC
9
1
16
15
2
171
14
3
IC5
13
4
512
6711
10
G2
COMMUNICATION
CIRCUIT
RECTIFICATION
CIRCUIT
FUSE101
T3.15A L250V
CN1
16
10
14
12
CN1
SWITCHING
POWER
SUPPLY
CIRCUIT
16
10
14
12
C174
0.1µ
25V
13V
6
D74
D76
1%
419
G2
R1
1%
U
V
W
63
64
30
31
G2
5V
CN-TANK
828
829180
U (RED)
V (BLU)
W (YLW)
5
4
M
3
2
1
CN-STM
R12
15.0k
1%
C10
1µ
10V
OUTDOOR TEMP.
SENSOR (15kΩ 3950)
1
2
3
4
CN-TH1
PIPE TEMP.
WHITE
SENSOR1 (4.96kΩ 3800)
1
3
TANK TEMP.
WHITE
SENSOR (50kΩ 3950)
3
1
CN-HOT
4-WAYS VALVE
RED
BLU
YLW
EXPANSION
VALVE
MS
3 ~
G2
D73
835
836
D75
837
838
5V
R11
15.8k
C9
1µ
10V
G2
420
C5
1µ
4.99k
10V
G2
G2
179
D20
G2
Q1
P
N
COMPRESSOR
70
60
50
40
30
Resistance (kΩ)
20
10
0
-10 0 10
Sensor (Thermistor)
Characteristics
1
Outdoor Air Sensor
2
Outdoor Heat Exchanger
Sensor
1
2
20 30 40 50
o
Temperature (
C)
39
Compressor Temp. Sensor
(Thermistor) Characteristics
70
60
50
40
30
Resistance (kΩ)
20
10
0
20 40 60
Temperature (
80 100 120 140
o
C)
Page 40
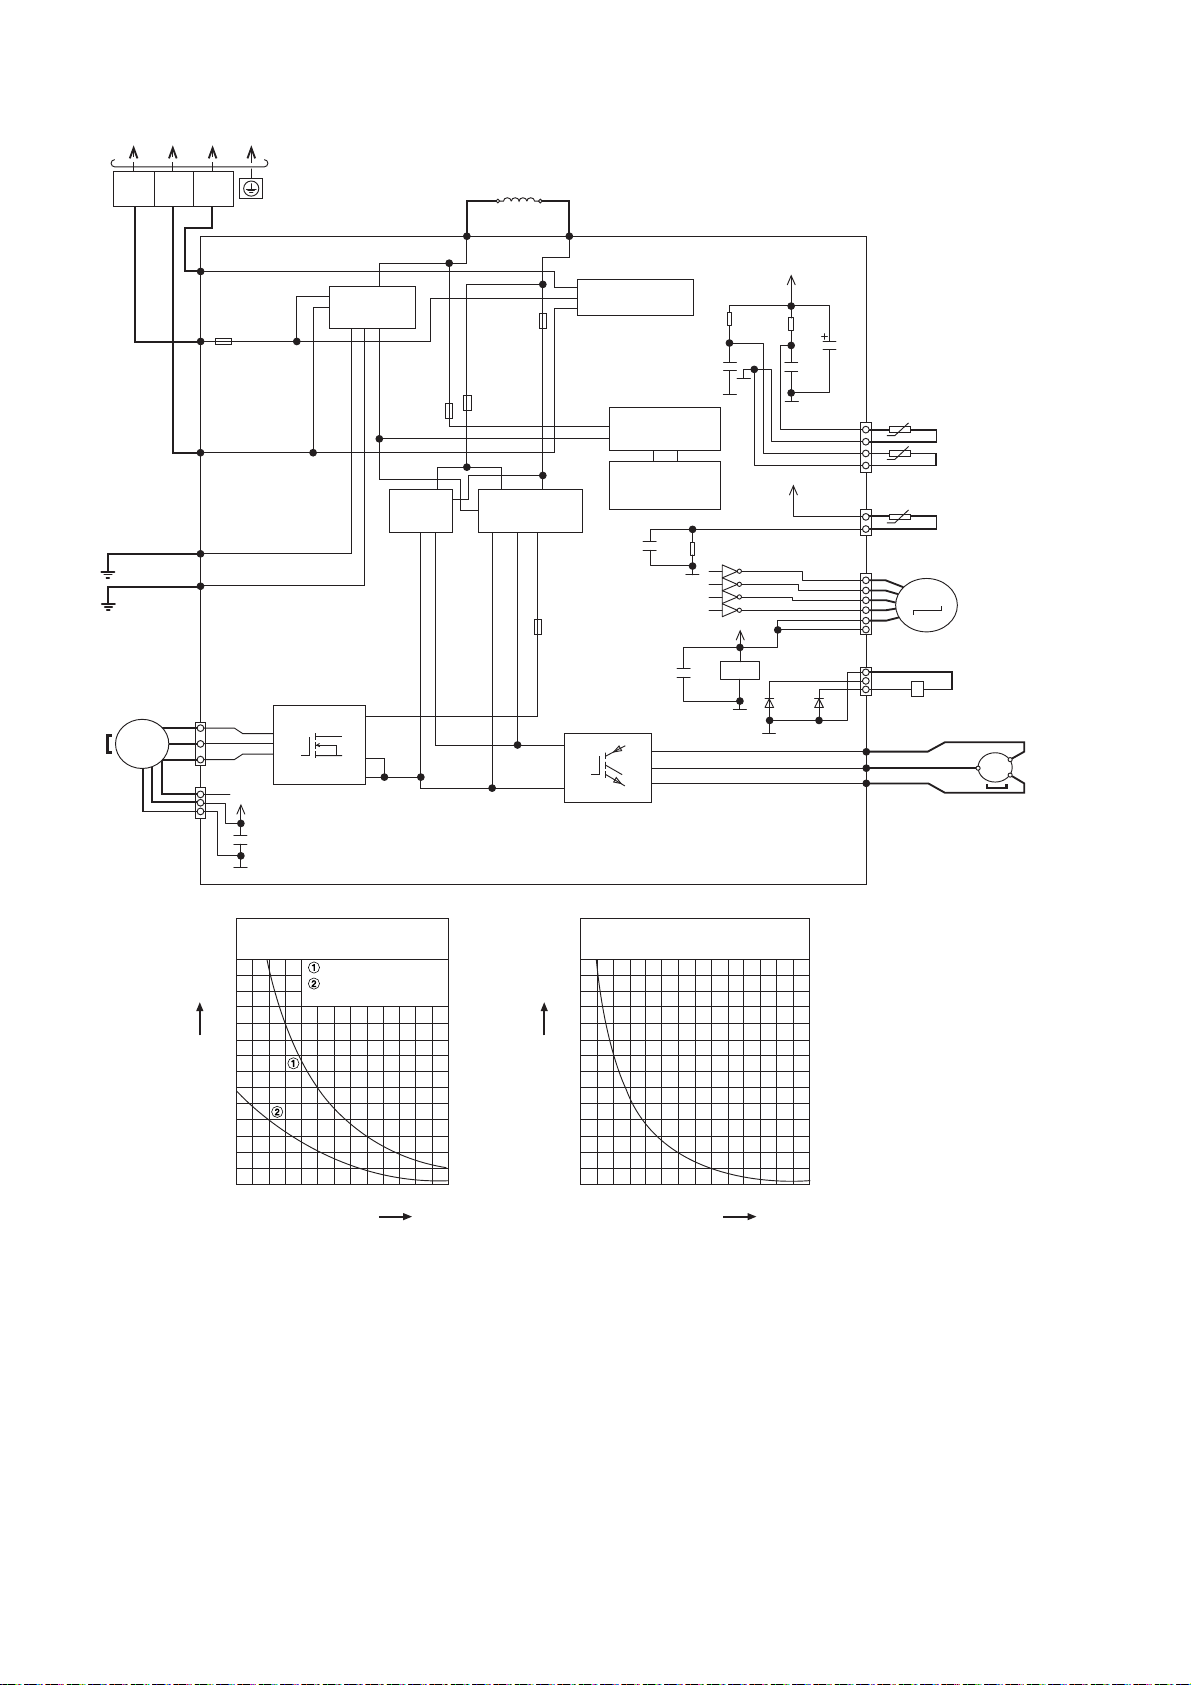
10.2.2 CU-Z25TKE CU-Z35TKE CU-Z50TKE CU-Z71TKE
TO INDOOR UNIT
FAN
MOTOR
S1 2 3
RED
BLK
WHT
GRN
GRN
MS
3~
DATA
(RED)
AC-BLK
(BLK)
FUSE 1
FOR Z25/35TK
(20A 250V)
FOR Z50/71TK
(25A 250V)
AC-WHT
(WHT)
FG1 (GRN)
FG2 (GRN)
CN-MTR2
(WHT)
1
3
5
CN-MTR1
(RED)
1
5V
3
C401
0.1u
25V
B1
G5
TERMINAL
BOARD
W
U
V
IC19
REACTOR
GRY GRY
RAT2
(GRY)
NOISE FILTER
CIRCUIT
FUSE 8
T3.15A
L250V
PFC
CIRCUIT
(20A 250V)
FUSE 6
(20A 250V)
RECTIFICATION
10
14
16
ELECTRONIC CONTROLLER
FUSE 5
CIRCUIT
RAT1
(GRY)
COMMUNICATION
FUSE 3
T3.15A L250V
Q1
P
N
CIRCUIT
RECTIFICATION
CIRCUIT
SWITCHING
POWER
SUPPLY CIRCUIT
C99
R28
1u
4.99k
10V
1%
B1
U (RED)
U
V (BLU)
V
W (YLW)
W
G5
C921
15.8k
0.1u
50V
B3
R21
1%
C9
1u
10V
B1
4
3
2
1
G5
G5
IC8
15V
COMMON
GND
G4A
5V
R22
15k
1%
15
16
17
18
C10
10V
G5
5V
1u
B1
CN-TH1
(WHT)
CN-TANK
(WHT)
CN-STM1
(WHT)
C98
470u
10V
KY
OUTDOOR AIR TEMP. SENSOR
(THERMISTOR)
1
tº
tº
4
PIPING TEMP. SENSOR
(THERMISTOR)
1
tº
3
COMPRESSOR TEMP.
SENSOR (THERMISTOR)
1
M
ELECTRO-MAGNETIC COIL
(EXPANSION VALVE)
6
10
9
IC8
G4A
D57
NONE
AK
CN-HOT
(WHT)
D59
AK
YLW
1
YLW
3
ELECTRO-MAGNETIC
COIL
(4-WAY VALVE)
RED
BLU
YLW
MS
3~
COMPRESSOR
70
60
50
40
30
Resistance (kΩ)
20
10
0
-10 0 10
Sensor (Thermistor)
Characteristics
Outdoor Air Sensor
Outdoor Heat Exchanger
Sensor
20 30 40 50
o
Temperature (
C)
Compressor Temp. Sensor
(Thermistor) Characteristics
70
60
50
40
30
Resistance (kΩ)
20
10
0
20 40 60
Temperature (
80 100 120 140
o
C)
40
Page 41
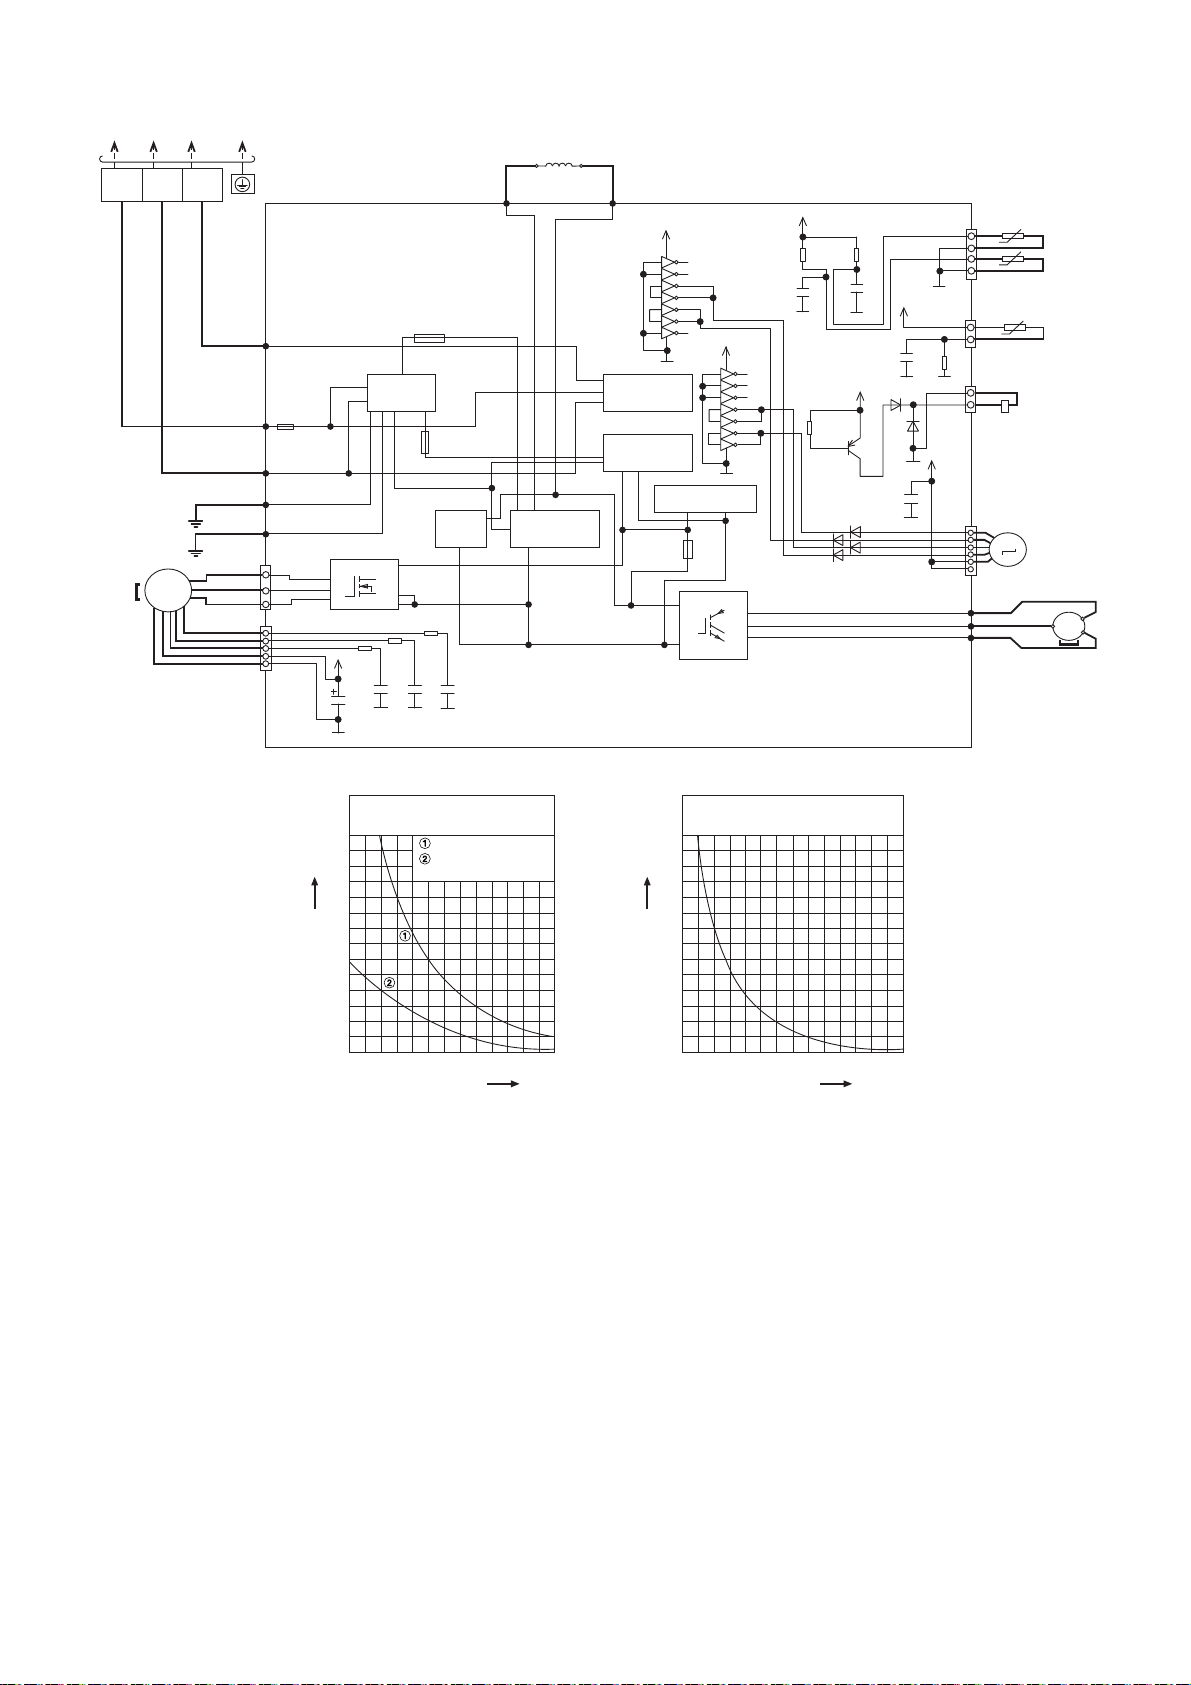
10.2.3 CU-Z42TKE
TO INDOOR UNIT
GRN
GRN
TERMINAL
BOARD
DATA
(RED)
AC-BLK
(BLK)
FUSE101
(20A 250V)
AC-WHT
(WHT)
FG 1
(GRN)
FG 2
(GRN)
1
3
CN-MTR2
5
1
5
CN-MTR1
(WHT)
(WHT)
W
U
V
5V
G5
S1 2 3
BLK
FAN
MOTOR
WHT
MS
3~
RED
NOISE FILTER
CIRCUIT
IC20
R167
1k
C173
NONE
G5 G5 G5
10
14
16
R166
C175
0.01u
KB
50V
1k
FUSE104
(15A 250V)
T3.15A L250V
R156
1k
C177
0.01u
KB
50V
FUSE102
PFC
CIRCUIT
C176
0.01u
KB
50V
GRY
RAT2
(GRY)
REACTOR
RECTIFICATION
CIRCUIT
GRY
RAT1
(GRY)
13V
VCC
9
1
IC12
2
IC12
3
IC12
4
IC12
5
IC12
6
IC12
7
IC12
GND
8
G2
COMMUNICATION
CIRCUIT
RECTIFICATION
CIRCUIT
SWITCHING POWER
SUPPLY CIRCUIT
FUSE103
T3.15A L250V
5V
R11
R12
15.8k
16
15
14
13
12
11
10
13V
VCC
1
IC19
2
IC19
3
IC19
4
IC19
5
IC19
6
IC19
7
IC19
8
G2
Q1
P
N
9
GND
W
16
15
14
13
12
11
10
U
V
U (RED)
V (BLU)
W (YLW)
C6
1u
KB
10V
G8
15.0k
1%
G8
4V
e
R18
10k
b
Q15
c
D62
D60
CN-TH
(WHT)
1%
C7
1u
KB
5V
10V
CN-TANK
(WHT)
C3
1u
R1
KB
4.99k
10V
1%
G8
D11
D9
13V
G2
C190
0.1u
KB
25V
G2
D63
D61
ELECTRONIC CONTROLLER
G8
G8
CN-HOT
(WHT)
CN-STM
(WHT)
1
4
1
3
1
3
1
6
OUTDOOR AIR TEMP.
SENSOR (THERMISTOR)
tº
tº
PIPING TEMP. SENSOR
(THERMISTOR)
tº
COMP. TEMPERATURE
SENSOR (THERMISTOR)
YLW
ELECTRO-MAGNETIC
COIL
YLW
(4-WAYS VALVE)
ELECTRO-MAGNETIC
M
COIL
(EXPANSION VALVE)
RED
BLU
YLW
MS
3~
COMPRESSOR
70
60
50
40
30
Resistance (kΩ)
20
10
0
-10 0 10
Sensor (Thermistor)
Characteristics
Outdoor Air Sensor
Outdoor Heat Exchanger
Sensor
20 30 40 50
o
Temperature (
C)
Compressor Temp. Sensor
(Thermistor) Characteristics
70
60
50
40
30
Resistance (kΩ)
20
10
0
20 40 60
Temperature (
80 100 120 140
o
C)
41
Page 42
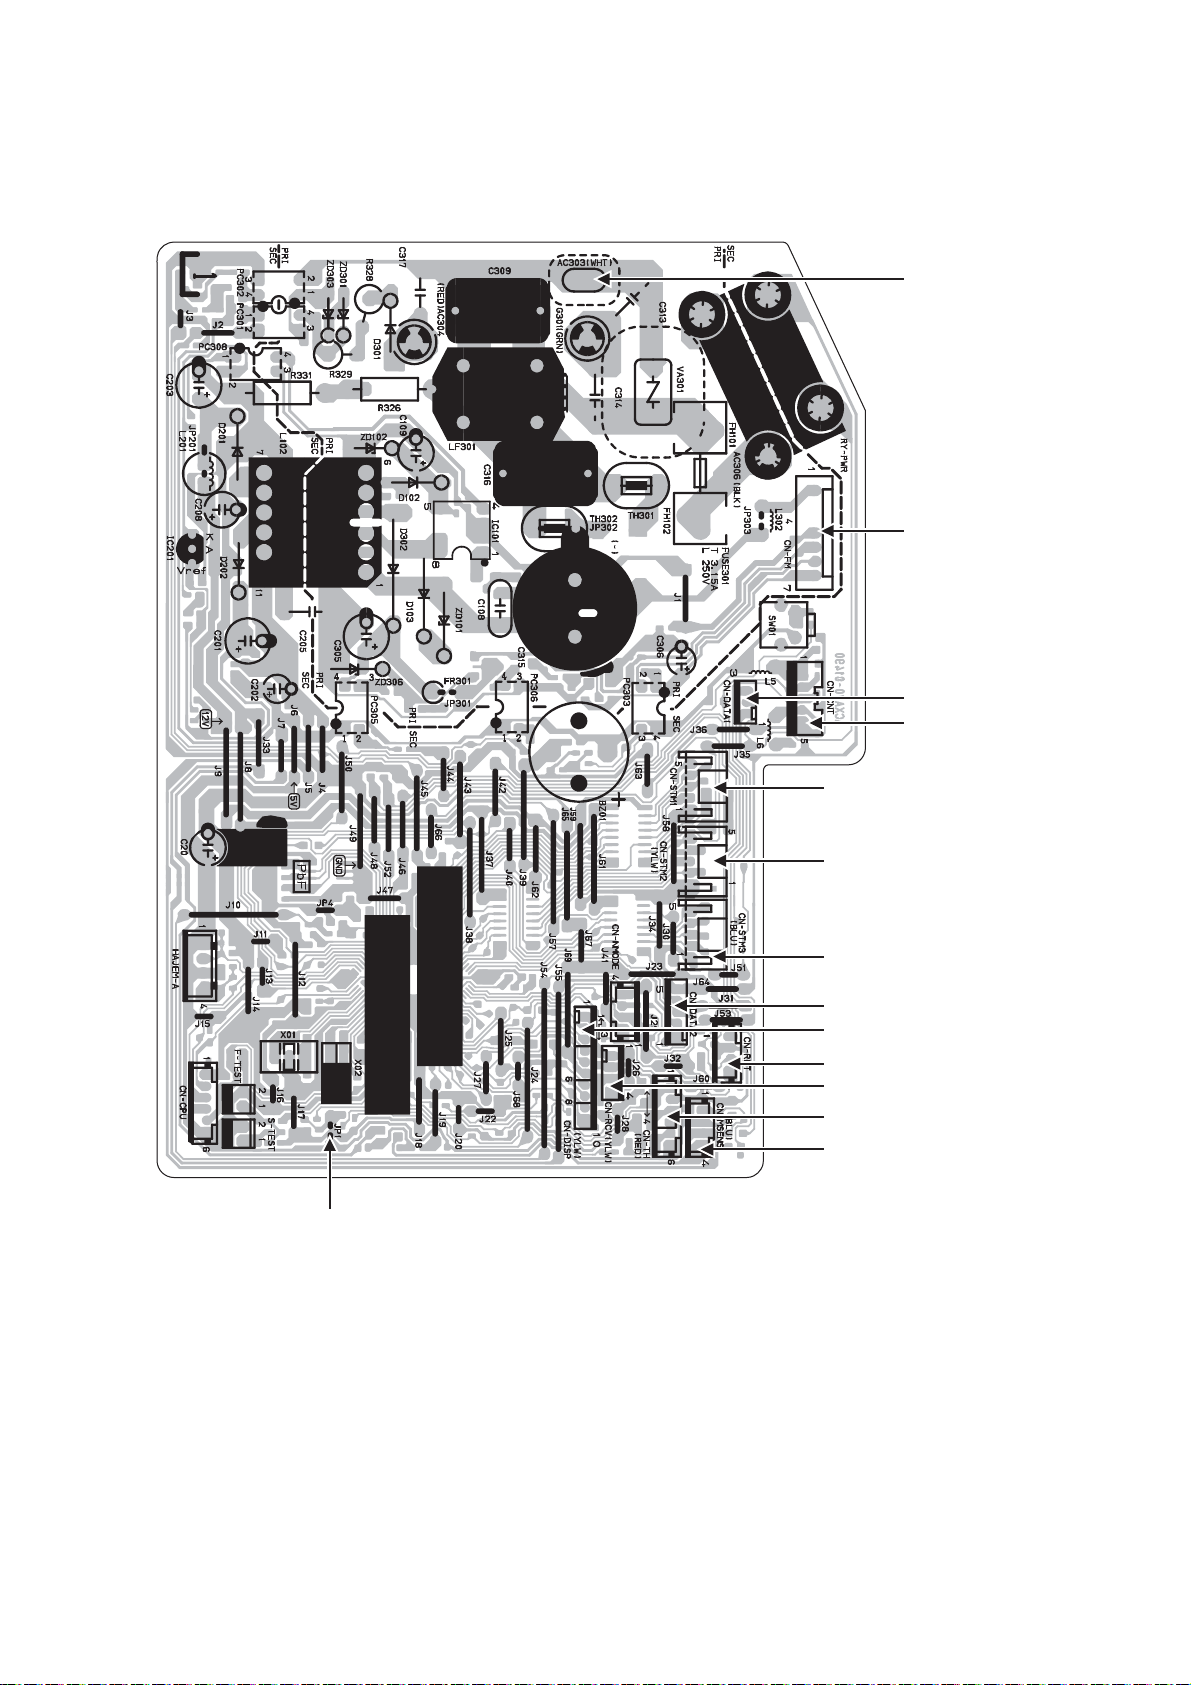
11. Printed Circuit Board
11.1 Indoor Unit
11.1.1 Main Printed Circuit Board
AC303
CN-FM
JP1 (Random Auto Restart enable/disable)
CN-DATA1
CN-CNT
CN-STM1
CN-STM2
CN-STM3
CN-DATA2
CN-DISP
CN-RMT
CN-RCV
CN-TH
CN-MSENS
42
Page 43
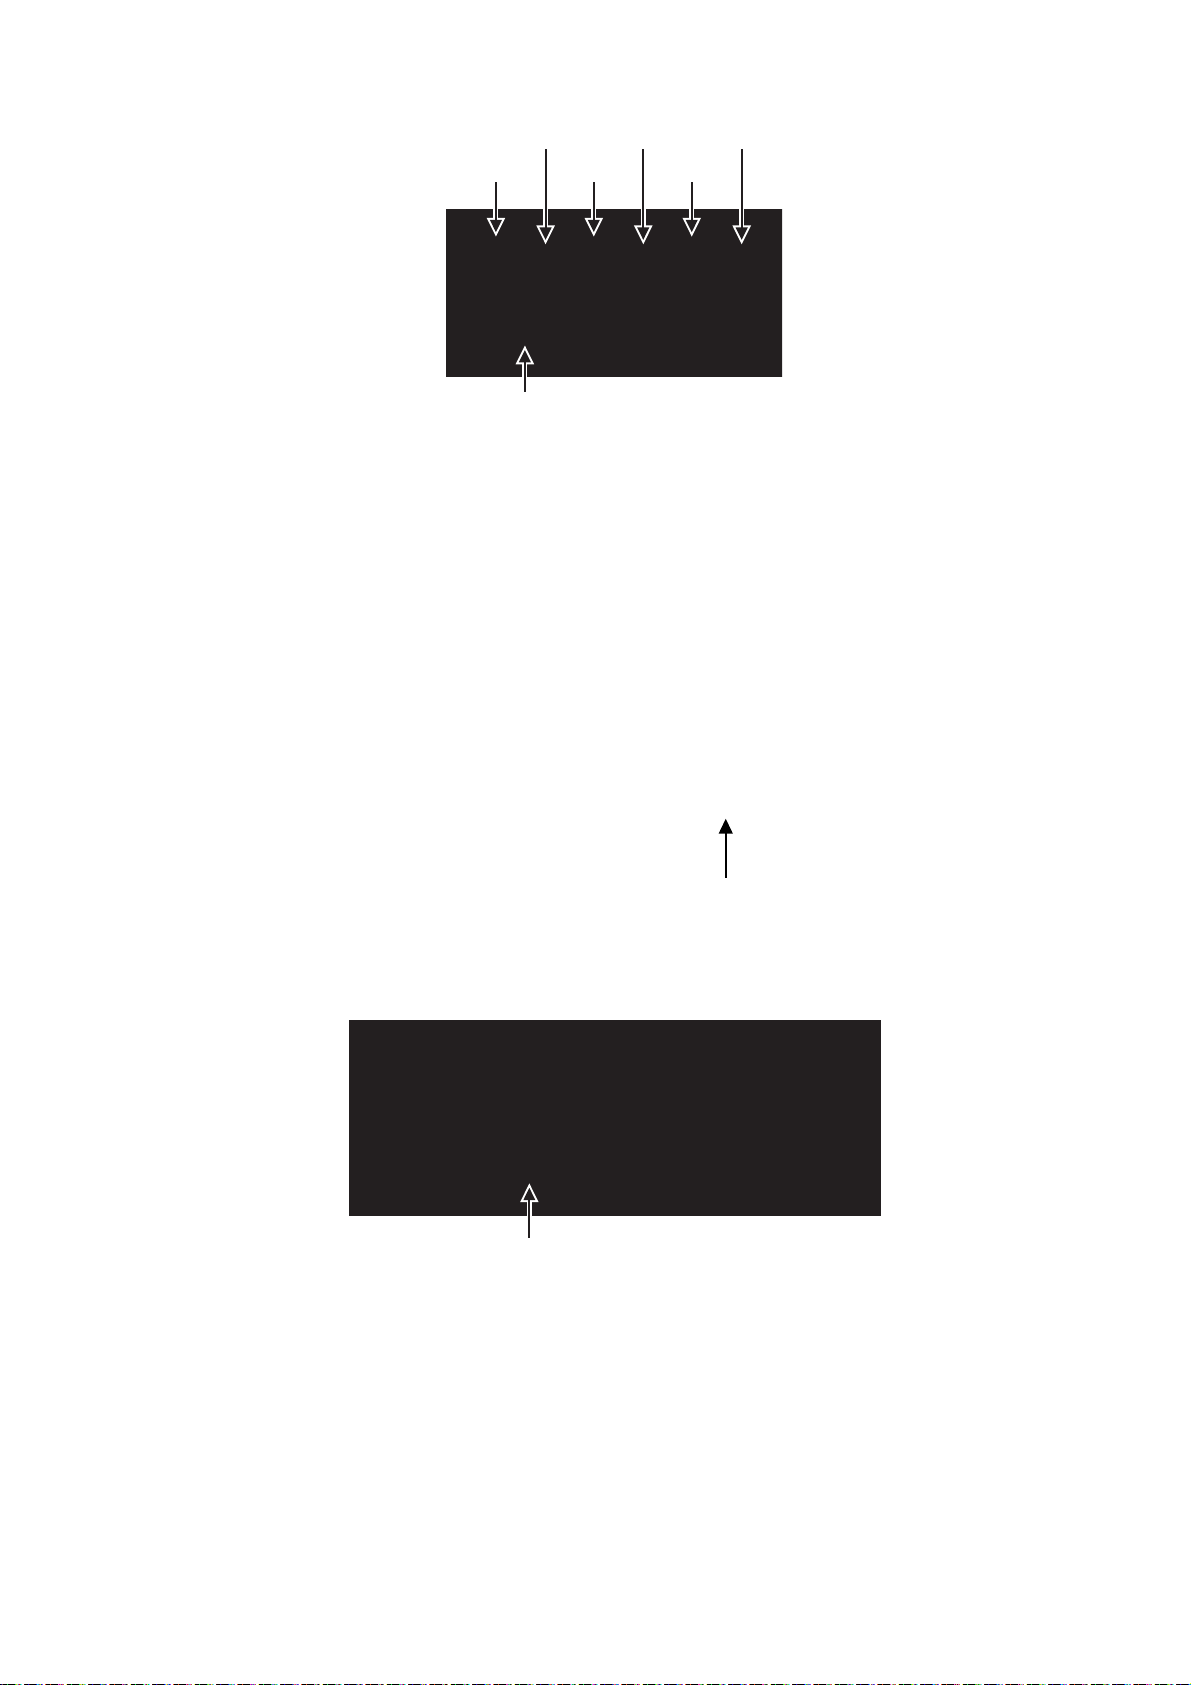
11.1.2 Indicator Printed Circuit Board
LED205
LED206 LED204 LED202
LED201LED203
CN-DISP
11.1.3 Receiver Printed Circuit Board
CN-RCV
11.1.4 High Voltage Power Supply Printed Circuit Board
CN2
43
Page 44
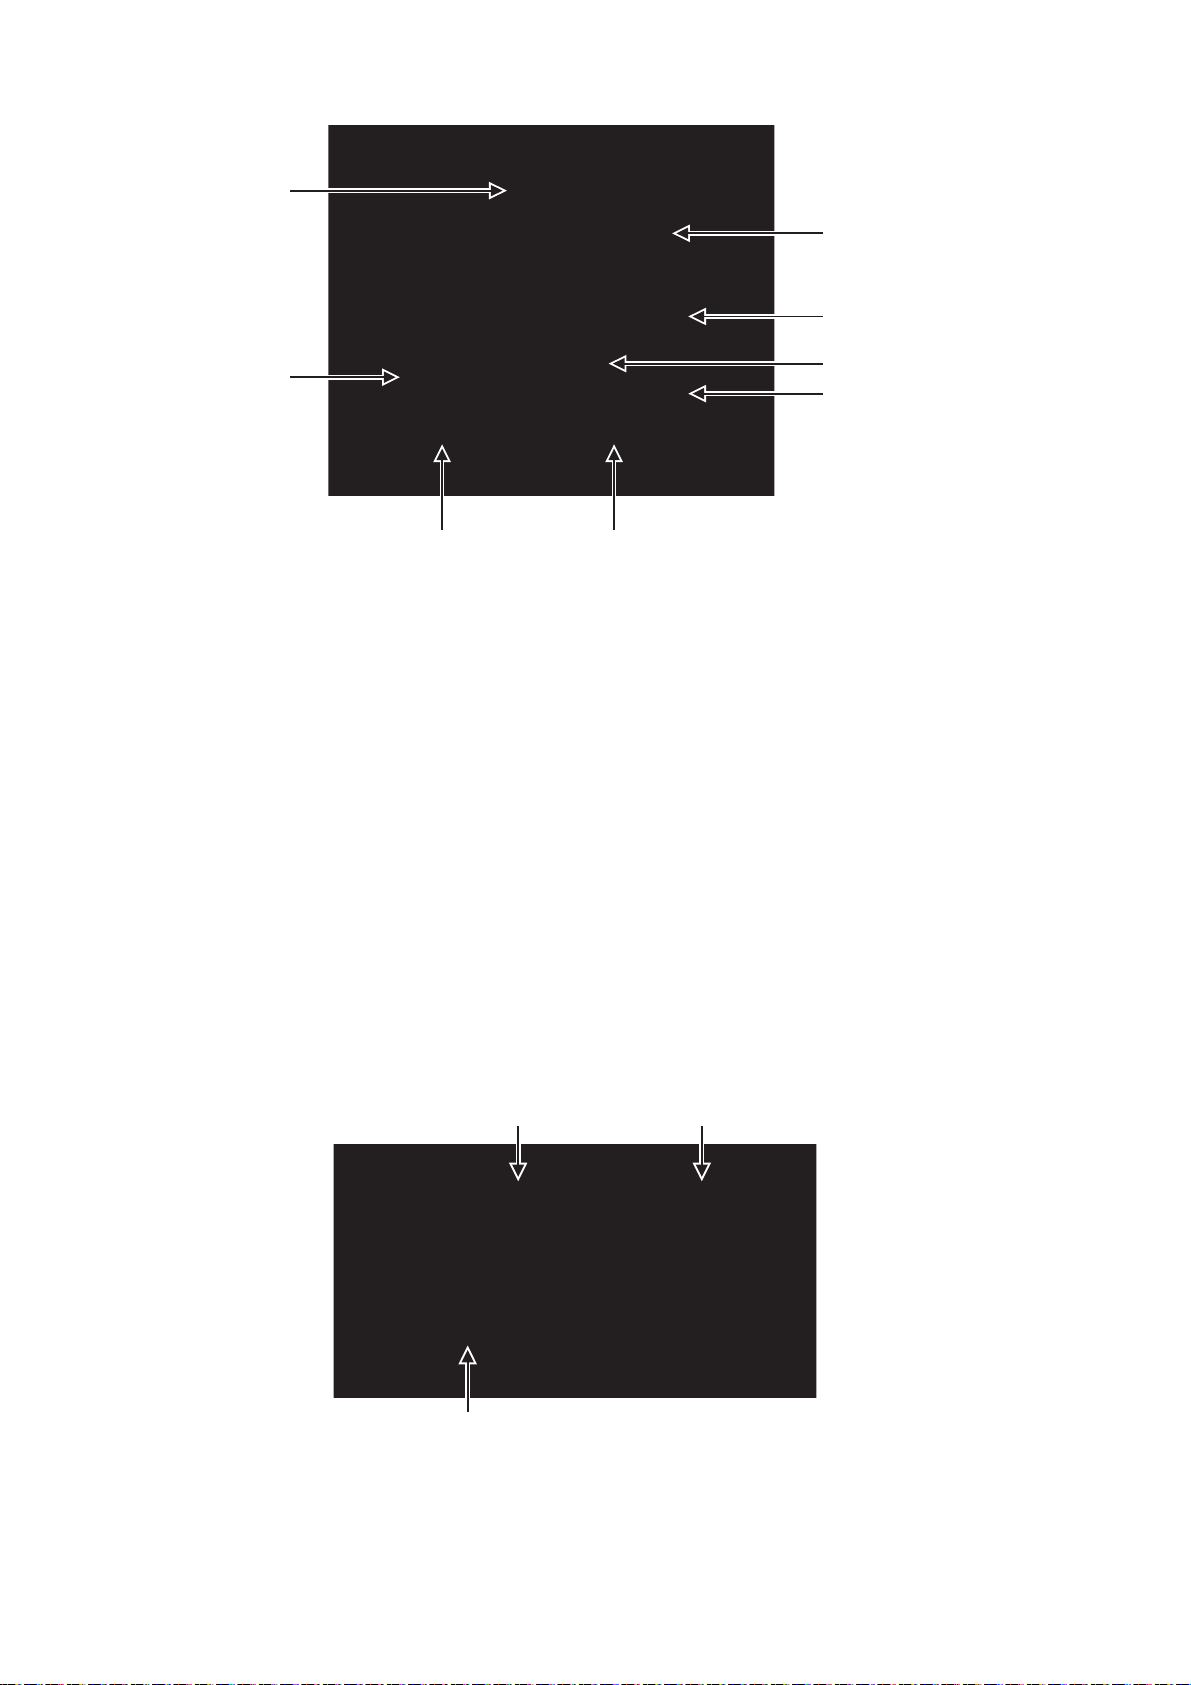
11.1.5 Sub Printed Circuit Board
A
A
C302
ACL501
ACN501
C306
CN-NANO CN-DATA2
11.1.6 Human Activity Sensor Printed Circuit Board
CN-DATA1
ACN502
11.1.7 Comparator Printed Circuit Board
CN-MSENS
CN-SENS2 CN-SENS1
44
Page 45
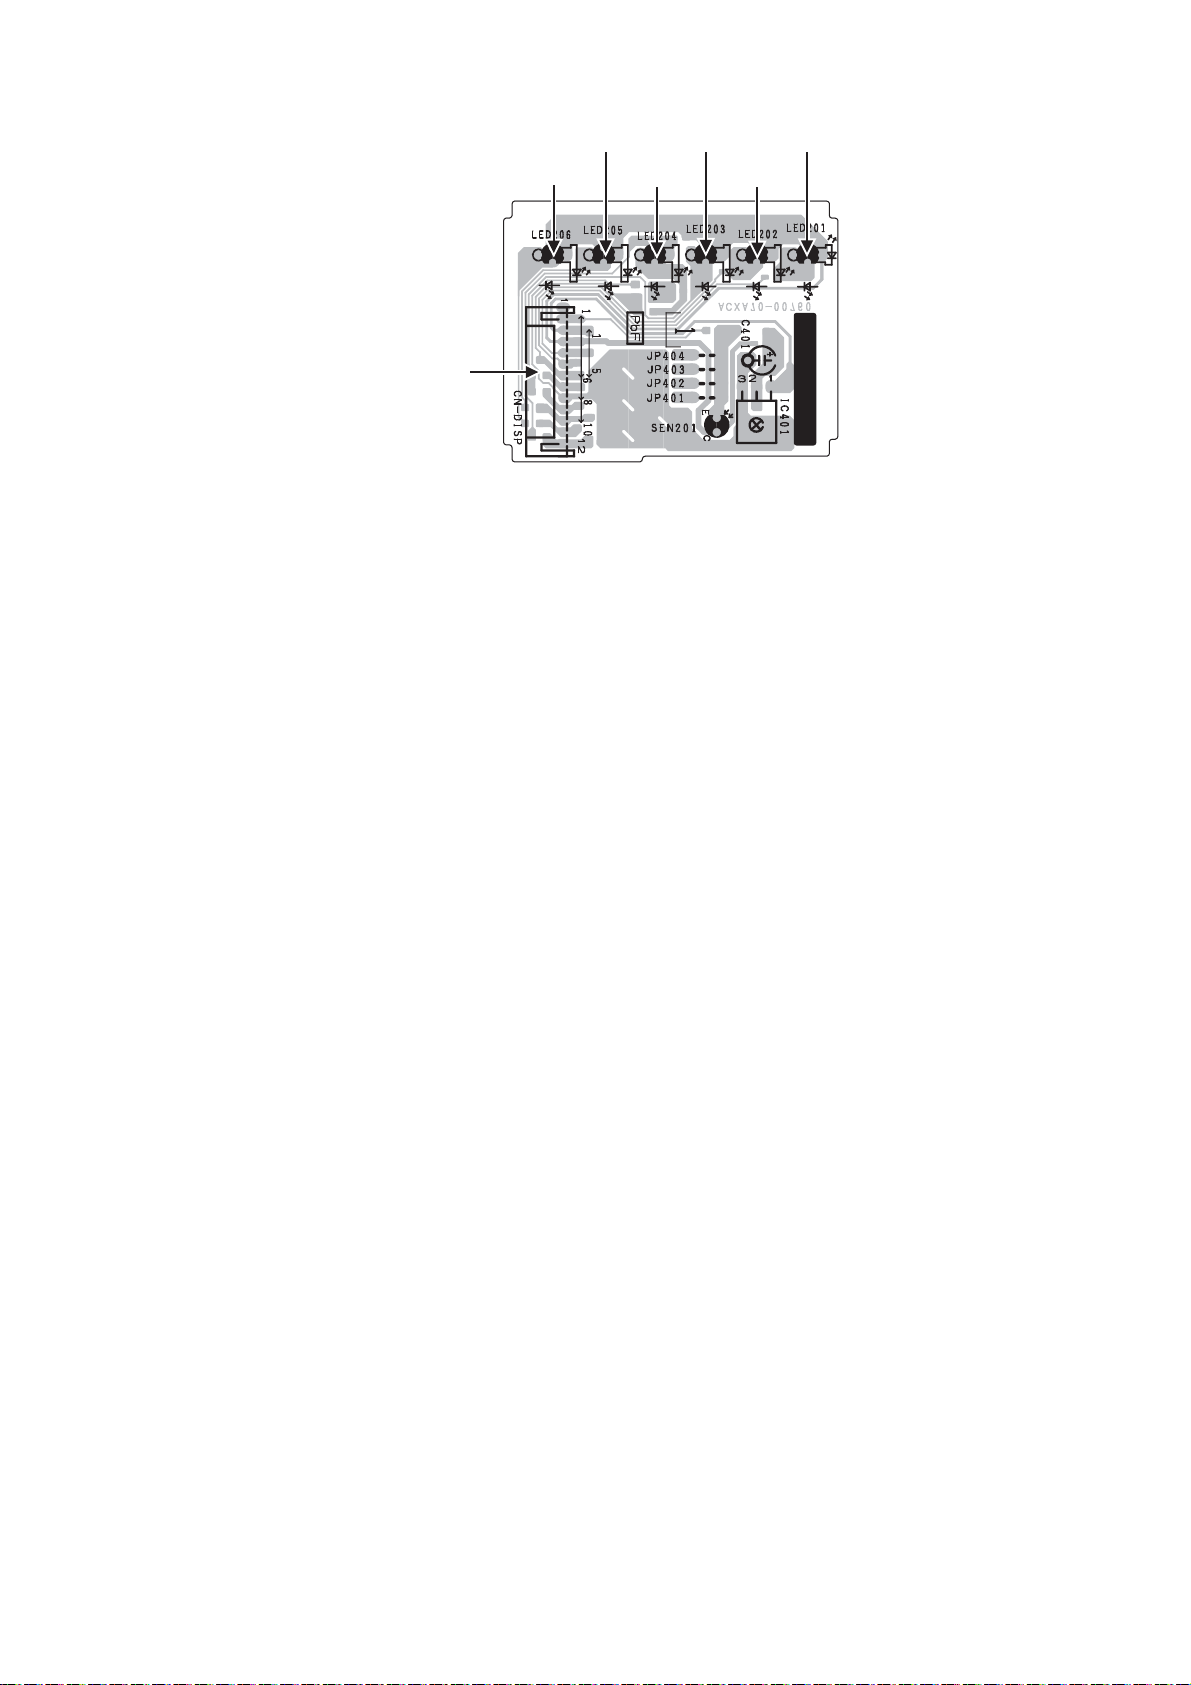
11.1.8 Indicator & Receiver Printed Circuit Board
LED205 LED203 LED201
CN-DISP
LED206
LED204
LED202
45
Page 46
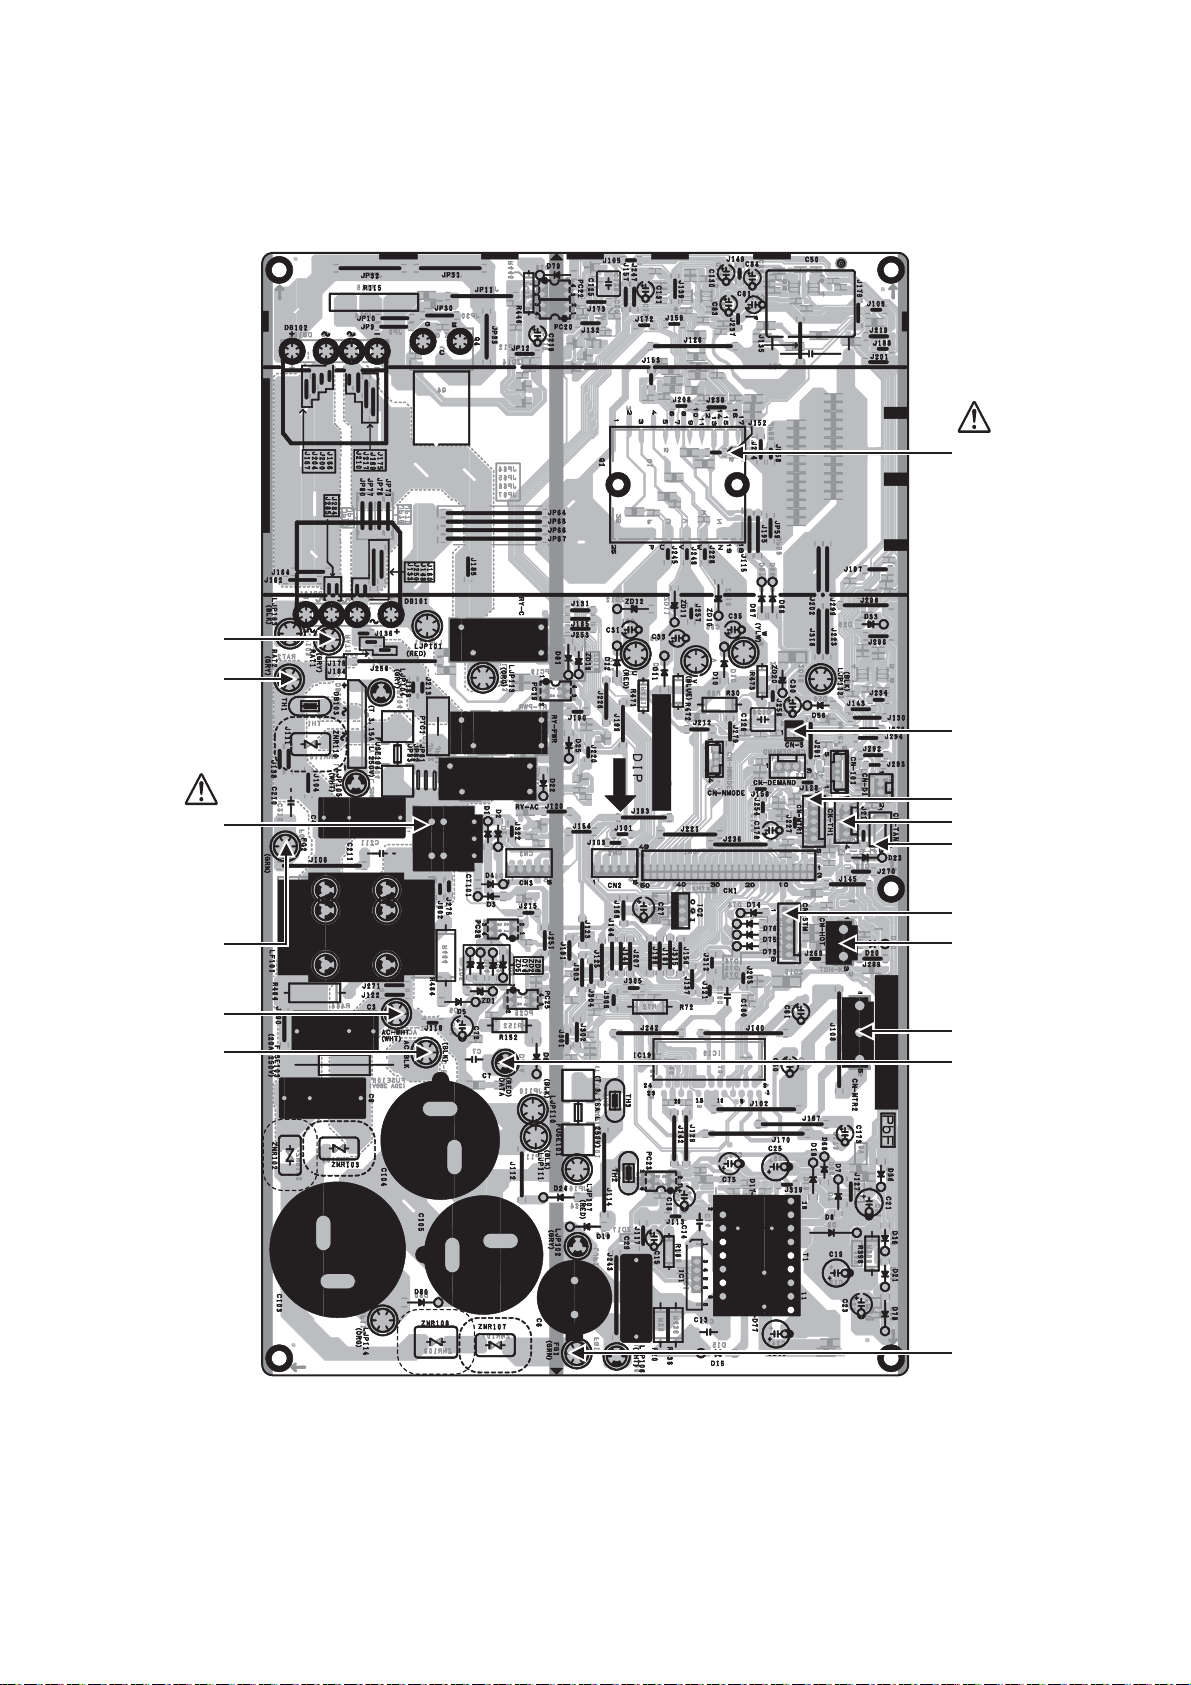
11.2 Outdoor Unit
11.2.1 Main Printed Circuit Board
11.2.1.1 CU-Z20TKE
RAT1
RAT2
POWER
TRANSISTOR
(IPM)
CURRENT
TRANSFORMER
(CT)
FG2
AC-WHT
AC-BLK
CN-S
CN-MTR1
CN-TH1
CN-TANK
CN-STM
CN-HOT
CN-MTR2
DATA
FG1
46
Page 47
11.2.1.2 CU-Z25TKE CU-Z35TKE CU-Z50TKE CU-Z71TKE
POWER
TRANSISTOR
(IPM)
CURRENT
TRANSFORMER
(CT)
DATA
AC-WHT
AC-BLK
CN-MTR2
CN-MTR1
CN-STM1
CN-TH1
CN-HOT
CN-TANK
47
Page 48
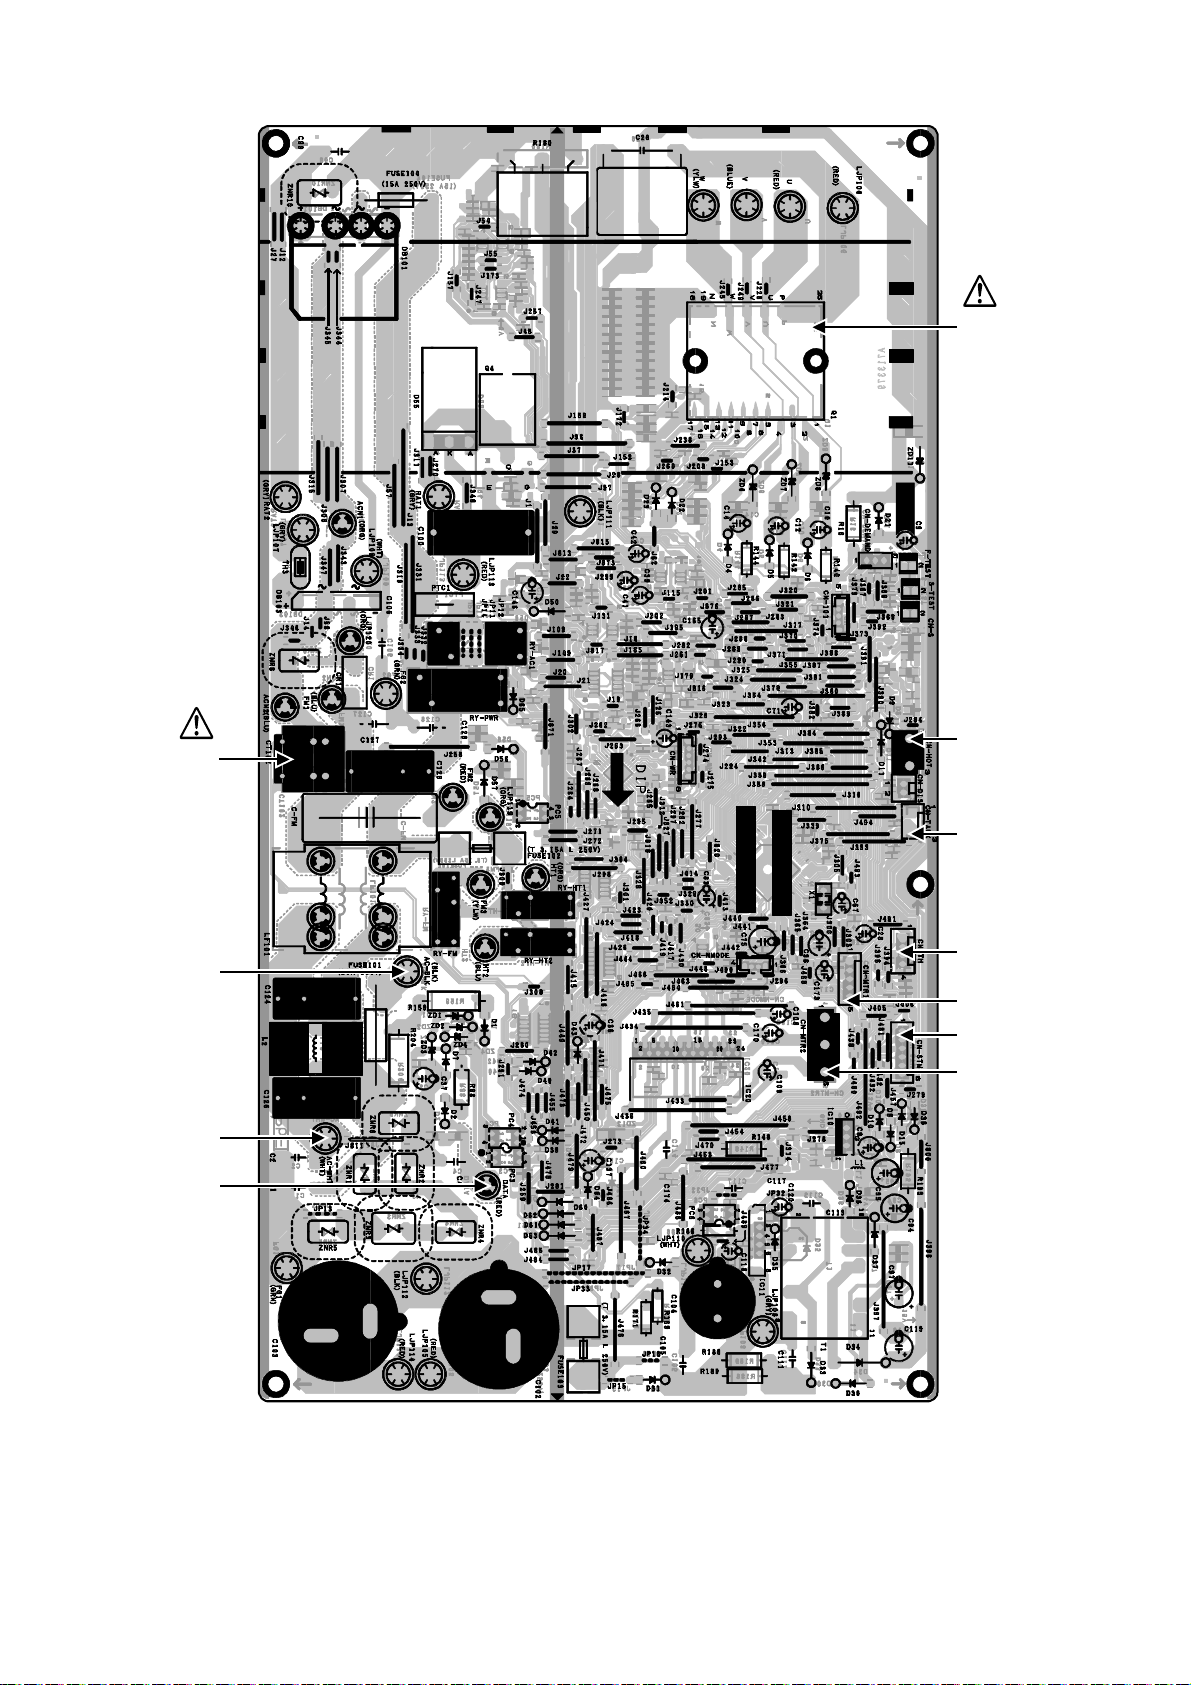
11.2.1.3 CU-Z42TKE
POWER
TRANSISTOR
(IPM)
CURRENT
TRANSFORMER
(CT)
AC-BLK
AC-WHT
DATA
CN-HOT
CN-TANK
CN-TH
CN-MTR1
CN-STM
CN-MTR2
48
Page 49
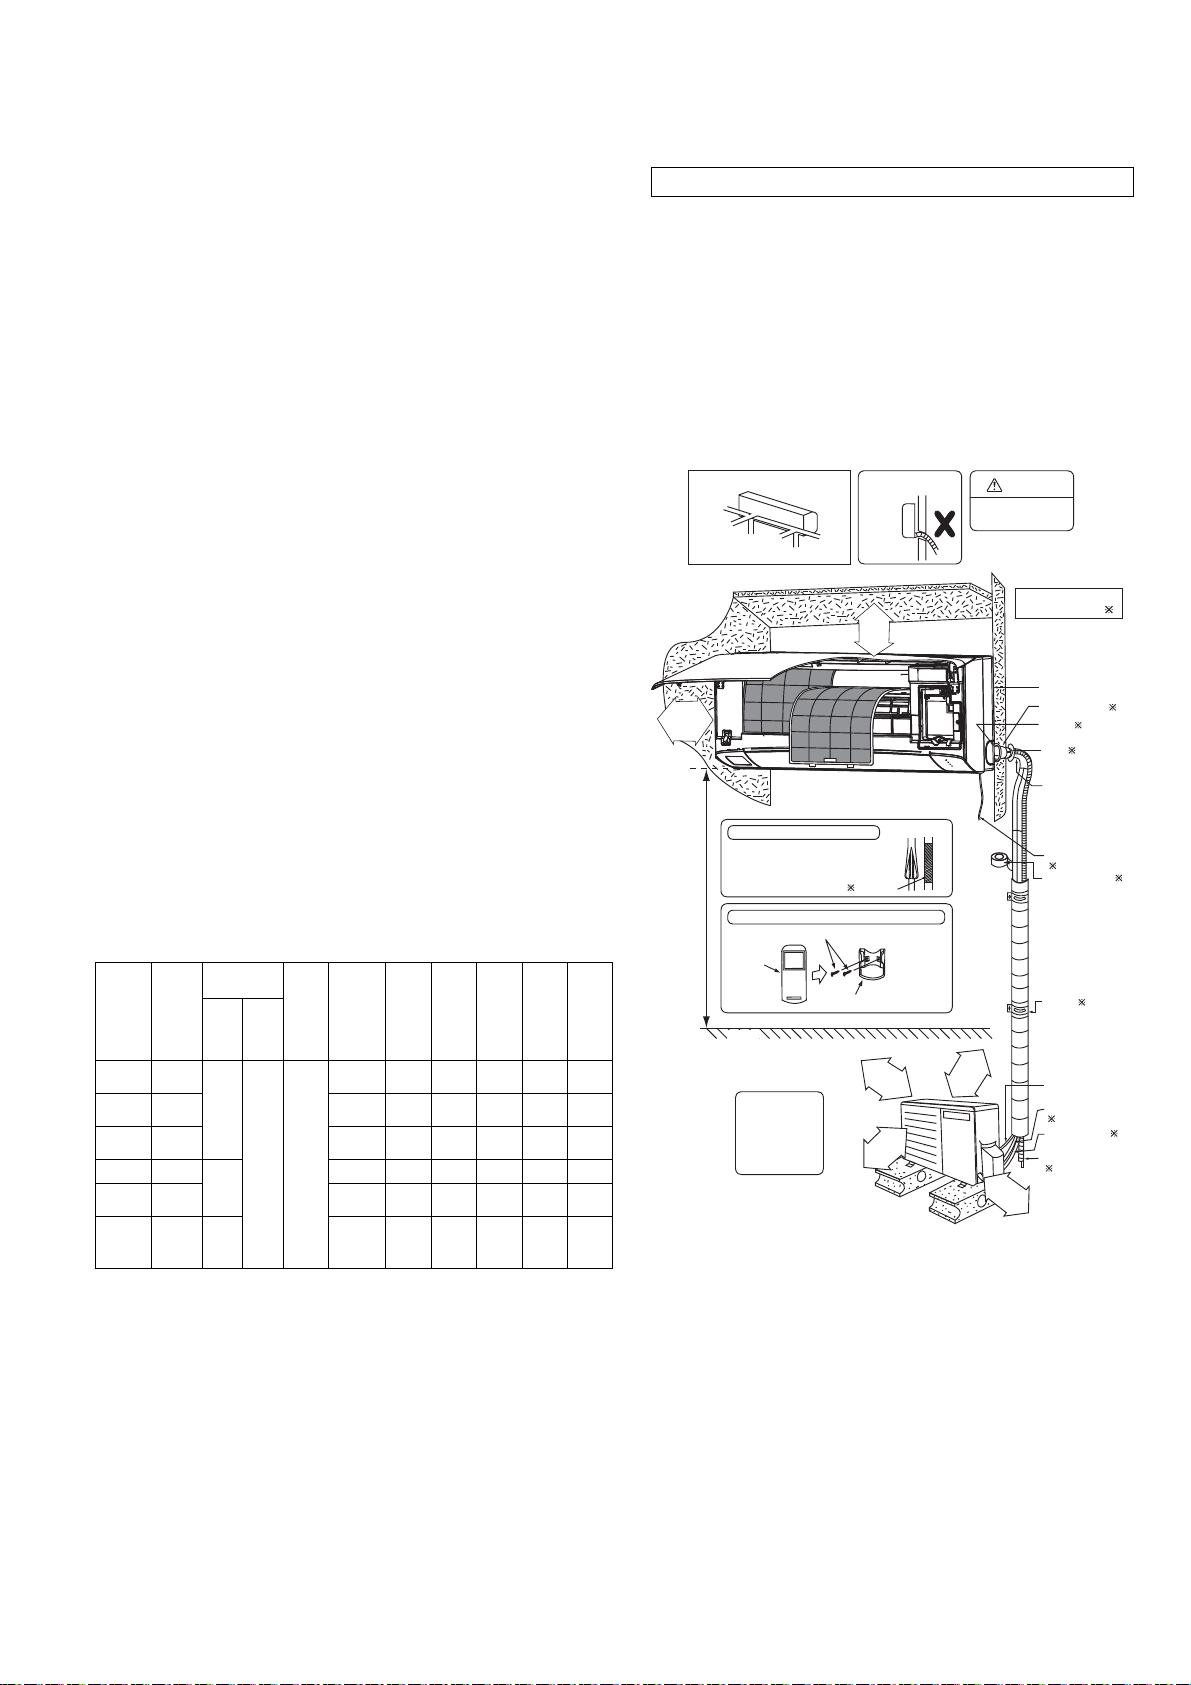
12. Installation Instruction
12.1 Select the Best Location
12.1.1 Indoor Unit
Do not install the unit in excessive oil fume area
such as kitchen, workshop and etc.
There should not be any heat source or steam
near the unit.
There should not be any obstacles blocking the air
circulation.
A place where air circulation in the room is good.
A place where drainage can be easily done.
A place where noise prevention is taken into
consideration.
Do not install the unit near the door way.
Ensure the spaces indicated by arrows from the
wall, ceiling, fence or other obstacles.
Installation height for indoor unit must be at least
2.5 m.
12.1.2 Outdoor Unit
If an awning is built over the unit to prevent direct
sunlight or rain, be careful that heat radiation from
the condenser is not obstructed.
There should not be any animal or plant which
could be affected by hot air discharged.
Keep the spaces indicated by arrows from wall,
ceiling, fence or other obstacles.
Do not place any obstacles which may cause a
short circuit of the discharged air.
If piping length is over the [piping length for
additional gas], additional refrigerant should be
added as shown in the table.
Table A
Piping size
Capa-
Model
Z20***,
XZ20***
Z25***,
XZ25***
Z35***,
XZ35***
Z42*** 1.75HP
Z50***,
XZ50***
Z71*** 2.5HP
city
W
Gas Liquid
(HP)
3/4HP
9.52
mm
1.0HP 15 3 15 10 7.5 0.82
(3/8
12.7
mm
(1/2
15.88
mm
(5/8
")
")
")
1.5HP 15 3 15 10 7.5 0.93
2.0HP 15 3 20 15 7.5 1.61
6.35
mm
(1/4
Length
")
Std.
(m)
5
tion (m)
Min.
Piping
Length
(m)
Max.
Piping
Length
(m)
Max
Eleva-
15 3 15 10 7.5 0.66
15 3 15 10 7.5 0.85
20 3 30 25 10 3.33
Example: For Z25***
If the unit is installed at 10 m distance, the quantity of
additional refrigerant should be 25 g .... (10-7.5) m ×
10 g/m = 25 g.
Table “A” only applicable for single split
connection.
In case of connection to outdoor multi inverter,
refer to installation manual at outdoor unit.
Additional
Refri-
gerant
(g/m)
Piping
Length
for
add.
gas
(m)
Indoor
A
min
2
(m
(5/4)
× h0)) 2
= (M / (2.5 × (LFL)
A
min
A
= Required minimum room area, in m2
min
= Refrigerant charge amount in appliance, in kg
M
= Lower flammable limit (0.306 kg/m
LFL
= Installation height of the appliance (1.8 m for
h
0
wall mounted)
12.1.3 Indoor/Outdoor Unit Installation
Diagram
Right
Right
Rear
Right
bottom
50 mm
or more
2.5 m (min)
Remote
control 3
)
(Front side)
Left
Rear
Left bottom
(Left and right are identical)
Insulation of piping connections
Carry out insulation after
•
checking for gas leaks and
secure with vinyl tape.
Attaching the remote control holder to the wall
Remote control holder fi xing screws 6
Floor
It is advisable to
avoid more than 2
blockage directions.
For better ventilation
& multiple-outdoor
installation, please
consult authorized
dealer/specialist.
up drain hose
Left
65 mm
or more
Vinyl tape
Remote control holder 5
100 mm
or more
1000 mm
or more
This illustration is for explanation purposes only.
The indoor unit will actually face a different way.
dneb ot ton noitnettAnoitcerid gnipiP
Flare connection only
at outside of building
100 mm
or more
or more
300 mm
3
)
WARNING
Installation parts you
should purchase (
Installation plate 1
Bushing-Sleeve (
Sleeve (
Putty (
(Gum Type Sealer)
Bend the pipe as
closely on the wall
as possible, but
be careful that it
doesn’t break.
Power supply cord
)
(
Vinyl tape (wide)
Apply after carrying
•
out a drainage test.
To carry out the
•
drainage test,
remove the air filters
and pour water into
the heat exchanger.
Saddle (
Connection cable
Liquid side piping
)
(
Gas side piping (
Additional drain hose
)
(
)
)
)
)
(
)
)
)
49
Page 50
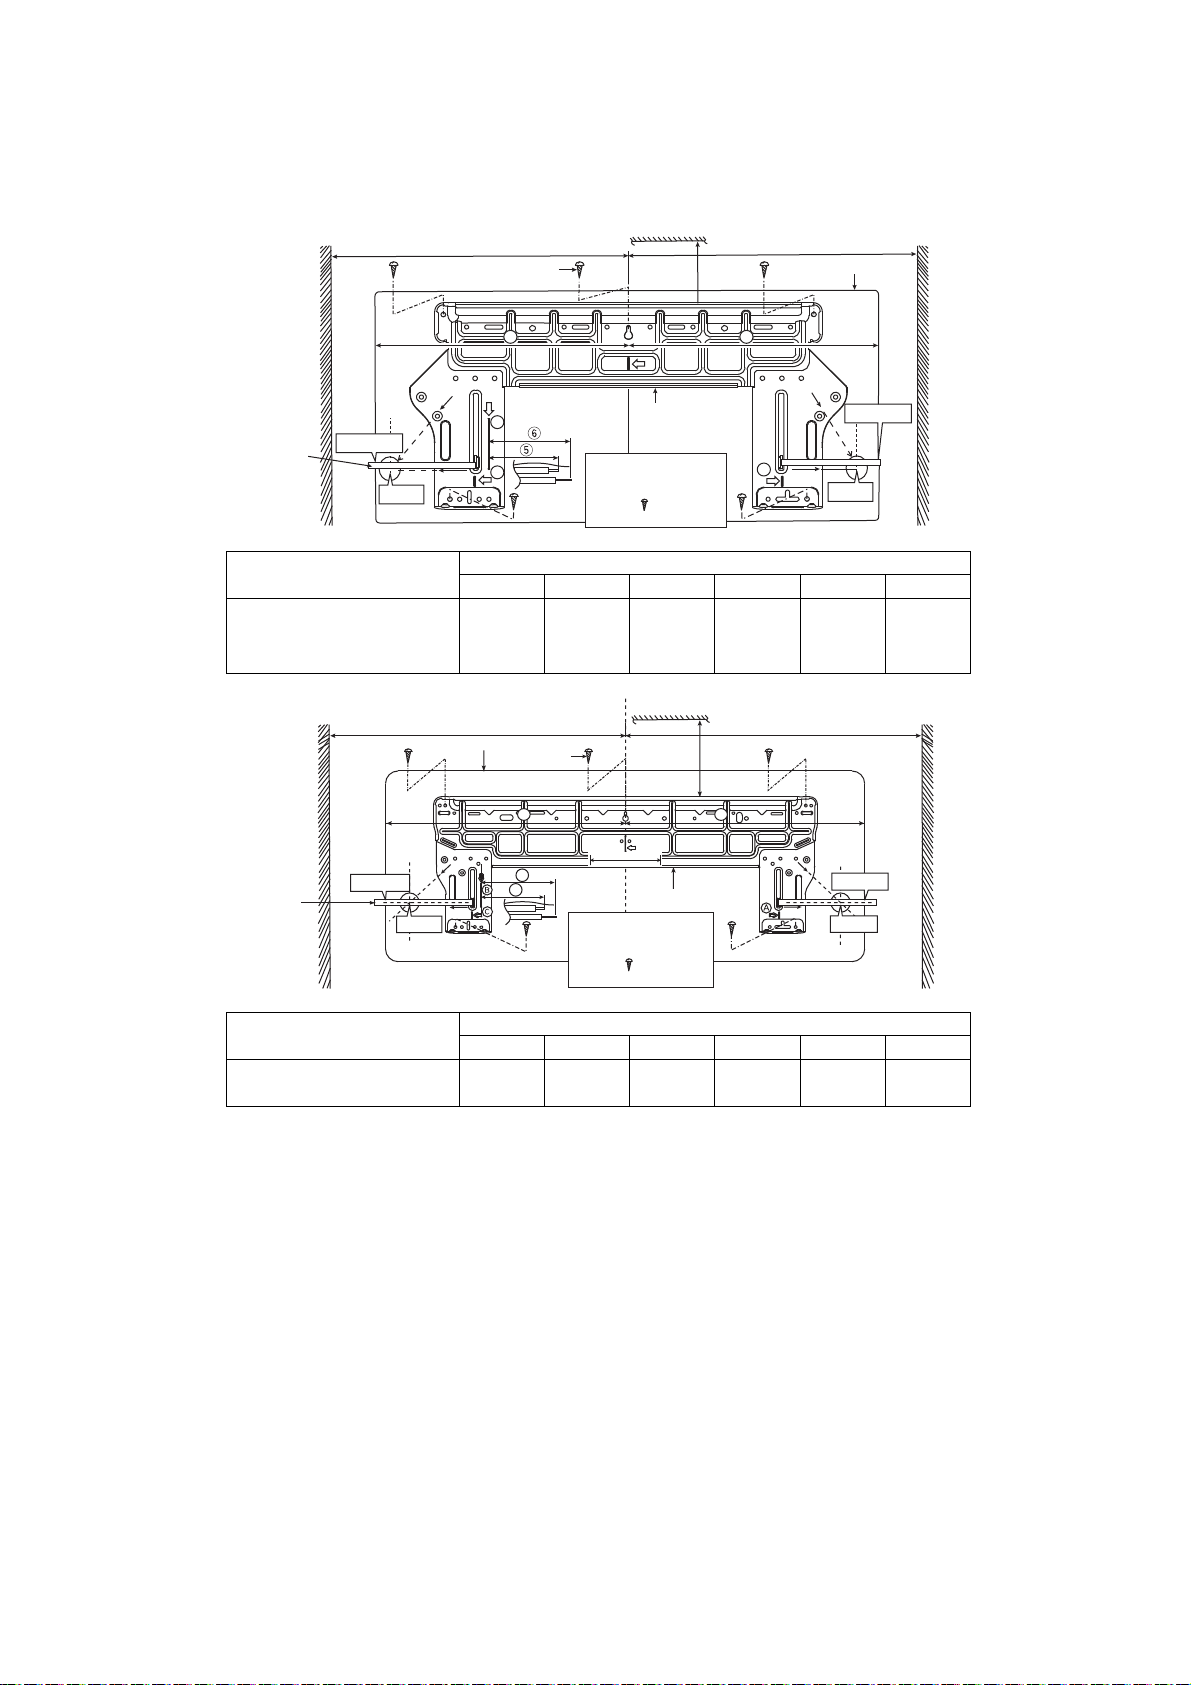
12.2 Indoor Unit
12.2.1 How to Fix Installation Plate
The mounting wall shall be strong and solid enough to prevent it from vibration.
Wall Wall
More than 1 More than 1
screw
2
3 4
Ceiling
More
than 2
Indoor unit
Installation
plate
1
For best strength of
INDOOR unit installation,
it is highly recommended
” at 5 position
to locate “
as shown.
PIPE
HOLE
CENTER
A
128mm TO
PIPE HOLE
CENTER
Measuring Tape
266 mm
128 mm
PIPE
HOLE
CENTER
128mm TO
PIPE HOLE
CENTER
B
C
Model
Z20***, XZ20***
Z25***, XZ25***
Z35***, XZ35***
Z42***
1 2 3 4 5 6
515 mm 85 mm 460 mm 460 mm 43 mm 95 mm
Dimension
Ceiling
than 2
128 mm
Installation plate
” at 5 position
More
More than 1
1
Measuring Tape
Wall
266 mm
128 mm
More than 1
Indoor unit
screw
2
3 4
6
5
For best strength of
INDOOR unit installation,
it is highly recommended
to locate “
as shown.
Model
Z50***, XZ50***
Z71***
1 2 3 4 5 6
615 mm 95 mm 560 mm 560 mm 270 mm 320 mm
Dimension
The center of installation plate should be at more than 1 at right and left of the wall.
The distance from installation plate edge to ceiling should more than 2.
From installation plate center to unit’s left side is 3.
From installation plate center to unit’s right side is 4.
B : For left side piping, piping connection for liquid should be about 5 from this line.
: For left side piping, piping connection for gas should be about 6 from this line.
1 Mount the installation plate on the wall with 5 screws or more (at least 5 screws).
(If mounting the unit on the concrete wall, consider using anchor bolts.)
o Always mount the installation plate horizontally by aligning the marking-off line with the thread and using
a level gauge.
2 Drill the piping plate hole with ø70 mm hole-core drill.
o Line according to the left and right side of the installation plate. The meeting point of the extended line is
the center of the hole. Another method is by putting measuring tape at position as shown in the diagram
above. The hole center is obtained by measuring the distance namely 128 mm for left and right hole
respectively.
o Drill the piping hole at either the right or the left and the hole should be slightly slanting to the outdoor
side.
266 mm
128 mm
Wall
266 mm
128 mm
50
Page 51
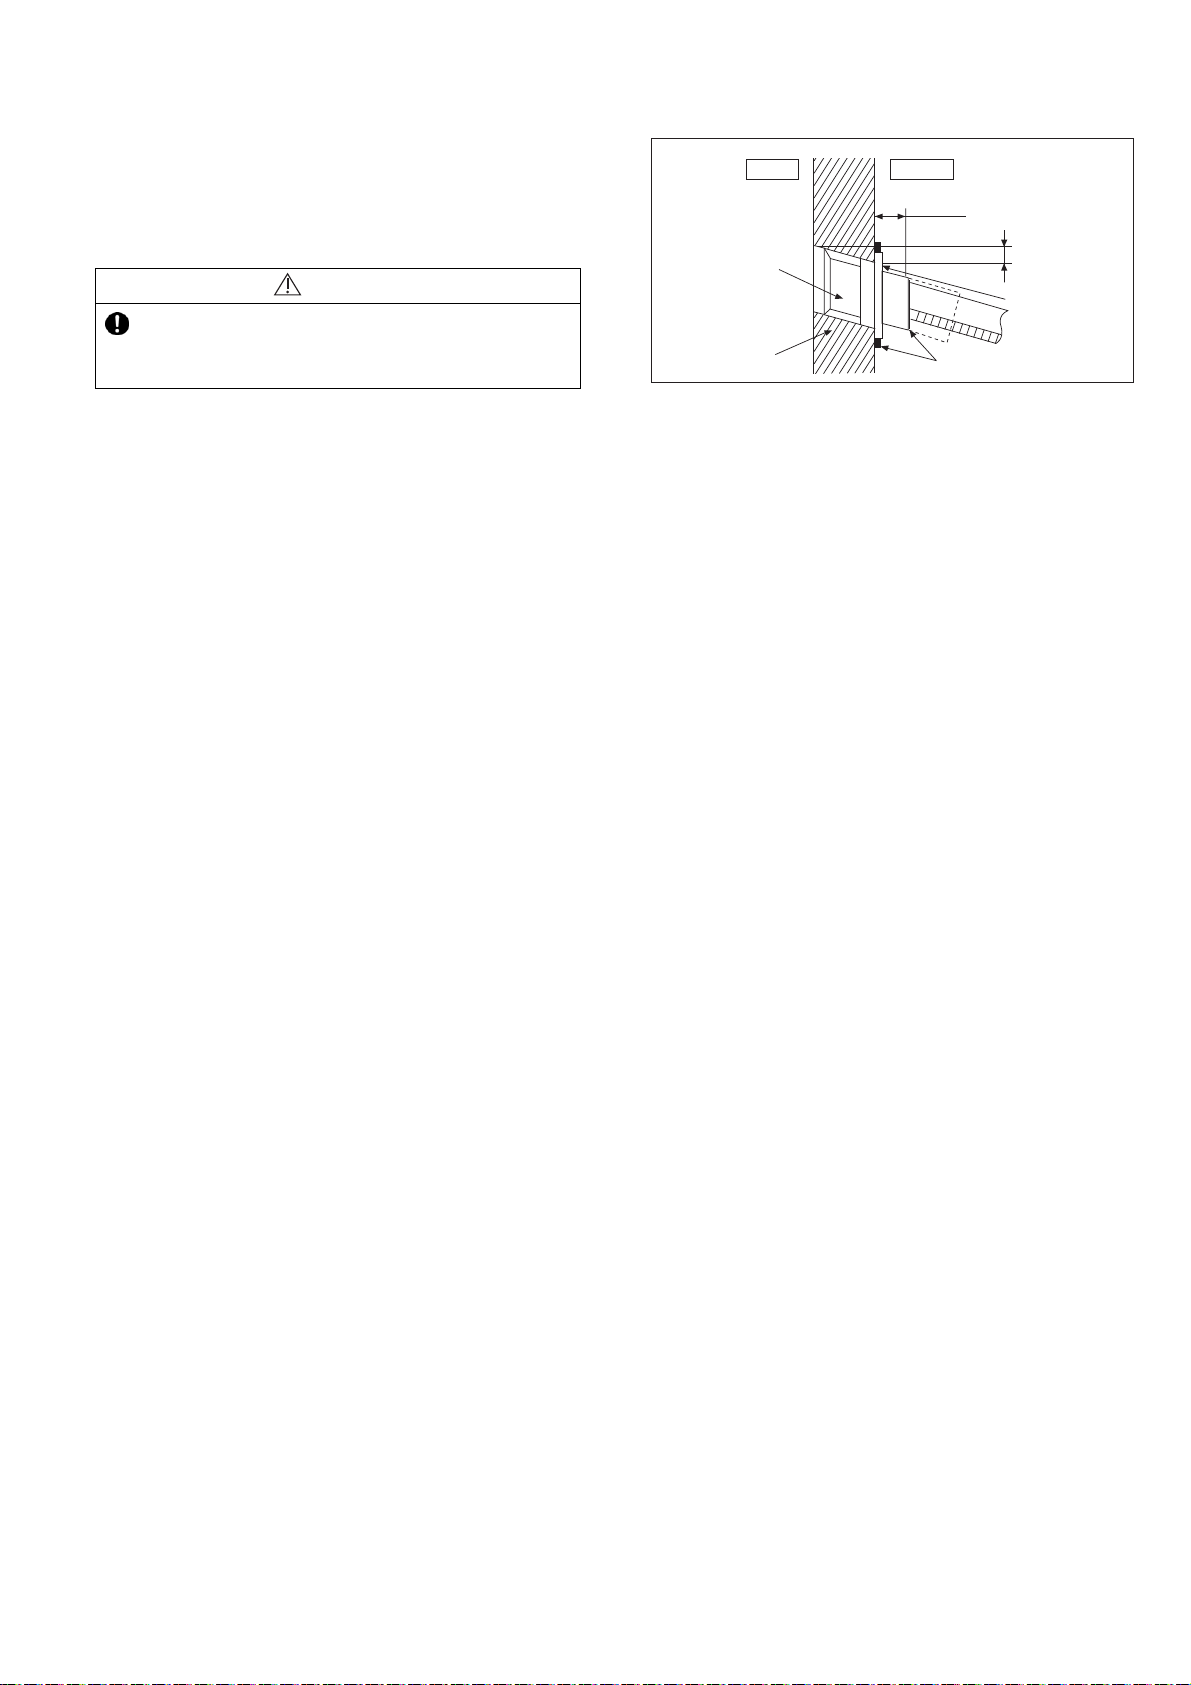
12.2.2 To Drill a Hole in the Wall and
Install a Sleeve of Piping
1 Insert the piping sleeve to the hole.
2 Fix the bushing to the sleeve.
3 Cut the sleeve until it extrudes about 15 mm
from the wall.
When the wall is hollow, please be sure to use
the sleeve for tube assembly to prevent dangers
caused by mice biting the connection cable.
4 Finish by sealing the sleeve with putty or
caulking compound at the final stage.
CAUTION
Sleeve for tube
assembly
ø70 mm through hole
Indoor
Wall
Outdoor
15 mm
Approx. 5 - 7 mm
Putty or caulking compound
Bushing for tube
assembly
51
Page 52
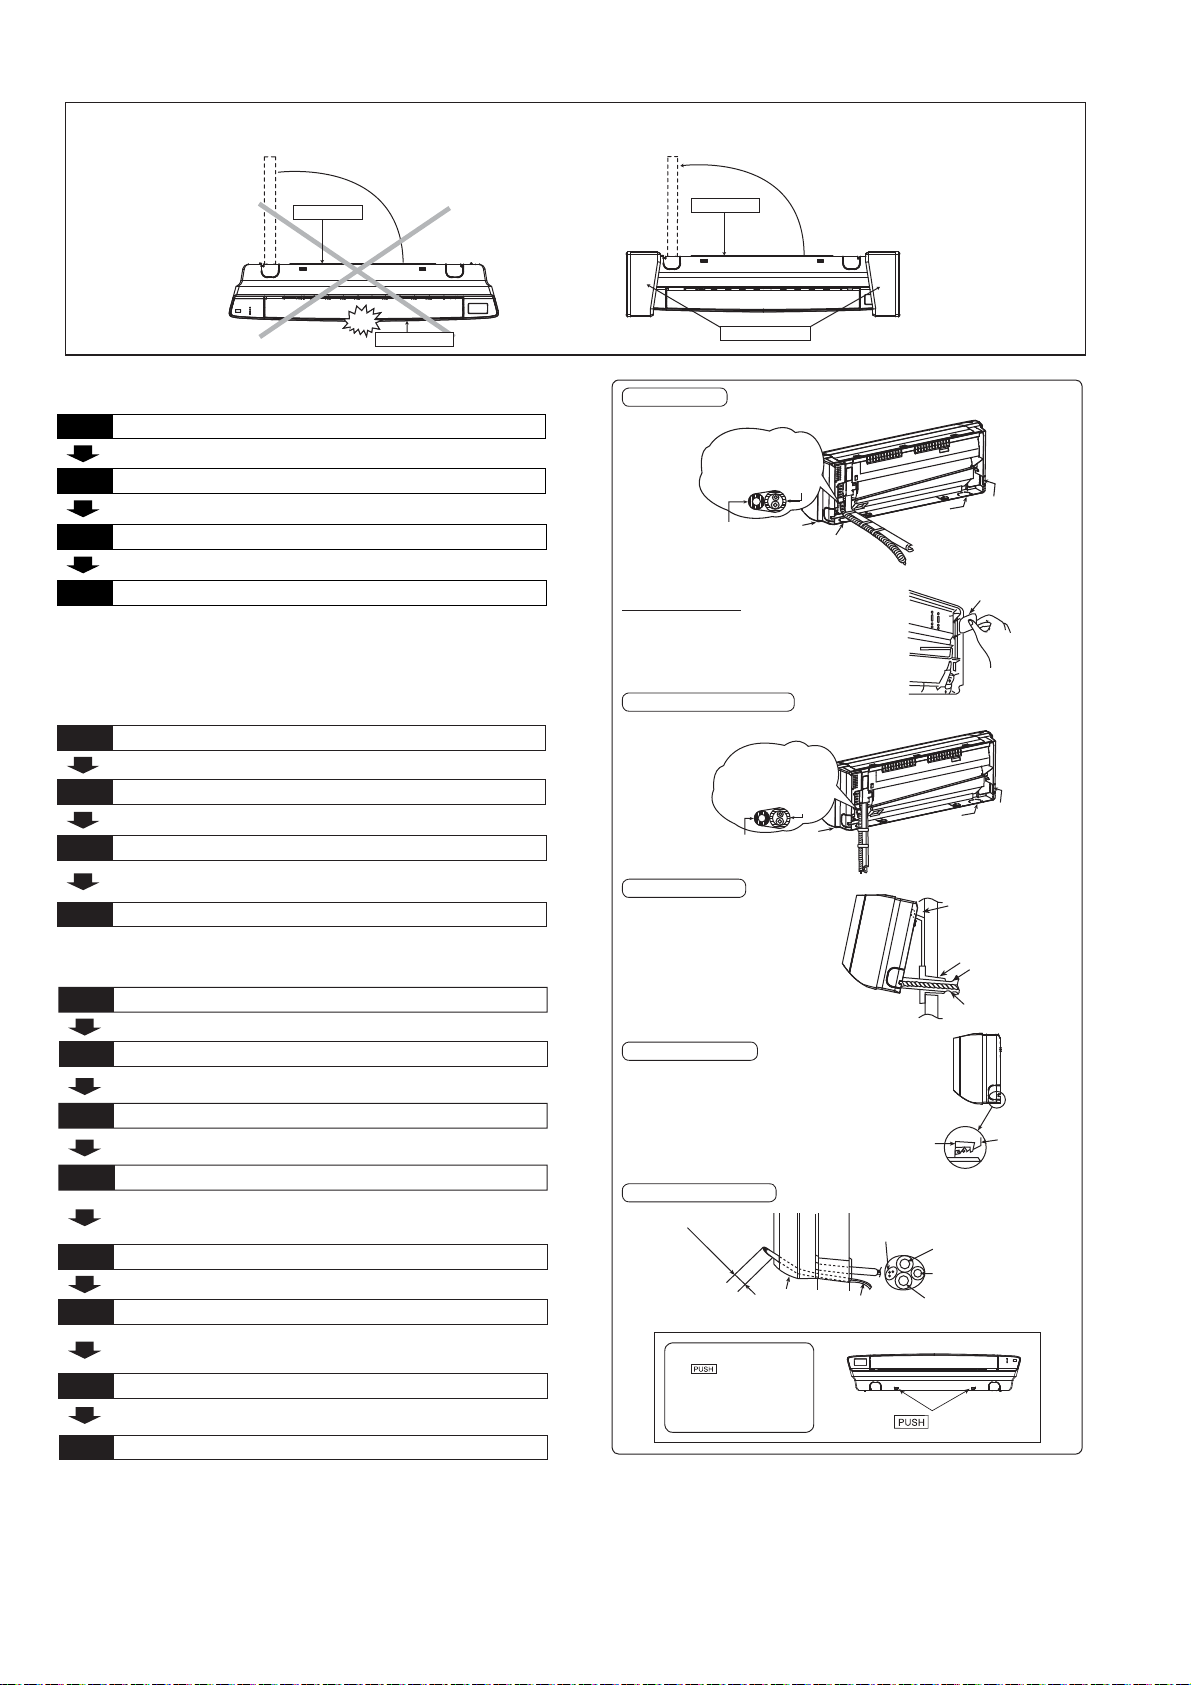
12.2.3 Indoor Unit Installation
● Do not turn over the unit without it’s shock absorber during pull out the piping.
It may cause intake grille damage.
● Use shock absorber during pull out the piping to protect the intake grille from damage.
p
u
l
l
o
u
t
t
h
e
p
i
p
i
n
Piping
g
Piping
p
u
l
l
o
u
t
t
h
e
p
i
p
i
n
g
Intake grille
12.2.3.1 For the Right Rear Piping
Pull out the Indoor piping
Step-1
Install the Indoor Unit
Step-2
Secure the Indoor Unit
Step-3
Step-4
Insert the power supply cord and connection cable
• Insert the cables from bottom of the unit through the control board hole until
terminal board area.
12.2.3.2 For the Right and Right
Bottom Piping
Pull out the Indoor piping
Step-1
Install the Indoor Unit
Step-2
Insert the power supply cord and connection cable
Step-3
• Insert the cables from bottom of the unit through the control board hole until
terminal board area.
Step-4
Secure the Indoor Unit
12.2.3.3 For the Embedded Piping
Replace the drain hose
Step-1
Shock absorber
Right Rear piping
Tape it with piping in a
position as mentioned
in Fig. below.
Piping
Indoor unit
Cover for the
bottom piping
Cover for
Drain
the right
hose
How to keep the cover
In case of the cover is cut, keep the cover at the rear
of chassis as shown in the illustration for future
reinstallation.
(Left, right and 2 bottom covers for piping.)
Right and Right Bottom piping
Tape it with piping in a
position as mentioned
Drain hose
Install the indoor unit
Hook the indoor unit onto the upper
portion of installation plate. (Engage
the indoor unit with the upper edge
of the installation plate). Ensure the
hooks are properly seated on the
installation plate by moving it in left
and right.
piping
in Fig. below.
Cover for the
bottom piping
Piping
Cover for
the right
piping
Cover for
the left
piping
Cover for piping
Cover for
the left
Cover for
piping
the bottom
piping
Hooks at installation
plate
Sleeve for piping hole
Piping
Drain hose
Step-2
Step-3
Step-4
Step-5
Step-6
Step-7
Step-8
Bend the embedded piping
• Use a spring bender or equivalent to bend the piping so that the piping is not
crushed.
Pull the connection cable into Indoor Unit
• The power supply cord and indoor unit and outdoor unit connection cable can
be connected without removing the front grille.
Cut and flare the embedded piping
• When deter m i n i ng the di m e n s io n s of the piping, slide the unit all the way to the
left on the installation plate.
• Refer to the section “Cutting and flaring the piping”.
Install the Indoor Unit
Connect the piping
• Please refer to “Connecting the piping” column in outdoor unit section.
(Below steps are done after connecting the outdoor piping and gas-leakage
confirmation.)
Insulate and finish the piping
• Please refer to “Insulation of piping connection” column as mentioned in
indoor/outdoor unit installation.
Secure the Indoor Unit
Secure the Indoor Unit
Press the lower left and right side of the unit
against the installation plate until hooks
engages with their slot (sound click).
gnikram
Installation
plate
Unit’s hook
Insert the connection cable
70 – 80 mm
About
Guide
surface
To take out the unit, push
the
marking at the
bottom unit, and pull it
slightly towards you to
disengage the hooks
from the unit.
Connection cable
Connection cable
Gas side piping
Liquid side piping
Drain hose
(This can be used for left rear piping and left bottom
piping also.)
52
Page 53
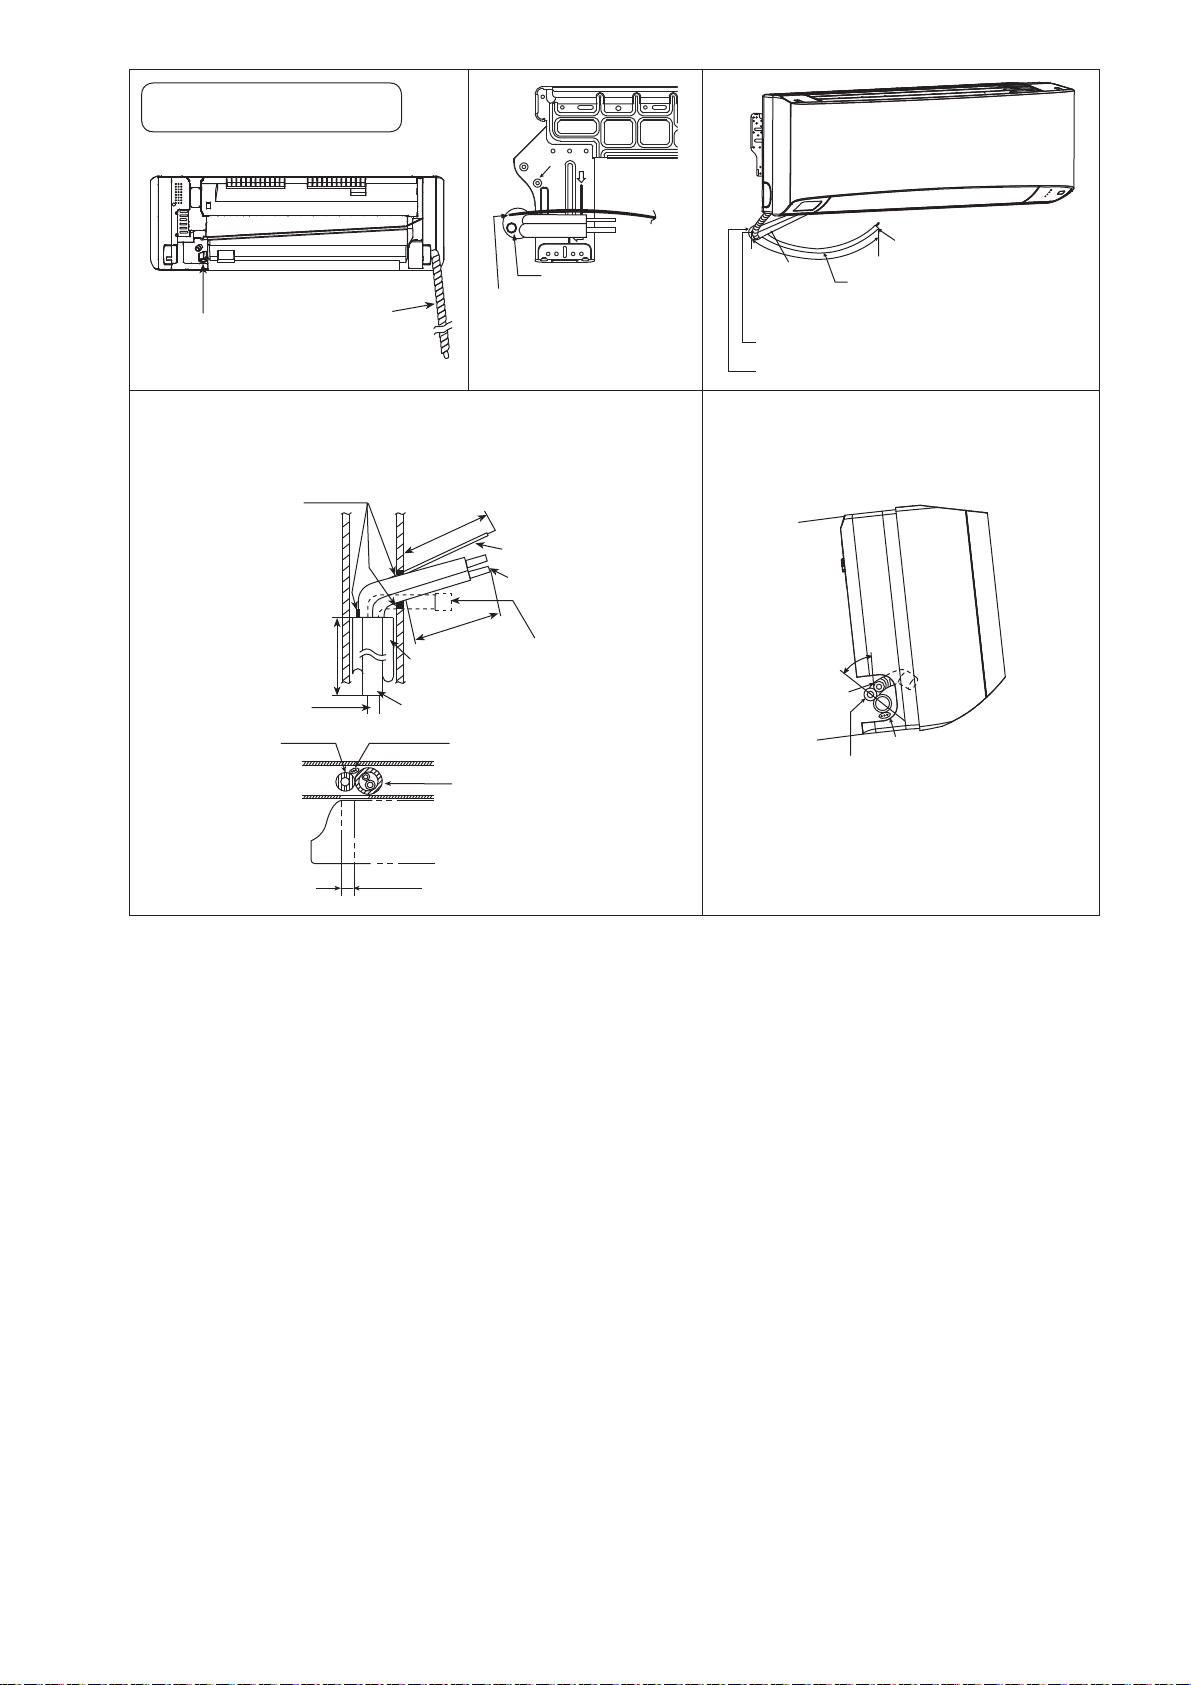
Exchange the drain hose and
the cap
Rear view for left piping installation
Drain cap
Drain hose
Drain hose
Connection cable
Adjust the piping slightly
downwards.
Piping
Drain hose
Sleeve for piping hole
More than 950 mm
(3/4 ~ 1.75HP) or
1150 mm (2.0 ~ 2.5HP)
Connection cable
How to pull the piping and drain hose out, in case of the
•
embedded piping.
Apply putty or
caulking material
to seal the wall
opening.
PVC tube for drain
hose (VP-20)
PVC tube
for drain
hose
More than 700 mm
More than 950 mm
(3/4 ~ 1.75HP) or
1150 mm (2.0 ~ 2.5HP)
More than
470 mm
PVC tube (VP-65) for piping
and connection cable
PVC tube for drain hose (VP-30)
Indoor unit
70 mm (3/4 ~ 1.75HP) or
80 mm (2.0 ~ 2.5HP)
Connection cable
Cable
Piping
Piping
Drain hose
from main unit
In case of left piping how to insert the
•
connection cable and drain hose.
45°
Drain
hose
Cable
Piping
(For the right piping, follow the same procedure)
12.2.4 Connect the Cable to the Indoor Unit
The power supply cord, indoor and outdoor unit connection cable can be connected without removing the front grille.
1 Install the indoor unit on the installing holder that mounted on the wall.
2 Open the front panel and grille door by loosening the screw.
3 Cable connection to the power supply through Isolating Devices (Disconnecting means).
o Connect the approved polychloroprene sheathed power supply cord 3 × 1.5 mm
3 × 2.5 mm
2
(2.0 ~ 2.5HP), type designation 60245 IEC 57 or heavier cord to the terminal board, and
connect the other end of the cable to Isolating Devices (Disconnecting means).
o Do not use joint power supply cord. Replace the wire if the existing wire (from concealed wiring, or
otherwise) is too short.
o In unavoidable case, joining of power supply cord between isolating devices and terminal board of air
conditioner shall be done by using approved socket and plug rated 15/16A (3/4 ~ 1.75HP) or 16A
(2.0HP) or 20A (2.5HP). Wiring work to both socket and plug must follow to national wiring standard.
4 Bind all the power supply cord lead wire with tape and route the power supply cord via the left escapement.
5 Connection cable between indoor unit and outdoor unit shall be approved polychloroprene sheathed
4 × 1.5 mm
2
(3/4 ~ 1.75HP) or 4 × 2.5 mm2 (2.0 ~ 2.5HP) flexible cord, type designation 60245 IEC 57 or
heavier cord.
6 Bind all the indoor and outdoor connection cable with tape and route the connection cable via the right
escapement.
2
(3/4 ~ 1.75HP) or
53
Page 54
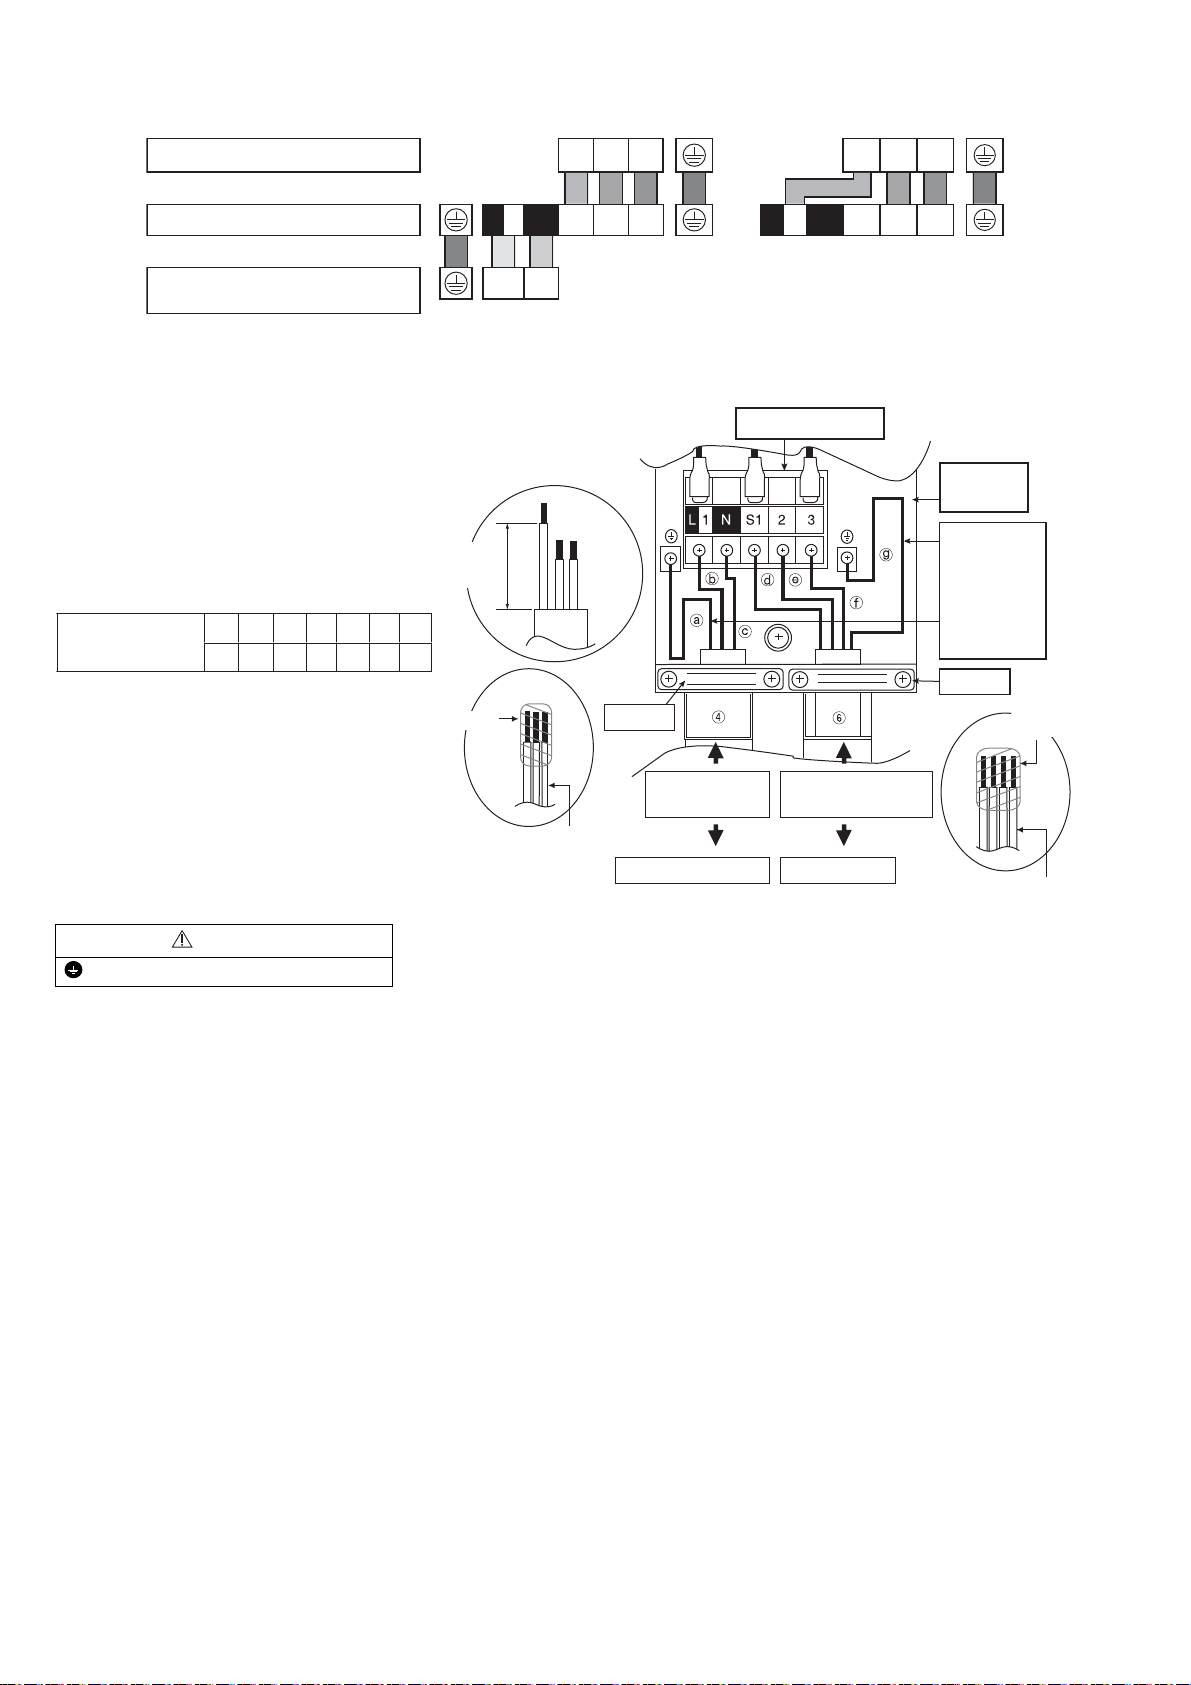
7 Remove the tapes and connect the power supply cord and connection cable between indoor unit and outdoor
unit according to the diagram below.
Terminals on the outdoor unit
Colour of wires (connection cable)
Terminals on the indoor unit
(Power supply cord)
Terminals on the isolating devices
(Disconnecting means)
L 1 N S1 2 3
(L) (N)
S1 2 3 123
OR L 1 N S1 2 3
*
Connection for multi inverter
model (Outdoor power
supply)
8 Secure the power supply cord and connection cable onto the control board with the holder.
9 Close grille door by tighten with screw and close the front panel.
Terminal Board
Control
Board
Earth Wire
longer than
others
AC wires
for safety
reason
Holder
Tape
Connection cable
Recommended
length (mm)
Recommended
length (mm)
abcdefg
55 35 35 50 40 35 60
Tape
Power supply cord
Holder
Power supply
cord
Isolating Devices
Indoor & outdoor
connection cable
Outdoor unit
WARNING
This equipment must be properly earthed.
Note:
Isolating Devices (Disconnecting means) should have minimum 3.0 mm contact gap.
Ensure the colour of wires of outdoor unit and the terminal Nos. are the same to the indoor’s respectively.
Earth wire shall be Yellow/Green (Y/G) in colour and longer than other AC wires as shown in the figure for the
electrical safety in case of the slipping out of the cord from the anchorage.
54
Page 55
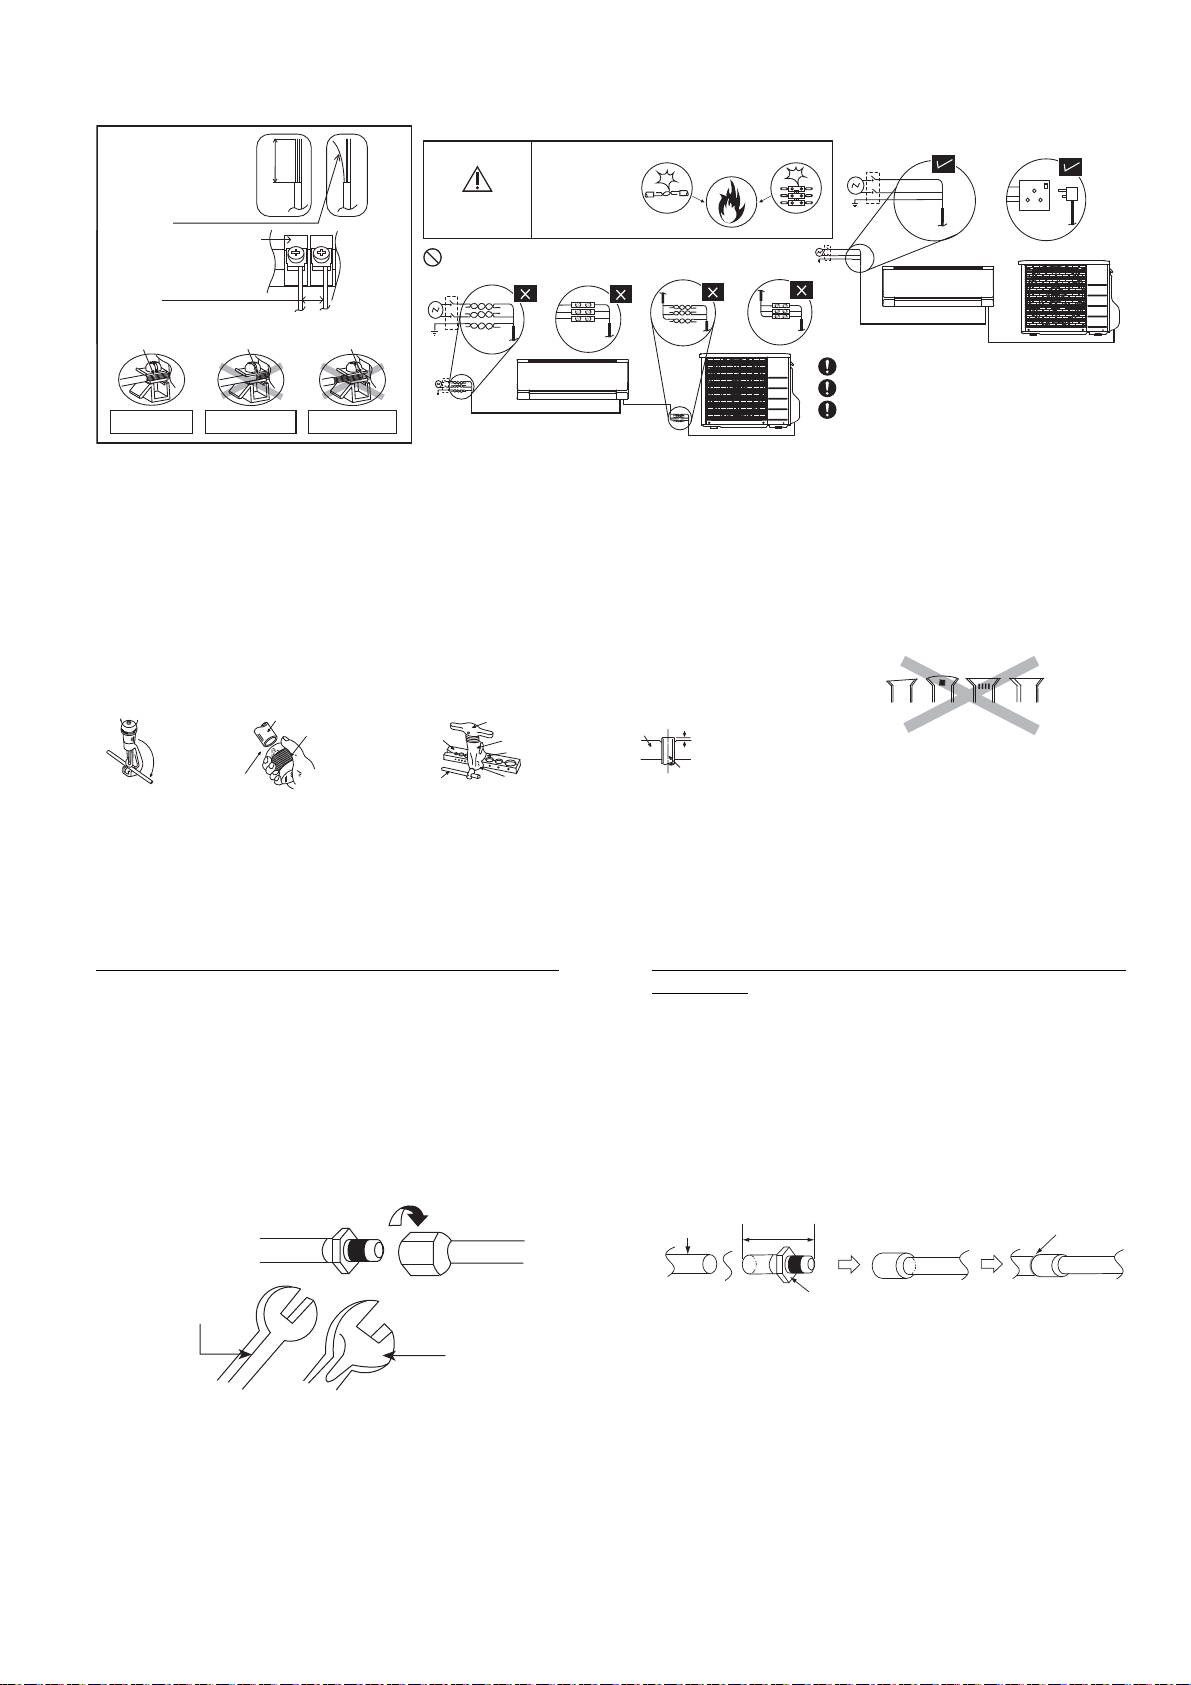
12.2.4.1 Wire Stripping Connecting and Requirement
Wire stripping
No loose strand
when inserted
Indoor/outdoor
connection
terminal board
5 mm or more
(gap between wires)
Conductor
fully inserted
ACCEPT PROHIBITED PROHIBITED
10 ± 1 mm
Conductor over
inserted
Conductor not
fully inserted
WARNING
Do not joint wires
RISK OF FIRE
JOINING OF
WIRES MAY
CAUSE
OVERHEATING
AND FIRE.
OR
OR
Use complete wire without joining.
Use approved socket and plug with earth pin.
Wire connection in this area must follow to national
wiring rules.
12.2.4.2 Cutting and Flaring the Piping
1 Please cut using pipe cutter and then remove the burrs.
2 Remove the burrs by using reamer. If burrs is not removed, gas leakage may be caused. Turn the piping end
down to avoid the metal powder entering the pipe.
3 Please make flare after inserting the flare nut onto the copper pipes.
Improper fl aring
Pipe
Reamer
Point down
1. To cut 2. To remove burrs 3. To fl are
Clamp handle
Bar
Handle
Yoke
Core
Red arrow mark
12.2.5 Connect the Piping
12.2.5.1 Connecting the Piping to Indoor
For connection joint of all model (except R32 model)
Please make flare after inserting flare nut (locate at
joint portion of tube assembly) onto the copper pipe.
(In case of using long piping)
Connect the piping
Align the center of piping and sufficiently tighten
the flare nut with fingers.
Further tighten the flare nut with torque wrench in
specified torque as stated in the table.
Spanner or
Wrench
Torque
wrench
Bar
0 – 0.5 mm
Copper pipe
Inclined Surface
When properly fl ared, the internal surface of the
fl are will evenly shine and be of even thickness.
Since the fl are part comes into contact with the
connections, carefully check the fl are fi nish.
damaged
Cracked Uneven
thickness
For connection joint location at inside building for R32
model only
Decide the length.
Cut and remove the tube connectors at indoor
copper pipings (both gas and liquid piping) by
using pipe cutter. Remove burrs from cut edge.
Use pipe expander to expand the end of long
piping.
Align the center of piping and braze the piping
joints.
Indoor
copper pipe
1. Cut and Remove 2. Expand long pipe 3. Braze both pipe
(40~50mm)
Tube connector
Brazing point
55
Page 56
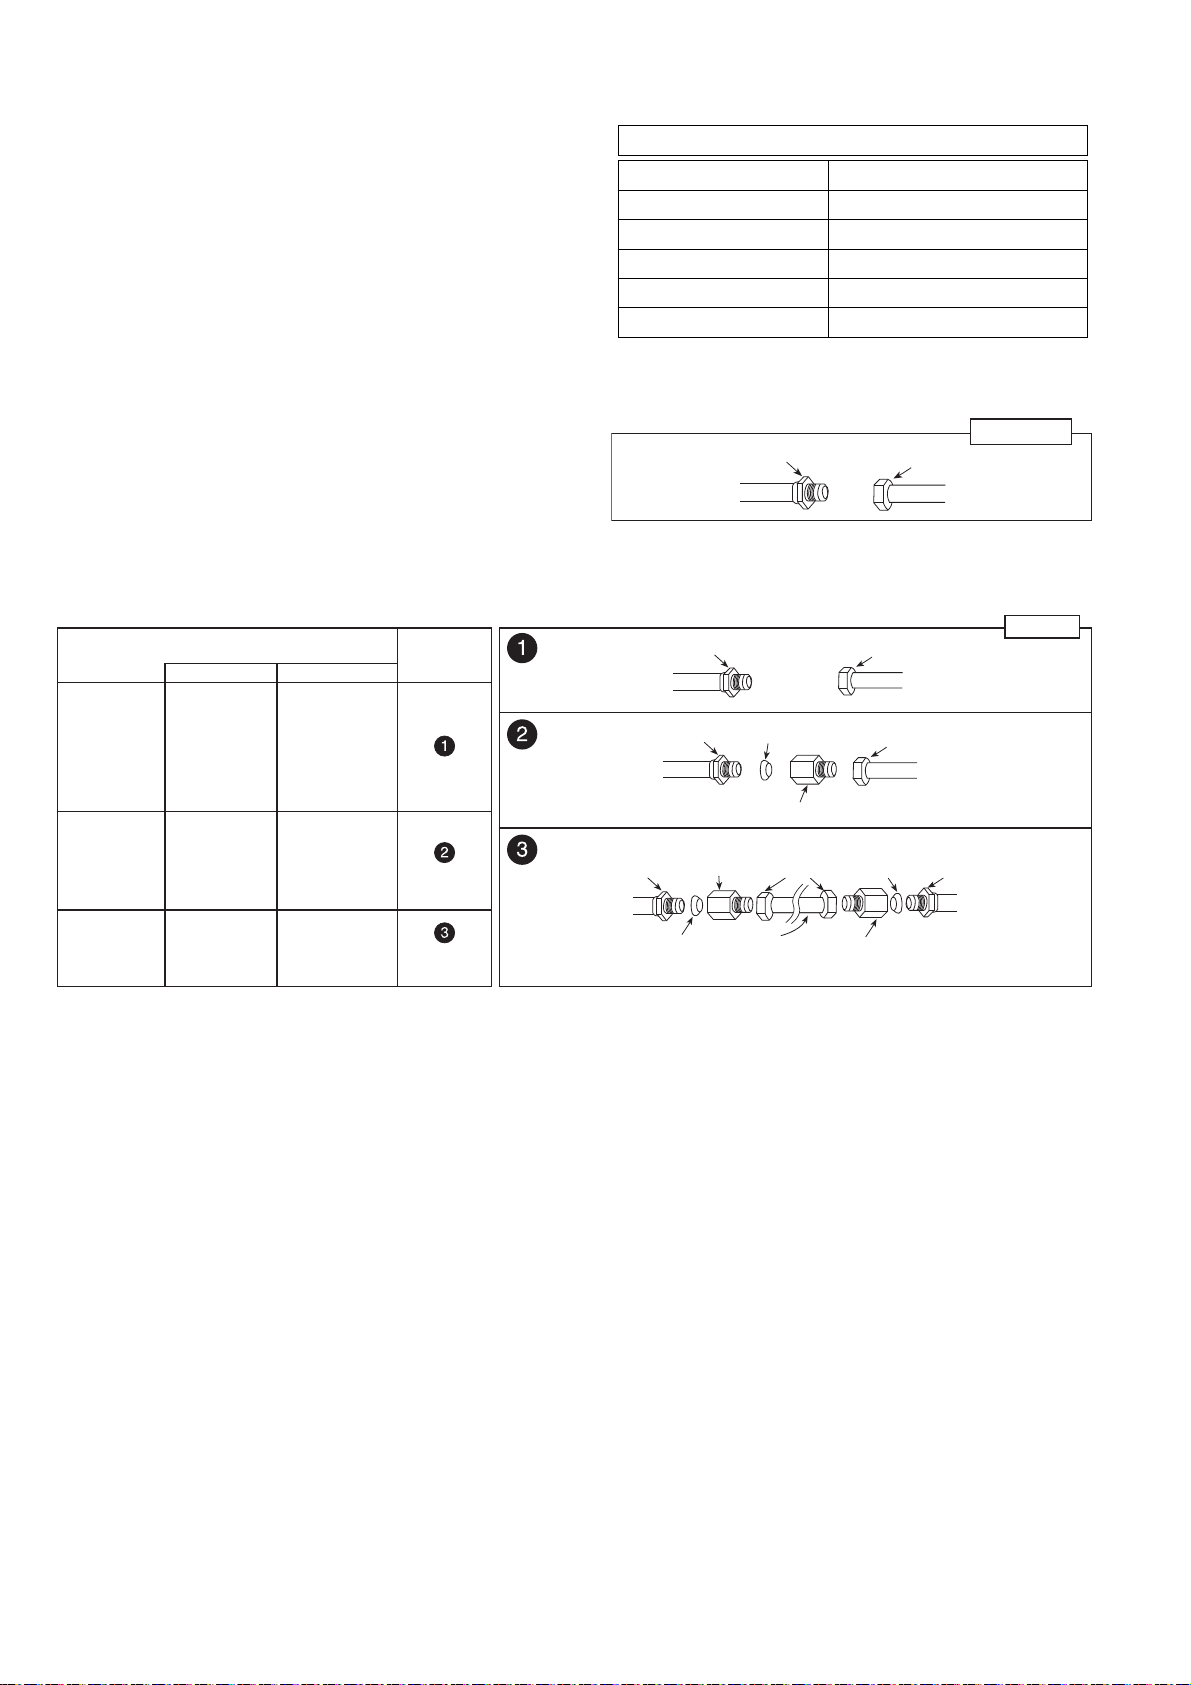
12.2.5.2 Connecting the Piping to Outdoor
Decide piping length and then cut by using pipe cutter.
Remove burrs from cut edge.
Make flare after inserting the flare nut (locate at valve)
onto the copper pipe. Align center of piping to valve
and then tighten with torque wrench to the specified
torque as stated in the table.
12.2.5.3 Connecting the Piping to Outdoor Multi
Decide piping length and then cut by using pipe cutter.
Remove burrs from cut edge. Make flare after
inserting the flare nut (locate at valve) onto the copper
pipe. Align center of piping to valve and then tighten
with torque wrench to the specified torque as stated in
the table.
* For Gas side piping please refer table and diagram below
Outdoor Multi Combination Model
R32 Model R410A Model
CS-Z20***,
CS-XZ20***,
CS-Z25***,
CS-XZ25***,
CS-Z35***,
CS-XZ35***
CS-Z42***,
CS-Z50***,
CS-XZ50***
CS-Z71*** CU-4Z80***,
CU-2Z35***,
CU-2Z41***,
CU-2Z50***,
CU-3Z52***,
CU-3Z68***,
CU-4Z68***,
CU-4Z80***,
CU-5Z90***
CU-2Z50***,
CU-3Z52***,
CU-3Z68***,
CU-4Z68***,
CU-4Z80***,
CU-5Z90***
CU-5Z90***
CU-2E12***,
CU-2E15***,
CU-2E18***,
CU-3E18***,
CU-3E23***,
CU-4E23***,
CU-4E27***,
CU-5E34***
CU-2E18***,
CU-3E18***,
CU-3E23***,
CU-4E23***,
CU-4E27***,
CU-5E34***
CU-4E27***,
CU-5E34***
Pipe size
(refer to
diagram)
(CZ-MA1P)
(CZ-MA2P) &
(CZ-MA3P)
Auxiliary pipe
(male side)
Auxiliary pipe
(male side)
Auxiliary pipe
(male side)
Hall Union
(Indoor)
Do not overtighten, overtightening may cause gas leakage.
Piping size Torque
6.35 mm (1/4") [18 N•m (1.8 kgf•m)]
9.52 mm (3/8") [42 N•m (4.3 kgf•m)]
12.7 mm (1/2") [55 N•m (5.6 kgf•m)]
15.88 mm (5/8") [65 N•m (6.6 kgf•m)]
19.05 mm (3/4") [100 N•m (10.2 kgf•m)]
Liquid side
Hall Union
Auxiliary pipe
(male side)
Flare Nut
Connection pipe
(female side)
Gas side
Hall Union
Hall Union
Pipe size reducer
Packing Connection pipe
Packing
Pipe size reducer (CZ-MA1P)
(CZ-MA3P)
(female side)
Flare Nut
Flare Nut
Connection pipe
(female side)
Flare Nut
Connection pipe
(female side)
Packing
Pipe size expander
(CZ-MA2P)
Hall Union
Auxiliary pipe
(male side)
(Outdoor)
56
Page 57
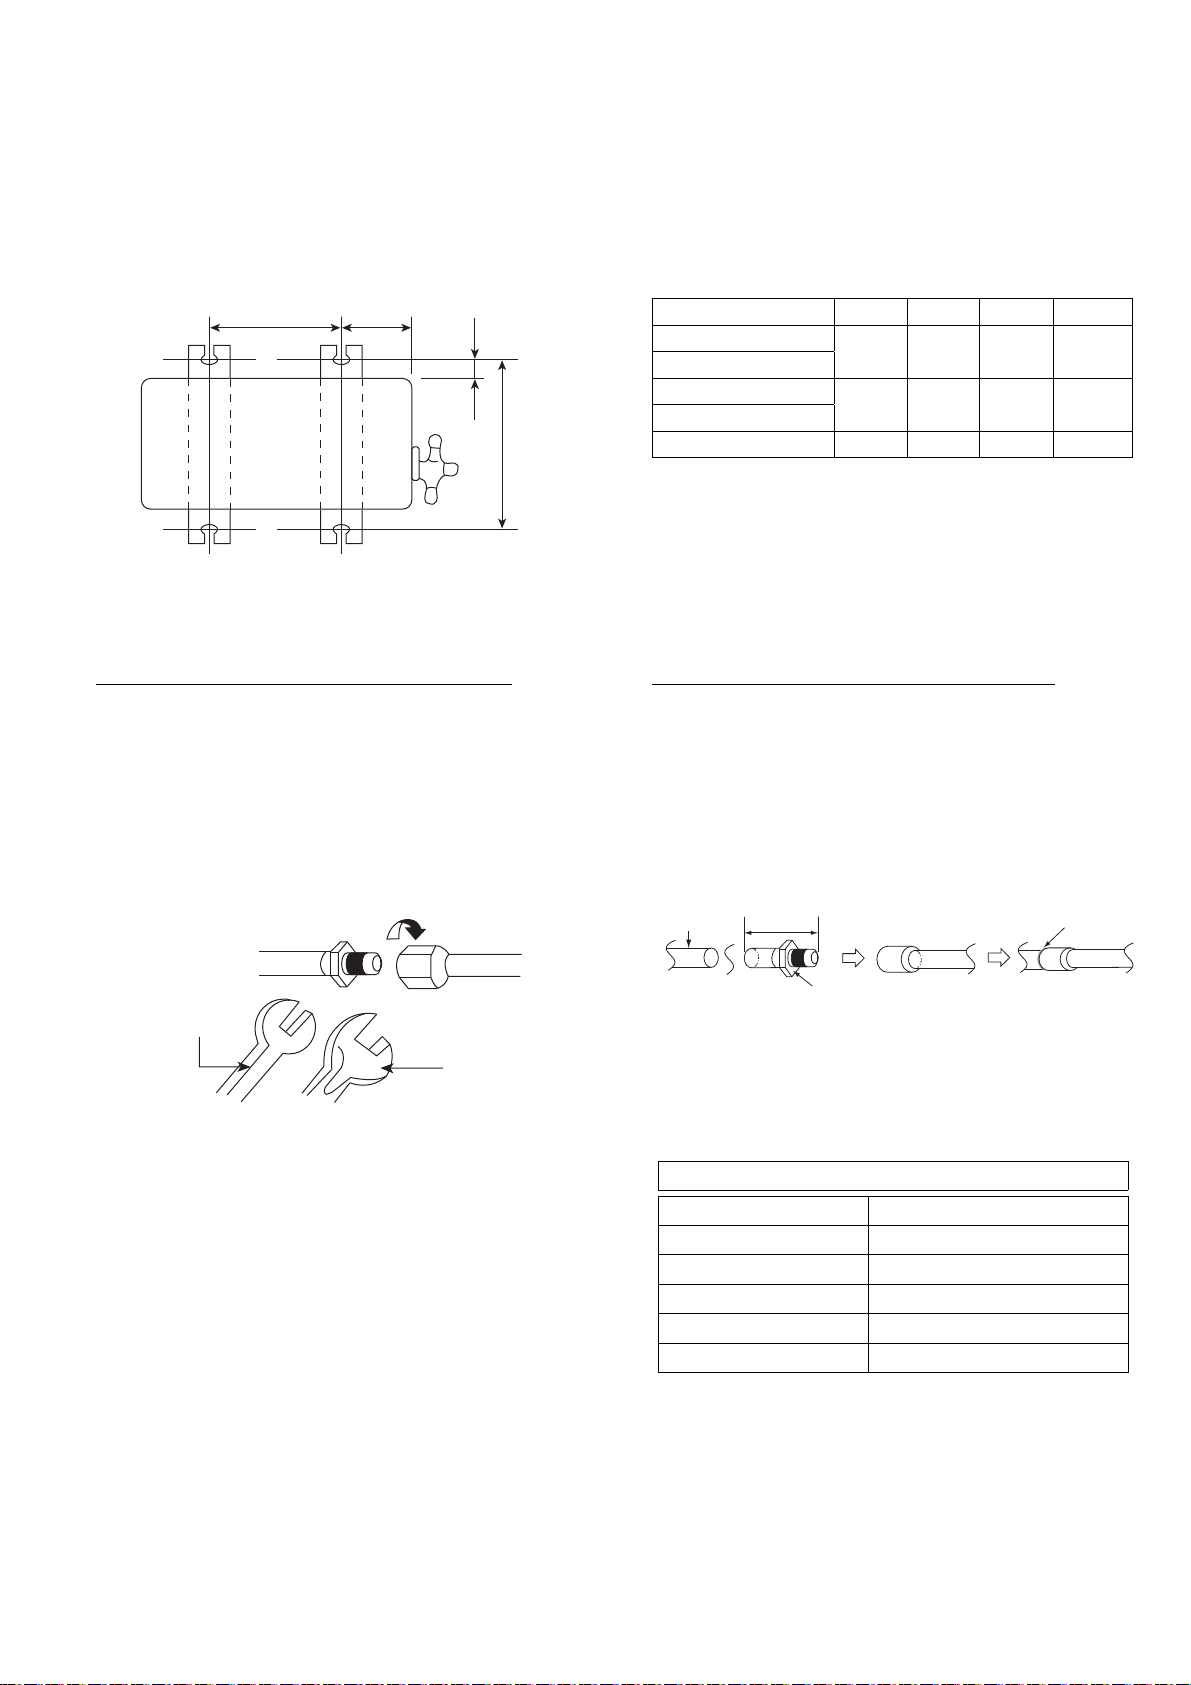
12.3 Outdoor Unit
12.3.1 Install the Outdoor Unit
After selecting the best location, start installation to Indoor/Outdoor Unit Installation Diagram.
1 Fix the unit on concrete or rigid frame firmly and horizontally by bolt nut (ø10 mm).
2 When installing at roof, please consider strong wind and earthquake.
Please fasten the installation stand firmly with bolt, screws or nails.
AB
C
D
12.3.2 Connect the Piping
12.3.2.1 Connecting the Piping to Indoor
For connection joint location at outside building
Please make flare after inserting flare nut (locate at
joint portion of tube assembly) onto the copper pipe.
(In case of using long piping)
Connect the piping
Align the center of piping and sufficiently tighten
the flare nut with fingers.
Further tighten the flare nut with torque wrench in
specified torque as stated in the table.
For connection joint location at inside building
Decide the length.
Cut and remove the tube connectors at indoor
Use pipe expander to expand the end of long
Align the center of piping and braze the piping
Indoor
copper pipe
Model A B C D
Z20***, XZ20***
Z25***, XZ25***
Z35***, XZ35***
Z42***
Z50***, XZ50***, Z71*** 613 mm 131 mm 16 mm 360.5 mm
570 mm 105 mm 18.5 mm 320 mm
540 mm 160 mm 18.5 mm 330 mm
copper pipings (both gas and liquid piping) by
using pipe cutter. Remove burrs from cut edge.
piping.
joints.
(40~50mm)
Brazing point
Spanner or
Wrench
Torque
wrench
12.3.2.2 Connecting the Piping to Outdoor
Decide piping length and then cut by using pipe cutter.
Remove burrs from cut edge.
Make flare after inserting the flare nut (locate at valve)
onto the copper pipe.
Align center of piping to valve and then tighten with
torque wrench to the specified torque as stated in the
table.
Tube connector
1. Cut and
Remove
Do not overtighten, overtightening may cause gas leakage
Piping size Torque
6.35 mm (1/4") [18 N•m (1.8 kgf•m)]
9.52 mm (3/8") [42 N•m (4.3 kgf•m)]
12.7 mm (1/2") [55 N•m (5.6 kgf•m)]
15.88 mm (5/8") [65 N•m (6.6 kgf•m)]
19.05 mm (3/4") [100 N•m (10.2 kgf•m)]
2. Expand long
pipe
3. Braze both
pipe
57
Page 58
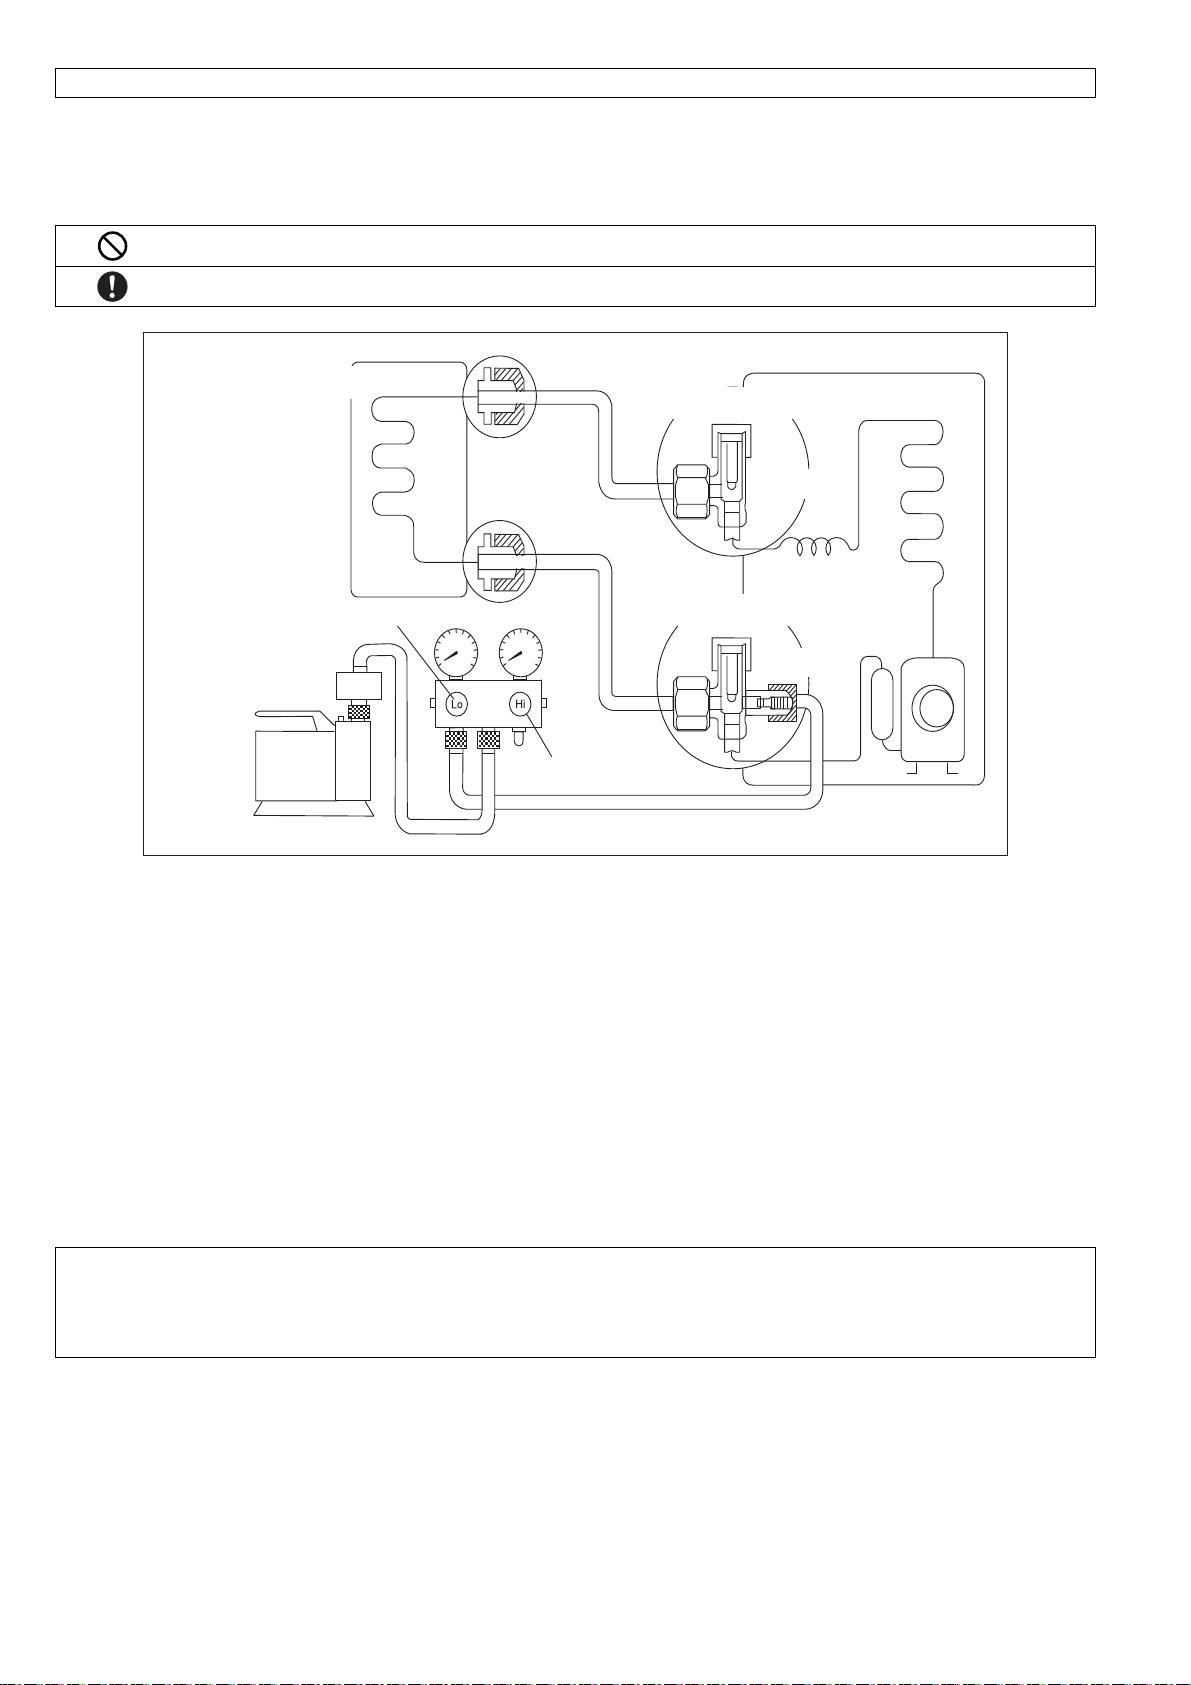
AIR PURGING METHOD IS PROHIBITED FOR R32 SYSTEM
12.3.3 Evacuation of the Equipment
WHEN INSTALLING AN AIR CONDITIONER, BE SURE TO EVACUATE THE AIR INSIDE THE INDOOR UNIT AND
PIPES in the following procedure.
Do not purge the air with refrigerants but use a vacuum pump to vacuum the installation.
There is no extra refrigerant in the outdoor unit for air purging.
Indoor unit
Liquid side
Two-way valve
Outdoor unit
Close
Gas side
Three-way valve
OPEN
Close
Vacuum
CLOSE
pump
1 Connect a charging hose with a push pin to the Low side of a charging set and the service port of the 3-way
valve.
o Be sure to connect the end of the charging hose with the push pin to the service port.
2 Connect the center hose of the charging set to a vacuum pump.
3 Turn on the power switch of the vacuum pump and make sure that the needle in the gauge moves from
0 cmHg (0 MPa) to -76 cmHg (-0.1 MPa). Then evacuate the air approximately ten minutes.
4 Close the Low side valve of the charging set and turn off the vacuum pump. Make sure that the needle in the
gauge does not move after approximately five minutes.
Note: BE SURE TO TAKE THIS PROCEDURE IN ORDER TO AVOID REFRIGERENT GAS LEAKAGE.
5 Disconnect the charging hose from the vacuum pump and from the service port of the 3-way valve.
6 Tighten the service port caps of the 3-way valve at a torque of 18 N•m with a torque wrench.
7 Remove the valve caps of both of the 2-way valve and 3-way valve. Position both of the valves to “OPEN”
using a hexagonal wrench (4 mm).
8 Mount valve caps onto the 2-way valve and the 3-way valve.
o Be sure to check for gas leakage.
If gauge needle does not move from 0 cmHg (0 MPa) to -76 cmHg (-0.1 MPa), in step 3 above take the following measure:
- If the leak stops when the piping connections are tightened further, continue working from step 3.
- If the leak does not stop when the connections are retightened, repair location of leak.
- Do not release refrigerant during piping work for installation and reinstallation.
- Take care of the liquid refrigerant, it may cause frostbite.
58
Page 59
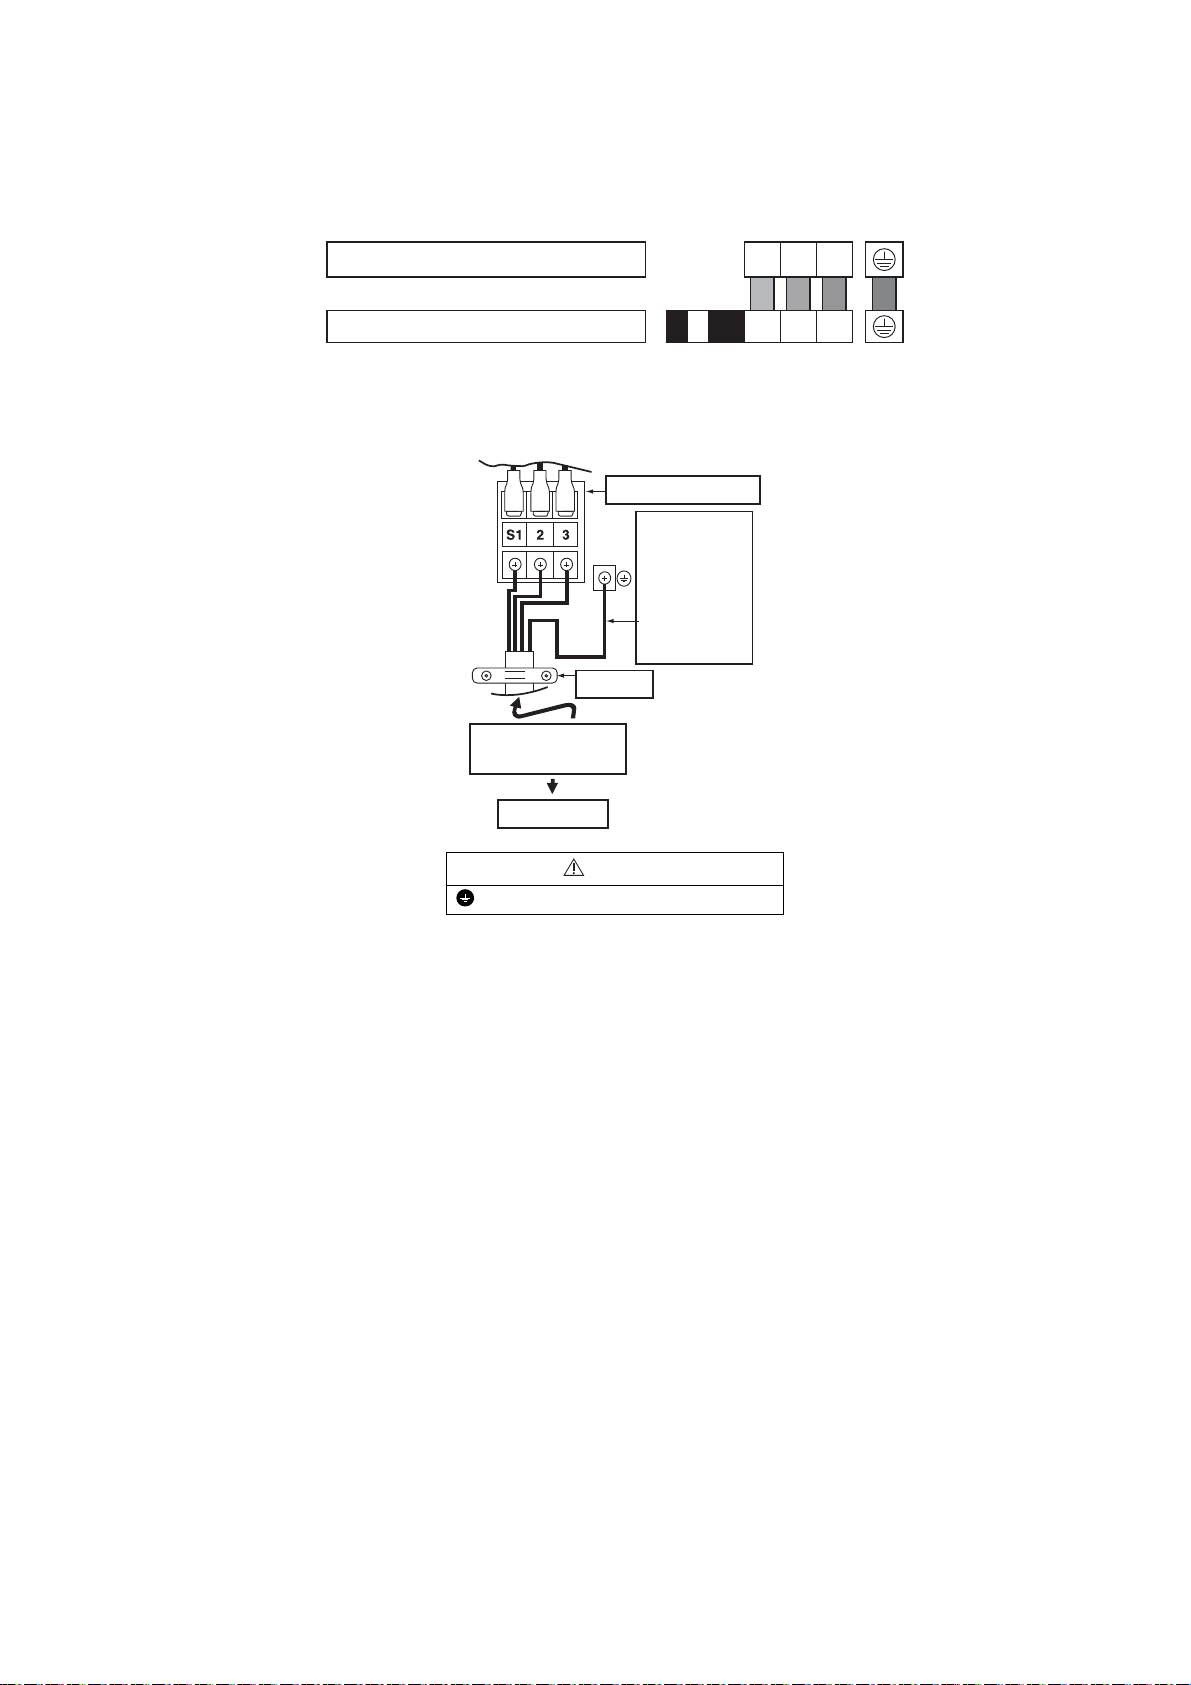
12.3.4 Connect the Cable to the Outdoor Unit
1 Remove the control board cover from the unit by loosening the screw.
2 Connection cable between indoor unit and outdoor unit shall be approved polychloroprene sheathed
4 × 1.5 mm
heavier cord. Do not use joint connection cable. Replace the wire if the existing wire (from concealed wiring,
or otherwise) is too short.
3 Secure the cable onto the control board with the holder (clamper).
4 Attach the control board cover back to the original position with screw.
5 For wire stripping and connection requirement, refer to instruction 11.2.4 of indoor unit.
2
(3/4 ~ 1.75HP) or 4 × 2.5 mm2 (2.0 ~ 2.5HP) flexible cord, type designation 60245 IEC 57 or
Terminals on the outdoor unit S1 2 3
Colour of wires (connection cable)
Terminals on the indoor unit L 1 N S1 2 3
Terminal Board
Earth wire
longer than
others
AC wires
for safety
reason
Holder
Indoor & outdoor
connection cable
Indoor unit
WARNING
This equipment must be properly earthed.
Earth wire shall be Yellow/Green (Y/G) in colour and longer than other AC wires for safety reason.
12.3.5 Piping Insulation
1 Please carry out insulation at pipe connection portion as mentioned in Indoor/Outdoor Unit Installation
Diagram. Please wrap the insulated piping end to prevent water from going inside the piping.
2 If drain hose or connecting piping is in the room (where dew may form), please increase the insulation by
using POLY-E FOAM with thickness 6 mm or above.
59
Page 60
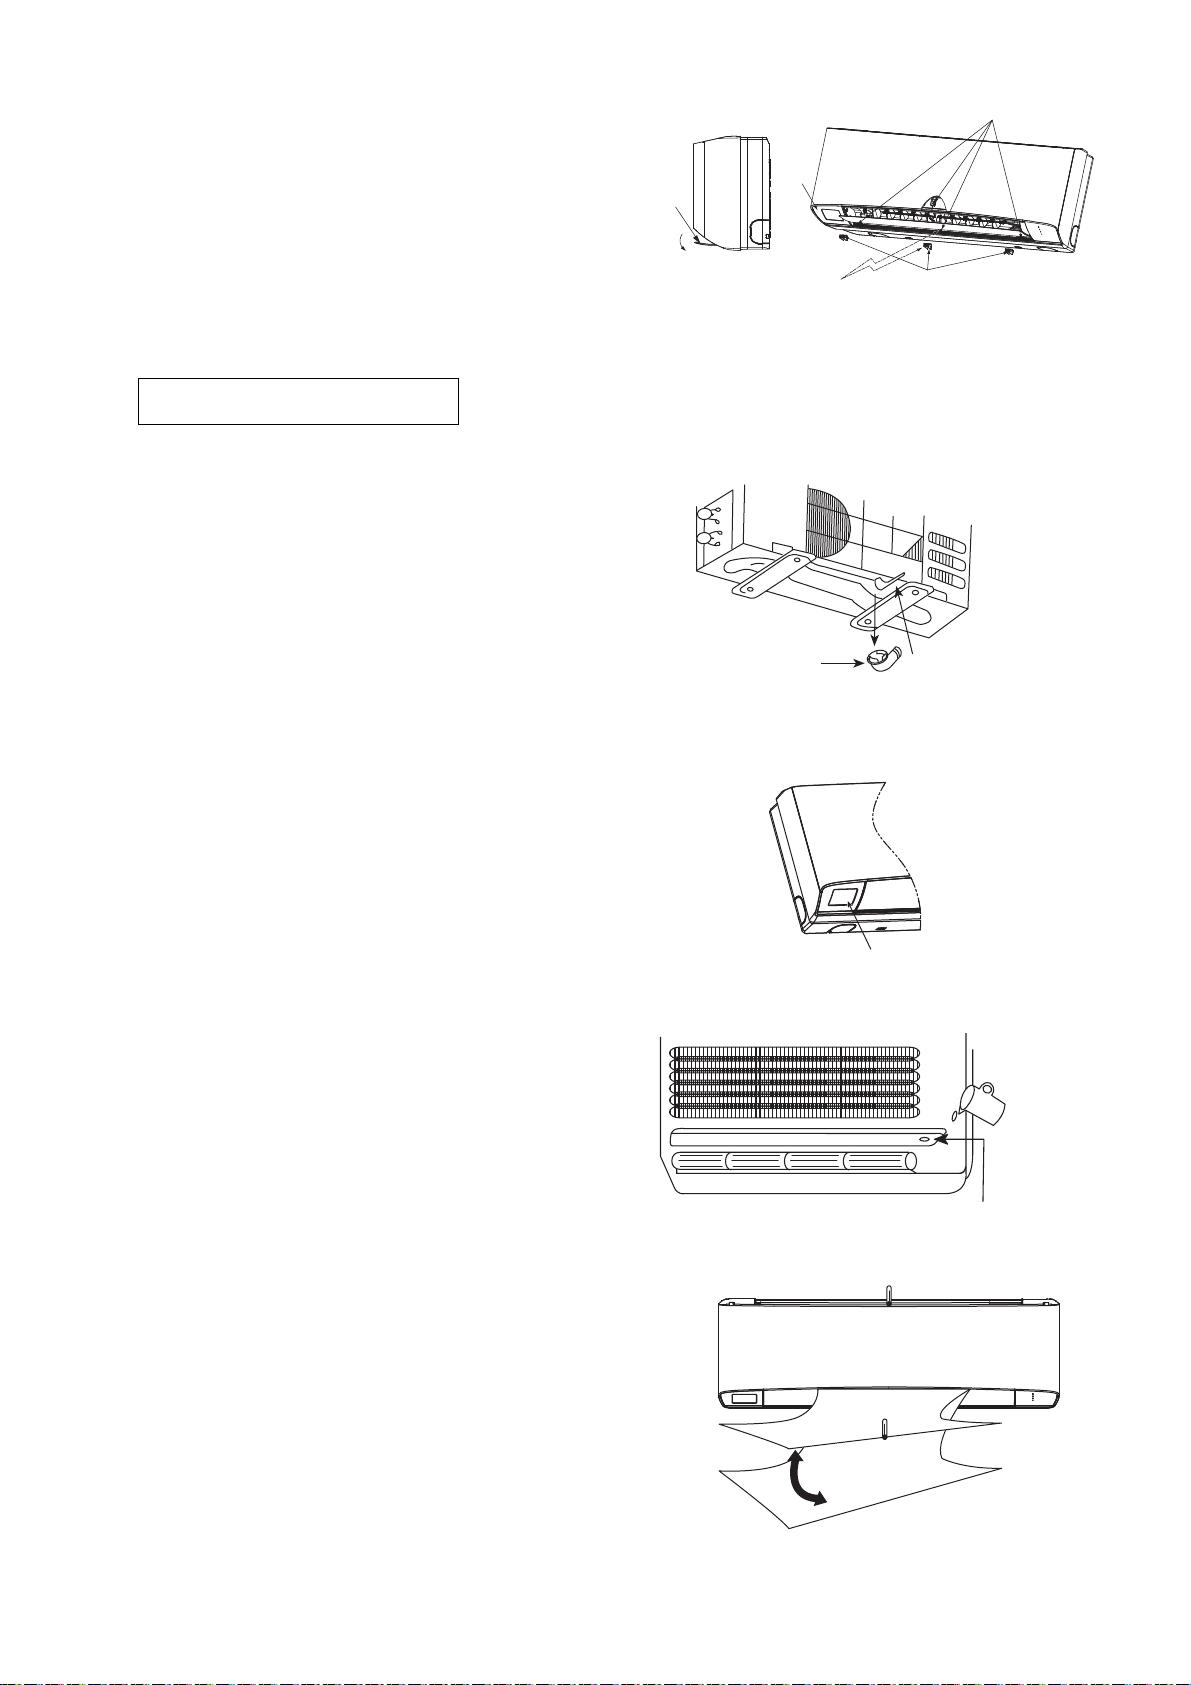
12.3.6 How to Take Out Front Grille
Please follow the steps below to take out front grille if
necessary such as when servicing.
1 Set the vertical airflow direction louvers to the
horizontal position.
2 Remove the 2 caps (1.0 ~ 1.75HP) or 3 caps
(2.0 ~ 2.5HP) on the front grille as shown in
the illustration at right.
3 And then remove the 3 (1.0 ~ 1.75HP) or
4 (2.0 ~ 2.5HP) mounting screws.
4 Pull the lower section of the front grille
towards you to remove the front grille.
When reinstalling the front grille, carry out
above step 2 - 3 in the reverse order.
12.3.7 Disposal of Outdoor Unit Drain Water
If a drain elbow is used, the unit should be placed
on a stand which is taller than 3 cm.
If the unit is used in an area where temperature
falls below 0°C for 2 or 3 days in succession, it is
recommended not to use a drain elbow, for the
drain water freezes and the fan will not rotate.
Vane
(Move the
vane to
downward)
Screw
Front
grille
(only for 2.0HP ~ 2.5HP model)
Drain elbow
Install the hose at an angle so that the
water smoothly fl ows out.
7
Cap
Hose
12.3.8 Eco Sensor
Do not hit or violently press the sensor. This can
lead to damage and malfunction.
Do not place large objects near the sensor and
keep heating units or humidifiers away from the
sensors detection area. This may lead to sensor
malfunction.
12.3.9 Check the Drainage
Open front panel and remove air filters. (Drainage
checking can be carried out without removing the
front grille.)
Pour a glass of water into the drain tray-styrofoam.
Ensure that water flows out from drain hose of the
indoor unit.
12.3.10 Evaluation of the Performance
Operate the unit at cooling/heating operation
mode for fifteen minutes or more.
Measure the temperature of the intake and
discharge air.
Ensure the difference between the intake
temperature and the discharge is more than 8°C
during Cooling operation or more than 14°C
during Heating operation.
ECO SENSOR
Drain tray-styrofoam
Discharge air
60
Page 61
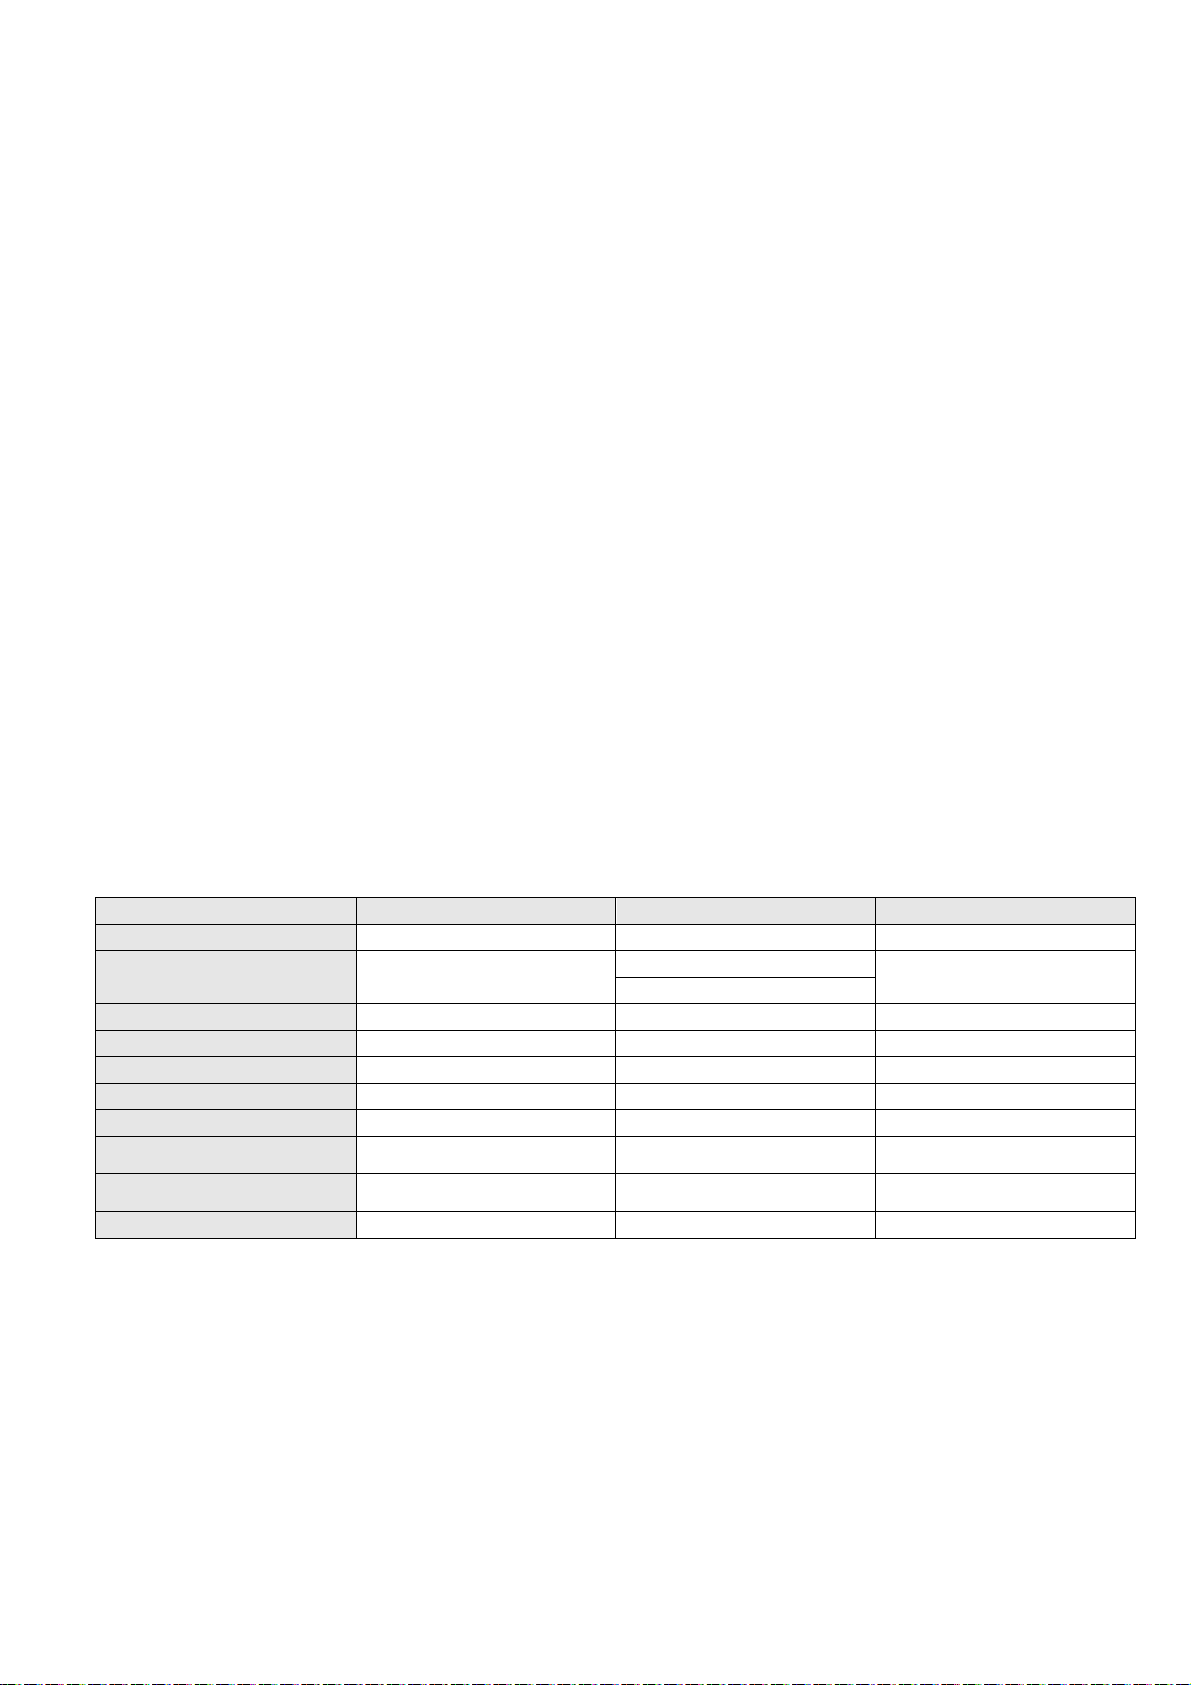
13. Installation and Servicing Air Conditioner using R32
13.1 About R32 Refrigerant
For air conditioning refrigerants such as R410A, the refrigerants were collected back in order to prevent their air
dissipation, to curbe the global warming impact, in case they were released into the atmosphere. In the “4th
Environmental Basic Plan”, 80% reduction of greenhouse gas emissions by 2050 is required, and due to this
requirement, further reduction in the emission of high greenhouse effect gas, such as CFCs, is required. Therefore,
the conversion of air conditioning refrigerant into the ones who has smaller greenhouse effect, even if it is dissipated
into the atmosphere, became our responsibility.
Nevertheless, in case of air conditioning refrigerant, it would be the best if there is a refrigerant which has smaller
impact on global warming, but ensures good energy efficiency and performance, and is safe; howeve r, there is no
such refrigerant which satisfies all these conditions. As a result, we have been considering the pra ctical u s age, within
the safety frame-work, of R32 refrigerant which has short lifetime in the atmosphere, and has smaller effect of global
warming, but is slightly flammable.
In 2004, due to the revision of air conditioner safety standards by the International Electro-safety Commission (IEC),
the safety standards of air conditioners using slightly flammable refrigerant was issued. In 2010, the regulations of
American Society of Heating, Refrigerating and Air-Conditioning Engineers in the United States (ANSI/ASHRAE34)
was issued adopting the grades for refrigerants which are difficult to inflame due to their slow burning rates, and as a
result have smaller damages in cases of fire. The burning rate of R32 is lower by 10cm / per second, and safety
standardization for various usage is now being processed.
13.2 Characteristics of R32 Refrigerant
1. Chemical Characteristics
R32 is one of the refrigerants used in R410A, has almost no toxicity, and chemically stable compound formed by
hydrogen, carbon and fluorine.
R32 has short lifetime of 4 to 9 years in case of being released into the atmosphere; therefore, it has smaller
greenhouse gas effect but has slight inflammability because of the large proportion of hydrogen.
Chemical Characteristic Table of R32, R410A and R22.
R32 R410A R22
Chemical Formula CH2F2 CH2F2 / CHF2CF3 CHCLF2
Composition
(mixture ratio wt.%)
Boiling Point (°C) -51.7 -51.5 -40.8
Pressure (physical) *1 3.14 3.07 1.94
Capacity (physical) *2 160 141 100
COP (physical) *3 95 91 100
Ozone Depletion Potential (ODP) 0 0 0.055
Global Warming Potential
(GWP) *4
Inflammability *5
Toxicity None None None
Single Composition
675 2090 1810
Slightly Inflammable
(A2L)
*1:Physical property of temperature condition 50°C
*2:Relative value of temperature condition 0/50°C, providing R22=100
*3:Te/Tc/SC/SH=5/50/3/0°C
*4:GWP=Global Warming Potential, each figure is based on “4
*5:Based on ANSI / ASHRAE std. 34-2010
R32 / R125A
(50 / 50 wt.%)
Non-inflammable (A1) Non-inflammable (A1)
th
IPCC4 Report”
Single Composition
61
Page 62
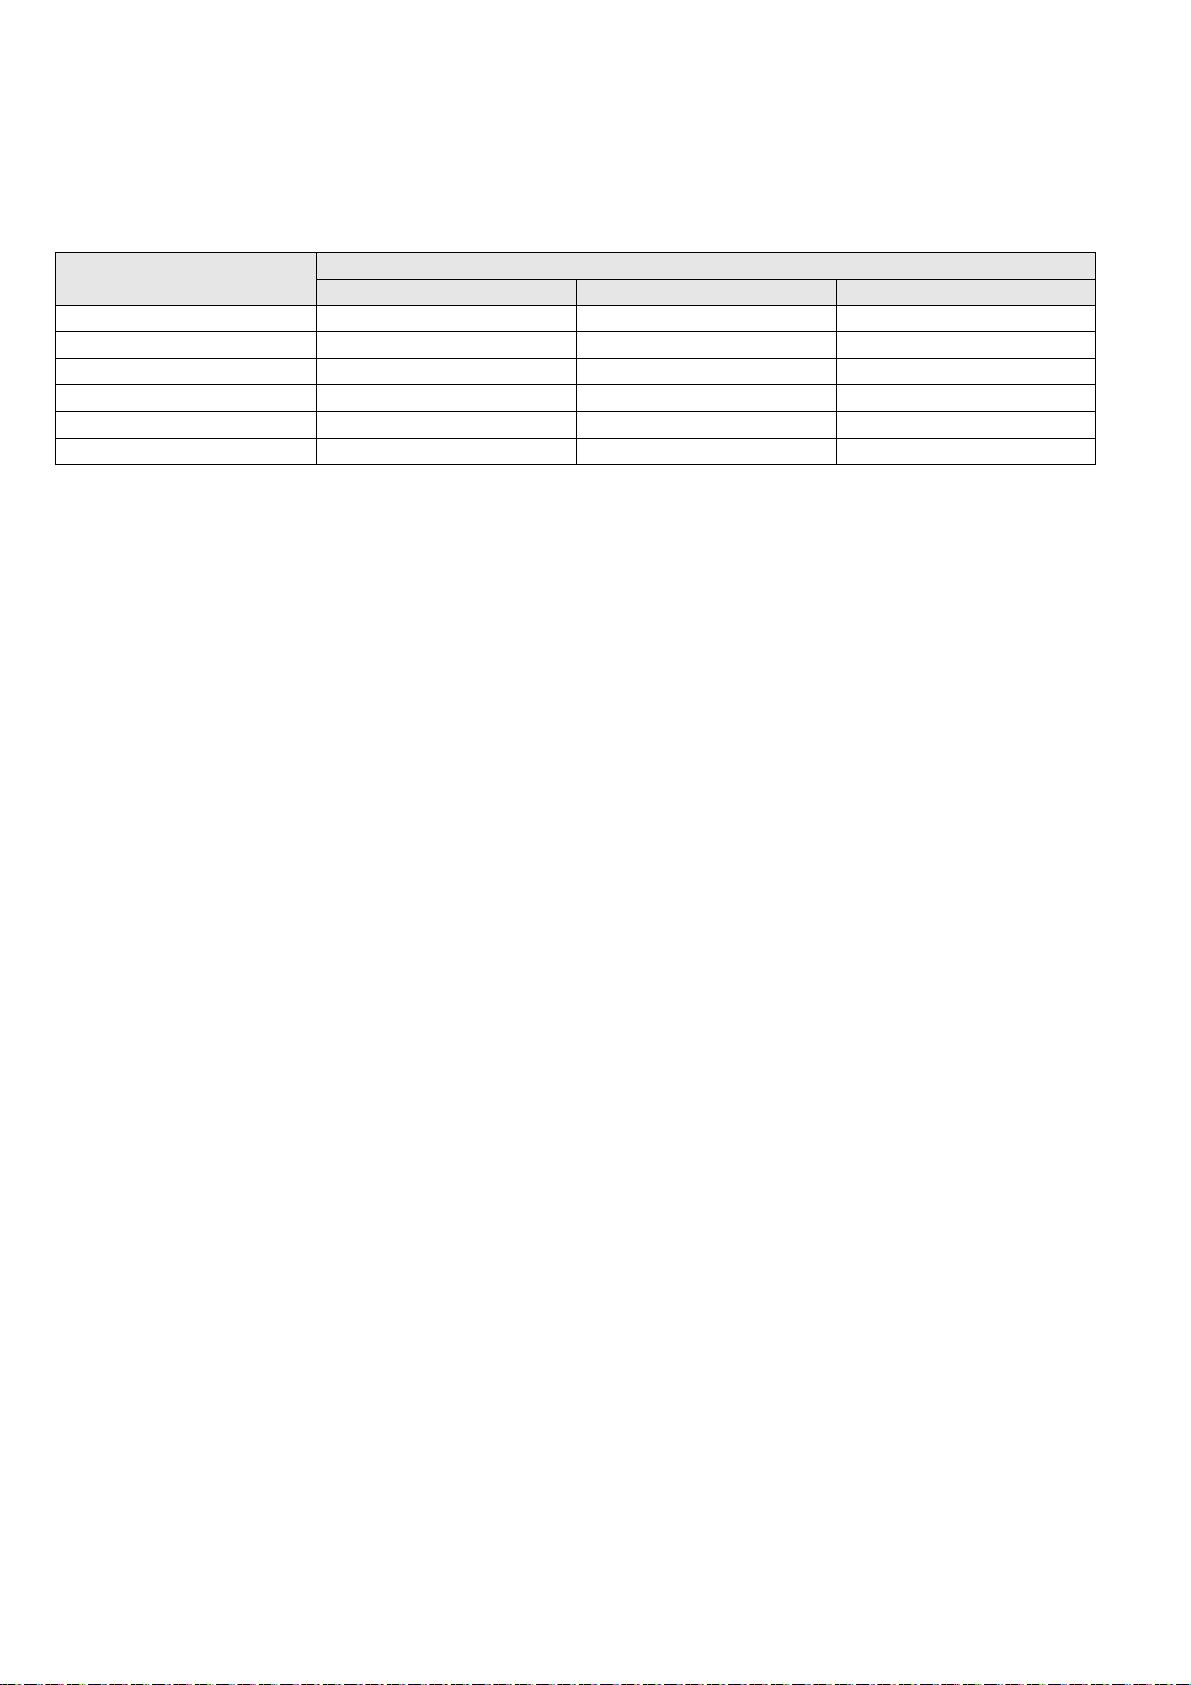
2. Characteristic of Pressure
As shown in Table 2, R32 does not have much difference in vapor pressure at the same refrigerant temperature
comparing to R410A, but comparing to R22, it is higher at 1.6 times more. Thus, the same as in case of R410A, it is
necessary to do installation and service using high-pressure tools and components.
Table 2. Saturated vapor pressure comparison table
(Unit: MPa)
Temperature
-20 0.30 0.30 0.14
0 0.71 0.70 0.40
20 1.37 1.35 0.81
40 2.38 2.32 1.43
60 3.84 3.73 2.33
65 4.29 4.17 2.60
R32 R410A R22
Refrigerant
Reference: Thermal properties table of Japan Society of Refrigerating and Air Conditioning Engineers (60, 65°C)
NIST REFPROP V8.0 (-20 ~ 40°C)
62
Page 63
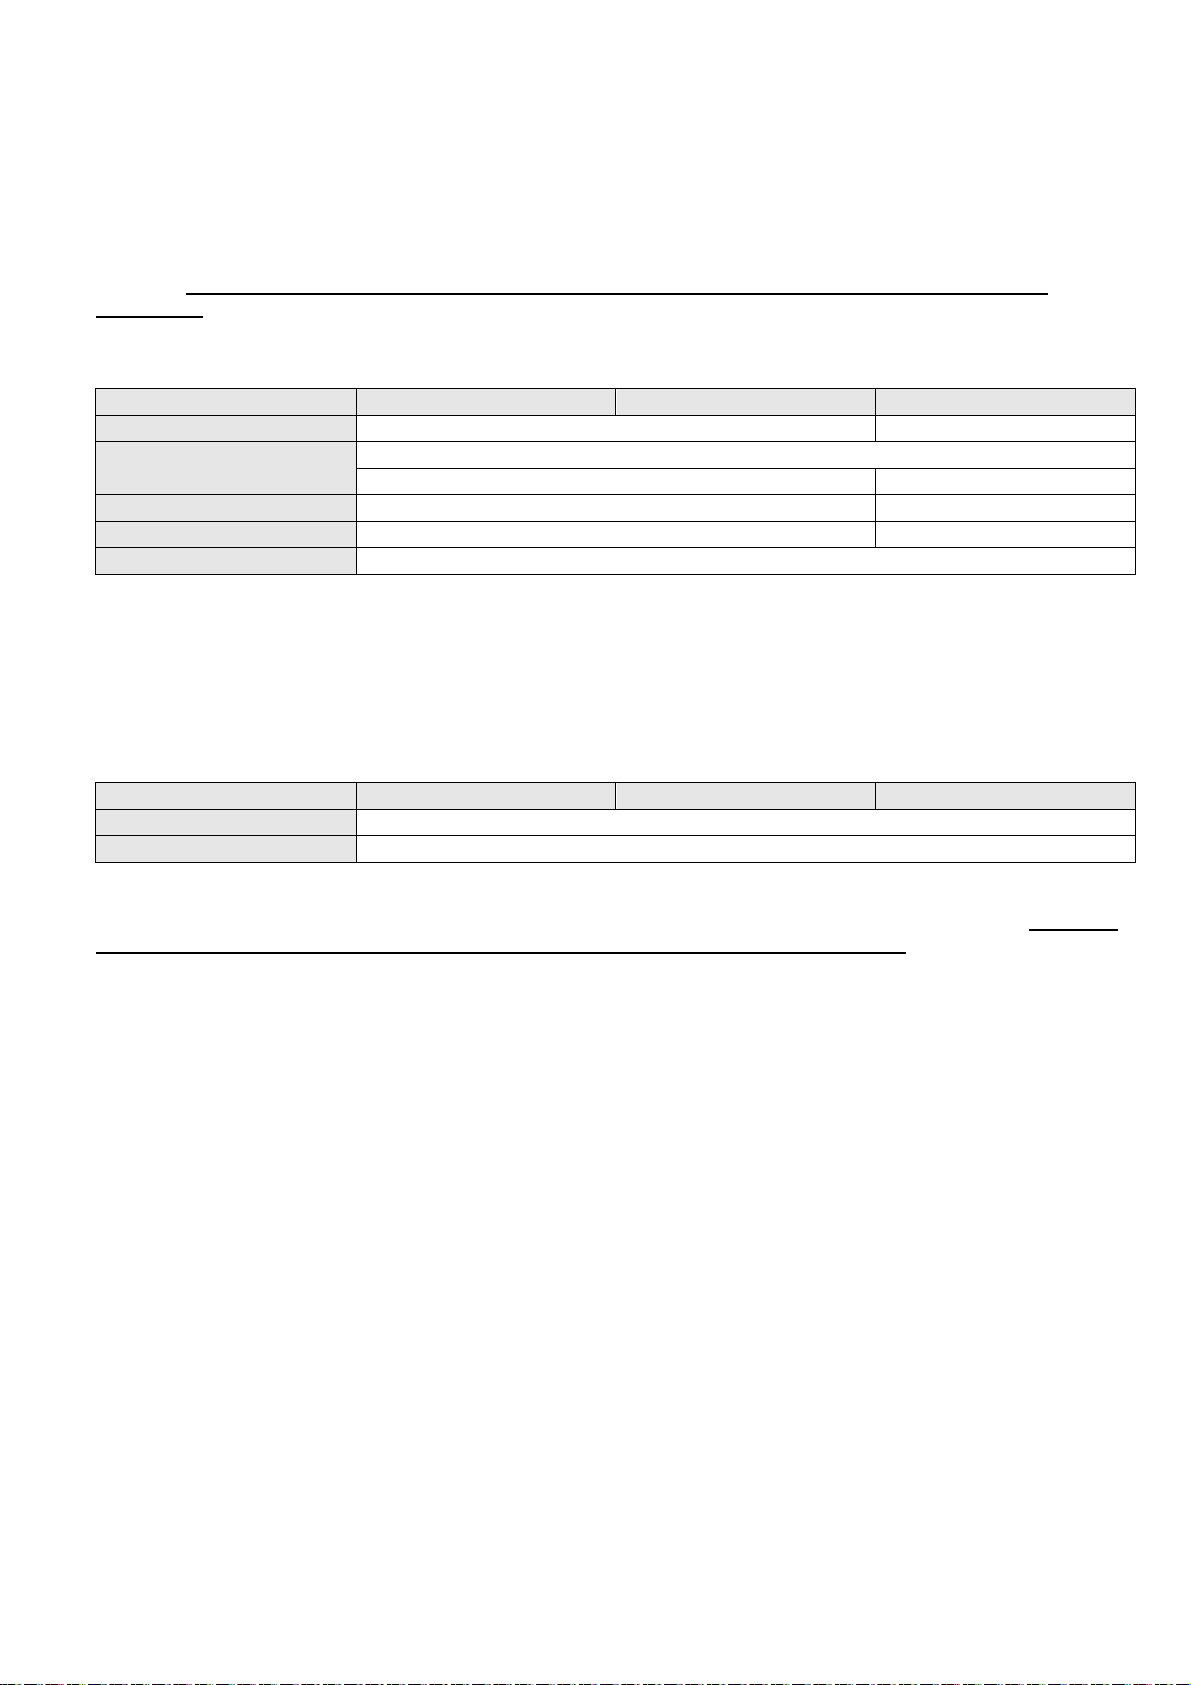
13.3 Refrigerant piping installation • Tools used in services
13.3.1 Required Tools
R32 refrigerant air conditioners use the common parts as R410A air conditioners for two-way valves and three-way
valves (diameters of service ports); thus, they maintain commonality in the maintenance of the compressive strength,
the size of pipe flaring, and the size of flare nuts as R410A. Therefore, for refrigerant pipe installation and services,
you can use tools for R410A.
However, mixing of refrigerants is not allowed, so that you have to separate the cylinders for the recovery of
refrigerants.
Tools used for installation •
Works R32 R410A R22
Flaring Flare tools for R410A (clutch type) Flare tools for R22 (clutch type)
Connection of pipes
Manifold gauge charging hose R32 & R410A Common (As at November 2013) R22 Only
Air purging Vacuum pump + Reducer / expander Vacuum pump
Gas leakage test Detection liquid or soup water, HFC detector
*1. Nut diameters of 1/2 5/8, the size of torque wrench common with R410A
For other installation, you can use general tools such as screw drivers (+, -), metal saws, electric drills, long-nose
pliers, hole core drills (ø70 or ø65), linen tape, levels, temperature gauges, clamp meters, electric knives, nippers,
pipe cutters, reamers or scrapers, spring benders, (diameters 1/4 3/8 1/2 5/8), monkey wrenches, fixing wrenches
(17 or 12 mm), feeler gauges, hexagon wrenches (4 mm), testers, megohm testers, etc.
Tools used for services
Works R32 R410A R22
Insertion of refrigerant Digital scale for refrigerant charging, refrigerant cylinders, cylinder adopters and packing *a
Recovery of refrigerant Refrigerant recovery devices, refrigerant cylinders, manifold gauges, charging hoses *b
*a. Use cylinder for each refrigerant, cylinder adopter and packing.
*b. Use refrigerant recovery cylinder separately for each refrigerant (no mixture of refrigerant allowed). Please be
aware that there are some refrigerant collection devices which do not have self-certification.
relocation • replacement of air conditioning units
Torque wrench (diameter 1/4 3/8)
Torque wrench (diameter 1/2 5/8) *1 Toque wrench (diameter 1/2 5/8)
13.3.2 Tools for R32 (common with R410A)
1. Flare gauges
Use flare gauges when you perform flaring with flare
tools (crutch type). Flare gauges are used to set the
pipe ends at 0.5 ~ 1.5 mm from clump bars of flare
tools.
Flare gauges
2. Flare tools (clutch type)
Flare tools have larger holes of clump bars in order
to set the pipe end at 0 ~ 0.5 mm, and have stronger
springs inside to ensure solid flaring torques. These
flare tools can be used commonly for R22.
Flare tools (clutch type)
63
Page 64
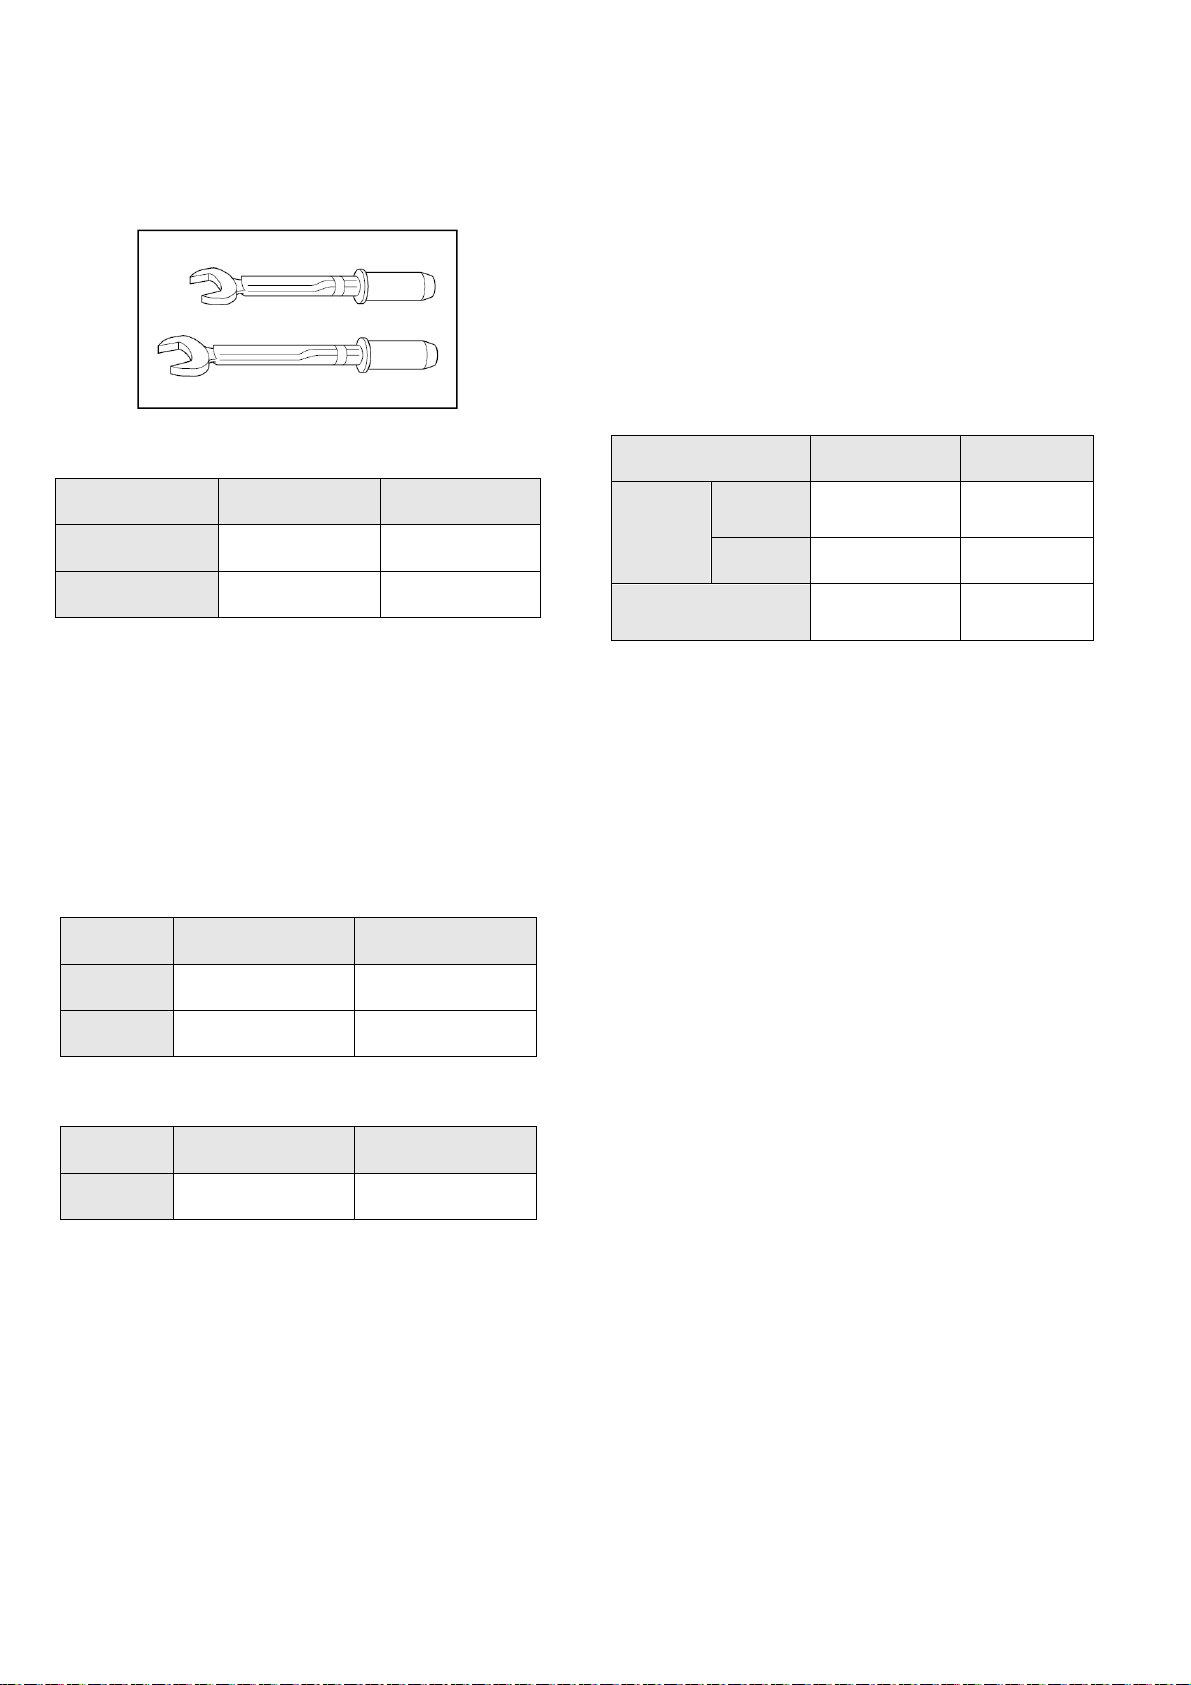
3. Torque wrenches (diameters 1/2, 5/8)
In order to strengthen the compressive strength, the
diameters of wrenches change depending on the flare
nut sizes.
Torque wrenches
Manifold gauges / Charging hoses
Differences in torque wrenches
1/2
(diameter × torque)
5/8
(diameter × torque)
R32
(common R410A)
26 mm × 55 N•m
(550 kgf•m)
29 mm × 65 N•m
(650 kgf•m)
R22
24 mm × 55 N•m
(550 kgf•m)
27 mm × 65 N•m
(650 kgf•m)
4. Manifold gauges
R22 gauges cannot be used because of the high
pressures.
Each port of manifold has different shapes in order
to prevent inserting wrong refrigerant.
*However, the port shape for R410A and R32 is the
same; therefore, attention need to be paid not to insert
wrong refrigerant.
Differences in high/low pressure gauges
High pressure
gauges (red)
Low pressure
gauges (blue)
-76 cmHg ~ 53 kgf / cm
-76 cmHg ~ 38 kgf / cm
R32
(common R410A)
-0.1 ~ 5.3 MPa
-0.1 ~ 3.8 MPa
R22
-76 cmHg ~ 35 kgf / cm
2
-76 cmHg ~ 17 kgf / cm
2
2
2
Difference in manifold port sizes
Port sizes 1/2 UNF20 7/16 UNF20
R32
(common R410A)
R22
Differences in charging hoses
R32
(common R410A)
5.1 MPa
(52 kgf / cm
27.4 MPa
(280 kgf / cm
HNBR rubber
Internal nylon
coating
2
)
2
)
R22
3.4 MPa
(35 kgf / cm2)
17.2 MPa
(175 kgf / cm2)
NBR rubber
Pressure
Resistance
Material
Normal
operation
pressure
Burst
pressure
6. Vacuum pump and Vacuum pump adopter
When using a vacuum pump, it is necessary to set a
solenoid valve in order to prevent backflow of vacuum
pump oil into the charge hoses, and use a vacuum
pump with oil backflow prevention function, or use the
vacuum pump with vacuum pump adopter.
If vacuum pump oil(mineral oil-based)mixes with
R410A (R32), it may cause damage to the machine.
Vacuum pump
Vacuum pump adopter
5. Charging hoses
The pressure resistance of charge hoses is increased.
At the same time, the material is changed to HFC
resistant, and the size of each manifold adopter is
changed, as the port size of manifold gauge itself.
Further, some hoses are with anti-gas pressure
backflow valves placed near the adopters. (hoses with
the valves recommended)
64
Page 65

7. HFC refrigerant_Electric gas leakage tester
R32 refrigerant is often used for other mixed
refrigerant (R410A, R404A, R407C etc.). Therefore,
the usage of existing HFC detectors is possible, but in
order to detect more accurately, we recommend to
use detectors specially set and adjusted for R32
detection.
HFC refrigerant_Electric gas leakage tester
9. Refrigerant cylinders
Refrigerant cylinders for R410A are painted in pink,
and the ones for R32 are painted in other colors that
might subject to change according to the international
standards. R32 is a single refrigerant, so that both
liquid and gas insertion are possible. Additional
charging is also possible.
(R410A is a mixed refrigerant, so only liquid insertion
is possible)
Refrigerant cylinders
8. Digital scale for refrigerant charging
R32 and R410A have high pressure level and their
evaporation speed is high.
Thus, if you recover the refrigerant by cylinder
charging method, the refrigerant evaporates within the
weighing scale glass, which makes reading the scale
difficult, rather than liquidating the refrigerant into the
cylinder. (Charging cylinders for R22 have different
pressure resistance, scale, connection port size;
therefore, they are not usable) At the same time, the
digital scale for refrigerant charging is strengthened by
receiving the weight of the refrigerant cylinders with
four pillars at the corners. The connection ports of
charging hoses have two separate ports for R22 (7/16
UNF20) and R32/R410A (1/2 UNF20) therefore, they
can be used for the insertion of the existing
refrigerants.
Digital scale for refrigerant charging
10. Connection ports of refrigerant cylinders and
packing
Charging ports which fit to the charging hose
connection port size (1/2 UNF20) is needed. At the
same time, the packing has to be of HFC resistant
materials.
Connection ports and packing
65
Page 66
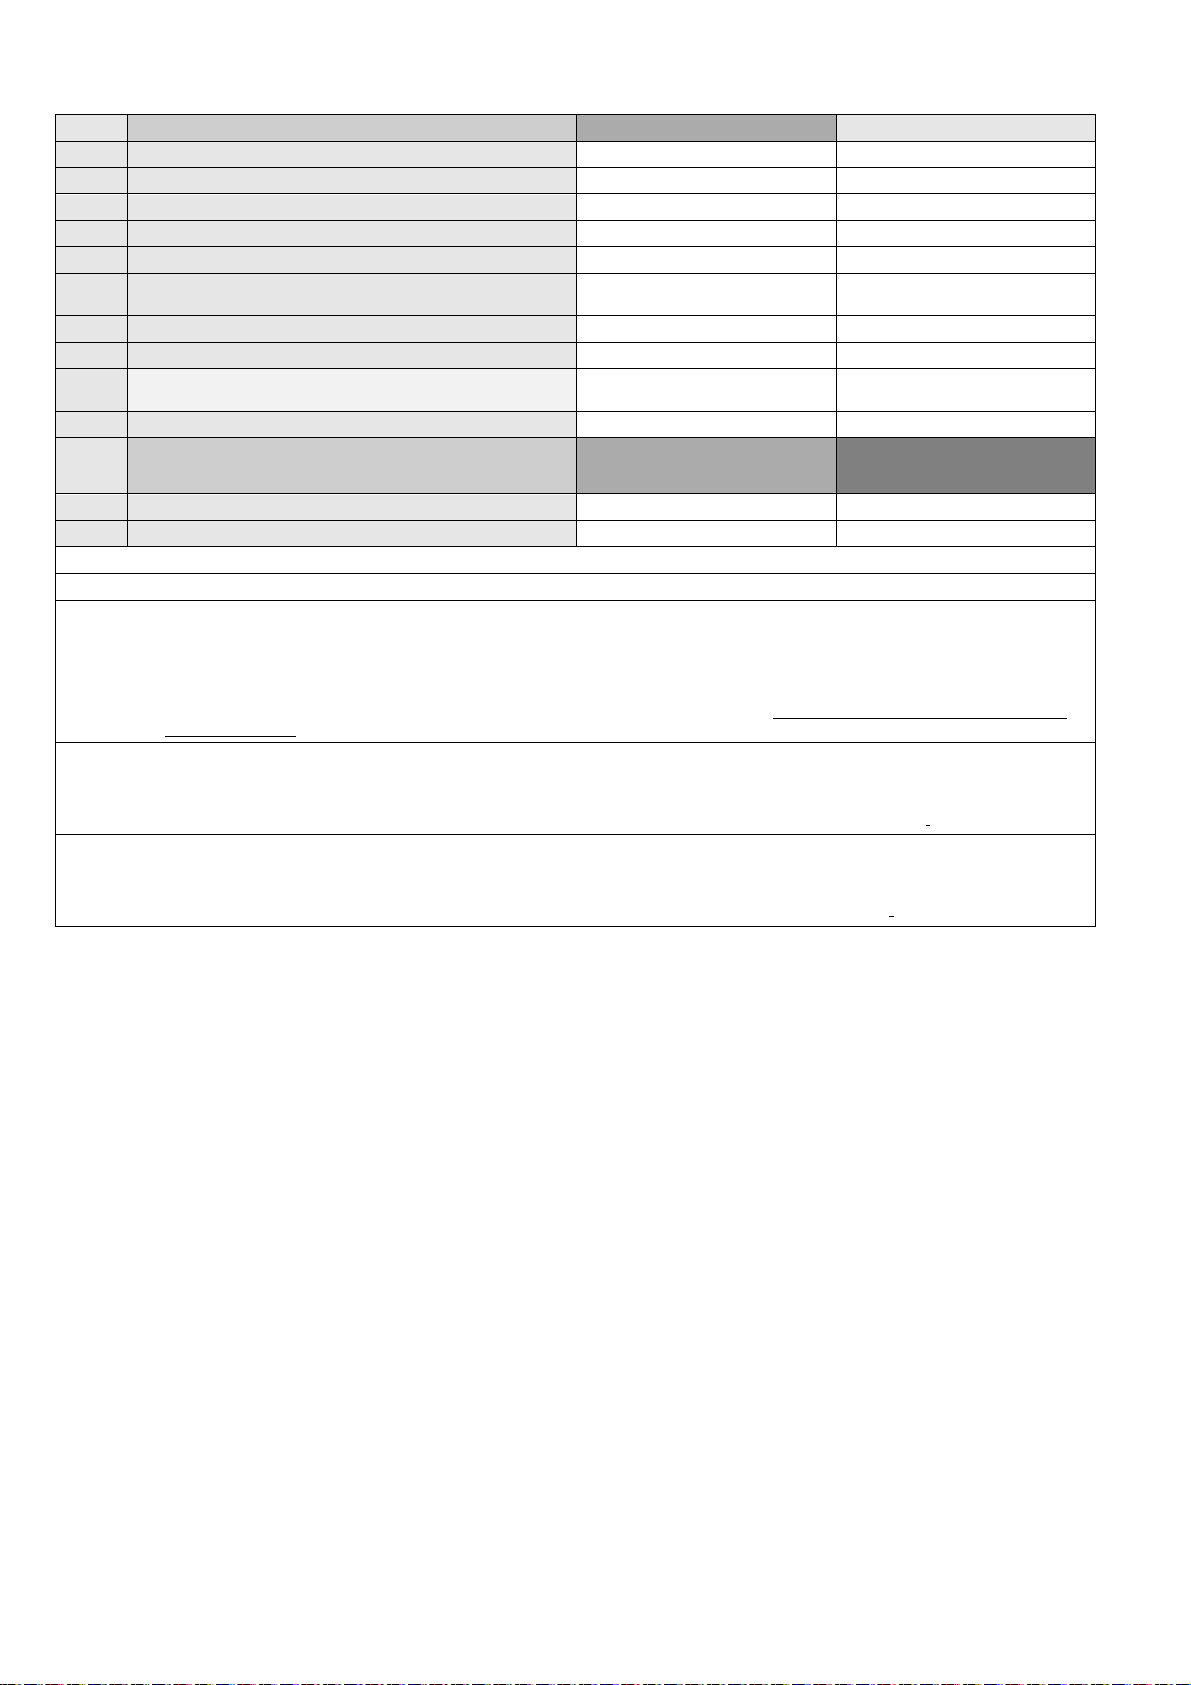
11. Tools used for refrigerant piping installations and services
Tools for R410A Common with R32 Possibility of usage for R22
1. Pipe cutters, reamers or scrapers
2. Flare tools (clutch type)
3. Torque wrench (1/4, 3/8)
4. Torque wrench (1/2, 5/8)
5.
6. Vacuum pumps, vacuum pump adopters
7. Electric gas leakage testers for HFC *1
8. Digital scale for refrigerant charging
9. HCF recovery devices (connection port 5/16) *2
10. Refrigerant cylinders (pressure resistant: FC3)
11. Refrigerant cylinders (pink)
12. Refrigerant cylinder connection ports and packing
13. Allen wrench (4 mm) Electric knives
*1 Those testers only for HCFC22 (R22), but not for HCF32 (R32) and HCF410A (R410A) cannot be for common use.
*2 Recovery devices which are self-certified for each HCF type can be used.
[Knowledge for the common usage of tools for R410A & R32]
R410A and R32 machines use different compressor oils.
If unregulated compressor oil gets mixed into, it may cause damage to the machine function.
Careful pump down will ensure the recovery of compressor oil, and it will minimize the remaining amount of the oil in the manifold
gauge and charging hose.
If you only perform the recovery of refrigerant and not be able to perform pump down, you have to dispose the compressor oil in
the charging hose.
[Precaution of repairing refrigerant cycle]
In the brazing, open 2-way and 3-way valves, and make sure the refrigerant is completely recovered back and not remaining the
system.
When repairing outside, make sure no refrigerant is in the air, ensure good air flow, and perform the brazing.
Manifold gauges・charging hoses
Other (colors that might subject to
change according to the
international standards).
○ ○
○ ○
○ ○
○ ×
○ ×
○ Connection
5/16
○
○ Connection
1/4
△
○ ○
○ Connection
5/16
Same specs
× ×
○ Connection
1/4
×
○ ×
○ ○
[Inserting wrong refrigerant]
It may cause “not cooling” and “not heating” customer claims because each component (expansion valve, compressor, PCB) of the
refrigeration cycle is specially adjusted for R32.
At the same time, it is not subject to product warranty, if wrong refrigerant was inserted into the system.
66
Page 67
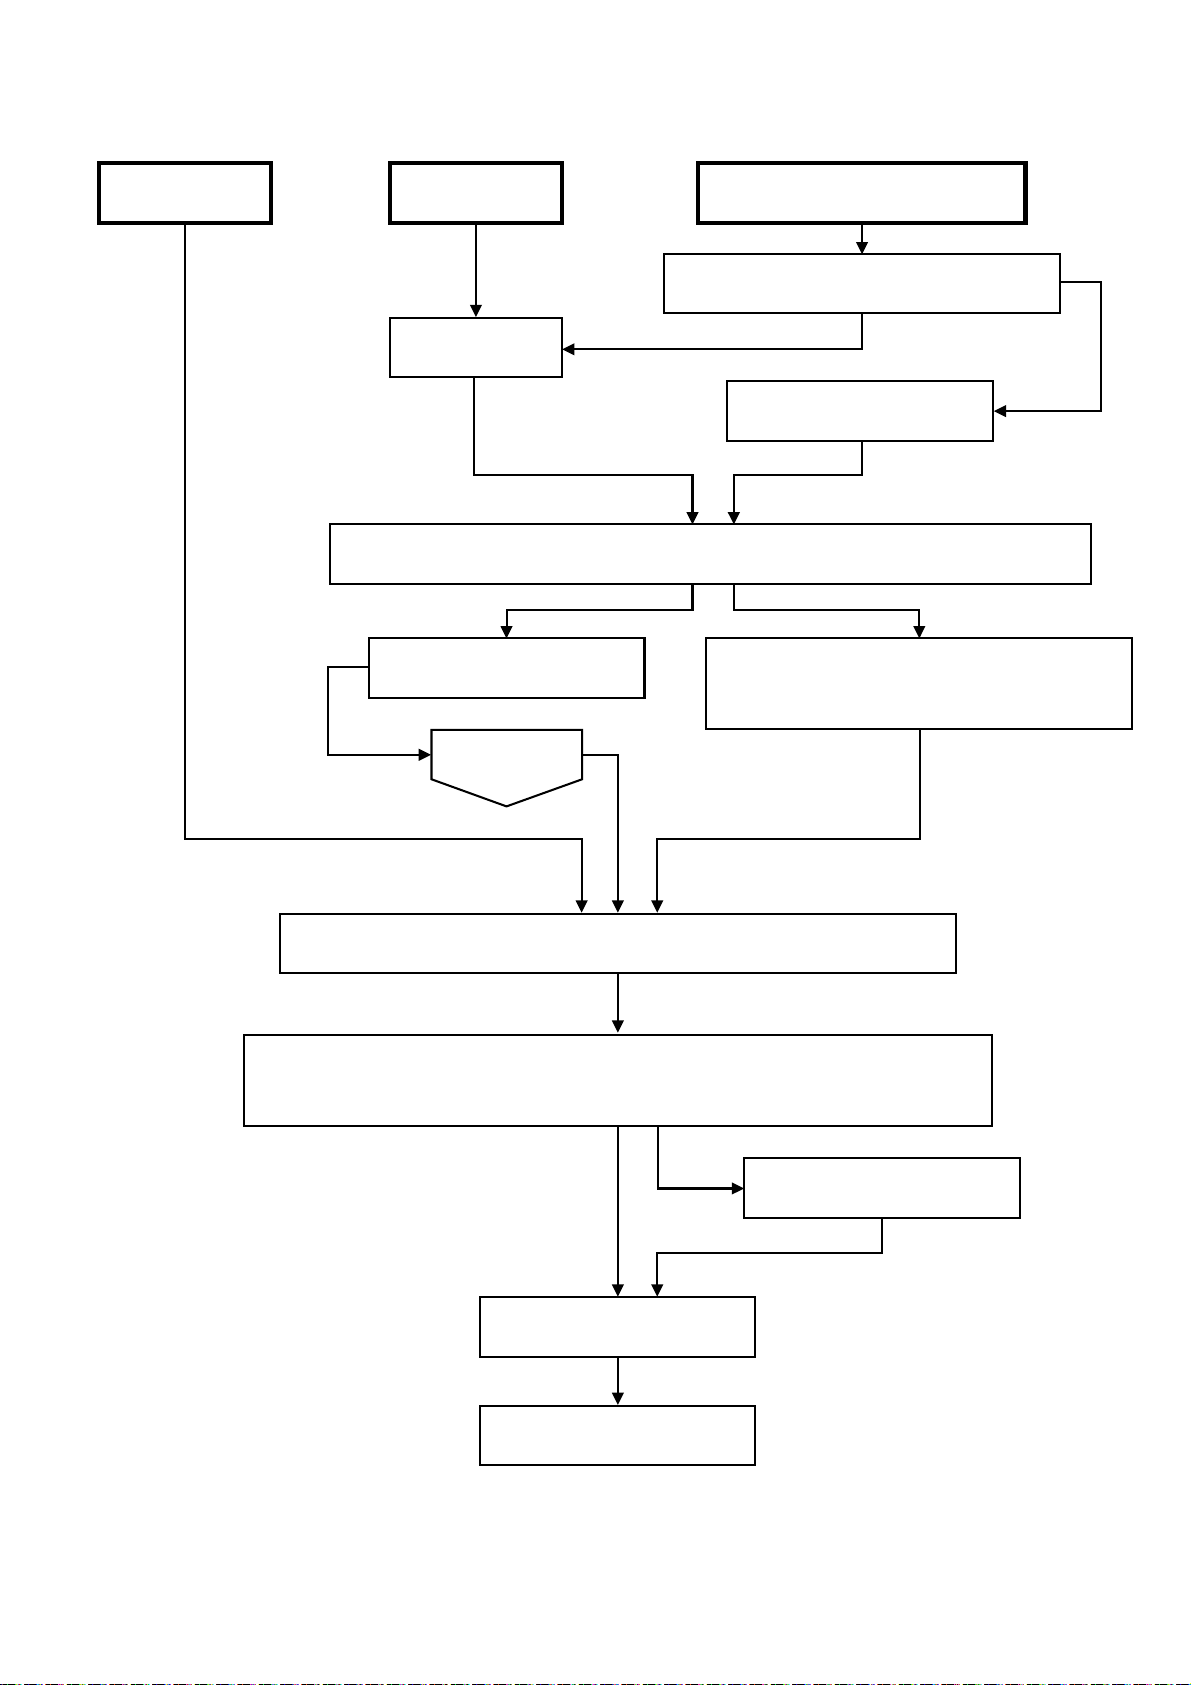
13.4 New installation, Relocation, Repairing of Refrigerant Cycle System The
Procedures
New
Installation
• Displacing pipes and wires, and displac ing indoor / outdoor units
Relocation Repairing refrigerant cycle
Indoor / outdoor units and piping
Pump down
Refrigerant recovery
Prevention of im pur ity
• Dismantling indoor / outdoor units
• Repairing by brazing
Removal
・Indoor / outdoor units installation and piping, and wir ing
Evacuation (Air pur ging) new ins t allat i on and r elocation for at or
more than 15 minutes , re-charging at or m or e than 60 minutes
Insertion of ref r iger ant
Leakage checking
Operation testing
67
Page 68
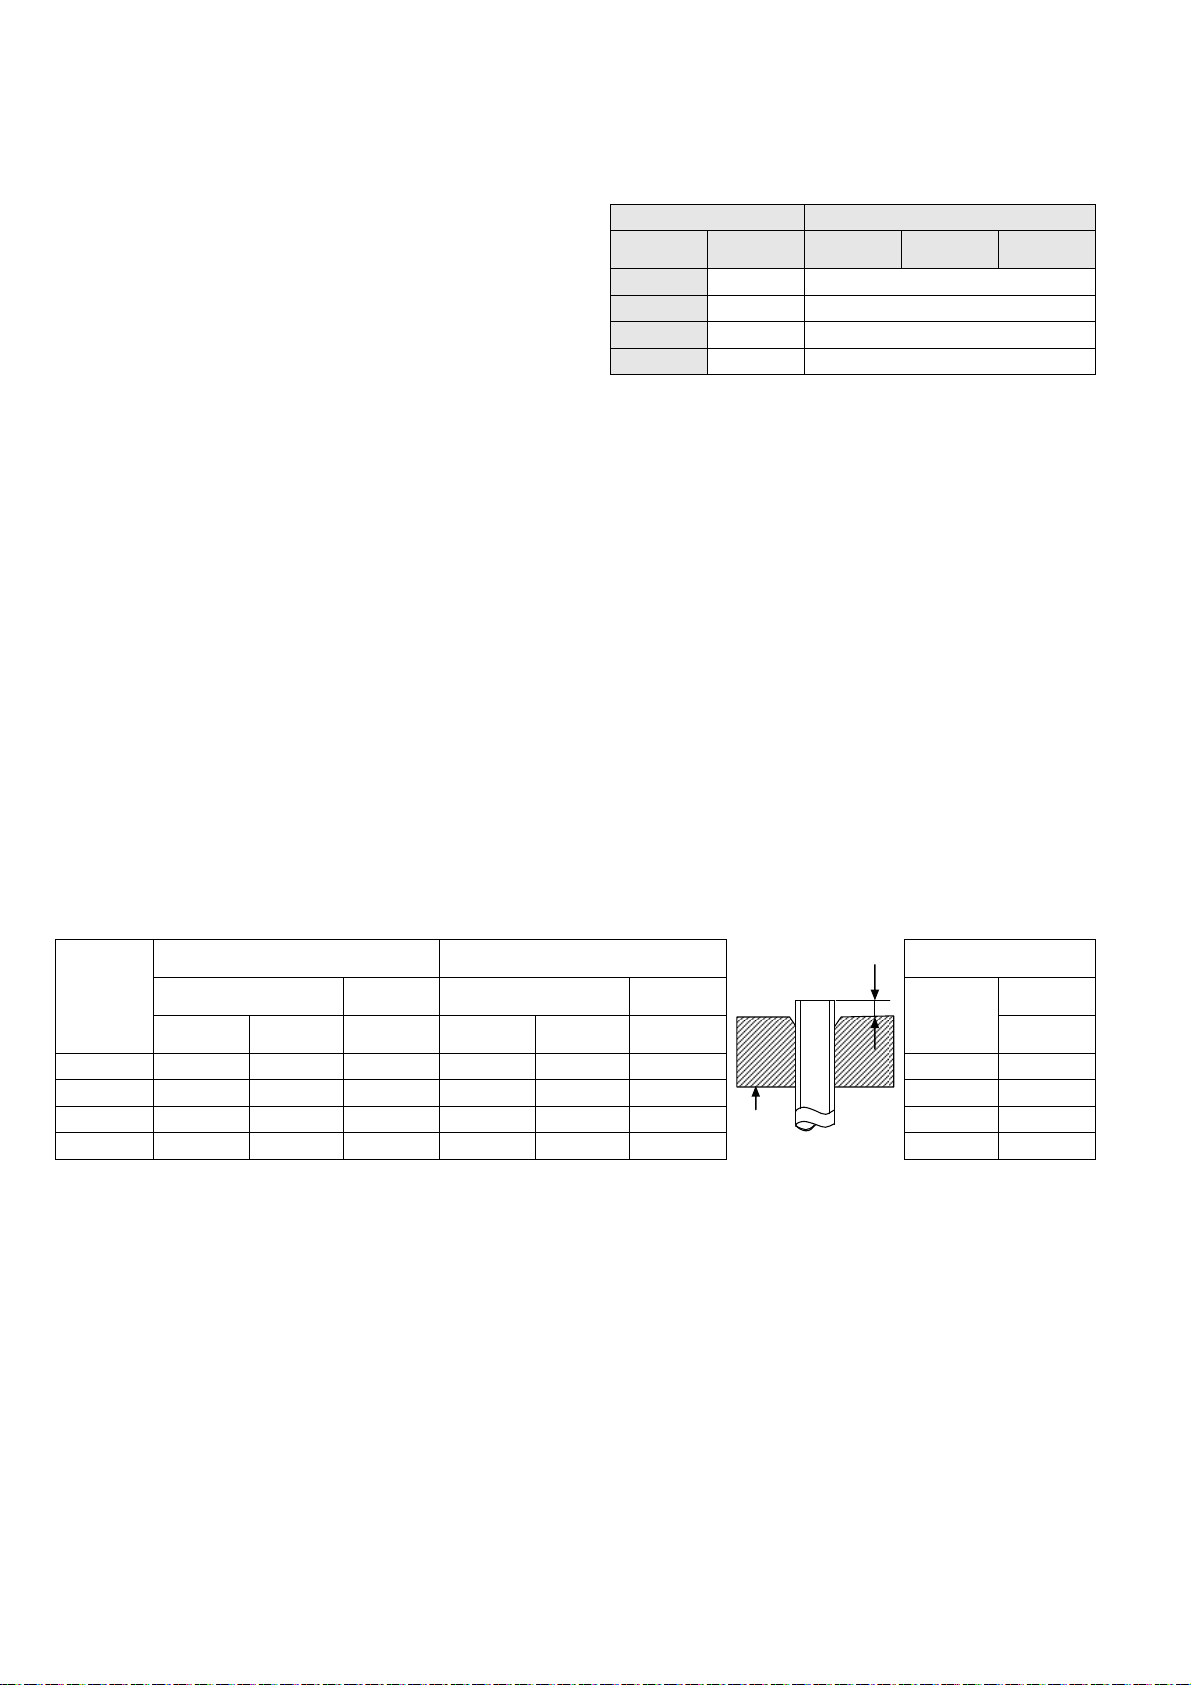
13.5 Piping installation of R32
13.5.1 Pipe materials used and flaring
Copper pipes are used for refrigerant piping. Pipes
which comply with JIS Regulations need to be used.
Room air conditioners which use R410A and R32
have higher pressure; thus, using pipes which comply
with the Regulations is important.
The pipe thickness is regulated by revised JIS B 8607
“Flaring and brazing fittings for refrigerant” and the
pipe thickness for R410A, R32 is shown in the table.
Caution
For connection piping, use copper phosphate seamless pipes (1220T) as regulated in “JIS H 3300” and the pipe
thickness is 0.8 mm.
In the market, there are some pipes of 0.7 mm thickness, but do not use these pipes (0.8 mm thickness has to be
strictly followed).
It is recommended to use pipes whose adhesion amount of oil is at or less than 40 mg / 10 m.
At the same time, do not use pipes with dent, de-shape, and color change (especially inside).
13.5.2 Processing and connection of pipes
For refrigerant pipe installation, be aware of moisture and dirt do not get into the pipes, and make sure of no
refrigerant leakage.
◎ The procedure of flaring and precautions
a) Cutting of pipes:use pipe cutter and cut the pipe slowly not to de-shape the pipe.
b) Removal of burrs on the edge of pipe (reamer or scraper)
If the condition of pipe edge after the deburring is no good or if burrs attaches on the flaring, it may cause
refrigerant leakage. Turn the pipe end down and perform deburring carefully.
c) Insert the flare nut (use the nut which is a part of the CZ parts)
d) Flaring
Ensure the cleanliness of clump bar and pipe, and perform flaring carefully.
Use the existing flare tools or flare tools for R410A. Be aware that the sizes and dimensions of flaring is different
in each flaring tool. If you use the existing flaring tools, use flaring gauge to measure the length of the flaring part.
Dimensions “a” (mm)
Piping
size
(mm)
6.35 (1/4") 0.5 ~ 1.0 1.0 ~ 1.5 0 ~ 0.5 1.0 ~ 1.5 1.5 ~ 2.0 0 ~ 0.5 17 17
9.52 (3/8") 0.5 ~ 1.0 1.0 ~ 1.5 0 ~ 0.5 1.0 ~ 1.5 1.5 ~ 2.0 0 ~ 0.5 22 22
12.70 (1/2") 0.5 ~ 1.0 1.5 ~ 2.0 0 ~ 0.5 1.0 ~ 1.5 2.0 ~ 2.5 0 ~ 0.5 24 26
15.88 (5/8") 0.5 ~ 1.0 1.5 ~ 2.0 0 ~ 0.5 1.0 ~ 1.5 2.0 ~ 2.5 0 ~ 0.5 27 29
Flare tools
Clutch type
R22
Wing nut
type
Flare tools
for R410A
Clutch type Clutch type
Dimensions “a” (mm)
R410A/R32
Flare tools
Pipe thickness
Wing nut
type
O and OL materials Thickness (mm)
Diameter
1/4 6.35 0.80
3/8 9.52 0.80
1/2 12.70 0.80
5/8 15.88 1.00
Flare tools
for R410A
Clutch type R32
Diameter
(mm)
Bar
R410A R32 R22
Nut outer diameter (mm)
a
R22
R410A
68
Page 69

13.6 Installation, Relocation, and Service
13.6.1 Air purge and gas leak test for new installation (using new refrigerant pipes)
using vacuum pump
(From the point of view of global environment protection, do not release CFCs into the atmosphere during installation
work)
1. Connect the charging hose of manifold gauge to the service port of 3-way valve (pushing insect pin).
2. Fully open the handle Lo of manifold gauge and operate vacuum pump.
(If the needle of the low-pressure gauge reaches the vacuum immediately, check 1 procedure again)
3. Perform vacuuming 15 minutes or more, and make sure low pressure gauge reaches to -0.1 MPa (-76cmHg).
When the vacuuming completes, fully open the handle Lo of manifold gauge and stop the operation of vacuum
pump, and leave it for 1 ~ 2 minutes. Then, remove the connection side of the charging hose of vacuum pump
adopter after checking the needle of manifold gauge does not turn back.
4. Open the stem of 2-way valve to 90° in anti-clock wise, and close the 2-way valve after 10 seconds, and perform
gas leakage test.
5. Remove the charge hose from the service port of 3-way valve, and open the stems of 2-way and 3-way valves
(open the valves to anti-clock wise carefully, do not use full strength to open)
6. Tighten the service port cap with torque wrench 18
Tighten the caps of 2-way and 3-way valves with torque wrench 18 N•m (1.8kg f•m)
7. After the tightening of each cap, check gas leakage around the cap.
N•m (1.8 kgf•m)
Liquid side
Gas side
2-way valve
Hex wrench
Valve stem caps
Service
port cap
Service port
valve core
-0.1 MPa
(-76cmHg)
3-way valve
Low-pressure
Lo Handle
Vacuum pump
adaptor
gauge
High-pressure
gauge
Manifold gauge
Hi Handle
Charging hoses
Vac uum
pump
69
Page 70

13.6.2 Process of refrigerant recovery
1. Connect the center charging hose of manifold gauge to the in-let side of recovery device.
2. Connect the valves of the discharge side of recovery device and liquid side of refrigerant cylinder with red hose
(charging hose).
3. Connect the yellow float switch cable of the recovery device to the refrigerant cylinder.
4. Open the low pressure side valve of manifold gauge.
5. Slightly loosen the charging hose of in-let connecting side of recovery device and perform air purge.
6. Open the liquid valve of refrigerant cylinder and slightly loosen the charging hose in discharging side of recovery
device, and perform air purge (the recovery cylinder needs slight inside pressure).
7. Insert electric plug of recovery device into electrical outlet (the fan operation starts).
8. Turn the valve 1 and 2 of recovery device to pressure equalization point.
9. After a few seconds, turn back the valve 1 and 2 to the original position.
10. Turn the switch of the recovery device to “ON”. (the compressor operation starts)
11. When the low pressure of manifold gauge is close to “0”, close the low pressure side valve, turn “OFF” the
recovery device switch.
12. Remove the center charging hose of manifold gauge from the recovery device.
(Indoor unit) (Outdoor unit)
Vacuum
Pump
(Liquid side)
Two-way valve
Close
(Gas side)
Three-way valve
Close
HiLo
70
Page 71
13.6.3 Relocation
1. Removing the air conditioning unit
a) Recovery of outdoor unit refrigerant by pumping down
Press “forced cooling button” (as a general rule, since 1998 the name of coolin g testing button is changed,
and this name is unified within the air conditioning industry), and then you are able to start cooling operation
in which the room temperature is low, and you can recover the refrigerant from the outdoor unit.
1. Check the valve stems of two-way and three-way valves are open by being turned to anti-clockwise
(Remove the caps, and confirm the bars are fully open. Use hexagon wrench <4 mm> to open and close
the valves).
2. Press the “Emergency Operation” button of the indoor units for five seconds and release [Forced cooling
operation] (for old models, press “forced cooling” button). Then, operate the air conditioning uni t for about
10 minutes.
3. Turn the stem of the two-way valve to the clock-wise and close the valve.
4. After about 2 ~ 3 minutes, turn the stem of the three-way valve quickly to the clock-wise, and stop the
operation.
Caution: In the pump down operation, stop the compressor before removing the refrigerant pipes.
If you do not stop the compressor operation, and if the valve is open and remove the refrigerant pipes, the air
may be sucked into the system and causes extreme high temperature in the refrigerant cycle. This may result in
rupture or injury, etc.
5. Attach and tighten the caps of two-way and three-way valves with torque wrench.
6. Remove the connecting pipes (liquid side and gas side).
b) Removal of indoor and outdoor units
1. Remove the connecting pipes and wires between the indoor and outdoor units.
2. Attach capping flare nuts on the edges of the pipes, connecting the indoor and outdoor units, in order to
prevent dust and moisture get into the pipes.
3. Remove the indoor and outdoor units.
2. Unit installation
Use new refrigerant pipes for the installation, and perform air purging usi ng vacuum pump and gas
leakage testing stated in 14.5.1.
13.6.4 Replacement of air conditioning units and evacuation (when re-using the existing
pipes)
When replacing the air conditioning units, you might use the existing pipes, but it is recommended to perform flaring
again. In case of unit replacement, even if the unit is new refrigerant air conditioner, if the refrigerant oil is different, it
may cause problem. Further, when re-using the existing refrigerant pipes, it is recommended to evacuate the pipes
as much as possible, due to the reason that much refrigerant oil may be attached on the surface of the pipes. If the
pipes are used without evacuation, the remaining refrigerant oil may cause under-performance and abnormal
refrigerant cycle caused by non-compatibility of those oils.
13.6.5 Inter-changeability of refrigerant
Do not operate air conditioning units inserting wrong (or mixed) refrigerant (R22, R410A, R32). It may cause malfunction of the units, and at the same time, may cause serious incident such as rupture of the refrigerant cycle.
71
Page 72

13.6.6 Re-insertion of refrigerant in service
When re-insertion is needed, follow the procedures to ensure the insertion of new refrigerant at correct amount.
1. Attach charging hose (blue) to the service port of the outdoor unit.
2. Attach charging hose (red) to the vacuum pump. Fully open the 2-way and 3-way valves.
3. Place the refrigerant cylinder on the digital scale for refrigerant charging and connect the charge hose (yellow) to
the connection port of the vacuum pump and the digital scale. Leave the cylinder valve fully open.
4. Fully open the handles Lo and Hi of the manifold gauge, and switch on the vacuum pump, and then perform
evacuation for at or more than one hour.
5. Confirm the compound gauge of -0.1 MPa (-76cmHg) and fully open the handles of Lo and Hi, and switch off the
vacuum pump. Leave it for about 1 ~ 2 minutes and confirm the needle of the compound gauge does not turn
back.
Refer to the picture below to follow the procedures below.
6. Remove the charging hose (red) of the manifold gauge from the vacuum pump adopter.
7. After adjusting the digital scale to zero, open the cylinder valve and the valve Lo of the manifold gauge, and
insert the refrigerant.
8. If it is not possible to insert the refrigerant at regulated amount at once, operate the cooling mode and gradually
insert the refrigerant (recommended amount approx. 150 g / 1 time)
*Do not insert much refrigerant at once.
9. Close the open/close valve and insert the refrigerant in the charging hose to the outdoor unit.
*Perform this procedure during operating cooling operation. Close the stem of the two-way valve, and when the
pressure of the manifold gauge becomes zero (0), quickly remove the charging hose (blue). Immediately open
the 2-way valve, and stop the cooling operation.
10. Final checking • • • Confirm the 2-way and 3-way valves are fully open.
Attach the caps of the service port and control valve, and then check the gas leakage around the cap s.
(Indoor unit)
(Liquid side)
Open
(Outdoor unit)
Vacuum pump
charging hose
Vacuum
pump
adaptor
Vacuum
pump
Electronic scale
(Gas side)
HiLo
Two-way
valve
Three-way
valve
Open
72
Page 73

13.7 Repairing of refrigerant cycle / Brazing point
13.7.1 Preparation for repairing of refrigerant cycle / brazing
Brazing which is a technique needed for repairing refrigerant cycle requires advanced technique and experience, and
this brazing procedure can only be performed by the workers who completed “Gas Welding Skill Training” regulated
by the Occupational Safety and Health Act, and went through the training programs of refrigerant operations.
Dismantling and re-connecting (assembling) refrigerant syst em requires working space, and the space has to ensure
good air flow and fire prevention (water bucket and fire extinguisher). Moreover, the worker has to ensure the
wearing of goggles, grabs, safety shoes, and long sleeve shirts, and be aware of work safety and attempt to prevent
secondary defect (quality assurance of products). For brazing the indoor / outdoor unit structural comp onents (heat
exchangers, compressors, expansion valves, four-way valve blocks), after the recovery of all refrigerant, confirm that
no refrigerant remains in the system, and fully open the 2-way and 3-way valves. When the brazing is conducted
outside, check and make sure no refrigerant is contained in the air (be careful with vaporized refrigerant).
Furthermore, protect the compressor terminal with metal plates, and heat but use wet clothes to cool down (releasing
the heat) the expansion valves, and four way valves (prevent destruction of parts). In brazing, it is important to pour
the brazing material without melting the base metal based on capillary action principle. In case of holes and oxidizing
caused by overheating, do not perform re-brazing or alteration but replace the parts.
13.7.2 Adjustment of vacuum pump pressure
1. Cylinder with adjustment handle
1. Check and confirm the adjustment handle of the 1
valve is opened when the 1
st
gauge pressure adjust handle is closed, the 2nd gauge might get broken.
The primary gauge
(High pressure)
Main valve
st
pressure adjuster is loosen (anticlockwise). If cylinder
Main valve
Adjustment
handle
The secondary gauge
(Low pressure)
2. Open the cylinder valve, and check the remaining amount with the first t side pressure gauge.
3. Check the pressure of 2
pressure.
◎ Oxygen 2
◎ Propane 2
Adjustment
handle
Oxygen regulator
nd
gauge and turn the adjustment handle to clock-wise direction to adjust the
nd
side gauge pressure・・・・・・・・・・0.5 MPa (5.0 kgf / cm2)
nd
side gauge pressure・・・・・・・0.05 MPa (0.5 kgf / cm2)
The secondary gauge
(Low pressure)
Propane regulator
73
Page 74

2. Cylinder without adjustment valve
nd
side gauge pressure is adjusted by the adjuster.
2
Check the both side valves of the torch and open the cylinder valve to check the remaining refrigerant in the
cylinder.
Caution: Do not attach oil component on the connection port of the adjuster.
Especially, use an oxygen cylinder adjuster which is no oil substance type. Do not dismantle or repair the
adjuster and pressure gauge.
Main valve
Fuel gauge
0~3 MPa
(0~30 kgf / cm²)
Main valve
Regulator
Propane tank
(Gray)
Fuel gauge
0~25 MPa
(0~250 kgf / cm²)
Regulator
Oxygen tank
(Black)
Black hose
Orange hose
13.7.3 Checking of gas provision
Checking there is no fire around the torch, and then confirm the provision of gas.
1. Slightly open the “propane valve” of the torch, and make sure the gas comes out from the torch crater and then
close the “propane valve”.
2. Slightly open the “oxygen valve” of the torch and make sure the gas comes out from the torch crater and then
close the “oxygen valve”.
Check there is no gas leakage around the hose connection.
13.7.4 Adjustment of flame
1. Slightly open the “propane valve” of the torch and lit with spark lighter.
This moment, the flame is only by propane and the color is red.
2. Gradually open the “oxygen valve” of the torch to mix oxygen, and adjust the amount of propane and oxygen with
the valve to make the flame suitable for brazing work.
If the white core flame splits into two, the torch crater might be clogged. In this case, remove the crater from the
torch and check.
Oxygen (Black hose)
Oxygen valve
Nozzle
Propane valve
Propane (Orange hose)
74
Page 75

13.7.5 Types of flame
Types of flame change based on the proportion of propane and oxygen.
[Neutral Flame]
Perform brazing with this flame
(This is a flame when oxygen and propane are mixed at proper proportion, and has lesser eff ect on the b ra zed
metals)
White core flame
10 ~ 15 mm
Outer flame (Light orange color)
[Carbide Flame]
When propane is excessive, the flame has white color flame in between the white core flame and outer flame.
(This is due to the lack of oxygen and the proportion of unburned propane is excessive.
The black carbon created during the brazing work may contaminate the surf ace of the brazed metal).
White core flame
Pale white
[Oxidizing Flame]
Oxygen is more compared to the neutral flame. Although the flame size is small, this has the highest flame heat.
However, due to the excessive oxygen contained in the flame, the brazing point gets oxidized. (This flame may cause
holes, due to the high heat. The pipe may get melt)
White core flame
Outer flame (Blue orange color)
Outer flame (Blue color)
13.7.6 Closing the flame
[In case of short break]
1. Close the “propane valve” of the torch.
2. Close the “oxygen valve” of the torch.
[In case of finishing work]
1. As above, close the flame following the procedure of “In case of short break”.
2. Completely close the valves of oxygen and propane cylinders.
3. Release the remaining gas inside the hose by opening the “oxygen valve” and “propane valve” of the torch.
Confirm the 1
st
and 2nd side gauge pressures of “oxygen” and “propane” cylinder pressure adopter are “zero”.
75
Page 76
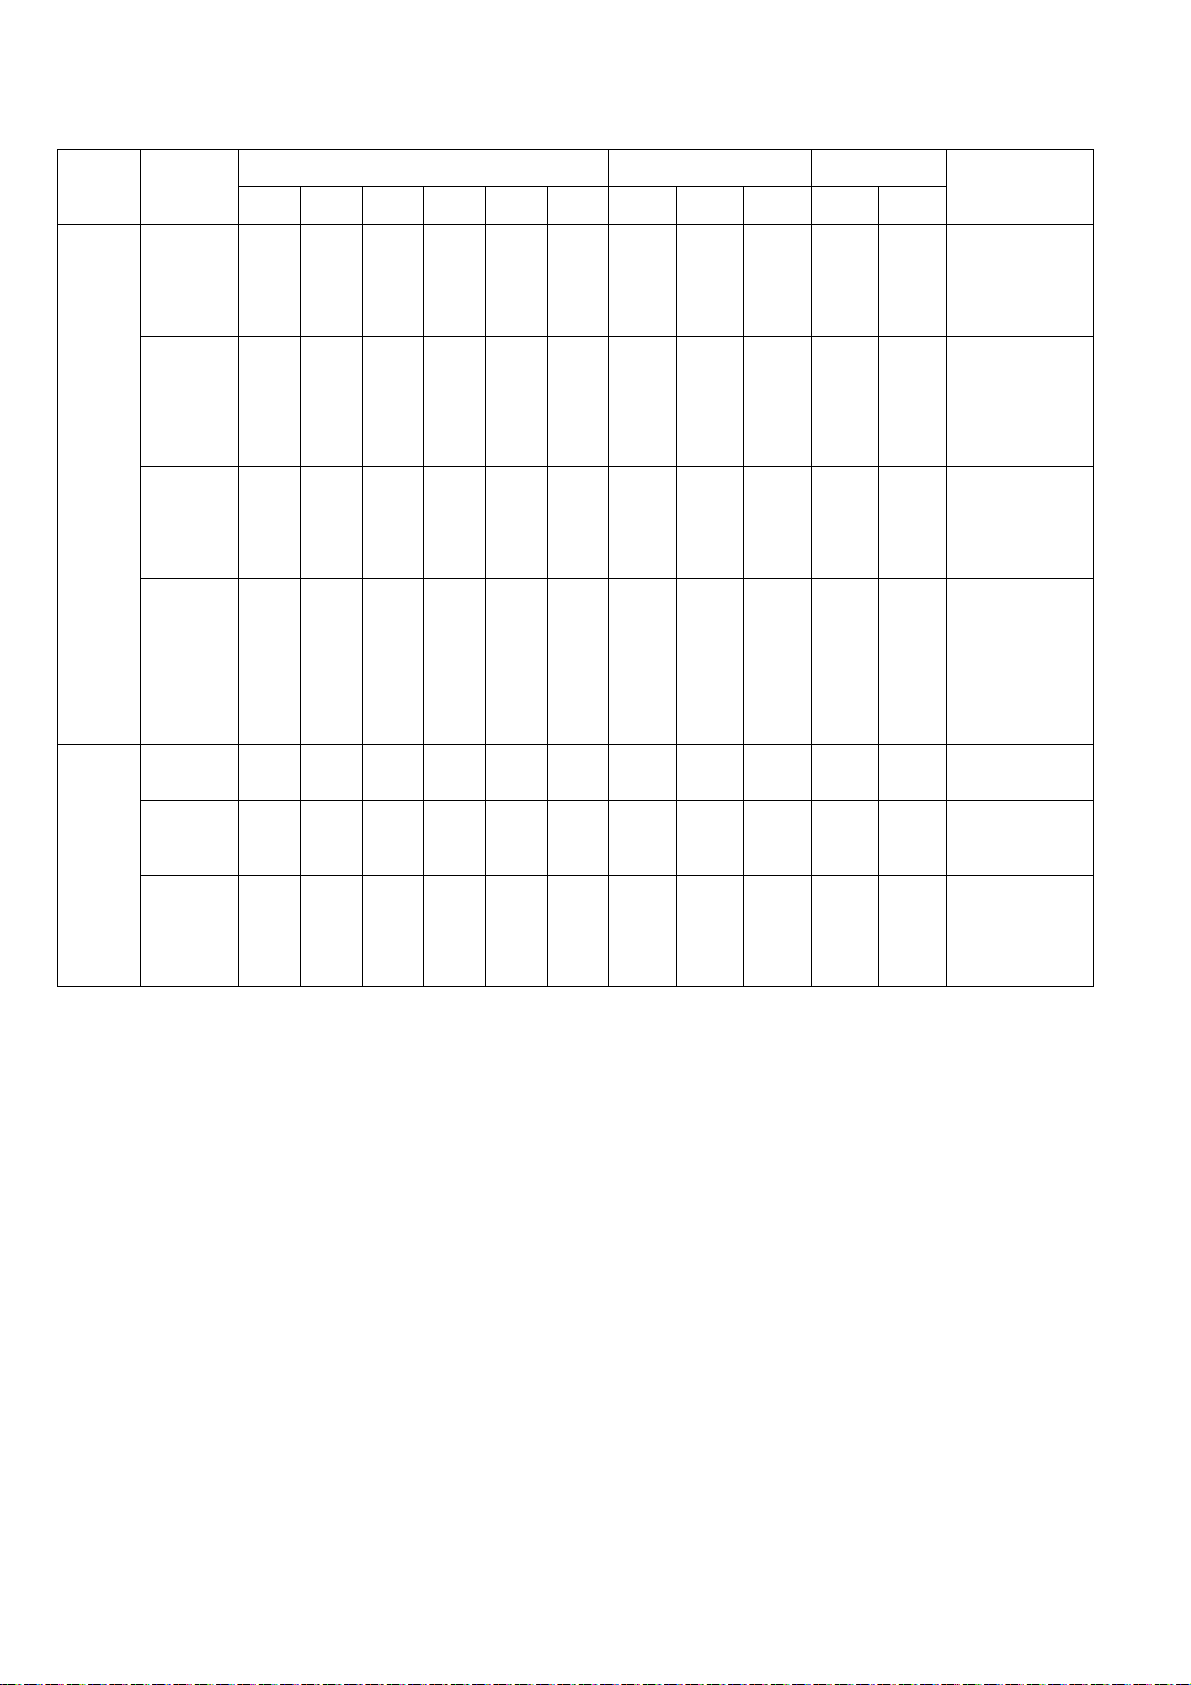
13.7.7 Selection of brazing material
Use BAg brazing material (silver solder) to increase the welding performan ce.
635
~
760
620
~
760
700
~
845
690
~
815
690
~
815
720
~
815
705
~
815
Tensile strength
(Reference)
Base
2
Kgf•cm
material
45.5
45.5 S20C
45.5 S20C
24.5
24.5
24.5
35
~
70
21
~
21
~
21
~
S20C
SS
~
SUS
Cu
Cu
Cu
Characteristics
and
applications
Liquidity is good at
low temperature,
it is preferable to
a small junction of
the gap in the
universal form.
It has similar
performance to the
BAg •
1A, and
suitable for every
base material
except the light
weight metal.
It is a brazing
filler metal in
universal form,
suitable for a
slightly larger gap
junction.
It has good
corrosion
resistance in
stainless
steel-based
brazing, suitable for
brazing tungsten
carbide, aluminum
bronze and copper.
Good liquidity,
suitable for brazing
copper tube.
Suitable for brazing
when the joint
spacing is not
constant
When brazing of
copper and copper,
it is used without a
flux, but not
possible for brazing
basic materials
Category
BAg
BCuP
JIS
Standard
Number
BAg •
1A
BAg • 1
BAg • 2
BAg • 3
BCuP-2
BCuP-3
BCuP-5
49.0
51.0
44.0
56.0
34.0
36.0
48.0
51.0
14.5
15.5
Composition of ingredients (%) Temperature (°C)
Ag
Cu Zu Cd Ni P Solidus Liquidus
~
~
~
~
—
4.8
~
5.2
~
14.5
~
16.5
14.0
~
16.0
25.0
~
27.0
14.5
~
16.5
remain
remain
remain
14.5
18.5
14.0
18.0
19.0
23.0
13.5
17.5
17.0
~
19.0
23.0
~
25.0
17.0
~
19.0
15.0
~
17.0
— — —
— — —
— — —
~
~
~
~
— —
— —
— —
2.5
~
3.5
—
6.8
~
7.5
5.8
~
6.7
4.8
~
5.3
approx.
625
approx.
605
approx.
605
approx.
630
approx.
710
approx.
645
approx.
645
Brazing
temp
approx.
635
approx.
620
approx.
700
approx.
690
approx.
785
approx.
815
approx.
800
Caution
BCuP (phosphorus copper wax) is easy to react with sulfur, and makes a brittle compound water soluble, and causes
gas leakage. In hot spring areas, use other brazing materials or paint the surface for protection.
13.7.8 Need of flux
Use flux to protect the base materials.
1. Remove impurity and oxide film on the metal base, and improve the flow of the brazing material.
2. Prevent oxidation of the metal surface in brazing.
3. Reduce the surface tension of the brazing material.
13.7.9 Need of nitrogen gas
In order to prevent oxidation in the pipe, perform the brazing operation in nitrogen gas flow.
Flow rate 0.05 m
3
/ h, or pressure reducing valve at 0.02 MPa (0.2kgf / cm2) below.
76
Page 77

13.7.10 Checking of brazing (insert) points
1. No impurity on the brazing point
If dirt or oil is attached on the brazing point, the
brazing filler metal does not reach to junction, and
it may cause poor welding.
2. Adequate gap space in the brazing point
The advantage of capillary current situation is
used in brazing. If the gap space is too large, this
phenomenon may not occur and it may cause
poor welding because brazing filler metal does not
flow to join the front part.
3. Appropriate size for insertion
The guideline for pipe insertion dimensions is to
three times the diameter of the base material, but
you need to decide the insertion size in
consideration of the clogging of the brazing
material. Generally, for thin pipes, you need to
increase the insert size, and for thick pipe vice
versa.
4. Brazing material to flow from top to bottom
Brazing filler metal will easily flow to the
connecting portion by capillary action.
Further, by bending the brazing portion of [dryer
side] of the capillary tube at 15 mm from the tube
top to the angle of about 120°, you can prevent
the damage of dryer inside and the clogging of
brazing material caused by the excessive insertion
of capillary tube.
Inner diameter ø6.45
Insert diameter 10 ~ 25 mm
Brazing material
(Runny)
Brazing material
(Hard to flow)
120°
Capillary
tube
15 mm
Gap 0.025 ~ 0.05 mm
Outer diameter ø6.35
Dryer
Filter
(Wire mesh)
13.7.11 Brazing and heating
1. Place the flame to a pipe which has more heat
capacity in order to let the brazing material melt by
the pipe heat. Heat the pipe up to the melting
temperature of the brazing material, but when it is
overheating, assess the temperature by pipe color
in order not to melt the pipe.
The pre-heating is to heat the base material until the melting temperature, and requires certain training to distinguish
the color of the heated base material in order not to melt the material.
The color and temperature of copper tube
Becoming red color • • • • • • • 480°C
Dull red • • • • • • • 650°C
Cherish red • • • • • • • 760°C
Brightening cherish red • • • • • • • 870°C
77
Brazing
material
Burner Burner
Brazing
material
Page 78

(Reference)
Melting temperature of copper • • • • • • • Approx. 1083°C
Maximum temperature obtained in propane and oxygen • • • • • • • Approx. 1083°C
The important point is to heat the bonding part uniformly within a short period of time until reaching to the brazing
temperature in the following manner.
2. Apply the flame on to the side with better heat transmission. If the pipe thickness is consistent, by heating like
30% iron and 70% copper, the copper pipe inside reaches to brazing temperature.
Iron pipes have low heat transmission and only the part the flame is applied get high temperature, and this
causes oxidization of the pipe. The flow of the brazing filler is affected negatively.
3. Apply the flame on to the side of larger heat
capacity.
When brazing a thin tubes such as capillary tube
and dryer, etc., caution has to be taken to apply
the flame to the dryer side (thick pipe side), in
order to prevent burn out by the heat.
4. When brazing the compressor connection pipes
(suction and discharge), remove the sound
insulation plate and the fan, and place the
compressor stand vertically (to prevent the
leakage of compressor refrigerating machine oil),
and apply the flame from the compressor body
side.
13.7.12 Terminologies of brazing
Pin holes → Small holes are generated on the surface of the brazing metal.
Wet temperature → Liquidus temperature at which the brazing material starts flowing out by heating, generally it is
the liquidus-line temperature.
Blow holes → Hollows made by gas in the brazing material of brazing portion (gas reservoirs).
Pits → As a result of blow holes, small dents generated on the outside surface of welding.
Voids → The blazing material does not reach completely to the brazing part. It cannot be identified from outside.
78
Page 79
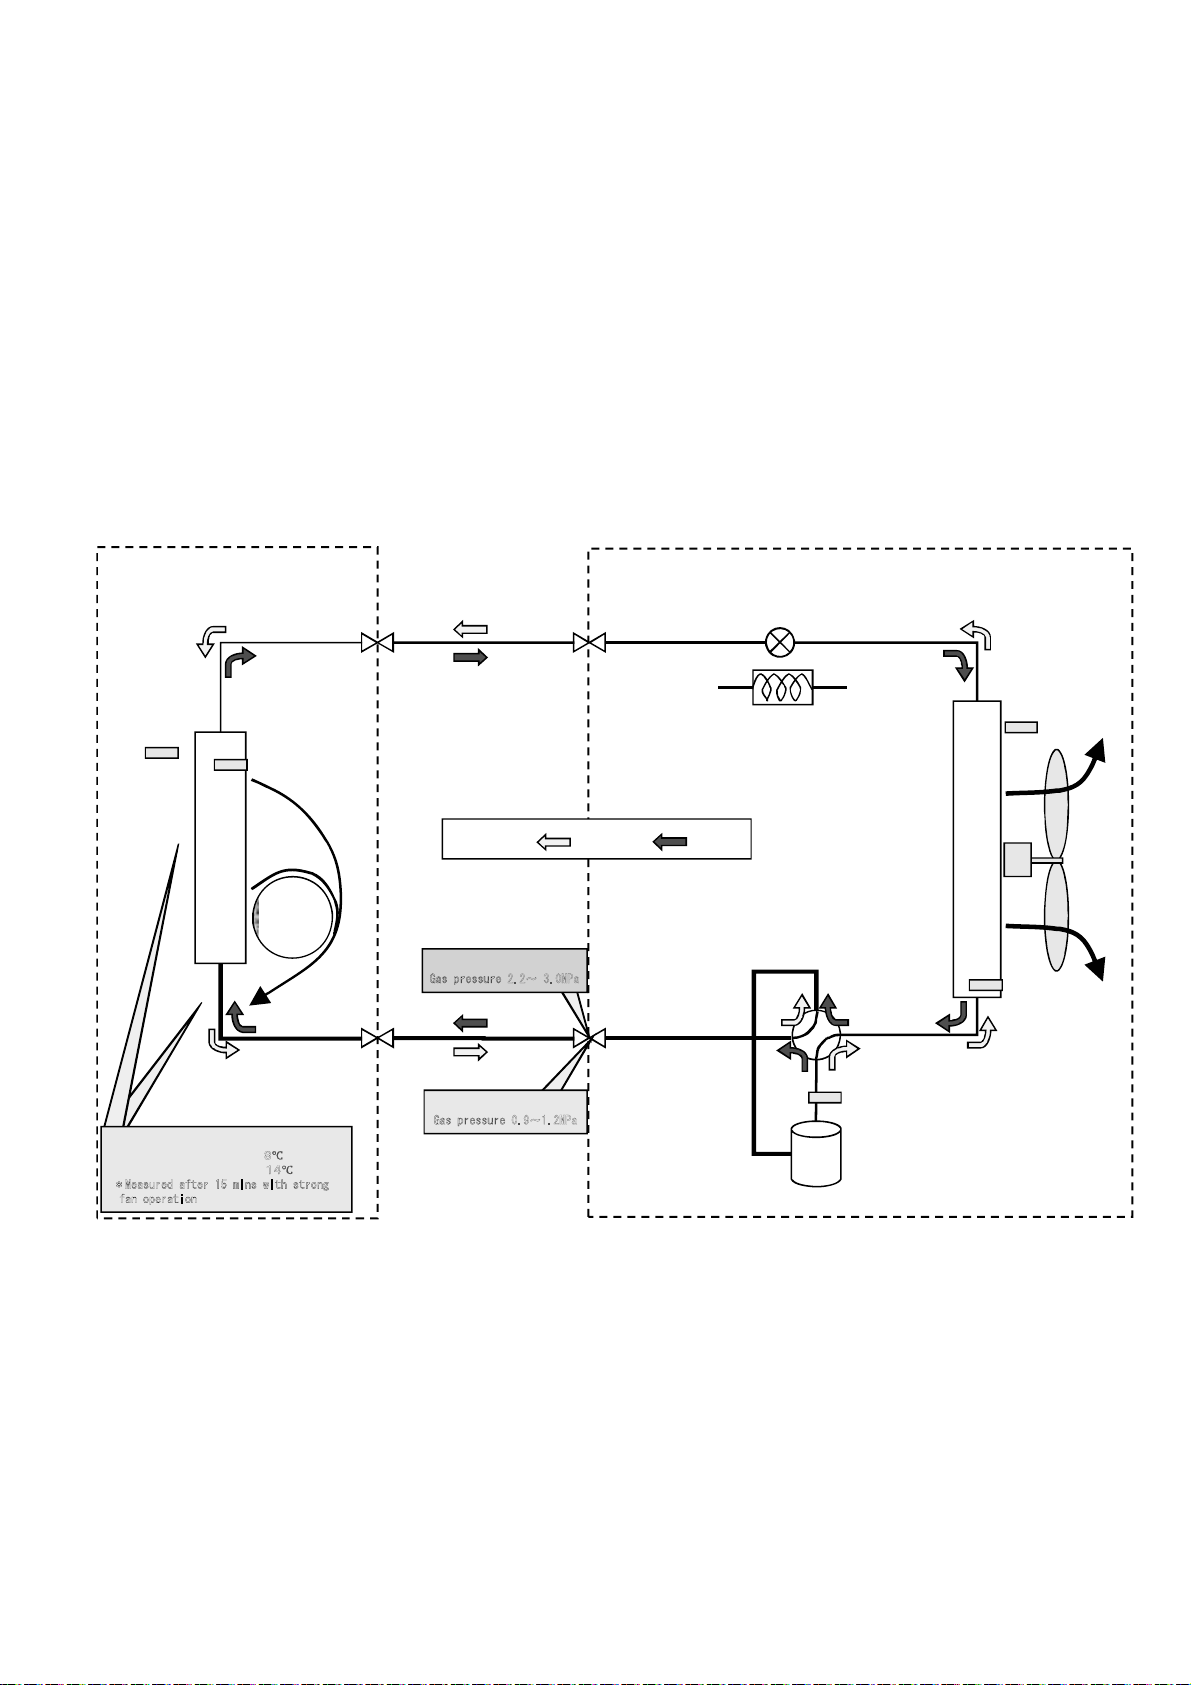
13.8 <Reference> Analysis method for no error code, no cooling / no
warming
13.8.1 Preparation for appropriate diagnosis
In order to obtain appropriate operation characteristics, minimum 15 minutes or more operation time [testing
operation (rated operation)] is required.
1. Method of rated operation (rated operation)
For the models which have two buttons of “emergency operation and forced cooling operation”, press forced
cooling button once. For the models which have only emergency operation button, press the button once for 5
seconds and when hear “beep” sound, release the button. Then, cooling operation starts.
2. Checking the mal-functions of indoor / outdoor units
1) Any obstacles against heat release and air suction? (sho rt circuit)
(Forget to remove the outdoor unit cover or fallen leaves blocking the outdoor unit)
2) Are the indoor unit air filters clean? (obstructing heat suction)
3) Is the setting temperature on the remote controller correct? (is the setting temperature set at lower/higher
than the room temperature?)
13.8.2 Understanding and verification of refrigerant cycle
Low
temp/
Pressure
liquid
Suctiont emp
「Indoor 「」 Outdoor」
Liquid side
2-way
valve
Heat exchanger
Mid temp /
high pressure
liquid
Heat exchanger
temp
Low temp/
Low pressure
liquid
Mid temp /
High temp
liquid
Expansion
valve
Capillary tube
Low temp /
Low pressure
Liquid
Mid temp /
High pressure
Liquid
Outdoor temp
Heat exchanger
Evaporator
(EVA)
Fan
Low temp
Low pressure
Air
Indoor unit Temp difference
Suction temp <Cooling> 8
Release temp <Heating> 1
*
Measured after 15 mins with strong
fan operation
or more
4 or more
High temp / high
pressure
Air
(Cooling Heating )
(Heating)
G
as pressure 2.2~ 3.0MPa
Gas side
3-way
valve
(Cooling)
G
as pressure 0.9~1.2MPa
High temp /
High pr essure
Air
Low temp/
Low pressure
Air
4-way
valve
Condenser
(COND)
Low temp /
Low pressure
Air
Releasetemp
Compressor
(COMP)
FM
Heat exchanger
High temp
High pressure
Air
Fan
temp
79
Page 80
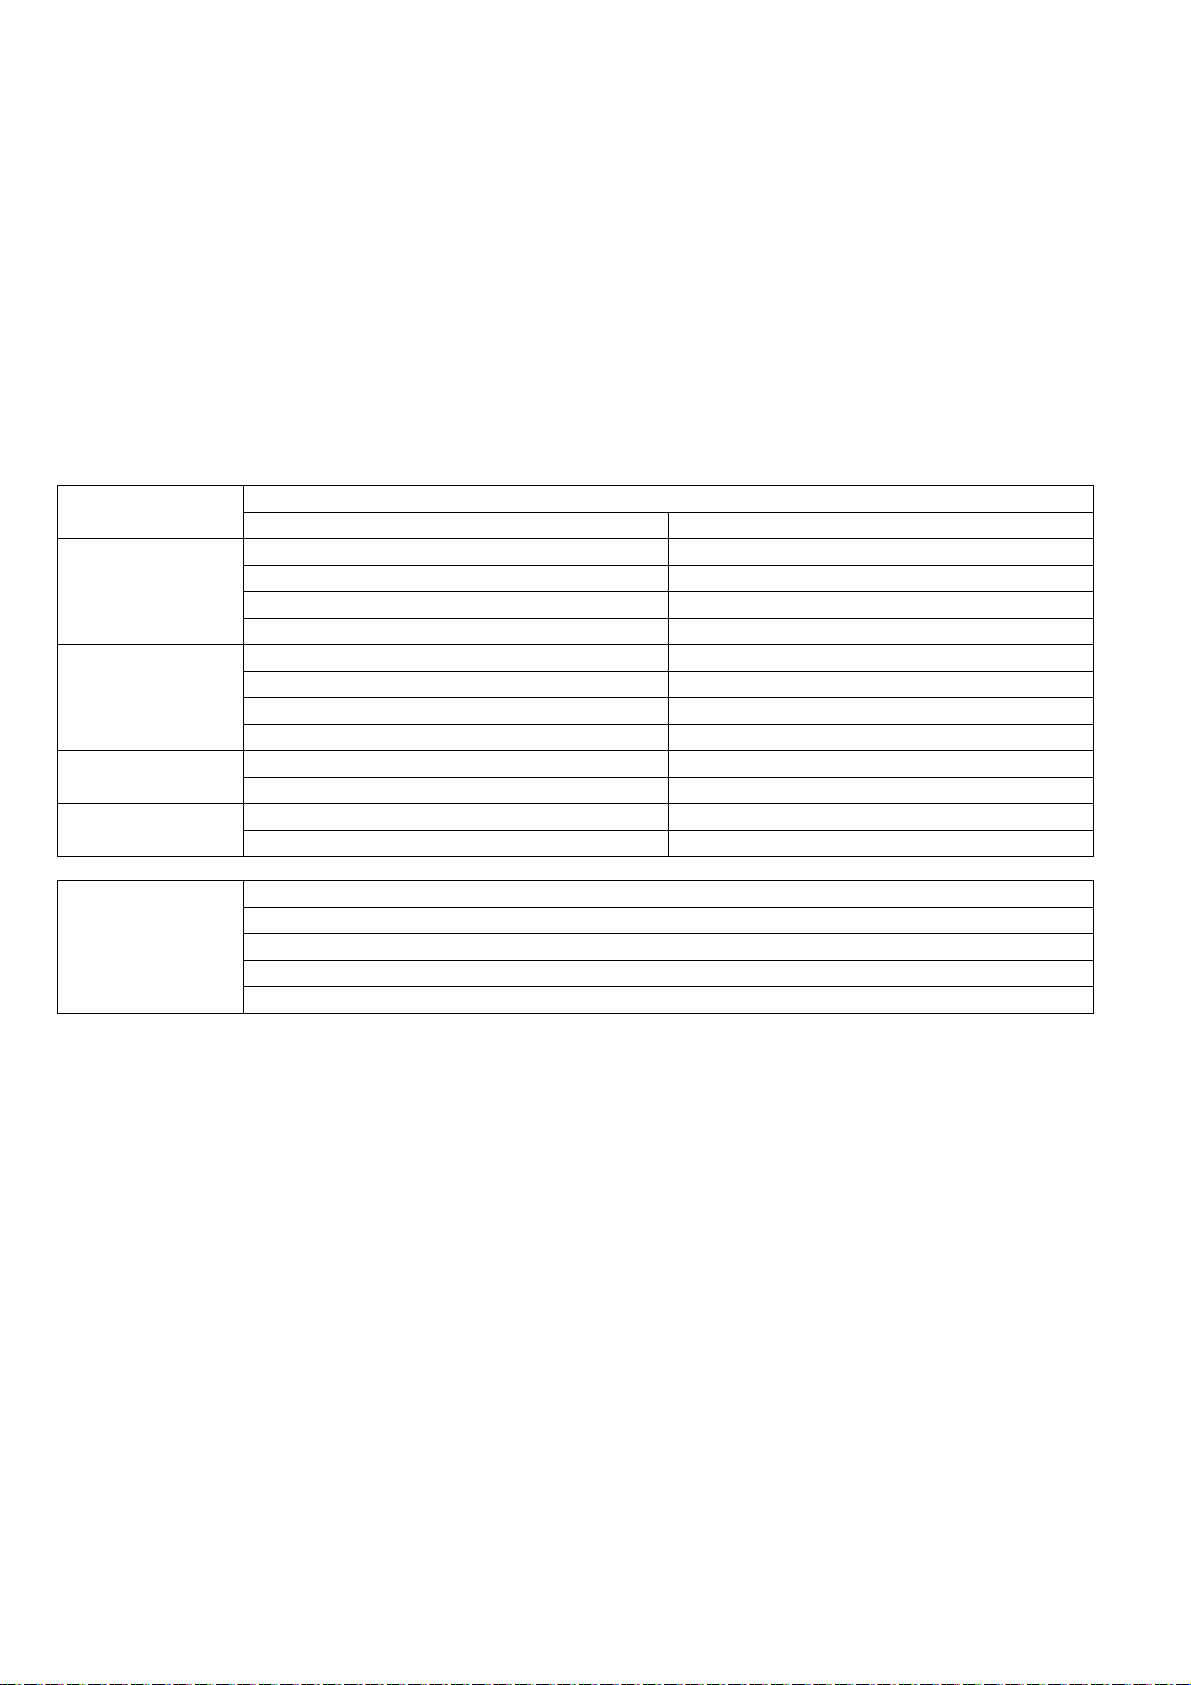
1. Measuring temperature
1) Indoor unit suction temperature, release temperature, temperature difference, → Measure by thermometer
2) 2-way valve pipe temperature in cooling mode is low temperature (benchmark:5 ~ 10°C), in heating mo de
is medium temperature (benchmark:25 ~ 35°C).
3) 3-way valve pipe temperature in cooling mode is low temperature (benchmark:7 ~ 15°C) in heating mo de is
high temperature (benchmark:38 ~ 50°C).
2. Measuring electric current
Measuring electric current in operation → check by clump meter (refer to table of technical characteristic
guideline)
3. Meauring pressure
Measuring gas pressure → check the pressure by manifold gauge (refer to table of technical characteristic
guideline)
4. Any sound from the expansion valve?
(when starting the operation and the outdoor unit is turned on, the expansion valve is re-set, check if there is any
edged sound or clack sound)
13.8.3 Guidance for diagnosis of refrigerant cycle
Comparison with
normal operation
Refrigerant
pressure
Operation electric
current
2-way valve
temperature
3-way valve
temperature
Excess insertion of refrigerant Clogged capillary, expansion valve malfunction
Heat releasing obstruction Clog by moisture
Dirty condenser, attachment of impurity Lack of refrigerant gas
Compressor malfunction
Excess insertion of refrigerant Lack of refrigerant gas
Heat releasing obstruction Compressor malfunction
Dirty condenser, impurity Mixture of air
Excess insertion of refrigerant Clogged capillary, expansion valve malfunction
Compressor malfunction Lack of refrigerant gas
Lack of refrigerant gas • Compressor malfunction Excess insertion of refrigerant
Clogged capillary, expansion valve malfunction
High Low
(Insufficient evacuation)
Suction
temperature
&
Release air
temperature
• Heat releasing obstruction • Dirty condenser • Attachment of impurity
• Lack of refrigerant gas • Excess insertion of refrigerant
• Mixture of air • Mixture of moisture
• Clogged capillary • Expansion valve malfunction • Compressor malfunction
Temperature difference at or less than 8°C in cooling operation • • • Causes
◎ Above all are based on the condition that the installation work is properly performed (no issues in indoor / outdoor
pipe connections, etc.)
Cooling mode
80
Page 81
14. Operation Control
14.1 Basic Function
Inverter control, which equipped with a microcomputer in determining the most suitable operating mode as time
passes, automatically adjusts output power for maximum comfort always. In order to achieve the suitable operating
mode, the microcomputer maintains the set temperature by measuring the temperature of the environment and
performing temperature shifting. The compressor at outdoor unit is operating following the frequency instructed by
the microcomputer at indoor unit that judging the condition according to internal setting temperature and intake air
temperature.
14.1.1 Internal Setting Temperature
Once the operation starts, remote control setting temperature will be taken as base value for temperature shifting
processes. These shifting processes are depending on the air conditioner settings an d the operation environment.
The final shifted value will be used as internal setting temperature and it is updated continuously whenever the
electrical power is supplied to the unit.
Remote Control Setting Temperature
16.0°C ~ 30.0°C
Auto Operation Mode Shifting
Indoor Air Temperature Shifting
Outdoor Air Temperature Shifting
Powerful Mode Shifting
Setting Temperature Limit Checking
(Min: 16.0°C; Max: 33.0°C)
Internal Setting Temperature
14.1.2 Cooling Operation
14.1.2.1 Thermostat control
Compressor is OFF when Intake Air Temperature - Internal Setting Temperature < -1.5 °C continue for 3 minutes.
When compressor is OFF (Thermostat OFF) and AUTO FAN is set, the fan will stop periodically.
Compressor is ON after waiting for 3 minutes, if the Intake Air Temperature - Internal Setting Temperature >
Compressor OFF point.
14.1.3 Soft Dry Operation
14.1.3.1 Thermostat control
Compressor is OFF when Intake Air Temperature - Internal Setting Temperature < -2.0 °C continue for 3 minutes.
When compressor is OFF (Thermostat OFF) and AUTO FAN is set, the fan will stop periodically.
Compressor is ON after waiting for 3 minutes, if the Intake Air Temperature - Internal Setting Temperature >
Compressor OFF point.
14.1.4 Heating Operation
14.1.4.1 Thermostat control
Compressor is OFF when Intake Air Temperature - Internal Setting Temperature > +2.0°C continue for 3 minutes.
Compressor is ON after waiting for 3 minutes, if the Intake Air Temperature - Internal Setting Temperature <
Compressor OFF point.
81
Page 82
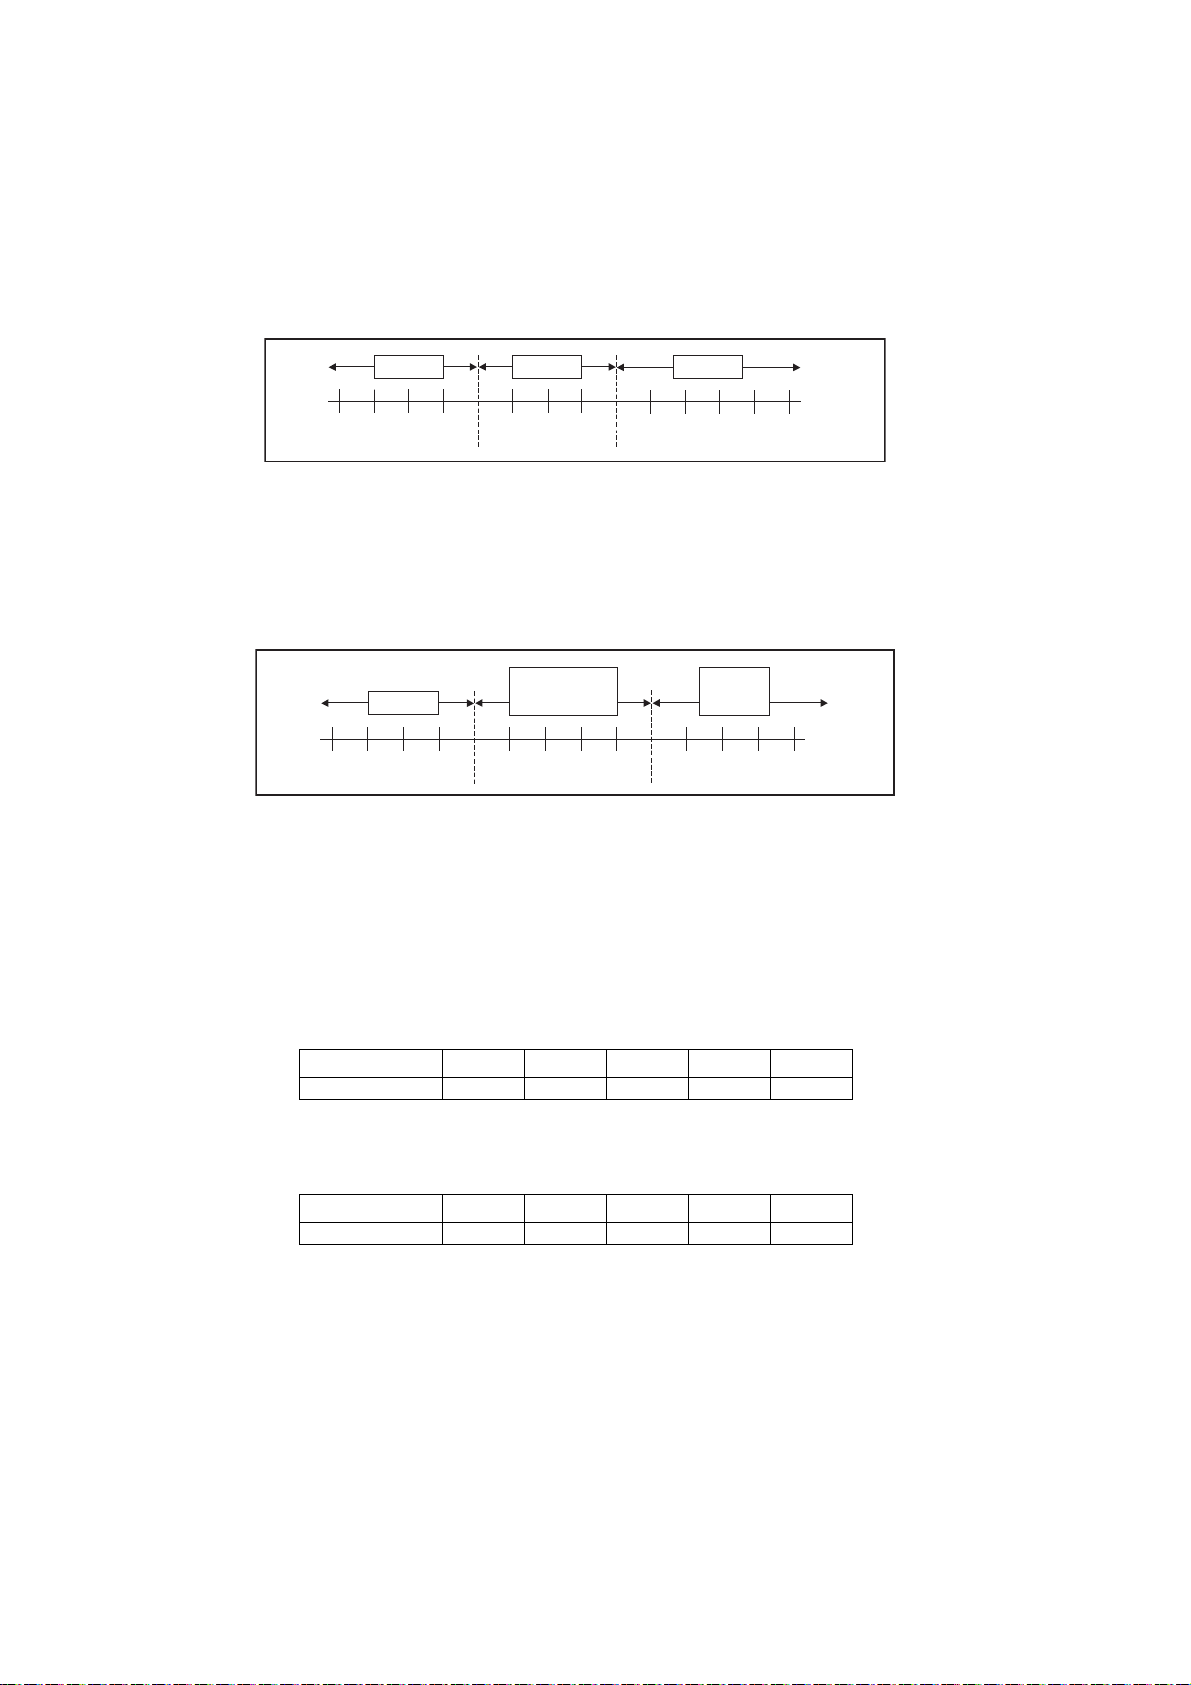
14.1.5 Automatic Operation
This mode can be set using remote control and the operation is decided by remote control setting tempe ratu re,
remote control operation mode and indoor intake air temperature.
During operation mode judgment, indoor fan motor (with speed of Lo-) is running for 30 seconds to detect the
indoor intake air temperature.
Every 10 minutes, the indoor temperature is judged.
For the 1st judgment
o If indoor intake temperature - remote control setting temperature ≥ 2.0°C, COOL mode is decided.
o If -2.0°C ≤ indoor intake temperature - remote control setting temperature < 2.0°C, DRY mode is decided.
o If indoor intake temperature - remote control setting temperature < -2.0°C, HEAT mode is decided.
Heat
Dry Cool
6.05.04.03.02.01.00.0-1.0-2.0-3.0-4.0-5.0-6.0
For the 2nd judgment onwards
o If indoor intake temperature - remote control setting temperature ≥ 3.0°C, if previous operate in DRY mode,
then continue in DRY mode. otherwise COOL mode is decided.
o If -2.0°C ≤ indoor intake temperature - remote control setting temperature < 3.0°C, maintain with previous
mode.
o If indoor intake temperature - remote control setting temperature < -2.0°C, HEAT mode is decided.
Maintain
Heat
-5.0-6.0
-4.0
current mode
Cool
/Dry
6.05.04.03.02.01.00.0-1.0-2. 0-3.0
14.2 Indoor Fan Motor Operation
14.2.1 Basic Rotation Speed (rpm)
A. Basic Rotation Speed (rpm)
i. Manual Fan Speed
[Cooling, Dry]
Fan motor’s number of rotation is determined according to remote control setting.
Remote control ○ ○ ○ ○ ○
Tab Hi Me+ Me Me- Lo
[Heating]
Fan motor’s number of rotation is determined according to remote control setting.
Remote control ○ ○ ○ ○ ○
Tab SHi Me+ Me Me- Lo
ii Auto Fan Speed
[Cooling, Dry]
According to room temperature and setting temperature, indoor fan speed is determined automatically.
When set temperature is not achieved, the indoor fan will operate according to pattern below.
When set temperature achieved, the indoor fan speed will be fixed. When thermostat off, the fan stop periodically.
82
Page 83
[Heating]
According to indoor pipe temperature, automatic heating fan speed is determined as follows.
B. Feedback control
Immediately after the fan motor started, feedback control is performed once every second.
During fan motor on, if fan motor feedback ≥ 2550 rpm or < 50 rpm continue for 10 se conds, then fan motor error
counter increase, fan motor is then stop and restart. If the fan motor counter becomes 7 times, then H19 - fan
motor error is detected. Operation stops and cannot on back.
14.3 Outdoor Fan Motor Operation
It starts when compressor starts operation and it stops 30 seconds after compressor stops operation.
During cooling operation, and outdoor ambient temperature is below 8°C, outdoor fan speed will be controlled
according to outdoor piping temperature as following:
OD Pipe Temperature
A 26°C
B 33°C
During above condition, when indoor heat exchanger temperature is below 5°C, the outdoor fan will stop
according to outdoor piping temperature as following:
83
Page 84
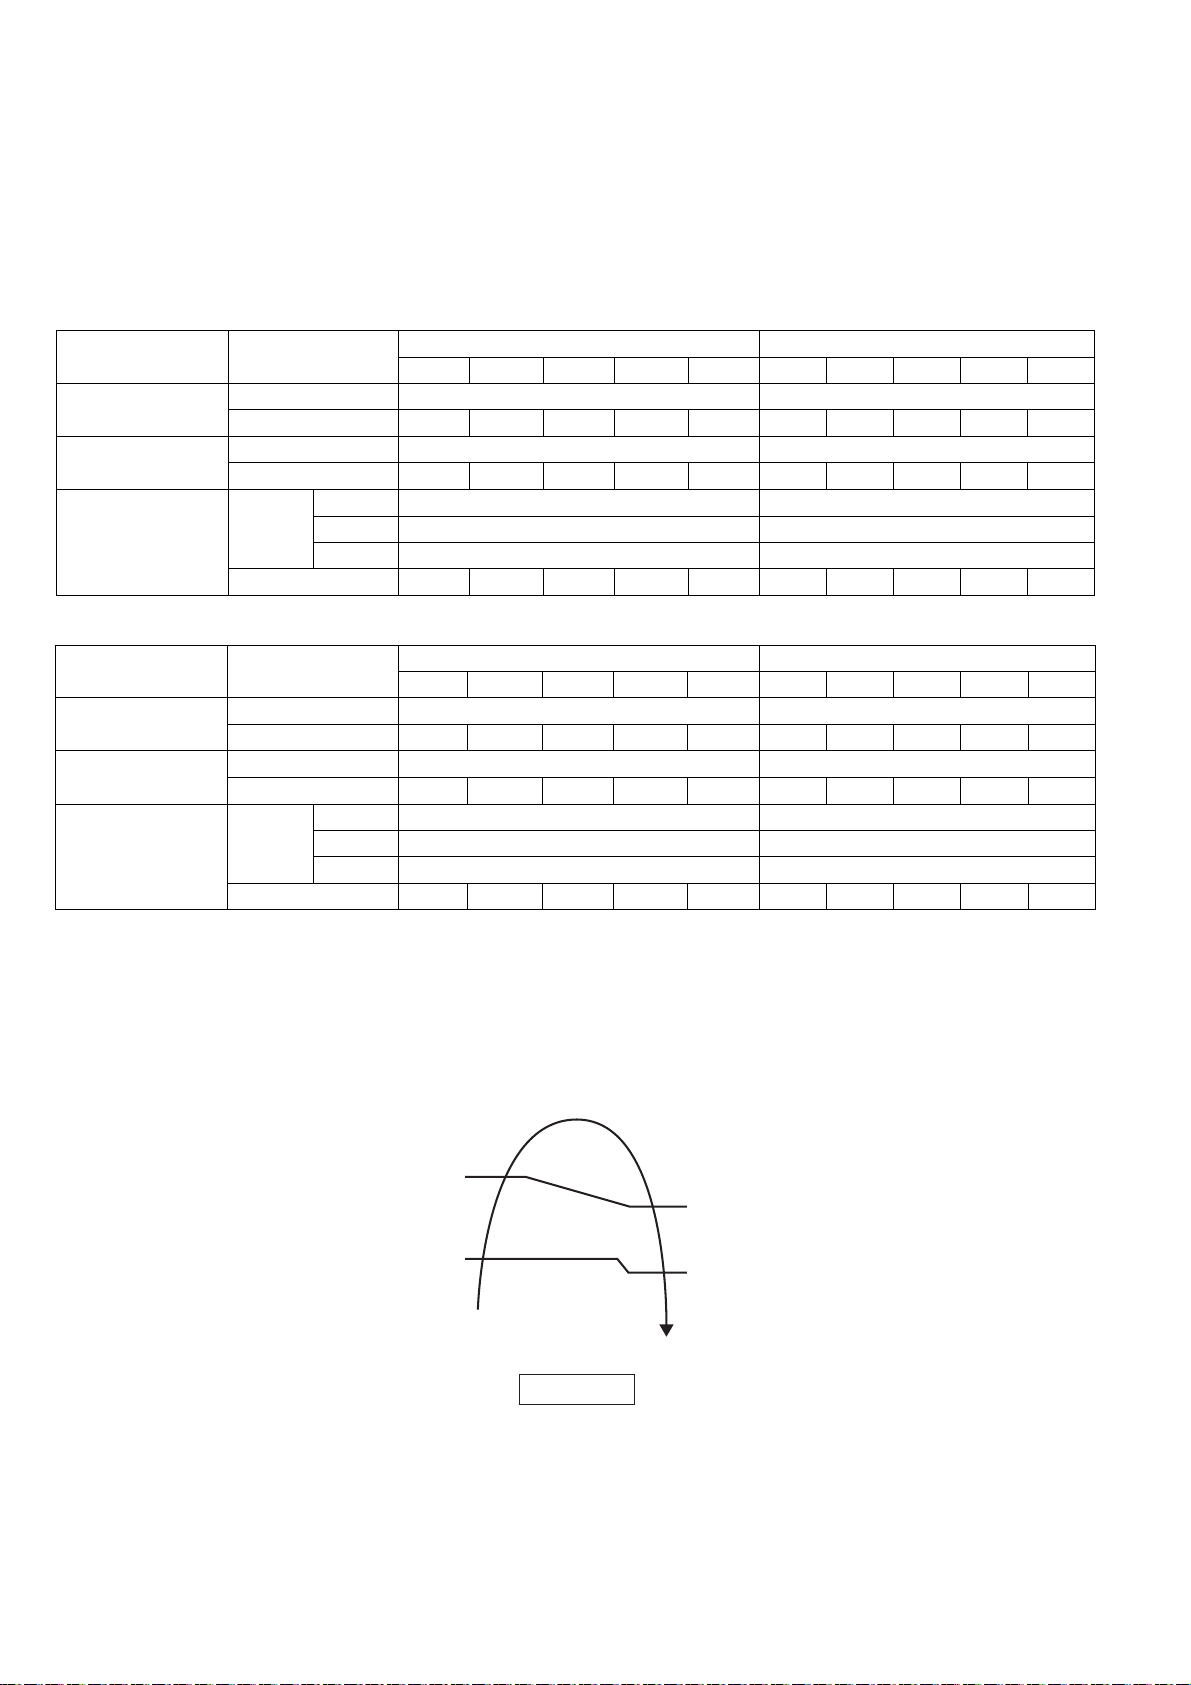
14.4 Airflow Direction
C
C
There are two types of airflow, vertical airflow (directed by horizontal vane) and horizontal airflow (directed by
vertical vanes).
Control of airflow direction can be automatic (angles of direction is determined by operation mode, heat
exchanger temperature and intake air temperature) and manual (angles of direction can be adjusted usi ng
remote control).
14.4.1 Vertical Airflow
Z20/25/35/42TK & XZ20/25/35TK
Operation Mode Airflow Direction
Cooling
Soft Dry
Heating
Auto 110 ~ 65 50 ~ 85
Manual 110 110 90 70 65 50 62 72 83 85
Auto 110 ~ 65 50 ~ 85
Manual 110 110 90 70 65 50 62 72 83 85
A 110 50
Auto
Manual 110 110 100 90 80 50 62 72 83 90
B 90 83
C 110 62
1 2 3 4 5 1 2 3 4 5
Inner Vane Angle (°) Outer Vane Angle (°)
Z50/71TK & XZ50TK
Operation Mode Airflow Direction
Cooling
Soft Dry
Heating
Auto 140 ~ 90 47 ~ 74
Manual 140 135 120 105 90 47 58 64 69 74
Auto 140 ~ 90 47 ~ 74
Manual 140 135 120 105 90 47 58 64 69 74
A 140 47
Auto
Manual 140 135 130 125 105 47 58 64 69 79
B 125 69
C 135 58
1 2 3 4 5 1 2 3 4 5
Inner Vane Angle (°) Outer Vane Angle (°)
1. Automatic vertical airflow direction can be set using remote control; the vane swings up and down within the
angles as stated above. For heating mode operation, the angle of the vane depends on the indoor heat
exchanger temperature as Figure 1 below. It does not swing during fan motor stop. When the air condition er is
stopped using remote control, the vane will shift to close position.
2. Manual vertical airflow direction can be set using remote control; the angles of the vane are as stated above and
the positions of the vane are as Figure 2 below. When the air conditioner is stopped using rem ote control, the
vane will shift to close position.
C
58°
B
37°
Indoor Heat
Exchanger Temperature
A
Figure 1
50°C
30°C
84
Page 85
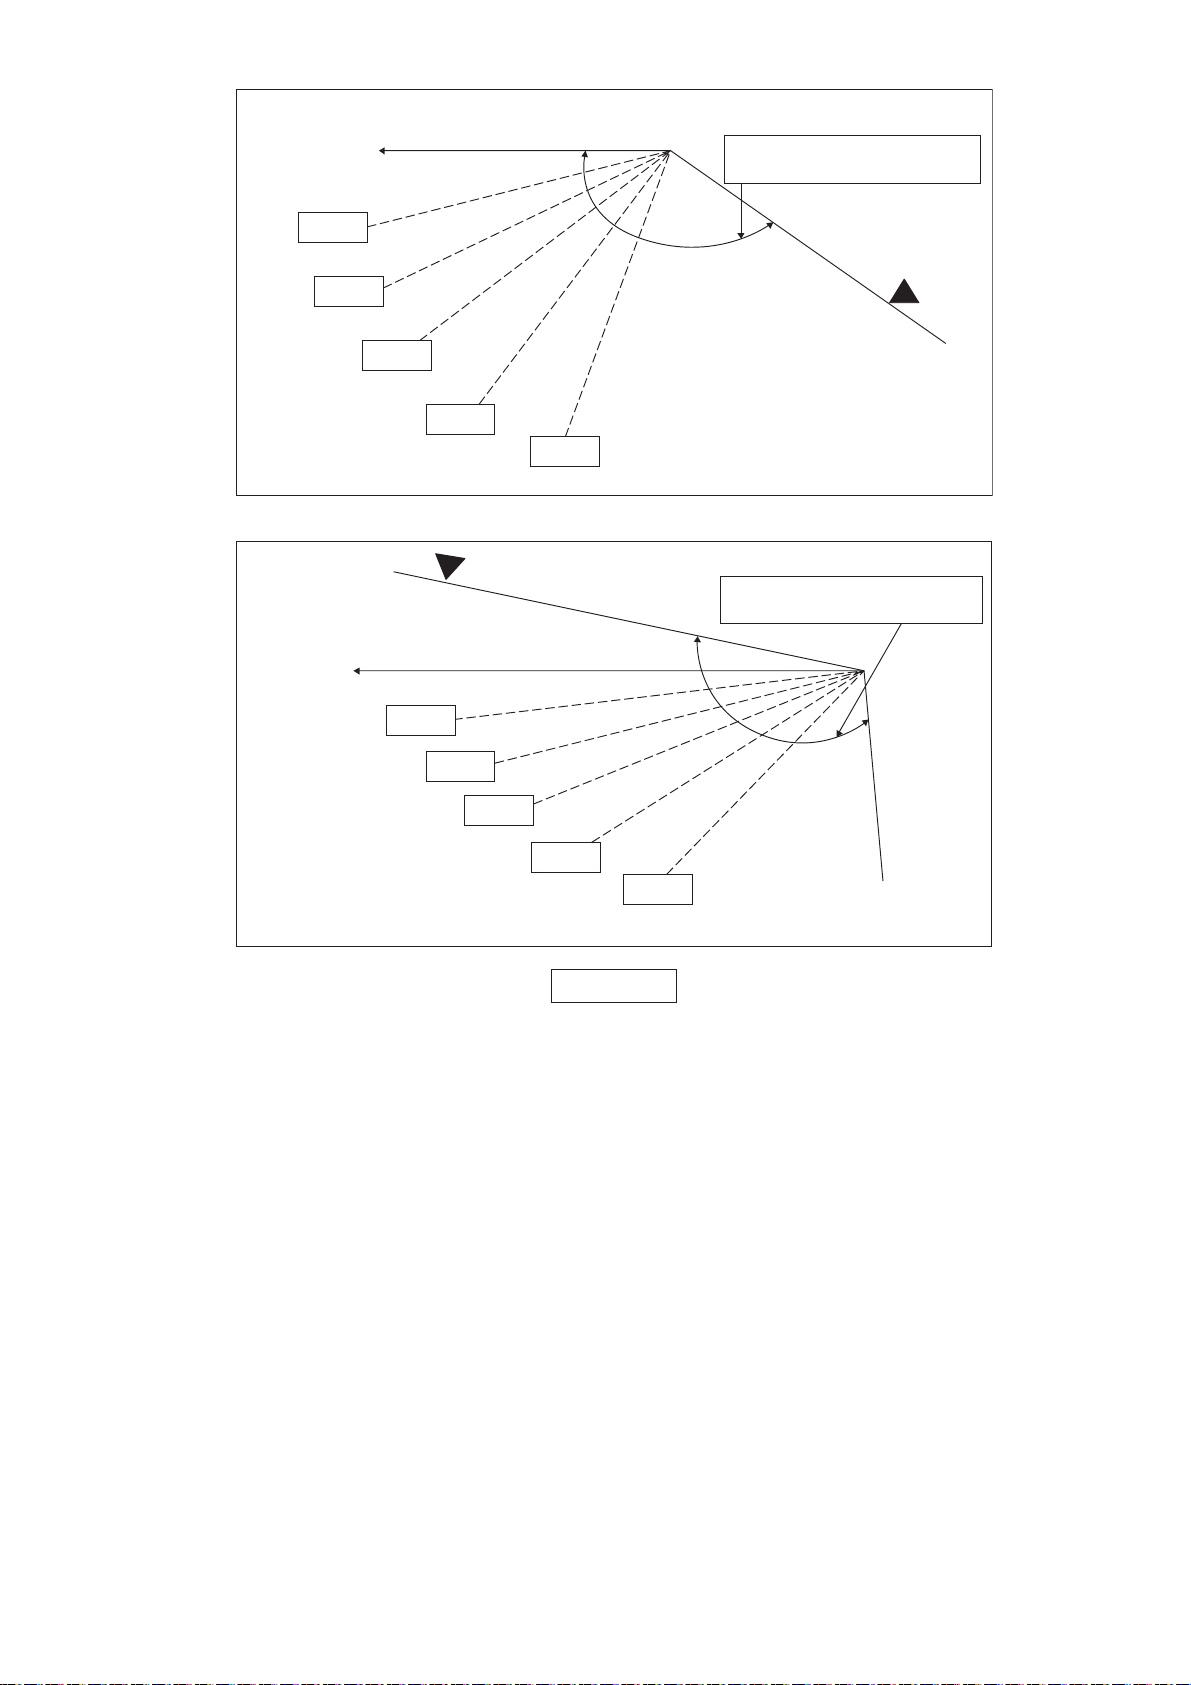
Side View (Inner Vane)
Reference point
Step 1
Step 2
Reference point
Closed
Position
Step 3
Step 1
Step 4
Stopper
Step 5
Side View (Outer Vane)
128º (Z20/25/35/42TK & XZ20/25/35TK)
148º (Z50/71TK & XZ50TK)
Stopper
Closed
Position
156º (Z20/25/35/42TK & XZ20/25/35TK)
101º (Z50/71TK & XZ50TK)
Step 2
Step 3
Step 4
Step 5
Figure 2
* The horizontal vane angle tolerance is within +/- 5 degree.
85
Page 86
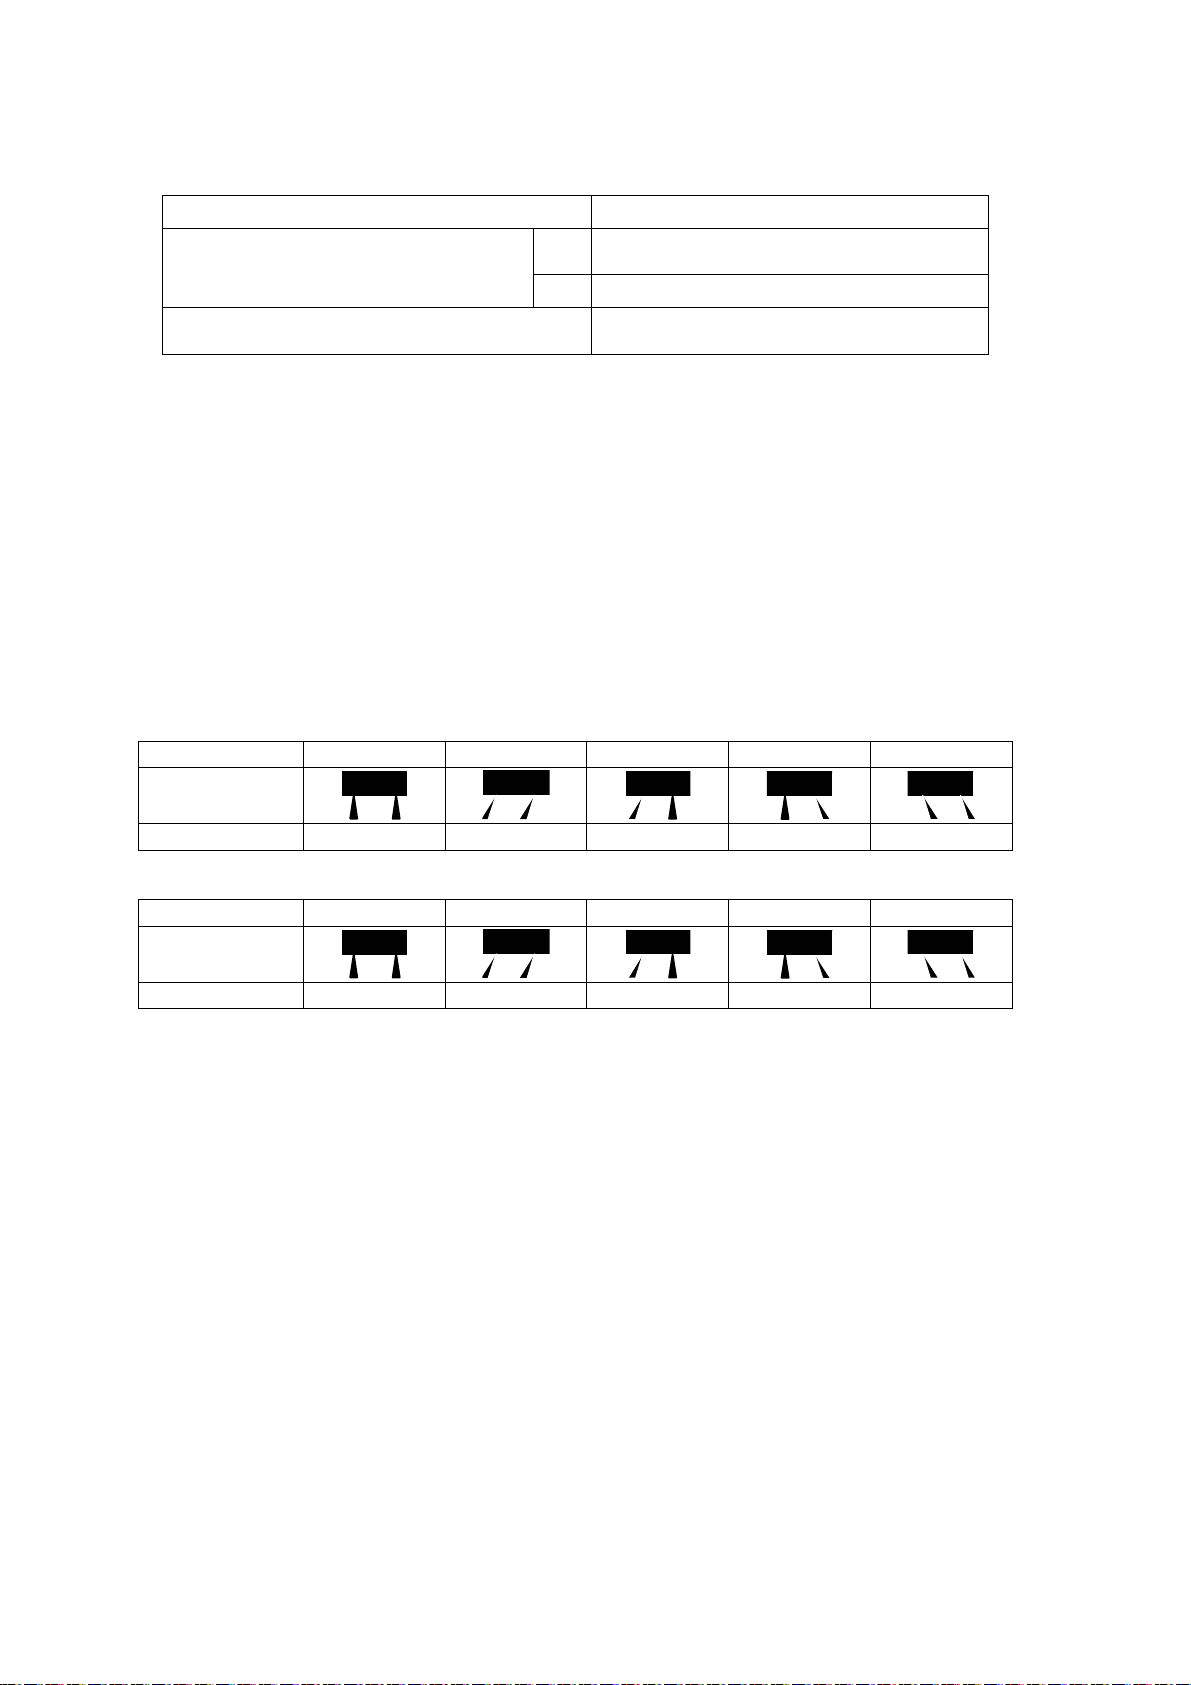
14.4.2 Horizontal Airflow
Automatic horizontal airflow direction can be set using remote control; the vane swings left and right within the
angles as stated below. For heating mode operation, the angle of the vane depends on the indoor heat
exchanger temperature as Figure 1 below. It does not swing during fan motor stop.
Operation Mode Vane Angle (°)
Heating, with heat exchanger temperature
A
B 90
Cooling and soft dry
65 ~115 (Z20/25/35/42TK & XZ20/25/35TK)
70 ~ 110 (Z50/71TK & XZ50TK)
65 ~115 (Z20/25/35/42TK & XZ20/25/35TK)
70 ~ 110 (Z50/71TK & XZ50TK)
Manual horizontal airflow direction can be set using remote control; the angles of the vane are as stated below
and the positions of the vane are as Figure 2 above.
Z20/25/35/42TK & XZ20/25/35TK
Pattern 1 2 3 4 5
Airflow Direction
Patterns at Remote
Control
Vane Angle (°) 90 65 77.5 102.5 115
Z50/71TK & XZ50TK
Pattern 1 2 3 4 5
Airflow Direction
Patterns at Remote
Control
Vane Angle (°) 90 70 80 100 110
* The vertical vane angle tolerance is within +/- 5 degree.
86
Page 87

14.5 Quiet Operation (Cooling Mode/Cooling Area of Dry Mode)
Purpose
o To provide quiet cooling operation compare to normal operation.
Control condition
o Quiet operation start condition
When “POWERFUL/QUIET” button at remote control is pressed twice.
QUIET will be shown on remote control display.
o Quiet operation stop condition
When one of the following conditions is satisfied, quiet operation stops:
POWERFUL/QUIET button is pressed again.
Stop by OFF/ON switch.
Timer “off” activates.
ECONAVI button is pressed.
Mild Dry Cooling button is pressed.
When quiet operation is stopped, operation is shifted to normal operation with previous setting.
When operation mode is changed, quiet operation is shifted to quiet operation of the new mode.
During quiet operation, if timer “on” activates, quiet operation maintains.
After off, when on back, quiet operation is not memorised.
Control contents
o Fan speed is changed to Lo-.
14.6 Quiet Operation (Heating)
Purpose
o To provide quiet heating operation compare to normal operation.
Control condition
o Quiet operation start condition
When “POWERFUL/QUIET” button at remote control is pressed twice.
QUIET will be shown on remote control display.
o Quiet operation stop condition
When one of the following conditions is satisfied, quiet operation stops:
POWERFUL/QUIET button is pressed again.
Stop by OFF/ON switch.
Timer “off” activates.
ECONAVI button is pressed.
Mild Dry Cooling button is pressed.
When quiet operation is stopped, operation is shifted to normal operation with previous setting.
When operation mode is changed, quiet operation is shifted to quiet operation of the new mode, except
fan mode only.
During quiet operation, if timer “on” activates, quiet operation maintains.
After off, when on back, quiet operation is not memorised.
Control contents
o Fan speed manual
Fan speed is changed to Lo-.
o Fan Speed Auto
Fan speed is changed to Lo-.
14.7 Powerful Mode Operation
When the powerful mode is selected, the internal setting temperature will shift lower up to 2.0°C (for Cooling/Soft
Dry) or higher up to 3.5°C (for Heating) than remote control setting temperature for 20 minutes to achieve the
setting temperature quickly.
87
Page 88
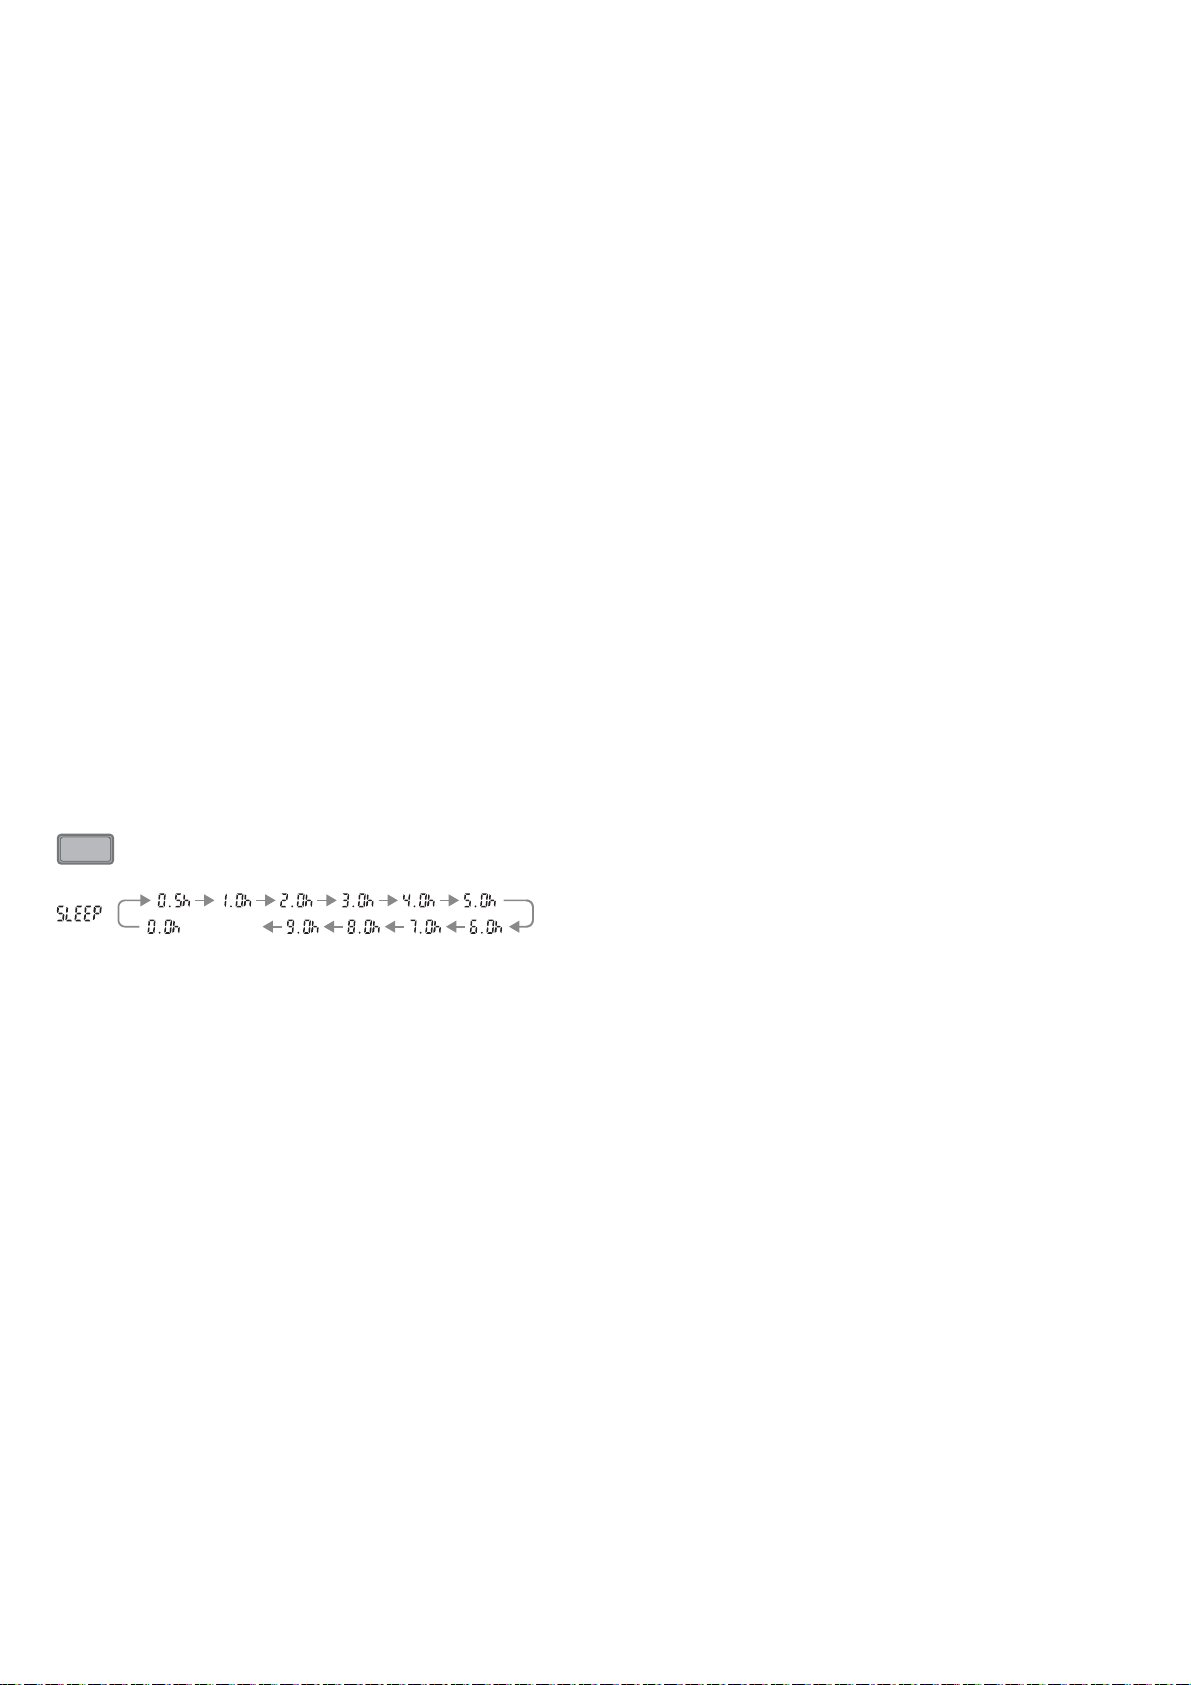
14.8 Timer Control
There are 2 sets of ON and OFF timer available to turn the unit ON or OFF at different preset time.
If more than one timer had been set, the upcoming timer will be displayed and will activate in sequence.
14.8.1 ON Timer Control
ON timer 1 and ON timer 2 can be set using remote control, the unit with timer set will start operate earlier than
the setting time.
This is to provide a comfortable environment when reaching the set ON time.
60 minutes before the set time, indoor (at fan speed of Lo-) and outdoor fan motor start operate for 30 seconds to
determine the indoor intake air temperature and outdoor air temperature in order to judge the operation starting
time.
From the above judgment, the decided operation will start operate earlier than the set time as shown below.
14.8.2 OFF Timer Control
OFF timer 1 and OFF timer 2 can be set using remote control, the unit with timer set will stop operate at set time.
14.9 Sleep Mode Operation
SLEEP
To maximise comfort while sleeping
(CANCEL)
This operation provides you with a comfortable environment while sleeping. It will automatically adjust the sleep
pattern temperature during the activation period.
The indoor unit indicator will dim when this operation is activated. This is not applicable if the indicator brightness
has been manually dimmed.
This operation is incorporated with the activation timer (0.5, 1, 2, 3, 4, 5, 6, 7, 8 or 9 hours).
This operation can be set together with single timer or twin timer. Sleep operation has the priority over OFF timer.
This operation can be cancelled by pressing the respective button when the sleep timer reaches 0.0h.
14.10 Auto Restart Control
When the power supply is cut off during the operation of air conditioner, the compressor will re-operate within
three to four minutes (there are 10 patterns between 2 minutes 58 seconds and 3 minutes 52 seconds to be
selected randomly) after power supply resumes.
This type of control is not applicable during ON/OFF Timer setting.
This control can be omitted by open the circuit of JP1 at indoor unit printed circuit board.
88
Page 89
14.11 Indication Panel
LED POWER TIMER nanoe ECONAVI
Color White White White White
Light ON Operation ON Timer Setting ON nanoe ON ECONAVI ON
Light OFF Operation OFF Timer Setting OFF nanoe OFF ECONAVI OFF
Note:
If POWER LED is blinking, the possible operation of the unit are Hot Start, during Deice operation, operation
mode judgment, or ON timer sampling.
If Timer LED is blinking, there is an abnormality operation occurs.
14.12 nanoe Operation
This operation provides clean air by producing great amount of negative ions and distribute through the
discharge airflow to capture or deactivate molds, bacteria or viruses.
Generate nanoe (water wrapped ion particle) to moisturize skin.
nanoe operation start condition
o During unit running at any operation mode, if nanoe operation is activated, combination operation (operation
mode + nanoe operation) starts.
o During unit is OFF, if nanoe operation is activated, nanoe individual operation starts.
nanoe operation stop condition
o When OFF/ON button is pressed to stop the operation.
o When nanoe button is pressed.
o When OFF Timer activates.
nanoe operation pause condition
o When indoor fan stop (during deice, odor cut control, thermostat off, etc.). nanoe operation resume after
indoor fan restarts.
o When indoor intake temperature ≥ 35°C and < 5°C. nanoe operation resume after indoor intake temperature
< 35°C or ≥ 5°C continuously for 6 minutes.
Indoor fan control
o During any operation mode combines with nanoe operation, fan speed follows respective operation mode.
However, nanoe system enabled when fan speed ≥ 470 rpm to ensure proper negative ion distribution,
nanoe system disabled when fan speed < 470 rpm.
o During nanoe individual operation, only Auto Fan Speed and no Powerful operation is allowed. Even if Fan
Speed button is pressed, no signal is sent to the unit and no change on remote control display. Auto Fan
Speed for nanoe individual operation is cooling medium fan.
Airflow direction control
o During any operation mode combines with nanoe operation, airflow direction follows respective operation
mode.
o During nanoe individual operation, only Auto Air Swing is allowed. Even if Air Swing button is pressed, no
signal is sent to the unit and no change on remote control display.
Timer control
o When ON Timer activates when unit stops, previous operation resumes and restored last saved nanoe
operation status.
o When ON Timer activates during any operation, no change on current operation.
o When OFF Timer activates during any operation, all operation stops and the latest nanoe operation status is
saved.
Indicator
o When nanoe starts, nanoe indicator ON.
89
Page 90
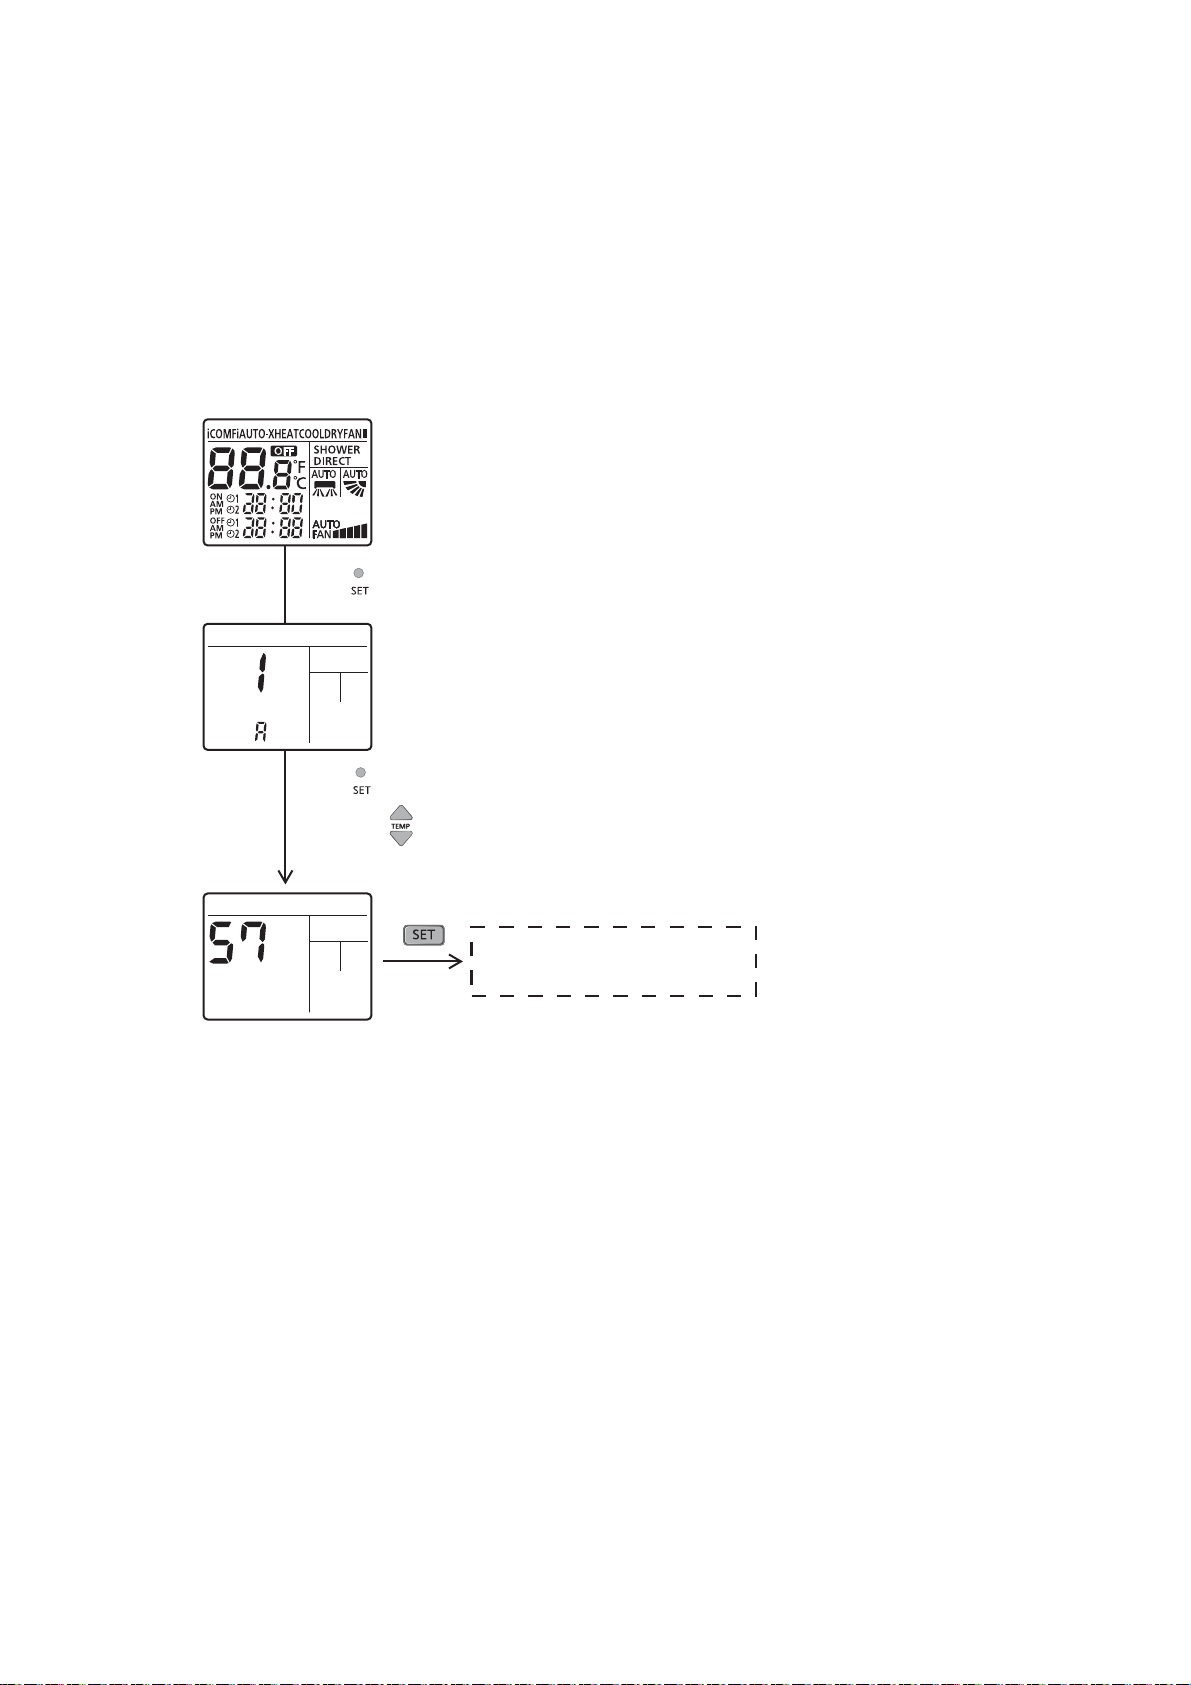
Remote Control Receiving Sound
o Normal Operation nanoe Operation : Beep
o nanoe Operation Normal Operation : Beep
o Stop nanoe individual Operation : Beep
o nanoe individual Operation Stop : Long Beep
Power failure
o During nanoe individual operation, if power failure occurs, after power resumes, nanoe individual operation
resumes immediately.
o During combination operation, if power failure occurs, after power resumes, combination operation resume
immediately.
nanoe check mode
o To enable nanoe check mode, during nanoe operation ON:
Normal display mode
Press SW (t ≥ 0 secs)
When SW pressed continuously for t ≥ 5 secs to enter service zone
and press SW’s to choose function 57
Transmit
“NANOE CHECK” code
o During nanoe check mode, H67 is judged when disconnection detected. Timer LED blinks.
nanoe Abnormal Detection
o Disconnection Abnormality
Abnormal detection condition
Start from 1 sec after nanoe power ON, 6 secs has passed and in this 6 secs period, abnormal signal
is detected continuously for 5.9 secs.
Action after abnormal detection condition fulfilled
Disconnection counters +1, nanoe power OFF for 5 minutes and then restart. However, according to
action mode and disconnection counter, below will be implemented:
o During nanoe Check Mode: Disconnection abnormality will judged when disconnection counter
≥ 1. Abnormal code: H67 will memorized in EEPROM, Timer LED blinking and nanoe LED Off.
o Other Than Above: Disconnection abnormality will judged when disconnection counter ≥ 3.
Abnormal code: H67 will memorized in EEPROM and nanoe LED OFF, Timer LED not blinking.
Disconnection counters clear condition >
Disconnection counter will be cleared when operation stop. (Not nanoe Check Mode)
90
Page 91

o nanoe Discharge Abnormality
Abnormal detection condition
After 30 minutes nanoe power ON, abnormal signal is being detected continuously for 5s.
Action after abnormal detection condition fulfilled
Abnormal discharge counter +1, nanoe power OFF for 30 minutes and then restart. When abnormal
discharge counter ≥ 12, abnormal code: H67 in analyze area (Area where abnormal code not
displayed) will be memorized.
Abnormal discharge counters clear condition
Discharge counter will be cleared when operation become normal for 50 mins above or when
operations stop.
14.13 Mild Dry Cooling Operation
This operation helps to prevent decreases in room humidity while maintaining the setting temperature.
During unit running at Cooling operation mode, if “Mild Dry Cooling” button is pressed, Mild Dry Cooling operation
starts and Mild Dry Cooling indicators turns ON at remote control display.
Mild dry cooling operation is unavailable when the unit is operating Auto mode and Soft Dry model operation.
Mild dry cooling operation is cancelled when the unit turned OFF, Mild Dry Cooling button is pressed again or
when the operation mode changed from Cooling to other mode.
ECONAVI, Powerful, Quiet and Mild Dry Cooling mode cannot function at the same time, the unit will follows the
operation according to the last signal received.
During this operation, the compressor frequency changes according to operating condition to prevent room
humidity decreases and when AUTO AIR SWING is set, the vertical airflow direction fixed at lower limit position.
14.14 ECONAVI Operation
Area of human availability, activity level and absent is judged based on pulses by using 2 infrared sensors. The
internal setting temperature shift, fan speed and horizontal airflow direction are adjusted in order to provide
comfort environment while maintain the energy saving level.
ECONAVI start condition:
o When ECONAVI button is pressed.
ECONAVI stop conditions:
o When ECONAVI button is pressed again.
o When unit is OFF by OFF/ON button.
o When unit is OFF when OFF TIMER activates.
o When unit is OFF by AUTO OFF/ON button at indoor unit.
o When QUIET operation activates.
o When
o When POWERFUL operation is selected.
button is pressed.
91
Page 92
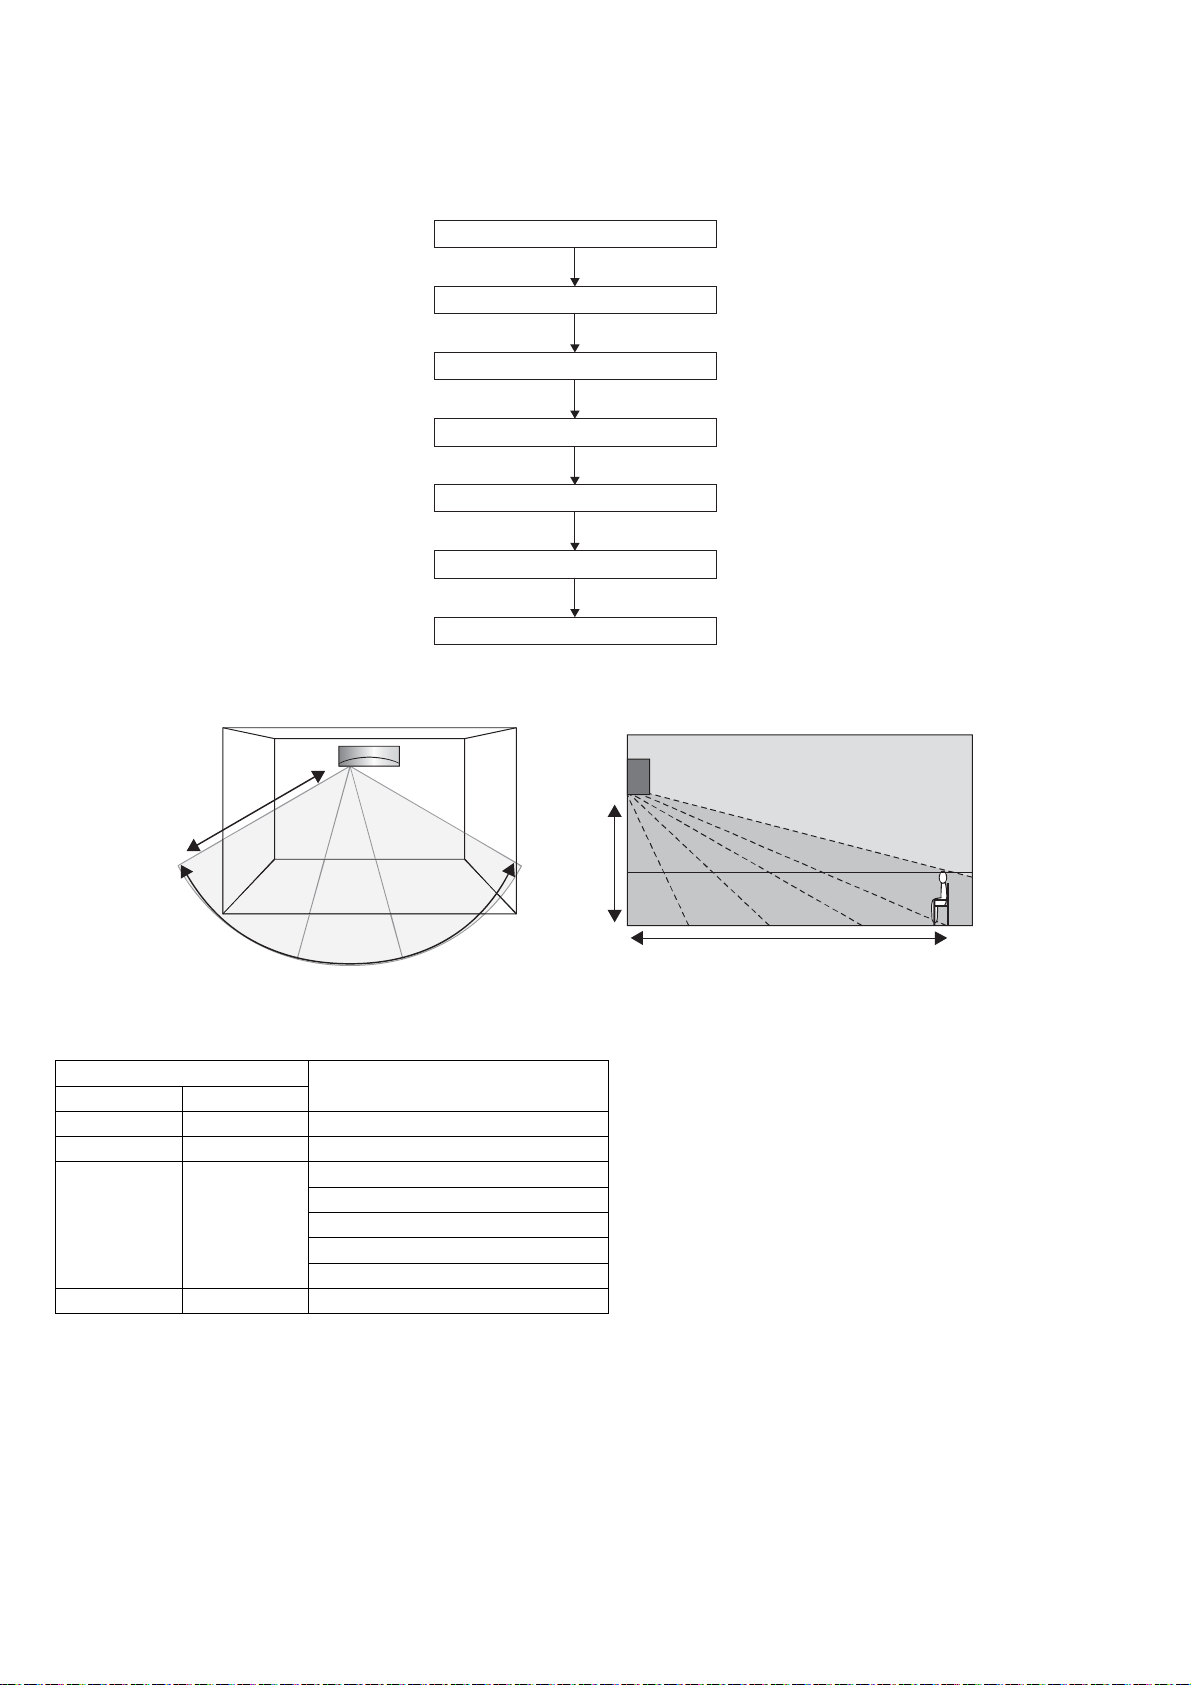
14.14.1 Human Activity Sensor
Area of human availability, activity level and absent is judged based on pulses by using 2 infrared sensors. The
internal setting temperature shift, fan speed and horizontal airflow direction are adjusted in order to provide
comfort environment while maintain the energy saving level.
Human activity judgment is as following
Signal Detection
Information Log
Area of Living Classification Judgment
Human Position Analysis
Target Area & Position Judgment
Human Activity Level Judgment
Setting Position Judgment
14.14.1.1 Signal Detection
7m
A
B
120°
Human Activity sensor will turns on according to infrared sensors signal detection.
Signal detection
Possible detected human
Sensor 1 Sensor 2
1 0 C
0 1 A
1 1
0 0 –
C
position area
B
A & C
B & C
A & C
A, B & C
2m
7m
14.14.1.2 Information Log
The signal from Infrared sensors will be log to human activity database for further analysis.
14.14.1.3 Area of Living Classification Judgment
The system is able to judge area of living according to human activity database, classified as following:
o Living Area – In front of television, dining table, etc.
o Walkway – Human detection is relatively less.
o Non-Living Area – near windows, wall, etc.
92
Page 93
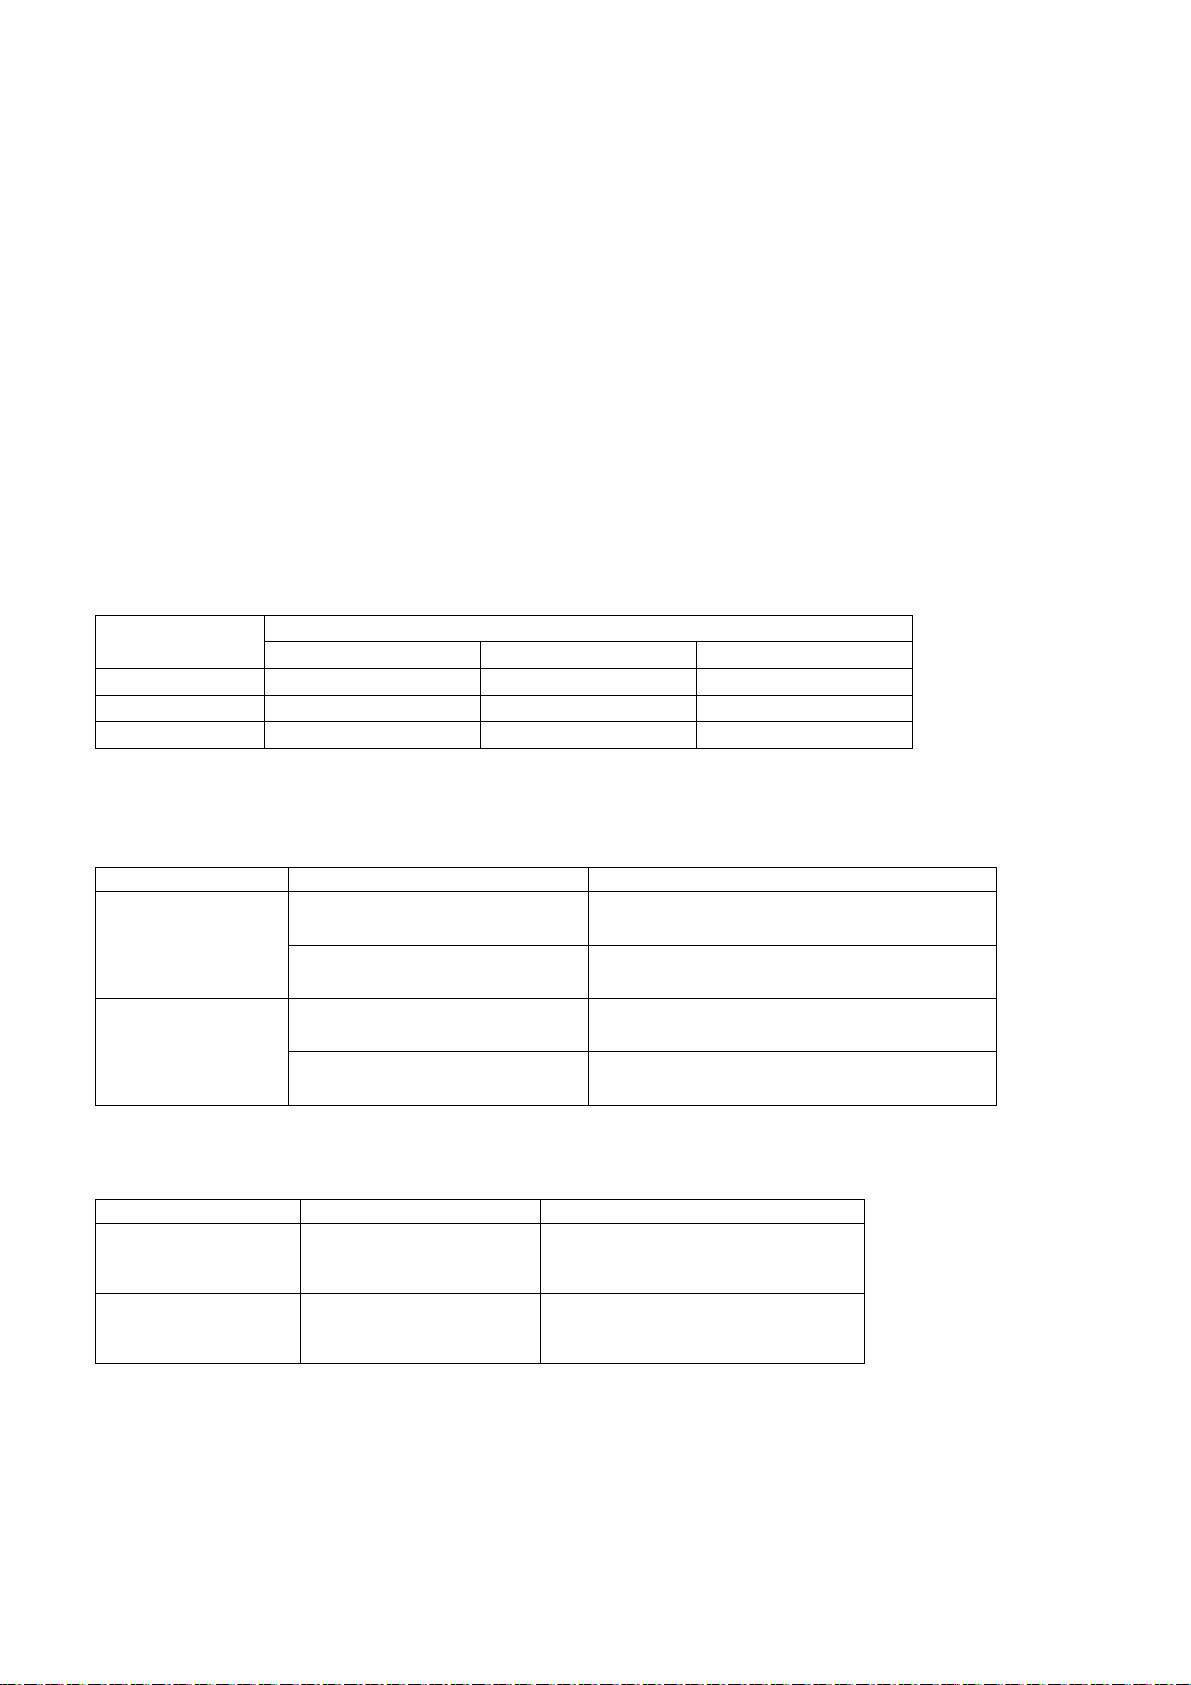
14.14.1.4 Human Position Analysis
According to Area of Living, frequency of activity and indoor unit intake temperature, the system will analyze the
human position away from the indoor unit.
14.14.1.5 Target Area and Position Judgment
The system will judge the indoor unit installation position according to human activity Non-Living Area:
o Non-Living Area at Position A – Indoor unit installed at left side of the room.
o Non-Living Area at Position C – Indoor unit installed at right side of the room.
o Other than above – Indoor unit installed at center of the room.
Every 4 hours, the Target Area and Position Judgment will restart.
14.14.1.6 Human Activity Level Judgment
Human Activity Level is judged based on the frequency of pulses detected by the infrared sensors within a
timeframe. The activity level will be categorized into High, Normal, Low level.
When a pulse is detected within this timeframe, the status of human presence is judged.
When there is no signal detection continues for 20 minutes or more, the status of human absence is judge d.
14.14.1.7 Setting Position Judgment
According to installation position when there is only one activity area detected, the horizontal airflow direction
louver position is fixed according to chart below:
Target area
A 3 2 2
B 1 1 1
C 5 5 4
Louver position refer to horizontal airflow direction control.
When 2 activity areas have been detected, according to Human Activity Level, the timing of horizontal airflow
direction louver steps at the targeted activity areas is judged.
Operation mode Activity level difference Louver stop time
Cooling
Cooling
When 3 activity areas have been detected, according to Human Activity Level the timing of horizontal airflow
louver steps at the targeted activity areas is judged.
Operation mode Activity level Louver stop time
Cooling
Heating
When 3 activity areas have same activity level, the horizontal airflow direction louver will swing left and right.
Left installation Center installation Right installation
Horizontal airflow direction louver position
1 level
2 levels
1 level
2 levels
Hi
Me
Lo
Hi
Me
Lo
Higher Activity level ≈ 60 seconds
Lower Activity level ≈ 30 seconds
Higher Activity level ≈ 60 seconds
Lower Activity level ≈ 8 seconds
Higher Activity level ≈ 8 seconds
Lower Activity level ≈ 30 seconds
Higher Activity level ≈ 8 seconds
Lower Activity level ≈ 60 seconds
≈ 45 seconds
≈ 30 seconds
≈ 20 seconds
≈ 20 seconds
≈ 30 seconds
≈ 45 seconds
93
Page 94
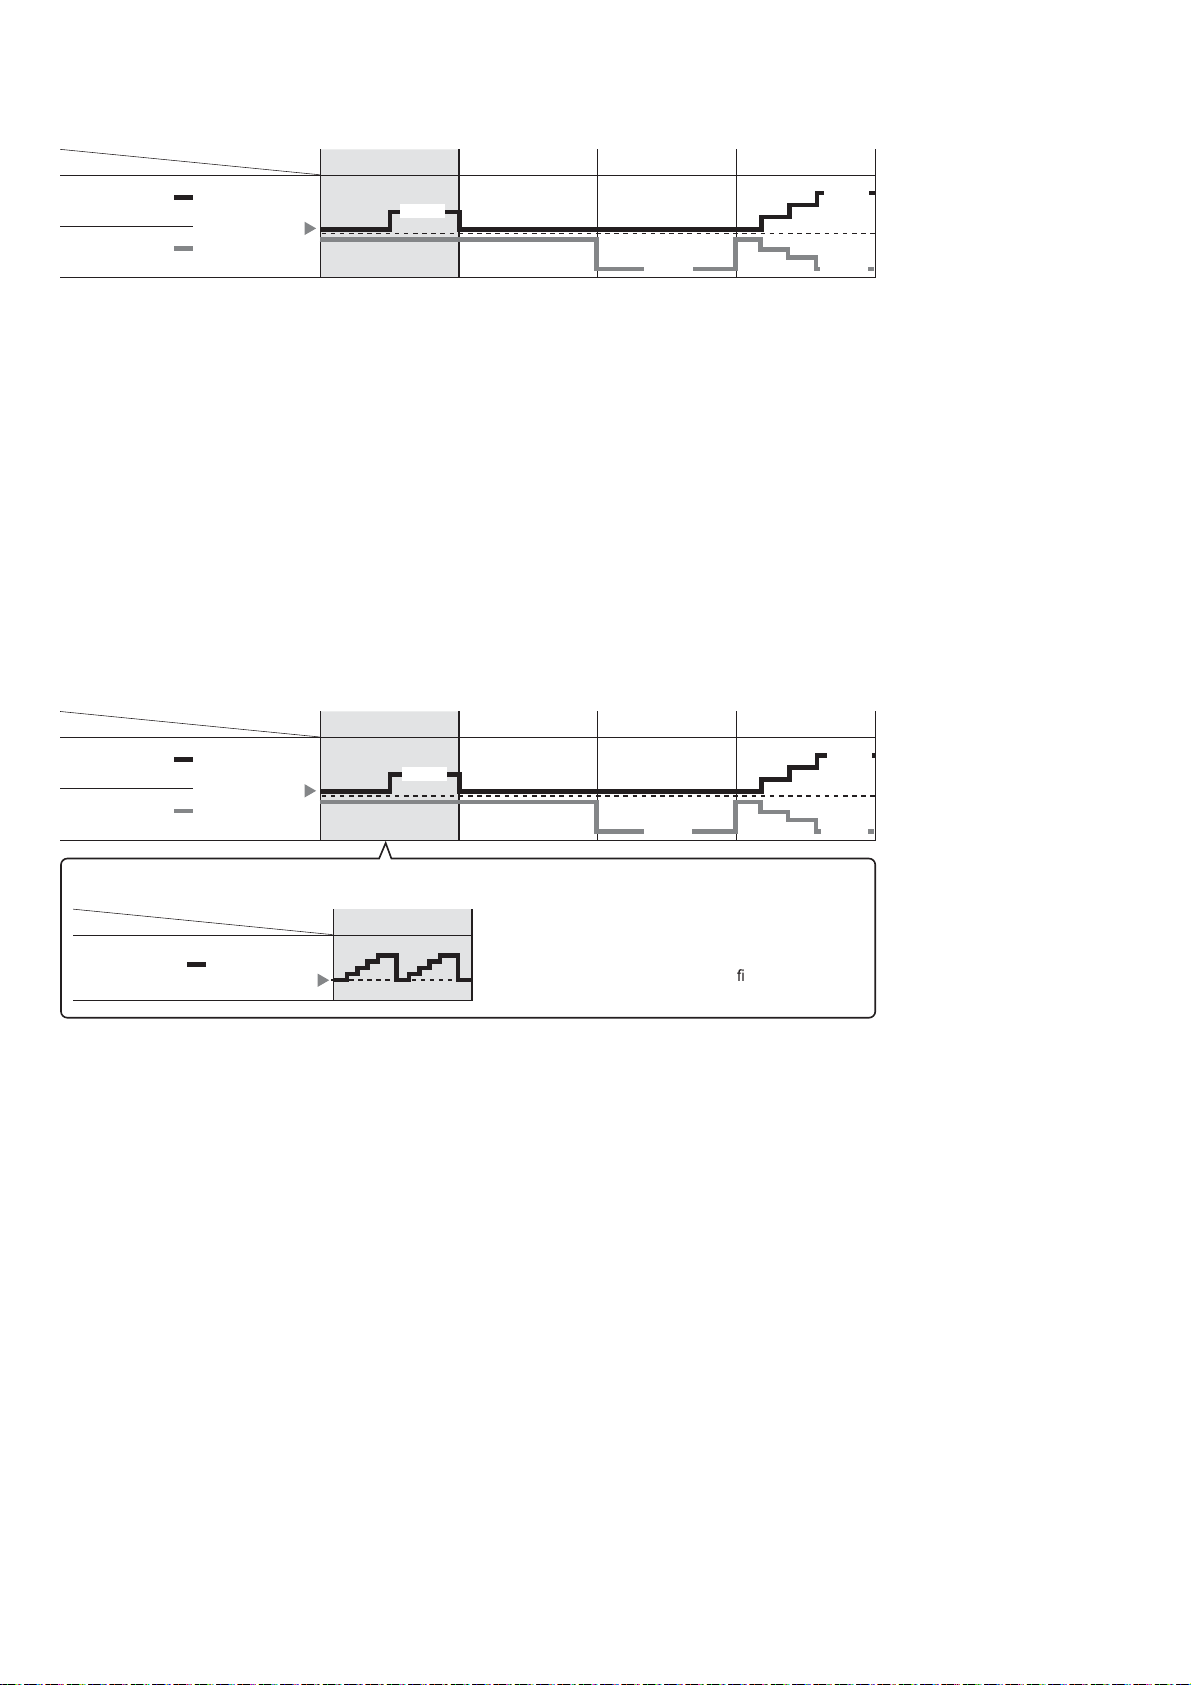
14.14.1.8 Setting Temperature and Fan Speed Shift
ECONAVI ; Detecting human presence and activity, the unit controls room temperature to save energy.
Mode
COOL/DRY
HEAT
Human
Set
temperature
Low activity Normal activity High activity Absent
+2.0°C
+1.0°C
-2.0 °C-2.0 °C
14.14.1.9 Rhythmic Temperature Wave Operation
To further maximize the energy saving during ECONAVI operates at low activity level.
Start condition
o The unit is operates in Cool or Dry mode under ECONAVI operation, and
o Human activity sensor detects low activity level continuously for 60 minutes, and
Stop condition
o Unit is off, or
o ECONAVI is off, or
o Human activity sensor detects high activity level or absent, or
Control contents
o When all start conditions complied, set temperature will shift accordingly as following:
ECONAVI ; Detecting human presence and activity, the unit controls room temperature to save energy.
Mode
COOL/DRY
HEAT
Human
Set
temperature
Low activity Normal activity High activity Absent
+2.0°C
+1.0°C
-2.0 °C-2.0 °C
ECONAVI
Precise control of temperature during low activity to maximise energy saving.
Mode
COOL/DRY
Human
Set
temperature
Low activity
ECONAVI take advantage of the human nature that
human being takes time to feel the temperature rise
during low activity level; the unit adjusts temperature to
maximise energy saving without sacri
cing the comfort.
94
Page 95
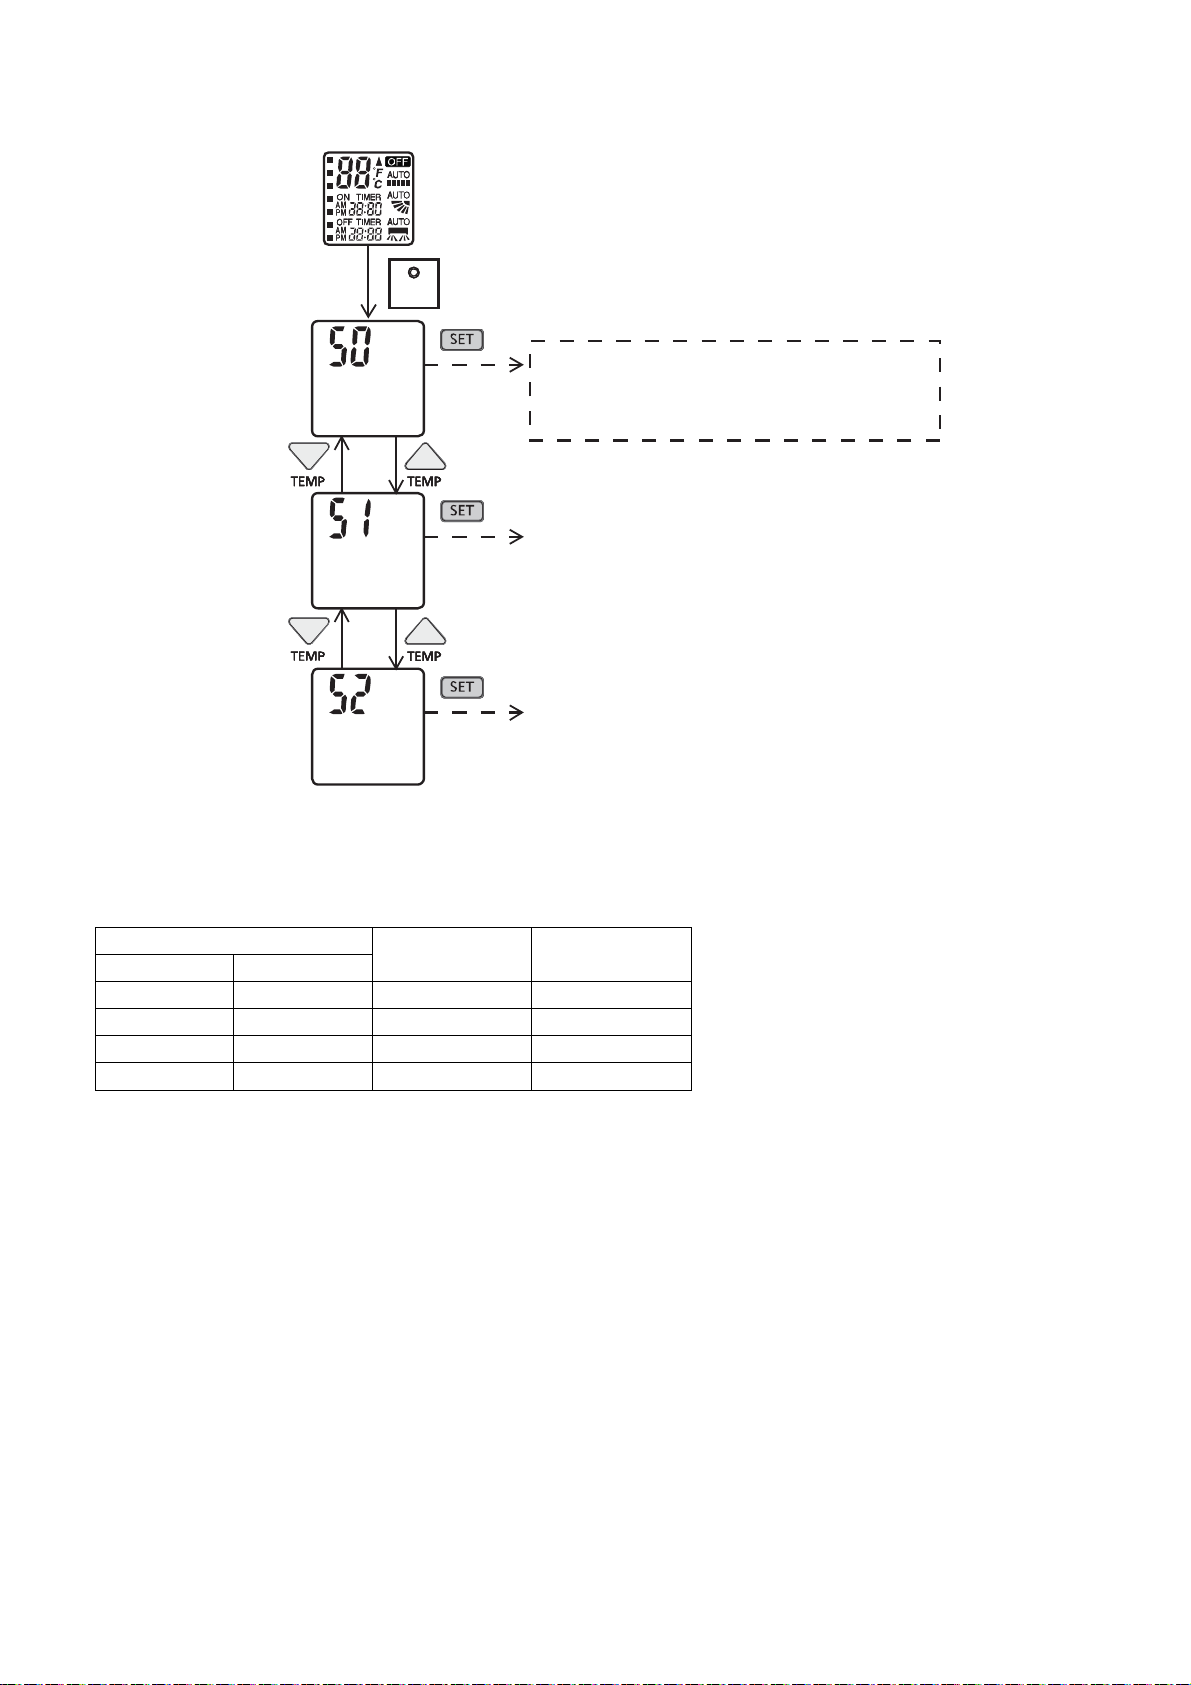
14.14.1.10 ECONAVI Demo Mode
To enable ECO DEMO mode, during unit is OFF (power standby):
Remote control normal mode
Press continously for 5s
SET
Transmit ECO demo code and
after 30 seconds return to normal
mode.
Transmit sunlight sensor check code
andafter30secondsreturntonormal
mode.
Transmit check code
andafter30secondsreturntonormal
mode.
To disable ECO Demo MODE:
o Transmit ECO Demo signal again.
Operation details
Infrared sensor
Sensor 1 Sensor 2
1 0 5 HI
1 1 Auto Swing HI
0 1 2 HI
0 0 Auto Swing LO
The target area will maintain for 5 seconds before changeover to next detection.
If no activity detection, the last action will maintain for 30 seconds before changeover to human absence status.
Vane position Fan speed
14.14.1.11 Human Activity Sensor Abnormality
Abnormality detection:
Connector disconnection / Wire cut abnormality
o Sensor judge Hi level continuously for 25 seconds
Circuit abnormality
o 70 seconds after power ON, if human activity sensor judge Lo level continuously for 25 seconds
Error Code judgment
When abnormality happened, internal counter increase by 1 time.
Human activity sensor power OFF, retry after 5 seconds.
When the human activity sensor maintains normal condition for 120 seconds, the counter reset or AC reset.
When abnormality counter reached 4 times, H59 occurred – No TIMER indicator blinking.
When error code happened, the unit is able to operate without ECONAVI.
95
Page 96
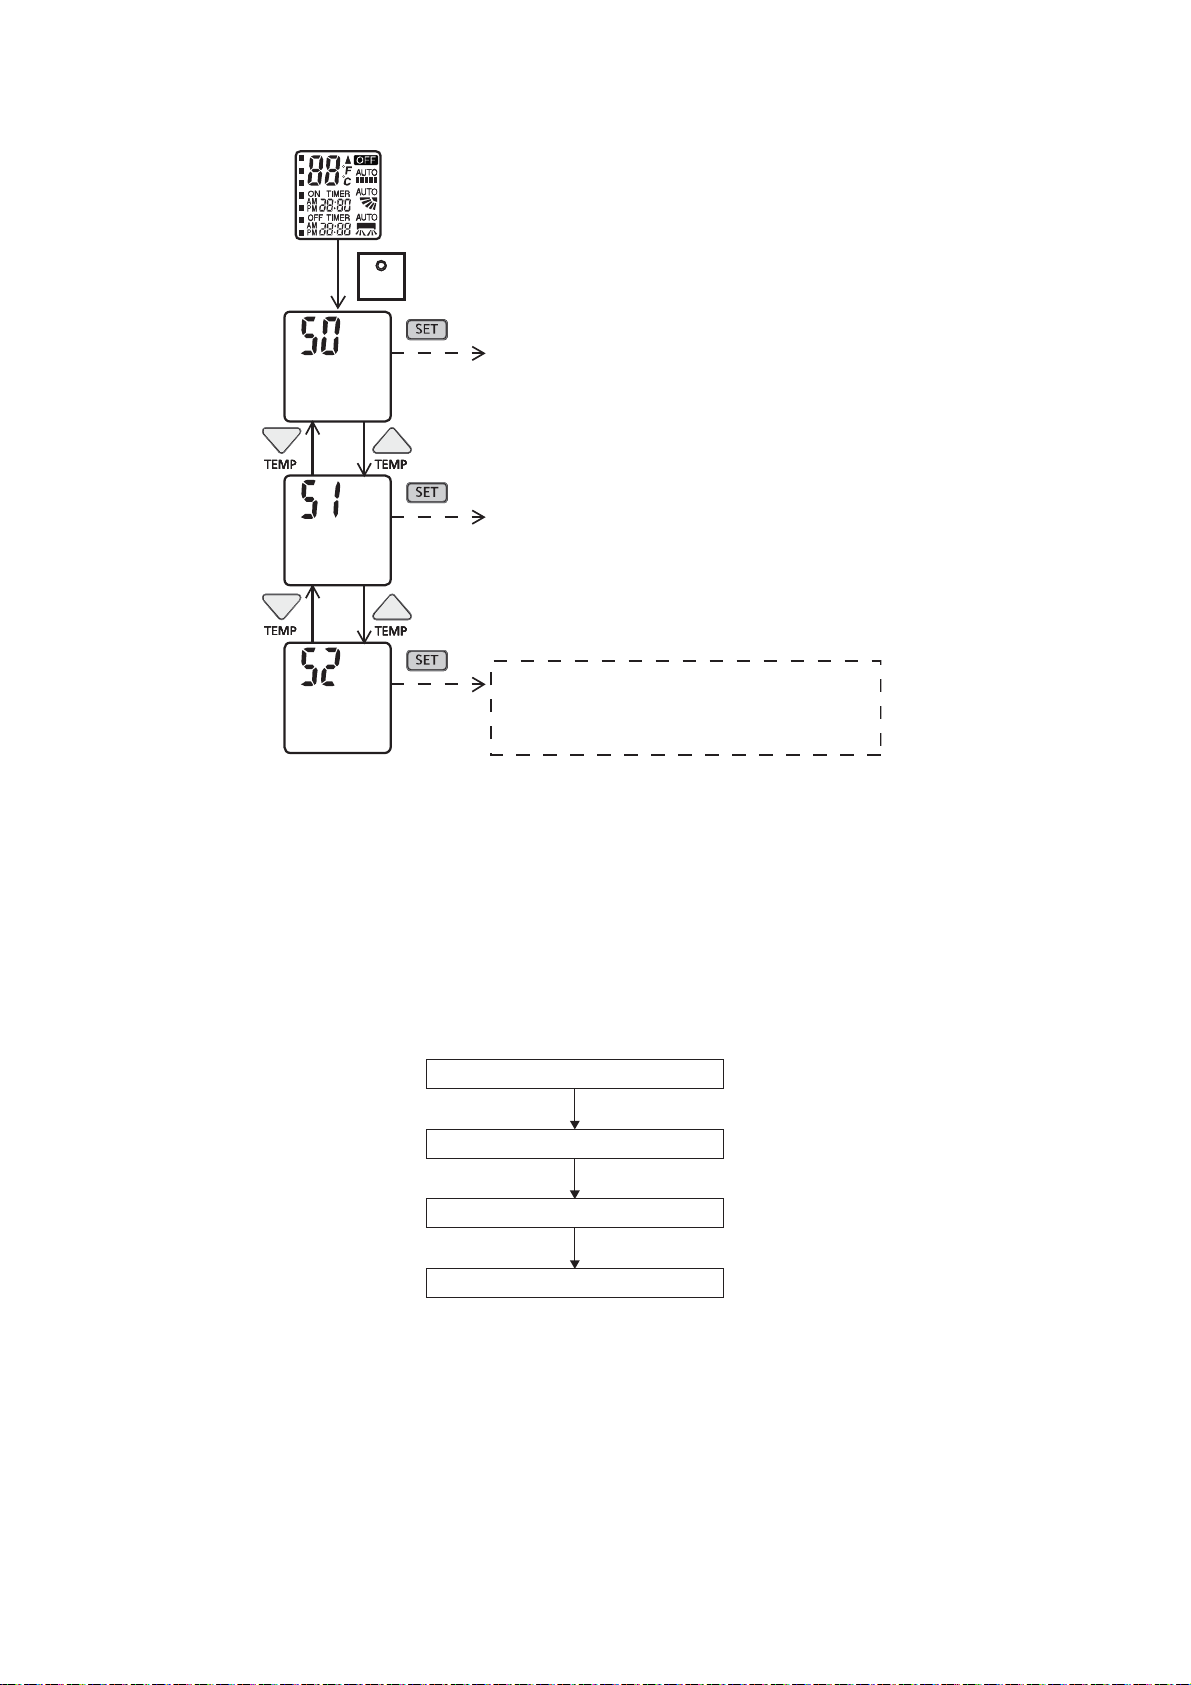
14.14.1.12 Human Activity Sensor Check Mode
To enable Human Activity sensor abnormality check mode, during ECONAVI operation ON:
Remote control normal mode
Press continously for 5s
SET
Transmit ECO demo code and
after 30 seconds return to normal
mode.
Transmit sunlight sensor check code
and after 30 seconds return to normal
mode.
Transmit check code
and after 30 seconds return to normal
mode.
During ECONAVI is ON, when CHECK signal received, if either sensors has abnormality, the 4 times abnormality
counter is ignored, ECONAVI Indicator will blink immediately and error code is memorized.
The unit could operate without ECONAVI.
The ECONAVI indicator blinking could be cancelled by pressing ECONAVI button agai n.
If the human activity sensor has no abnormality, the CHECK process will end and continue with normal operation.
14.14.2 Sunlight Sensor
During ECONAVI operation, the sunlight sensor detects sunlight intensity coming through windows and
differentiates between sunny and cloudy or night to further optimize energy saving by adjusting the temperature.
Sunlight judgment is as following
Sunlight intensity reset
Judge sunlight intensity
Judge ambient condition
Temperature shift
14.14.2.1 Sunlight Intensity Reset
The sunlight intensity will reset to zero (no sunlight condition) when
o Each time ECONAVI is activated.
o Setting temperature is changed.
o Operation mode is changed.
96
Page 97
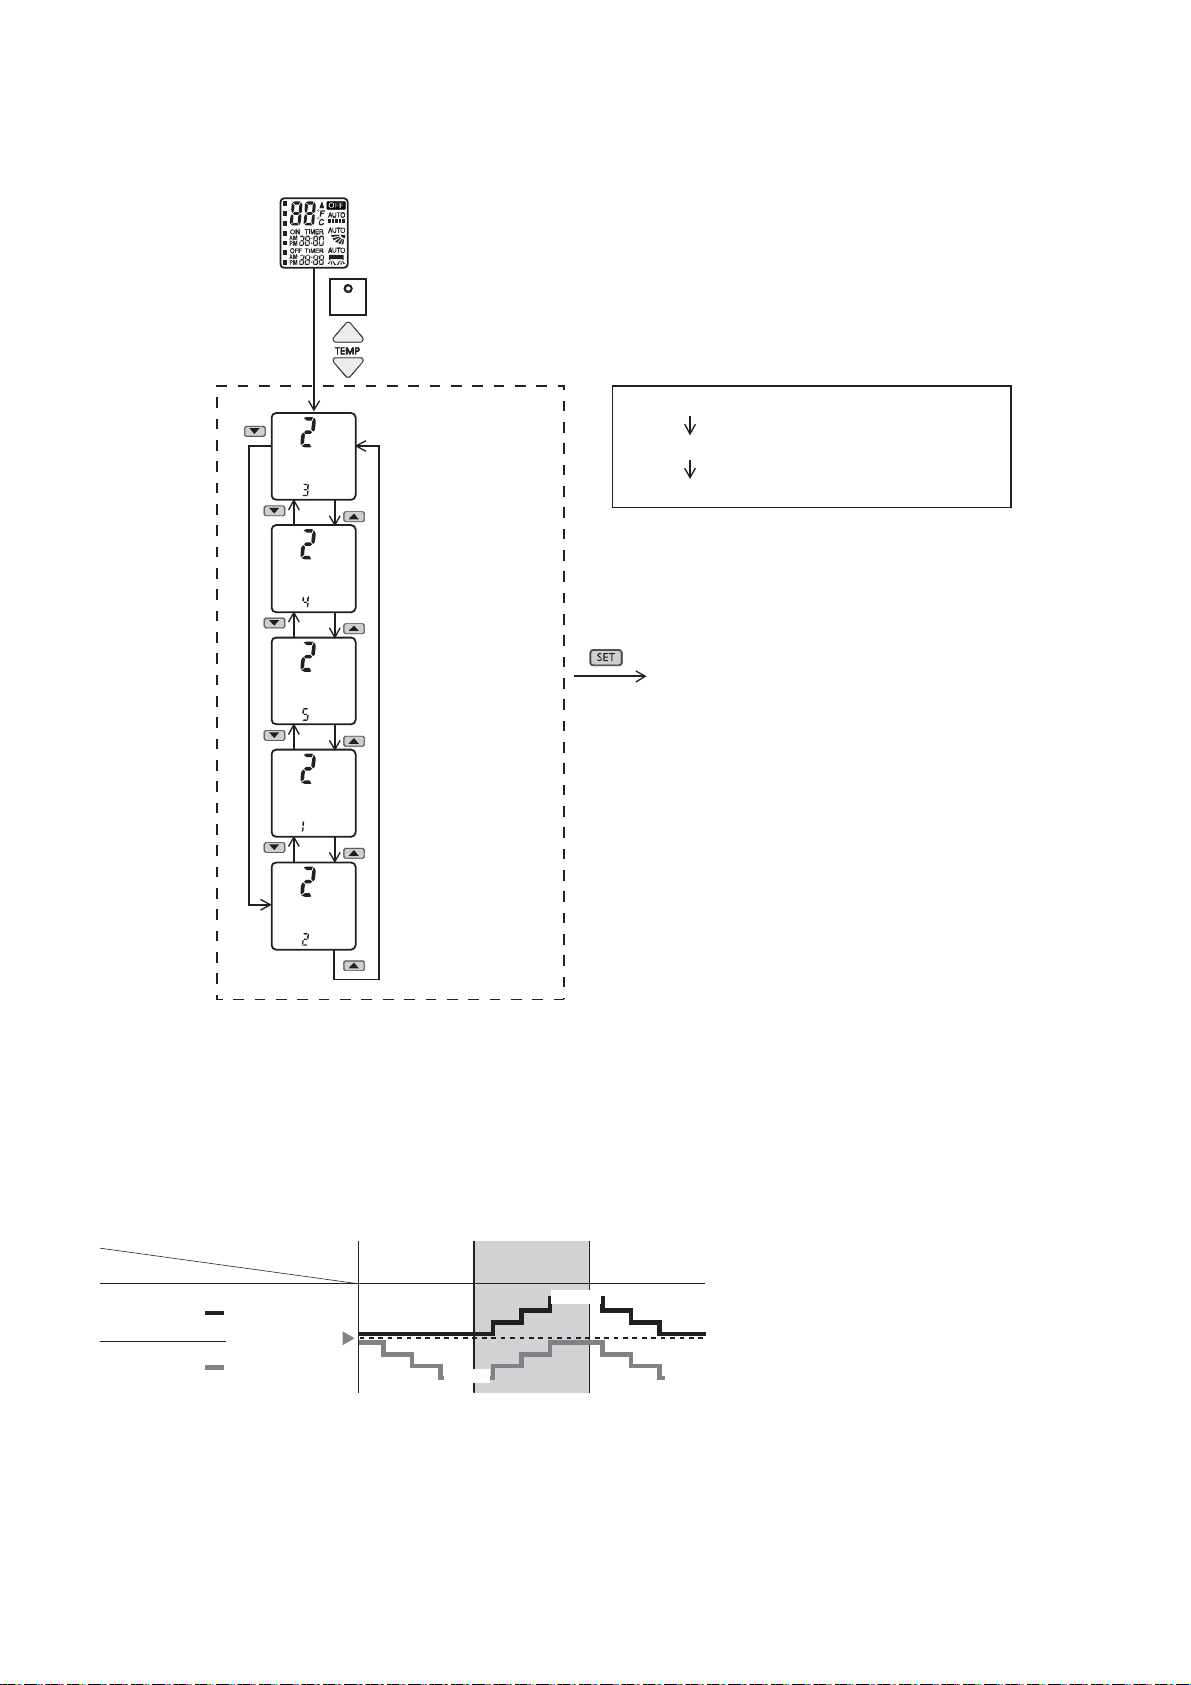
14.14.2.2 Judge Sunlight Intensity
Based on sunlight sensor output voltage, the sunlight intensity value will be computed and logged to sunlight
intensity database.
The sunlight sensor sensitivity could be adjusted:
Remote control normal mode
Press & release
SET
Press to choose No.2
Sensitivity Level 1: Less sensitive to sunlight intensity
Default: (Battery insert)
Set to Level. 3
Other than default
Display last set data
SettoLevel.4
Sensitivity Level 3: Default sensitive level
Sensitivity Level 5: More sensitive to sunlight intensity
Press
Timer
SettoLevel.5
SettoLevel.1
SettoLevel.2
Transmit
solar radiation
level
&
after *30 secs
go back to
normal mode
14.14.2.3 Judge Ambient Condition
According to sunlight intensity over a period of time, the system will analyze the ambient condition is sunny,
cloudy or night.
14.14.2.4 Temperature Shift
ECONAVI ; Detecting sunlight intensity, the unit adjust temperature to save energy.
Mode
COOL/DRY
HEAT
Ambient condition
Set
temperature
Sunny
In a room without window or with thick curtain, the sunlight sensor will judge as cloudy/night.
-1.0 °C
Night/Cloudy
+1.0 °C
Sunny
-1.0 °C
97
Page 98
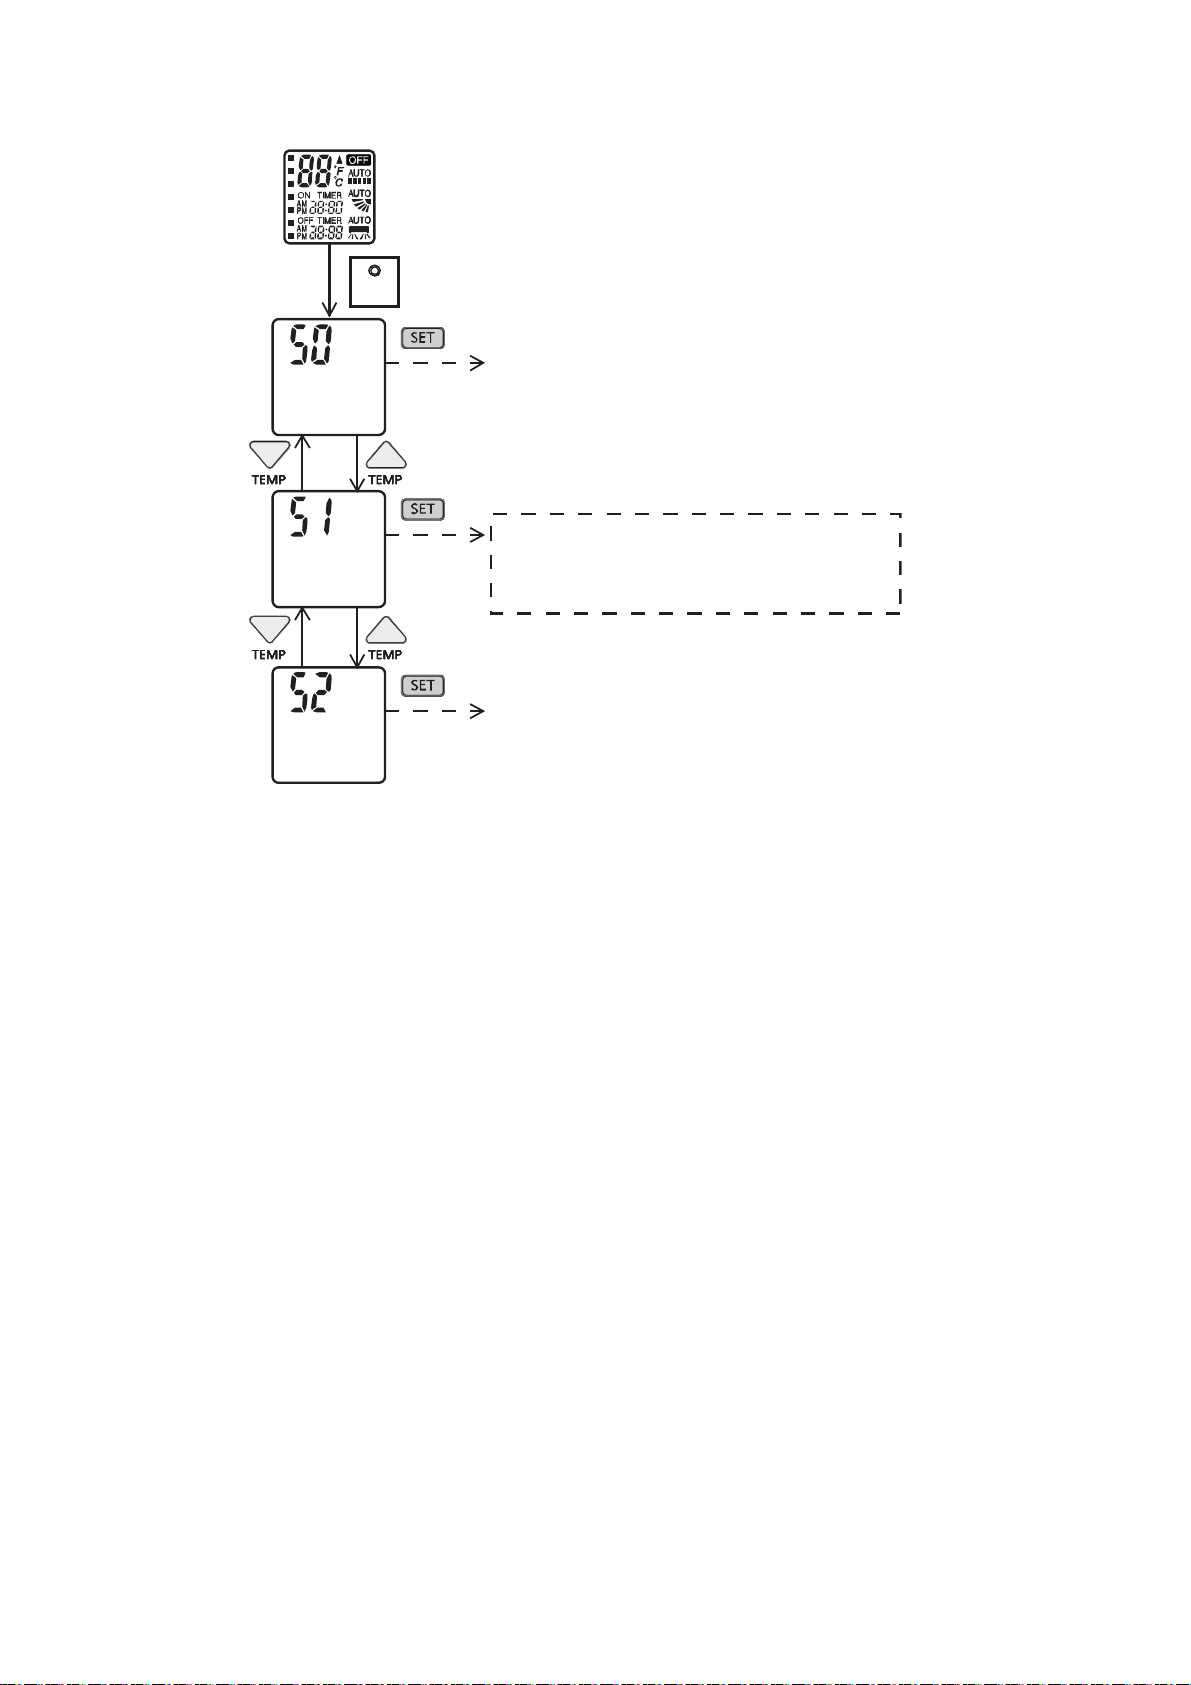
14.14.2.5 Sunlight Sensor Check Mode
To enable sunlight sensor check mode, during unit is OFF (power standby):
Remote control normal mode
Press continously for 5s
SET
Transmit ECO demo code and
after 30 seconds return to normal
mode.
Transmit sunlight sensor check code
and after 30 seconds return to normal
mode.
Transmit check code
and after 30 seconds return to normal
mode.
Operation details
o The sunlight sensor check mode will be operated for 5 minutes.
o During check mode, the ON and OFF timer will be memorized but it operation be ignored.
o During check mode, if the sunlight sensor check code is retransmitted, the 5 minutes counter will be reset.
o During check mode, if sunlight sensor detected the sunlight intensity value above minimum level, the
ECONAVI indicator turns ON. Else if sunlight sensor detected sunlight intensity value below minimum level,
the ECONAVI indicator is OFF.
To disable sunlight sensor check mode
o After check mode is ended (5 minutes counter elapsed), press AUTO OFF/ON button at indoor unit.
o If the sunlight sensor detected sunlight intensity is at abnormal range, the check mode will be ended.
Please check for error code.
14.14.2.6 Sunlight Sensor Abnormality
Abnormality detection:
o When ECONAVI is ON, if the sunlight intensity value below minimum level continuously for 24 hours, the
sunlight sensor disconnection error counter will increase by 1 time. If the ECONAVI is OFF, the 24 hours
timer will be reset, but the sunlight sensor disconnection error counter will not be reset.
Error Code judgment
o When sunlight sensor disconnection error counter reached 15 times. H70 occurred.
o No TIMER indicator or ECONAVI indicator blink.
When error code happened, the unit is able to operate without sunlight sensor.
98
Page 99

15. Operation Control (For Multi Split Connection)
During multi split connection, indoor unit’s operation controls are same with single split connection unless specified in
this chapter.
15.1 Cooling operation
15.1.1 Thermostat control
Capability supply to indoor unit is OFF (Expansion valve closed) when Intake Air Temperature — Internal setting
temperature < -2.0°C.
Capability resume supply to indoor unit after waiting for 3 minutes, if the Intake Air temperature — Internal setting
temperature > Capability supply OFF point.
15.2 Soft Dry Operation
15.2.1 Thermostat control
Capability supply to indoor unit is OFF (Expansion valve closed) when Intake Air Temperature — Internal setting
temperature < -3.0°C.
Capability resume to indoor unit after waiting for 3 minutes, if the Intake Air temperature — Internal setting
temperature > Capability supply OFF point.
15.3 Heating Operation
15.3.1 Thermostat control
Capability supply to indoor unit is OFF (Expansion valve closed) when Intake Air Temperature — Internal setting
temperature > +1.0°C.
During this condition, the indoor fan is stopped if compressor is ON.
Capability resume supply to indoor unit after waiting for 3 minutes, if the Intake Air Temperature — Internal
setting temperature < Capability supply OFF point.
15.3.2 Temperature Sampling Control
Temperature sampling is controlled by outdoor unit where room temperature for all power supply ON indoor unit
could be obtained.
When capability supply to the indoor unit is OFF and the compressor is ON, the indoor fan motor is stopped.
During this condition, 15 seconds after sampling signal from outdoor unit is received, the indoor fan start
operation at low fan speed.
However, within first 4 minutes of capability stopped supply to the indoor unit, even sampling signal is received,
the sampling control is cancelled.
99
Page 100
15.4 Automatic Operation
This mode can be set using remote control and the operation is decided by remote control setting tempe ratu re,
remote control operation mode, indoor intake and outdoor air temperature.
During operation mode judgment, indoor fan motor (with speed of -Lo) and o utdoor fan motor are running for
30 seconds to detect the indoor intake and outdoor air temperature. The operation mode is decided based on
below chart.
Every 180 minutes, the indoor and outdoor temperature is judge. Based on remote control setting temperature,
the value of T1 will increase up to 10°C, T2 will decrease by 3°C and T3 will decrease up to 8°C.
15.5 Indoor Fan Motor Operation
15.5.1 Residual Heat Removal Control
To prevent high pressure at indoor unit, when heating mode thermostat-off condition or power supply OFF,
indoor fan continue to operate at controlled fan speed for maximum 30 seconds then stop.
15.6 Powerful Mode Operation
When the power mode is selected, the internal setting temperature will shift lower up to 4.0°C for Cooling/Soft
Dry or higher up to 6.0°C for heating than remote control setting temperature, the powerful operation continue
until user cancel the Powerful operation by pressing powerful button again.
15.7 Auto Restart Control
When the power supply is cut off during the operation of air conditioner, the compressor will re-operate between
three to four minutes (10 patterns to be selected randomly) after power resume.
During multi split connection, Indoor unit will resume previous mode, include unit standby mode.
15.8 Indication Panel
LED POWER TIMER nanoe ECONAVI
Color White White White White
Light ON Operation ON Timer Setting ON nanoe ON ECONAVI ON
Light OFF Operation OFF Timer Setting OFF nanoe OFF ECONAVI OFF
Note:
If POWER LED is blinking (0.5 seconds ON, 0.5 second OFF), the possible operation of the unit are during
Indoor Residual Heat Removal, Hot Start, during Deice operation, operation mode judgment, or ON timer
sampling.
If POWER LED is blinking (2.5 seconds ON, 0.5 second OFF), the unit is in standby mode.
If TIMER LED is blinking, there is an abnormality operation occurs.
15.9 Mild Dry Cooling Operation
During multi split connection, Mild Dry Cooling Operation is disabled.
100
 Loading...