

Panasonic CQ-R221W User Manual

High-Power Cassette Player/Receiver with Changer Control
Operating Instructions
CQ-R221W
R
• Please read these instructions carefully before using this product and save this manual for future use.
•
CQ-R221W
2
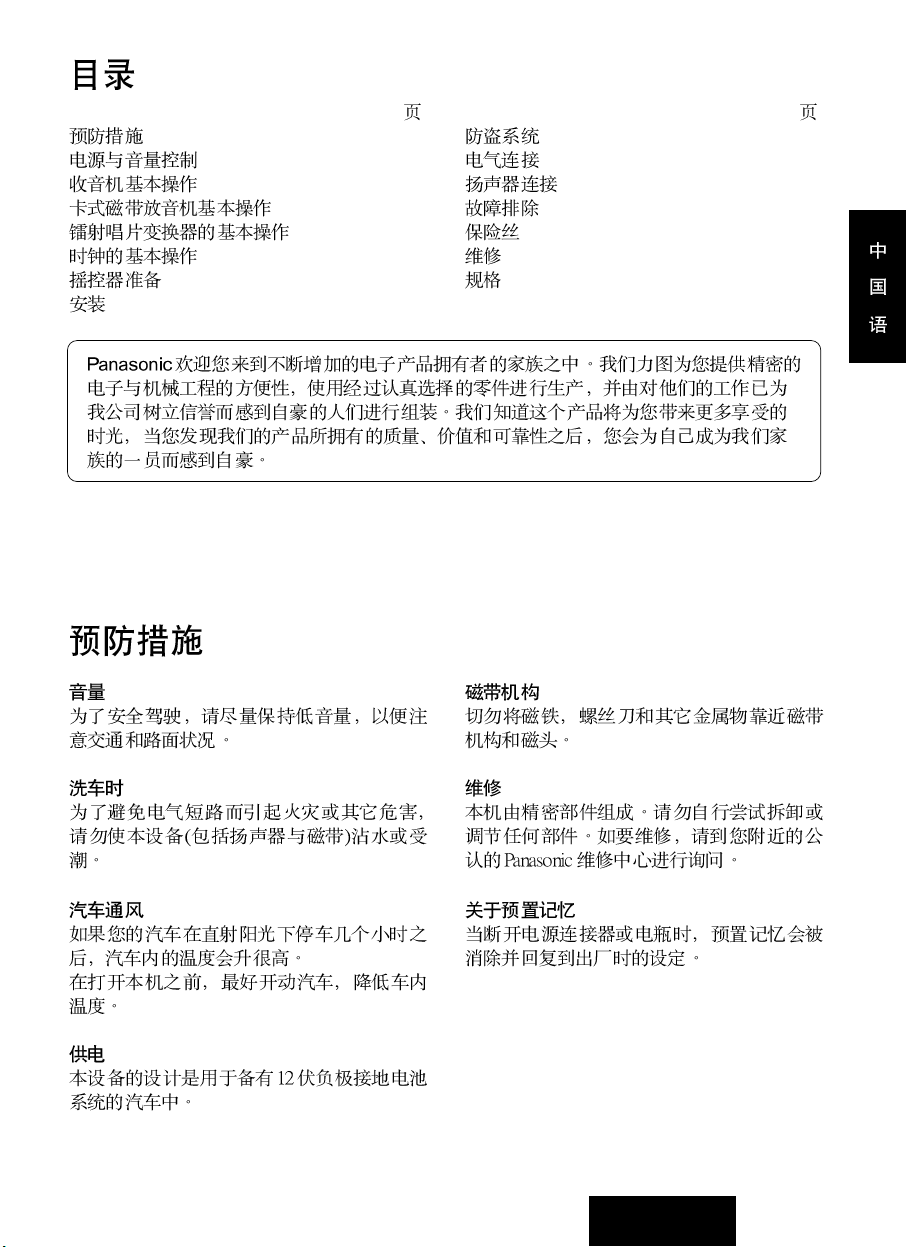
Contents
Page
Precautions ................................................... 2
Power and Sound Controls ........................... 4
Radio Basics ................................................. 6
Casssette Tape Player Basics ......................8
CD Changer Basics .................................... 11
Clock Basics ............................................... 13
Remote Control Unit Preparation................. 14
Installation Guide......................................... 15
Page
Anti-Theft System ....................................... 18
Electrical Connections ................................ 20
Speaker Connections .................................. 21
Troubleshooting ........................................... 22
Fuse ............................................................ 23
Maintenance ............................................... 23
Specifications .............................................. 23
Panasonic welcomes you to their constantly growing family of electronic products owners.
We endeavor to give you the advantages of precise electronic and mechanical engineering,
manufactured with carefully selected components, and assembled by people who are proud of
the reputation their work has built for our company. We know this product will bring you many
hours of enjoyment, and after you discover the quality, value, and reliability we have built into it,
you too will be proud to be a member of our family.
Precautions
Volume Level
For your driving safety, keep the volume level
low enough to be aware of road and traffic
conditions.
Car Washing
To avoid electrical shorts which may cause fire
or other damage, do not expose this equipment
(including the speakers and tape) to water or
excessive moisture.
Car Ventilation
If your car is parked for several hours in direct
sunlight, the temperature inside the car may
become very high. It is advisable to drive the
car and give the interior a chance to cool down
before switching the unit on.
Power Supply
This equipment is designed to be used in a car
having 12-Volt negative ground battery system.
Tape Mechanism
Keep magnets, screwdrivers and other metallic
objects away from the tape mechanism and
tape head.
Service
This unit is made of precision parts. Do not
attempt to disassemble or adjust any parts. For
repair, please consult your nearest authorized
Panasonic Service Center.
About Preset Memory
The preset memory is cleared to return to the
original factory setting when the power
connector or battery is disconnected.
E
N
G
L
I
S
H
CQ-R221W
3
.................................................. 3
..................................... 24
..................................... 26
....................... 28
................... 31
..................................... 33
............................................. 34
....................................................... 35
................................................ 38
................................................ 40
............................................ 41
................................................ 42
.................................................... 43
....................................................... 43
....................................................... 43
CQ-R221W
4
E
N
G
L
I
S
H
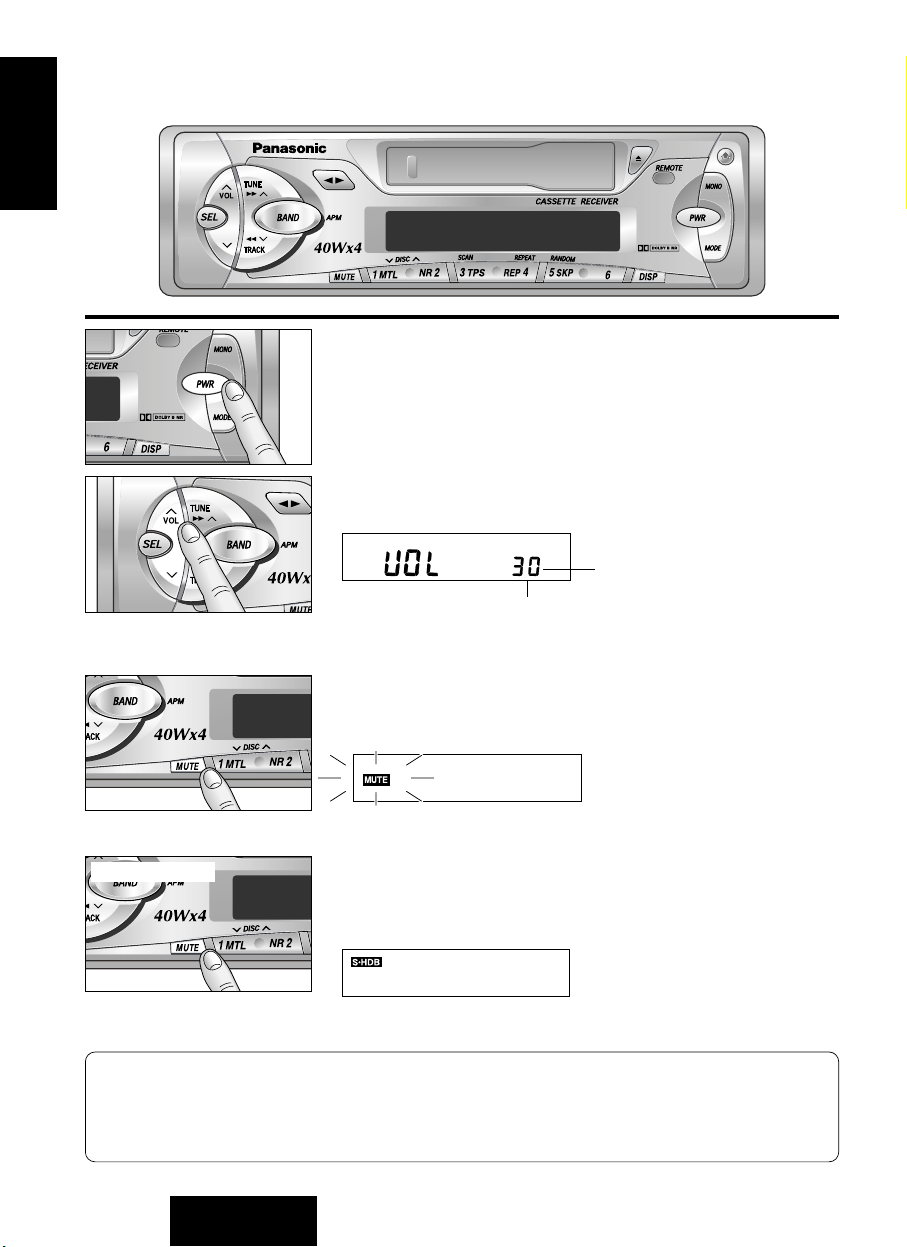
1
S•HDB (Super High Definition Bass)
Especially for rock music, the bass-sound will be more powerful.
●
Press and hold [MUTE] (S•HDB) for more than 2 seconds to be
able to listen to super high-definition bass.
●
Press and hold [MUTE] (S•HDB) for more than 2 seconds again
to return to the normal tone.
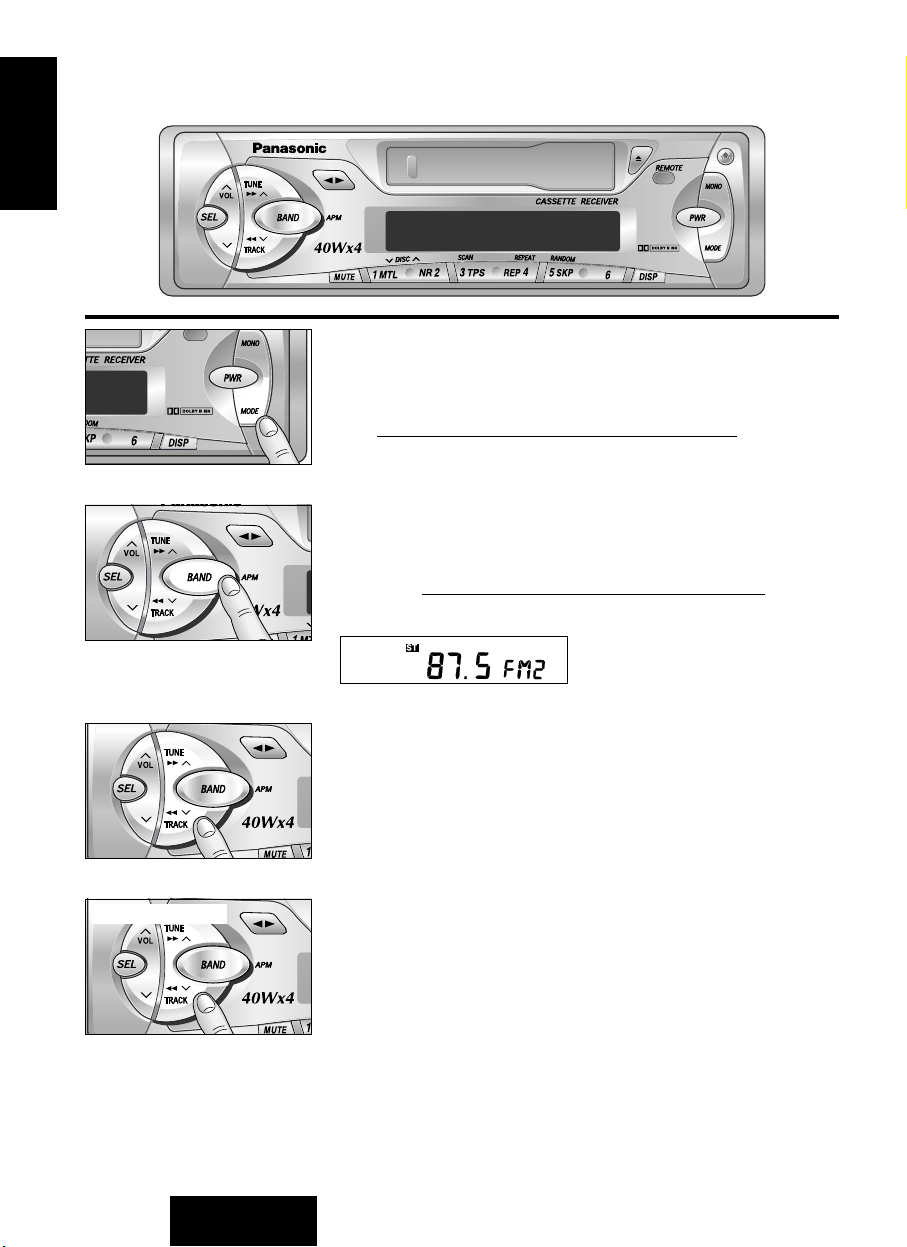
Power and Sound Controls
CQ-R221W
S•HDB
Power
Turn the key in the ignition until the accessory indicator lights.
Press [PWR] to switch on the power.
S
•H
D
B
Volume
●
Press [VOL
jj
] or [VOLii] to increase or decrease volume.
0 to 39
Volume Level
●
Press [VOLjj] or [VOLii] for more than 0.5 second to change
numeric levels on the display rapidly.
CQ-R221W
S
•H
D
B
Mute
●
Press [MUTE] to mute the sound completely.
●
“MUTE” blinks while this operation.
●
Press [MUTE] again to cancel.
Note: This unit is equipped with an anti-volume-blast circuit which serves as an automatic
volume level adjuster so that you will not be deafened with sudden loud volume.
This system operates as follows. When [PWR] is switched on, the volume level is low. After that,
the volume level gradually returns to the level as the same as the one before turning off.
Anti-volume-blast circuit is not effective when volume level is lower than position 20 at the display.
Press and hold
B
D
•H
S
CQ-R221W
CQ-R221W
5
E
N
G
L
I
S
H
2
S•H
D
B
B
Changing Audio Modes
Press [SEL] to switch the audio modes as follows.
VOL
a
BAS
a
TRE
(Volume) (Bass) (Treble)
cd
FAd
b
BAL
(Fader) (Balance)
Bass and Treble
Press [SEL] to select the BASS/TREBLE mode. Press [VOLjj]
or [VOLii] to increase or decrease the bass/treble response.
–12 to 0 (Center) to 12
–12 to 0 (Center) to 12
Balance
Press [SEL] to select the BALANCE mode. Press [VOLjj] or
[VOLii] to shift the sound volume to the right or left speakers.
1 to 15R or L Balance Center
Fader
Press [SEL] to select the FADER mode. Press [VOLjj] or
[VOLii] to shift the sound volume to the front or rear speakers.
1 to 15F or R
Fader Center
Note: When a control mode (BAS/TRE/BAL/FAd) is selected but no operation is made within 5
seconds (2 seconds at volume mode), the display will return to the normal operation (Radio,
Cassette, etc.) mode. In such a case, press [SEL] again to select the next control mode.
d
(R: Right, L: Left)
(F: Front, R: Rear)
S
•H
D
B
D
•H
S
CQ-R221W
6
E
N
G
L
I
S
H
3
Radio Basics
CQ-R221W
S•HDB
Change to the tuner mode
Press [MODE] to switch the operation mode as follows.
TUNER
a
TAPE
a
CD Changer Control
(When Tape is inserted) (When connecting CD Changer)
cd
CQ-R2
S
•H
D
B
Selecting a Band
Press [BAND] to select the bands as follows.
FM1
a
FM2
a
FM3
a
AM
cd
STEREO indicator lights if the station is broadcasting in stereo.
CQ
S
•H
D
B
Q
Manual Tuning
Press [TUNEjj] or [TUNEii] to move to a higher or lower
frequency.
Seek Tuning
Press and hold [TUNEjj] or [TUNEii] for more than 0.5
seconds, then release. The radio automatically stops on the next
station.
Hold and release
S
D
•H
C
B

CQ-R22
Q
1
CQ-R221W
7
E
N
G
L
I
S
H
4
Manual Station Preset
Press [BAND] to select a desired band.
Use manual or seek tuning to find a station that you want to
program into memory.
Press and hold one of the station selector buttons [1] through
[6] until the display blinks. The memory is now set for that
button on the band you have selected.
Repeat the process to set other stations for the FM1 to AM
bands.
Auto Preset Memory
Select a band, and press and hold [BAND] (APM) for more than 2
seconds.
●
The 6 strongest available stations will be automatically set in
memory on preset buttons [1] through [6].
●
Once set, the preset stations are sequentially scanned for 5
seconds.
●
Press the appropriate preset button for the station you want to
hear.
Note: The stations manually preset on the selected band will be
deleted.
Note: You can change the memor y setting by repeating the above
procedure.
Preset Station Setting
Up to 24 stations can be preset in the station memory as follows;
FM1 FM2 FM3 AM
6 stations 6 stations 6 stations 6 stations
Press and hold
d
d
Caution: For safety reasons, do not attempt to program while driving.
Preset Number
To reduce interference during
FM broadcasts (MONO)
Press [MONO] for monaural reception in case a lot of interference
is present in an FM stereo signal or to improve the listening quality
of weak FM broadcasts. To turn it off, press [MONO] again.
Tuning in a Preset Station
Press any of the buttons 1 through 6 to tune in the station preset
by the above steps to .
Press and hold
CQ-R22
C
B
•

S
•H
D
B
CQ-R221W
8
E
N
G
L
I
S
H
5
Cassette Tape Player Basics
CQ-R221W
S•HDB
CQ-R221W
S
•H
D
B
Loading a Cassette
Insert the cassette with the exposed tape side facing to the right.
Gently push the cassette in until the loading begins. The cassette
will be loaded in place and playback starts.
Program Indicator
(This indication “ ” rotates.)
Rewind and Fast Forward
Press either [
] to rewind or [] to fast forward the tape.
To stop rewind or fast forward, press []
If you rewind the tape fully, it will play on the same program side
again.
If you fast forward to the end, play will resume from the beginning
of the other side of the tape.
Changing Sides
Press [] to switch to the program on the other side of the tape.
The display changes to indicate which program is playing.
Ejecting the Tape
Press [
u
] and the cassette will eject for removal, and the
previous mode of operation will be resumed.
Notes:
●
If power is switched off before [u] is pressed, the cassette will
not eject. Switch on the power again and press [u] to eject the
cassette.
●
The cassette tape should always be removed from the cassette
slot when not in use.
Top Side Playing Bottom Side Playing
Fast Forward
Rewind
Exposed Tape Side
CQ-R221W
CQ-R221W
9
E
N
G
L
I
S
H
6
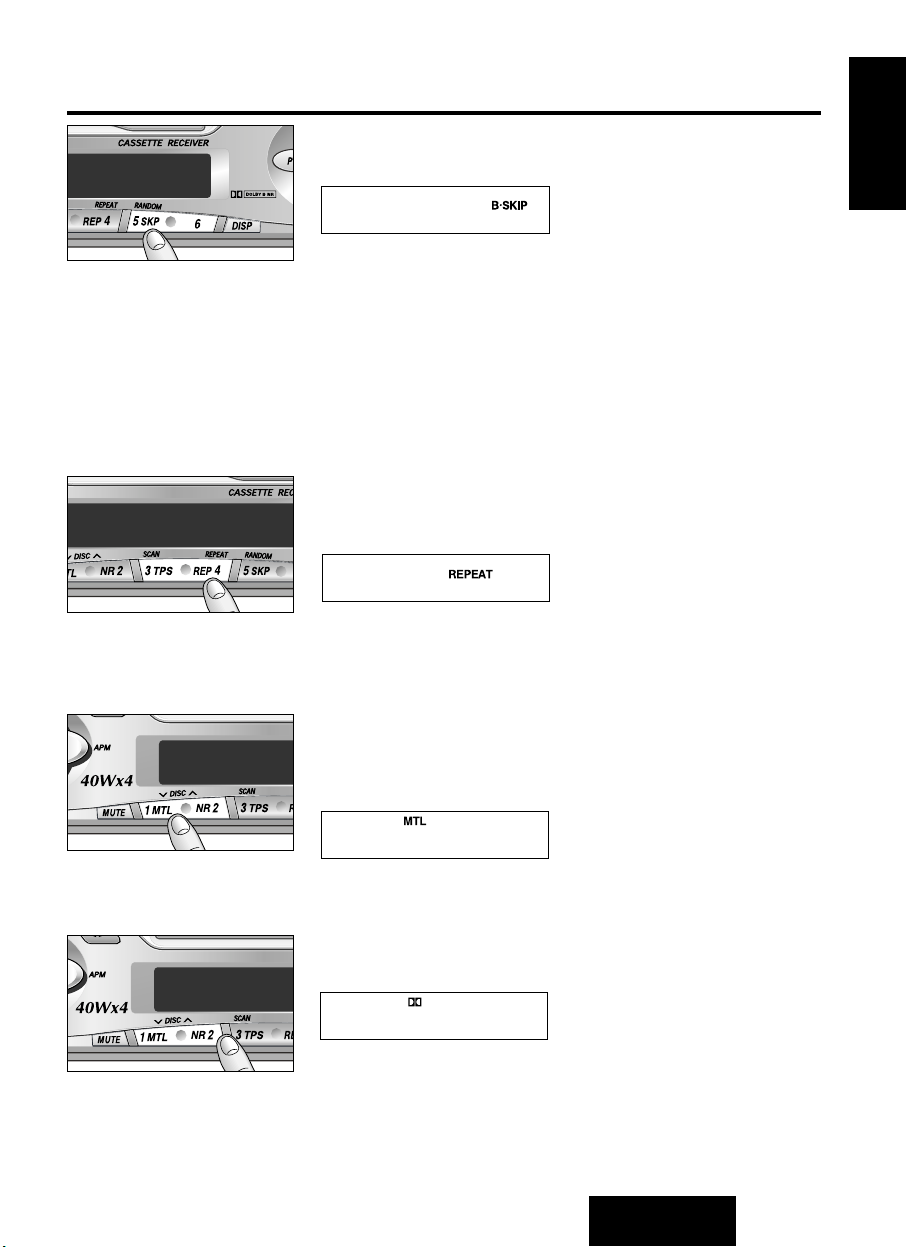
Blank Skip
Press [5] (SKP) to skip long unrecorded portions on the tape.
This is most convenient if you quickly want to skip the remaining
unrecorded portions at the end of the tape and fast forward to the
beginning of the first music on the reverse side of the tape.
To turn it off, press [5] (SKP) again.
Notes:
●
“B·SKIP” indicator lights. However, the blank skip operation will
not work if REPEAT is on. The repeat function has pr iority over
that of the blank skip function.
●
Also the blank skip operation will not work when the unrecorded
portion of the tape is less than 15 seconds.
Repeat Play
Press [4] (REP) to repeat the same music you are now listening
to.
After finishing the music just listened to, the rewind starts
automatically until the beginning of music, and the same music
starts playing again.
To turn it off, press [4] (REP) again.
Metal Tape Mode
Press [1] (MTL) when playing metal or chromium dioxide (CrO
2)
tapes.
To turn it off, press [1] (MTL) again.
Note: Playing non-metal tapes in metal tape mode causes high
frequency imbalance, which affects tone quality.
Dolby Noise Reduction
Press [2] (NR) to set the Dolby B NR mode.
To cancel the Dolby B NR mode, press [2] (NR) again.
Note: Set the Dolby B NR mode when playing back a tape
recorded with Dolby B Noise Reduction.
CQ-R221W
B
D
•H
S
CQ-R221W
B
D
•H
S
CQ-R221W
10
E
N
G
L
I
S
H
7
Cassette Tape Player Basics
(continued)
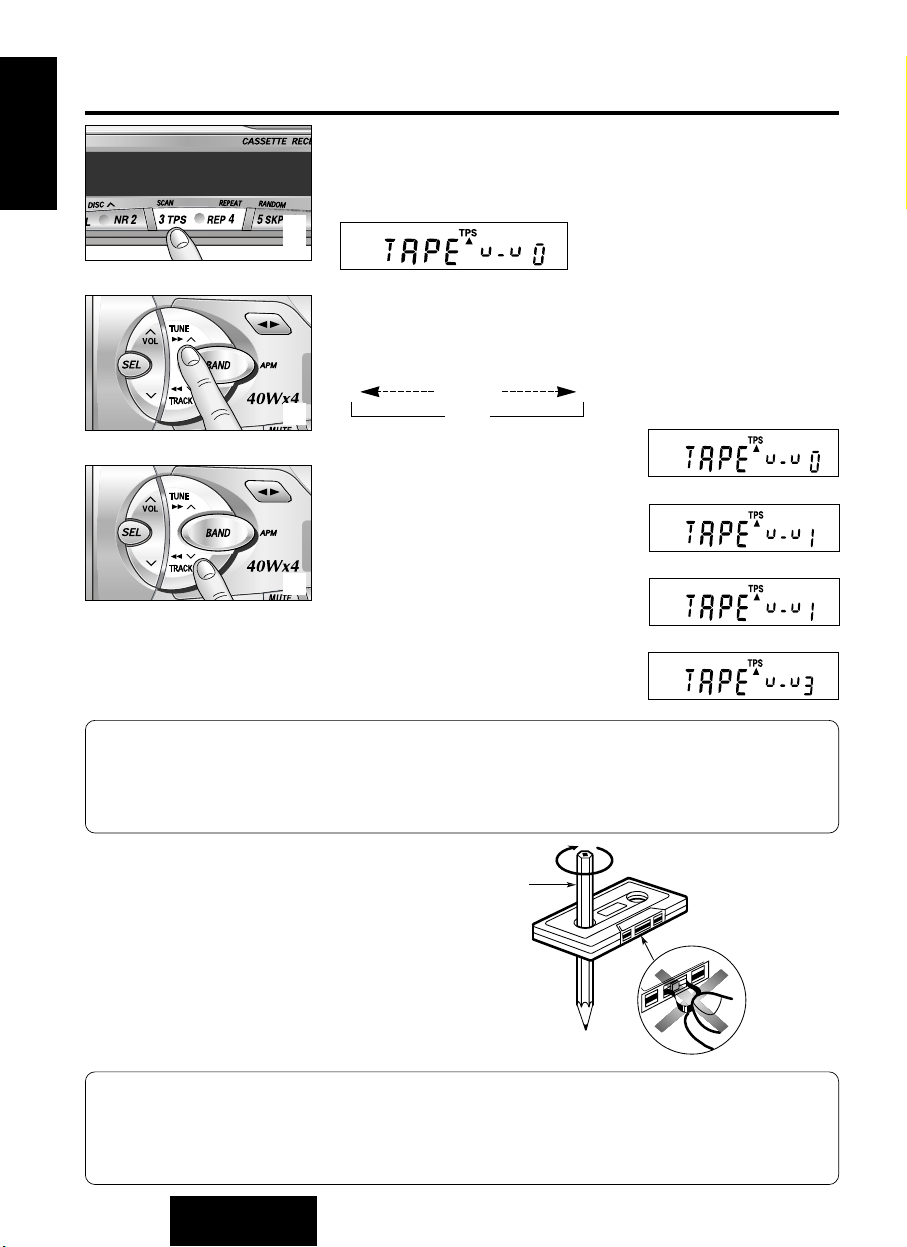
TPS Operation (Tape Program
Search)
Press [3] (TPS) to activate the tape program search mode.
From the current selection, decide which program you want to
select. Now, press [] several times forward (up to 9
programs) or press [] several times backward (up to 8 ) to
select the corresponding program number.
EX1. To select the current program
again press [3] (TPS), and press
[] once.
EX2. To select the 1st program
backward of the current selection,
press [3] (TPS) once, and press
[] two times.
EX3. To select the next program, press
[3] (TPS) and press [] once.
EX4. To select the 3rd program forward
of the current selection, press [3]
(TPS) once, and press []
three times.
To turn it off, press [3] (TPS) again.
Note:
The TPS mode may not work correctly in the following cases. This, however, does not mean that
the unit is defective.
●
There is an interval less than 4 seconds or having a high level of noise or hum between
programs.
●
There is particularly low-level passage during the program.
Notes on Cassette Tapes
Pencil
Do not touch
or pull out
the tape.
Tape Slack:
Use a pencil or similar object to take up the slack
as shown. If a loose tape is used, this may result
in the tape becoming tangled in the rotating
parts of the unit.
Q
Q
d
or
(Rewind:)
80
c
(Fast forward:)
19
c
Notes:
●
To maintain your cassette player in top condition, avoid using tapes that are longer than 90
minutes (C-90).
●
If you insert into the unit a cassette with a loose tape caused by forcing it into cassette with a
finger or the like, the cassette may not be properly reproduced. In such a case, eject the
cassette, make the tape tight, then insert it back into the deck.
C
B
D
•H
S
C
S
B
D
•H

CQ-R221W
11
E
N
G
L
I
S
H
8
CD Changer Basics
Note:
CD changer functions are applicable to units with optional CD changer unit.
(sold separately)
CQ-R221W
S•HDB
To Changer mode
While a disc magazine is inserted in the CD changer, press
[MODE] to switch to changer mode.
Play starts from the first track.
CQ-R221W
S
•H
D
B
Selecting a Disc
Press [1MTL] (
i
DISC) or [NR2] (DISCj) to select discs in
descending or ascending order.
Selecting a Track
Press [TRACK] once to go to the next track. Press repeatedly
to step forward through all the tracks.
Press [TRACK] once to play from the beginning of the current
track. Press twice to play the previous track. Press repeatedly to
step backward through all the tracks.
CQ-R
S•HDB
R
Searching a Track
Press and hold [TRACK] or [TRACK] for more than 0.5
seconds to activate fast forward or reverse through a track.
Release [TRACK] or [TRACK] to resume the nor mal CD
play from that position.
Hold and release
Play
Time
Disc Number
Track Number
CQ-
S•HDB

CQ-R221W
12
E
N
G
L
I
S
H
9
❏
Error Display Messages
Repeating a Track
Press [4] (REPEAT) to repeat the current selection. “REPEAT”
indicator lights.
Random Selection
●
Press [5] (RANDOM) to random selection of music is played
from all available CDs. “RANDOM” indicator lights.
Scanning Tracks
●
Press [3] (SCAN). The track number blinks and the first 10
seconds of each track on the discs play in sequence.
●
To stop scanning and continue with the current track, press [3]
(SCAN) again.
Displays when the compact disc is
dirty or upside down. Selects the
next available compact disc.
Displays when compact disc is
scratched. Selects next available
compact disc.
Displays when the compact disc
stops operating for some reason.
Please contact your nearest
authorized Panasonic Servicenter.
Displays when there is no disc in
the magazine.
CD Changer Basics
(continued)
Scanning Discs
Press and hold [3] (SCAN) for more than 2 seconds. The 1st track
of all the discs in the magazine is played for 10 seconds each.
Also, Disc Number blinks at the same time. To stop the current
play of the disc scanning, press and hold [3] (SCAN) for more
than 2 seconds again.
The current selection continues to repeat until you press [4]
(REPEAT) again.
●
To turn it off, press [5] (RANDOM) again.
Press and hold
1W
1W

CQ-R221W
13
E
N
G
L
I
S
H
10
Clock Basics
(The clock system is 12-hours.)
CQ-R221W
S•HDB
Initial Time Setting
Press and hold [DISP] for more than 2
seconds. “AdJ” is displayed.
Press and hold [DISP] again for more
than 2 seconds. “12” blinks indicating
the time setting mode is activated.
To set hours, press [jj] or [ii].
Press again [DISP] for minute setting.
To set minutes, press [jj] or [ii].
Hold [jj] or [ii] to change numbers
rapidly.
When you have set the time, press
[DISP].
d
d
Resetting the Time
When you want to reset the time, press and hold [DISP] for more
than 2 seconds to activate the time setting mode. Then, repeat
step to above.
Selecting the Clock Display
Press [DISP] for clock display.
Press [DISP] once again, the current audio display mode
resumes.
CQ
S
•H
D
B
Press and hold
Press and hold

CQ-R221W
14
E
N
G
L
I
S
H
11
Remote Control
Remote Control Unit Preparation
Battery Installation
Remove the battery holder.
Take hold of the holder at position B and pull
it out by pushing position A in the direction
shown by the arrow.
Install the battery on the battery holder.
Set a new battery properly with its (+) side
facing up as shown in the figure.
Insert the battery holder.
Push in the battery holder back into its
original position.
Battery Notes
Remove and dispose of an old battery immediately.
Battery information:
●
Battery Type: Panasonic lithium battery (CR2025)
(Included)
●
Battery Life: Approximately 6 months under normal
use (at room temperature)
●
Do not disassemble or short the battery. Do not throw a battery into a fire.
●
Keep batteries away from children to avoid the risk of accidents.
●
Be careful to the disposal rules when you dispose of batteries.
Caution:
Improper use of batteries may cause overheating, an explosion or ignition, resulting in injury or a
fire. Battery leakage may damage the unit.
Position B
Battery holder
Position A
Lithium battery
(Back side)
Power
Mode (Source)
Band/Disc up, program,
STOP
Car AudioCar Audio
BAND/DISC UP
PRG
(ATT)
PWR
VOL
MODE
MUTE
TRACK
TUNE
Mute
Volume Control
Tune, Track Search,
Fast Forward/Rewind

CQ-R221W
15
E
N
G
L
I
S
H
12
Installation Guide
Preparation
●
Before installation, check the radio operation with antenna and speakers.
●
Disconnect the cable from the negative (–) battery terminal (see caution below).
●
Unit should be installed in a horizontal position with the front end up at a convenient angle, but not
more than 30°.
Caution:
For installation to cars with trip or navigational computers, all electronic memory settings
previously registered in the computer will be lost when the battery terminal is disconnected. For
this type of car, battery could not be disconnected. Therefore, extra care should be taken to
prevent short circuitting.
In-dash Installation
Installation Opening
In-dash installation can be done if the car’s
dashboard has an opening for this unit as shown in
Fig. 1. The car’s dashboard should have a
thickness of 4.5 mm - 6 mm in order to make the
installation of the unit.
Installation Precautions
This equipment, if possible, should be installed by a professional installer.
In case of difficulty, please consult your nearest authorized Panasonic Service Center.
1. This system is to be used only in a 12-volt, DC battery system (car) with negative ground.
2. Follow the electrical connection on page 20 carefully. Failure to do so may result in damage to the
unit.
3. Connect the power lead after other connections are made.
4. Be sure to connect the YELLOW lead to the positive terminal (+) of the battery or fuse block (BAT)
terminal.
5. Insulate all exposed wires to prevent short circuitting.
6. Secure all loose wires after installing the unit.
7. Please carefully read the operating and installation instructions of the respective equipment
before connecting it to this unit.
182 mm
53 mm
Fig. 1
Supplied Hardwares
No.
1
1
1
1
Item
Mounting Collar
Hex. Nut (5 mm φ)
Rear Support Strap
Tapping Screw
(5 mm φx 16 mm)
Diagram Qty
1
Mounting Bolt (5 mm φ)
No. Item Diagram Qty
1
1
1
1
Power Connector
Dismounting Plate
Removable Face
Plate Case
Remote control
Car AudioCar Audio
BAND/DISC UPBAND/DISC UP
PRG
(ATT)(ATT)
PWR
VOL
MODE
MUTE
TRACK
TUNE
1
Lithium battery
 Loading...