

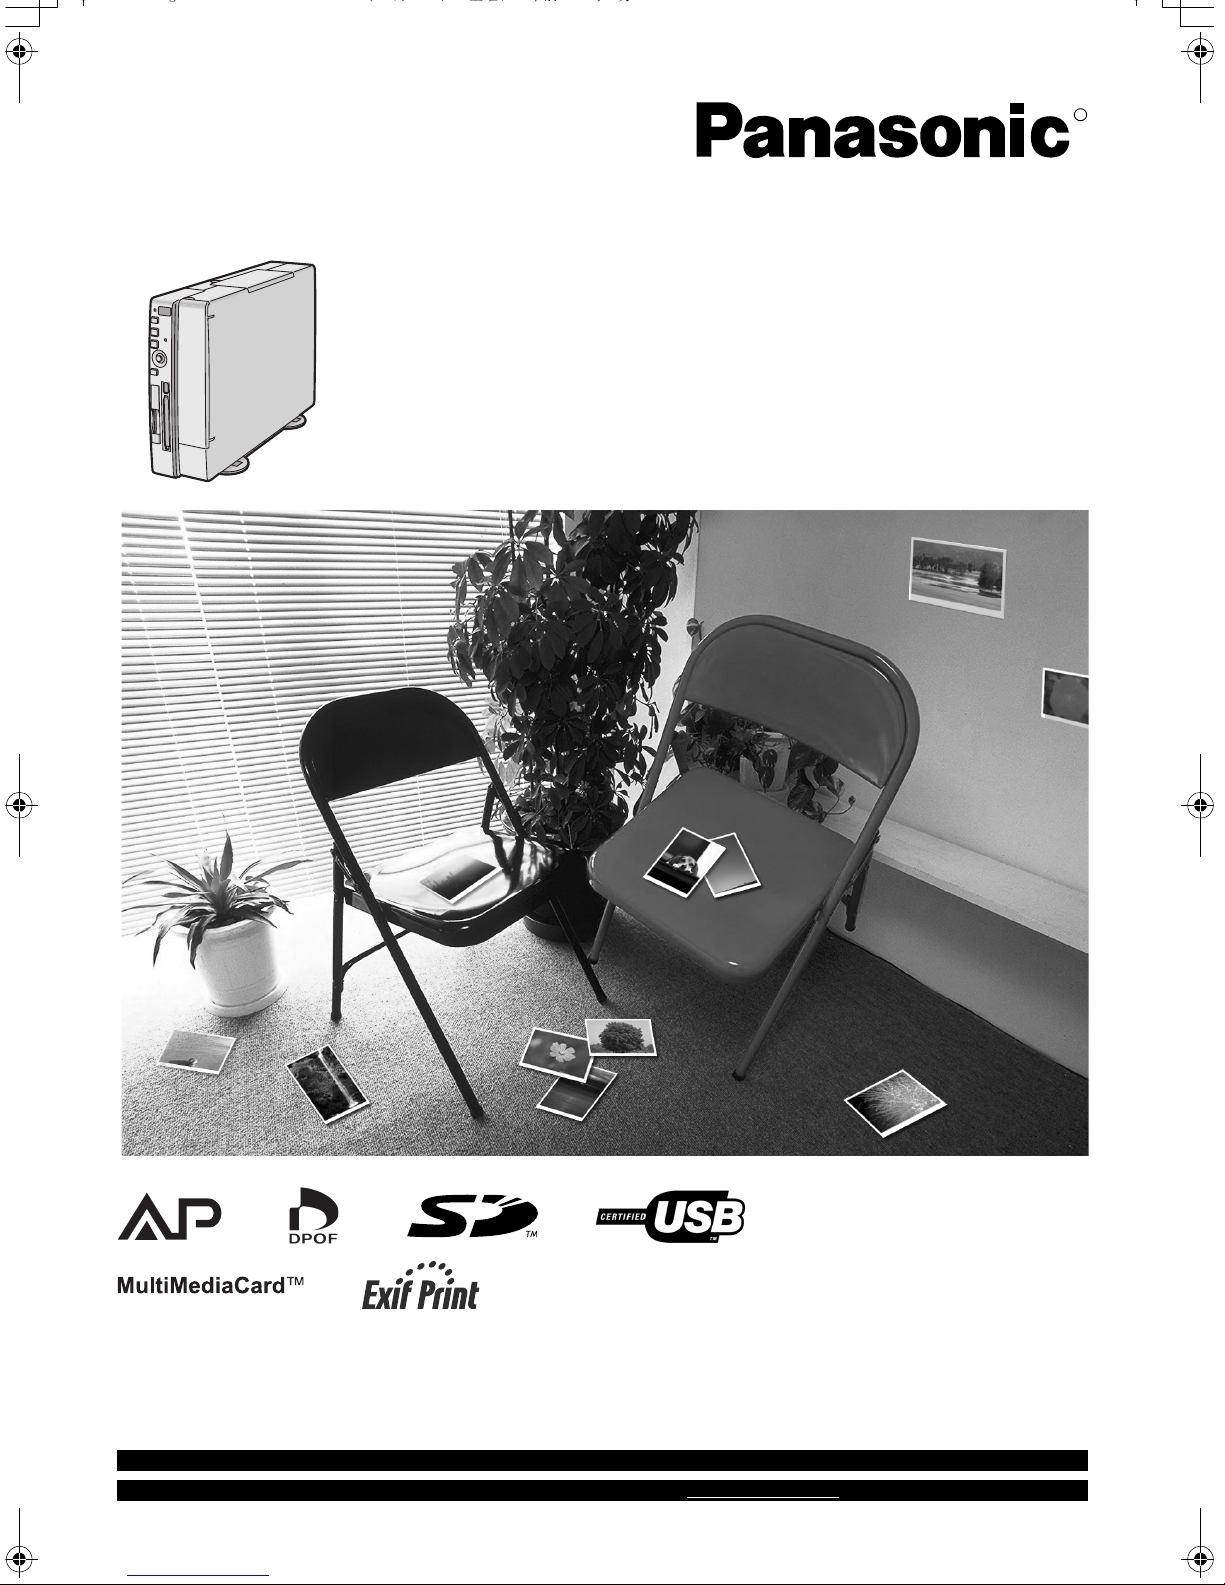
Panasonic SV-AP10, SV-AP10U, AP10 - Thermal Dye Sublimation Photo Printer Operating Instructions Manual
AP10U-Eng.book 1 ページ 2002年9月27日 金曜日 午前10時8分
R
Digital Photo Printer
Operating Instructions
Model No. SV-AP10U
For USA assistance. please call:1-800-211-PANA(7262) or send e-mail to:consumerproducts@panasonic.com
For Canadian assistance. please call:1-800-561-5505 or visit us at www.panasonic.ca
Before use, please read these instructions completely.
Please retain this manual for continuing reference.
VQT0B55

AP10U-Eng.book 2 ページ 2002年9月27日 金曜日 午前10時8分
Information for Your Safety
WARNING
TO REDUCE THE RISK OF FIRE OR SHOCK
HAZARD AND ANNOYING INTERFERENCE, USE
ONLY THE RECOMMENDED ACCESSORIES AND
DO NOT EXPOSE THIS EQUIPMENT TO RAIN OR
MOISTURE. DO NOT REMOVE THE COVER (OR
BACK); THERE ARE NO USER SERVICEABLE
PARTS INSIDE. REFER SERVICING TO QUALIFIED
SERVICE PERSONNEL.
≥As this equipment gets hot during use, operate it in a
well-ventilated place; do not install this equipment in a
confined space such as a book case or similar unit.
≥Do not open the Ink Cassette Side Cover while
printing is in progress. Your fingers could be pinched
between the thermal head arms and the Ink Cassette.
IMPORTANT
Please respect all copyrights.
Whatever you have recorded and created can be used
for your personal entertainment only. Under
copyright laws, other materials cannot be used
without obtaining permission from the holders of the
copyrights.
®
≥Microsoft
Microsoft Corporation in the United States and other
countries.
≥Other names, company names, and product names
printed in these instructions are trademarks or
registered trademarks of the companies concerned.
≥Avoid using a cell phone near the Photo Printer because
doing so may cause noise to adversely affect the
picture.
Before opening the CD-ROM package, please read the
following.
Windows® is a registered trademark of
End User License Agreement
You (“Licensee”) are granted a license for the Software
defined in this End User Software Agreement
(“Agreement”) on condition that you agree to the terms
and conditions of this Agreement. If Licensee does not
agree to the terms and conditions of this Agreement,
promptly return the Software to Matsushita Electric
Industrial Co., Ltd. (“Matsushita”), its distributors or
dealers from which you made the purchase.
Article 2 Use by a Third Party
Licensee may not use, copy, modify, transfer or allow any
third party, whether free of charge or not, to use, copy or
modify the Software, except as expressly provided for in
this Agreement.
Article 3 Restrictions on Copying the Software
Licensee may make a single copy of the Software in
whole or a part solely for back-up purpose.
Article 4 Computer
Licensee may use the Software only on one computer,
and may not use it on more than one computer.
Article 5 Reverse Engineering, Decompiling or
Disassembly
Licensee may not reverse engineer, decompile, or
disassemble the Software, except to the extent either of
them is permitted under law or regulation of the country
where Licensee resides. Matsushita, or its distributors will
not be responsible for any defects in the Software or
damage to Licensee caused by Licensee’s reverse
engineering, decompiling, or disassembly of the Software.
Article 6 Indemnification
The Software is provided “AS-IS” without warranty of any
kind, either expressed or implied, including, but not limited
to, warranties of non-infringement, merchantability and/or
fitness for a particular purpose. Further, Matsushita does
not warrant that the operation of the Software will be
uninterrupted or error free. Matsushita or any of its
distributors will not be liable for any damage suffered by
Licensee arising from or in connection with Licensee’s
use of the Software.
Article 7 Export Control
Licensee agrees not to export or re-export to any country
the Software in any form without the appropriate export
licenses under regulations of the country where Licensee
resides, if necessary.
Article 8 Termination of License
The right granted to Licensee hereunder will be
automatically terminated if Licensee contravenes of any of
the terms and conditions of this Agreement. In the event,
Licensee must destroy the Software and related
documentation together with all the copies thereof at
Licensee’s own expense.
Article 1 License
Licensee is granted the right to use the software, including
the information recorded or described on the CD-ROM,
instruction manuals, and any other media provided to
Licensee (collectively “Software”), but all applicable rights
to patents, copyrights, trademarks and trade secrets in the
Software are not transferred to Licensee.
2
AP10U-Eng.book 3 ページ 2002年9月27日 金曜日 午前10時8分
ENGLISH
ENGLISH
Important Information
FCC Note: (U.S. only)
This equipment has been tested and found to comply
with the limits for a Class B digital device, pursuant to
Part 15 of the FCC Rules. These limits are designed to
provide reasonable protection against harmful
interference in a residential installation. This
equipment generates, uses, and can radiate radio
frequency energy and, if not installed and used in
accordance with the instructions, may cause harmful
interference to radio communications. However, there
is no guarantee that interference will not occur in a
particular installation. If this equipment does cause
harmful interference to radio or television reception,
which can be determined by turning the equipment off
and on, the user is encouraged to try to correct the
interference by one or more of the following measures:
≥Reorient or relocate the receiving antenna.
≥Increase the separation between the equipment and
receiver.
≥Connect the equipment into an outlet on a circuit
different from that to which the receiver is connected.
≥Consult the dealer or an experienced radio/TV
technician for help.
FCC Caution: To assure continued compliance,
follow the attached installation
instructions and use only shielded
interface cables with ferrite core when
connecting to computer or peripheral
devices.
Any changes or modifications not
expressly approved by the party
responsible for compliance could void
the user’s authority to operate this
equipment.
The Preheat function works so that high picture quality is
maintained when the surrounding temperature is low.
Therefore, even if pressing the [PRINT] button, the
operation may not start for a while. (Printing starts within
about 1 minute automatically.)
If the temperature of the main unit increases when
performing multiple copying, printing pauses automatically
to lower the temperature and the printing time becomes
longer. However, this is not a malfunction with the product.
≥In the case of printing when using a personal computer,
the message [Please wait until the temperature of
printer decreases.] is displayed on the monitor of the
personal computer.
≥In the case of printing with using a memory card, the
message [Please wait until the temperature decreases.]
is displayed on the monitor of a TV.
When using the Photo Printer with a PC Card (Especially
Hard Disk Type card), temperature on the surface of the
card may rise and it may become hot. Turn off the power
and remove the card after a while.
Trade Name: Panasonic
Model No.: SV-AP10U
Responsible party: Matsushita Electric
Corporation of America One
Panasonic Way, Secaucus, NJ
07094
Support Contact: Panasonic Consumer
Electronics Company
1-800-211-PANA(7262)
This device complies with Part 15 of the FCC Rules.
Operation is subject to the following two conditions: (1)
This device may not cause harmful interference, and
(2) this device must accept any interference received,
including interference that may cause undesired
operation.
This Class B digital apparatus complies with Canadian
ICES-003.
3
AP10U-Eng.book 4 ページ 2002年9月27日 金曜日 午前10時8分
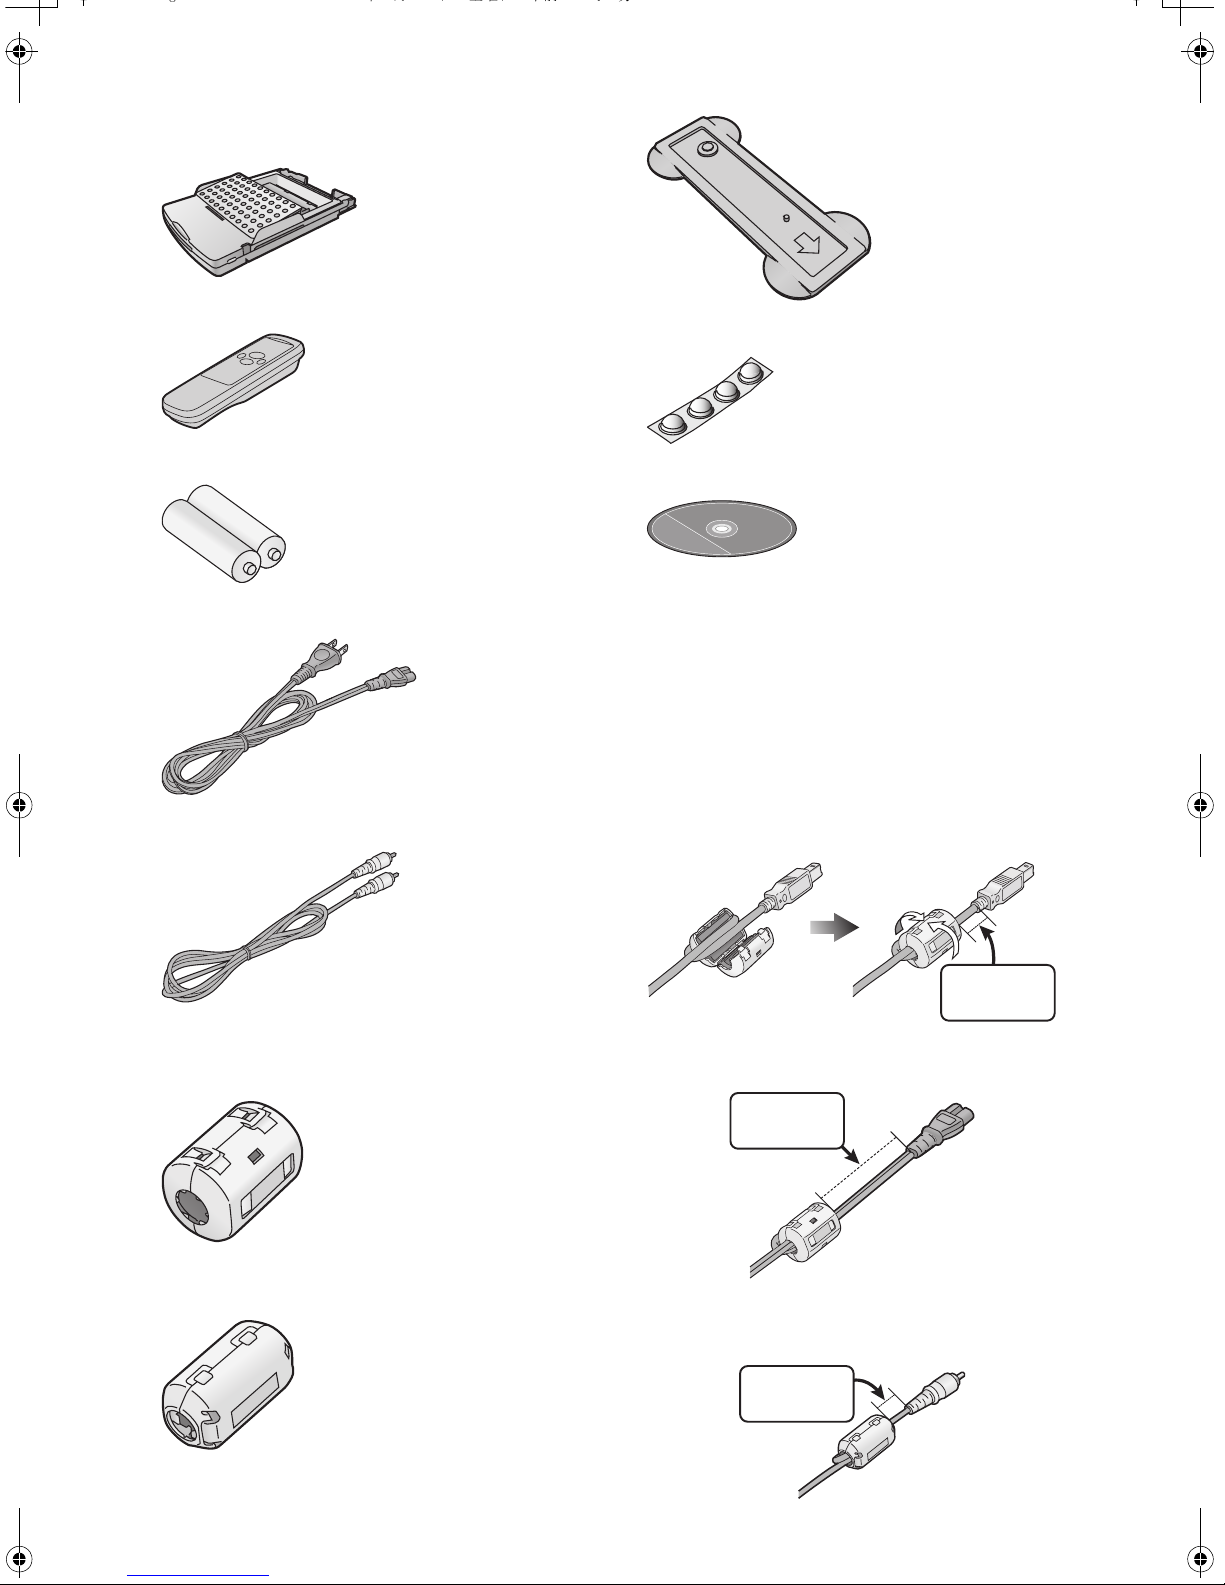
Supplied Accessories
Paper Cassette (VXA7602)
Remote Controller (N2QADB000006)
AA Size Batteries (x2)
AC Power Cord (K2CA2EA00002)
Video Cable (K1EA02BA0001)
Stand for Vertical Layout (VYQ2551)
Feet for Horizontal Layout (VKA0376)
CD-ROM (VFF0170)
Important Information
(Including USB Connection Cable (not supplied))
In order to prevent electromagnetic interference, install
the Clamp Filter (supplied) on the Cable as shown in the
figure below.
≥After passing the Cable through the Clamp Filter and
looping it around once, close the Clamp Filter until it
clicks into place.
When you attach the Clamp Filter be sure to attach it near
≥
the side of the Cable connected to the main unit.
USB Connection Cable (Not supplied)
Clamp Filter (x2) (Large Size)(for AC Power Cord and
optional USB Connection Cable)
(J0KG00000053)
Clamp Filter (x1) (Small Size)(for Video Cable)
(J0KG00000036)
0.4 inch
(1 cm)
AC Power Cord (Supplied)
5.9 inch
(15 cm)
Video Cable (Supplied)
0.4 inch
(1 cm)
4

AP10U-Eng.book 5 ページ 2002年9月27日 金曜日 午前10時8分
Contents
Information for Your Safety ................................. 2
End User License Agreement .............................2
Important Information ..........................................3
Supplied Accessories.......................................... 4
Settings
Settings..............................................................29
Setting the Layout..............................................30
Preparation
Controls and Components...................................6
Inserting Remote Control Batteries .....................8
Using the Remote Controller...............................8
Insertion and Connections...................................9
Inserting a Card.................................................10
Inserting Paper..................................................10
Inserting the Ink Cassette..................................11
MENU Interface.................................................11
MENU Controls .................................................12
On Screen Display ............................................12
Basic Functions
Test Print ...........................................................13
Switching the Pictures between
the Album Display and the Index Display.......... 15
To Enlarge/Reduce/Rotate/Move the Picture.... 15
Printing Batches/Indexing..................................16
Using Date Search When Printing.....................16
Printing With a DPOF Marked Card ..................17
Copying/Erasing Images from a Card ..............18
Recording Titles onto Cards..............................19
Erasing Titles From Cards.................................19
Viewing Slide Shows......................................... 20
Connecting and Operating with a
personal computer
Operating environment......................................31
Installing the Printer Driver ................................32
Uninstalling the Printer Driver ............................39
Printing from PC ................................................40
Caution for Use..................................................43
Others
After Use............................................................44
Precautions........................................................44
Q&A ...................................................................47
Before Requesting Service................................48
Error Messages .................................................50
Error Messages for Printer Driver......................51
Specifications.....................................................52
Limited Warranty (For U.S.A. Only)...................53
Customer Services Directory
(For U.S.A. Only) ...............................................54
Multiple Functions
Printing Multiple Screen Shots of
the Same Picture (MULTI FRAME MODE) .......21
Returning a Multiple Screen
to a Single Screen.............................................21
Printing Multiple Screen Shots of
Different Pictures...............................................22
Creating a Personalized Picture Calendar ........24
Inserting Wallpaper and Printing .......................25
Title Functions
Inserting Illustrations and Printing .....................26
Switching Displays
(Indicate/Don’t indicate/Clear) ...........................26
Inserting Characters and Printing......................27
Print in Sepia Tone............................................28
5
SET
Í
DISPLAY/
CANCEL
ERROR
PRINT
MENU
AP10U-Eng.book 6 ページ 2002年9月27日 金曜日 午前10時8分
Preparation
7 8
13
1
2
3
4
5
6
Preparation
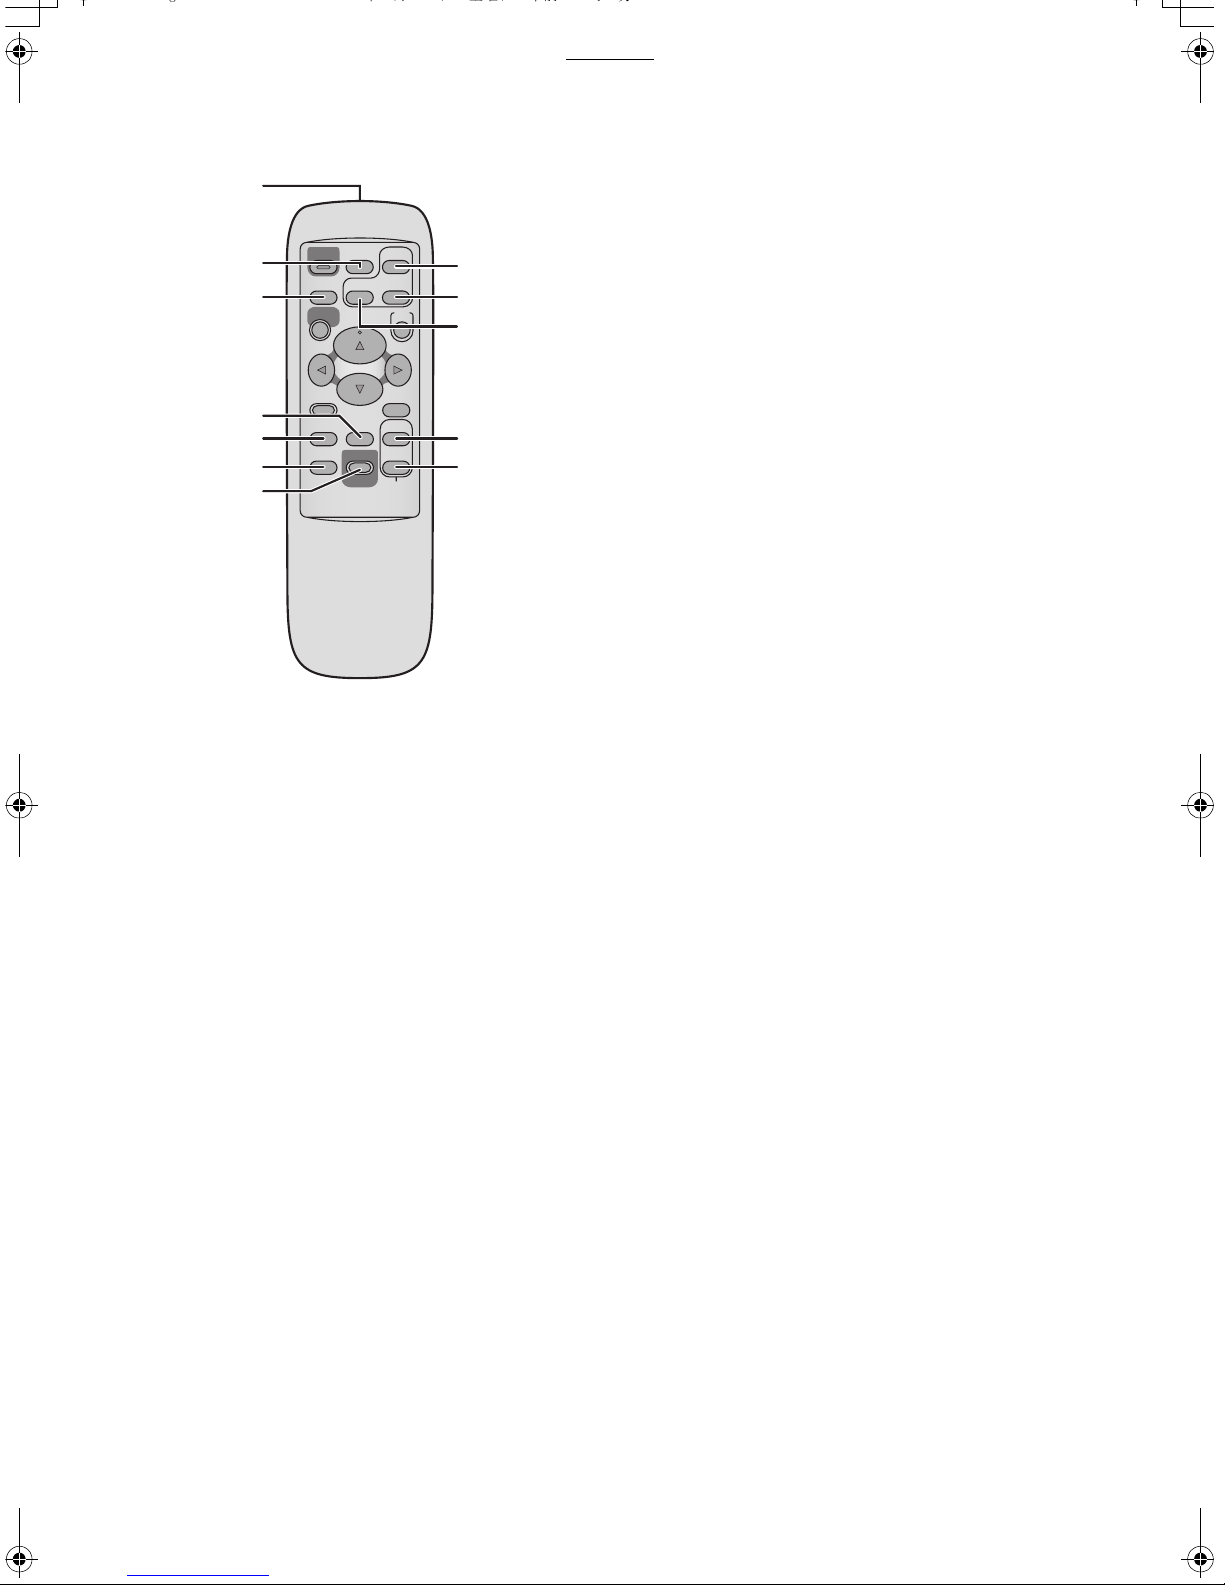
Controls and Components
1 Power Lamp [Í]
When you turn the power on, the Power lamp
turns green. When you turn the power off, the
Power lamp turns red, and all images in the
Photo Printer’s memory are deleted.
2 Power Button [Í]
Press to turn Photo Printer on/off.
3 PRINT Button
Press this button to print images.
4 MENU Button
Use this button to display the menu screen.
5 2134 Buttons/SET Button
2134 Buttons:
Use these buttons to select menu choices and
card images.
SET Button:
Use this button to enter various selections.
6 DISPLAY/CANCEL Button
DISPLAY Button:
Changes the picture display on a card among a
Single Screen Display, an Index Display and an
Album Display.
CANCEL Button:
Use to cancel printing and other such
processes.
Use to exit MENU.
7 Remote Control Receiver
Receives the signal from the remote controller.
Do not obstruct the remote control receiver in
order to avoid difficulties using the remote.
8 Error Lamp
Flashes when an error has occurred.
15 16
EJECT
ACCESS
9
10
14
11
PC CARD
SD MEMORY CARD
12
9 Card Access Lamp
Lights while the Photo Printer is accessing data
on the Card.
10 PC Card Eject Button
11 SD Memory Card/MultiMediaCard Insert
Location
12 PC Card Insert Location
13 Paper Cassette Insert Location
14 Stand for Vertical Layout
Use the stand for vertical layout.
15 Ink Cassette Eject Lever
16 Ink Cassette Insert Location
17 Power Socket
Connects the AC Power Cord (supplied).
18 Paper Removal Port
19 Cord Stopper
Fixes the AC Power Cord.
20 USB Socket
Connects the USB Connection Cable (not
supplied) to the USB Socket for PC.
21 VIDEO OUT Socket
Connect the Video Cable (supplied) to Video
Input Terminal of TV.
20
21
VIDEO
OUT
17
18
19
6
AP10U-Eng.book 7 ページ 2002年9月27日 金曜日 午前10時8分
Preparation
Controls and Components (Cont.)
ªRemote Controller
1
2
3
Í
CARD SELECT
PRINT
ALBUM
ROTATE
ZOOM IN
ZOOM OUT
SET
8
9
10
DISPLAY/
DATE
DPOF/ALL
PRINT
CANCEL
COPY
SELECT
MULTI
11
12
MENU
4
5
TITLE
NUMBER
6
7
11 MULTI (COPY) Button
Press this button to select numbers of multiple
screen shots of the same picture.
12 MULTI (SELECT) Button
Press this button to select numbers of multiple
screen shots of different pictures.
The buttons below have the same functions as
ones of the Photo Printer. (The same numbers
as the main unit are used.)
2 Power Button [Í], 3 PRINT Button, 4 MENU
Button, 5 2134 Buttons, 5 SET Button, and
6 DISPLAY/CANCEL Button
1
Remote Control Transmitter
2 ALBUM Button
Press this button to change the screen between
the Album Display and Index Display.
3 CARD SELECT Button
Press this button to change the input between
SD Memory Card or MultiMediaCard and PC
Card.
4 DATE Button
Press this button to add the date when the
picture was taken in the lower right corner.
5 TITLE Button
Press this button to display the menu screen of
[FUNCTION].
6 NUMBER Button
Press this button to select the copies to print.
7 PRINT (DPOF)/PRINT (ALL) Button
PRINT (DPOF) Button:
Press this button to print the pictures that were
marked for DPOF.
PRINT (ALL) Button:
Prints all pictures when there are no pictures
indicated with DPOF setting.
8 ZOOM IN Button
Press this button to enlarge the picture and
characters.
9 ZOOM OUT Button
Press this button to reduce the picture and
characters.
10 ROTATE Button
Press this button to rotate the picture and
characters.
7
A
A
AP10U-Eng.book 8 ページ 2002年9月27日 金曜日 午前10時8分
Preparation
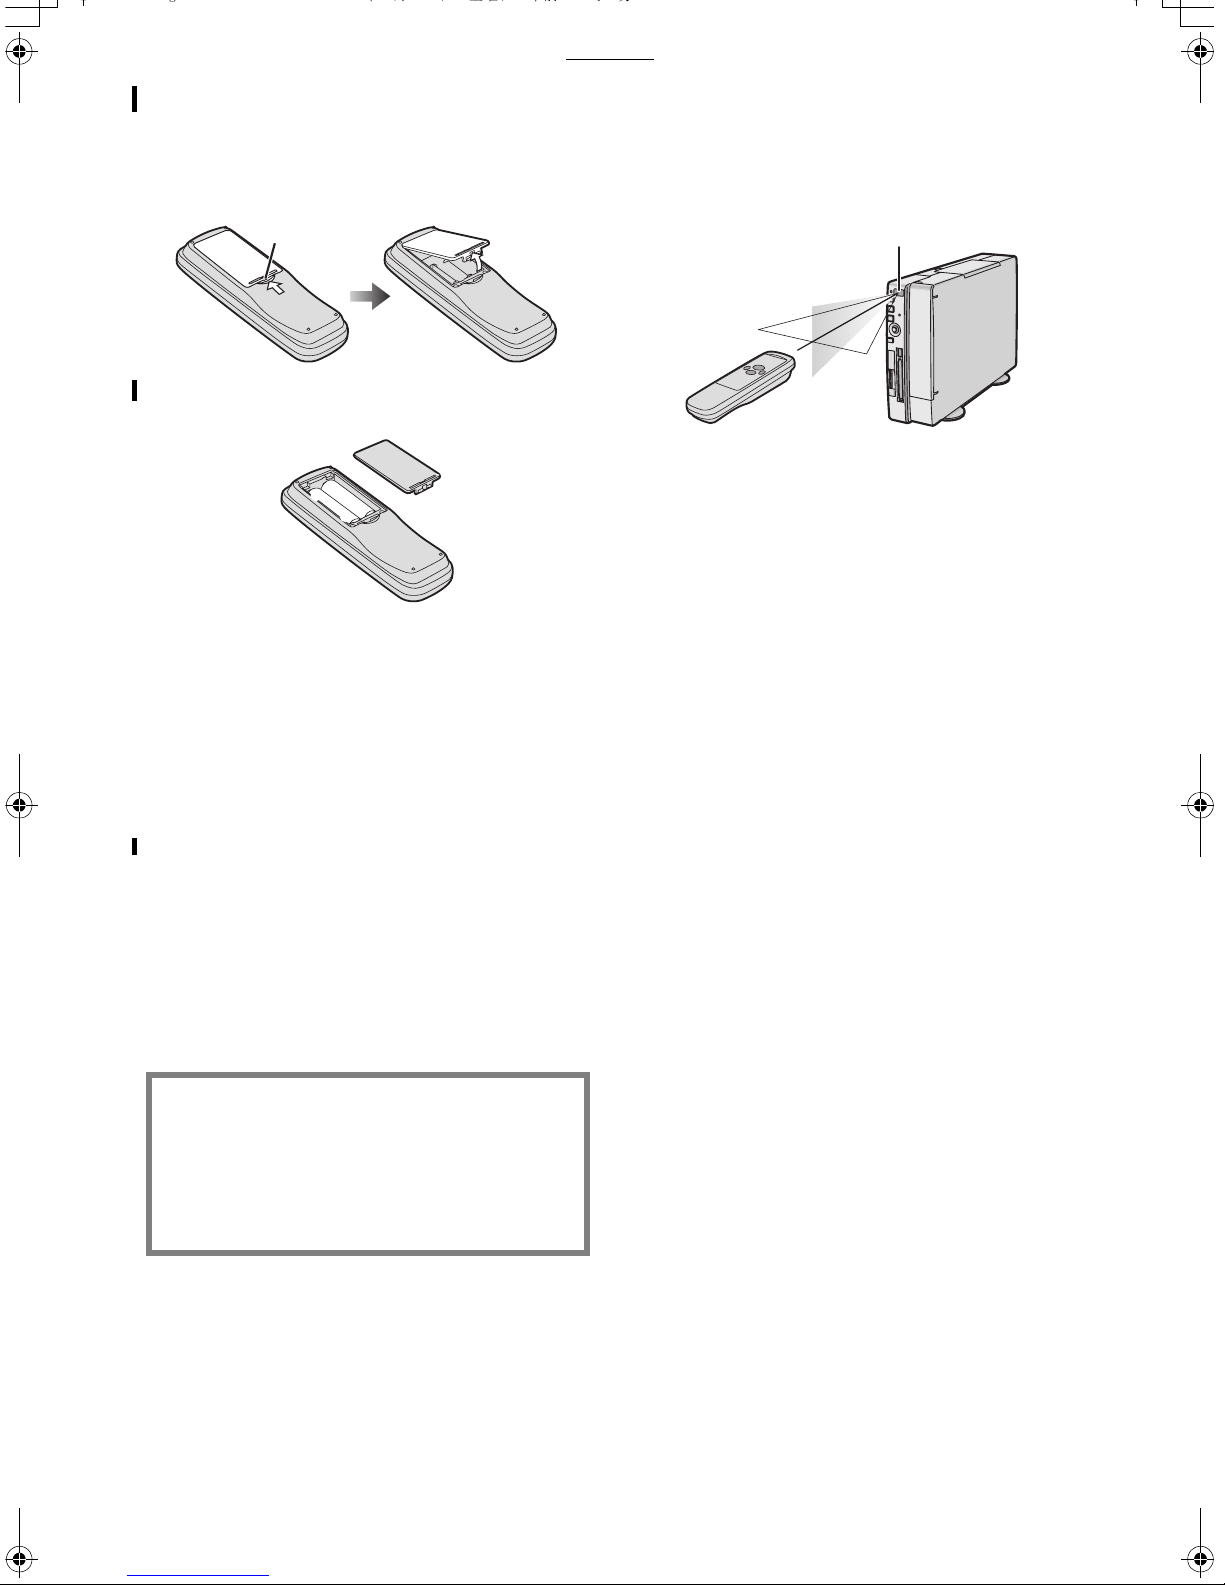
Inserting Remote Control Batteries
1 While pressing the indentation A in the
direction indicated by the arrow, lift the
cover up.
2 Insert the batteries (supplied) with the
polarity (
3 Cover is returned.
Precautions for Battery Replacement
The service life of the batteries is approximately 1 year.
However, it varies considerably depending on the
frequency of use.
≥When they are exhausted, replace them with two AA,
UM3, or R6 size batteries.
≥When the batteries are exhausted, remove them
immediately and dispose of them correctly.
≥Make sure that the batteries are inserted with the
polarity (
≥Do not mix old battery with new battery.
≥Do not mix different battery types, i.e. Alkaline and
Manganese.
≥Do not use rechargeable (Ni-Cd) batteries.
≥Do not heat or short-circuit the batteries.
≥When you do not use the remote control for a long time,
take out the batteries and store them in a cool, dry
place.
+ and -) correctly aligned.
+
-
-
+
+ and -) correctly aligned.
Using the Remote Controller
1 Direct the remote controller at the remote
control receiver
the remote controller.
≥Distance from the Photo Printer: Within approximately
23 feet (7 m)
≥Angle: Within approximately 40 degrees in the vertical
direction and 60 degrees in the horizontal direction from
the central axis
≥Do not put an the obstruction between the Photo Printer
and remote controller.
≥Do not expose the remote control receiver to direct
sunlight or strong light.
≥When attaching the paper cassette, you cannot use the
remote controller from the right angle or lower right
angle.
≥The receiver range reverses between the Vertical and
Horizontal layout.
A and press a button on
CAUTION
Danger of explosion if battery is incorrectly
replaced.
Replace only with the same or equivalent type
recommended by the manufacturer.
Dispose of used batteries according to the
manufacturer’s instructions.
8
AP10U-Eng.book 9 ページ 2002年9月27日 金曜日 午前10時8分
Preparation
Insertion
Vertical Layout
Horizontal Layout
Connections
TV
Insertion and Connections
ª Insertion
Be sure to insert the stand when selecting the Vertical layout and the
feet when selecting the Horizontal layout.
Insertion for Vertical Layout
1 Insert the stand into the holes as shown in the
illustration.
2 Tighten the screw to join the main unit and the stand.
Insertion for Horizontal Layout
1 Attach the feet for Horizontal Layout to the four corners
of the side which does not have a vent on the main unit.
(Attach them to the position of mark
≥When detaching the feet, coating may be peeled off. Do not detach
them after attaching them.
≥Select [Vertical] or [Horizontal] under [Layout] after Insertion and
connections. (Initial setting: [Vertical])
≥If you do not select the [Layout] menu, the direction of operation of the
Cursor buttons will be different when using with the Horizontal layout.
ª Precautions During Setup
A
As this printer gets hot during use, operate it in a well ventilated area.
Place printer at least 4" (10 cm) away from any walls to the left, right,
above or rear of printer. Do not place any objects on top of printer.
ª Connections
For Connection to TV
1 Connect the AC Power Cord (supplied) with the main
unit and AC outlet with the cord hooked to the cord
stopper.
1
2 Connect the Video cable (supplied) to [VIDEO OUT]
Socket on main unit and the Video Input Socket on TV.
≥After connections, turn on the Photo Printer and TV, and switch the
input to the video input.
A.)
PC
For Connection to PC
2
1 Connect the AC Power Cord (supplied) with the main
unit and AC outlet with the cord hooked to the cord
stopper.
2 Connect the USB Connection Cable (not supplied) to the
USB Socket on main unit and the USB Socket on PC.
≥You can purchase a generic USB A-B cable to use with this product at
many consumer electronic retail outlets.
≥After connections, see page 31.
THE SOCKET OUTLET SHALL BE INSTALLED NEAR THE
EQUIPMENT AND SHALL BE EASILY ACCESSIBLE
.
1
ª Paper That Can Be Used For Printing
The Photo Printer can use the following types of paper. Use Ink
Cassette/Paper Sets that bear the mark. (Print Sets that bear the
µ mark, the ∂ mark, or no mark at all cannot be used.)
2
≥4" x 5-7/8" (100 x 148 mm) printing paper* *with borders: The Ink
Cassette/Paper Set VW-APA50U is required.
≥16 Pre-Cut Adhesive paper (overcoat type): The Ink Cassette/Paper
Set VW-APASD16U is required.
≥4" x 6" (100 x 150 mm) printing paper* (overcoat type) *without
borders: The Ink Cassette/Paper Set VW-APKC36U is required.
≥Use the Ink Cassette with the paper provided in the same box.
9

AP10U-Eng.book 10 ページ 2002年9月27日 金曜日 午前10時8分
Preparation
Inserting a Card
ª When using an SD Memory Card or a
MultiMediaCard
1
Insert the card all the way into the slot.
≥The Card Access Lamp lights.
[Removing the Card]
1 Push the card.
2 Remove the card.
2
ª When Using a PC Card
1
Insert CF Card all the way into 1 (PC Card Adaptor/
Product Sold Separately).
2 Insert 1 into the Photo Printer.
[When Removing the Card Adaptor]
1 Press 2.
1
1
2 Remove 1.
≥Never take the card out or turn off the power while the card is being
accessed. This could damage the format of the card and make it
unusable.
≥Insert/remove cards only when the power is off.
≥Card images are formatted as JPEG baselines (JFIF, EXIF, DCF
[Design rule for Camera File system], CIFF, SISRIF) TIFF (Baseline
TIFF Rev.6.0RGB Full Color Images compatible).
The following types of cards can be used:
Compact Flash, IBM Microdrive, Memory Stick and Smart Media.
≥Do not insert/remove the card with the card adaptor inserted.
5
3
2
6
7
4
Inserting Paper
1 Open the lid of the paper cassette (included) 1, spread
out
2, and stand up (or push down) 3.
≥When using 4" x 5-7/8" (100 x 148 mm) printing paper or 16 Pre-
Cut Adhesive printing paper, spread
≥When using 4" x 6" (100 x 150 mm) printing paper, spread
push down
3.
2 Face the white (print) side of the paper up, and insert
under
4 (5 is the perforation line).
3 While opening the paper cassette door 6 and pushing
the Photo Printer with your hand, insert the paper
cassette all the way into
≥Insert up to 25 sheets of 4" x 5-7/8" (100 x 148 mm) printing paper, or
up to 36 sheets of the other types of paper.
≥Do not pull out the paper cassette during printing.
≥Pull out the paper cassette and close the paper cassette door after
use.
≥Do not fold, bend, or turn paper upside down when inserting into
printer.
≥If you do not insert the paper cassette all the way, when pressing the
[PRINT] button, the error message [There is no paper cassette] will be
displayed on the monitor connected to the unit.
7.
2, and stand up 3.
2, and
10
AP10U-Eng.book 11 ページ 2002年9月27日 金曜日 午前10時8分
Preparation
1
2
3
2
1
A
2
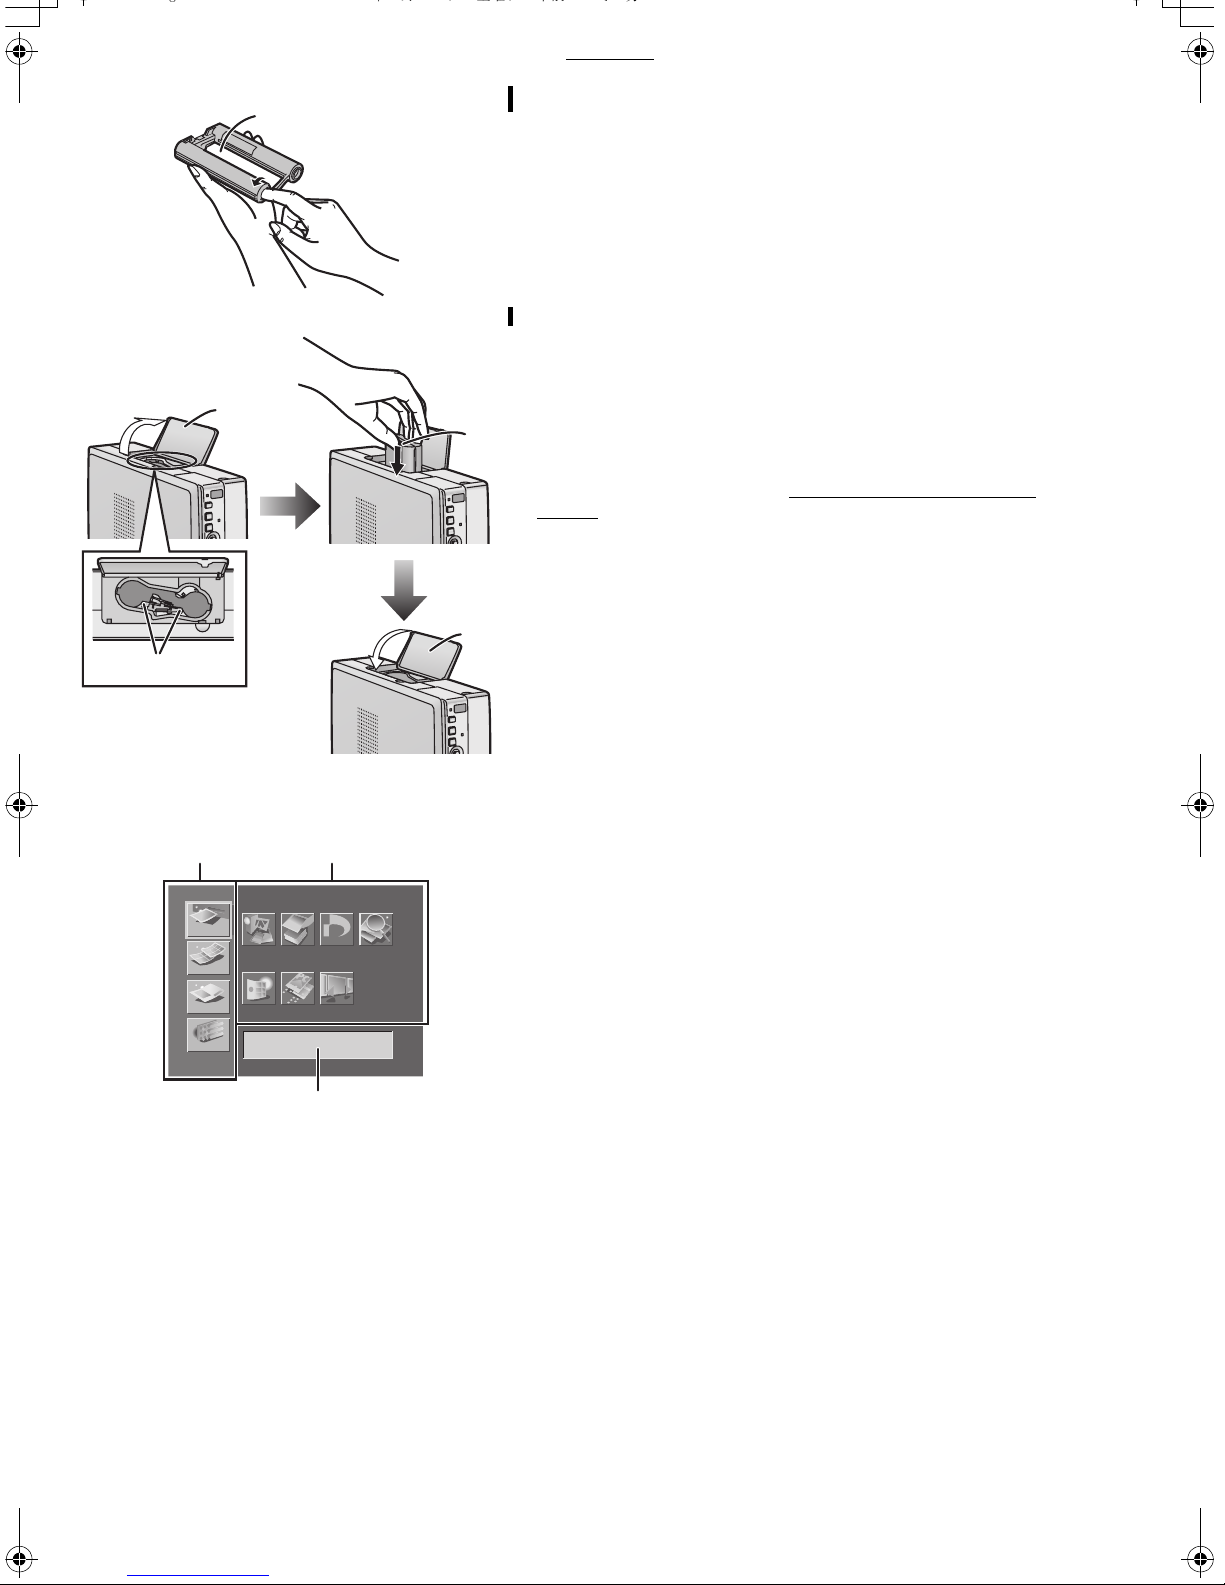
Inserting the Ink Cassette
1 Use your finger to push in the hole with the arrow, and
turn it in the direction of the arrow.
Tighten any slack in
≥The Ink Cassette is included in the Ink Cassette/Paper Set
(optional).
2 Open 2 (Ink Cassette Compartment Door), place the
side that contains
insert the Ink Film all the way into the Ink Cassette, and
close 2.
≥Do not touch the Ink Film in the Ink Cassette, and do not pull it out of
the cassette.
≥Close the Ink Cassette Compartment Door.
≥Do not peel off the label on the Ink Cassette.
≥When all of the Ink film in an Ink Cassette has been used up, replace
the Ink Cassette with a new one. Used Ink Cassettes cannot be
reused.
1 (Ink Film).
3 (small hole in Ink Cassette A) up,
12
BASIC
FUNCTION
A
EFFECT
OPTION
Input
Batch
DPOF
DPOF
SlideCardAlbum
Search
3
MENU Interface
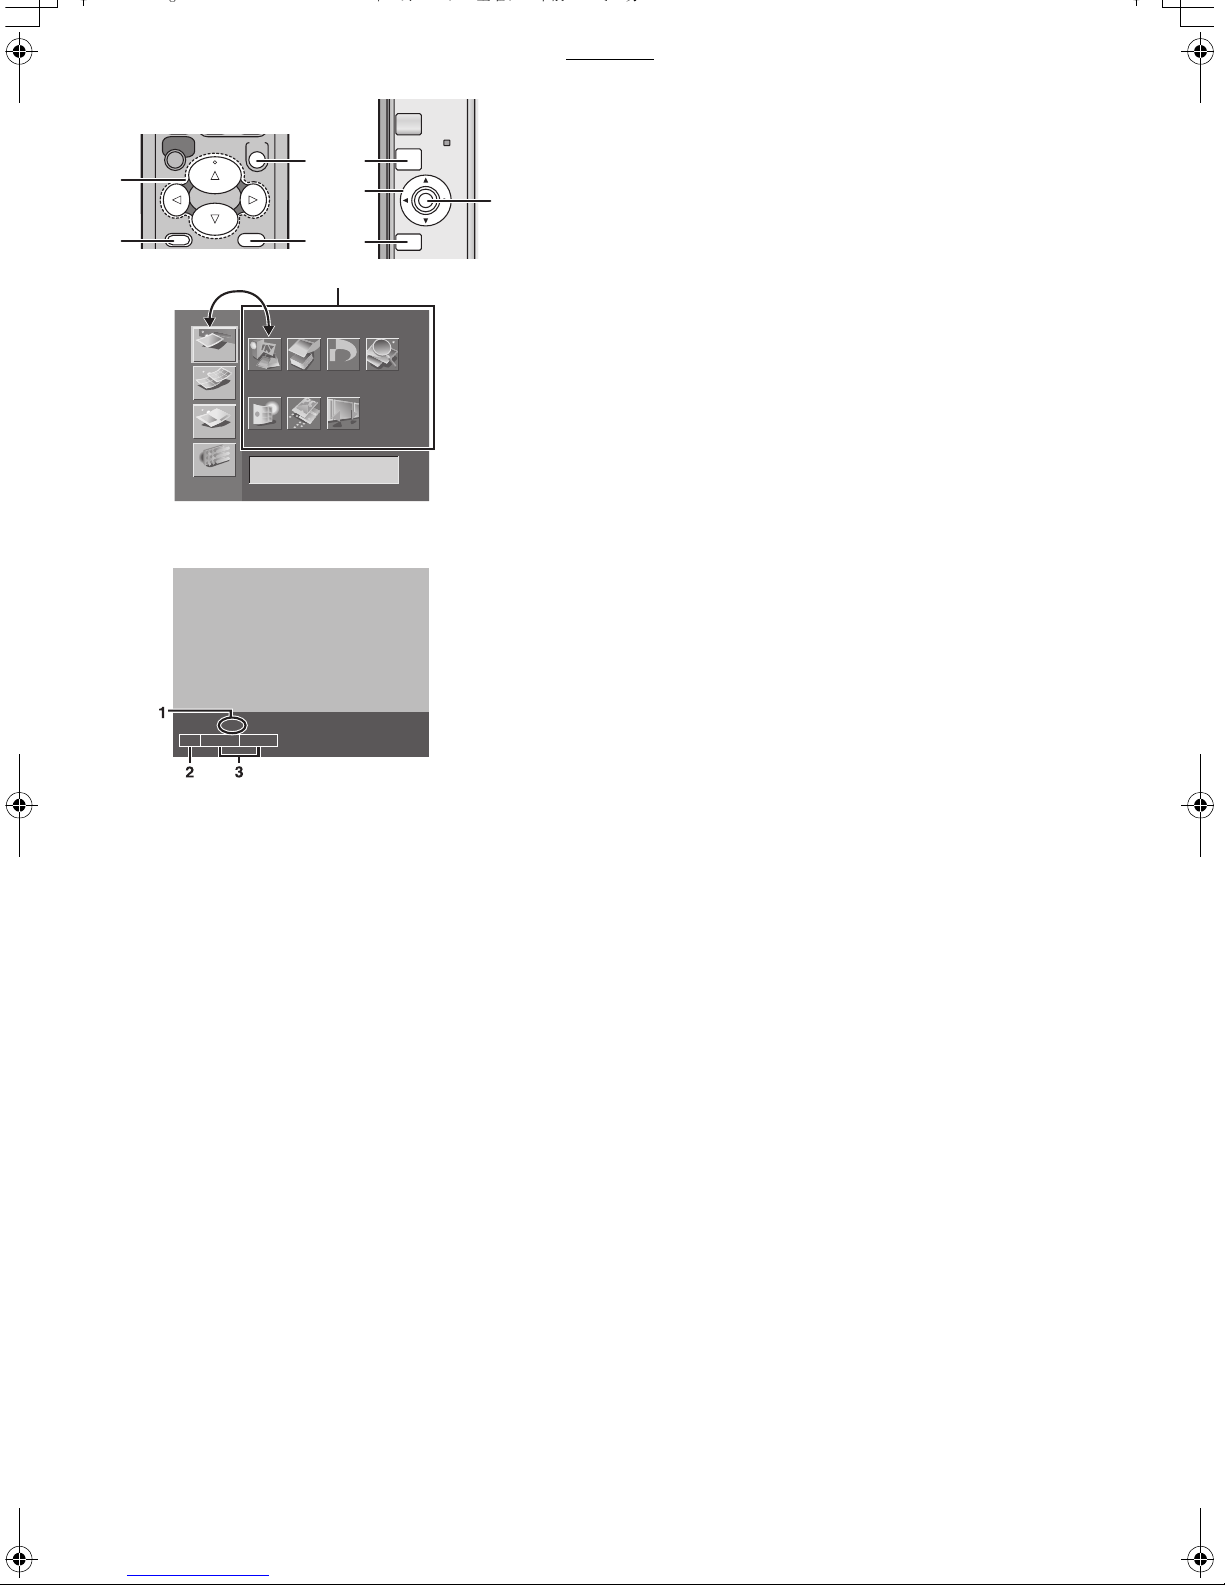
1 MENU Categories
The Photo Printer is divided into 4 major categories.
2 MENU Contents
Select the specific MENU you desire here.
3 Description/Control Display
The selected MENU’s description as well as control
confirmation messages are displayed in this area.
11
AP10U-Eng.book 12 ページ 2002年9月27日 金曜日 午前10時8分
Preparation
B
A
PRINT
MENU
FUNCTION
Standard x1
DATE
BASIC
A
EFFECT
OPTION
SD/MMC
SET
DISPLAY/
CANCEL
Input
PC CARD
Batch
C
D
A
B
D
32
DPOF
DPOF
SlideCardAlbum
SET: Zoom set up
Search
PRINT
MENU
1/39
SET
DISPLAY/
CANCEL
ERROR
MENU Controls
Use the MENU Mode as follows.
1:Press
C
2:Use the 21 Buttons
A to display the MENU screen.
B to switch between MENU categories and
MENU contents.
3:Use the 2134 Buttons
enter your selection, press
4:Press
5:Press
C to enter your selection.
D to exit the MENU.
B to move within the MENU Contents. To
C.
On Screen Display
The screen display disappears after a few seconds, but appears again
when pressing the 34 Buttons.
1 Number display
2 Date display
3 Input display
12
CARD SELECT
PRINT
MENU
ZOOM OUT
ROTATE
SET
DISPLAY/
CANCEL
AP10U-Eng.book 13 ページ 2002年9月27日 金曜日 午前10時8分
Basic Functions
Basic Functions
B
D
1
2
4
1
2
BASIC
FUNCTION
EFFECT
OPTION
Layout
SFTWT SM
13
20
27
A
14
21
28
A
C
Number Date
Layout
15
16
22
23
29
30 31
7
7
5
5
3
3
365421
2
Horizontal
121110987
1926172418
25
D
C
Vertical
PRINT
MENU
ERROR
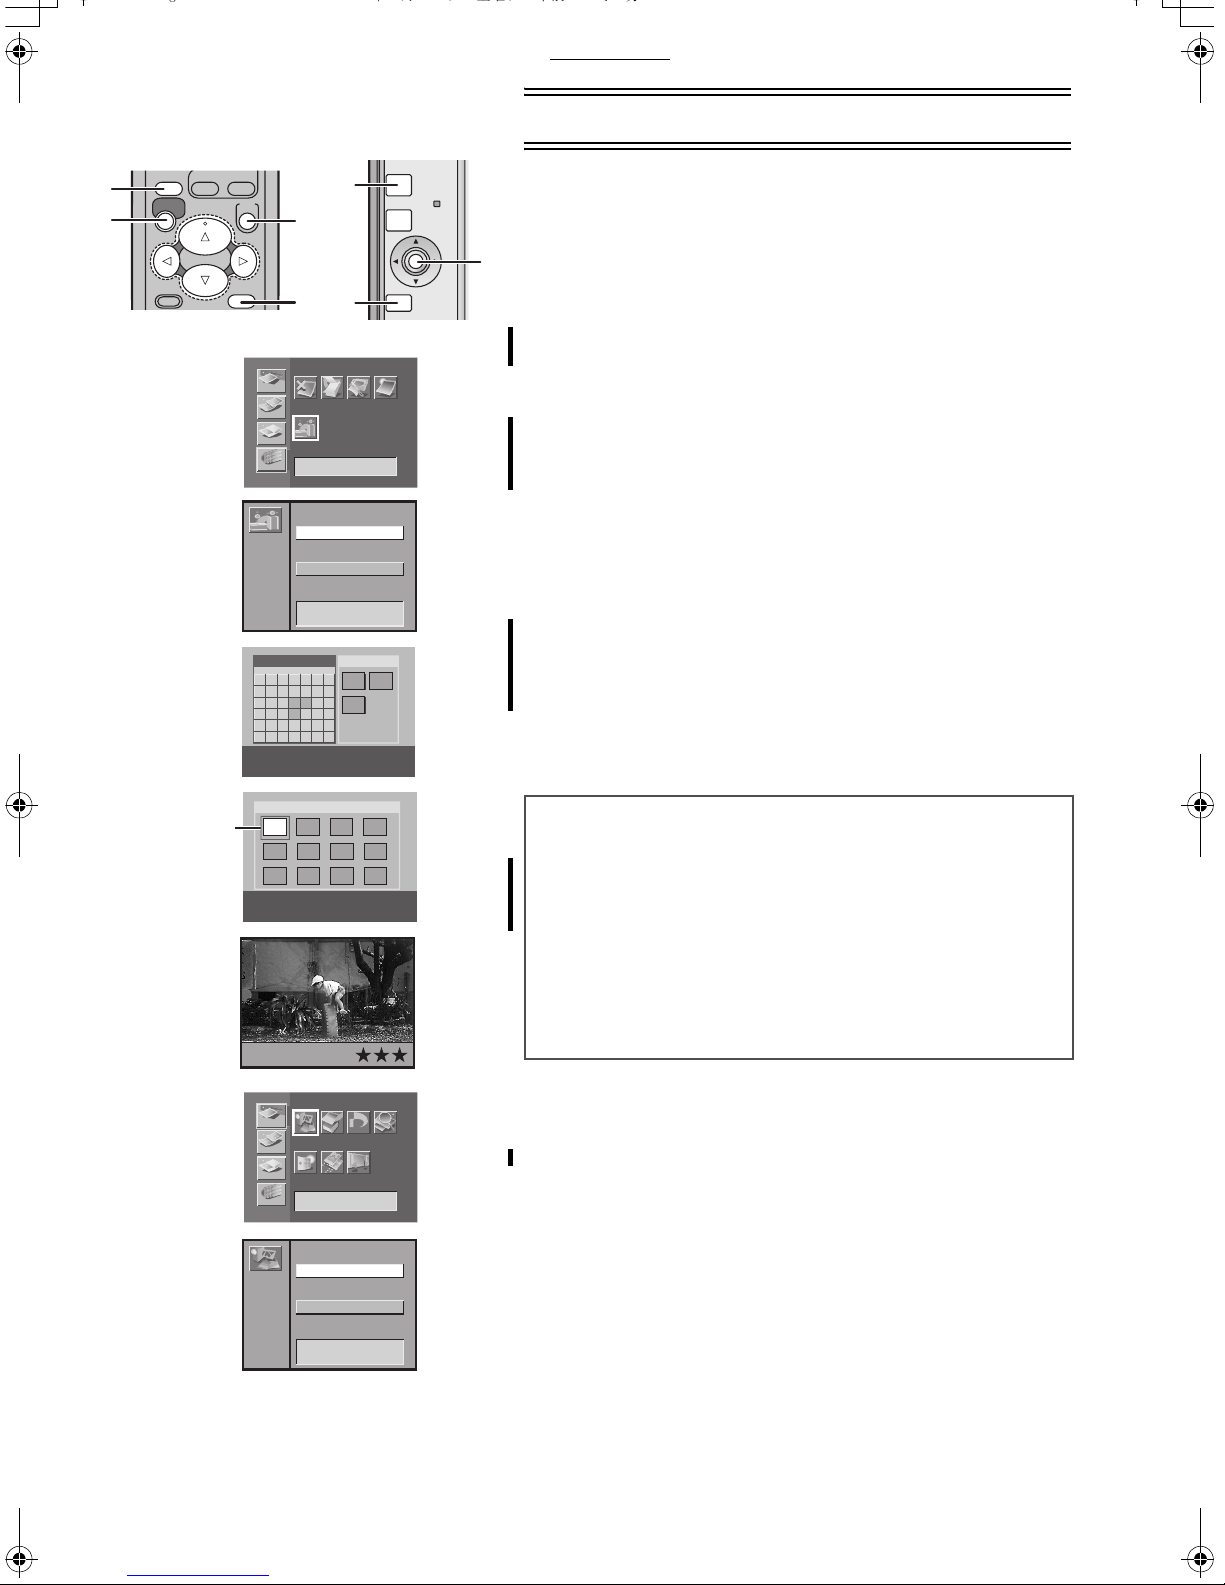
Test Print
≥The explanations below are made for the Vertical layout and the Album
SET
DISPLAY/
CANCEL
Display setting.
A
ª Printing Images From a Card
≥Make sure that the paper, the Paper Cassette and the Ink Cassette are
all inserted.
≥Insert a card into the Photo Printer.
≥Turn on the power.
Picture
Tri m
1 Select [Layout] under [OPTION] on the MENU screen,
and press
2
Select [Vertical] or [Horizontal], and press A.
3
Press B (CARD SELECT Button).
A (SET Button).
4 Using the 21 Buttons, select the date you wish.
Selected date: Yellow
Date with the picture: Light Blue
5 Using C (DISPLAY Button), change to the Index Display
and using the 2134 Buttons, align
over the image you wish to print.
≥You can enlarge, reduce and rotate the picture here. (P15)
1 (blue frame)
6 Pressing C changes to a Single Screen Display.
7 Press D (PRINT Button).
≥Printing begins.
≥The “j” symbols all change to “¡” symbols. Once they disappear,
printing is complete.
5
6
3
4
1
BASIC
FUNCTION
EFFECT
OPTION
Input
To Operate with the Buttons on the main unit
1 Select [Layout] under [OPTION] on the MENU screen,
and press
2
Select [Vertical] or [Horizontal], and press A.
3
Select [Input] under [BASIC] on the MENU screen, and
press
A (SET Button).
A (SET Button).
4 Using the 34 Buttons, select [SD/MMC] or [PC card],
and press
≥Go to Step 5 on the operations with the remote controller after the
operations above.
≥Some images on the display may be unsteady depending on the card
DPOF
Input
Batch
DPOF
Search
A
SlideCardAlbum
SD/MMC
PC card
being used. If “The picture is unreadable.” or “The card can’t be used.”
error message appears, or if an “x” symbol appears even though the
image is stored, turn off the power, remove the card and re-insert it.
≥A white border may appear around the card’s image, but this will not
affect the printed image.
≥Do not pull out the paper when moving during printing. Do not remove
the paper cassette or the Ink Cassette.
≥Do not leave 11 or more printing papers on the receiving position to
avoid causing a paper jam.
≥It may take some time until the picture is displayed depending on the
card.
≥The picture on the TV screen may flicker depending on the card.
However it does not affect the printing of the image.
≥When saving the picture file on PC, the saved date is displayed.
≥It may take longer to print two or more sheets or print in low or high
temperatures.
A (SET Button).
13

COPY
SELECT
DATE
NUMBER
PRINT
MENU
TITLE
DPOF/ALL
SET
DISPLAY/
CANCEL
AP10U-Eng.book 14 ページ 2002年9月27日 金曜日 午前10時8分
Basic Functions
ª Forwarding/Reversing the Screen
B
When 13 or more images are recorded on a card, using the 2134
Buttons, aligning
to the left and pressing the 2134 Buttons will forward/reverse the
screen.
A
ª Reprinting the Image
C
1234
5678
9101112
1234
5678
9101112
1
1
13
13
14
16
15
17
18
20
19
22
21
24
23
Press A to make the Index Display appear after printing is complete
and the Album Display appears and then press the PRINT Button
after selecting the picture in the blue frame.
≥If inserting a different Ink Cassette before reprinting when using a card,
re-select the image.
ª Printing Multiple Copies of a Single Image
1
Press C (NUMBER Button) when the picture is
displayed.
≥The number of prints increases when pressing C.
≥The Photo Printer can continuously print up to 10 copies of the same
image.
≥The number of pages remaining to be printed (including the currently
printing page) appears in the lower left corner of the screen.
1 (blue frame) on the places indicated in the diagram
B
2
1
To Operate with the Buttons on the main unit
See page 29.
ª Paper Jams
≥If a “Paper jam has occurred. Remove paper and press [PRINT]” error
message appears. Remove paper out of the left side
2, and remove the Ink Cassette. Make sure no more paper is
side
stuck inside, then re-insert the Ink Cassette. Press the Print button.
The error message will disappear and printing will continue.
≥If you have trouble removing the paper, turn the power off, and then
back on again. Proceed to remove the paper from either
≥If the paper stops moving during print even though no error messages
appear, do not remove the paper. Wait for printing to resume
automatically.
1 or the right
1 or 2.
14
CARD SELECT
PRINT
ZOOM IN
Í
ALBUM
ZOOM OUT
ROTATE
SET
CARD SELECT
PRINT
MENU
ZOOM IN
Í
ALBUM
ZOOM OUT
ROTATE
SET
DISPLAY/
CANCEL
AP10U-Eng.book 15 ページ 2002年9月27日 金曜日 午前10時8分
Basic Functions
A
1
MENU
SET
DISPLAY/
CANCEL
SFTWT SM
365421
121110987
13
1926172418
14
15
16
20
25
21
22
23
27
28
29
30 31
1
2
BASIC
FUNCTION
EFFECT
OPTION
Album
DPOF
Input
Batch
DPOF
Search
A
SlideCardAlbum
Display
Don't display
Display and the Index Display
You can display the pictures where a date has been recorded in the
A
Album Display.
1 Press A (ALBUM Button) when the pictures are
displayed.
≥The pictures can be also switched between the Album Display and
the Index Display when pressing
To Operate with the Buttons on the main unit
1 Select [Album] under [BASIC] on the MENU screen,
and press
A.
2 Using the 34 Buttons, select [Indicate] or [Don’t
indicate], and press
≥When saving the picture file on PC, the saved date is displayed.
A.
A.
Switching the Pictures between the Album
PRINT
MENU
C
A
B
B
D
1
2
3
SET
DISPLAY/
CANCEL
ERROR
To Enlarge/Reduce/Rotate/Move the Picture
≥Select the INPUT method.
≥Make the picture appear in the Single Screen Display.
A
1 Press A (ZOOM IN Button) to enlarge the picture.
≥The picture can be enlarged up to 3 times.
2 Press B (ZOOM OUT Button) to reduce the picture.
≥The picture can be reduced up to 1/2 the size.
3 Press C (ROTATE Button) to rotate the picture.
≥The picture can be rotated by 90 degrees clockwise whenever the
button is pressed.
4 Using the 2134 Buttons, move the picture after
enlarging/reducing/rotating or pressing
To Operate with the Buttons on the main unit
1 Press A.
2 Using the 2134 Buttons, move the picture.
3 Press B.
4 Using the 21 Buttons, rotate the picture and using
the 34 Buttons, enlarge or reduce the picture.
≥Pressing B returns to Step 2.
≥Make the picture appear in the Index Display and then make the same
picture appear again with the [DISPLAY] button.
≥When the picture is enlarged
picture quality may be inferior.
≥You cannot enlarge, reduce, rotate or move the picture when setting to
the multi select display or the calendar display.
using the ZOOM IN button, the
15
D.

PRINT
MENU
SET
DISPLAY/
CANCEL
PRINT
MENU
SET
DISPLAY/
CANCEL
AP10U-Eng.book 16 ページ 2002年9月27日 金曜日 午前10時8分
Basic Functions
1
2
4
6
A
B
BASIC
FUNCTION
EFFECT
OPTION
Batch
B
Input
A
2
All pictures
Selected pictures
Selected date
Selected index
Selected date index
Clear selected mark
Batch
All index
DPOF
DPOF
SlideCardAlbum
PRINT
MENU
Search
SET
DISPLAY/
CANCEL
ERROR
1
3
5
7
A
Printing Batches/Indexing
Multiple pictures can be automatically printed from a card.
Furthermore, 25 frames of images on a card can be indexed and printed.
≥Select the INPUT method.
≥If you select all pictures, begin from Step 2.
1 Select the pictures, and mark them with A (¥).
2 Select [Batch] under [BASIC] on the MENU screen, and
press
A.
Select a MENU you wish to use, and press
1Print a batch of all pictures.
2Print a batch of selected pictures.
3Print a batch of selected pictures with the Album function.
4Index all pictures.
5Index selected pictures.
6Print a batch of Index selected pictures with the Album function.
7Clear a batch of selected pictures.
≥Press
≥You can print a batch of pictures when also pressing [PRINT (DPOF/
ALL)] Button. (When you insert cards that are marked by DPOF, only
the pictures for which DPOF setting were made are printed.)
≥Pictures will be printed in the order selected.
≥When using [Selected pictures],(
is complete. When using [Selected index], marks will not disappear
after printing.
≥All pictures stored to memory will be lost if the power is turned off.
≥If [With date] is selected under [Date], the date will appear on all
indexed pictures. However, dates cannot be verified on the TV Screen.
B to cancel.
¥) mark will disappear when printing
A.
B A
1
2
BASIC
Input
FUNCTION
A
EFFECT
OPTION
21
Search
3
Batch
Year
Month
Date
Year
Month
Date
B
DPOF
DPOF
SlideCardAlbum
2002
:
October
:
:
2002
:
October
:
:
PRINT
MENU
ERROR
Using Date Search When Printing
Dates are recorded for pictures that were recorded on cards with Digital
Movie Cameras or Digital Cameras. Using this information, pictures
SET
DISPLAY/
CANCEL
A
taken on the designated date(s) can be printed.
≥Select the INPUT method.
1 Select [Search] under [BASIC] on the MENU screen, and
press
A.
Search
2 Enter the period you wish to search (Begin Search Date/
End Search Date), and press
A.
21 Buttons: Change the Date
43 Buttons: Move the Cursor
≥Years can be entered from 1980 to 2040.
3 Confirm the pictures you found (¥) in the lower right
1
30
corner, and press
B.
≥A batch of the searched pictures is printed.
≥If no images could be found within the designated search period, a “A
picture wasn’t found.” message will appear.
≥To print all images that were found as a batch, return to the MENU
screen and select [Selected pictures], under [Batch] in [BASIC].
≥The selected pictures can also be viewed as a Slide Show.
≥When searching the date on the Album Display, the screen switches to
the Index Display.
≥When saving the picture file on a PC, the saved date is displayed.
16

COPY
SELECT
MULTI
DATE
NUMBER
TITLE
PRINT
DPOF/ALL
AP10U-Eng.book 17 ページ 2002年9月27日 金曜日 午前10時8分
Basic Functions
A
1
2
BASIC
FUNCTION
EFFECT
OPTION
DPOF
DPOF
PRINT
MENU
ERROR
Printing With a DPOF Marked Card
When a card with marked files (DPOF) that contains pictures and print
counts set with a Digital Video Camera or a Digital Camera is inserted,
A
SET
DISPLAY/
CANCEL
printing can be automatically be performed.
≥Insert a DPOF card
≥Select the INPUT method
1 Press A (DPOF Button) when the pictures are
displayed.
DPOF
Input
Batch
DPOF
Search
A
SlideCardAlbum
Start printing
Return
≥Printing begins.
DPOF stands for Digital Print Order Format. Using a Digital Video
Camera or a Digital Camera, this adds printing information to stored
pictures on cards so they can be applied to DPOF systems.
≥When you insert a card for which DPOF setting is not made, all the
pictures are printed by pressing [PRINT (DPOF/ALL)] Button.
≥The Photo Printer cannot configure DPOF.
≥Confirm settings on the equipment on which the settings were made.
≥Setting the print count in [Number] under [OPTION] will have no effect.
Only the DPOF configured print count will be printed.
≥If 100 or more copies are set to be printed on the DPOF settings, only
99 will be printed.
≥If you do not use the DPOF-configuring device to set the date on cards,
it cannot be entered even when printing a batch of pictures.
To Operate with the Buttons on the main unit
1 Select [DPOF] under [BASIC] on the MENU screen,
and press
A.
2 Using the 34 Buttons, select [Start printing] or
[Return], and press
A.
17
 Loading...