


®
Handheld Computer
OPERATING INSTRUCTIONS
Model No. CF-P1Series
Contents
Getting Started
Read Me First ..........................................................3
Precautions............................................................. 5
What’s in the Box? .................................................. 8
Names and Functions of Parts ............................... 9
First-time Operation .............................................. 12
Operation
Starting Up/Shutting Down ................................... 15
LCD (Touchscreen)............................................... 19
Backlight Setting ................................................... 21
Entering Information ............................................. 22
Program Buttons .................................................. 27
Battery Power ....................................................... 28
SD Memory Card/MultiMedia Card ...................... 29
Panasonic Backup ................................................ 30
Pocket Internet Explorer ....................................... 32
Connecting to Your Computer ............................... 33
Customizing the Computer ................................... 36
Troubleshooting
Dealing with Problems .......................................... 39
Appendix
For Effective Use .................................................. 43
Specifications ....................................................... 44
LIMITED USE LICENSE AGREEMENT ............... 46
Please read this instructions manual carefully before using this product and save this manual
for future use.

Customer's Record
Model No.*
Serial No.
or
Code No.
Date of Purchase
* For the Model No., insert the 12 digit number (for example, CF-P1P3CZF6E) located on the back of
the computer.
Introduction
Thank you for purchasing the Panasonic Handheld Computer. Read the operating instructions thoroughly for proper operation of your new computer.
Illustrations and Terminology in this Manual
NOTE: NOTE provides a useful fact or helpful information.
CAUTION: CAUTION indicates a condition that may result in minor or moder-
ate injury.
- [Programs]: This illustration means to tap at the top of the screen, then to
tap [Programs].
< For the CF-P1P3 series >
: This illustration means to press the [A] key .
Mode key + NUM key: This illustration means to press and hold the [ ] key (Mode key),
then press the [NUM ] key.
< For the CF-P1P1 series >
: This illustration means to press the [1] key .
Dealer's Name
Dealer's Address
: Where to go for referred information.
Some of the illustrations in this manual may differ slightly in shape from the actual items in
order to make the explanation easier to understand.
This operating instructions describes the models below.
Note however that the illustrations mainly show the CF-P1P3 series.
CF-P1P3 series
(QWERTY key
type keyboard)
CF-P1P1 series
(numeric keypad
type keyboard)
2

Read Me First
For U.S.A.
Federal Communications Commission Radio Frequency Interference
Statement
Note: This equipment has been tested and found to comply with the limits for a Class B digital
device, pursuant to Part 15 of the FCC Rules. These limits are designed to provide reasonable
protection against harmful interference in a residential installation. This equipment generates,
uses and can radiate radio frequency energy and, if not installed and used in accordance with
the instructions, may cause harmful interference to radio communications. However, there is
no guarantee that interference will not occur in a particular installation. If this equipment does
cause harmful interference to radio or television reception, which can be determined by turning the equipment off and on, the user is encouraged to try to correct the interference by one
or more of the following measures:
Reorient or relocate the receiving antenna.
Increase the separation between the equipment and receiver.
Connect the equipment into an outlet on a circuit different from that to which the receiver
is connected.
Consult the Panasonic Service Center or an experienced radio/TV technician for help.
Warning
To assure continued compliance, use only shielded interface cables when connecting to a
computer or peripheral. Also, any changes or modifications not expressly approved by the
party responsible for compliance could void the user's authority to operate this equipment.
This device complies with Part 15 of the FCC Rules. Operation is subject to the following two
conditions:
(1) This device may not cause harmful interference, and
(2) This device must accept any interference received, including interference that may cause
undesired operation.
Responsible Party: Matsushita Electric Corporation of America
One Panasonic Way
Secaucus, NJ 07094
Tel No:1-800-LAPTOP-5 (1-800-527-8675)
Notice for the products using LCD
This product uses one or more fluorescent lamps containing a small amount of mercury. It also
contains lead in some components. Disposal of these materials may be regulated in your
community due to environmental considerations. For disposal or recycling information please
contact your local authorities, or the Electronics Industries Alliance: <http://www.eiae.or g/>
3

Read Me First
For Canada
This Class B digital apparatus complies with Canadian ICES-003.
Cet appareil numérique de la classe B est conforme à la norme NMB-003 du Canada.
Lithium Battery
Lithium Battery!
This computer contains a lithium battery to enable the date, time, and other data to be stored.
The battery should only be exchanged by authorized service personnel.
W arning! A risk of explosion from incorrect installation or misapplication may possibly occur .
Pile au lithium!
Le micro-ordinateur renferme une pile au lithium qui permet de sauvegarder certaines données
comme la date et l'heure notamment. Elle ne devra être remplacée que par un technicien qualifié.
Avertissement! Risque d'explosion en cas de non respect de cette mise en garde!
4

Precautions
The CF-P1 was developed based on thorough research into real-world portable computing
environments. Exhaustive pursuit of usability and reliability under harsh conditions led to
innovations such as the magnesium alloy exterior and flexible internal connections.
The CF-P1's outstanding engineering has been tested using the stiff MIL-STD- 810F (for
vibration and shock) and IP (for dust and water) based procedures.
As with any portable computer device precautions should be taken to avoid to the CF-P1
damage. The following usage and handling procedures are recommended.
Before putting the computer away, be sure to wipe off any moisture.
A void Extr eme Heat and Cold
Do not store or use the computer in locations
exposed to heat (in an automobile on a sunny
day, for example), direct sunlight, or extreme
cold.
A void moving the computer between locations
with large temperature differences.
Operation
Temperature:
Humidity:
Storage
Temperature:
Humidity:
-20 oC to 50 oC {-4 oF to 122 oF}
30 % to 80 % RH (No condensation)
-25 oC to 60 oC {-13 oF to 140 oF}
30 % to 90 % RH (No condensation)
A void Radio Frequency Interference
Do not place the computer near
a television or radio receiver.
Be careful of low-temperature
burns
Avoid more than casual contact
with any heat producing area of
the computer, AC adaptor, and
any option or accessory you use
with it. Even low heat, if warmer
than the body’s temperature, can
cause burns, if the skin is exposed
to the heat source for a long
enough period of time.
Avoid Magnetic Fields
Keep the computer away from
magnets.
Avoid Stacking
Do not place heavy objects on
the computer.
Keep Small Objects A way
Do not insert paper clips or other
small objects into the computer.
Do Not Disassemble the computer
Do not attempt to disassemble
your computer.
Avoid Excessive Force on the
LCD
Do not apply excessive downward force on the LCD.
Handling
Do not drop or hit your computer against
solid objects.
Remove all cables before transporting your
computer.
We recommend that the battery be fully
charged. We also recommend that the
backup battery (a built-in coin type battery) be fully charged.
When transporting spare batteries inside a
package, briefcase, etc., we recommend
that the batteries be stored in a plastic bag.
Always carry your computer with you when
traveling. Never check it in with luggage.
For use of the computer inside an aircraft,
we recommend asking the airlines regarding their policy on this issue.
It is a good idea to make backup copies on
SD memory cards/MultiMedia Cards and
carry them with you.
5

Precautions
Battery Pack
Care should be exercised with regard to the
following in order to avoid the possibility
of over-heating, fire, or damage.
Avoid Heat
Do not throw the battery pack
into a fire or expose it to excessive heat.
Keep Articles A way
Do not place the battery pack together with articles such as necklaces or hairpins when carrying
or storing.
Do Not Disassemble
Do not insert sharp objects into
the battery pack, expose it to
bumps or shocks, or deform, disassemble, or modify it.
Do Not Short
Do not short the positive (+) and
negative (-) contacts.
A void Extreme Heat, Cold and
Direct Sunlight
Do not charge, use or leave the
battery pack for extended periods where it will be exposed to
direct sunlight, in a hot place (in
an automobile on a sunny day,
for example), or in a cold place.
Do Not Put Into a Microwave
Do not put the battery pack into
a microwave oven or a pressurized chamber.
Do Not Use With Any Other
Device
The battery pack is rechargeable
and was intended for the specified computer. Do not use it with
a device other than the one for
which it was designed.
Stop Using
Should the battery emit an abnormal odor, become hot to the
touch, become discolored,
change shape, or become in any
way different from normal, remove it from the computer and
stop using it.
If the battery pack will not be used for a
long period of time (a month or more),
charge or discharge (use) the battery pack
until the remaining battery level becomes
30 % to 40 % and store it in a cool, dry
place.
The battery pack is not charged when the
computer is first purchased. Be sure to
charge it before using it for the first time.
When the AC adaptor is connected to the
computer, char ging begins automatically.
If the battery leaks and the fluid gets into
your eyes, do not rub your eyes. Immediately flush your eyes with clear water and
see a doctor for medical treatment as soon
as possible.
About High T emperature Mode
This computer has a high temperature mode
function that prevents the degradation of
the battery in high temperature environments. We recommend setting the high
temperature mode function when installing the computer in a car, etc. To do this,
set [Charging mode] in - [Settings] [System] tab - [Panasonic Settings] to [High
Temperature]. In the high temperature
mode, the full charge capacity of battery
becomes approximately 80 %.
6

NOTE
The battery pack may become warm during recharging or normal use. This is completely
normal.
Recharging will not commence outside of the allowable temperature range (5 °C to 40 °C
{41°F to 104°F})*. Even if charging stops because the temperature is outside the
charging temperature range, the battery indicator will remain in the illuminated orange.
Once the allowable range requirement is satisfied, charging begins automatically . Note
that the recharging time varies based on the usage conditions. (Recharging takes longer
than usual when the temperature is 10 °C {50 °F} or below.)
If the temperature is low, the operating time is shortened. Only use the computer within
the allowable temperature range.
The battery pack is a consumable item. If the amount of time the computer can be run off
a particular battery pack becomes dramatically shorter and repeated recharging does
not restore its performance, the battery pack should be replaced with a new one.
When a spare battery pack is to be carried in a pocket or bag, it is recommended that it
be placed in a plastic bag so that its contacts are protected.
Always power off the computer when it is not in use. Leaving the computer on when the
AC adaptor is not connected will exhaust the remaining battery capacity .
*These temperature settings are valid when the battery is charging and the computer is off.
The temperature range may become narrower when the battery is charging and the computer
is operating.
A lithium ion battery that is recyclable powers the product
you have purchased. Please call 1-800-8-BA TTER Y for information on how to recycle this battery .
L’appareil que vous vous êtes procuré est alimenté par une
batterie au lithium-ion. Pour des renseignements sur le
recyclage de la batterie, veuillez composer le 1-800-8-BATTERY.
When Using Peripheral Devices
Pay strict attention to the following points to avoid damage to the computer, peripheral devices, cables, etc. Also, in addition to following this manual, carefully read the instruction
manuals for the peripheral devices being used.
Use only peripheral devices that conform to the computer’s specifications.
Connect the devices properly, paying close attention to the condition and position of the
connectors.
If a connection cannot be made easily, do not apply undue force; check once more to
confirm the condition and position of the connector (alignment of pins, etc.).
If the connector has holding screws, fasten the screws firmly .
Do not carry the computer with cables attached, and do not pull on the cables forcefully.
7

What’s in the Box?
Make sure the parts shown in the figure have been supplied. If any of these items is missing
or is not working properly , contact Panasonic Technical Support.
Make sure the provided stylus has been stored to the computer ( page 19).
AC Adaptor .......................................1
AC Cord ..........................................1
Model No:CF-AA1623A
Battery Pack ..................................... 1
Model No: CF-VZSU28
Strap ........................... 1
(see below)
Operating Instructions .. 1
Cradle ...............................................1
R
E
L
E
A
S
E
C
F
V
E
B
P
1
A
Model No: CF-VEBP12
Companion CD*
(this book)
1
..........................
*1You can use the Companion CD to install various software, including Microsoft®Outlook
2002 and Microsoft®ActiveSync® ( page 33).
Attaching the Strap
1
2
1
®
3
4
CAUTION
The strap has been designed to carry only the weight of the computer. Therefore,
be sure that the strap does not carry a weight that exceeds the weight of the
computer. The strap may accidentally come loose from the computer.
Do not use a strap that is damaged or about to tear.
8

Names and Functions of Parts
The illustrations shown may differ from the actual physical appearances.
*1 Available on specific models.
*2 Can be set to not light up( page 37).
or AC adaptor not connected
Depending on built-in card
or modules, some models
have a different shape (e.g.,
barcode scanner). For details, refer to the attached
Supplementary Instructions.
(These cards and module
cannot be changed.)
LED Indicators
*1*2 ( “Supplementary Instructions”)
*1*2 RF Module Power
Notification/*1 Message-In Indicator
Battery Indicator
Green: Fully-charged
Orange: Charging in progress
Not lit: Charging not being performed
LCD (Touchscreen)
( page 20)
Cursor Control
( page 10)
Program Buttons
By pressing a program
button (F1, F2, F3 and
F4), the program assigned to the button is
started up. ( page 27)
Keyboard
(QWERTY key type)
( page 23)
< For the CF-P1P1 series >
The keyboard is of the numeric keypad
type. There are no LED indicators
( Numeric key lock and Caps
Lock).
Stylus
Receiver
SD Memory Card/
MultiMedia Card Slot
( page 29)
Power Switch
Infrared Communication Port
( page 35)
Internal Microphone
For detailed settings, tap - [Settings] - [System] tab - [Panasonic Set-
tings]. ( page 37)
LED Indicators
( page 19)
Numeric key lock
Caps lock
Keyboard
(numeric
keypad type)
( page 25 )
9

Names and Functions of Parts
Strap Attachments
( page 8)
Speaker
T o adjust the volume, tap - [Settings] - [Personal] tab - [Sounds & Notifications] - [Volume]
tab.
Battery Pack
Headset Jack
Use this connector to connect a headset or a 3.5
DIA plug adaptor ( pages 11). Audio output
from the internal speaker is disabled when the
headset or the 3.5 DIA plug adaptor is connected.
Reset Switch
DC-IN Jack
Expansion Connector
Set the computer into the cradle (included)
( next page). Or, you can connect the computer directly to the computer using the proper
cable ( page 34).
( pages 12 and 28)
( page 39)
Cursor Control
Using the cursor control, the following operations can be performed.
“Push” Operation:
Executes a selected item from a menu, or a selected icon.
For example, after an item within a menu is selected, the
cursor control can be pushed to execute this selected item.
“Move Up/Down Right/Left” Operations:
Performs the same function as the up/down left/right cursor keys. For example, the “Move Up” operation can be
performed to select an item towards the top within a menu.
Changing the Cursor Control Settings
The cursor control settings allow you to adjust the interval between the waiting time
until the repetition of an input begins (from the first input to the second input) if the
cursor control is held down, and the repeat of the input (from the second input and on).
1 Tap - [Settings] - [Personal] tab - [Buttons] - [Up/Down Control] tab.
2 Customize the way your cursor control repeats.
3 Tap [ok].
10

R
E
L
E
A
S
E
C
F
-V
E
B
P
1
A
Headset and 3.5 DIA plug adaptor
Only the CF-VHSP11W (sold separately) can connect to CF-P1’s headset jack.
CF-VHSP11W includes A and B. When using a 3.5 DIA plug, B is required. This adaptor
can be connected to stereo headphones.
A. Headset B. 3.5 DIA plug adaptor
3.5 DIA plug
*1Press for about one second to answer/
Front
1
*
Answer switch Microphone
Back
hang up voice calls. Function will not
operate if the switch is not pressed long
enough.
Connecting/Removing the Cradle
Connecting the Cradle
Connect the cradle after removing the AC adaptor from
the computer and closing the DC-IN Jack Cover.
DC-IN Jack Cover
The AC adaptor is con-
nected to the position
shown by the arrow in the
figure.
Only the provided adap-
tor can be used.
DC-IN Jack
Removing the Cradle
1 Press the release lever.
2 While firmly holding the cradle and pressing
down on the release lever with one hand, lift
the computer up with the other hand.
Release Lever
2
1
E
S
A
E
L
E
R
A
1
P
B
E
V
-
F
C
11

First-time Operation
1 Install the battery pack.
(1) Power off your computer and turn it over.
(2) Press position (A) to depress the battery pack cover
and then slide the latch, and remove the battery pack
cover.
NOTE
If the attached strap makes it difficult to remove the
battery pack cover, unbuckle the strap and then remove the cover.
(3) Set the arrow mark of the battery in the direction shown
in the figure, and then insert the battery pack into the
battery pack compartment.
(4) Align the projecting part of the cover with the hole, at-
tach the cover at an angle, and then set the cover on the
body. Press position (A) to depress the battery pack
cover and then slide the latch to lock the cover.
NOTE
After attaching the battery pack cover, slide
the latch all the way to the left so that CF-P1
can turn on after the power switch is pressed.
Battery Pack Cover
Latch
Arrow Mark
(A)
(A)
Latch
2 Connect your computer to a power outlet.
When the AC adaptor is connected to the computer, charging begins automatically .
Charging Time: Approx. 3 hours
This computer is equipped with a memory backup battery
which automatically charges from the fully-charged lithiumion battery (main battery). This backup battery retains data
in memory when the lithium-ion battery is removed, and takes
36 hours to charge when you first use this computer.
12

NOTE
When the backup battery or main battery becomes low, some alert messages and
icons will be displayed. ( pages 16)
CAUTION
Do not remove the main battery before the backup battery is fully charged. Otherwise, data in RAM will be lost.
Take care to ensure that the remaining power in the main battery and the backup
battery never discharges completely.
When any remaining power discharges completely, the computer will no longer
function properly, and the computer powers of f automatically . Connect the AC adaptor and recharge the battery. If the computer is left for 72 hours or more without
recharging, the computer may be fully reset. When the computer is fully reset, all
user-added data will be deleted. The computer will be returned to the condition at
the time of purchase.
After the cover is closed, press down firmly on the cover and confirm
that the cover is locked.
Handling the AC adaptor
Do not twist or pull the AC power cord forcefully. Doing so may damage the
connections.
Use only the provided AC adaptor with your computer. Using an AC adaptor other
than the one provided might damage the battery and/or the computer ( pages 8).
When the DC plug is not connected to the computer, disconnect the AC cord from
your AC wall outlet.
Problems such as sudden voltage drops may arise during periods of thunder and
lightning storms. Since this could adversely affect your computer, an uninterruptible
power source (UPS) is highly recommended unless the battery pack is installed.
13

First-time Operation
3 Turn your computer on
(1) Using the provided stylus, push the center of the reset switch straight
in for 1 second. If the DC-IN Jack's cover makes it difficult to
push the reset switch, push the cover in a little as you push the
switch.
CAUTION
Use only the stylus provided to push the reset switch.
Do not push the reset switch with any other sharp-pointed
objects, i.e. pencils, and ball point pens. The reset switch or
other parts may become damaged.
(2) Tap the screen to set up your Pocket PC.
The Windows*1 alignment screen is displayed.
*1 This computer uses Microsoft® Windows® Mobile
(3) Align the touchscreen.
(For alignment, tapping operations are required. For information
on tapping, refer to page 20.)
"+" is displayed in the center, upper left, lower left, lower right,
and upper right portions of the screen, in that order. Each time the
"+" mark is displayed, tap the center of the "+" mark with the
stylus.
(4) At [complete], tap the screen to begin using CF-P1.
TM
2003 software for Pocket PC.
Reset Switch
4 Set the time and date
(1) Tap - [Settings] - [System] tab - [Clock].
(2) Set the time and date.
(3) Tap [ok].
NOTE
You can also set the time and date by tapping on [Today] screen.
This concludes the first-time use operation guidelines.
14

Starting Up/Shutting Down
Starting Up (from the second time)
Lightly press the power switch once.
A program or file that was previously displayed appears on
your screen.
Power Switch
OFF
Lightly press the power switch (for less than 0.5 seconds).
Leave an interval of at least 10 seconds between turning the computer off and on.
To turn the backlights on/off:
Press the power switch until the LCD backlight and keyboard backlight go on/off and
release the switch.
At the time of purchase, the setting of the keyboard backlight is “off.” T o turn the keyboard
backlight on, refer to page 21.
NOTE
ON
Power Switch
When the backlight is on, more power is consumed, and the shortening of the operating
time is accelerated.
15

Starting Up/Shutting Down
The Navigation Bar and Command Bar
The navigation bar is located at the top of the screen. It displays the active program and
current time, and allows you to switch to programs and close screens.
Use the command bar at the bottom of the screen to perform tasks in programs. The command bar includes menu names, buttons, and the input panel button.
Status Icon ( below)
or may be displayed depending
on the program that is running.
Tap to quickly select a program you have recently
used.
Tap to select a program.
Tap to see additional programs.
Tap to customize CF-P1 ( page 36-38).
New Button
Input Panel Button
Menu Names Buttons
Following are some of the status icons you may see.
Status Icon & Meaning
Turn all sounds on and off
Backup battery is very low
Main battery is charging
Main battery is full
Main battery is low
Main battery is very low
*1This icon differs depending on model.
16
(Example for [Notes])
Connection is active
Synchronization is occurring
Connection is not active
Notification that one or more instant
messages were received
Notification that one or more e-mail
messages were received
1
*
More Notification icons need to be
displayed. T ap the icon to view all.

Today Screen
You’ll see the Today screen when you turn on the computer for the first time each day (or
after 4 hours of inactivity*1). You can also display it by tapping - [Today]. On the Today
screen, you can see at a glance important information for the day.
*1To change the setting, tap - [Settings] - [Personal] tab - [Today] - [Items] tab.
Tap to switch to a program.
Tap to change date and time.
Tap to open an item.
Your day at a glance.
Tap to view connection status.
Tap to create a new item.
17

Starting Up/Shutting Down
Pop-up Menus
With pop-up menus, you can quickly choose an action for an item. For example, you can use
the pop-up menu in the contact list to quickly delete a contact, make a copy of a contact, or
send an e-mail message to a contact. The actions in the pop-up menus vary from program to
program. T o access a pop-up menu, tap and hold the stylus on the item name that you want to
perform the action on. When the menu appears, lift the stylus, and tap the action you want to
perform. Or tap anywhere outside the menu to close the menu without performing an action.
Tap and hold to display the pop-up menu.
Lift the stylus and tap the action you want.
Tap outside the menu to close it without performing an
action.
Shutting Down (power off)
Lightly press the power switch once (within 0.5 seconds).
CF-P1 shut down is the same as the suspend state of a computer. (Suspend state is a function allowing you to turn of f
the power without closing applications. The settings before the power was turned off are stored in the memory , so
when the power is turned back on, the screen is the same as
it was before the power was turned off (the same applications and files are opened) and you can start working immediately.)
Power Switch
CAUTION
Check that the SD memory card/MultiMedia Card is not being accessed before turning
off the power . If the power is turned of f while the card is being accessed, the data stored
on the card may be damaged and the computer may stop working properly .
18

LCD (Touchscreen)
Using the Stylus
Use the stylus provided to perform operations on the
touchscreen. The stylus is located in the stylus holder at
the upper right of the computer, and can be held like a pen
or pencil. The following operations are possible on the
touchscreen.
Tapping
You can select an item on the screen by tapping it with the stylus.
This operation is called a “tap”.
Dragging
You can drag on item on the screen by holding the stylus down over
the item and then moving the stylus. This operation is called a “drag”.
Tapping and Holding
You can tap and hold the stylus on an item to see a list of actions
available for that item. On the pop-up menu that appears, tap the
action you want to perform.
Handling the Stylus
Clean the stylus tip and screen prior to operation. Foreign particles can scratch the screen
and impede the operation of the stylus.
Use the provided stylus only on the screen. Using it for any other purpose may damage the
stylus and scratch the screen.
19

LCD (Touchscreen)
Handling the Touchscreen
Use the provided stylus with CF-P1. Do not use an implement other than the stylus that
comes with the computer.
Do not place any object on the surface or press down forcefully with sharp-pointed objects
(e.g., nails), or hard objects that can leave marks (e.g., pencils and ball point pens).
Do not operate the computer when such things as dust are on the LCD. Do not allow
substances such as oil to contact the LCD. The cursor may not work properly in such
cases.
Aligning the Screen
Align the screen if the cursor does not correctly move to the position where the stylus touches
the screen of the computer.
1 Tap - [Settings] - [System] tab - [Screen].
2 Tap [Align Screen].
3 "+" is displayed in the center, upper left, lower
left, lower right, and upper right portions of
the screen, in that order.
Each time the "+" mark is displayed, tap the center of
the "+" mark with the stylus.
The alignment procedure is executed after the five
“+” marks are touched.
NOTE
<For the CF-P1P3 series>
You can also display the alignment screen when (Mode key) + the cursor control are
pushed.
<For the CF-P1P1 series>
You can also display the alignment screen when PF (PF key) + the cursor control are
pushed.
20

Backlight Setting
Adjust the LCD Brightness
Screen brightness can be adjusted in accordance with the usage conditions.
1 Tap - [Settings] - [System] tab - [Backlight].
2 Tap the [Brightness] tab and adjust the brightness with the slider.
3 Tap [ok].
LCD Backlight ON/OFF
Press the power switch until the LCD backlight goes on/off after the computer is turned on
and release the switch.
Setting of the LCD Backlight and Keyboard Backlight
The LCD backlight and keyboard backlight can be set to switch off automatically (e.g., for
conserve power) by setting the timeout function. Individual settings can be made for battery
use and AC adaptor use.
1 Tap - [Settings] - [System] tab - [Backlight].
2 Battery use setting: Tap the [Battery Power] tab.
AC adaptor use setting: Tap the [External Power] tab.
Add a check mark so that when the device is not operated, the LCD backlight switches off automatically
when the timeout expires.
Timeout
Add a check mark so that tapping the screen turns the
LCD backlight on.
(Example for [Battery Power])
3
Tap [ok].
Add a check mark to turn the keyboard backlight on
when the LCD backlight turns on.
21

Entering Information
You can use the following options to enter information:
Use the keyboard to input the number, character*1 or symbol*1 shown on the key top.
Use the input panel to input typed text, either by using the soft keyboard or other input
method.
Write directly on the screen.*
Draw pictures on the screen.*
Speak into the internal microphone to record a message.*
Use Microsoft® ActiveSync® to synchronize or copy information from a host computer to
CF-P1. For more information on Microsoft®ActiveSync®, see ActiveSync Help on the
host computer ( page 33).
*1 Only for the CF-P1P3 series.
*2 For more information, tap - [Help] - [Settings] - [Input].
Using the Input Panel
Use the input panel to enter information in any program on CF-P1. You can either type using
the soft keyboard or write using Letter Recognizer, Block Recognizer, or Transcriber. In
either case, the characters appear as typed text on the screen.
To show or hide the input panel, tap the input panel button. Tap the arrow next to the input
panel button to see your choices.
2
2
2
Select an input method
Input Panel Button
Tap to see your choice
Tap [123] to allow the keyboard to input $,
{}, %, etc.
T o type with the soft keyboard:
(1) T ap the arrow next to the input panel
button and then [Keyboard].
(2) On the soft keyboard that is displayed,
tap the keys with your stylus.
NOTE
If the keyboard is used while the soft keyboard is open, the soft keyboard will close.
22

Using the QWERTY Keypad Type Keyboard <For the CF-P1P3 series>
OK Key
Alphabet Keys
ESC Key
Mode Key
NUM Key
1
2
3
4
5
Q
W
E
R
/
+
S
D
(
Z
X
NUM
6
Y
T
-
=
F
H
G
)
?$!
C
B
V
áü
SPACE
8
7
U
"
'
:
K
J
.
,
M
N
CAP
0
9
P
O
I
@
L
DEL(Delete)/
Backspace Key
Enter Key
TAB Key
CAP Key
áü/SPACE Key
Mode Key
A symbol or number on the key top is input by pressing the Mode key (the numeric key
lock indicator goes on) followed by the corresponding alphabet key . Each Mode key press
works for the input of only one symbol or number. This is convenient when using one hand
to input sentences including symbols/numbers.
Example: T o input “abc.def.”, press the keys in the following order.
A B C M D E F
“.”
M
“.”
To input only symbols or numbers on the key top, keep holding down this key while
inputting symbols or numbers.
This key is also for inputting accented letters, using [ESC]key and [DEL]key. For more
details, see the explanation of each keys.
NUM Key
Each time the Mode key + NUM key are pressed, the mode changes from the alphabet
input mode (default) to the symbol/number input mode, and vice versa. In the symbol/
number input mode (numeric key lock indicator on), the symbols and numbers on the key
top can be inputted continuously.
T o exit the symbol/number input mode, you can also choose to press only the NUM key.
Pressing this key once and pressing an alphabet key can be input the capital letter.
áü/SPACE Key
Pressing this key inserts a space.
Pressing the Mode key + áü/SPACE key input accented letters after inputting the corresponding alphabet key.
Example: T o input “à” or “â”, press the keys in the following order.
“à”:
A
áü
SPACE
“â”:
A
áü
SPACEáüSPACE
Hold down the Mode key and press the áü/SPACE key repeatedly if necessary, until the desired
character appears.
áü
SPACE
23

Entering Information
CAP Key
This key is used for inputting capital letters.
Each time the Mode key + CAP key are pressed, the mode changes from the standard
(non-caps) input mode to the caps lock mode, and vice versa. In the caps lock mode (caps
lock indicator goes on), capital letters can be inputted continuously.
(When both the numeric key lock indicator and caps lock indicator are on, priority is given
to the symbol/number input mode.)
Inputting non-capital characters in the caps lock mode:
Press an alphabet while also holding down on the NUM key.
Pressing this key once and pressing an alphabet key can be input the capital letter (like the
NUM key).
Enter Key
This key works the same as the Enter key of a computer, e.g., line feed in a document, and to
select icons and items from menus, etc.
DEL (Delete) /Backspace Key
This key works the same as the Backspace key of a computer.
If pressed the Mode key + DEL/Backspace key , this key works the same as the Delete key of
a computer.
TAB Key
This key works the same as the T ab key of a computer.
OK Key
This key works the same as the tapping [ok] on the screen.
ESC Key
If pressed with Mode key, this key works the same as the Esc key on a computer.
24

Using the Numeric Keypad Type Keyboard <For the CF-P1P1 series>
Press a key to input the number shown on the key top.
The keys can also be used as function keys. (See "PF key" below.)
PF Key indicator
PF Key
Minus Key
CLR (Clear) Key
Period Key
PF
CLR
A
3
21
-
4
5
8
7
ENT
0
.
B
6
BS
9
OK Key
A Key
B Key
BS (Backspace) Key
ENT (Enter) Key
Number Keys
PF Key: When is pressed and the PF key indicator is turned on (function
key mode), the functions assigned to the each number key are activated
when the corresponding keys are pressed.
(The functions assigned to the number keys differently depending
on the application.)
- To use the function key mode only once:
Press once, then press a number key.
(You can also press the number key while pressing .)
Once the number key is pressed, indicator turns off. To turn it
off without pressing a number key, press twice.
- To use the function key mode continuously:
Press twice to lock the function key mode, then press the number
keys. Press once to unlock the function key mode.
You can also assign these keys to the program. For detailed settings, see the next page.
Minus Key: Press this to input a "-".
CLR (Clear) Key: The function differently depending on the application.
Period Key: When pressed, a period (".") is input.
ENT (Enter) Key: This key works the same as the Enter key of a computer, e.g., line
feed in a document, etc.
BS (Backspace) Key: This key works the same as the Backspace key of a computer.
A/BKey: These operate as function keys.
You can also assign these keys to the program. For detailed settings, see the next page.
OK Key: This key works the same as the tapping [ok] on the screen.
25

Entering Information
Assigning of Programs
Customize the keys to open your most used programs.
<Only for the CF-P1P1 series>
1 Tap - [Settings] - [System] tab - [Panasonic Settings] - [Buttons] tab.
2 Choose each setting.
(1)T ap one item.
(2)Tap under [Button assignment] and select a pro-
gram from the list.
When selecting [None], the button assignment in
the list shown above will be none.
When selecting [(...Free command)], [Open] will
be displayed (See below).
3 Tap [ok].
26
(3)T ap and select a folder and type of files.
The following functions are assigned to the keys at
the time of purchase:
PF+6 - V olume up, PF+7- V olume down
The assignment of those keys can be changed.

Program Buttons
The F1, F2, F3 and F4 buttons are called program buttons. If either of the program but-
Start Menu
Context Menu
tons is pressed after the computer has started
up, the program assigned for that button is
started up.
1
2
3
4
5
Q
W
E
6
R
Y
T
9
8
7
O
I
U
Program Buttons
Changing the Assignment of a Program Button
Programs are assigned to the program buttons at the time of purchase.
F3 - Start Menu, F4 - Context Menu
You can change the assignment of the program buttons following the procedure.
1 Tap - [Settings] - [Personal] tab - [Buttons].
2 Choose each setting.
(1)Tap one button.
(2)Tap under [Button assignment] and select a pro-
gram from the list.
0
P
If the [Restore Defaults] is tapped, the assignments
will return to the default settings.
3 Tap [ok].
Resuming with a Program Button
You can resume the computer with one of the F1, F2, F3 and F4 buttons.
1 Tap - [Settings] - [System] tab - [Panasonic Settings] - [Wakeup]*
*1 T o display the hidden tab, tap the on the right edge of the tab.
2 Add a check mark to resume when the program button is pressed.
3 Tap [ok].
1
tab.
27

Battery Power
Remaining Battery
Tap - [Settings] - [System] tab - [Power].
The remaining battery charge is displayed.
When the Remaining Battery Charge Becomes Low
Plug in the AC adaptor, and fully char ge your battery.
Use a spare battery if you have one.
If you have neither the AC adaptor nor a spare battery , power off your computer.
Replacing the Battery Pack
When the charge provided by your battery pack is supplied for only a short period of time,
even after full charging according to the instructions, it may be time to replace your battery
pack. The battery pack is a consumable item and therefore requires replacement (CF-VZSU28W).
CAUTION
Ensure that the backup battery is fully charged before replacing the battery pack and
replace the battery pack within 5 hours; otherwise the data in RAM will be lost.
Do not touch the terminals of the battery pack. The battery pack may no longer function
properly if the contacts are dirty or damaged.
Do not expose the battery pack to water, or allow it to become wet.
The battery pack is not charged when CF-P1 is first purchased. Be sure to charge it
before using it for the first time. When the AC adaptor is connected to CF-P1, charging
begins automatically .
Use only the specified battery pack (CF-VZSU28W) with CF-P1.
Do not install or remove the battery pack while CF-P1 is on.
Remove the battery pack
(1) Turn off your computer and wait for 30 seconds.
(2) Turn your computer over .
(3) Press position (A) to depress the battery pack cover and
then slide the latch, and remove the battery pack cover.
NOTE
If the attached strap makes it difficult to remove the
battery pack cover, unbuckle the strap and then remove the cover.
(4) Remove the battery in the direction shown in the figure.
Install the battery pack
(1) Refer to page 12 about installing the battery pack.
(2) Turn your computer on.
(3) Save the unsaved data and push the reset switch.
28
Battery Pack Cover
Latch
(A)

SD Memory Card/MultiMedia Card
An SD memory card/MultiMedia Card can be used for the following purposes.
The exchange of data with various devices equipped with an SD memory card/MultiMedia
Card slot, audio storage, and so on.
NOTE
Software (e.g., drivers) required to exchange data with these devices. (Refer to the
instructions manual provided with each SD compatible peripheral device.)
Use as a memory card (e.g., use as a storage unit on which files can be written).
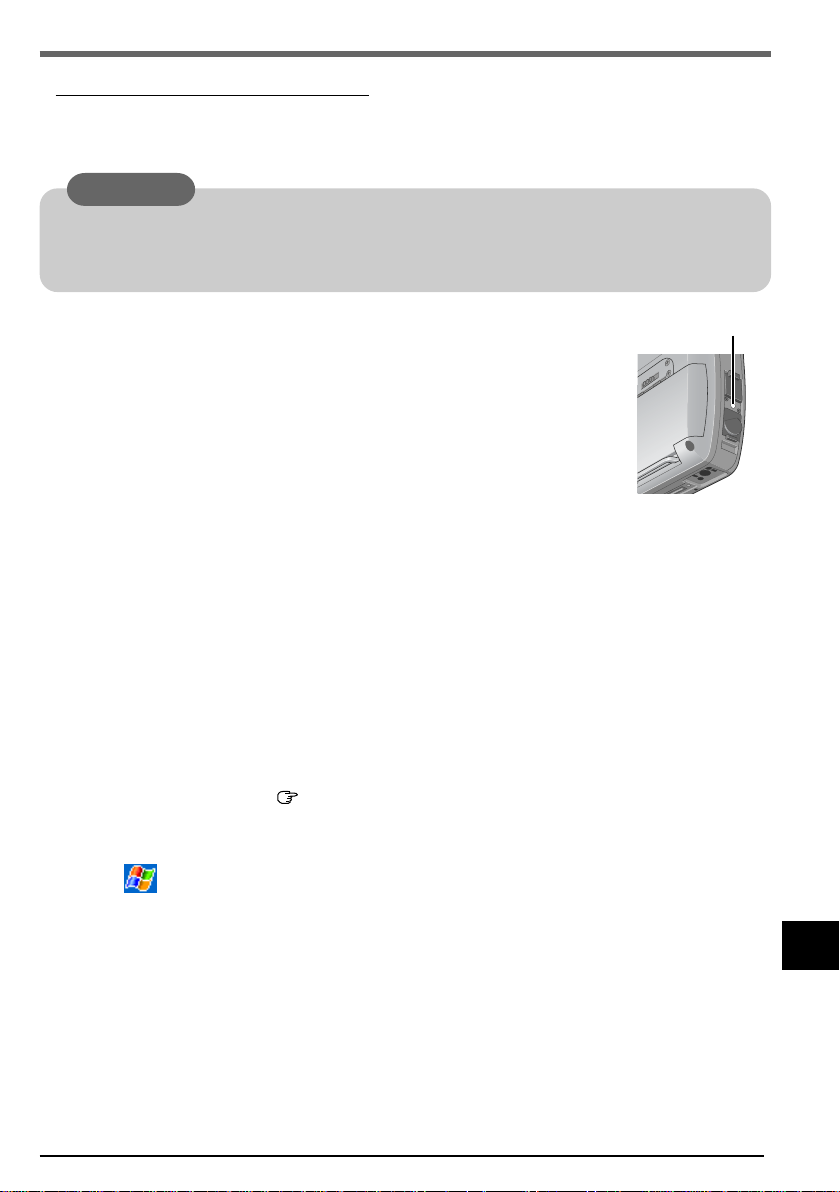
Inserting/Removing an SD Memory Card/MultiMedia Card
1 Open the SD memory card/MultiMedia card slot
cover.
2 Inserting
Slide the card in until it snaps into place as shown in the
illustration.
Make sure the labeled face of the SD memory card/
MultiMedia card is towards the front of the computer and
then firmly insert the card. If you mistake the back side of
the card with the top surface side, the card cannot be inserted all the way into the slot.
Do not insert the card at an angle.
Insert the card all the way into the slot.
SD Memory Card/
MultiMedia Card Slot
Removing
(1) Press the card. It will come out slightly.
(2) Remove the card.
3 Close the SD memory card/MultiMedia Card slot
cover.
CAUTION
Before removing an SD memory card/MultiMedia card or powering off CF-P1, check to see
if CF-P1 is trying to access the card. Such accesses are done intermittently for a short
period of time. Be sure to remove the card or power off CF-P1 only after confirming that
CF-P1 is not trying to access the card. If the card is removed or CF-P1 is powered off
during an access attempt, valuable data may be lost or CF-P1 may fail to work properly.
29

Panasonic Backup
Using the backup function, you can back up data from the CF-P1 RAM to an SD memory
card, MultiMedia card, CF card or ROM option area, or restore data backed up on those
storage area to the CF-P1 RAM.
CAUTION
Do not do the following during the procedure:
• T ouching the power switch • Performing any keyboard and touchscreen.
Disable the connection with the host computer, for example by disconnecting the cable.
Confirm that battery remaining is at least 50%, disable all power management, and
stop any other programs that may be running.
The data in [Inbox] cannot be backed up. If necessary, Use Microsoft®ActiveSync® to
backup.
NOTE
Backup processing cannot be executed manually during Auto Backup or Auto
Restore.
We recommend that each media be formatted as shown below when backing up.
S D SD Format (use SD Formatter)
MMC F AT16
CF/ROM option area not required.
Manual Backup
1 Reset CF-P1 ( page 39).
2 When backing up to an SD memory card, insert
the SD memory card.
3 Tap - [Programs] - [Panasonic Backup] -
[Backup] tab.
4 Tap to select the storage area to back up the
data.
5 Tap [Backup Start].
6 Input the Backup file name.
Add a check mark for [Set Password] and set a password if required.
7 Tap [OK].
Follow the on-screen instructions.
The progress screen will be displayed. To stop the operation, tap [Abort].
“Backup successful” will be displayed when the backup
is complete. Tap [ok].
30

Auto Backup
1 Tap - [Programs] - [Panasonic Backup].
2 Tap [Tools] on the command bar and select [Auto Backup Settings].
3 Tap [File] tab.
(1) Tap to choose the storage area for auto backup.
(2) Change the settings in [Settings].
If the ROM option area is chosen, some settings cannot be changed.
CAUTION
If there is a check mark in [Stop other application before backup], some applications currently being executed may not be shut down properly.
4 Tap [Schedule] tab.
(1) Add a check mark for [Scheduling backup].
(2) Set the time and day to back up at [Backup Schedule].
CAUTION
If you want to make settings immediately after copying a file of 10 MB or more
and then turn off the computer soon after that, wait for about one minute
before turning off the computer.
T ap [Battery] tab if required.
Add a check mark for [Backup when battery is low .] and set the threshold.
NOTE
If power is off, the amount of battery power remaining cannot be checked so
that this function cannot work.
T ap [Password] tab if required.
Set password for backup files.
5 Tap [ok].
Auto Restore
1 Full reset CF-P1( page 39 step (1) - (4)).
[Panasonic Backup] screen will be displayed.
2 Select a file for restore, and tap [OK].
If a password has been set, a message will be displayed.
Enter the password and press [OK]. Restore will start.
The progress screen will be displayed. When the restore is complete, CF-P1 resets automatically.
31

Pocket Internet Explorer
You can connect to Internet service provider (ISP), and use the connection to send and receive e-mail messages and view W eb or WAP pages.
Getting Connected
The settings will vary for different network environments. Ask your system administrator or
the person in charge of the network and make settings using the followings.
(1)Tap - [Settings] - [Connections] tab - [Connections] in order.
(2)Set up or change connection information
On the [Tasks] tab:
(1) Tap one of the followings:
Add a new modem connection (My ISP)
Add a new modem connection (My Work Network)
Add a new VPN server connection (My Work Network)
Set up my proxy server (My Work Network)
(2) Enter the necessary information.
On the [Advanced] tab:
T ap [Select Networks], [Select Location] or [Network Card] and set up if required.
For details, tap - [Help].
To run Pocket Internet Explorer
Tap - [Internet Explorer].
32
Favorites Button
Home Button
Refresh Button

Connecting to Your Computer
Use Microsoft®ActiveSync® to synchronize a host computer and CF-P1 information, to transfer files between a host computer and CF-P1, or to backup and restore data.
CAUTION
T o ensure that synchronization functions properly, install Microsoft®ActiveSync® 3.7
before connecting CF-P1 and the host computer for the first time.
The following methods can be used to connect the CF-P1 with a host computer.
The use of a Serial Cable or USB Cable.
The use of the infrared communication port.
Use an RS-232C Cable or a USB Adaptor Cable to connect CF-P1 with a peripheral.
Installing ActiveSync
®
1 Set the Companion CD into the host computer.
The opening screen is displayed automatically .
• When the opening screen is not automatically displayed
In [Start] - [Run], input [x:\setup] and select [OK].
(“x” is the drive letter. You can change the letter to suit your preference.)
2 Select button.
3 Select [Start Here].
4 Select [Install ActiveSync x.x*
select [Install].
1
] and read the on-screen instructions and
5 At [Installation Message], select [OK].
[File Download] will be displayed. This screen varies depending on the host
computer’s software (e.g. Internet Explorer version).
• If [Open] is displayed on [File Download], select [Open].
• If [Run this program from its current location] is displayed on [File Download],
select it and then select [OK].
6 At [Microsoft ActiveSync], select [Next].
7 At [Select Installation Folder], select [Next].
8 At [Get Connected], read the on-screen instructions and connect the CF-
P1 with a host computer.
(Refer to page 34 to connect the CF-P1 with a host computer.)
• For details, select [Microsoft ActiveSync x.x*1 Help] during the installation.
1
*
The version is shown.
33

Connecting to Your Computer
9 At [Set up a Partnership], select the partnership and select [Next].
NOTE
To change the synchronization settings, tap, in order, - [ActiveSync] - [Tools] [Options...]. Be sure to disconnect the cable when changing the synchronization set-
tings.
Disconnect and connect the cable again if communications do not start.
For information about the Microsoft®ActiveSync®, refer to the Microsoft®ActiveSync
Help.
CAUTION
While performing communications, avoid the following:
• Connect/disconnect the cable.
• Remove the computer from the cradle.
• Turn on/of f the computer.
When Connecting the CF-P1 Directly with a Computer
Use a Connector Protector (optional: CF-VCCP11U) to
connect CF-P1 with an external device firmly .
®
34
Expansion Connector of the CF-P1
USB Autosync Cable
Removing
or
Serial Autosync Cable

When Connecting the CF-P1 with a Computer via the Cradle
Expansion Connector of the Cradle
Removing
or
Using the Infrared Communication Port
By using the infrared communication port, data can be exchanged without a physical connection (e.g., using a cable or the cradle) between the
CF-P1 and a host computer.
Position CF-P1 so that the infrared communication port is face-to-face
with the port of a host computer.
Have the infrared port of the CF-P1 face the infrared communication
port of a host computer.
We recommend a port to port distance of 30 cm {11.8"} or less.
Infrared Communication Port
35

Customizing the Computer
If you want information on the various individual settings of the computer, tap - [Settings] and then tap the item (icon) you want to check.
(For details, tap - [Help] - [Settings].)
Personal
Buttons
Program buttons and the cursor control settings.
Input
Input panel (soft keyboard or letter recognizer, etc.) settings.
Menus
Select programs to be displayed in , or items to be displayed in [New]
in the Today screen.
Owner Information
Registration (or changing) of the user’s (owner’s) personal information.
Y ou can choose to display the registered owner information on the screen
when CF-P1 is turned on.
Password
Password enable/disable, and a password hint setting.
If a password is set, it has to be inputted in order to open the password
screen. When the wrong password is inputted four times, the set hint is
displayed. At times certain characters, such as á and ü, cannot be input
from the keyboard. Use the soft keyboard.
System
36
Sounds & Notifications
Volume setting and operation sound setting.
Specific sound settings to be generated in a wide range of situations.
T oday
Desktop display setting.
About
Display of release version and copyrights, and device ID setting.
Backlight
LCD backlight timeout function, tap-induced backlight on and keyboard
backlight setting, and LCD brightness adjustment.

Certificates
Add and delete personal certificates and root certificates.
Clear T ype T uner
Make a text clear by moving the slider.
Clock
Time/date settings and alarm settings.
CPU Clock
Change the operating speed of the processor.
Memory
Computer memory assignment possible (assignment of memory for data
memory and memory for program execution). Display of total storage
card memory if it is installed. Activate or stop the running programs.
Option Devices
Add a check mark in a box to activate CF card and RF module when the
power is off*1, and make Wireless LAN card*1 on/off setting.
T o set to not light up LED indicators*1, remove the check mark at the [Use
LED to indicate RF module status].
*1 Available on specific models.
Panasonic Settings
[Version] tab: Display of ROM release version, the size of ROM
option area, UUID and available devices*2.
*2 Available on specific models.
[Record] tab: When a check mark is added at [Mix playsound], both
play sound and microphone sound can be recorded. When the check
mark is removed, only microphone sound can be recorded. (When using the telephone, both play sound and microphone sound will be
recorded regardless of whether or not this check mark is turned on.)
Select either [Use ALC (Automatic Level Control)] or [Manual] and
move the slider to adjust the record gain level.
[Phone] tab: Add a check mark for [Speaker phone] to use with the
speaker phone when using the telephone.
Add a check mark for [Enable built-in microphone with Headset/Head-
phone] to use Headset/Headphone, using built-in microphone.
[Charging Mode] tab ( page 6)
[W akeup] tab ( page 27)
[Buttons] tab (only for CF-P1P1 series) : Change the assignment of a
program keys.( page 26)
37

Customizing the Computer
Power
Current battery charge status, the wireless signals on/off settings and
automatic power off time setting.
Regional Settings
Display methods of the region, number system, currency, time, and date.
Remove Programs
Remove programs in storage memory.
Screen
T ouchscreen alignment ( page 20), ClearType setting.
Connections
Bluetooth (Only for the Bluetooth model)
The Bluetooth radio turning on or off settings. The device discoverable
setting.
38
Beam
Enable or disable the function for receiving data via infrared communication.
Connections
Internet connection and Intranet connection settings ( page 32).
Wireless Ethernet (Only for the wireless model)
The wireless ethernet settings.
Wireless LAN Settings (Only for the wireless LAN model)
The wireless LAN settings.
Dealing with Problems
Resetting Your Computer
When the computer fails to respond to an operation, reset your computer. There are two
methods for resetting the computer.
CAUTION
Use only the provided stylus to push in the reset switch.
Do not push the reset switch with any other sharp-pointed objects, i.e. pencils, and ball
point pens. The reset switch or other parts may become damaged.
Performing a Reset
This selection saves all stored records and entries and then restarts
the computer.
Unsaved data in open windows may be lost.
If possible, turn off the computer and push the center of the reset
switch straight in.
Push the reset switch within 1 second using the stylus.
Resetting the computer may cause the clock to malfunction.
After resetting the computer, check the time and correct the clock
settings if necessary.
Reset Switch
Performing a Full Reset
This selection erases all stored records and entries and then restarts the computer.
Therefore, never perform a full reset unless a reset does not solve your problem.
(1) Using the provided stylus, push the center of the reset switch straight in for 1
second while holding down on the power switch.
(2) Tap the screen to set up your Pocket PC.
The Windows alignment screen is displayed.
(3) Align the touchscreen ( page 20 step 3).
(4) At [complete], tap the screen to begin using CF-P1.
(5) Set the time and date.
Tap - [Settings] - [System] tab - [Clock] to set the time and date, and tap [ok].
39

Dealing with Problems
Troubleshooting
Starting Up
CF-P1 does not turn on.
Or, there is no display
when CF-P1 is turned on.
The date and time are incorrect.
CF-P1 shuts down automatically .
The data cannot be copied.
Alarm and Auto backup do
not operate according to settings.
Check to see if a fully charged battery pack is properly
installed.
The power does not go on unless the AC adaptor is connected:
The battery level is too low . Char ge the battery with the
AC adaptor. (Make sure that the battery never dischar ges
completely and that it is charged periodically.)
Push the reset switch to restart CF-P1.
Slide the latch to lock the
battery pack cover all the
way to the left.
If the power does not turn on when the above operations
are performed, the battery pack must be replaced.
You can set the date and time through [Clock] in
- [Settings] - [System] tab.
If you continue to experience problems, the backup
battery maintaining the clock may need to be replaced.
Contact Panasonic T echnical Support.
This computer will not correctly recognize the date and
time starting from the year 2085 A.D.
The battery level may be too low. If the battery level
goes below a certain threshold, CF-P1 automatically shuts
down. In such cases, connect the AC adaptor and charge
the battery .
The computer may have entered a locked state. If this is
the case, connect the AC adaptor and push the reset
switch. Check the remaining battery level and make sure
that multiple applications are not running simultaneously.
Close all applications that are not being used.
The computer may be turned off automatically while the
data is being copied by beams or when using File Explorer. To prevent this, change the time setting to a longer
time in - [Settings] - [System]tab - [Power] [Advanced]tab.
It is possible that settings were made immediately after a
file of 10 MB or more was copied, and that the power was
turned off soon after that. In this case, the power should
be turned off after waiting for about one minute.
Latch
40

Application Software
The computer locks up during the execution of an application, or the execution
speed becomes noticeably
slower.
Display
It is hard to view the LCD.
The cursor cannot be controlled.
The cursor does not properly correspond to a stylus
tap.
Connecting a Host PC
A host computer does not
recognize CF-P1.
Connect the AC adaptor and push the reset switch. Check
the remaining battery level and make sure that multiple
applications are not running simultaneously. Close all
applications that are not being used.
The LCD backlight may have automatically turned off
due to the power-saving function. Turn on the LCD backlight by holding down the power switch until the backlight goes on.
Adjust the backlight brightness.
1 Tap - [Settings] - [System] tab - [Backlight].
2 T ap the [Brightness] tab and adjust the brightness with
the slider.
Push the reset switch to restart.
Align the screen ( page 20).
Confirm that Microsoft®ActiveSync® 3.7 (or a later version) has been installed in the host computer.
Check to see if a fully charged battery pack is properly
installed to CF-P1.
If a modem card has been inserted, disconnect these devices and check the communication status again.
Confirm that CF-P1’s power is on.
Push the reset switch to restart.
If a cable or cradle is being used for the connection,
recheck the connection to the host computer.
Connecting Peripherals
Peripheral is not recognized even after driver is
installed.
Network
Cannot connect to the network.
Remove cards or other peripherals, and push the
reset switch.
Check the server information and network settings.
41

Dealing with Problems
Sounds
Quality of recorded sound is
poor .
Play sound is recorded even
though the Mix playsound
checkmark is off.
Noise in recording or playback sound.
Character Input
Entering characters
< Only for CF-P1P1 series >
T ap - [Settings] - [Personal] tab - [Input] - [Options] tab
- [Voice recording format], and select a higher frequency .
Playsound (sound from the speaker) is being picked up
and recorded by the microphone. If you want to avoid
playsound recording completely, connect the headset
or the headphone.
If a load is applied during recording or playback, for
example when the SD memory card is disconnected or
connected, then noise in the recording or playback will
result. In this event, stop the recording or playback, and
restart after closing other applications.
Characters can be input using the input panel.
( page 22)
42

For Effective Use
Maintenance
LCD
A void using water when cleaning the panel. Ingredients included in
water may leave residue and reduce readability of the screen.
<When cleaning dust/dirt>
A void rubbing off dust/dirt with cloth since it may leave scratch
on the screen.
Sweep dust/dirt with fine brush, then wipe it with “dry” soft
cloth used for cleaning glasses.
<When cleaning oily surface>
Apply camera lens cleaner on a soft gauze and clean it with
gentle force. Then, wipe with dry soft cloth used for cleaning
glasses.
Areas excluding the LCD
Wipe these areas with a soft cloth, after applying water or deter gent diluted with water to the
soft cloth and firmly wringing out excess water.
CAUTION
Do not use benzene, thinner, or rubbing alcohol. Doing so may adversely affect the
surface, e.g., discoloration. In addition, do not use commercially-available household
cleaners and cosmetics, as they may contain components harmful to the surface.
Do not directly add or spray water or detergent. If liquid enters the inside of the
computer, it may cause the computer to work improperly or be damaged.
43

Specifications
Model No.
CF-P1P3 series CF-P1P1 series
Intel® PXA263 400MHz
CPU
Instruction Cache Memory: 32 KB
Data Cache Memory: 32 KB
Memory (RAM/ROM)
Video Memory
LCD Type
Displayed Colors
Keyboard
64 MB (Max 128 MB)/ 64 MB (Flash)
256 KB
3.5 type (Reflective color TFT with front light*1)
65536 colors (240 x 320 dots)
38-key keyboard
(QWERTY type)
Pointing Device
Slots
CF Card Slot
Touchscreen, Cursor Control
One Type I or Type II,
Allowable current 3.3 V: 400 mA, 5 V: 400 mA
SD Memory
SD memory card/MultiMedia Card
Card Slot
Interface
Communication Port
Headset Jack
Speaker
Microphone/Receiver
Sound
Battery Battery Pack
Sub-Battery
AC Adaptor*
3
Input
Output
Operating System
IrDA 1.2 low power compliant,
115.2 kbps data transmission speed
Miniature jack, 2.5 DIA
Monaural Speaker
Built-in for supporting as Mobile Phone
16-bit Stereo ADC/DAC, Sample Rate 48 kHz
Li-ion 7.4 V, 2.1 Ah
Operating Time*
Charging Time*
2
Approx. 8 hours - 24 hours
2
Approx. 3 hours
Lithium Rechargeable Backup Battery
100 V - 240 V AC, 50 Hz/60 Hz
16 V DC, 2.5 A
Microsoft® Windows® MobileTM 2003 software for
Pocket PC
Environment
In use Temperature -20 °C to 50 °C {-4 °F to 122 °F}
Humidity
Not in use Temperature
Humidity
1
*
In this manual, “front light” is described as “backlight”.
2
*
Varies depending on the usage conditions, backlight on/off, etc.
3
*
The AC adaptor is compatible with power sources up to 240 V AC adaptor.
This computer is supplied with a 125 V AC compatible AC cord.
23-key numeric keypad
(“10-key” type)
30 % to 80 % RH (No condensation)
-25 °C to 60 °C {-13 °F to 140 °F}
30 % to 90 % RH (No condensation)
44

Microsoft® ActiveSync® 3.7 System Requirements
Microsoft® Windows® XP, Microsoft® Windows® 2000, Microsoft® Windows® Millennium Edition,
Microsoft® Windows NT® Workstation 4.0 with SP6 or later, or Microsoft® Windows® 98
Microsoft® Outlook® 98 or later required for synchronization to the desktop or portable computer of email, calendar, contacts, tasks, and notes. (Microsoft® Outlook® 2002 recommended)
Microsoft® Internet Explorer 4.01 SP1 or later
Hard-disk drive with 12 to 65 MB of available hard-disk space (actual requirements will vary based on selection
of features and user's current system configuration)
Available 9- or 25-pin communications port (adaptor required for 25-pin communications port), infrared port, or
USB port (available for Windows® 98, Windows® Millennium Edition, Windows® 2000, and Windows® XP
only)
One CD-ROM drive
VGA graphics card or compatible video graphics adapter at 256 color or higher
Keyboard
Microsoft® Mouse or compatible input device
Options for Windows® XP, Windows® 2000, Windows® Millennium Edition, Windows NT® Workstation
4.0, or Windows® 98
Audio card/Speakers for sound
Microsoft® Office 97, Microsoft® Office 2000, or Microsoft® Office XP
Modem for remote synchronization
Ethernet LAN connection for remote synchronization
Microsoft® Outlook® 2002 System Requirements
Hard disk space requirements will vary depending on configuration; custom installation choices may
require more or less hard disk space.
245 MB of available hard disk space with 115 MB on the hard disk where the operating system is installed.
RAM requirements depend on the operating system used:
Windows® 98, or Windows® 98 Second Edition
24 MB of RAM plus an additional 8 MB of RAM for each Office program running simultaneously
Windows® Millennium Edition, or Microsoft® Windows NT
32 MB of RAM plus an additional 8 MB of RAM for each Office program running simultaneously
Windows® 2000 Professional
64 MB of RAM plus an additional 8 MB of RAM for each Office program running simultaneously
®
45

LIMITED USE LICENSE AGREEMENT
THE SOFTWARE PROGRAM(S) (“PROGRAMS”) FURNISHED WITH THIS PANASONIC® PRODUCT
(“PRODUCT”) ARE LICENSED ONLY TO THE END-USER (“YOU”), AND MAY BE USED BY YOU ONLY
IN ACCORDANCE WITH THE LICENSE TERMS DESCRIBED BELOW. YOUR USE OF THE PROGRAMS SHALL BE CONCLUSIVELY DEEMED TO CONSTITUTE YOUR ACCEPTANCE OF THE TERMS
OF THIS LICENSE.
Matsushita Electric Industrial Co., Ltd. (“MEI”) has developed or otherwise obtained the Programs and
hereby licenses their use to you. You assume sole responsibility for the selection of the Product (including the associated Programs) to achieve your intended results, and for the installation, use and results
obtained therefrom.
LICENSE
A. MEI hereby grants you a personal, non-transferable and non-exclusive right and license to use the
Programs in accordance with the terms and conditions stated in this Agreement. You acknowledge
that you are receiving only a LIMITED LICENSE TO USE the Programs and related documentation
and that you shall obtain no title, ownership nor any other rights in or to the Programs and related
documentation nor in or to the algorithms, concepts, designs and ideas represented by or incorporated in the Programs and related documentation, all of which title, ownership and rights shall remain
with MEI or its suppliers.
B. You may use the Programs only on the single Product which was accompanied by the Programs.
C. You and your employees and agents are required to protect the confidentiality of the Programs. You
may not distribute or otherwise make the Programs or related documentation available to any third
party, by time-sharing or otherwise, without the prior written consent of MEI.
D. You may not copy or reproduce, or permit to be copied or reproduced, the Programs or related
documentation for any purpose, except that you may make one (1) copy of the Programs for backup
purposes only in support of your use of the Programs on the single Product which was accompanied
by the Programs. You shall not modify, or attempt to modify, the Programs.
E. You may transfer the Programs and license them to another party only in connection with your trans-
fer of the single Product which was accompanied by the Programs to such other party. At the time of
such a transfer, you must also transfer all copies, whether in printed or machine readable form, of
every Program, and the related documentation, to the same party or destroy any such copies not so
transferred.
F. You may not remove any copyright, trademark or other notice or product identification from the Pro-
grams and you must reproduce and include any such notice or product identification on any copy of
any Program.
YOU MAY NOT REVERSE ASSEMBLE, REVERSE COMPILE, OR MECHANICALLY OR ELECTRONICALLY TRACE THE PROGRAMS, OR ANY COPY THEREOF, IN WHOLE OR IN PART.
YOU MAY NOT USE, COPY, MODIFY, ALTER, OR TRANSFER THE PROGRAMS OR ANY COPY
THEREOF, IN WHOLE OR IN PART, EXCEPT AS EXPRESSLY PROVIDED IN THE LICENSE.
IF YOU TRANSFER POSSESSION OF ANY COPY OF ANY PROGRAM TO ANOTHER PARTY, EXCEPT AS PERMITTED IN PARAGRAPH E ABOVE, YOUR LICENSE IS AUTOMATICALLY TERMINATED.
TERM
This license is effective only for so long as you own or lease the Product, unless earlier terminated. You
may terminate this license at any time by destroying, at your expense, the Programs and related documentation together with all copies thereof in any form. This license will also terminate effective immediately upon occurrence of the conditions therefore set forth elsewhere in this Agreement, or if you fail to
comply with any term or condition contained herein. Upon any such termination, you agree to destroy, at
your expense, the Programs and related documentation together with all copies thereof in any form.
YOU ACKNOWLEDGE THAT YOU HAVE READ THIS AGREEMENT, UNDERSTAND IT AND AGREE
TO BE BOUND BY ITS TERMS AND CONDITIONS. YOU FURTHER AGREE THAT IT IS THE COMPLETE AND EXCLUSIVE STATEMENT OF THE AGREEMENT BETWEEN US, WHICH SUPERSEDES
ANY PROPOSAL OR PRIOR AGREEMENT, ORAL OR WRITTEN, AND ANY OTHER COMMUNICATIONS BETWEEN US, RELATING TO THE SUBJECT MATTER OF THIS AGREEMENT.
46

Copyright
This manual is copyrighted by Matsushita Electric Industrial Co., Ltd. with all rights reserved. No part
of this manual may be reproduced in any form without the prior written permission of Matsushita
Electric Industrial Co., Ltd.
No patent liability is assumed with respect to the use of the information contained herein.
©2003 Matsushita Electric Industrial Co., Ltd. All Rights Reserved.
Disclaimer
Computer specifications and manuals are subject to change without notice. Matsushita Electric Industrial
Co., Ltd. assumes no liability for damage incurred directly or indirectly from errors, omissions or
discrepancies between the computer and the manuals.
Trademarks
Microsoft®, Windows®, Windows NT®, Outlook® and ActiveSync® are registered trademarks of Microsoft
Corporation of the United States and/or other countries.
is a trademark of Microsoft Corporation of the United States and/or other countries.
Mobile
®
and Pentium® are registered trademarks of Intel Corporation.
Intel
Panasonic
®
is a registered trademark of Matsushita Electric Industrial Co., Ltd.
47

© 2003 Matsushita Electric Industrial Co., Ltd. All Rights Reserved.
Printed in Japan
SS1103-0
DFQX5434ZA
 Loading...