

Panasonic 96NBL WV10 Users Manual
Setup Guide
Wireless Camera Monitoring System
Model No. BL-WV10A
This guide will help you install and configure the BL-WV10A Wireless Camera Monitoring System and your
Network Cameras (sold separately).
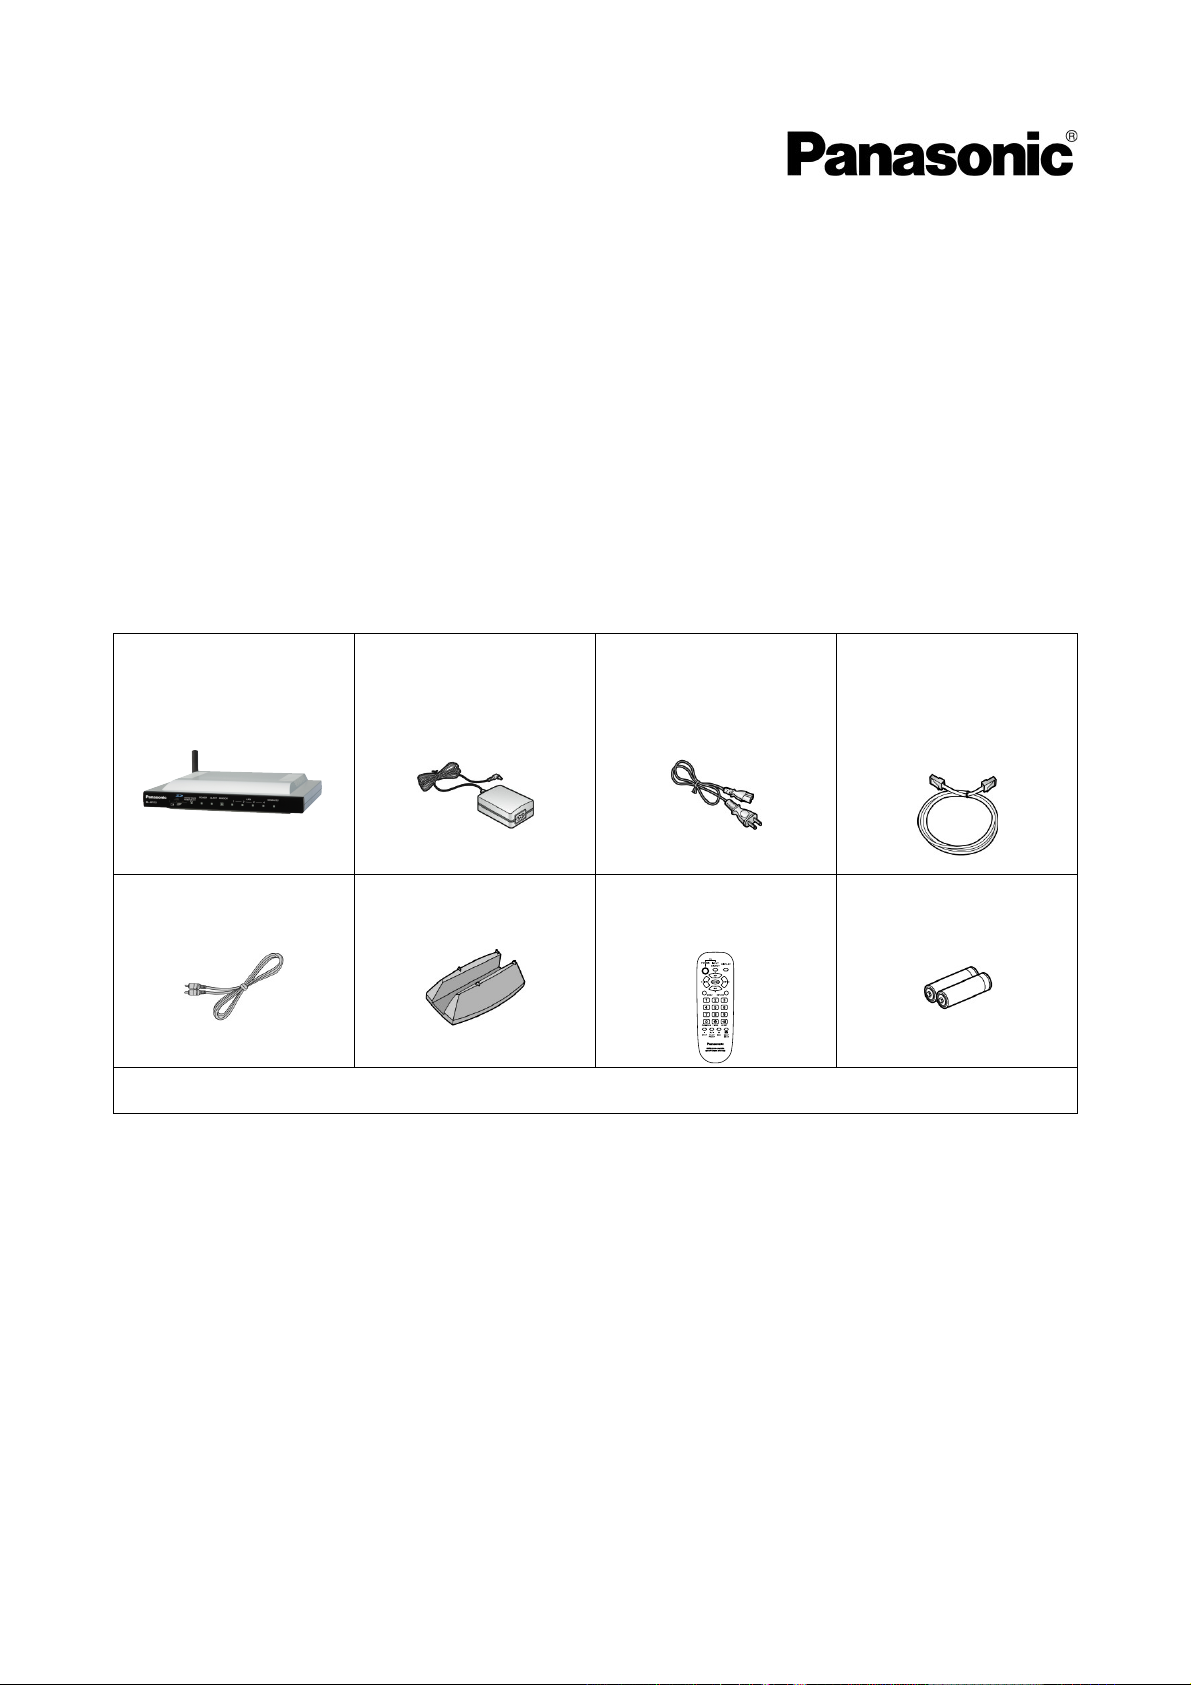
Included Items
Confirm that the following items are included in the product box.
Additional pieces can be ordered by calling 1-800-332-5368.
BL-WV10A
Video cable
Part no.
Length: PSJP01R02Z
- Operating Instructions
- Warranty
Recommended Accessories (sold separately)
Compatible router: Panasonic BB-HGW700A Network Camera Management System
Compatible Network Cameras*: Panasonic BL-C10A, BL-C30A (firmware version 1.20 or higher**)
AC adaptor
Part no. PQLV202Y
Cord length: 1.8 m (6 ft.)
Stand
Part no. PSYLWV10N
AC cord
Part no. PSJA1069Z
Length: 55 cm (1 ft. 10
in.)
Remote control
Part no. EUR648057
Ethernet cable
Part no. PQJA10138Z
(Cat. 5 straight cable)
Length: 1 m (3 ft. 3 in.)
Batteries (2 AA size)
Part no. R6PNB/2ST
* Cameras not listed here (including other Panasonic Network Cameras) may not be compatible with this
product.
** For the latest firmware, visit http://panasonic.co.jp/pcc/products/hnetwk/support/
1
Setup Guide
Setup Overview
1. Insert the batteries in the remote control.
2. Connect the BL-WV10A to the power outlet and to the TV.
3. Use the BL-WV10A’s Basic Setup utility to configure the BL-WV10A.
4. Connect the cameras (and an optional BB-HGW700A Network Camera Management System, if you are
using one).
5. Use the BL-WV10A’s Quick Setup utility to configure the cameras .
6. Confirm that camera images are viewable on the TV.
7. Place the cameras where you plan to use them.
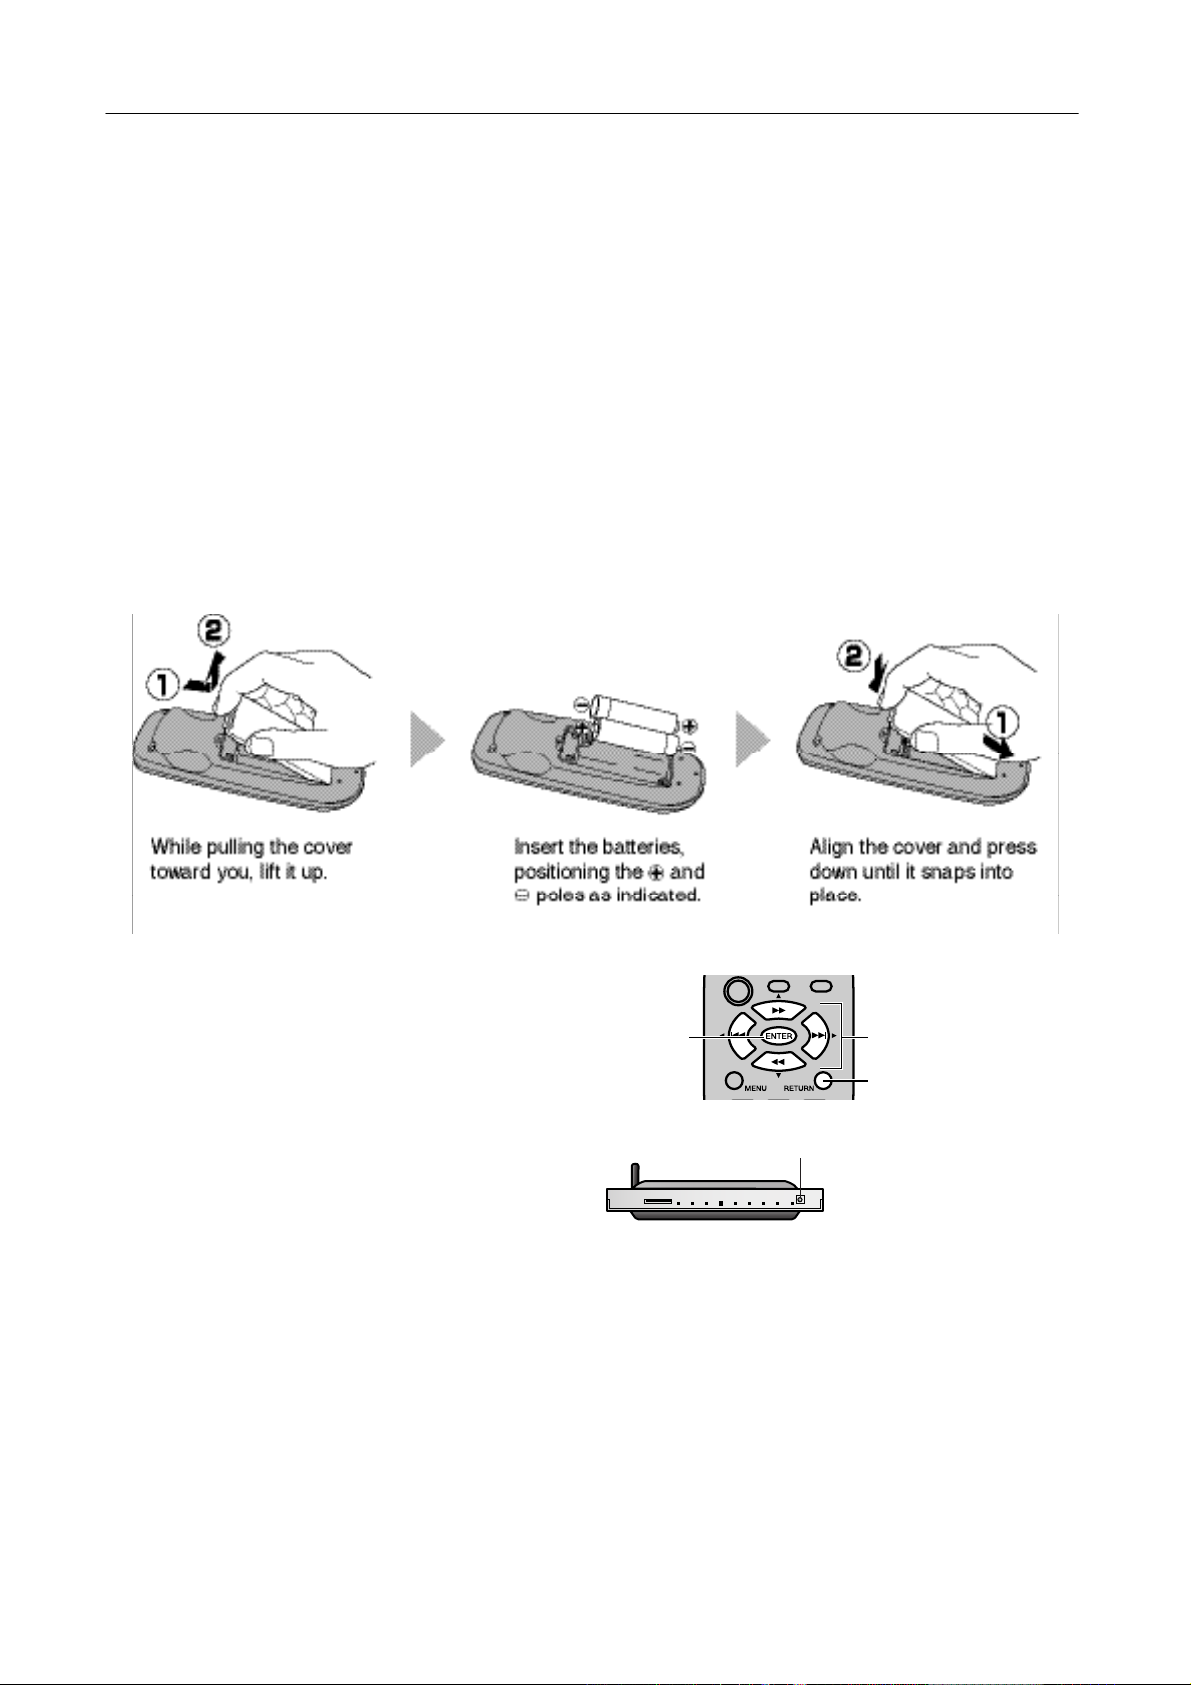
Preparing the Remote Control
The remote control included with the BL-WV10A is required for most operations.
Insert the included batteries as shown below.
Using the Remote Control
The remote control’s navigator keys are used to
navigate through the BL-WV10A’s on-screen menus
and to select on-screen items. The [RETURN] button
is used to return to the previous menu. The [ENTER]
button is used to select a menu item or parameter.
When using the remote control with the BL-WV10A,
make sure you aim the remote control toward the
unit’s remote control sensor.
[ENTER]
Remote control sensor
Navigator keys
[RETURN]
2
Setup Guide
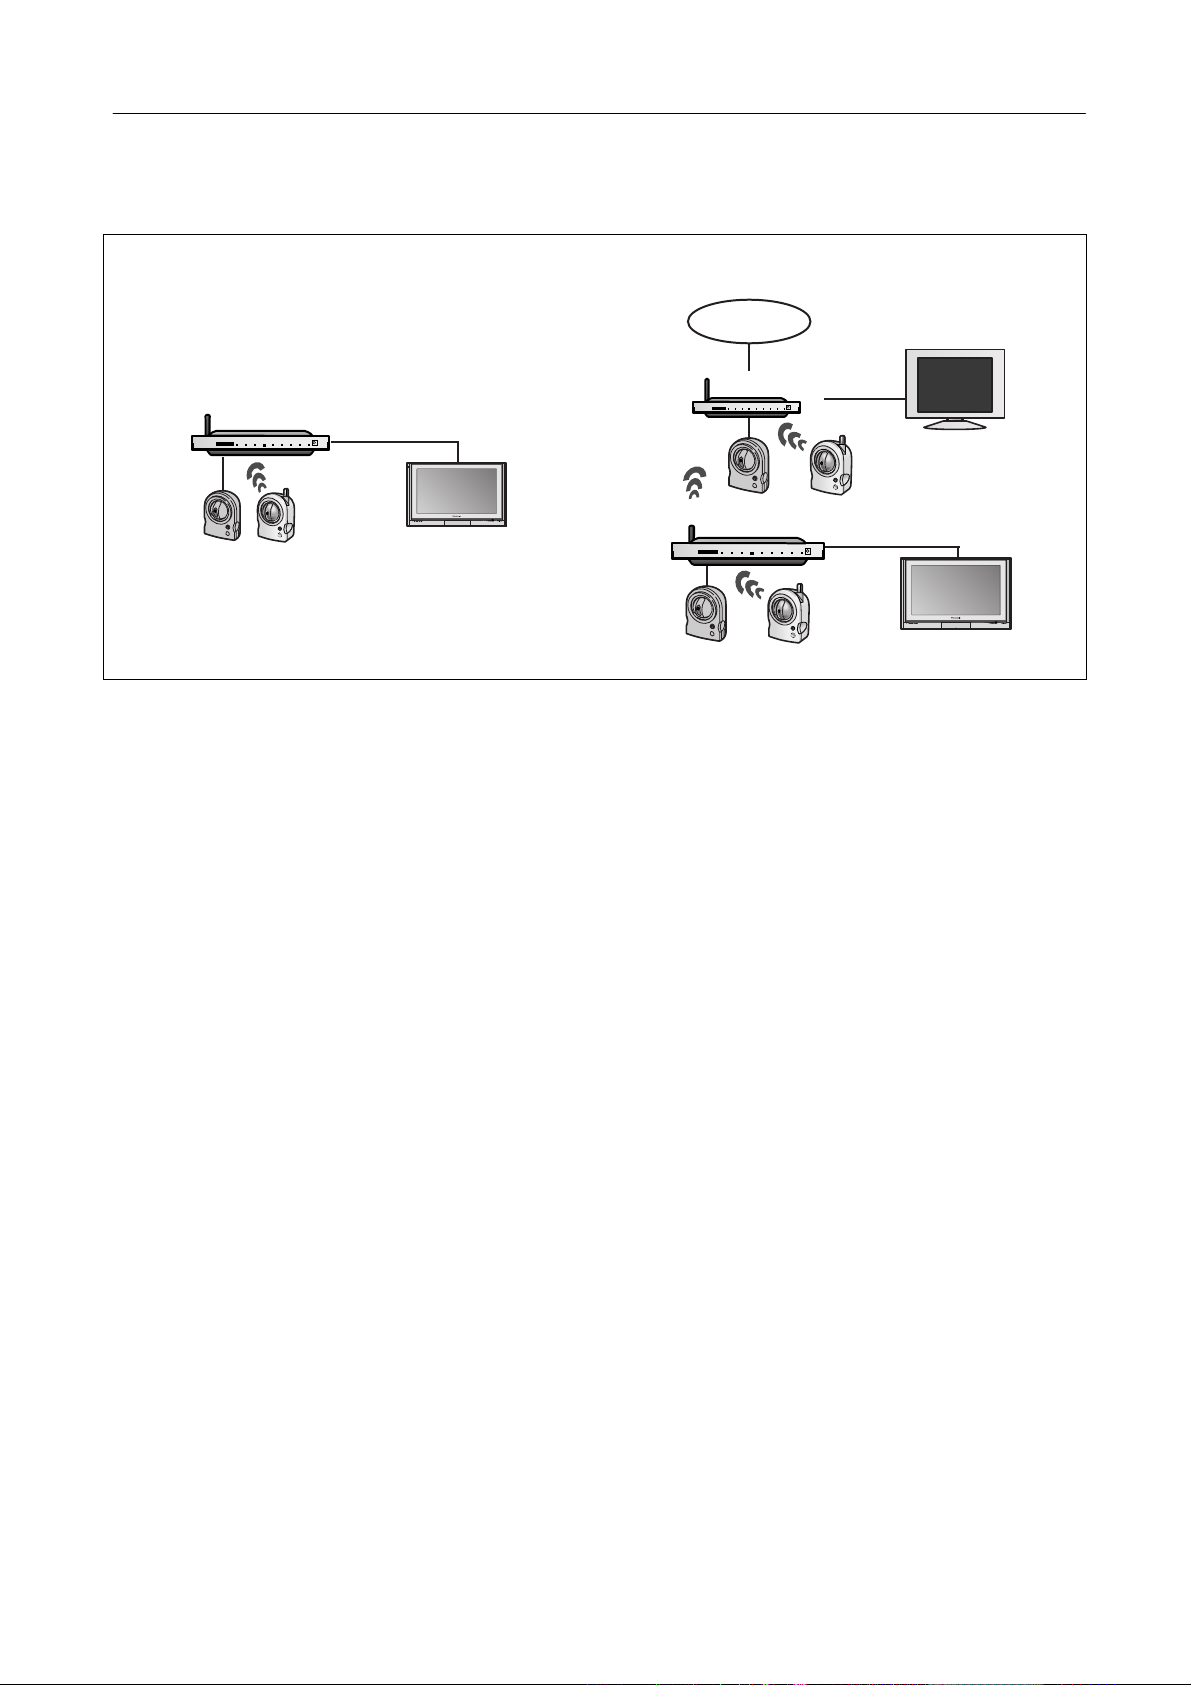
Connecting the BL-WV10A
There are 2 ways to connect your cameras to the BL-WV10A. Determine which method you will use, and refer
to the pages in this manual listed below.
Using the BL-WV10A only. Using an optional BB-HGW700A .
Internet
BL-WV10A
TV
BL-BR30A
BL-WV10A
PC
TV
3

Setup Guide
Using the BL-WV10A Only
Connecting Cameras Using the BL-WV10A Only
1. Connect the BL-WV10A to your TV using the included video cable.
2. Turn the TV on and set the TV’s input switch to the external video input (“VIDEO”, “EXT”, “INPUT 1”, etc.)
3. Set the mode switch on the rear of the BL-WV10A to [SETUP].
4. Connect the DC cord to the AC adaptor and to the power outlet.
5. Turn on the BL-WV10A by connecting the DC cord to the unit.
• The startup screen appears on the TV screen.
6. Use an Ethernet cable to connect the camera to one of the LAN jacks on the BL-WV10A.
• If connecting a BL-C30A, set the camera’s mode switch to [WIRED].
7. Connect the camera to the power outlet.
4

Setup Guide
Basic Setup
After the BL-WV10A starts up for the first time, the [Basic Setup] screen is displayed. For most installations,
these parameters do not need to be changed. For information regarding Basic Setup settings, see page xx in
the Operating Instructions.
1. Use the navigator keys to select [Finished], then press [ENTER].
2. When the dialog is displayed, select [Yes] then press [ENTER] to start Quick Setup.
• The BL-WV10A restarts.
5
 Loading...