

Page 1
Panamorph V250J
Anamorphic Lens System
For JVC Projector models:
Reference Series DLA-RS10/DLA-RS15/DLA-RS20/DLA-RS25
Procision DLA-HD350/DLA-HD550/DLA-HD750/DLA-HD950/DLA-HD990
Summary
The V250J is a high performance customized anamorphic lens system desig ned specifically for
the above ceiling mounted JVC projectors to provide the ultimate in true 2.40:1 cinema
immersive theater environments. It is designed to be very easy to install and is used with
custom JVC projector settings to make home theater projection on a 2.40:1 aspect ratio screen
as plug and play as possible. For optimum performance, please note the following guidance:
Optimum throw distance from screen to projector: 12 - 28 feet (3.5 to 8.5 meters).
Ratio of throw distance to screen width: 1.7 minimum.
Panamorph V250J User Manual and Installation Guide, Version 1.0, copyright November, 2009, all rights reserved.
Page 2

Designed projector mounting configuration: ceiling mounted (i.e. projector feet "up") and
horizontally centered (approximately) on the center of the screen.
Optimum vertical position of the projector: +/- 20% of screen height from the top of the screen.
Design tip: Variations from optimum guidance will typically not cause noticeable effects on
image quality, although a small ratio of throw distance to screen width will likely result in the
image being cut off at the edges (overall, a larger ratio is recommended).
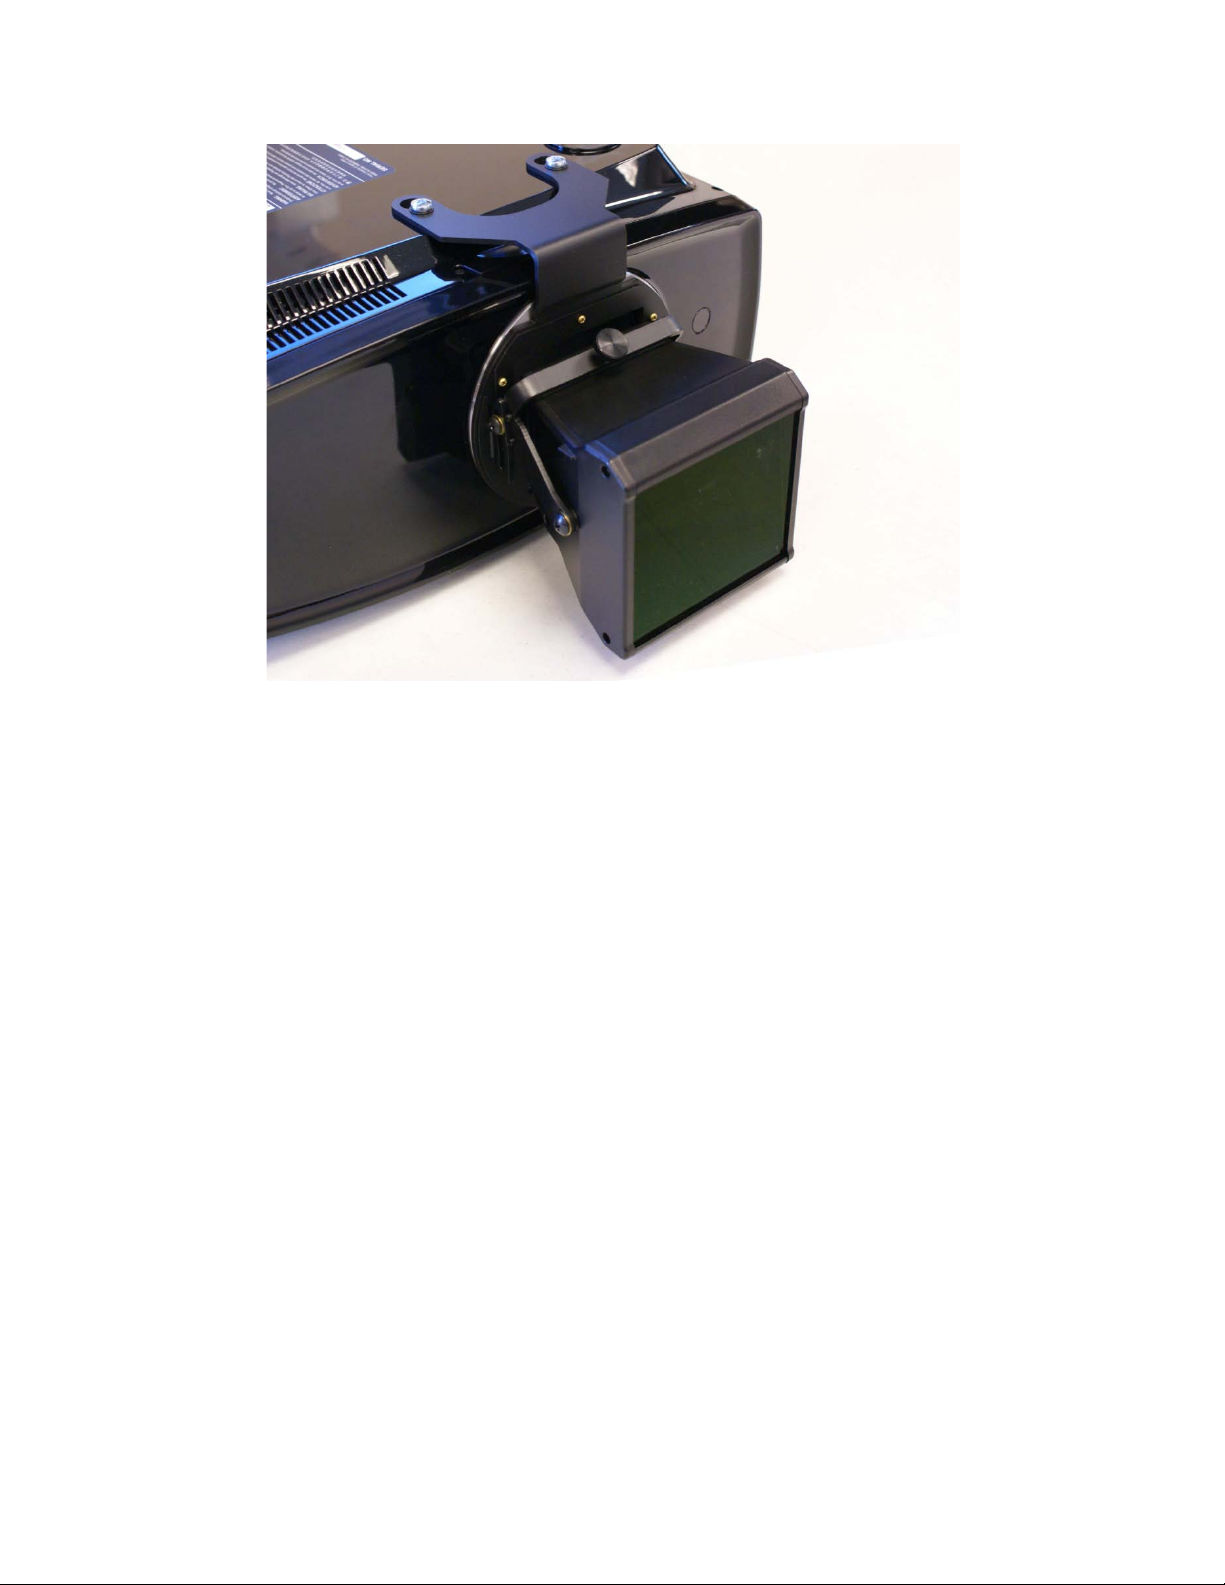
1. Fine Tilt Knob
2. Lens Adjustment Screws
3. Lens Attachment Screw
Installation
1. Before installing the lens, make sure the projector lens is horizontally aligned with the
center line of the screen and that the image is not tilted left to right relative to the top and bottom
of the screen border. Also make sure the projector ceiling mount is secure since the
anamorphic lens system will add mass to the front of the projector.
2. Insert the lens mounting screws into the two holes in the top of the ceiling mounted
projector j ust above the projector lens location. Leave at least 1/8" (3mm) of thread remaining.
This can be done by hand.
3. Make sure t he Fine Tilt knob has approximately the same amount of thread showing on
either side of the lens bracket as shown and the screws holding the V250J lens are reas onably
tight so that the lens does not tilt in its bracket.
4. Install the lens system by placing the slot openings over the mounting screws and sliding
back until the system is flush against the projector's lens housing. Tighten the lens mounting
screws.
5. Turn on the projector. REMOVE THE PROTECTIVE FILM ON THE FRONT OF THE
V250J LENS. Using the remote, select " Lens => Zoom" and adjust the image size to fill the
entire width of screen (the lens may be cutting off part of the image but you will correct this in
step 6). Select "Lens => Focus" and tune in the focus.
Panamorph V250J User Manual and Installation Guide, Version 1.0, copyright November, 2009, all rights reserved.
Page 3

TUNING IN LENS TILT AND SHIFT
This is the core step of the setup so please be patient!
Step 6a Select "Lens => Shift" and move the image vertically so that it appears to be vertically
centered on the screen. The image may still be somewhat cut off by the lens during initial
stages.
Step 6b Loosen the two Lens Adjustment Screws and slide the V250J lens up or down until it
does not block the beam. Note that this will likely move the image vertically off the screen.
Make sure the Lens Adjustment Screws are roughly even in their vertical slot position or the
image will show an irregular geometry from right to left.
Repeat steps 6a and 6b until the image is vertically centered on the screen and the beam is
passing through the center of the V250J lens.
ADVANCED ADJUSTMENT OPTION
It is possible that some residual color separation may exist in the center of the image at the pixel
level. While this will be very difficult to see, it is possible to make further adjustments to totally
eliminate this at the center of the imag e and to minimize it at the top and bottom of t he image.
To do so, it is preferable to have a white grid test pattern on a black background. This test
pattern is not available through the projector so an external source will be necessary such as an
image processor or test pattern DVD. It is also extremely helpful to be familiar with the pixel
offset controls of the projector and to use these controls to begin with the best image possible.
An experienced installer may choose to apply the following steps in combination with the pixel
offset controls for the most flexibility.
7a Loosen the large screws that hold the V250J lens in its bracket so that it is fr ee t o tilt. At this
point it will be supported by the Fine Tilt Adjustment screw.
7b Turn the Fine Tilt Adjustment screw in whichever direction is necessary to minimize any
residual color separation at the center of the image. Note that this will slightly shift the image in
the vertical direction.
7c Use the remote and select "Lens => Shift" to center the image vertically on the screen. If the
amount of shift is significant you may need to loosen the Lens Adjustment screws and slide the
lens vertically to center the beam in the lens (Note: this will bring back a slight bit of color
separation to the center of the image, but less than existed before).
Repeat steps 7b and 7c until the image is vertically centered on the screen and the center of the
image is free of any color separation then tighten the Lens attachment screws.
8. Fine tune the zoom setting to slightly overscan onto the screen border to insure there
are no gaps between the full projector image and the screen. Finish by fine tuning the focus.
Panamorph V250J User Manual and Installation Guide, Version 1.0, copyright November, 2009, all rights reserved.
Page 4

PROJECTOR SETTINGS WHEN USING THE V250J
For 2.35:1 or greater aspect ratio sources:
· From the remote, choose Menu > Input > V-Stretch > On AND Menu > Input >
Aspect=16:9.
For smaller format sources such as 1.85:1, 16:9 or 4:3 aspect ratios
· From the remote, choose Menu > Input > V-Stretch > Off AND Menu > Input >
Aspect=4:3.
CLEANING
In most applications lenses do not need very much cleaning – a bit of dust will not impact image
clarity. However, in today’s high performance home cinemas with very dark rooms a small
build-up of dust or other foreign matter on your projector lens or your Panamorph lens can
produce a measurable reduction in contrast. The most effective cleaning approach is to simply
blow off any dust. If there is any residue or build-up then it is recommended that you clean the
optics with professional lens cleaning supplies such as from a camera store while the lens is in
front of the lit beam of the projector. This will allow you to quickly see both the results of
cleaning and also if you are causing any damage.
LIMITED WARRANTY
Panamorph, Inc. warrants this product to be free of defects in original workmanship and material
for a period of eighteen months from the date of manufacture listed on or inside its shipping
container. During this period, a defective unit may be repaired or replaced, at the discretion of
Panamorph, Inc., by returning it in its original packaging with a copy of your receipt. This
warranty does not cover damage resultant from lack of prudent care, accident or misuse
(including the use of motor systems with lenses or other products in ways not intended), or any
cosmet ic dam age not reported within 15 days of purchase. Damages are limited to the cost of
the product. A service charge may be applied to any returned product requiring cosmetic
attention, or to the repair of any damage not covered under this warranty.
Panamorph, Inc.
1880 Office Club Pointe
Suite 3000
Colorado Springs, CO 80920
719-266-2680
www.panamorph.com
Panamorph V250J User Manual and Installation Guide, Version 1.0, copyright November, 2009, all rights reserved.
 Loading...