

Panamorph CineVista Installation Manual
1"
"
Pic 1
Panamorph CineVista
Anamorphic Lens System
For Ceiling and Shelf/Table Mount Installations
SUMMARY
The CineVista is a high performance anamorphic lens system designed
for both ceiling mounted and shelf mounted projectors to provide the
ultimate in true ultra wide entertainment. It is designed to be very easy to
install and is used with your projector’s aspect modes to display ultra wide
movies and PC games on a 2.35:1 or 2.40:1 aspect ratio screen.
"
"
"
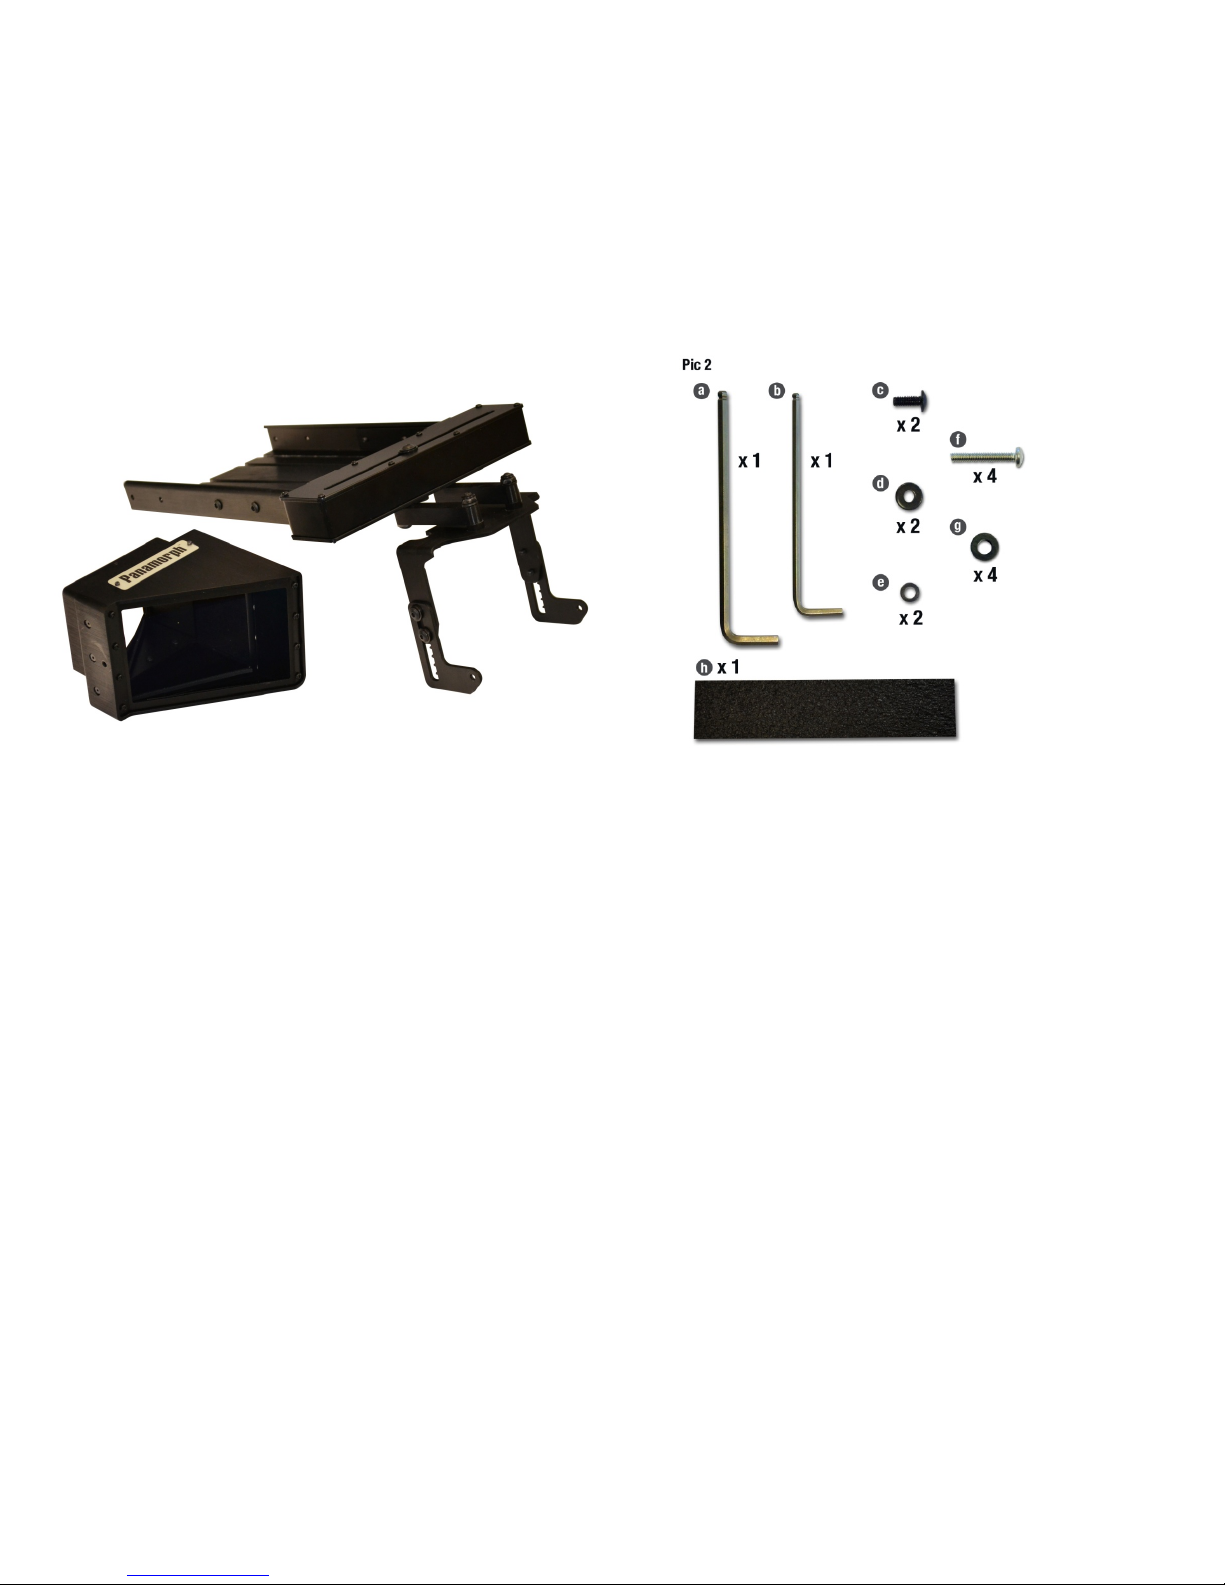
CONTENTS AND HARDWARE LIST:
Pic 1: One CineVista Anamorphic Lens
One CineVista Lens Mount with Lens Bracket attached
Pic 2: a) Qty 1 - 5/32” Gold Hex Key
b) Qty 1- 1/8” Gold Hex Key
c) Qty 2 - #10-32 ½” Black Hex Screw
d) Qty 2 - #10-32 ½” Black Metal Washer
e) Qty 2 - #10-32 ½” Knurled Washer
h) Qty 1 – 9” x 2” x1/2” Foam Spacer
Hardware for Chief SLB installation (bent sides)
f) Qty 4 - 3/8” Plastic Spacer
g) Qty 4 - #10-24 1 ½” Stainless Steel Screw
2"
"
FOR OPTIMUM PERFORMANCE
Range of focal distance from screen to projector: 8 - 18 feet (2.4 to 5.4 meters).
Ratio of projector throw distance to screen height: 2.5 x screen height minimum installation
distance. Optimal installation range of 3 to 3.5 times screen height. It is not recommended
to place your projector further back than a throw ratio of 4.5 times screen height.
Mounting configurations: 1) ceiling mounted (i.e. projector feet "up") and 2) shelf (or table
top) mounted. If shelf mounted, the lens bracket or the lens mount should be attached to the
shelf for stability.
Optimum vertical position of the projector: +/- 20% of screen height from the top or bottom
edge of the screen.
Design tip: Minor variations from these instructions will typically not cause noticeable effects
on image quality. However, a small throw ratio (ratio of throw distance to screen height) will
likely result in the image being cut off at the edges. Overall, a larger ratio is recommended.
EQUIPMENT REQUIREMENTS
• Projector: 16:9 front projector (HD preferred) with required aspect modes. See the
Aspect Mode Chart on page 4 for necessary modes and names. If your projector does
not have the necessary aspect modes, an external video processor including a few Bluray players and A/V receivers have this ability or an external scalar can properly scale
the image instead.
• Projector Ceiling Mount: Chief RPA series projector mounts are recommended either
using the RPAU universal projector attachment or a projector specific SLBxx
attachment bracket. The pictures in this manual use an SLB attachment bracket for
clarity.
• Screen: 2.35:1 or 2.40:1 aspect projection screen
INSTALLING THE CINEVISTA LENS MOUNT
CEILING MOUNT OVERVIEW
• The CineVista Mount and Lens Bracket are shipped pre-assembled to make installation
as simple as possible.
• The CineVista Mount (CV Mount) installs between the top and bottom halves of your
projector’s ceiling mount.
• The only additional piece needed to complete the lens system installation is to attach
the CineVista Lens to the Lens Bracket once the projector and lens mount are both
ceiling mounted.
• Once the CineVista Lens is attached to the CV Mount, final adjustments are made to
center the lens in front of the projector’s lens and fine tune the image on the screen.
INSTALLATION STEPS
1. Perform a standard installation of your projector. For safety, we recommend that two
people be involved whenever the projector is lifted on or off the ceiling mount. If you are
using a Chief SLB bracket and the bracket sides are bent up on the sides, please use
the additional hardware provided (Page 1, Pic 3) for the SLB installation.
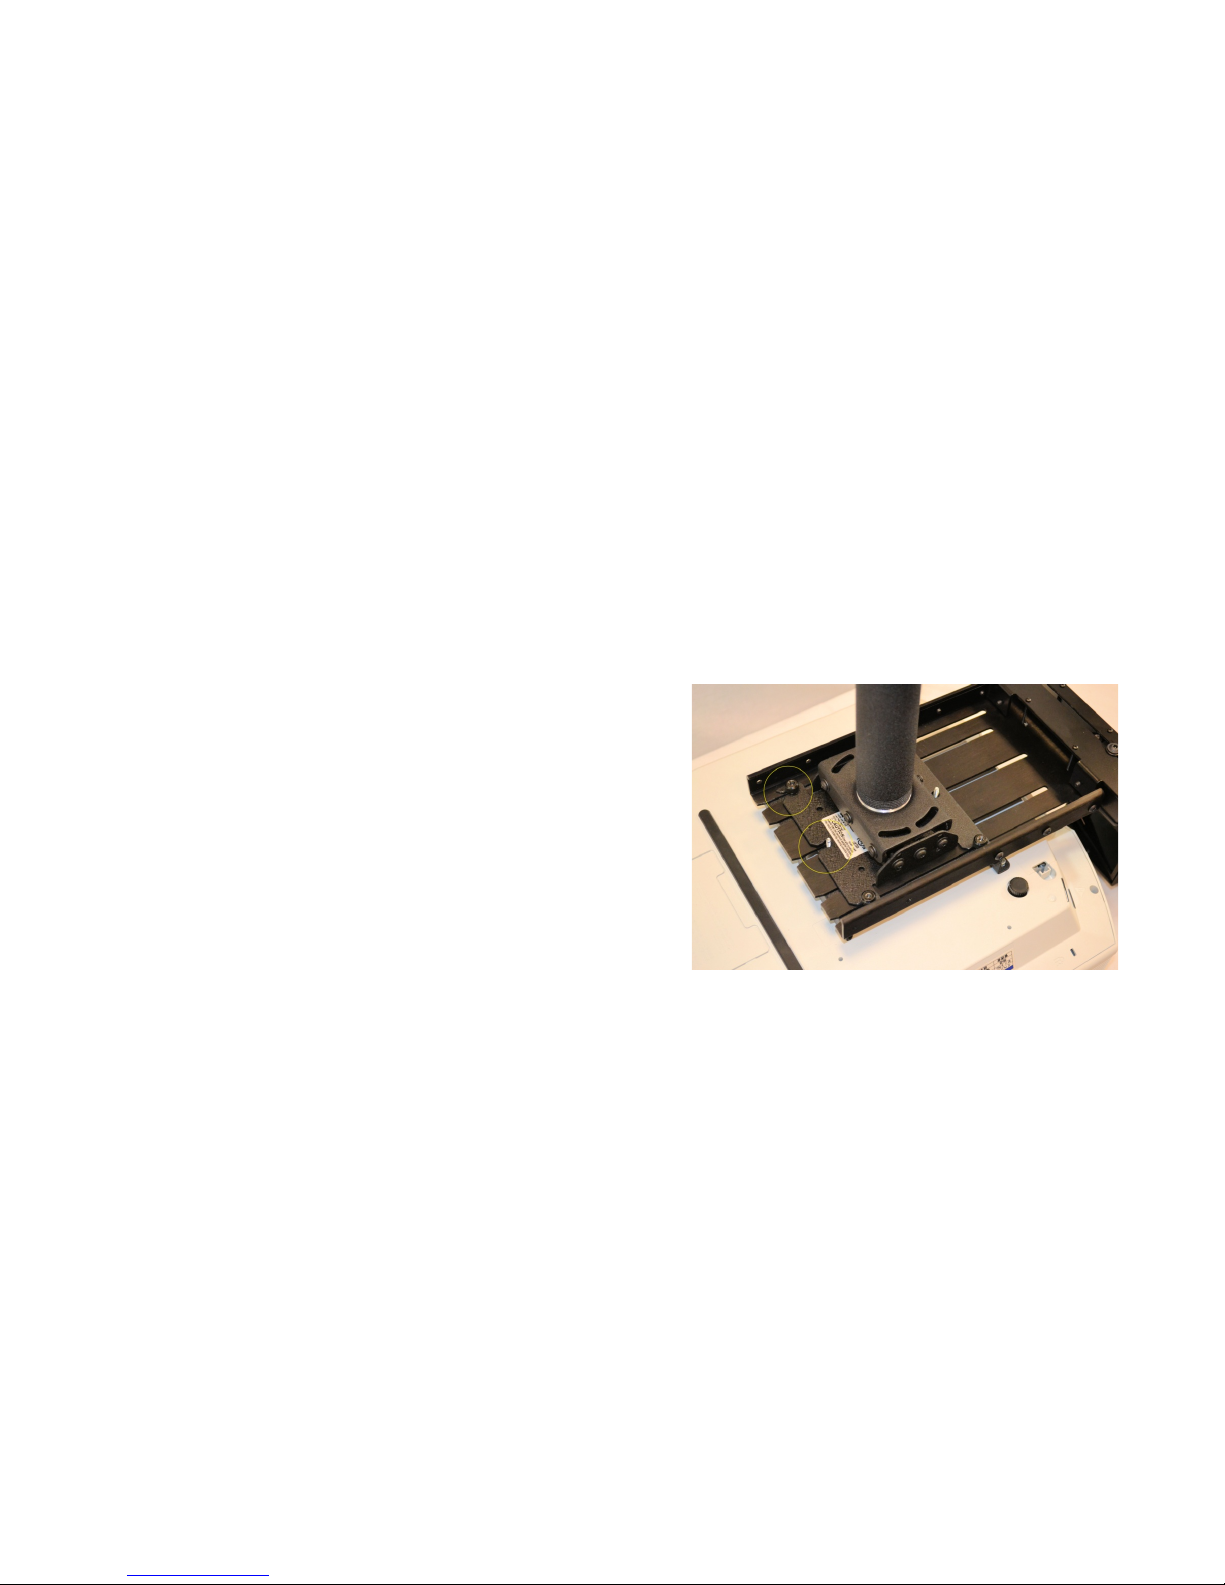
2. It is also recommended that, when installing the Chief mount, that the top half of the
projector mount be oriented such that the locating slots are facing the back of the
projector and pointed away from your projector screen. The image below shows the
correct orientation.
3. Make sure that the projector’s lens is horizontally aligned with the center line of the
screen and that the image is not tilted left to right relative to the top and bottom of the
screen border (key-stoned). Be sure that the projector ceiling mount is properly
installed, since the anamorphic lens system will add weight to the front of the projector.
The CineVista system weight is 11 lbs, which does not include the projector weight.
 Loading...