

Panacom HP-9686 User Manual

HP-9686 User Manual
HP-9686 Manual del Usuario


Pg. 3
HP-9686 WIRELESS HEADPHONE
USER’S MANUAL
Thank you for purchasing Panacom’s Wireless Headphone HP-9686.
Please read the manual carefully before operating.
CAUTION
• Do not place product in moisture or hot environment.
• Avoid splashing water or impact on product.
• Overload operation will cause damage and shorten the life of the product.
• Turn off power source when product is not in use.
• Normally clean the headphone using a soft dry cloth. Always before cleaning, disconnect the power line and all connection cables.
INSTALLATION
Installing the Receiver:
Insert two AAA batteries into the battery compartment according to the
positive (+) and negative (-) polarity
Installing the Emitter:
Insert two AAA batteries into the battery compartment according to the
positive (+) and negative (-) polarity, or insert a power adaptor (not included)
into the power socket of emitter (4.5V DC)
Insert audio plug of the emitter into “Audio OUT” socket of the audio source selected.
Note: replace the batteries if the indicator becomes dim, the receiver reception is
poor or the volume become weak and the sound is distorted.

Pg. 4
PRODUCT FUNCTIONS
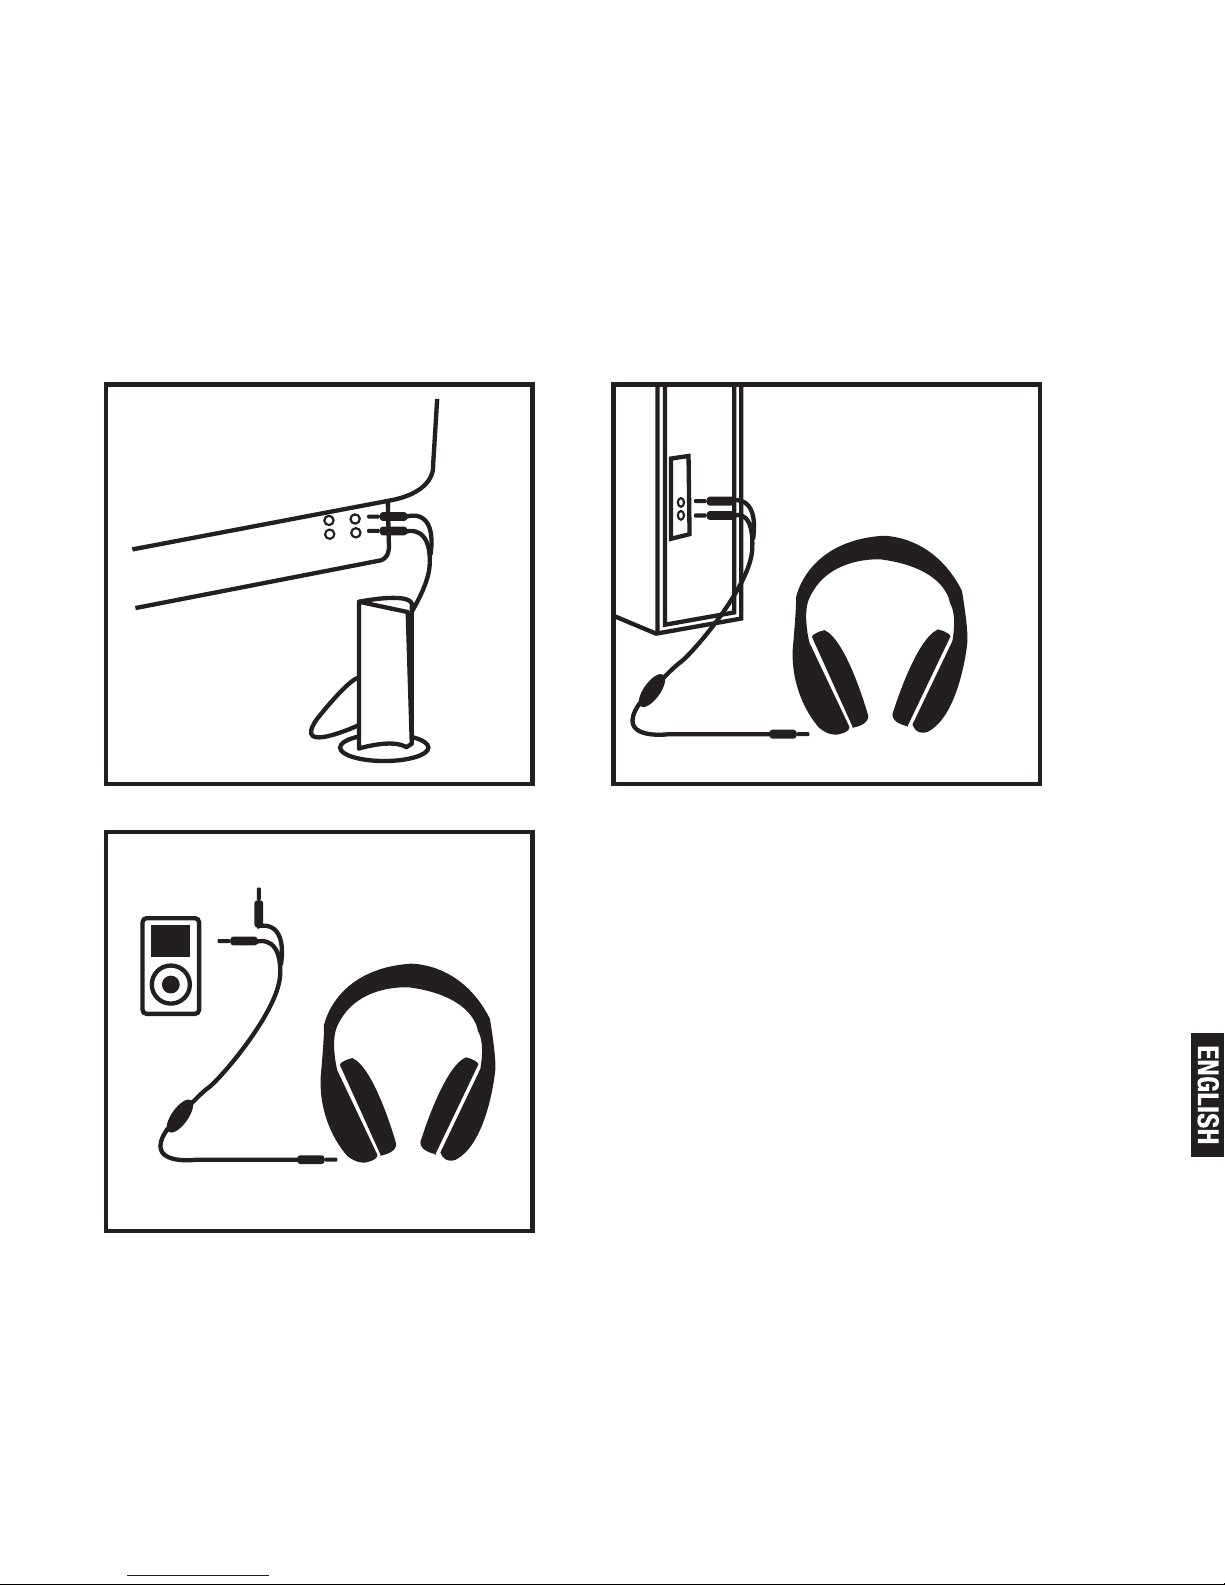
Wireless Headphone
1. Insert the emitter audio cable into the “Audio OUT” socket of the audio
source (see Fig.1) or earphone socket, and turn ON the function switch of
the emitter.
2. Turn on the volume control and power button ON/OFF on receiver, the
indicator will light up. First press the RESET key, and then press the SCAN
key, the sound sent from the emitter will be heard.
Note: If the sound is distorted or too strong, adjust the volume of the sound source
to a lower level, and the reception performance may improve.
Wired PC Headset
Connect the black end of the microphone cable into the audio socket on
the receiver, and insert the other two ends into the microphone and audio
sockets of the PC. (see Fig.2)
Wired Earphone
Insert one end of the audio cable into the audio socket of the receiver (see
Fig.3) and insert the other end into the earphone socket of the audio device,
such as MP3 player, VCD player, DVD player, etc. and then the unit can be
used as a wired earphone.
Turning off the unit
1. When the unit is not used, move the power switch on the emitter to OFF
position to turn it off .
2. Turn the volume control on the receiver to OFF position, it will “click” and
the power indicator of the receiver will light off.
Note: Remove batteries when not using unit for a long time.
Pg. 5
I
N
O
U
T
AU
D
IO
AUDIO OUT SOCKET
CABLE FROM EMITTER
FIG. 1
TV
MIC AND AUDIO OUT SOCKET
FIG. 2
MIC
PC
AUX SOCKET
FIG. 3
MP3
AUX SOCKET
HEADPHONE PLUG
Pg. 6
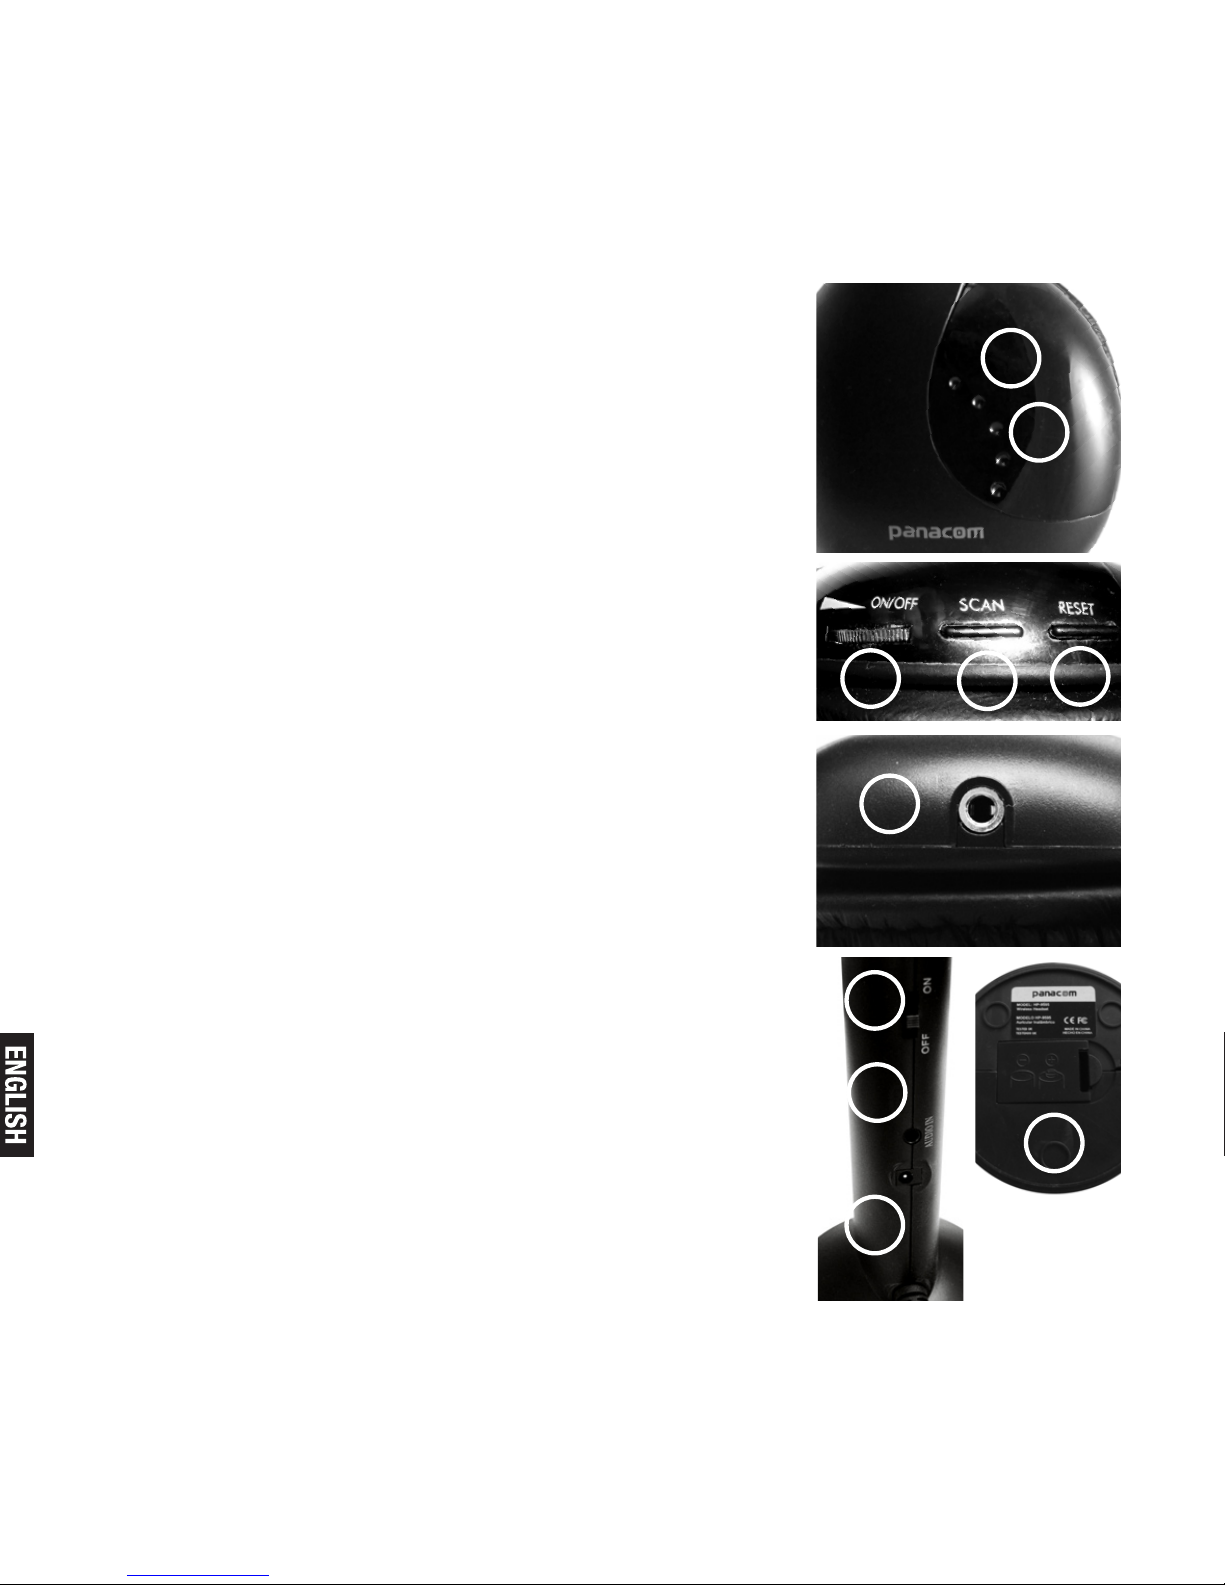
DESCRIPTION OF THE PRODUCT
Receiver
1. Battery Compartment Cover
2. Volume Control and Power Button ON/OFF
3. Scan Key
4. Reset Key
5. Power Indicator
6. Audio Socket
Emitter
7. Power and Function Switch
8. Audio in socket
9. Power Socket (4.5V DC)
10. Battery Compartment Cover
PACKING CONTENTS
Emitter
Headphone (Receiver)
3.5 Audio Cable
Microphone Cable
User’s Manual
1
2
3
4
5
6
8
9
10
7
 Loading...