

Palsonic VCR-2110 EASY GUIDE

EASY GUIDE
VIDEO CASSETTE RECORDER
VCR-2110
Note:
This is a reduced version of the of the full instructuion manual.
If you require more information please obtain the full version.

Equipment Connection
RF connection
To watch a picture from the VCR using this connection, it is necessary to set one of the TV channels as the "Video Channel"
See Preparations in “Video Channel Setting” (on Page 6).
1. Connect the antenna (or CATV) connector to the ANT.
IN socket.
2. Connect the coaxial cable (supplied) between the RF
OUT socket and the TV.
3. If you have a stereo receiver or amplifier, connect them
with an Audio cable (Not supplied).
4. Insert the power cord plug into the AC outlet.
NOTE
If you have tuned the VCR and TV set to different TV channels, you can only use the decoder for one of them.
When both the TV and VCR receive signals simultaneously
with the TV/VCR button switched to the TV mode, signal
interruption occurs.
When signal interruption appears on the TV screen, switch
the TV/VCR button to the VCR mode in order to view the
TV clearly.
AV connection
With this cable connection, many televisions automatically
switch to the “EXT” (external) or “AV” (Audio/Video)
programme number when a video cassette is played back.
You will find instructions for this in the operation manual of
your TV set.
1. Connect the antenna (or CATV) connector to the ANT.
IN socket.
2. Connect the coaxial cable (supplied) between the RF
OUT socket and the TV.
3. Insert the power cord plug into the AC outlet.
4. Connect the TV and the AUDIO/VIDEO socket with the
SCART cable (Not supplied).
1
If your connection is . . . . (see page 5)
.
RF : Start from "Video Channel Setting".
.
AV : Turn on the TV and select the video position
Press the OPERATE button, then start from
"initial Settings" on the next page.
Video Channel Setting
1.
Press the OPERATE button to turn the unit on. Then,
press the MENU button for 3 seconds or more and make
sure that the Multi-display is changed as shown in the
illustration at right.
If your TV receiver does not have a position designed for
Videorecorder use, select a position that is not being used
by a broadcaster, then adjust the tuning on the TV (UHF
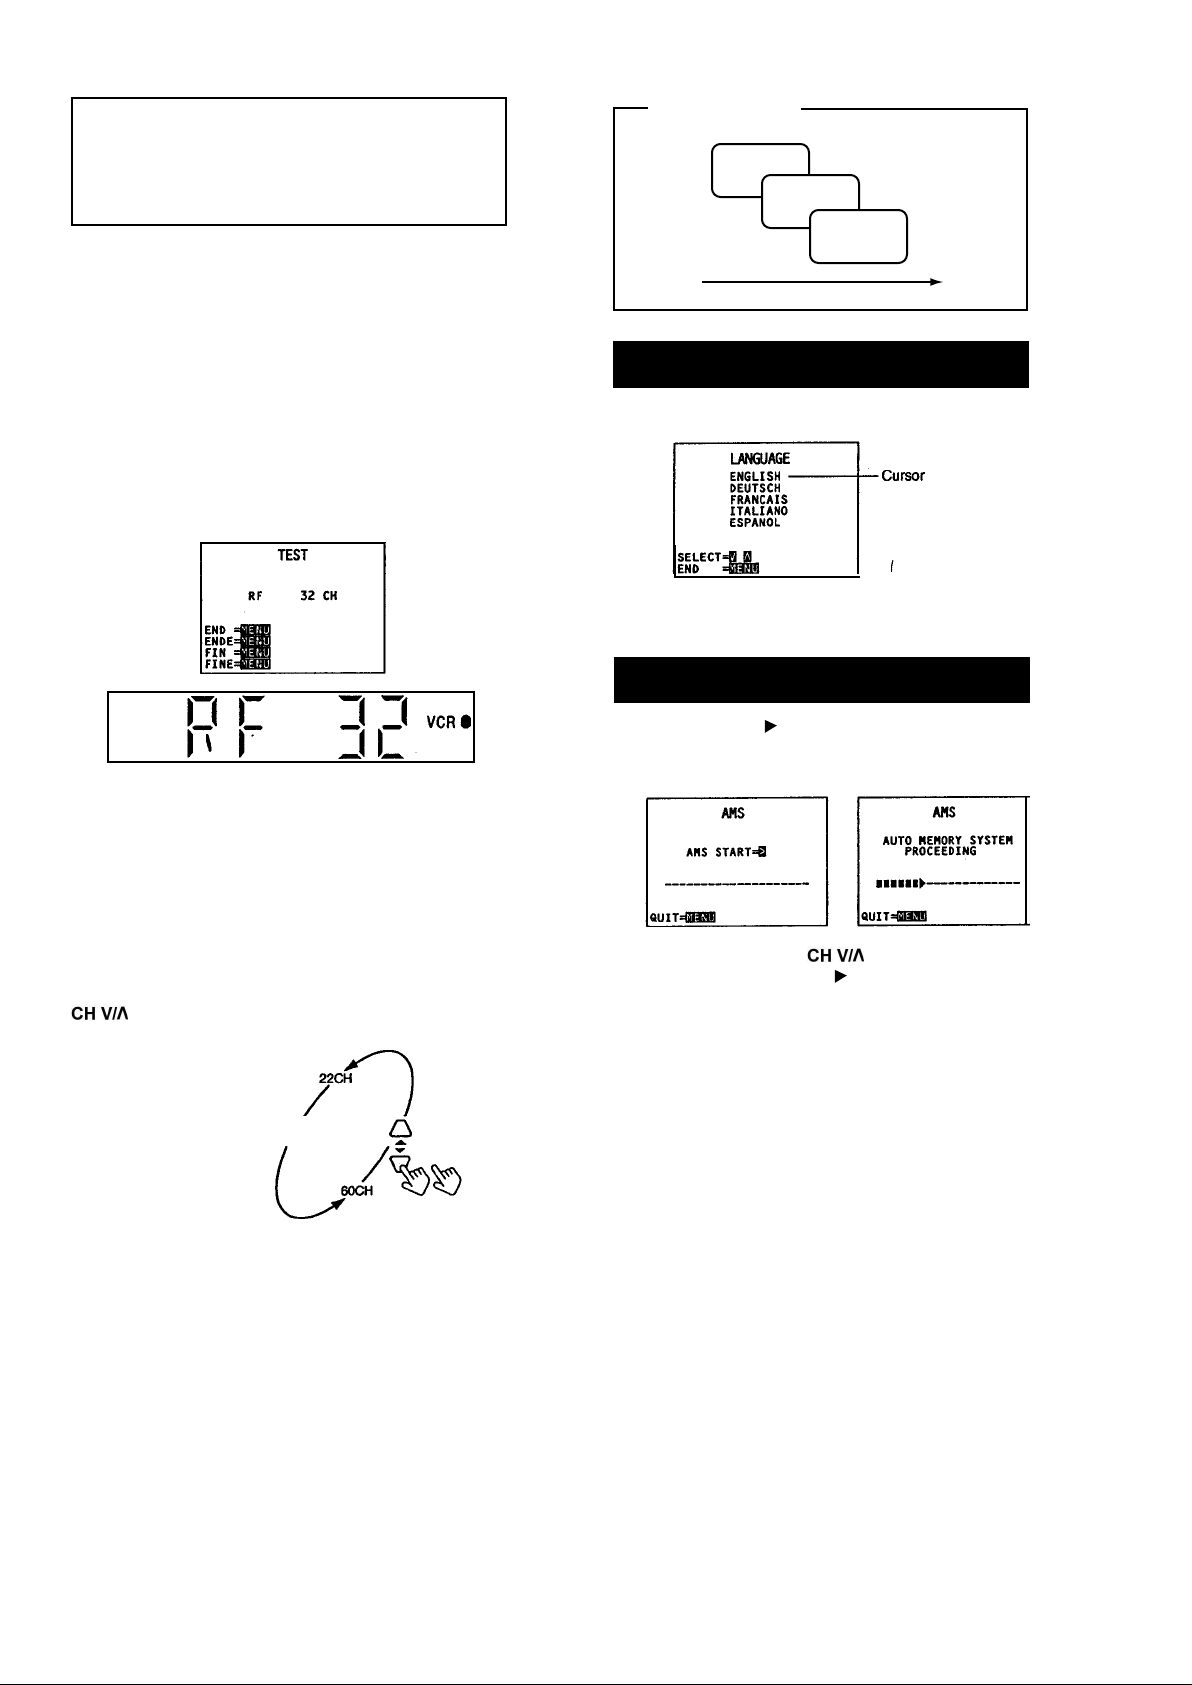
channel 32) so that the TEST screen is clearly displayed.
If you TV has the search function for every position, seek a
channel until TEST screen appears and then store it.
Initial Settings.
1. Language
2. AMS
3. Clock
1. Language Setting
1 . Press the button to select a language.
2. Press the MENU button to set the language and proceed with AMS.
2. AMS
Multi-display
IN THE CASE THAT
.
the TEST screen is not clear and makes noise.
.
you couldn’t find the TEST screen.
It could be that the output channel of the VCR is being used
by a broadcaster in your area. Follow the steps below to set
up the output to a different channel and try tuning your TV
again.
The default setting is RF32CH. Each time you press the
button, the selected channel changes as follows:
Initial Setting
NOTE
To make the TEST screen appear after the Initial settings,
keep pressing the MENU button for 3 seconds or longer
when the clock or the counter is shown on the multi-display.
Press the MENU button again to return to the current screen.
.
When you press the RESET button, it will turn OFF.
RF 32CH
1.
Press the SHIFT button to start AMS.
This automatically stores the channels in memory and
assigns positions.
2. If necessary, press the button to select CLOCK
SET, and press the SHIFT button to proceed to the
next step, clock setting.
! NOTES
.
If the power to the unit is cut off because of a power failure or the plug being unplugged from the socket, the initial settings must be made again. However, the channel
preset memory is retained.
.
If a broadcasting station configured for 32CH is found in
your local area, this machines RF OUT’s may interfere
and prevent normal reception.
In this case, press the MENU button for three seconds or
longer to display the TEST screen. Based on the "Video
Channel Setting" on page 6, move RF OUT to an empty
channel. Then execute AMS.
2.
Make sure the TEST screen is displayed properly, then
proceed to the Initial Settings by pressing the MENU
button.
2
 Loading...