

Palsonic MODEL 6823G Owner's Manual

PALSONIC CORPORATION PTY LTD
1 JOYNTON AVENUE
WATERLOO NSW 2017 AUSTRALIA
TEL:(02)9313 7111
FAX:(02)9313 7555
www.palsonic.com.au
PALSONIC CUSTOMER SERVICE
TELEPHONE
AUSTRALIA:1300 657 888
68CM CORDLESS REMOTE COLOUR TELEVISION
MODEL: 6823G
OWNER'S MANUAL
Type Tested
Electrical
Safety
AS/NZS 3250 Lic 4166
Standards Australia
APP No: N15899

Channel selection.............................................12
Convenient Picture Controls..........................13
Convenient Sound Control and Sleep Time..14
SYSTEM setting..............................................15
Special functions........................................16-17
CLOCK setting................................................18
Channel reservation........................................19
Turning the Power On/Off........................7
Tuning in.....................................................8
CONNECTING OTHER EQUIPMENT
External Equipment Connections.................20
To connect AV input terminals......................20
To connect MONITOR
output terminal...............................................21
OTHERS
Troubleshooting...............................................22
Specifications....................................................22
Remote controller...................................5
Back view.................................................4
Front view................................................4
Battery installation..................................3
Antenna connection.................................3
Cautions for safety..................................2
Features ...................................................1
INTRODUCTION
NOTES FOR OPERATION
INSTALLATION
APPEARANCE
Contents
OPERATION
To preset channels (Auto Search)..................8
To preset channels (Manual Search)..............8
To skip unnecessary position numbers........10
MFT (Manual Fine Tuning).........................10
The setting of colour and sound system.......11
Congratulations on your purchase of this Palsonic colour television receiver.
We recommend that you thoroughly read this manual before use to fully enjoy the many functions
and excellent effects of this receiver.
Retain this manual in an easily accessible location for future reference.
* Screen displays and illustrations in this manual may differ from the actual ones for better visibility.
Introducing the menu..............................6
MENU INSTRUCTION

English/Chinese on-screen menu display
INTRODUCTION
Features
Hyperband
256 preset channels
Intellectualized I C-bus control
Full function remote control
ON Timer, OFF Timer
Four picture modes' setting
AUDIO/VIDEO input & output terminals
S-VIDEO terminal
.
.
.
.
.
.
.
.
.
2
1
Games calendar function
Advanced digital picture improvement circuit
Digital AFT technology
Channel reservation
.
.
.
.
NOTES FOR OPERATION
Do not let the TV set be in stand-by condition for a long period of time. When it is not in use, please
turn off the power supply and remove the power plug. When it is to be left unattended for
a prolonged period of time, it is recommended to disconnect the connection to the outdoor aerial, to
avoid thunder strike.
Please follow cautions for safety in the TV set instructions, and all warnings and descriptions denoted
on the TV set.
Note: This TV set can be operated on an AC power of 240V, 50Hz. You should not use power
supply of the other type.
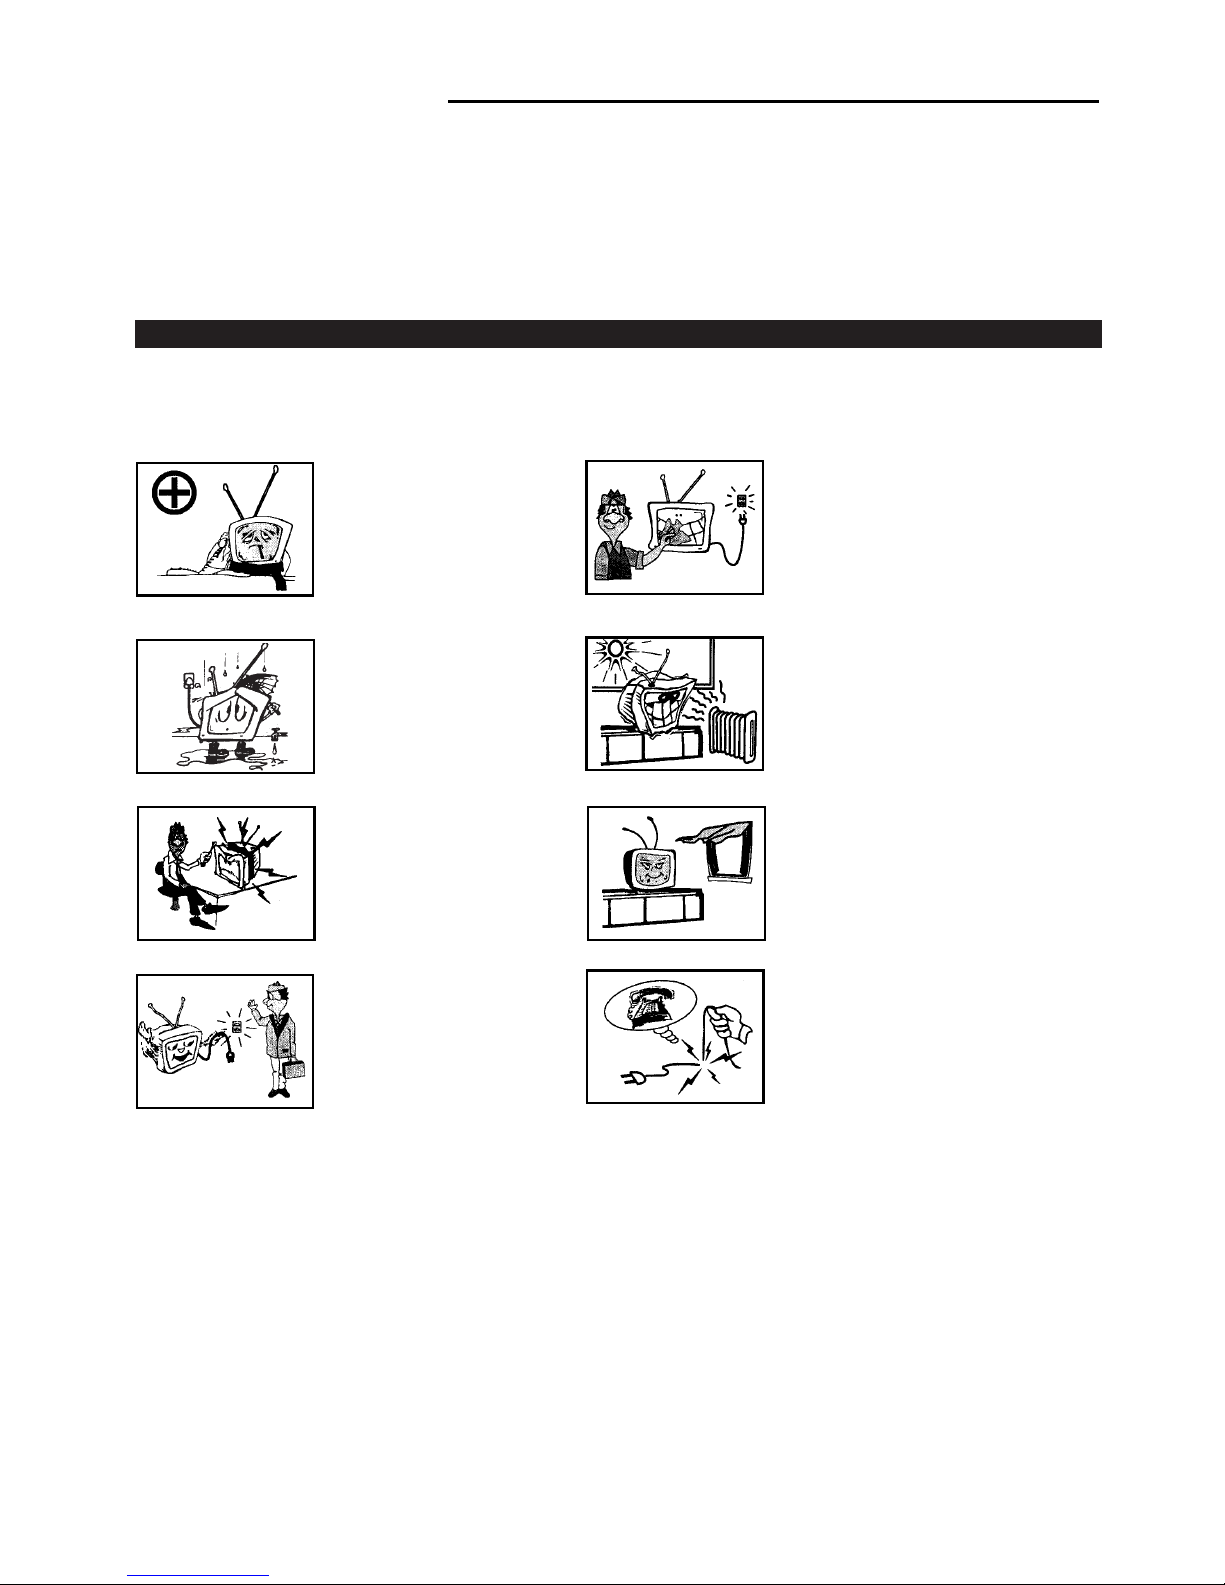
When an unusual situation
occurs, turn off the power
switch at once and remove the
plug from the wall outlet.
Contact a qualified service
department in your local area.
Do not expose the TV set to
rain or excessive moisture, to
prevent tire disaster or
electric shock. Avoid using
the set in very warm or damp
places. Never use it in a
bathroom.
There exists High Voltage in
this TV set. Do not remove
the cover to avoid danger.
The TV set should be placed
on an adequate place without
exposing it to direct sunlight
and other sources of heat to
prevent the deformation of the
cabinet or damage to components.
When the TV set is to be left
unattended, please turn off the
power switch and remove the
plug from the wall outlet.
In order to wipe dust off the
picture tube or off the cabinet,
you should remove the power
plug from the wall outlet first.
You can wipe lightly with a
piece of dry, clean, soft cloth.
Do not cover the Ventilating
holes in the cabinet. Keep a
space of more than 5cm from
the walls to the TV set, to
guarantee the good ventilation.
When the power cord or the
plug is damaged, please
contact a qualified service
department to get service.
Cautions for safety
2
*
*

Effective range of the remote
control operation
Antenna Connection
(1) Remove the back battery cover.
Installation
To ensure a bright-coloured and clear picture, you should use an outdoor aerial or CATV cable. If
the signals are strong enough, you may use an indoor aerial.
Note: In case of using the
Twin-lead aerial feeder (300 )
for UHF/VHF aerial, use a 300-75
ohm adaptor (not supplied)
When using the coaxial cable (not
supplied) (75 ) for UHF/VHF
aerial, connect the plug into the
75 ohm aerial socket directly.
Note:
When you connect the outdoor aerial cable to the aerial terminal on the TV set, please turn off the
power switch on the TV while connecting the antenna lead.
In thunder and lightning weather, please disconnect the outdoor aerial to avoid thunder/lightning
strike.
(2) Insert two size AAA batteries according to
the polarity indication inside the remote
controller.
3
Notes:
When the remote controller is not used for
an extended period of time or the batteries
are worn out, please remove the batteries in
time to avoid battery leakage.
Avoid moisture and mechanical shock to
the remote controller.
Do not drop, dampen or disassemble the
remote controller.
Battery installation
1.
2.
3.
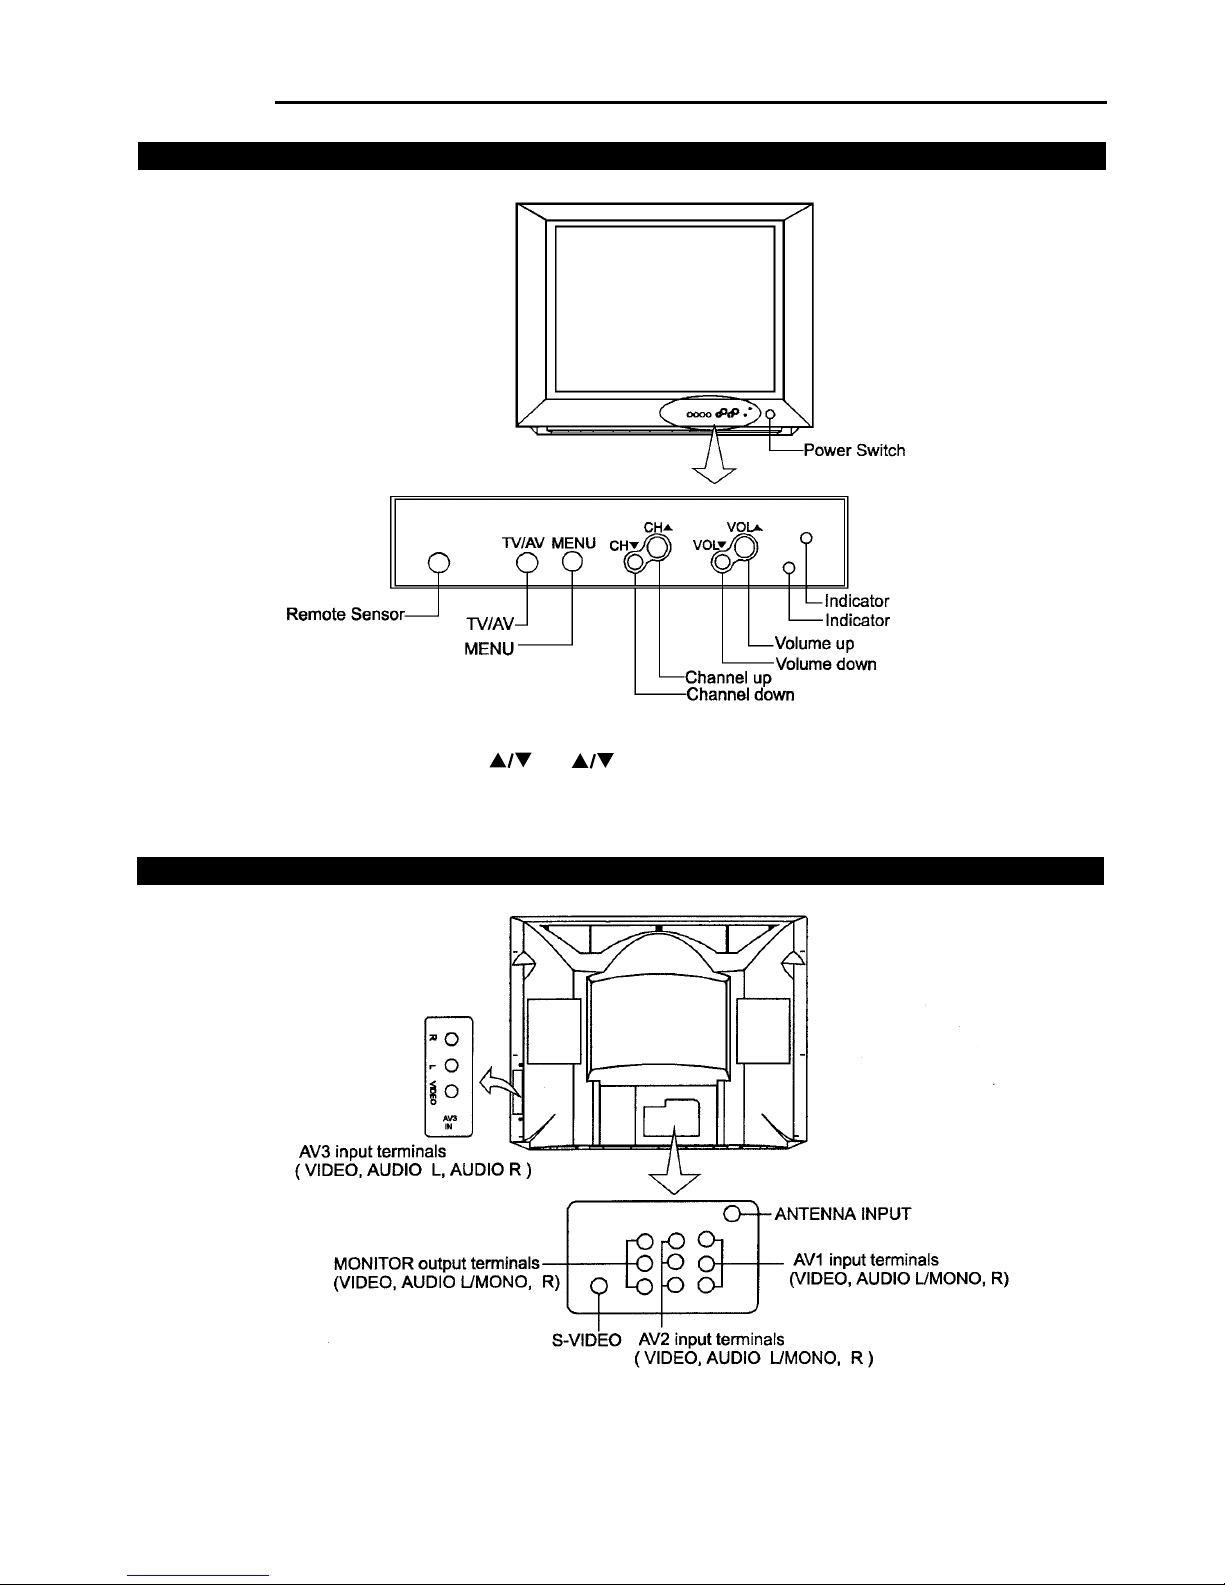
Back View
Front view
Note: Functions of MENU, TV/AV, VOL , CH are also provided to the remote
controller.
4
Appearance
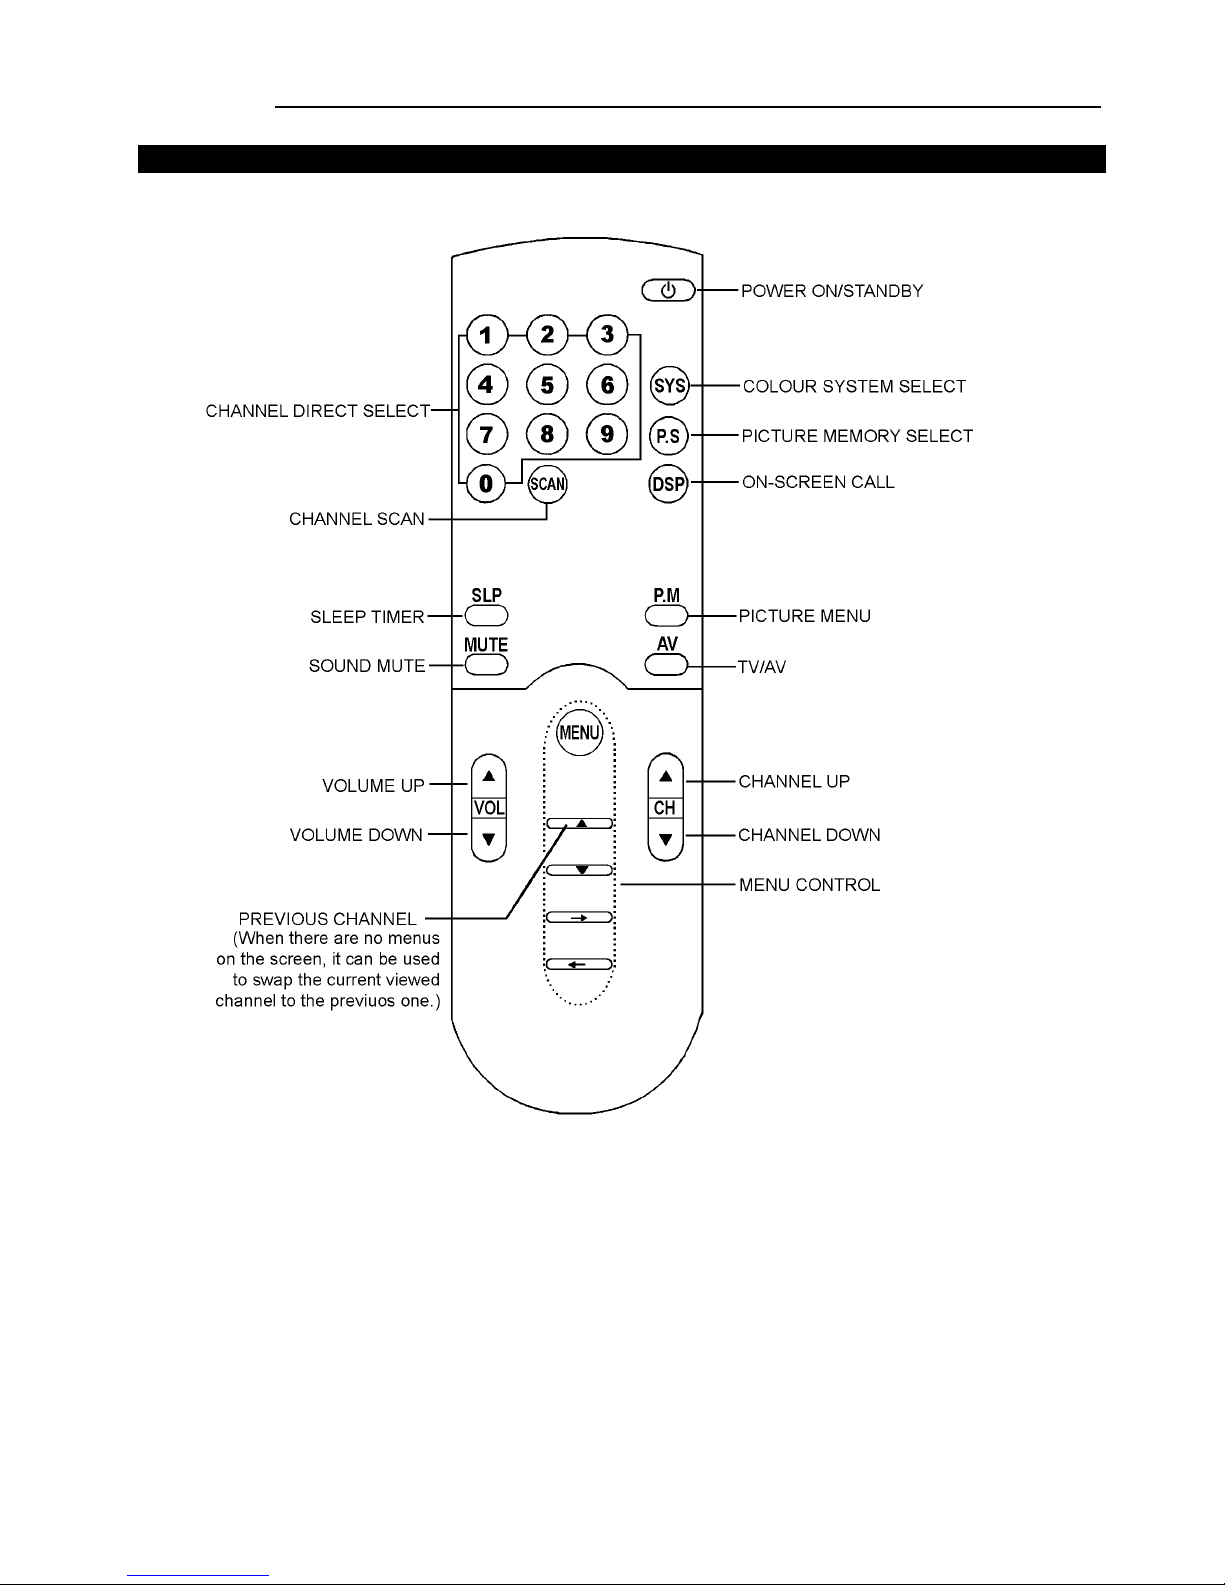
Remote Controller
Appearance
5

POSITION
BAND
SKIP
SEARCH
MFT
AUTO MEMORY
008
VHFL
OFF
76
75
100
50
COLOR
BRIGHT
CONT
SHARP
CALENDAR
GAME 1
GAME 2
Introducing the menu
You can use the on-screen menus to set the picture quality and other settings. You can use buttons on
both the remote controller and the TV to operate the menus.
Normal Screen
Press MENU button
Notes:
To select each item, use the or
button.
To adjust or set each item, use the
or button
NOW TIME
ON TIME
OFF TIME
ON CHANNEL
TIME ADJ
18.3018
OFF
OFF
-
0M
Menu Introduction
Press MENU button
Press MENU button
Press MENU button
Press MENU button
Press MENU button
Press MENU button
6
SELECT: SET:
SELECT: SET:
SELECT: SET:
SELECT: SET:
SELECT: SET:
TIME
CHANNEL
OFF
-
LANGUAGE
C.SYSTEM
S.SYSTEM
B.B SET
ENG/
AUTO
BG
ON
 Loading...