

Page 1

OWNER'S MANUAL
61CM CORDLESS REMOTE COLOUR TELEVISION
MODEL: 6138
PALSONIC CORPORATION PTY LTD
1 JOYNTON AVENUE
WATERLOO NSW 2017 AUSTRALIA
TEL:(02)9313 7111
FAX:(02)9313 7555
www.palsonic.com.au
PALSONIC CUSTOMER SERVICE
TELEPHONE
AUSTRALIA:1300 657 888
Page 2
This equipment has been designed and manufactured to meet the highest international
standards, but, like any electrical apparatus which is operated at mains voltage, care must be
taken if you are to obtain the best results and safety is to be assured. This is particularly
important with audio and TV equipment.
DO
DO
DO
DO
DON'T
Remember that to obtain the best performance and lasting satisfaction from your
equipment: have it regularly maintained by a reliable service organisation: ensure that it is correctly
used by all the family.
read this handbook carefully and keep it handy for ready reference.
ensure that all electrical connections (including the mains plug, extension leads and
interconnections between pieces of equipment) are properly made and in accordance
with the manufacturer’s instructions. Check that the mains fuse rating is correct.
always call in your dealer if you are ever in doubt about the installation, operation or
safety of your equipment, he is the best person to advise you.
unplug the power cord if the appliance is left unused.
obstruct the necessary all round ventilation: especially DON'T stand the set close to
curtains or on soft furnishing such as carpet. Overheating can cause unnecessary
damage and shorten the life of the set.
ABOVE ALL:-
.
Never let children push anything into holes or slots in the cabinet - this could result in an
electric shock.
.
Never guess or take chances with electrical equipment of any kind - it is better to be safe than
sorry.
WARNING:
.
To prevent fire or shock hazard do not expose this appliance to rain or moisture.
No user serviceable parts inside. Refer servicing to qualified service personnel. Never
.
remove covers unless qualified to do so; this unit contains dangerous voltages.
LOCATION:
.
LOCATE appliance in the room where direct light does not strike the screen.
.
ALLOW adequate space between the appliance and the wall to permit proper ventilation.
.
AVOID excessive warm and dusty location to prevent possible damage to the cabinet and
component failure.
.
NEVER install the appliance in a strong magnetic field.
.
CONNECT the appliance to AC 120-240 Volts, 50/60Hz.
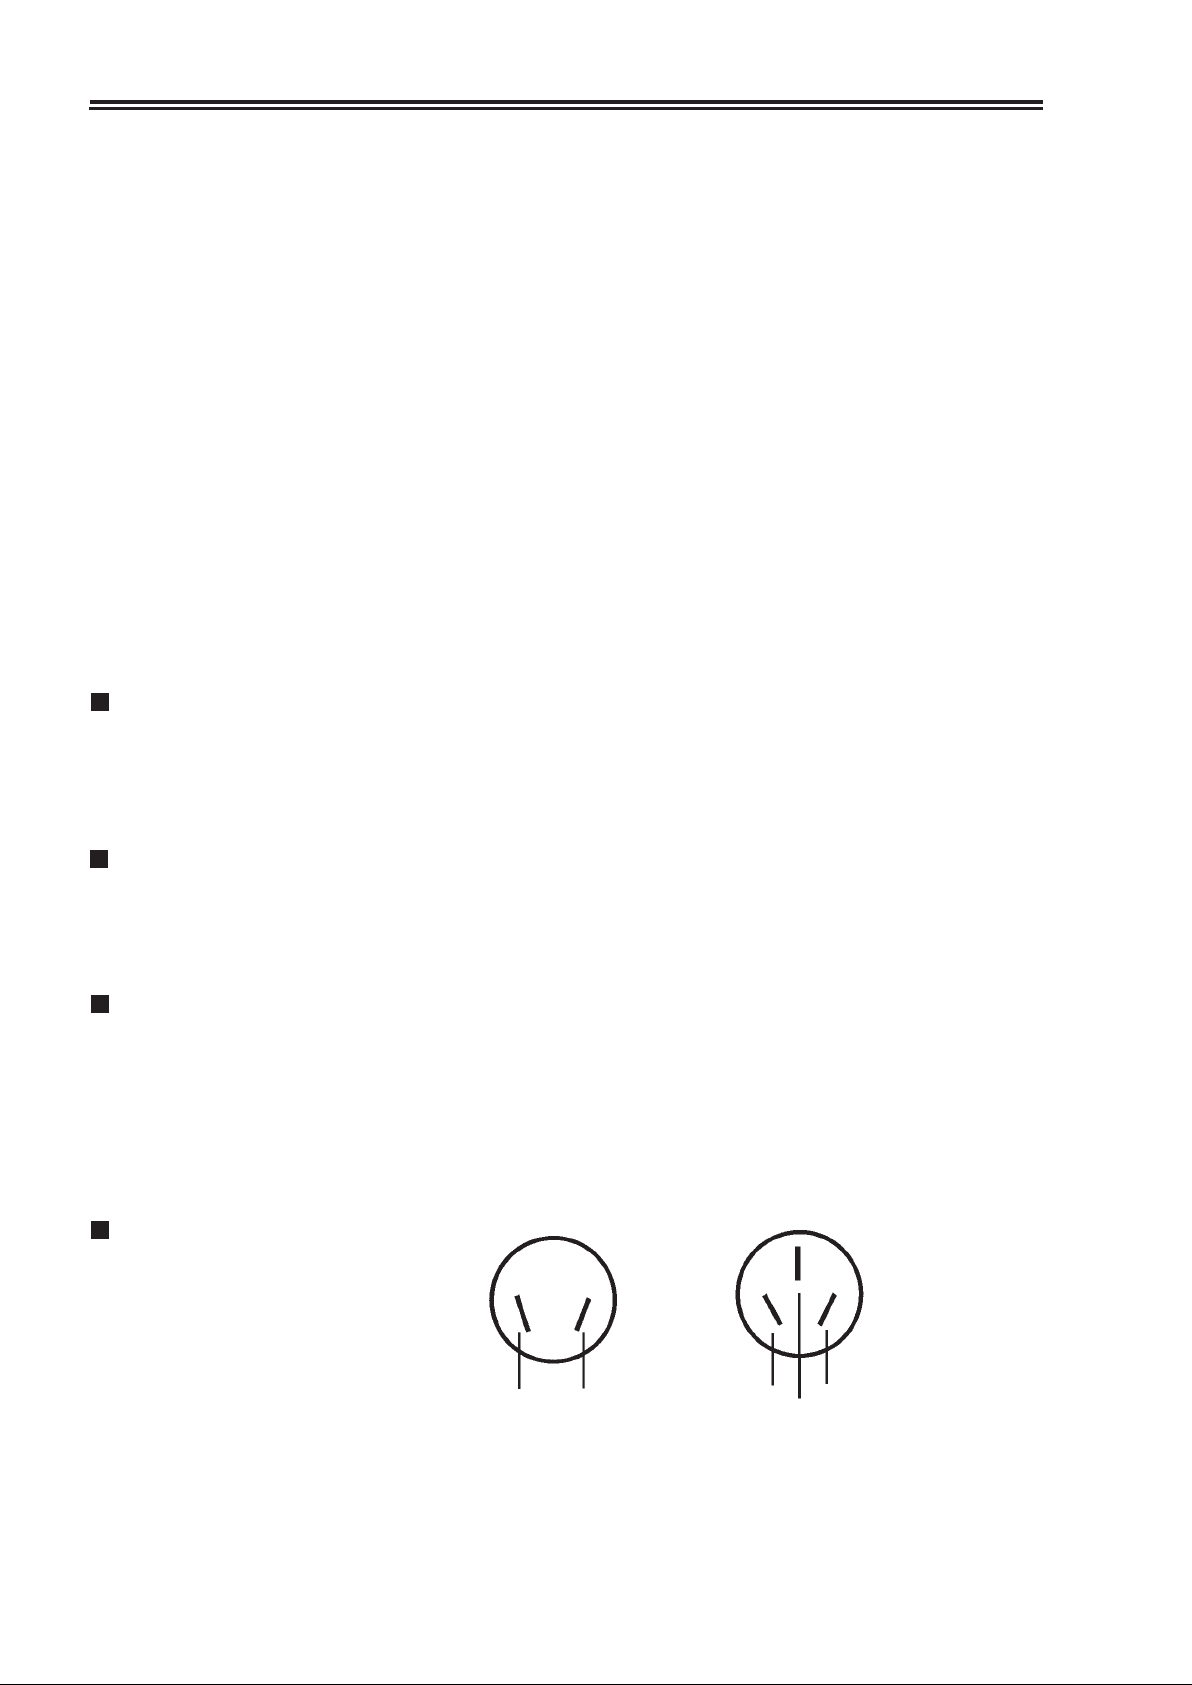
MAINS (AC) OPERATION
The wires in this mains lead are coloured
in accordance with the following code:
PHASE
(LIVE)
NEUTRAL
PHASE
(LIVE)
EARTH
(OPTION)
NEUTRAL
1
Page 3
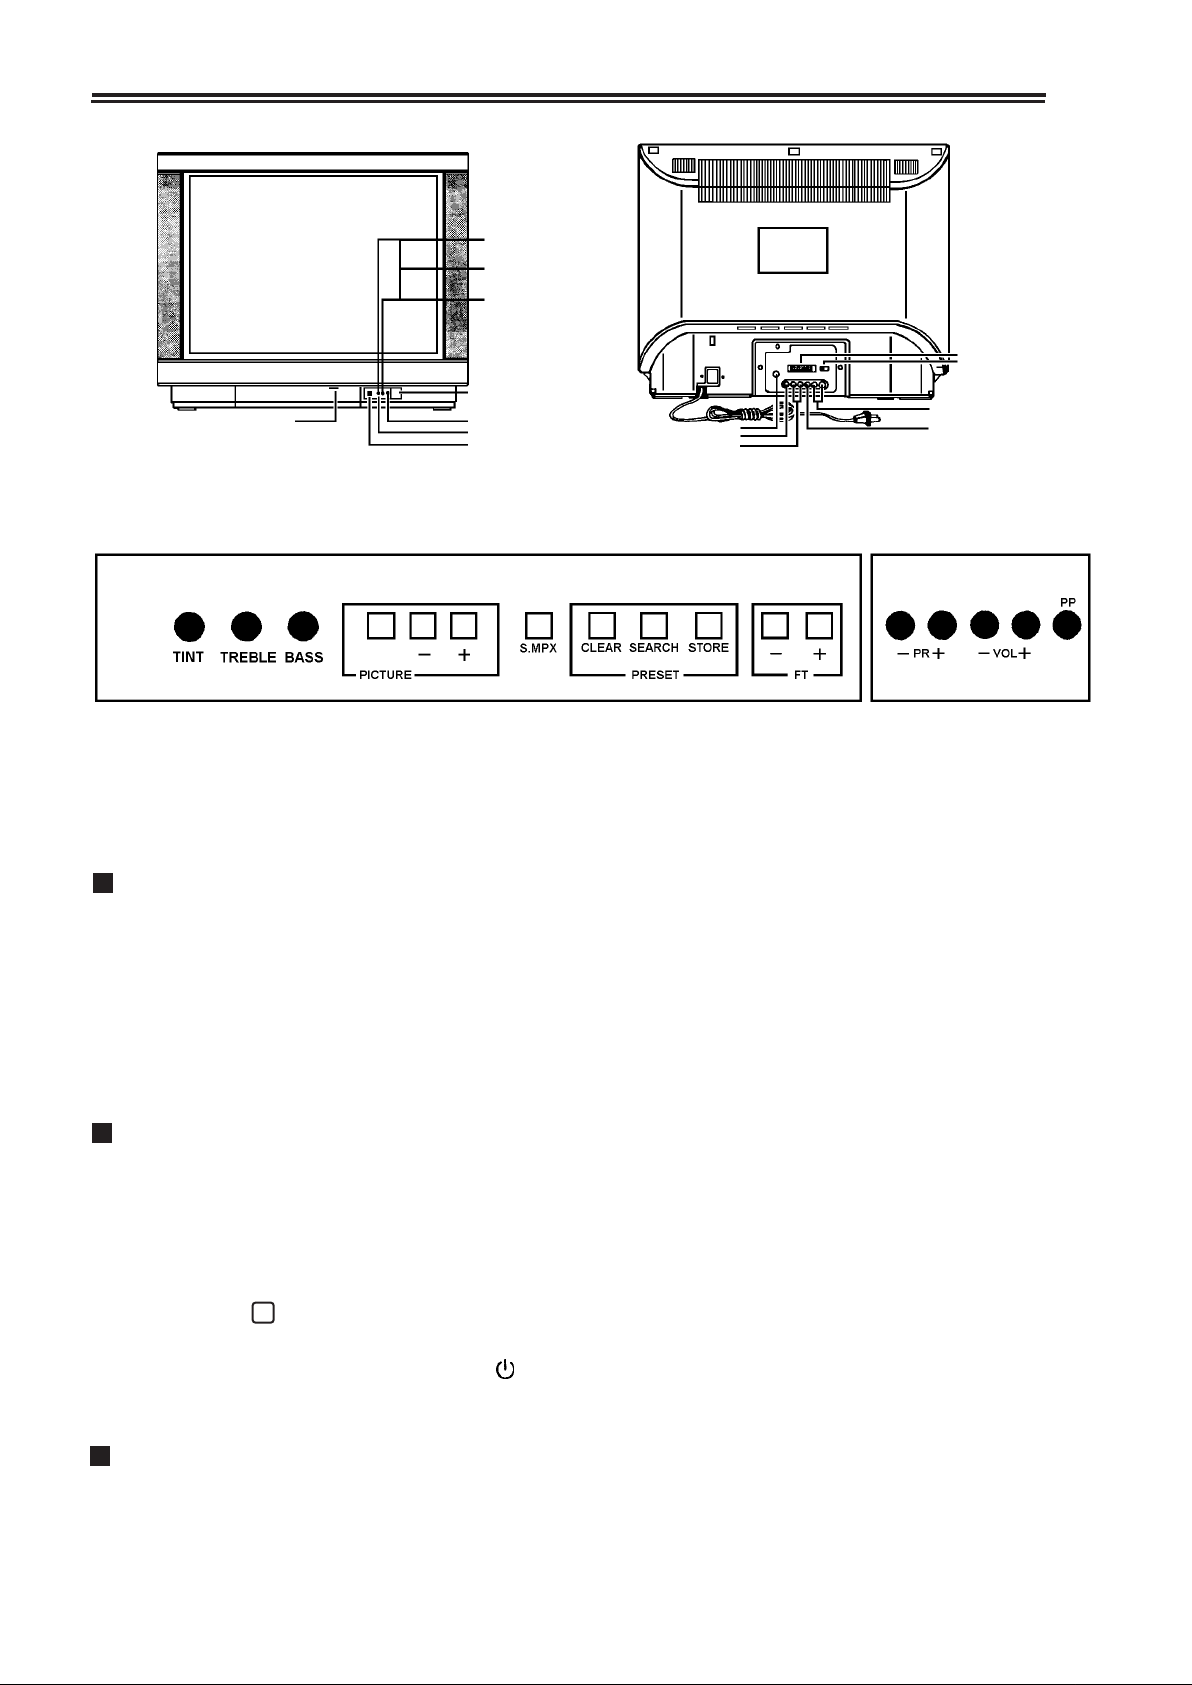
PUSH OPEN
SOUND II INDICATOR
STEREO INDICATOR
SOUND I INDICATOR
POWER SWITCH
POWER INDICATOR
STAND BY INDICATOR
INFRARED SENSOR
ANTENNA INPUT
VIDEO INPUT
AUDIO INPUT
EXTERNAL SPEAKERS
EX./IN SPEAKER SWITCH
AUDIO OUTPUT
VIDEO OUTPUT
OPERATING INSTRUCTION:
POWER ON/OFF SWITCH
.
Press the Power Switch, the appliance will be in "STANDBY" mode. A red light shows on
the control panel. Press "PR-/+" buttons to turn on the set. The red light goes out, and
a green light, shows on the control panel.
.
If there is no TV signal on the screen for five minutes, the TV set switches to STANDBY
automatically. The red light is on.
.
Pressing the Power Switch again disconnects the set’s power. The light goes out.
STANDBY:
In STANDBY the set takes power to run the remote control circuitry, but the main power
is disconnected. The Red light is on.
1. Pressing any of these buttons will bring the set out of STANDBY and turn it on.
(1) Position Selector PR(-/+) on the remote control or the front panel will recall the
previous setting.
(2) RECALL will recall the previous setting before the set was turned off.
(3) Digital Numbers 0 ~ 9 will switch the set to whichever number is pressed.
2. To put the set into STANDBY press the ( ) button on the Remote Control
unit. This only turns it OFF, it will not turn it ON.
+
CHANNEL SELECTION:
This set is pretuned to Australian channels 2, 7, 9, 10 & 28 on those numbers. If you
wish to change the settings or add more channels, the method is quite straightforward.
2
Page 4
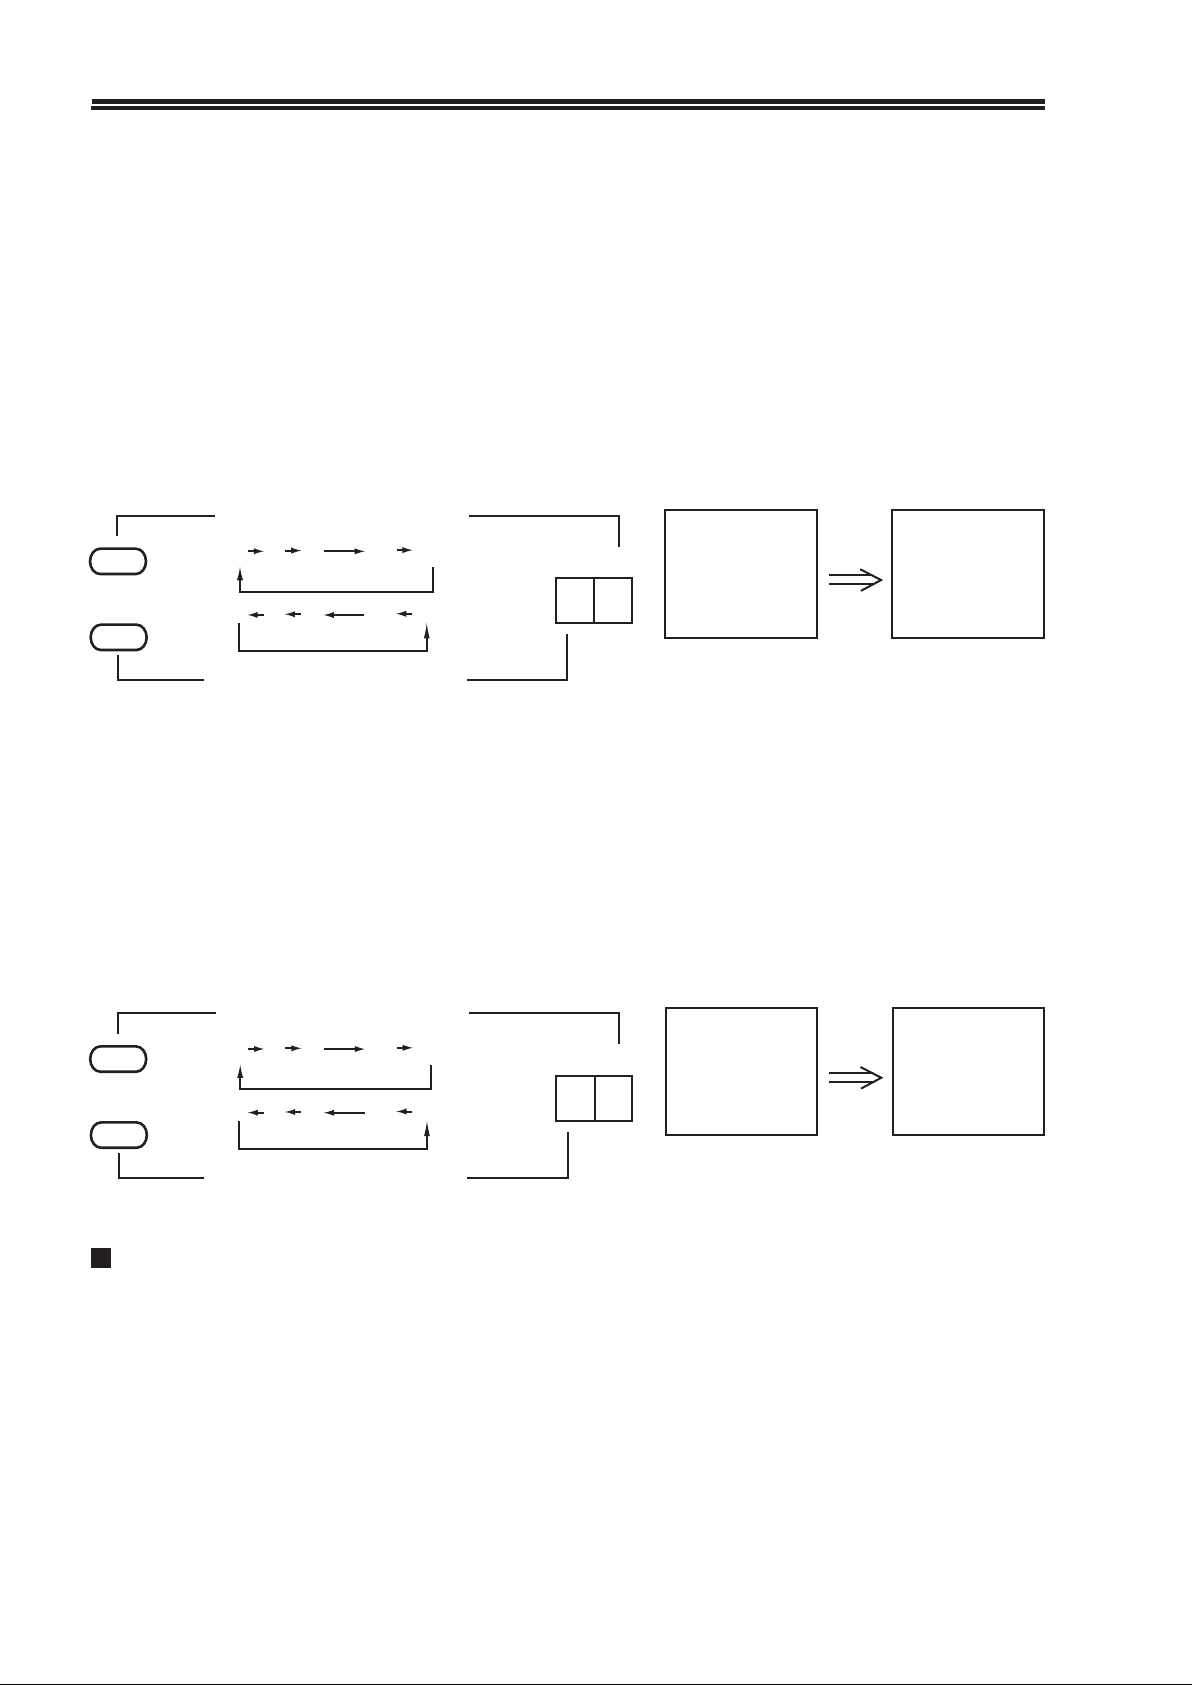
There are two ways to choose the channel number you want-the single-number method and
the double-number method.
1.
Single-digit Method (highest Program Number is 9)
This allows numbers 0 ~ 9 ONLY and is useful for limiting the number of channels if you
do not mind some channels on the wrong number (10 and 28 could be put on 1 and 0, for
instance).
Press the DIGITAL SELECT (-/--) button (12) on the remote control until the symbol "-"
appears on the screen This is single digit mode.
.
The Keypad Numbers 0 ~ 9 on the remote control may be used. For numbers over 9, use
the two-digit method or press PR (-/+) below.
.
Press PR (-/+) on the control panel or the remote control. The Program Number will
increase or decrease from 0 to 39 one at a time, and will be shown in the upper left corner
of the screen.
POSITION NUMBER INCREASE
+
PR
-
Two-digit Method
2.
Press the DIGITAL SELECT (-/--) button (12) so that the symbol "--" appears on the
screen.
.
Use the Number Keypad. If you want to select channel 28, press button "2" and then
button "8" If you want channel 6, press button "0" and then button "6". The numbers will
be shown in the upper left corner of the screen as shown.
.
Press PR (-/+) on the control panel or the remote control. The Program Number will in
crease or decrease from 00 to 39 one at a time, and will be shown in the upper left corner
of the screen.
+
0 1 2 38 39
0 1 2 38 39
POSITION NUMBER DECREASE
POSITION NUMBER INCREASE
00 01 02 38 39
- PR +
- PR +
- 6
Press PAGE UP
- - 06
Press PR (-/+)
PR
-
00 01 02 38 39
Press PAGE UP
POSITION NUMBER DECREASE
TUNING CHANNELS
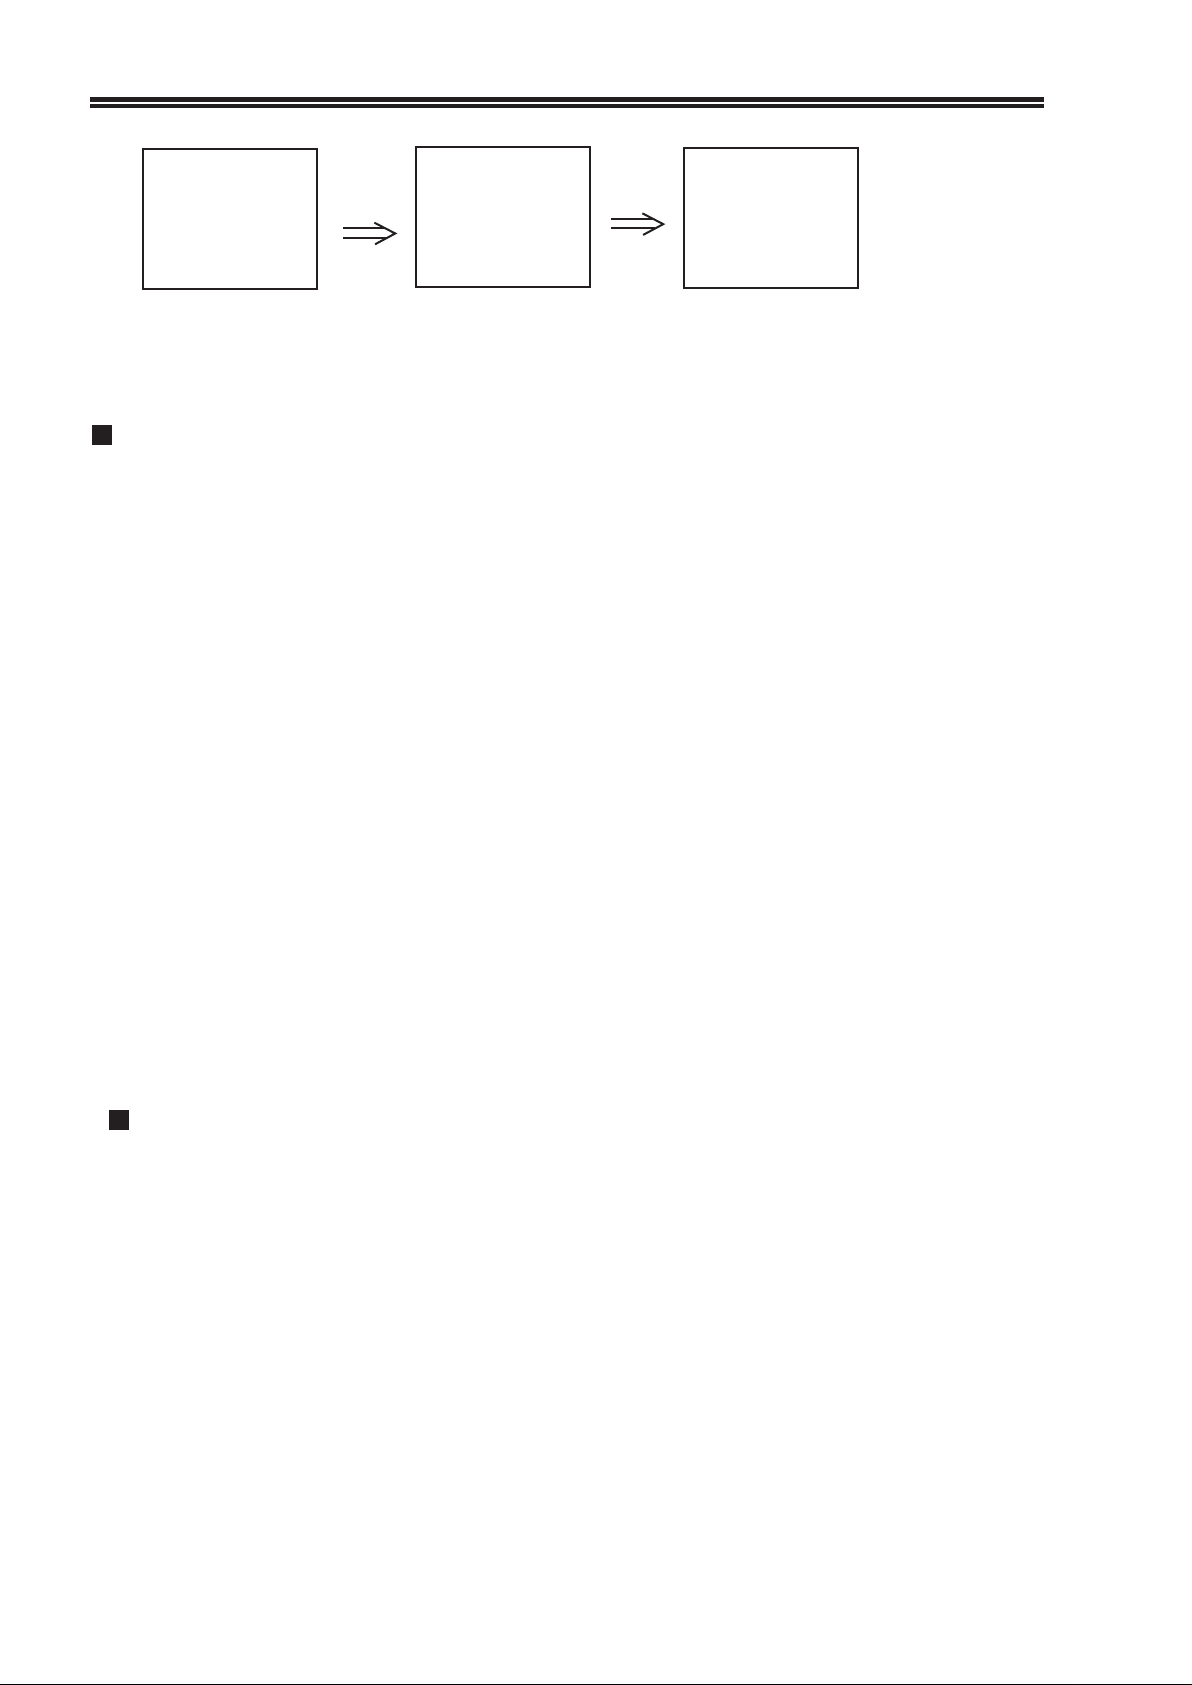
Open the door at the front of the set.
1.
Press the SEARCH BUTTON once. The set will scan the television bands to find a TV
2.
station, searching VHF - 1, VHF - 3 and UHF in order starting from the present channel. If
you want to stop the scan, simply press one of the PR (-/+) buttons.
* Green bars will be shown on the screen, and increase step by step as the set scans.
3
Press PR (-/+)
Page 5

VHF-1
lllllllll-------
When the set finds a TV signal, it will stop searching automatically, and show the TV
picture on the screen. The tuning is optimised for strong signals. Weak signals may need fine
tuning for the best result. If you want another channel, press the SEARCH button again.
The station may be fine-tuned with the FT (-/+) buttons for the best picture and sound
3.
if the auto-search result is not satisfactory. Another set of green bars appears in the upper
right corner of the screen, showing the set fine-tuning.
4.
When the station has been tuned correctly, store the results for each channel in the set’s
memory as shown below.
VHF-1 TUNE---llll----
lllllllll-------
STORE
.
CHANNEL STORE
Use this method is you want to store a TV station on a specific number (ie Channel 10 on
Number 10).
After you have tuned the TV station, press the STORE button once.
1.
A Red "STORE -" will be displayed on the screen.
Select a Number to apply to the TV station, using the PR (-/+) buttons to pick the
2.
number. (The number will be shown on the screen next to "STORE").
Press the STORE button again. The "STORE-" on the screen will change from Red to
3.
Green. This shows that the number has been attached to the channel.
STORE -
Press STORE button
.
PERSONAL PREFERENCE STORE
After you have set the volume, brightness, contrast and colour you may use the following
procedure to store the results. If the adjustments are changed, the "PP" button on the remote
control will instantly restore them. This is very useful if children play with the set.
Press the STORE button; "STORE-" (Red) will be displayed on the screen.
1.
Press the Personal Preference "PP" button once; "PP" will be displayed on the screen.
2.
Press the STORE button again, and the caption on the screen will change from Red to
3.
Green. The current adjustment are now stored in memory.
STORE 12
Select a position
number
STORE 12
Press STORE
button again
4
Page 6
STORE -
STORE PP
STORE PP
Press STORE button
The settings of picture and sound will be stored in memory until you reset them.
Press PP button
Press STORE
button again
TUNING & STORING A VCR
The set is provided with Audio/Video sockets that allow direct connection to the VCR, but
the set may also be used with the antenna connection. In this case, the VCR acts as a TV
station.
.
Connect the VCR and play a tape. The antenna should be connected to the VCR, and the
RF OUT from the VCR should be connected to the TV set. Read your VCR manual if you
are unsure. (The VCR takes the signal off-air from the antenna, and then acts as a TV
station which is fed to the TV set).
.
Open the door at the front of the TV and press the SEARCH button once. The TV set will
scan the TV bands searching for the VCR signal. This is usually at the bottom end of VHF1 or in UHF. Play a tape that you can recognise and ignore normal TV stations and any
weak signals. Press SEARCH again if the set finds a signal, until it finds the one you
want, It should be strong and clear.
.
Press STORE and attach a convenient number to the VCR channel using the PR -/+
tons. The screen should show "STORE--" in Red with the number attached. Press STORE
again to change the display to Green and make it permanent. Choose a Channel Number
that is easy to remember. You will switch to that number when you want to watch the
VCR.
.
Hints and Tips:
Some VCR’s have a test signal and the tape is not needed. Some VCR’S have a switch for
two channels, CH1 & CH2. Try them both and pick the clearest signal. It only takes a few
minutes. Check that the VCR channel does not interfere with the other TV channels.
The Audio/Video sockets on the back of the set may be used also.
CLEAR
The CLEAR button allows you to SKIP unwanted numbers so that you can tune 2, 7, 9,
10 without intermediate steps.
The procedure is the same as STORE- just substitute CLEAR for STORE in the
procedure:
Press CLEAR, choose the number, press CLEAR again. The number attached to "CLEAR
-" on the screen is then removed from the program. Another number may be cleared in
the same way.
To get the number back, use the STORE procedure.
5
Page 7

THE CONTROL OF PICTURE AND SOUND
Function select
1.
.
On the Front Panel, the "PICTURE" button is used to select the following functions:
BRIGHTNESS, COLOUR, CONTRAST, BALANCE and VOLUME in that order. Each
of the functions is adjusted by means of the adjacent -/+ level control buttons. The
-/+ control buttons only work while the function is displayed.
On the Remote Control Unit, each function has a separate set of buttons.
2.
Adjustments
ON SCREEN
DISPLAY
----------------
FUNCTION
DISPLAY
CONTRAST
SATURATION
BRIGHTNESS
VOLUME
FUNCTION
DISPLAY
BALANCE
ON SCREEN
DISPLAY
Decrease
press PIC(VOLUME) DOWN button
Weak
Pale
Dark
Low
Green Bar Moves
----------
Green/Cyan Bar Moves
press PIC(VOLUME) DOWN button
Low (Right Speaker)
Increase
press PIC(VOLUME) UP button
Strong
Deep
Light
Loud
------------
press PIC(VOLUME) UP button
Low (Left Speaker)
3. Tint control: Turn the TINT knob on the TV set to obtain correct hue reproduction.
4. Treble control: Turn the knob on the TV set to adjust proper treble effect.
5. Bass control: Turn the knob on the TV set to adjust proper bass effect.
6
Page 8

REMOTE CONTROL UNIT
The remote control unit allows almost everything to be adjusted from the armchair.
DIGITAL BUTTON 16
RECALL 15
VOLUME UP/DOWN 5
PR (+/-) 6,7
PP 8
MUTE 9
BRIGHTNESS UP/DOWN 2
14 TV
13 AV
12 DIGITAL SELECT
11 SOUND MPX SWITCHING
10 SLEEP
3 CONTRAST UP/DOWN
1 STANDBY
4 COLOUR UP/DOWN
17 BALANCE LEFT/RIGHT
BATTERIES:
1. Remove the battery cover of Remote Control Unit.
2. Insert two "AA" 1.5V batteries making sure the polarity
( + / - ) of the batteries matches the polarity marks
inside the unit.
3. When the Remote Control Unit is not used for a long
time or the batteries are worn out , take out the batteries
to prevent electrolyte leakage.
4. Operatable remote control range is limited as shown.
7
Page 9

BUTTON LIST
The trick is to push the buttons slowly; it takes a moment to register. Be careful that the
button does not lock down. Some buttons behave differently in TV and Teletext. The following
list is grouped according to TV or Teletext. If the description of a button is missing in one list,
it will be found in the other.
.
TV FUNCTIONS
1. STANDBY (O)
This turns the set off. The red STANDBY light comes on to show that the set is in
Standby. If the set is left unattended for long periods it should be switched off with the
POWER SWITCH.
2. BRIGHTNESS ( - +)
3. CONTRAST ( - +)
4. COLOUR
5. VOLUME ( - + )
The "-" button decreases the level and the "+" button increases it.
6,7. PR (+ / -)
Press these buttons to change the Channel Numbers up and down one at a time.
8. PP
Press this button to select the Personal Preference preset values of Volume, Brightness,
Colour and Contrast.
9. MUTE ( )
Cuts the sound without affecting the picture. To restore sound press it again.
10. SLEEP ( )
This button is for those who fall asleep watching TV. The set switches off after a preset
time. Press the button repeatedly to count up to 120 minutes and back to OFF. The set
will go into STANDBY automatically when the time is up.
-
11. S.MPX (Stereo switching)
This TV set is fitted with full Stereo/Dual-channel Sound. Depending on what the TV
station is transmitting, the S.MPX button selects between Stereo/Mono, and Dual I
and Dual II channels. This also shows on the screen.
For more detailed explanation, see "Listing to Stereo/Dual-channel TV Sound" in a
following section of the Manual.
12. DIGITAL SELECT (-/--)
Press this button to change from single-digit to double digit mode.
13. AV ( )
The set is has Audio/Video sockets on the back for connecting VCRs directly. Press this
button to take input from the Audio/Video sockets. If there is no signal the screen will be
blank grey with AV showing in the upper left corner. To return to TV press Button (14)
14. TV( )
This button returns all other modes back to TV.
15. RECALL ( )
If the TV set is in STANDBY (red light), press this button to turn the set on.
It also shows the Channel Number, the TV Band, and the Sleep timer settings.
+
8
Page 10

16. DIGITAL BUTTON
In single-digit mode, press these buttons to select any of 0~9 channels.
In double-digit mode, press these buttons to select any of 00~39 channels.
17. BALANCE LEFT/RIGHT
Press these two buttons to balance the Sound between left and right. The left button
reduces the volume of the right speaker: the right button reduces the volume of the left
speaker.
LISTENING TO STEREO/DUAL-CHANNEL TV SOUND
The Model 6138 is fitted with full performance Stereo Theatre Sound where the internal
speakers are ducted to the front of the set for maximum stereo effect. The Model 6138 is
fitted with separate bass and treble controls available on the front panel and these should be
used to give the most enjoyable results tailored to your own taste in sound.
The audio response has been adjusted by the factory to give best results across a range of
movies and studio programs, but there will be some programs where the stereo effect is too
pronounced and may detract from the overall performance. This is particularly noticeable
no some outside broadcasts and movies, where sibilance in speech is heard as lisping or
spitting on 'S' and 'T' sounds. In this case, the set should be switched back to MONO
using the handset) when the lisping sound will be more acceptable. It is a characteristic of
stereo sound that such flaws in the broadcast system are much more audible.
Stereo on a good program adds a new dimension to sound, but it can also be annoying on
a bad movie or on an uncontrolled outside-broadcast. In this case, switch back to MONO
using the handset and the Stereo effect is removed. You have full control over the sound
with the bass and treble controls. Reducing bass and treble will give a better result on both
Stereo and Mono.
.
TRANSMISSION MODE INDICATION
Transmission Mode
Mono
Stereo
Dual Sound
Stereo Selection
Forced Mono Selection
Sound I Selection
Sound II Selection
LED (Yellow)
sound I
OFF
ON
ON
ON
OFF ON
LED (Red)
sound II
OFF
ON
ON
OFF
9
Page 11

.
SOUND MULTIPLEX SWITCHING
The TV station has the option of transmitting Mono, Stereo, or Dual-channel sound. The
set detects the transmission automatically and allows the S. MPX button to make the correct
choices.
.
S. MPX Button (11)
The choice of sound is limited by what the TV station is sending. The possible choices are
shown below. Press the button and the choices available will be displayed on the screen in
turn.
STEREO
Stereo Sound Transmission Mode
MONO
DUAL I DUAL II
Dual Sound Transmission Mode
AUDIO OUTPUT AND DISPLAY ON SCREEN
Transmission Mode
Mono
Stereo
Dual. Sound
Display on Screen
STEREO : MONO
STEREO
MONO
DUAL I
DUAL II
Audio Output
Ineffective
Stereo
Mono (Forced)
Sound I
Sound II
CONNECTING A VCR TO THE TV SET
This TV set has AUDIO/VIDEO input and output sockets on the back panel which allow direct
connection to a VCR using the AV Button (13). The direct Video/Audio connection bypasses
the antenna circuitry and allows for better quality recordings and easier operation, but like all
high-technology it gets complicated.
The sockets are grouped in two sets of three, OUT and IN.
The TV set has true Stereo sound, and there are two Audio sockets in each group-L/Mono
and R/Stereo channels-plus one Video socket. Which of these sockets you connect depends on
what you to do with the VCR and what sort of VCR it is. If the VCR is Mono, connect just
the L/Mono Audio lead. The R/Stereo lead is optional for Stereo only.
10
Page 12

.
OUT Sockets
These sockets take the signal OUT of the TV set and feed it TN to the VCR. They are hardly
ever used. Most VCR’s have their own Tuner built in and do not need the TV set to tune
the TV channel for them. The usual setup is to give the VCR the antenna, and feed the TV
set out of the VCR’s RF output. (This loops the antenna signal through and shares it). See
your VCR manual.
The exception to this is if you are dubbing one VCR off another. The connection for this is
shown later.
.
IN Sockets
These sockets take the signal OUT of the VCR and feed it IN to the TV set. The main confusion in
connecting a VCR to a TV, is that both have a set of sockets, and what is OUT
for one is IN for the other. The VCR OUT sockets go to the TV IN sockets. Think about it
for a moment.
For a full Stereo hookup you will need three leads which can be bought at Tandy or Dick
Smith, and some Video Stores. If the VCR has a SCART socket (which combines all six
sockets in one), then you will need a SCART to RCA set. (The TV set uses RCA sockets).
The various connections are shown in detail below.
.
Antenna
The VCR can be connected to the TV set through its antenna. For details of this, see the
section "Tuning a VCR" earlier in this manual.
11
Page 13

CONNECTION DIAGRAMS
1. VIDEO PLAYBACK/RECORD
This is the usual connection where Audio/Video is taken out of the VCR and is connected
IN to the TV set.
.
The material being played on the VCR can be viewed on the TV screen by pressing the AV
Button (13).
.
Pressing the TV Button (14) shows the TV station being tuned by the TV set.
.
If the VCR is recording (using its own tuner), you can watch what the VCR is recording
by pressing the AV button (13), or what the TV set is getting off-air, by pressing the TV
Button (14). In one case it monitors the Audio/Video from the VCR, and in the other its
own tuner.
It is easy to record one channel and watch another, or switch between without disturbing
the VCR recording. You can even turn off the TV set.
NOTE:
* You can use either RF or Audio/Video input from the VCR, but the quality of picture and
sound is better using the Audio/Video sockets.
* If the VCR has Mono sound, connect it to the L/Mono input socket. The R/Stereo cable is
optional for Stereo and need not be used.
2. RECORDING FROM THE TV
This is useful if the VCR does not have a tuner, or if the quality of the VCR tuner is not
as good as the one in the TV set.
.
Press the TV (14) to select TV mode and choose a TV channel.
.
Check you VCR manual for how to record Audio/Video. The VCR has to be switched to
AV. Some VCR's do this automatically. Check your VCR manual.
.
Start the recorder. The VCR will now record what is on the screen. If you change channels
while recording, then that will be recorded too.
12
Page 14

3. DUBBING
The figure below shows how to connect TWO VCRs to the TV for dubbing one from the other.
Press AV Button (13) to switch to Video mode. The TV set will act as a monitor to help
edit while dubbing. The set MUST remain in Video mode and MUST NOT be switched
off during the session.
13
Page 15

CONNECTING EXTERNAL SPEAKERS
You can connect speakers to the EXTERNAL SPEAKER terminals on the TV set to
enhance sound from the TV.
Note: Before connecting the external speakers, turn off your TV set.
1 Connect speaker leads
While pressing the button, insert
the wire into the hole as shown
below, and then release the
button.
Pull firmly on the sire make sure
it is secure.
Note:
.
Do not connect two sound sources to the
same speaker system. You may damage
the TV.
.
Use only external speakers with an
impedance rating of 8 ohms and input
power 7 watts or greater.
Note: Be Sure to connect the Right
speaker to the R + and - and the
Left speaker to the L + and -
2 Set the SPEAKER SELECT
switch.
Push the switch to "EXIT" side
(left). The built - in speakers
are disconnected.
14
Page 16

TROUBLE SHOOTING
Many apparent malfunctions may be caused by slight misadjustment of regular controls or
some other similar causes. If any difficulty arises in the operation of your set, first
check through this list of symptoms and correction. Should the difficulty cause concern,
unplug the set and contact your dealer.
Symptoms
.
No picture,
no sound.
.
Poor sound,
picture OK.
.
Poor picture,
sound OK.
Snowy picture
Lines in picture
Distorted picture
Weak picture.
.
Multiple images
(Ghost)
Check these things
.
Be sure power cord is plugged in.
.
May be station trouble.
.
Check antenna connections.
.
Maybe in AV mode.
.
May be station trouble.
.
May be local interference from
another appliance.
.
Check antenna connections.
.
May be station trouble.
.
Check antenna connections.
.
Check antenna for broken wires.
.
May be local interference from
another appliance.
.
May be station trouble.
.
Check antenna connections.
.
May be local interference.
Try these adjustment
.
Press POWER BUTTON
.
Try another channel.
.
Press AV button once.
.
Try another channel.
.
Re-orient antenna.
.
Adjust VOLUME control.
Try another channel.
.
Re-orient antenna.
.
Adjust BRIGHTNESS
.
control.
Adjust CONTRAST control.
.
.
Try another channel.
.
Re-orient antenna.
.
Poor colour or
no colour
.
Remote control
does not work.
.
May be station trouble.
.
Check antenna connections.
.
Check antenna for broken wires.
.
May be local interference from
another appliance.
.
Be sure power cord is plugged in
.
Check battery in Remote Control
Hand Unit.
.
Try another channel.
.
Re-orient antenna.
.
Adjust COLOUR control.
.
Change batteries.
15
Page 17

Specifications
Colour System:
Receivers Channel
Cable Channel
Stereo
Power supply
CRT
Audio Output
Antenna Impedance
Dimension (mm)
Weight
Remote Control Unit
Power Supply
* Design and specifications are subject to change without notice.
: CCIR PAL, B/G; NTSC PLAYBACK
: VHFL 0-3; VHFH 4-11; UHF 21-69
: S1-S41 (OPTION)
: FULL REAL STEREO
: AC 120-240V, 60/50Hz
: 61cm Flat Square Picture Tube
: 2 x 7W Max : 2 x 5W 10% THD
: VHF/CATV/UHF 75 ohm
: 640 (W) x 563 (H) x 460 (D)
: 32kg
: DC 3V (2 x UM-3)
16
Page 18

PALSONIC CORPORATION PTY LTD
1 JOYNTON AVENUE
WATERLOO NSW 2017 AUSTRALIA
TEL:(02)9313 7111
FAX:(02)9313 7555
www.palsonic.com.au
PALSONIC CUSTOMER SERVICE
TELEPHONE
AUSTRALIA: 1300 657 888
604-64063-01
 Loading...