

Page 1
TV
+
USER MANUAL
3415DVD
34cm TV / DVD Combination
DVD
Please read this manual carefully before using
this TV set and keep it for future reference.
PALSONIC CORPORATION PTY LTD
1 JOYNTON AVENUE
WATERLOO NSW 2017 AUSTRALIA
TEL: (02) 9313 7111
FAX: (02) 9313 7555
www.palsonic.com.au
PALSONIC CUSTOMER SERVICE
TELEPHONE
AUSTRALIA: 1300 657 888
Page 2

CONTENTS
Before Operation
Safety and precautions ........................................................................
Installation .............................................................................................
Aerial Connections ..............................................................................
Preparation of the remote control ........................................................
Function buttons and external sockets ..............................................
Front panel of the TV set .....................................................................
Rear panel of the TV set .....................................................................
Using the remote control .....................................................................
Basic operation
Switching the TV set on/off ..................................................................
Watching TV ..........................................................................................
Watching TV program .........................................................................
Program swap and auto scan functions ..............................................
Searching channels ..............................................................................
Full automatic mode ...........................................................................
Semi-automatic search ........................................................................
Manual fine tune ..................................................................................
Program skip .......................................................................................
Convenient picture and sound control functions ..............................
Multiple picture modes ........................................................................
Black stretch and noise reduce ...........................................................
Mute and Fade ....................................................................................
Time functions ......................................................................................
Clock setting and timer on/off functions ..............................................
Sleep timer and program preset ..........................................................
Setup function .......................................................................................
Screen saver and Calender .................................................................
AVL ......................................................................................................
Organise function ................................................................................
Setting the clock ...................................................................................
DVD Operation
Basic Playback ......................................................................................
Advanced Playback ..............................................................................
Special Function Playback - JPEG ......................................................
DVD System Setup ................................................................................
Playable Discs .......................................................................................
Disc Protection and DVD Characteristics ...........................................
Others
Connection to the external audio and video equipment ...................
Trouble shooting guide ........................................................................
Specifications ........................................................................................
2
3
3
3
4
4
4
5
6
7
7
7
8
9
10
11
12
13
13
14
15
16
16
17
18
18
19
20
21
23
24
25
26
29
30
31
33
33
1
Page 3
Safety and Precautions
To ensure safe and reliable operation of the TV set, please observe the following precautions, operation and maintenance.
Attention:
1. Pay attention to the power supply cord before installing the TV set. Do not hang anything on the cord,
and avoid treading on the cord.
2. The slots on the housing are designed for ventilation to ensure reliable operation of the TV set and prevent
overheating. They must never be blocked. The TV set must not be placed near a heat source or it
might be damaged.
3. The outdoor antenna must not be erected close to HV lines or other power supply lines. Use extreme care when
erecting the antenna and don't touch live wires or injury may occur.
4 This TV set can only use the supply voltage and frequency indicated on the back of the housing. If you power
supply does not comply with them, please consult with service personnel.
5. Don not let any object fall into the ventilation openings of the TV set housing, nor let any liquid flow into the
machine via the openings
6. Do no not subject the TV set to rain, or use in a damp environment. When cleaning dust, be sure to remove the
power supply plug from the socket first. Don not clean the housing directly with liquid detergent, use a damp cloth.
Be sure to remove the power supply plug from its socket and remove the antenna plug during a thunderstorm or
when it will not be use for a long time, to avoid components being damaged by lightning.
7. if you use an indoor antenna, do not let it touch any electrical appliance, or normal reception of TV programs
mat be affected.
Safety:
1. Do not remove the back of the housing yourself, as high voltage inside the unit are dangerous. If it is
necessary to open the back, ask a technician with specialised service experience.
2. Remove the power supply plug from its socket in case of the following conditions, and consult with service
personnel.
(1) The power cord or plug are damaged or show cracks.
(2) Any object has fallen into or liquid flown into TV set.
(3) The performance of the TV set has deteriorated significantly or there is damage on the housing.
(4) The TV set will not operate normally according to the instruction.
3. Please remove the power supply plug from its socket when the TV set will not be used for a long period of
time.
CAUTION:
Use of controls, adjustments or procedures other than those specified herein may result in hazardous
radiation exposure.
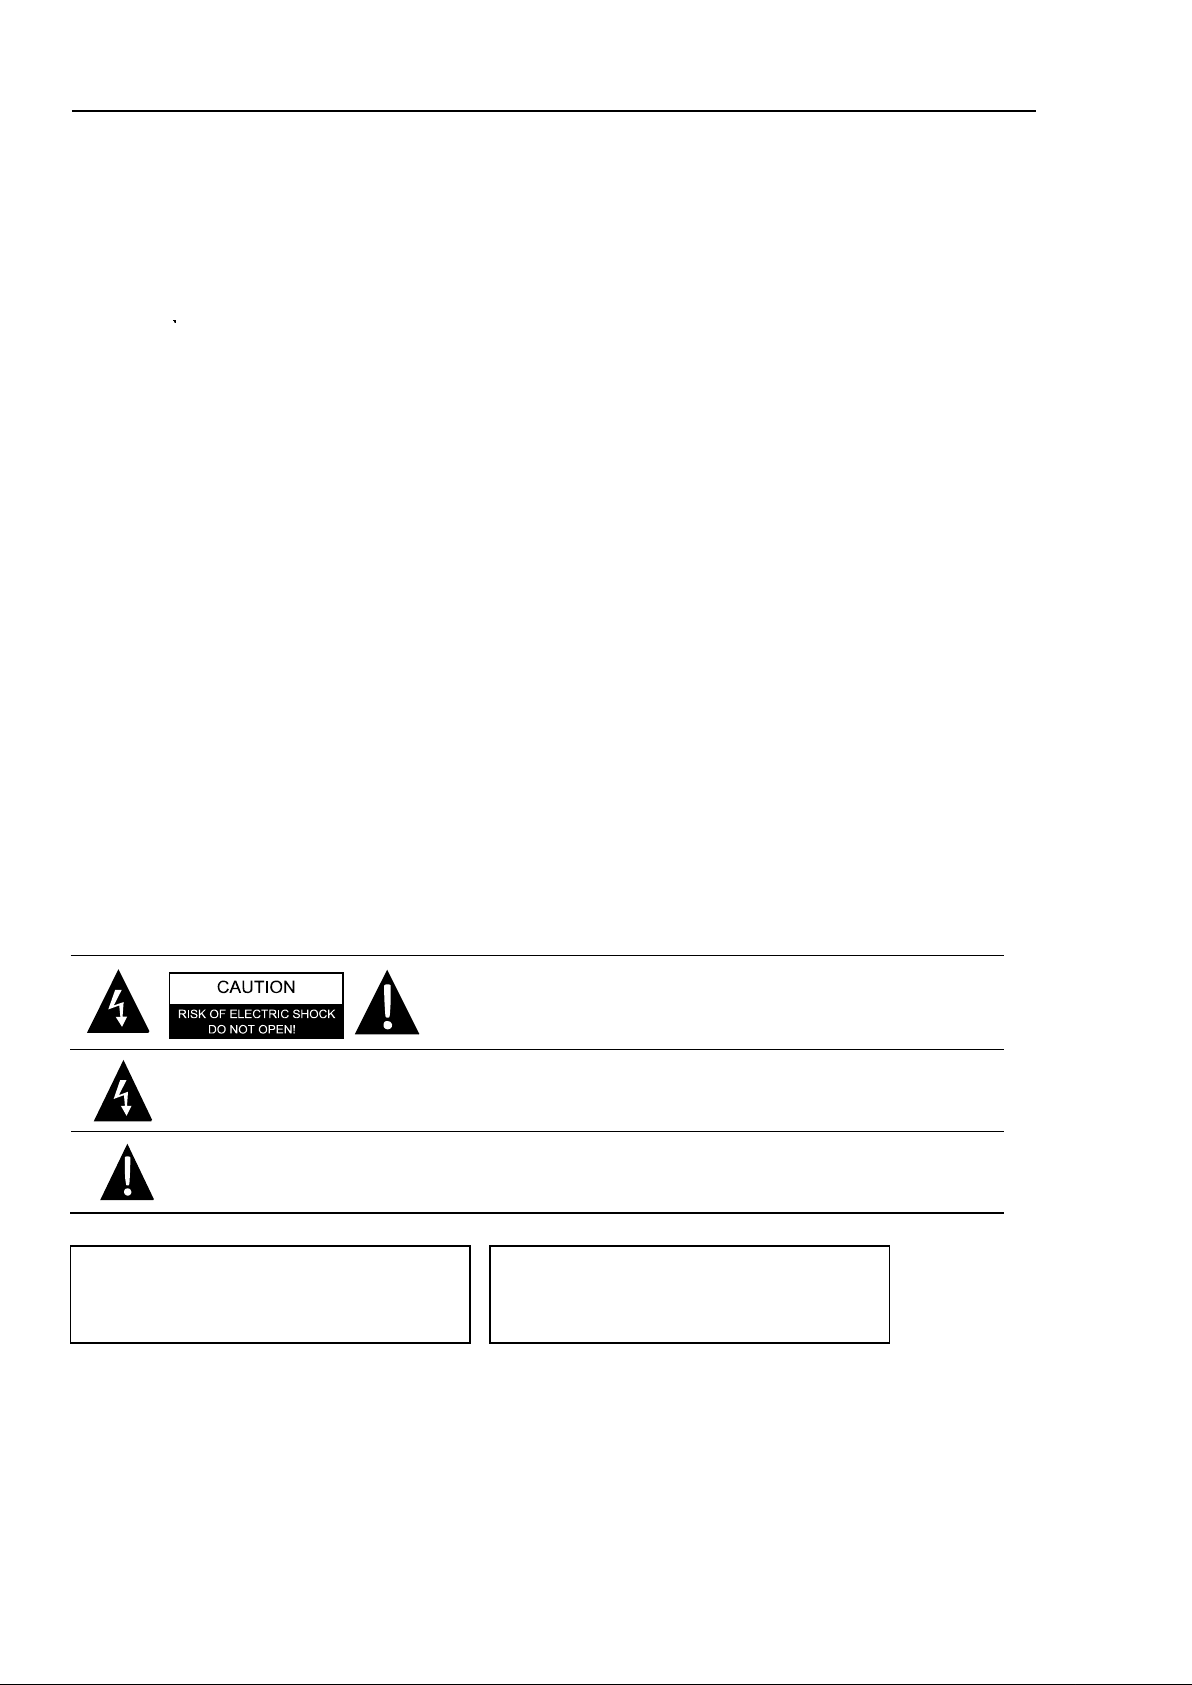
The lightning flash with arrowhead symbol, within an equilateral triangle, is intended
to alert the user to the presence of uninsulated "Dangerous Voltage" within the product’s
enclosure that may be of sufficient magnitude to constitute a risk of electric shock to persons.
The exclamation point within an equilateral triangle is intended to alert the user to
the presence of important operating and maintenance (servicing) instructions in the
literature accompanying the appliance.
This appliance has a serial number on the rear
panel. Please record the serial number and
retain it for your records.
Serial Number ...............................................
CAUTION: TO REDUCE THE RISK OF ELECTRIC
WARNING: TO REDUCE THE RISK OF FIRE
SHOCK, DO NOT REMOVE COVER (OR
BACK). NO USER SERVICING PARTS
INSIDE. REFER SERVICING TO QUALIFIED
SERVICE PERSONNEL.
OR ELECTRIC SHOCK, DO NOT
EXPOSE THIS APPLIANCE TO
RAIN OR MOISTURE.
2
Page 4
Installation
1. First read carefully the relevant instructions in "Safety and Precaution".
2. place the TV set in a place where there in no direct sunlight on it. Any light reflecting from the screen will cause fatigue
of your eyes.
3. Use gentle indirect lighting for comfortable watching. The best distance of watching is 5~7 times the screen height.
4. Keep a space of 10cm or over between the TV set and wall for good ventilation.
5. Never put the TV set in a place with excessive temperature or moisture, to avoid damage or failure of its components.
Automatic demagnetising
A colour TV set is likely to be affected by magnetic fields causing colour distortion. If the TV set is moved while on, turned
or affected by a magnetic object nearby, turn off the power and wait for at least 1 hour before you turn it on. That is to
ensure that the automatic demagnetising circuit will operate eliminating adverse effects of magnetism an colour purity.
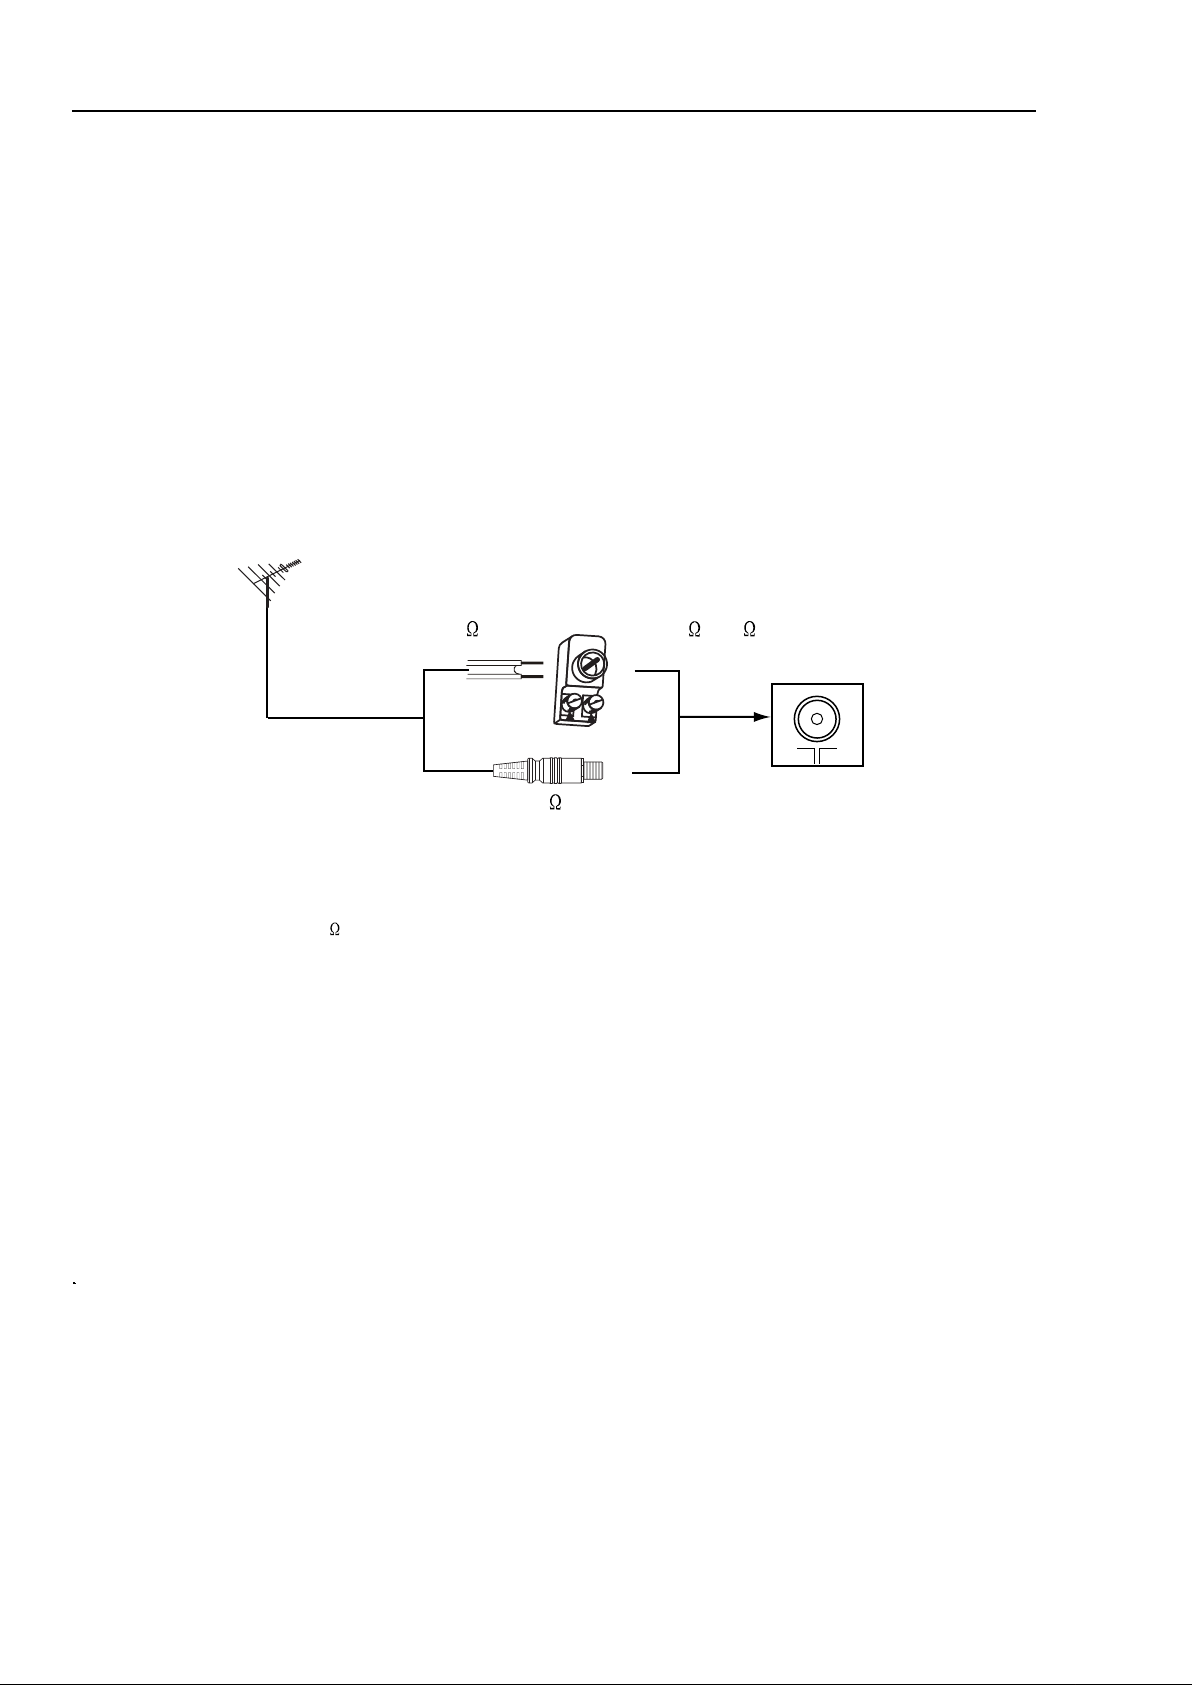
Antenna Connection
Parallel flat cable
(300 )
Impedance adaptor
(300 - 75 )
Antenna input
(75 )
For good reception use an outdoor antenna. The recommended type and location of antenna varies between different areas.
Notes:
1. Connect the outdoor antenna as shown above.
2. It is suggested to use a 75 coaxial cable to eliminate
interference or noise.
3. The cable must not be tied together with supply cords
Preparing the remote controller
1. Remove the battery cover of remote controller.
2. Load two AA type batteries into the chamber observing the correct polarity.
Precaution operating the remote controller
1. Direct the remote controller to the infrared receiver window of the TV set
2. Do not press the keys on the remote controller continuously.
3. If the remote controller will not be used for long time or if the batteries have
depleted, please remove them to prevent leaking.
4. Never throw batteries into fire and properly dispose of the used batteries.
5. Take care not to drop, damp or dismantle the remote controller.
3
Page 5
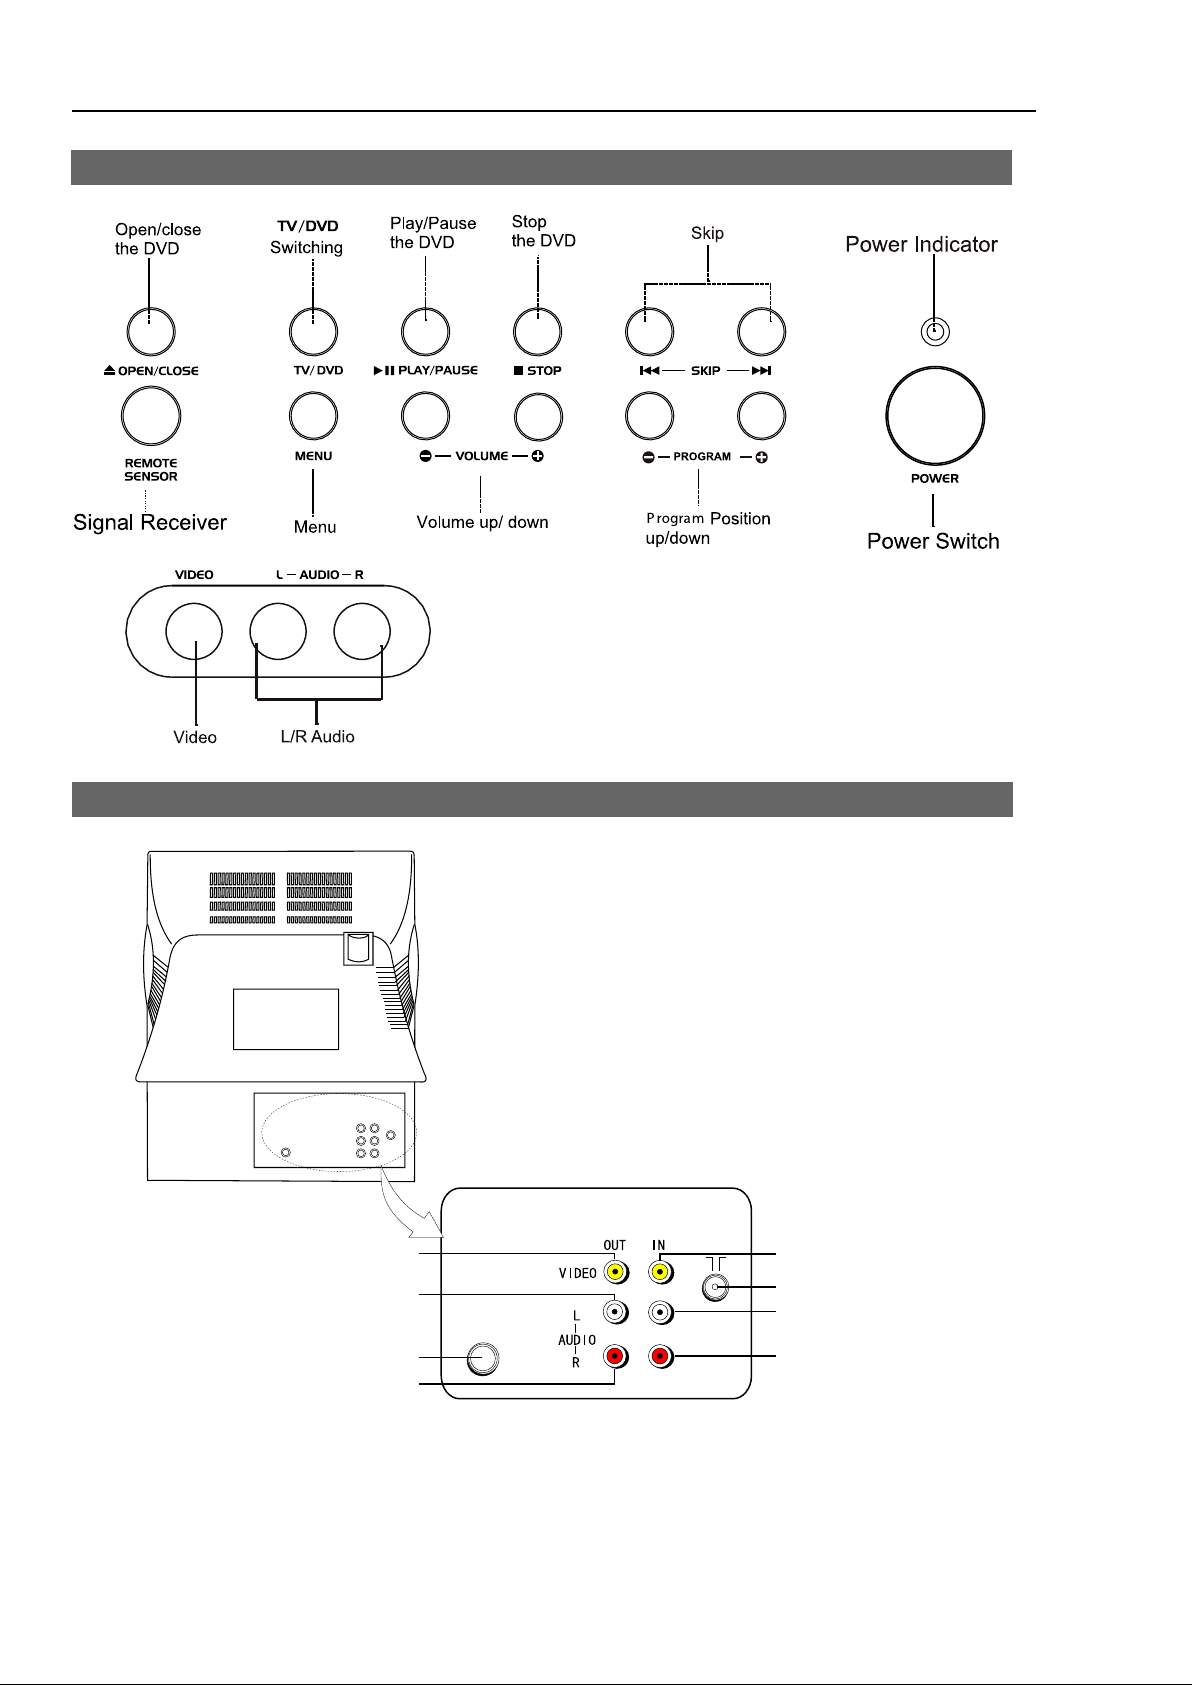
Function Buttons and External Sockets
Front panel of the TV set
Rear panel of the TV set
Video output terminal
Audio left channel output terminal
Coaxial terminal
Audio right channel output terminal
COAXIAL
Video input terminal
Antenna/ CATV input socket
Audio left channel input terminal
Audio right channel input terminal
4
Page 6

Using the Remote Control
Buttons on the remote control
POWER
SCAN
SWAP CALL
1 2 3 4
5 6 7 8
9 0
H.LOCK
EXIT
CALENDAR TIME
REV FWD PREV NEXT
STOP
SETUP
D.MENU REPEAT
PLAY/ENTER
AUDIO
D.CALL
-/--
MENU
PAUSE/STEP
TITLE/PBC
PROGRAM
CAPTION
OPEN/CLOSE
MUTE
TV/AV
TV/DVD
P.STD
10+
A-B
SLOW
SEARCHANGLE
ZOOM
Stand By
DVD Open/close
Scan
Former Program
Mute
Call Screen Display
Program Number
TV/AV Exchange
Digital Selector
H.LOCK
TV/AV DVD
Volume/Channel Selection
MENU
Exit Screen Mode
Picture Mode
Calendar
(Not Available)
Time
(Not Available)
DVD PREVIOUS
DVD NEXT
DVD FAST FORWARD
DVD FAST REVERSE
DVD STOP
10+
DVD SETUP
DVD PAUSE/STEP
DVD MENU
LEFT
DVD A-B REPEAT
DVD Cursor Move button
DVD REPEAT
DVD PLAY/ENTER
DVD SLOW
DVD ANGLE
DVD SEARCH
DVD AUDIO
DVD TITLE
ZOOM
DVD PROGRAM
DVD CALL
DVD CAPTION (SUBTITLE)
UP
RIGHT
DOWN
5
Page 7
Switching On/Off the TV Set
This section explains the use of the power button and remote handset
to turn your unit on and off.
Switching on/ off the TV set
Switching on/off the TV set
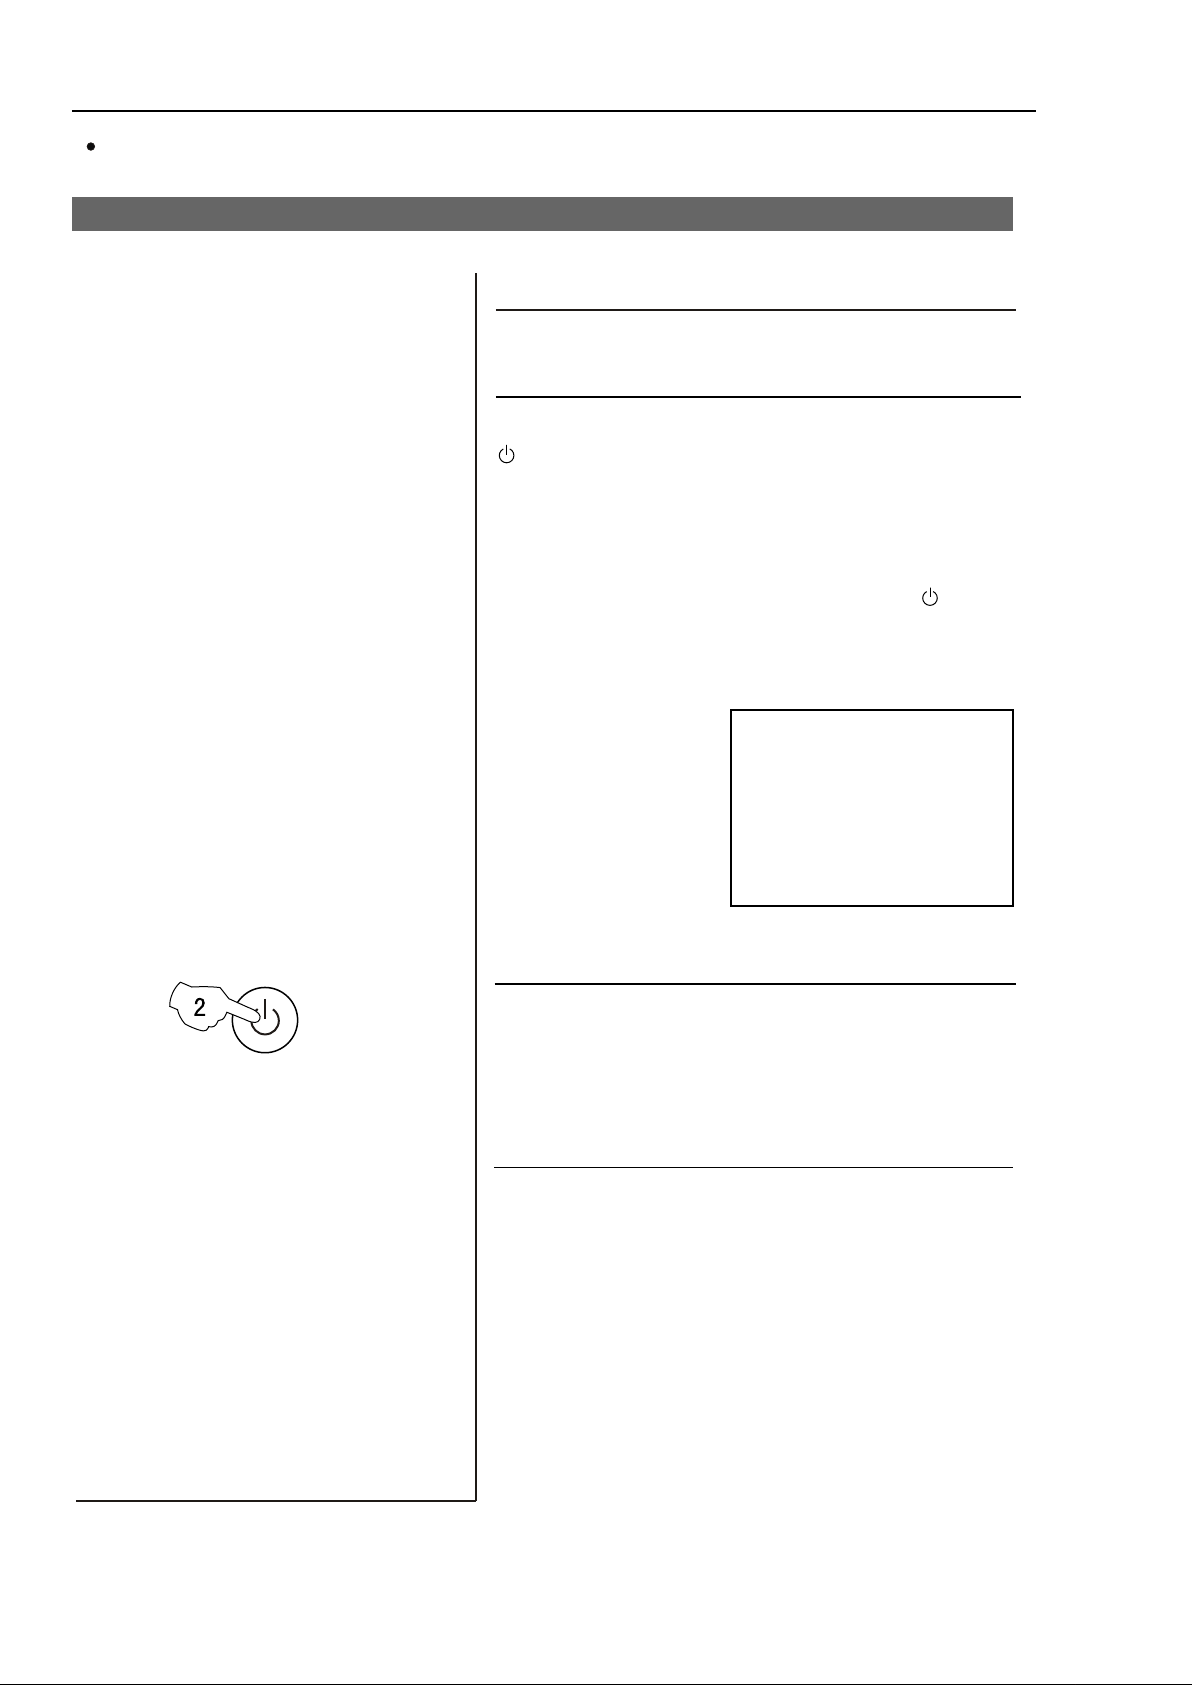
1 Press the Power switch on the The power
indicator will light.
2 If the indicator "RED" press the button
on the remote control. Alternatively you
can turn the TV on with P+ or P- buttons
if the "Child lock is not set.
Note:
1 To turn the sett off to "Standby" press
button on the remote control
POWER
4
AUTO
BG
2 To turn off the TV fully, press the Power button
and release.
Auto switch-off function
Should the signal input from the aerial be
interrupted for more than 5 minutes, the TV
will automatically switch to "Standby".
If the TV is in A/V mode or the "background"
is set to off (see page18), the set will not
switch to standby.
6
Page 8
Watching TV
You can watch a TV program on a channel which has been tuned to a broadcast.
Watching TV programs
How to select a TV program
Select the desired programs
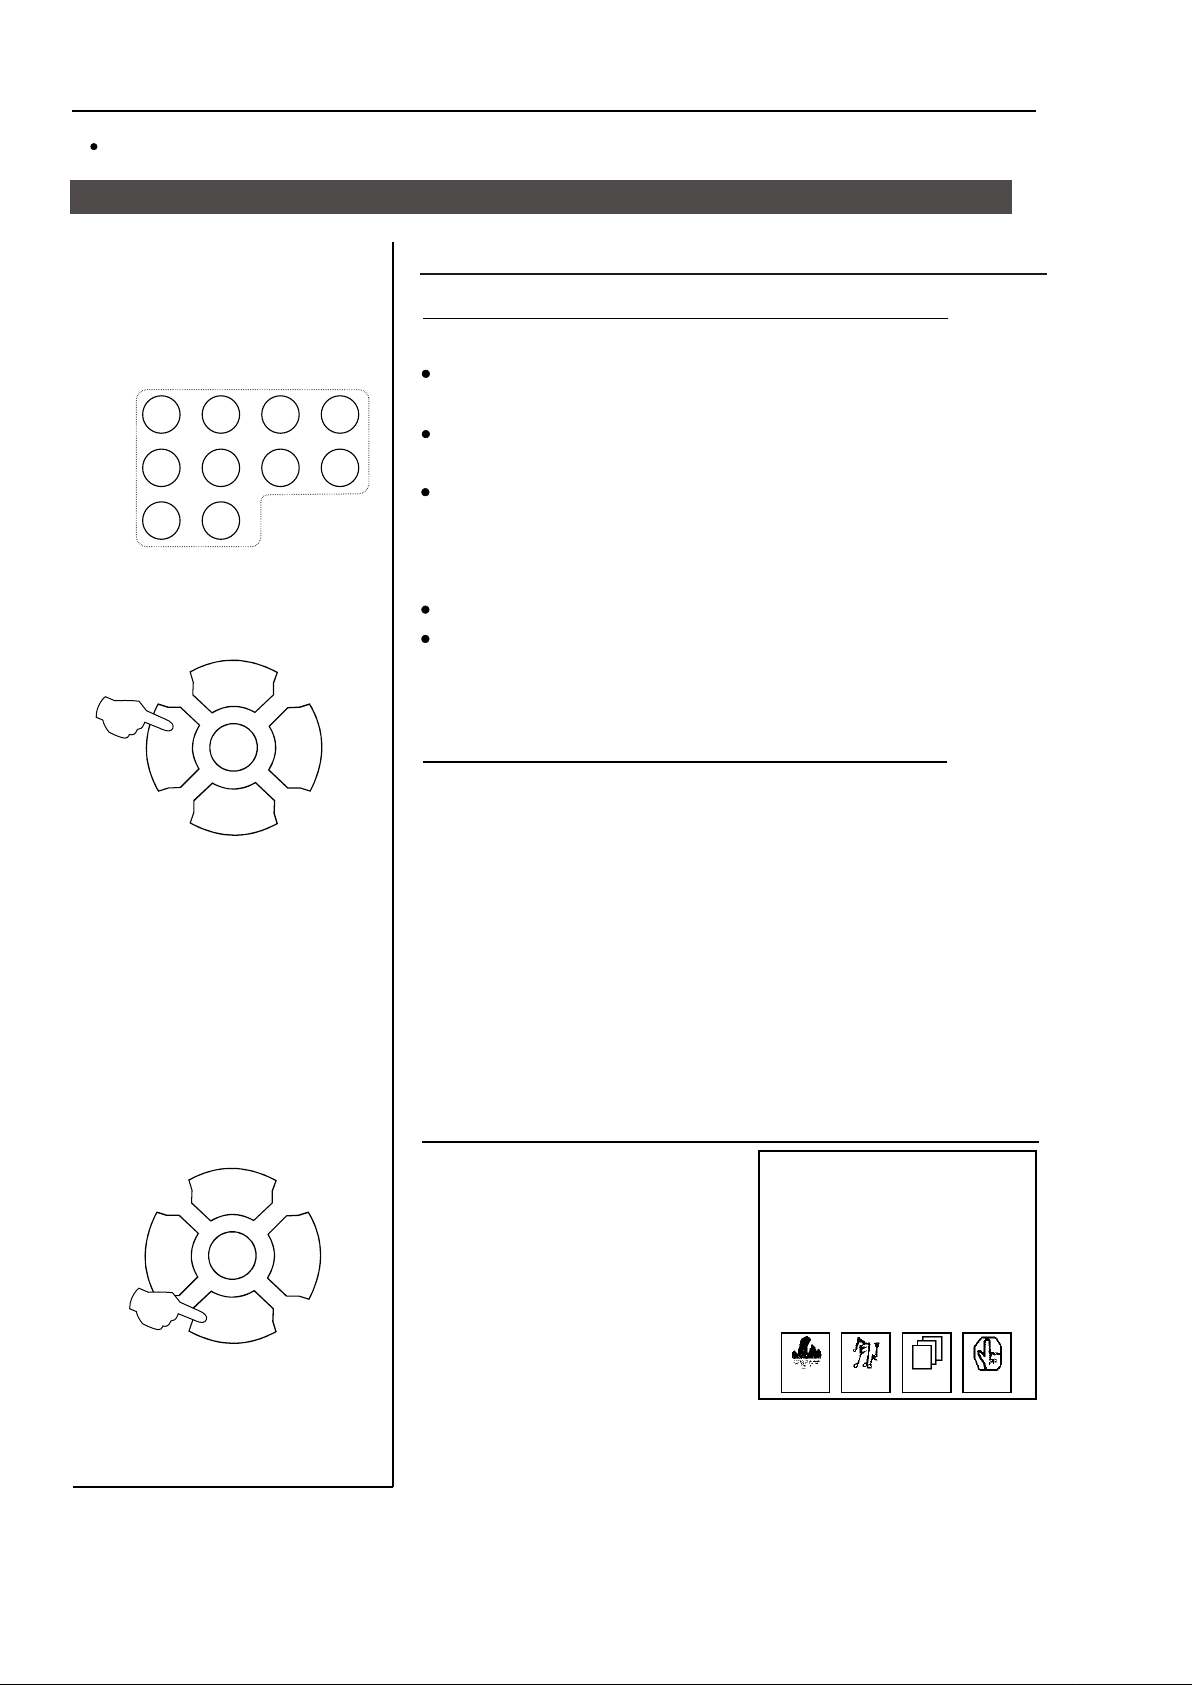
1 Using number buttons
Directly enter the channel number with the numeric keypad
1 2
5
9
3
7
6
0
4
8
on the remote control.
To select channel numbers between 10 ~ 99 press [-/--] button
and enter the two digit channel number.
To select channel numbers between 100 ~ 218 press [-/--] button
twice and enter the 3 digit channel number
.
2 Using the P+/- buttons
Press the P+ button to increase channel number.
Press the P- button to decrease channel number.
V-
V-
P+
MENU
P-
P+
MENU
P-
V+
V+
Select the desired sound
Press the V-/+ buttons on the remote or the front of the
TV set to adjust the volume level. The range is 0~100. When
the volume buttons are pressed the volume level is
displayed automatically on the TV screen.
How to select the menu
Press the MENU button and
the menus will appear at the
bottom of the screen. The
PlC icon will initially be
flashing. Each subsequent
press of the menu button
will highlight SOU (sound),
FUN (function), TUN
PIC SOU
FUN
TUN
(tuning) icons respectively.
Press the P-button to display
the appropriate menu. Press EXIT to exit.
7
Page 9
Watching TV (continued)
Press the SWAP button to select the channel you were watching previously.
Auto scan function scans through all programs in memory including those with
"skip" set to "off" (see "Program skip" on page 12).
Program swap and auto scan functions
Program swap
Press the SWAP button to
select the channel you were
watching previously.
SWAP
18
AUTO
BG
8
AUTO
BG
18
AUTO
BG
SCAN
Auto program scan
1 Press the SCAN button to
scan through all the memorised
TV programs. The scan will
pause for a bout 2 seconds on
each channel.
2 If you want to stop the
function during auto tuning,
simply press the SCAN button
again.
1
AUTO
BG
SCAN
2
BROWSE
3
BROWSE
1
AUTO
BG
BROWSE
8
Page 10
Searching Channels
This TV set has three methods to set the channels, which are respectively full
automatic, semi automatic and manual fine tune.
In this section, how to use the remote control to set the channel is explained. You
can also use the buttons on the TV set to set channel.
Full automatic mode
Automatic search
1 Press the MENU button. The
V-
P+
MENU
MAIN MENU will appear with the
PlC (picture) icon flashing. Press
the MENU button a further 3 times
until the TUN (tuning) icon is
flashing. Press P- to enter the
TUNING menu.
V+
TUN
PROG NO
ORGANISE
SEARCH
FINE TUNE
AUTO SEARCH
V-
P-
P+
MENU
P-
V+
2 Press the P+/- buttons to
select "AUTO SEARCH".
3 Press the V+ button to start
AUTO search. All channels will
be stored in the order they are
received. After the search has
finished, the first channel
received will be displayed.
Please see page 20 (Organise).
TUN
PROG NO
ORGANISE
SEARCH
FINE TUNE
AUTO SEARCH
6
AUTO SEARCH
152.25MHz
CALL
Display function
Press the CALL button, then
the channel number and the
systems will be displayed on
the screen.
9
3
AUTO
BG
Page 11
Searching Channels (continued)
Semi-automatic search
Semi-automatic search
V-
V-
P+
MENU
P-
P+
MENU
P-
V+
V+
1 Press the P+/- buttons or the.
PROGRAMME NUMBER (0-9)
to choose the desired channel
1
AUTO
BG
(e.g. Channel 1).
2 Press the MENU button. The MAIN MENU will appear
with the PlC (picture) icon flashing. Press the MENU button
a further 3 times until the TUN (tuning) icon is flashing.
Press P-to enter the TUNING menu.
3 Press the P+/- buttons to
select "SEARCH".
4 Press the V-/ V+ button to
TUN
PROG NO
ORGANISE
SEARCH
FINE TUNE
AUTO SEARCH
start search.
Press the V- to search down
the scale and the V+ to search
up the scale.
6
EXIT
SEARCH
152.25MHz
To turn off the on-screen menu
In general, after you press the MENU button, the menu
item display (PlC, SOU, FUN, TUN) will automatically
disappear within 30 seconds. If you want to eliminate
these contents immediately, please press the
EXIT button.
10
Page 12

Searching Channels (continued)
Manual fine tune
Manual fine tune
If the picture and/or sound are poor, try using the FINE
TUNE feature. Do not use this feature unless
reception is poor.
V-
P+
MENU
P-
V+
1 Press the P+/- buttons or
PROGRAM NUMBER (0-9)
1
AUTO
BG
button to choose the desired
channel (e.g. channel 1).
2 Press the MENU button. The MAIN MENU will appear
with the PlC (picture) icon flashing. Press the MENU
button a further 3 times until the TUN (tuning) icon is
flashing. Press P- to enter the TUNING menu.
3 Press the P+/- buttons to
select " FINE TUNE".
TUN
PROG NO
ORGANISE
SEARCH
FINE TUNE
AUTO SEARCH
P+
MENU
V- V+
P-
4 Use the V-/+ buttons to
manually fine tune the station
until the best picture and
sound are obtained.
11
5
FINE TUNE
152.25MHz
Page 13

Searching Channels (continued)
Programme skip
Program skip
Channels can be set so that they are skipped during
program selection.
V-
V-
P+
MENU
P-
P+
MENU
P-
V+
V+
1 Press the P+/- buttons or
PROGRAM NUMBER (0-9)
button to choose the desired
1
AUTO
BG
channel (e.g. channel 1).
2 Press the MENU button. The MAIN MENU will appear
with the PlC (picture) icon flashing. Press the MENU
button a further 3 times until the TUN (tuning) icon is
flashing. Press P- to enter the TUNING menu.
3 Press the P+/- buttons to
select "SKIP".
4 Press the V-/+ buttons to
turn the SKIP function "ON".
TUN
SKIP
PROG NO
ORGANISE
SEARCH
FINE TUNE
ON
5 Press the EXIT button to close
the menu. When you use the P+/buttons to select channel, this
channel will be skipped. However,
you can still use the PROGRAM
NUMBER buttons to select the
skipped channel numbers.
V-
P+
MENU
P-
V+
If you want to recover the skipped channel
1 Use the PROGRAM NUMBER buttons to select the
channel number to be recovered.
2 Repeat steps 1-3 above.
3 Press the V-/+ buttons to turn the SKIP function "OFF".
12
Page 14

Convenient Picture & Sound Control Functions
Multiple picture modes
How to select picture modes
You can quickly select the desired picture mode from
P.STD
four preset modes and one customised mode.
Press the P.STD button to select the desired
picture quality. Five kinds of picture modes
(i.e., "STANDARD", "RICH", "USER", "LISTEN",
"SOFT") can be selected in turn.
The 5 modes are
Listen - This is a new feature that blacks out
the TV screen when listening to music only channels
Soft - Designed for night time low light viewing;
Standard - Designed for rooms that have good all round
lighting;
Rich - Designed for rooms with high ambient lighting such
as daytime sport;
User - A spare setting that can be adjusted to personal
tastes.
STANDARD
RICH
USER
LISTEN
SOFT
V-
V-
P+
MENU
P-
P+
MENU
P-
V+
V+
How to customise your own picture status
1 Press the MENU button, the MAIN MENU will appear with
the PlC (picture) icon flashing. Press P- to enter the PICTURE
menu.
PIC
CONTRAST
BRIGHTNESS
COLOR
SHARPNESS
2 Press the P+/- buttons to select the item to adjusted, then press
the V-/+ buttons to obtain the desired effect.
ITEM
CONTRAST
BRIGHTNESS
COLOUR
SHARPNESS
*Hue
Press V - Press V +
Weak
Dark
Shallow
Soft
lean to purple
Strong
Bright
Deep
Sharp
lean to green
85
Note: The "Hue" item only appears when the colour system is NTSC.
13
Page 15

Convenient Picture & Sound Control Function (continued)
Black Stretch Automatically increases the contrast range
Noise Reduce Picture Noise & Grain Reduction Circuit. (Use only on poor reception)
Black stretch and noise reduce
How to select BLACK STRETCH
1 Press the MENU button. The
MAIN MENU will appear with the
PlC (picture) icon flashing. Press
BACKGROUND
BLACK STRETCH
NOISE REDUCE
FADE
AVL
ON
V-
P+
MENU
the MENU button a further 2
times until the FUN (function)
icon is flashing. Press P- to
enter the FUNCTION menu.
V+
V-
P-
P+
MENU
P-
V+
2 Press the P+/- button to select "BLACK STRETCH".
Press the V-/+ buttons to turn it "ON" or "OFF".
How to select NOISE REDUCE
1 Press the MENU button. The MAIN
MENU will appear with the PlC
(picture) icon flashing. Press the
MENU button a further 2 times until
the FUN (function) icon is flashing.
Press P- to enter the FUNCTION
menu.
BACKGROUND
BLACK STRETCH
NOISE REDUCE
FADE
AVL
ON
2 Press the P+/- buttons to select "NOISE REDUCE".
Press the V-/+ buttons to turn it "ON" or "OFF".
14
Page 16

Convenient Picture & Sound Control Functions (continued)
Mute and Fade
Sound mute
V-
MUTE
P+
MENU
P-
V+
1 Press the MUTE button on the
remote control to turn off the
MUTE
sound. MUTE will appear on the
top left of the display.
2 Press MUTE again to turn the
sound back on.
Fade
When FADE is turned on, the TV will protect the tube by
fading the picture in when the TV is switched on, and
fading the picture out when the TV is switched off.
1 Press the MENU button.
The MAIN MENU will
appear with the PlC (picture)
icon flashing. Press the
MENU button a further 2
times until the FUN
(function) icon is flashing.
Press P- to enter the
FUNCTION menu.
BACKGROUND
BLACK STRETCH
NOISE REDUCE
FADE
AVL
ON
V-
P+
MENU
P-
V+
2 Press the P+/- buttons to select FADE.
3 Press the V-/+ button to turn the FADE function "ON"
or "OFF".
15
Page 17

Time Functions
Clock setting and timer on/off functions
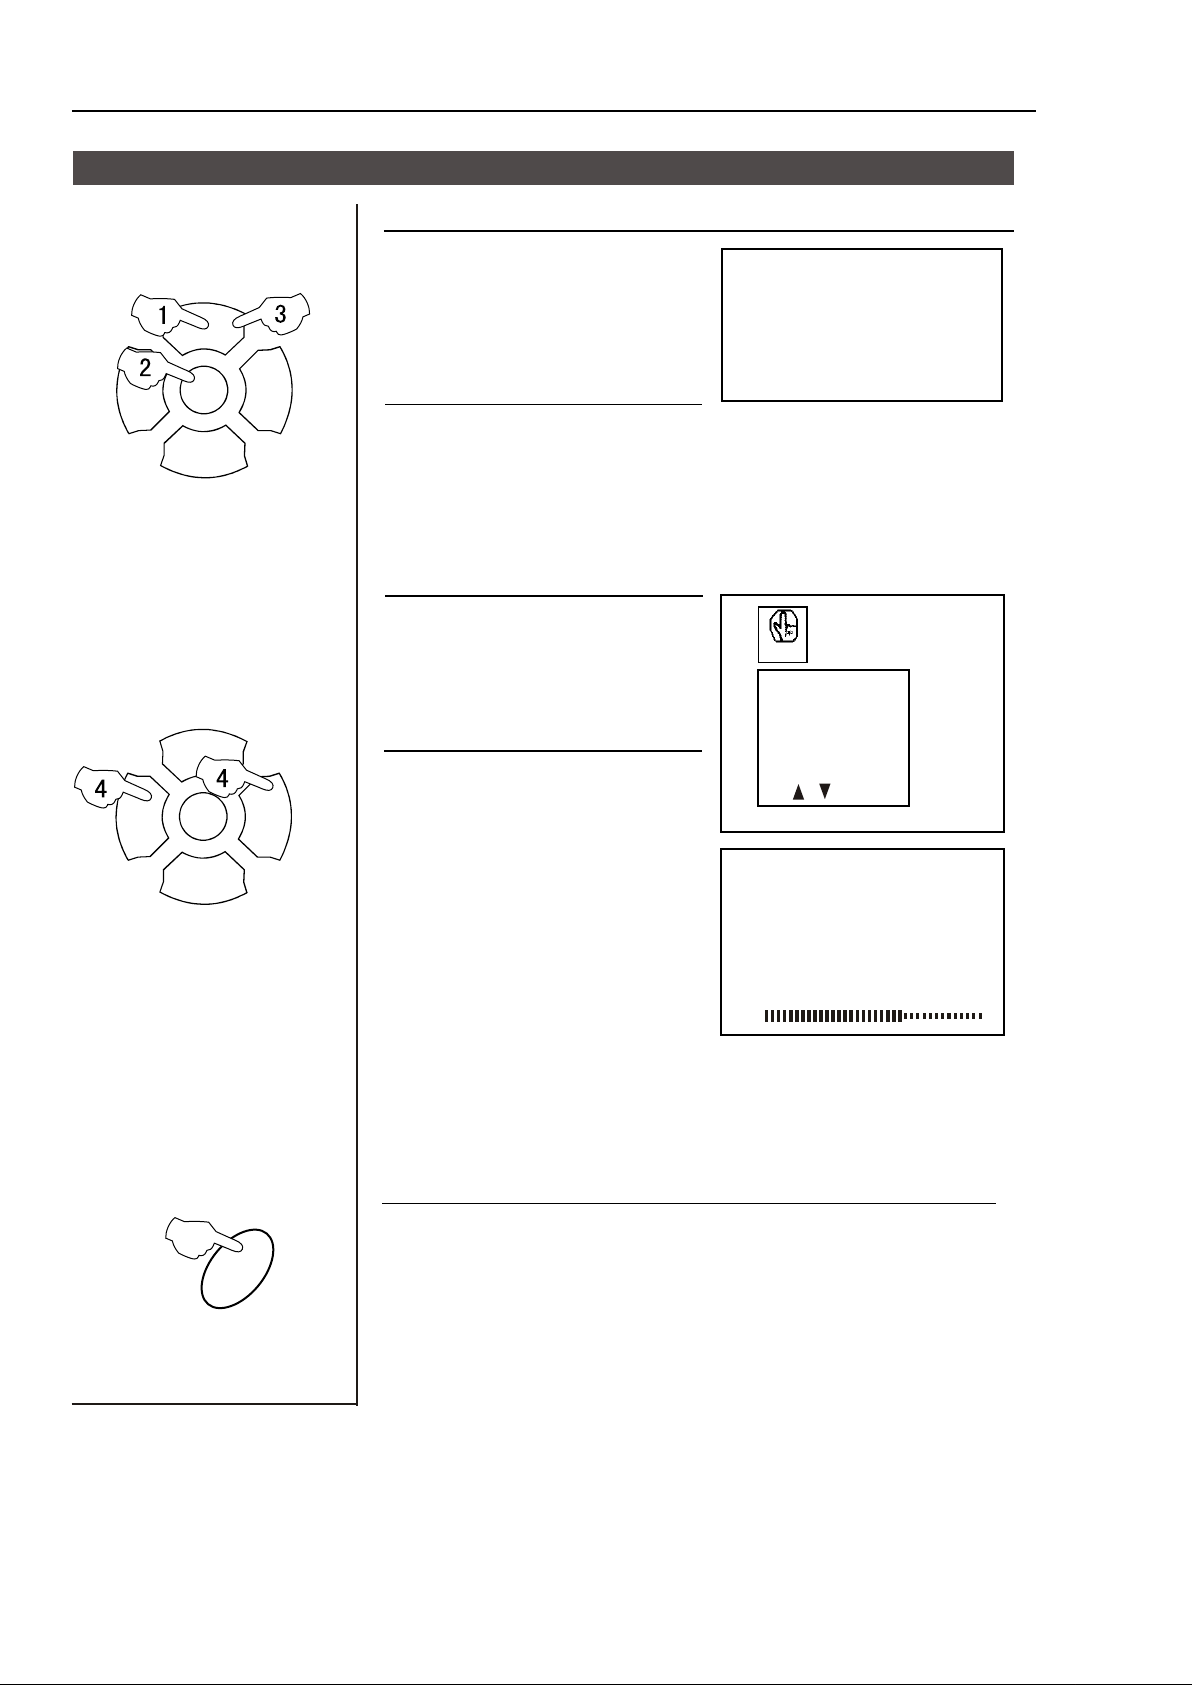
Clock setting
The clock will only work if the TV set if left turned on
or in standby. When the set is disconnected from the
power supply or is turned off by the main power on
the front panel, the clock loses power and will need to
be reset when the power is reconnected.
1 Press the TIME button, and
the TIME menu appears on
the screen.
2 Press the P+/- buttons select
"CLOCK", then press the V -/+
buttons to adjust the time in
hour position; press again the
P+/- buttons to select the time
in minute position, then press
the V-/+ buttons to adjust the
value of minutes.
V-
TIME
P+
MENU
P-
V+
TIME
CLOCK
ON TIME
ON PROG
OFF TIME
SLEEP TIME
REMIND TIME
REMIND PROG
17:18
18:00
1
--:-0
--:-1
V-
TIME
P+
MENU
P-
V+
On/off timer On-off time setting is cleared after timer operates.
Using on/off timer function, the TV set can automatically
turn on to a preset program or shut down at a preset time.
1 Press the TIME button, and
the TIME menu display on the
screen.
2. Press the P+/- buttons to
select "ON TIME", then press
the V-/+ buttons to set the value
in hour position; press again
the P+/- buttons to select the
minute position and set the
value of the minute (take 18:00
as an example).
3 Press the P+/- buttons to
select "ON PROG", then press
the V-/+ or program number
buttons to select your desired
channel (take 8 as an example).
4 Repeat step 1-2 to set OFF
TIME (take 23:00 as an example).
TIME
CLOCK
ON TIME
ON PROG
OFF TIME
SLEEP TIME
REMIND TIME
REMIND PROG
TIME
CLOCK
ON TIME
ON PROG
OFF TIME
SLEEP TIME
REMIND TIME
REMIND PROG
17:18
18:00
1
--:-0
--:-1
17:18
18:00
8
23:00
0
--:-1
16
Page 18

Timer Functions (continued)
Sleep timer and program preset
Sleep timer
TIME
P+
MENU
V- V+
P-
The sleep timer switches the set
to stand-by after the sleep time
has elapsed. Sleep time can be
set in 10 minute intervals up to
180 minutes, as shown in the
illustration. Setting the sleep
time to zero turns off the sleep timer.
1 Press the TIME button, and the
TIME menu appears on the
screen.
2 Press the P+/- buttons to
select "SLEEP TIMER".
3 press the V-/+ buttons to set
the value of the SLEEP TIMER.
170
180
TIME
CLOCK
ON TIME
ON PROG
OFF TIME
SLEEP TIME
REMIND TIME
REMIND PROG
0
10
20
17:18
18:00
8
23:00
120
--:-18
V-
TIME
P+
MENU
P-
V+
REMIND PROG function
Program remind timer, that can automatically change channel
when a program on a different channel is due to start.
1 Press the TIME button, and
the TIME menu display on the
screen.
2 Press the P+/- buttons to
select "REMIND TIME", then
press the V-/+ buttons to set
the value in hour position;
press again the P+/- buttons to
select the minute position, and
then set the value of the
minute (take 19:00 as an
example).
3 Press the P+/- buttons to
select "REMIND PROG", then
press the V-/+ buttons or the
program direct number buttons
to set the desired channel
(take 18 as an example).
NOTE: For REMIND PROG to
operate CHILD LOCK must be
turned off.
TIME
CLOCK
ON TIME
ON PROG
OFF TIME
SLEEP TIME
REMIND TIME
REMIND PROG
TIME
CLOCK
ON TIME
ON PROG
OFF TIME
SLEEP TIME
REMIND TIME
REMIND PROG
17:18
18:00
8
23:00
120
19:00
1
17:18
18:00
8
23:00
120
19:00
18
17
Page 19

Set Up Functions
Screen saver and Calendar
P+
How to start screen saver function
When the background
function is ON a bouncing
'NO SIGNAL' will be
displayed on a blue
back ground.
NO SIGNAL
MENU
V-
P-
CALENDAR
P+
MENU
V-
P-
V+
V+
1 Press the MENU button. The MAIN MENU will appear
with the PlC (picture) icon flashing. Press the MENU
button a further 2 times until the FUN (function) icon is
flashing. Press P- to enter the FUNCTION menu.
2 Press the P+/- buttons to select
BACKGROUND. Then press
V+/- to turn the BACKGROUND
function ON or OFF.
BACKGROUND
BLACK STRETCH
NOISE REDUCE
FADE
AVL
ON
Calendar function
1 Press the CALENDAR
button. The calendar menu
will be displayed on the
screen.
The date on the top line is in
Year / Month / Day format.
2 Press the P+/- buttons to highlight
the year, month or day number. Press
the V-/+ buttons to set or change
each number.
SOLAR 2001 11 14
S M T W T F S
1 2 3
4 5 6 7 8 9 10
11 12 13 14 15 16 17
18 19 20 21 22 23 24
25 26 27 28 29 30
Press EXIT or wait a minute for the calendar to disappear.
18
Page 20

Set Up Functions (continued)
AVL
AVL function
Automatic Volume Level control reduces the effect of
large volume changes. For instance, when
advertisements come on.
V-
V-
P+
MENU
P-
P+
MENU
P-
V+
V+
1 Press the MENU button.
The MAIN MENU will
appear with the PlC
(picture) icon flashing.
Press the MENU button
a further 2 times until the
FUN (function) icon is
flashing. Press P- to enter
the FUNCTION menu.
2 Press the P+/- button to
select "AVL".
BACKGROUND
BLACK STRETCH
NOISE REDUCE
FADE
AVL
BACKGROUND
BLACK STRETCH
NOISE REDUCE
FADE
AVL
ON
ON
V-
P+
MENU
P-
V+
3 Press V-/+ button to turn the
AVL function "ON" or "OFF".
19
Page 21

Organise Functions
Organise
ORGANISE
This feature enables TV programmes that may be on a wrong program
number to be moved to another number.
This feature is very useful when Automatic Search Tuning has been used
because programmes are stored in the order they are found, which is usually
not the desired order.
When organising, it is best to start from the lowest programme number first.
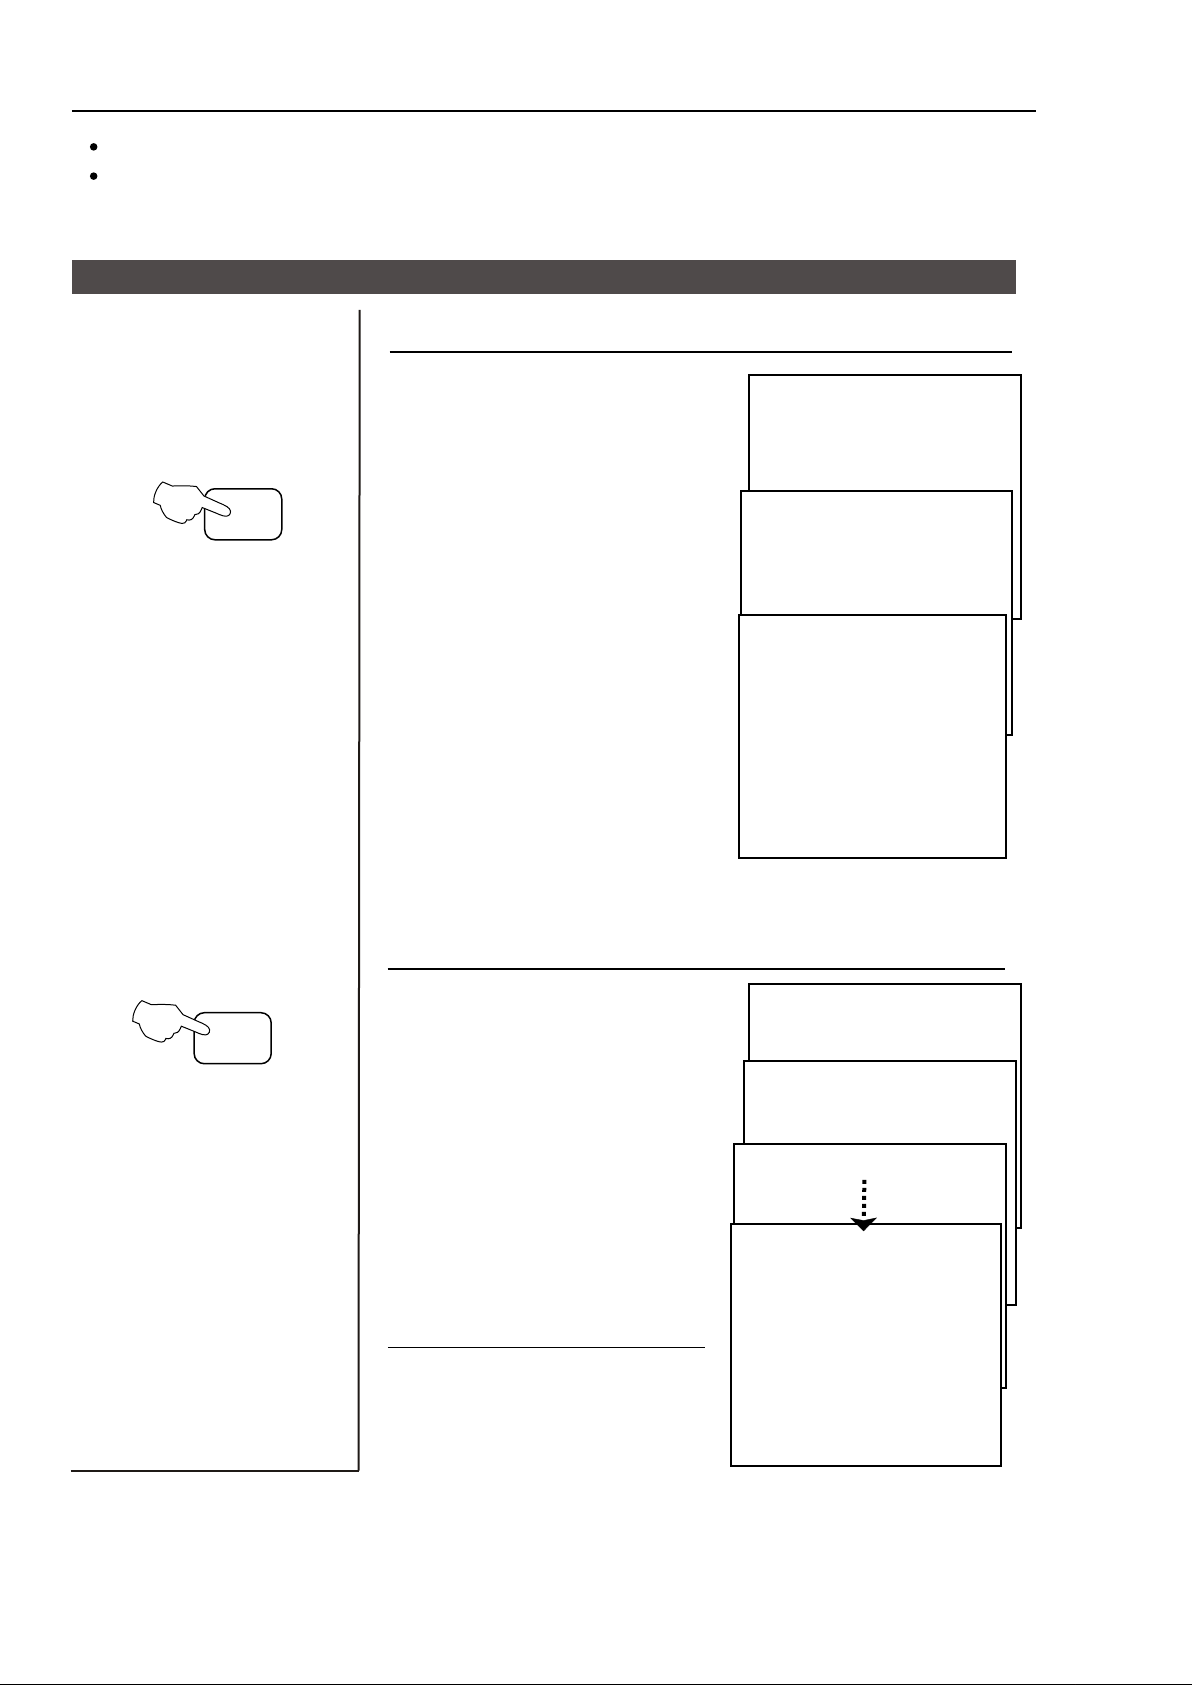
1. Press the MENU button. The
MAIN MENU will appear with the
PlC icon flashing.
Press the MENU button a further 3
times until the TUN icon is flashing.
Press P- to enter the TUNING
menu.
2. Press P+ or P- buttons to
select ORGANISE.
Press V+ to enter the menu.
(For Example) If the Automatic Search function has placed SBS
on programme position 6 and you would like to move this so it
appears on programme position 1.
3. Use P+ or P- to select "FROM".
4. Press V+ or V- to change
the "FORM" programme number
to 6.
5. Use P+ or P- to select "TO".
6. Press V+ or V- to change
the "TO" programme number to 1.
7. Use P+ or P- to select "MOVE
CHANNEL".
8. Use V+ or V- to perform the
action.
V-
V-
V-
P+
MENU
P-
P+
MENU
P-
P+
MENU
P-
V+
V+
V+
TUN
PROG NO
ORGANISE
SEARCH
FINE TUNE
AUTO SEARCH
ORGANISE
FROM
TO
6
1
MOVE CHANNEL
The diagrams below explain how the ORGANISE function
affects other channels when position 6 is moved to position 1.
Start Position
Move FROM 6. TO 1
Other programmes move
down to allow for space
Contents
P 01
P 02
P 03
P 04
P 05
P 06
Contents
Contents
Contents
Contents
Contents
P 01
P 02
P 03
P 04
P 05
P 06
Contents
Contents
Contents
Contents
Contents
Contents
P 01
P 02
P 03
P 04
P 05
P 06
Contents
Contents
Contents
Contents
Contents
Contents
What was on programme position 6 is now on programme position 1.
All the other stored channels have now moved down 1 position so that now.
What was on programme position 1 is now on programme position 2.
What was on programme position 2 is now on programme position 3.
What was on programme position 3 is now on programme position 4.
What was on programme position 4 is now on programme position 5.
What was on programme position 5 is now on programme position 6.
Note: It needs some time to move two channels, please wait till the TV
finishes the process.
20
Page 22

Setting the Lock
This TV set provides the option of locking various parts of the TV to guard
against unauthorised viewing.
Changing your Password
Changing your password
This TV set can set a four digit password, the original
H.LOCK
one is 0000, if you want to reset it, please follow the
instructions below.
1 Press H.LOCK button, the
screen will show as the form
on the right.
INPUT PASSWORD ----
V-
1 2
5
9
P+
MENU
P-
6
0
3
7
V+
2 Press the 0 button four times
and enter the menu of LOCK
setting. Press P+/- button
and move the indicator to
CHANGE PW., and press
V+ button to enter the
sub-menu of change
LOCK SET
CHANGE PW.
TUNING LOCK
PRESET PROG
AV LOCK
CHILD LOCK
MAX VOLUME
UNLOCK
OFF
1
OFF
OFF
50
password.
4
8
3 Press the PROGRAM
NUMBER (0-9) button and
input a four-digits
CHANGE PW.
NEW PASSWORD ---CONFIRM ----
password.
4 After inputting your new password, please confirm it by
keying it in again. You can now enter the lock settings using
your new password.
21
Page 23

Setting the Lock (continued)
Setting the Lock
Setting the Lock
1 2
5
9
V-
H.LOCK
3
6
0
7 8
P+
MENU
V+
There
etc, you
1 Press the H.LOCK button,
are
can
TUNING
set
it
due
LOCK, AV
to
your
LOCK,
and
CHILD
needs.
INPUT PASSWORD .....
LOCK,
the screen will show as the
form on the right.
4
2 Press the PROGRAM
NUMBER (0-9) button 0 for
four times (or input the
password you set), and enter
the LOCK menu.
LOCK SET
CHANGE PW.
TUNING LOCK
PRESET PROG
AV LOCK
CHILD LOCK
MAX VOLUME
UNLOCK
OFF
1
OFF
OFF
50
3 Press P+/- button, move
the indicator to the lock function you require and press V+
or V-button to set it ON or OFF, change setting or activate it.
P-
Description of each lock function
1. When the TUNING LOCK is set ON, if you want to enter the
TUNING menu, you will have to type the password.
2. The PRESET PROG allows the TV to always be on the same
channel when you turn it on.
3. When AV LOCK is set ON the AV channel cannot be used, hence
the screen will indicate that AV has been locked.
4. When the CHILD LOCK is set ON, if the buttons on the TV
are pressed, the screen will indicate that the TV set is in the
status of CHILD LOCK, and the buttons won't work.
5. The MAX VOLUME allows you to set a figure for the top limit
of volume. Volume control still shows 1~100 but volume level is
scaled down.
6. The UNLOCK allows to you to set all the lock to OFF and set
the MAX VOLUME to 100.
7. If you forget your password or a password is accidentally set
enter 9443 as the password. This will enable you to regain control.
22
Page 24

Basic Playback
Basic Playback
Preparations
Press the TV/DVD button on the remote control
or the TV to enter the DVD status.
Basic playback
1. Press OPEN/CLOSE to open the disc tray,
place a disc on the disc tray.
There are two different disc sizes. Place the
disc in the correct guide on the disc tray. If the
disc is out of the guide, it may damage the disc
and cause the DVD player to malfunction.
Do not place a disc which is unplayable in this
DVD player.
2. Press OPEN/CLOSE to close the disc tray, the
playback will automatically start.
Some discs do not start automatically. Press
PLAY/ENTER to start playback.
3. Some discs may start playback with a menu. Use
the cursor buttons on the remote control to select
menu options and press PLAY/ENTER to start. You
may also press the digit buttons to select a menu
option directly. Many DVDs will not allow this during
start-up.
Pause playback
1. Press PAUSE/STEP to pause playback (still mode).
The sound will be muted during still mode.
2. Press PLAY/ENTER to resume normal playback.
Stop playback
1. Press STOP button to go to stop mode, the TV
screen will show the start logo. For some discs the
player can recall the location where stopped, such
as DVDs and audio CDs.
2. Press PLAY/ENTER to resume play-back from the
location where playback was stopped.
3. Press STOP twice to stop completely.
Play must then resumed from the title beginning.
Previous and Next
During Playing, pressing the PREV key will
restart the current chapter and skip chapters
backwards with each subsequent press until the
start of the disc is reached.
Each press of NEXT key during playing will
skip the current chapter and play the next one.
In case of CD audio and photo discs the next
track, song or photo is reached.
Fast forward and Fast reverse
1. Press FWD to fast forward through the disc.
Each time the FWD button is pressed, the
fast forward motion speed changes.
2. Press PLAY/ENTER to resume normal playback.
3. Press REV to fast reverse through the disc.
Each time the REV button is pressed, the
fast reverse motion speed changes.
4. Press PLAY/ENTER to resume normal playback.
Single step playback
To "single step" press the "Pause" button,
then press "Pause/Step" in continuous steps
to view the next frame.
23
Page 25

Advanced Playback
Advanced Playback
IMPORTANT NOTE:
ALL DESCRIBED FUNCTIONS ARE FOR DVD DISCS. IF YOU PLAY OTHER FORMATS
THE OPERATION AND DISPLAY ON SCREEN MAY VARY.
SUBTITLE
Press " SUBTITLE ", the screen will display "SUBTITLE 01/XX XXXXX", "01" indicates the ordinal
number of this language; "XX" indicates total number
of language; "XXXXXX" indicates the language of
country. (the number of language depends on disc).
This function can select up to 32 languages
displayed on screen.
REPEAT
Press " REPEAT " and Chapter repeat will be
displayed on screen, the second press will display
Title repeat, the third press will display All repeat,
the fourth press will cancel this function.
A-B
Press "A-B" to begin start-point, press again
to set an end point and complete setting. The
selected section A-B will be repeated. The third
press will cancel this function.
ANGLE
When enjoying sports, concert or theatre, press this
key to watch same actions in different angles. (Valid
for discs possessing this function. Using a disc
recorded in multi-angle you can view the scene from
different angles, for example, front, side, whole view
and exterior scene).
PROGRAM
When playing discs, press "PROGRAM" to enter
program mode. Starting with program number "01"
highlighted, press the digit buttons to select the title
and chapter number that you want. When finished
move the cursor to select "START". This will start
the program playback.
SEARCH
Press "SEARCH" once to display Disc Go To --:--,
use numeric key to enter the desired time of Disc.
Press " SEARCH " twice to display Track Go To --:--,
use numeric keys to enter the desired time of track.
Press " SEARCH " 3 times to display Select Track
--/03, use numeric keys to enter the desired track.
SLOW
Press SLOW to play a disc in slow forward. Each
time the SLOW button is pressed, the slow
motion speed changes.
Press PLAY/ENTER to resume normal playback;
Note: This function is invalid for CD.
TITLE/PBC
With some DVD discs pressing this key will display
the title menu. You can then use the digit buttons
to select the item you prefer.
D.MENU
Press this key to display root menu, select item
according to your preference. (This function will work
with a DVD having a multi-layer menu.)
D.CALL
Pressing this key will cycle through "title elapsed",
"title remain", "chapter elapsed", "chapter remain"
and "display off ". Each displays the appropriate
time information.
AUDIO
Press this key can change the mode of audio.
such as: Audio 1/2: AC 3 2 CH English
Audio 2/2: AC 3 5.1 CH English
Press this button to cycle between Mono Left, Mono
Right, Mix-Mono and Stereo.
Note: Do not press this button continuously.
Each press must have a 3 second delay.
24
Page 26

Special Function Playback
JPEG DISC PLAYBACK
Users can record pictures from digital camera or scanner onto a CD-R or CD-RW disc using a
personal computer, CD recording drive and suitable software. Be sure to use good quality
recordable discs and trustworthy software with good instructions. Take care with recording
settings: the disc must be recorded as data disc IS09660 format, short file names (8
characters) are best, no multi-session and must be "finalised".
JPEG disc contains pictures in a compact file format which can be decoded by the DVD
player and output for viewing and enjoyment on the television screen.
When a disc containing standard JPEG picture files is inserted into the player, a navigation
menu will be displayed automatically. Use the UP and DOWN cursor buttons to select a file
then press PLAY/ENTER. The slide show will commence. Press PREVIOUS or NEXT to move
between pictures. Press pause to stop on the current picture. Press PLAY/ENTER to resume
normal playing.
Press D.MENU to go back to folder and file view.
In the navigation menu you can open folders containing files by moving the highlight onto
them with the UP and down buttons, then pressing PLAY/ENTER.
Program button changes between folder and file list.
Some repeat functions can be used (see MP3 play).
Zoom functions are not included.
SCREEN SAVER FUNCTION
This unit employs a screen saver mode to help protect the tube during static video
pictures. This can be turned off on the GENERAL SETUP PAGE (see Pg. 27)
25
Page 27

DVD System Setup
DVD System Setup
General Setup Process
SETUP
PLAY/ENTER
SETUP
PLAY/ENTER
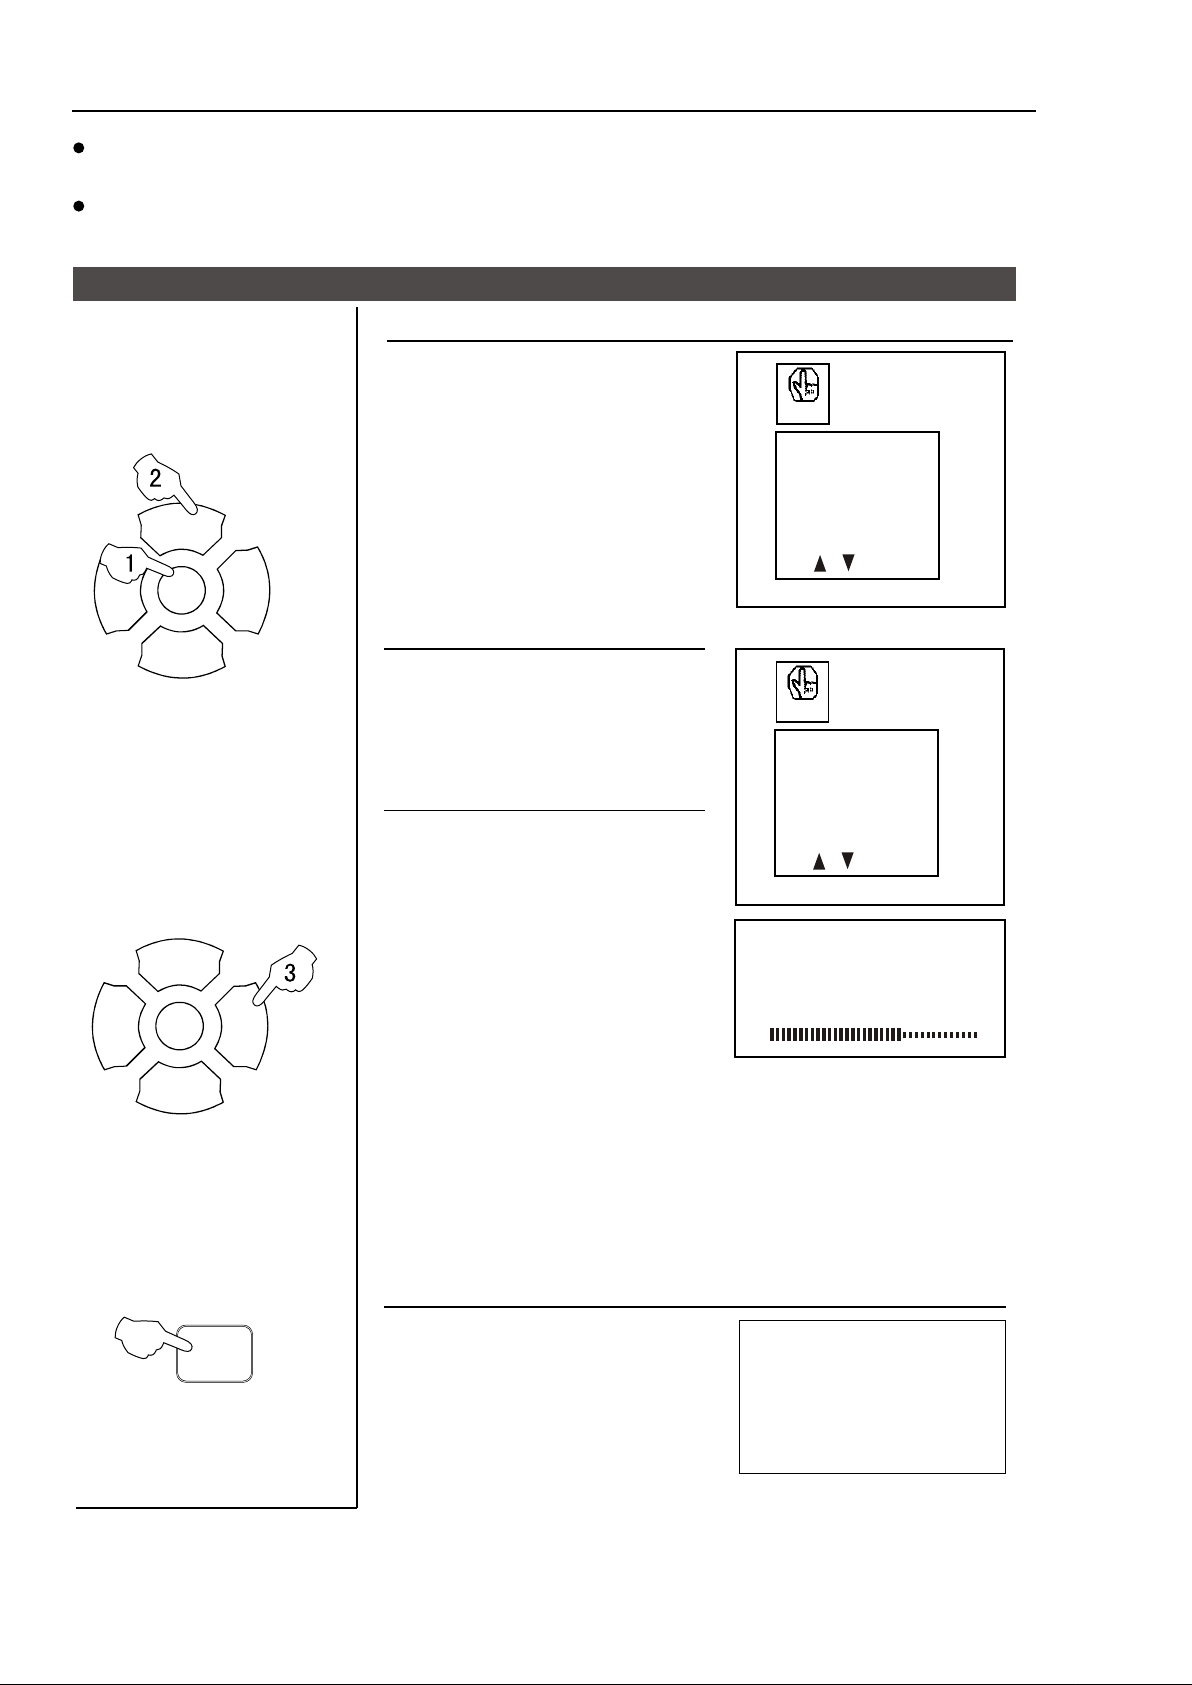
1. Press the SETUP button, the
General Setup Page, Preference
Page will be displayed in turn.
2. Press or to select the
item, then press to enter the
..General Setup Page..
TV Display LB
Angle Mark On
OSD Lang ENG
Spdif Output
Caption On
4: 3:Ps
4: 3:Lb
16: 9
submenu.
..Preference Page..
3. Press or to setup, then
press PLAY/ENTER to confirm.
TV Type Auto
Parental
Password
Default
PAL
AUTO
NTSC
4. Press EXIT key or press SETUP
repeatedly to exit the set-up
menus.
General Setup Page
ASPECT RATIO DESCRIPTION
When using the DVD with the internal
TV, select 4:3/LB.
The following information applies
only when the DVD output is
connected to an external TV.
4:3/PS (PS = Pan and Scan)
You may select if you have a normal aspect
ratio (4:3) TV, although the 4:3/LB
(letter box) is a more common choice. In PS
mode, widescreen material will fill the screen, but at the expense of chopping
off extreme left and right edges of the original film picture. For this feature to
work, the disc must be specially coded. Such discs are uncommon.
4:3/LB (LB = Letter Box)
You may select this if you have a normal aspect ratio (4:3) TV. Widescreen
material will be shown in pure unaltered form, allowing the entire picture area
of the original film to be viewed without any side cropping. Black bars will
appear above and below the picture.
16:9
You may select this if you have a widescreen (16:9) TV. Back bars may still
appear above and below the picture even if using a widescreen TV. This is
because some film directors prefer to use ultra widescreen aspect ratios e.g.
2.35:1. This will normally be indicated on the DVD packaging.
..General Setup Page..
TV Display LB
Angle Mark On
OSD Lang ENG
Spdif Output
Caption On
Screen Saver Off
4: 3:Ps
4: 3:Lb
16: 9
26
Page 28

DVD System Setup (continued)
DVD System Setup
General Setup Page
ANGLE MARK: Users can select a particular
camera angle when playing a DVD which offers
multiple angles.
This item allows you to set Angle Mark ON or OFF.
On Screen Display (OSD) Language: Users
can select on-screen display language.
..General Setup Page..
TV Display LB
Angle Mark On
OSD Lang ENG
Spdif Output
..General Setup Page..
TV Display LB
Angle Mark On
OSD Lang ENG
Spdif Output
Caption On
Screen Saver Off
On
Off
English
France
SPDlF OUTPUT MODE: Sets the audio outputs.
This DVD player includes three kinds of audio output:
1. SPDlF OFF: An analog surround sound format is output through the
back-panel connections for 2-CH audio out or 5.1 CH audio out.
2. SPDlF/RAW or SPDIF/PCM: This
surround sound format is output to a Dolby Digital/DTS decoder
through the coaxial connector on the back panel of the product.
..General Setup Page..
TV Display LB
Angle Mark On
OSD Lang ENG
Spdif Output
Caption On
Screen Saver Off
CAPTIONS: This function allows you to display or hide the caption.
..General Setup Page..
TV Display LB
Angle Mark On
OSD Lang ENG
Spdif Output
Captions On
Screen Saver Off
SCREEN SAVER: If the screen saver is on, then there
will be an animated picture of DVD on the screen
whenever the DVD player is idle for more than 3
minutes.
..General Setup Page..
TV Display LB
Angle Mark On
OSD Lang ENG
Spdif Output
Caption On
Screen Saver Off
Spdif Off
Spdif: Raw
Spdif: Pcm
On
Off
On
Off
27
Page 29

DVD System Setup (continued)
DVD System Setup
Preference Page
SETUP
PLAY/ENTER
SETUP
The Preference Page is only available when there is no disc
in the player. These settings are applied consistently to all
discs which are inserted and played.
TV TYPE: This player
supports different TV output,
including MULTI (Auto),
NTSC, and PAL systems.
..Preference Page..
TV Type Auto
Default
PAL
AUTO
NTSC
Usually please set to MULTI.
DEFAULT: Resets all settings
(except password and parental
lock status) for this DVD player
..Preference Page..
TV Type Auto
Default
Reset
back to the manufacturers
original settings. Press ENTER
to perform the reset.
PLAY/ENTER
Note:
Some functions may not be available depending on the type of disc.
28
Page 30

Playable Discs
The following discs can be played:
You cannot play discs other than those listed above.
You cannot play discs of non-standardized discs, even if they may be labelled as above.
The performance of CD-R or CD-RW disc is depend on the way the disc is prepared.
- see under "Special function playback - JPEG disc playback".
29
Page 31

Disc Protection and DVD Characteristics
ON HANDLING DISCS
Do not touch the playback side of the disc.
Do not attach paper or tape to disc.
Playback side
ON CLEANING DISCS
Fingerprints and dust on the disc cause picture
and sound deterioration. Wipe the disc from the
centre outwards with a soft cloth. Always keep
the disc clean.
If you can not wipe off dust with a soft cloth,
wipe the disc lightly with a slightly moistened soft
cloth and finish with a dry cloth.
Do not use any type of solvent such a thinner,
benzene, commercially available cleaners or antistatic spray for vinyl LPs. It may damage the disc.
ON STORING DISCS
Do not store discs in a place subject to direct
sunlight or near heat source.
Do not store discs in place subject to moisture
and dust such as bathroom or near humidifier.
Store discs vertically in a case. Stacking or
placing object on discs outside of their case may
cause warping.
STRUCTURE OF DISC CONTENTS
Normally, DVD discs are divided into titles, and the
titles are sub-divided into chapters. Audio CD are
divided into tracks
Compare DVD disc with other discs:
DVD LD
Encode
method
Capacity
Playing Time
Disc diameter
Horizontal
resolution
Picture
proportion
Subtitle
Language
Singleside
singlelayer
4.7G
minutes
Digital/MPEG
Double
-side
single
-layer
8.5G
133
minutes
More than 500 line
Singleside
doublelayer
9.4G
242
minutes
12cm/8cm 12cm/8cm
Multiple kinds
32 kinds
8 kinds
Doubleside
doublelayer
17G
266
minutes
484
Analog
Single-side
60 minutes
double-side
120 minutes
30cm/20cm
No more than
430 line
One kind
16 kinds
at most
4 kinds
at most
SVCD
Digital
650MB 650MB 650MB
45 minutes 74 minutes 74 minutes
12cm 12cm
No more than
350 line
One kind
4 kinds
4 kinds
at most
VCD CD
Digital/
MPEG I
No more than
250 line
One kind
2 kinds 2 kinds
Digital
Sound quality
48KHz, 96KHz/
6, 20, 24bit
44.1KHz/
16bit
44.1KHz/
16bit
30
44.1KHz/
16bit
44.1KHz/
16bit
Page 32

Connecting the TV Set to Other Video & Audio Equipment
Connection of AV input/output terminal
The figure below shows how to connect external equipment using AV signals.
an additional TV
DVD, VCD or other units
Video output
DVD, VCD or other units
COAXIAL
VIDEO
AUDIO
VHF
OUT
IN
L
R
To video input
To audio input
UHF
Laser DVD with output terminal
To audio output
There is also an AV input on the side of your television. Use the Left Audio input (white terminal on
the TV), if you are connecting equipment with mono sound. The MONO sound will be delivered by
both left and right speakers.
VIDEO
L - AUDIO - R
DVD player
VCR
Video output
Audio left output
Audio right output
31
Page 33

Troubleshooting Guide
To assist in location possible faults use help guide below.
BREAKDOWN PHENOMENON
PICTURE
SOUND
The aerial direction and connection
CHECKING
Picture with snow
Double or Triple Image
Disturb
Normal No sound
No Picture
No colour Normal volume
Noise
Normal
Noise
No sound
This is called ghosting which can be minimised
with an outside aerial, and good quality cable and
terminations. Altering the aerial direction can also
minimise this effect.
Electrical interference which can be caused by cars,
motorbikes etc, Fluorescent lamps and dirty
insulators on overhead power cables.
Volume Sound mute
Ensure that the power supply is connected to
the TV set and turned on. Also ensure that the
TV set is not in "Listen Mode" or that the
brightness and contrast are not turned down.
Adjust colour control
Adjust channel again
Scramble
Colour Spot
Note:
1. If the fault can not be repaired using the above guide consult with your local authorised service
centre. The TV set must only be repaired by a qualified registered service person. Never attempt to
remove the back cover as TV set has dangerous voltages inside that may cause a fatality or fire.
2. The cabinet may produce the occasional "snapping sound". This is normal and caused by the
materials in the cabinet expanding with room temperature changes.
Normal or Weak Volume
Normal volume
Colour Purity fault which can be caused by moving the
TV set, placing magnets near the TV screen or turning
on/off house hold appliances such as vacuum cleaners
near the TV set. Turn the TV off with the mains power
switch for 15 minutes. When the power is turn on again
the TV set will automatically demagnetise the screen.
In severe cases you may need to repeat this process.
32
Page 34

Specifications
Specifications
Model
Colour system
Sound system
Picture tube
Sound output power
Power requirements
Power consumption
Dimension
Accessories
3415VD
PAL, NTSC PLAYBACK
BG
34cm colour picture tube
2X2W (10% THD)
AC 240V ~ 50Hz
70W
356 (Width) x 370 (Depth) x 367 (Height) mm
Remote control X1
Owner's manual X1
Battery (AAA) X2
NOTE
Design and specifications are subject to change without notice.
Dimensions quoted in this manual are approximate.
33
Page 35

PALSONIC CORPORATION PTY LTD
1 JOYNTON AVENUE
WATERLOO NSW 2017 AUSTRALIA
TEL: (02) 9313 7111
FAX: (02) 9313 7555
www.palsonic.com.au
PALSONIC CUSTOMER SERVICE
TELEPHONE
AUSTRALIA: 1300 657 888
01
0090504837
 Loading...