

Page 1
SUNTUF® Technical Guide
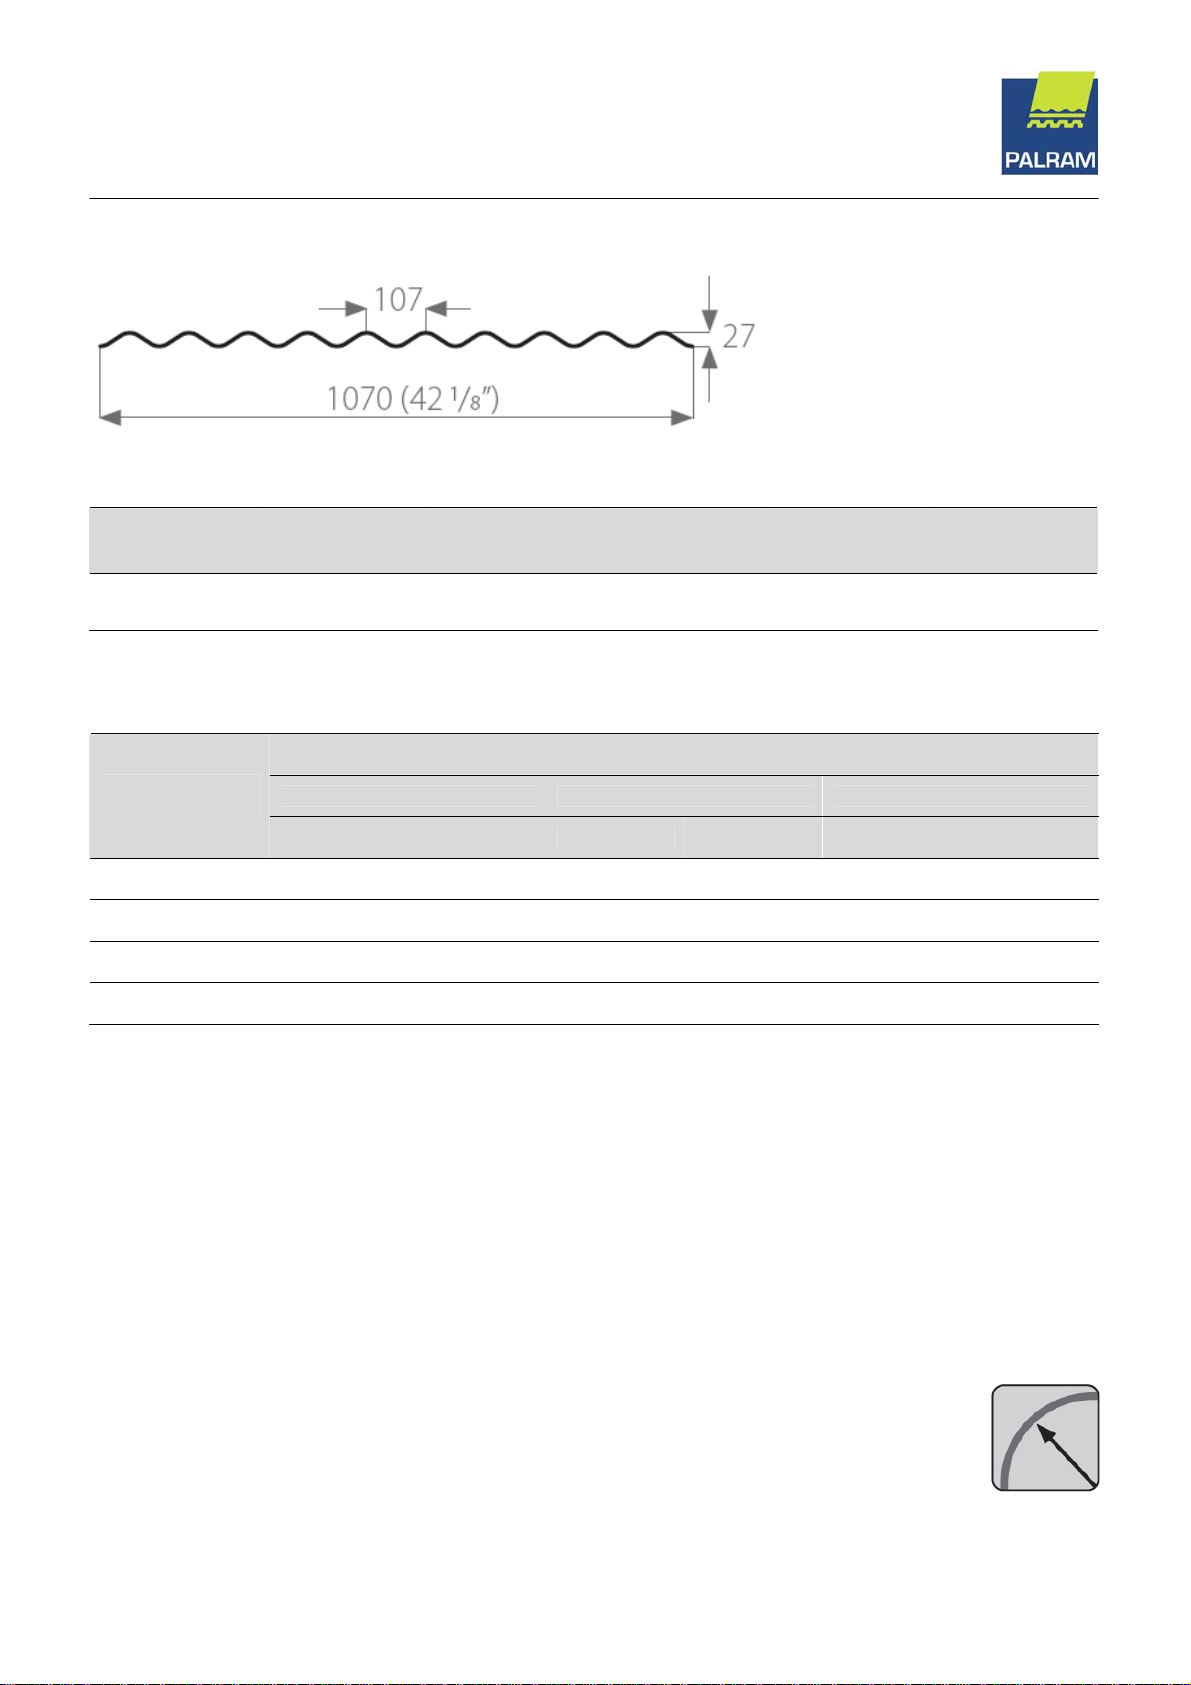
Profile: 107/27 (American 4.2)
Profile Drawing
Profile Dimensions
Profile
(mm)
107 / 27 0.8-1.5 1.5 - 11.8 1070 963 10
Load / Span Data
Load
(kg/m²)
75
100
125
150
The dimensions specified do not supersede the requirements of local construction codes.
Thickness
(mm)
1.0 mm 1.2 mm 1.5 mm
Mid Field End Field Mid Field End Field Mid Field End Field
1250 940 1300 975 1350 1010
1150 860 1200 900 1250 940
1050 790 1100 825 1150 860
950 710 1000 750 1050 790
Length
(m)
Overall width
(mm)
Maximum Roof Span (mm)
Cover Width
(mm)
Side-Lap
( % )
The maximum purlin spans are based on continuous beam calculation model and practical testing.
The criterion for allowed deflections is L/20.
For single span application use the end field column.
The mentioned load refers to both wind and snow loads and intended for rooflights only.
Minimum recommended slope – 10%.
Maximum recommended panel length - 7.0 m.
Curved Roof
Minimum curving radius 6.0 m.
©PALRAM Industries. All rights reserved.
Page 2
SUNTUF® Technical Guide
Profile: 107/27 (American 4.2)
Positioning
Make sure the UV protected side faces out.
Lay the SUNTUF panel to overlap roof panels on both sides. If not feasible -
SUNTUF Rooflight panels must underlap the roof panels against the primary direction of rain.
The SUNTUF sheet must be located and installed without any stresses.
Do not pull, stretch or force the sheets when the profiles are not perfectly matched.
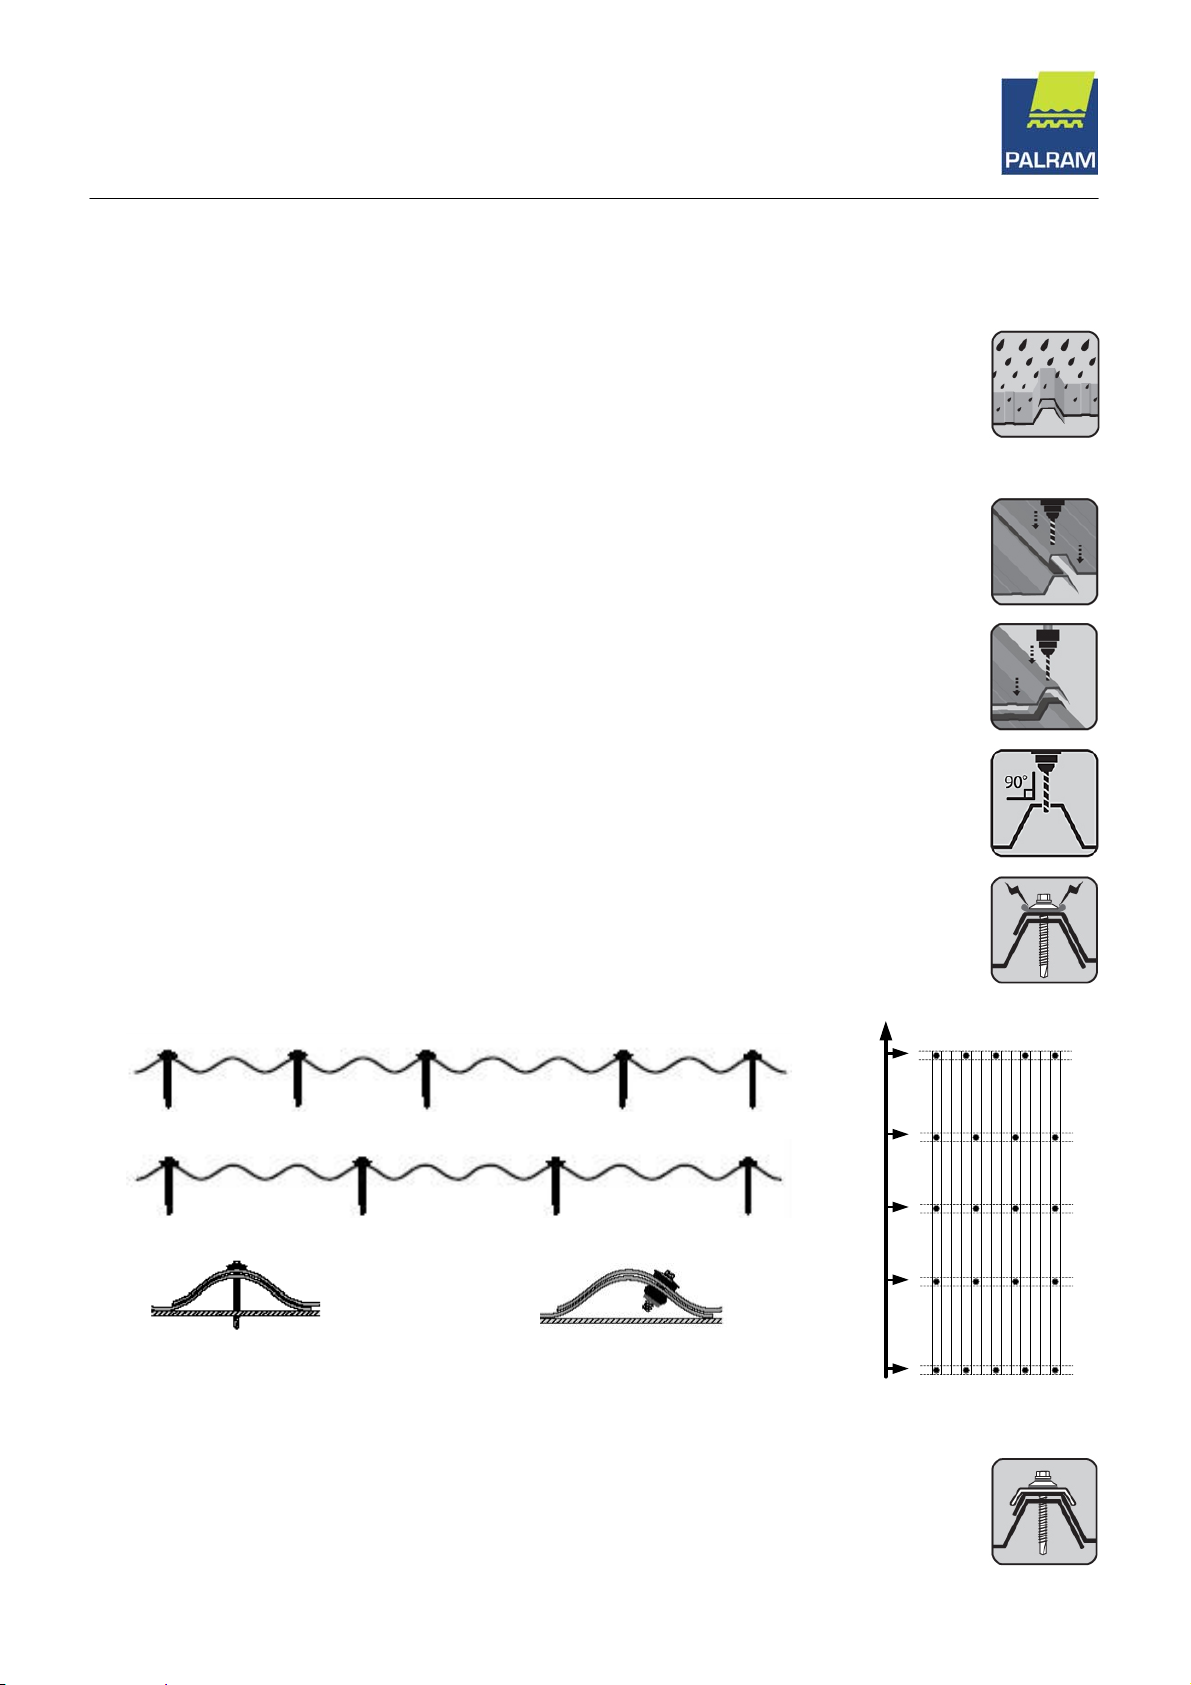
Fastening
Apply sealing tape over the SUNTUF panel side-lap corrugation crests, where covered by the next panel.
Apply sealing tape along the bottom and top End-lap (if there is), along screws centerline or two tapes
on both sides of screw centerline.
Pre-drill 10mm holes at crests where screws are positioned.
Start fastening the screws from the first side-lap (left) through the pre-drilled holes (3).
Start fastening the screws on the lower edge purlin (End-lap), through every other corrugation crest (1).
Fasten screws at the internal purlins, through every third corrugation crest, starting at the same side (2).
Fasten screws at the upper edge purlin, through every other corrugation crest,
starting at the same side (1)
Do not over-tighten!
• Fasten the stitching screws at every 300-400 mm (4).
Fastening Location
(1)
(2)
(3) 4)
Screws and Washers Specification
1
Crest fixing: Self-drilling 5.5mm (¼") x 65mm (2
with EPDM gasket.
Side Stitching: 5.5mm x 25mm (¼”x1") Stitching Screws (Grommet seals) with EPDM seal.
©PALRAM Industries. All rights reserved.
/2") screw + matched metal crest rider (Storm washers)
Page 3

SUNTUF® Technical Guide
Profile: 107/27 (American 4.2)
Important Notes
Use only PALRAM approved accessories, including EPDM rubber washers, silicones,
sealing tape, closure fixtures etc.
For clear SUNTUF onto wooden purlins, apply white acrylic paint, or aluminum tape, in
order to prevent over-heating of the purlins.
Cutting Tips
Use jigsaw or circular saw with fine tooth blades.
Apply high blade speed with moderate feeding rate.
Support the sheets near the cutting line.
Clean the dust and cutting chips after cutting.
Fastening Tips
Use adjustable electric screwdriver.
The screw must be installed perpendicular to the SUNTUF sheet.
Important: Do not over-tighten.
Safety
Do not step directly on the panel.
Use stepping boards.
Work according to local safety regulations.
Handling and Storage
Store in a shaded place, protect from direct sunlight and rain.
Avoid covering the sheets with heat absorbing materials.
Avoid contact or environment of chemicals.
Protect the sheets from any physical damage.
Inasmuch as PALRAM Industries has no control over the use to which others may put the material, it does not guarantee that the same results as those described herein will
be obtained. Each user of the material should make his own tests to determine the material’s suitability for his own particular use. Statements concerning possible or
suggested uses of the materials described herein are not to be construed as constituting a license under any PALRAM Industries patent covering such use or as
recommendations for use of such materials in the infringement of any patent. PALRAM Industries or its distributors cannot be held responsible for any losses incurred
through incorrect installation of the material. In accordance with our company policy of continual product development you are advised to check with your local PALRAM
Industries supplier to ensure that you have obtained the most up to date information.
©PALRAM Industries. All rights reserved.
 Loading...