

Page 1

SMS Handbook
Page 2

Copyright
© 1998-2002 Palm, Inc. All rights reserved. Graffiti, HotSync, the Palm logo, and Palm OS are registered
trademarks of Palm, Inc. The HotSync logo and Palm are trademarks of Palm, Inc. Palm, Inc. uses the
Bluetooth trademarks under express license from Bluetooth SIG, Inc., U.S.A. All other brands are
trademarks or registered trademarks of their respective owners.
Disclaimer and Limitation of Liability
Palm, Inc. assumes no responsibility for any damage or loss resulting from the use of this guide.
Palm, Inc. assumes no responsibility for any loss or claims by third parties which may arise through the use
of this software. Palm, Inc. assumes no responsibility for any damage or loss caused by deletion of data as
a result of malfunction, dead battery, or repairs. Be sure to make backup copies of all important data on
other media to protect against data loss.
IMPORTANT Please read the End User Software License Agreement with this product before using the
accompanying software program(s). Using any part of the software indicates that you accept the terms of the
End User Software License Agreement.
PN: 407-4924A-US
Page 3

Contents
SMS . . . . . . . . . . . . . . . . . . . . . . . . . . . . . . . . . . . . . . . . . . . . . . . . . . . . . . . . . . 1
Installing SMS . . . . . . . . . . . . . . . . . . . . . . . . . . . . . . . . . . . . . . . . . . . . . . . . . . . . . . 1
Configuring Phone Preferences . . . . . . . . . . . . . . . . . . . . . . . . . . . . . . . . . . . . . . . . 2
Making the connection . . . . . . . . . . . . . . . . . . . . . . . . . . . . . . . . . . . . . . . . . . . . . . . 2
Working with SMS . . . . . . . . . . . . . . . . . . . . . . . . . . . . . . . . . . . . . . . . . . . . . . . . . . 3
Using the navigator . . . . . . . . . . . . . . . . . . . . . . . . . . . . . . . . . . . . . . . . . . . . . . . 3
Opening SMS . . . . . . . . . . . . . . . . . . . . . . . . . . . . . . . . . . . . . . . . . . . . . . . . . . . . 4
Creating messages . . . . . . . . . . . . . . . . . . . . . . . . . . . . . . . . . . . . . . . . . . . . . . . . 4
Sending and receiving messages . . . . . . . . . . . . . . . . . . . . . . . . . . . . . . . . . . . . 6
Viewing messages . . . . . . . . . . . . . . . . . . . . . . . . . . . . . . . . . . . . . . . . . . . . . . . . 6
Working with draft messages . . . . . . . . . . . . . . . . . . . . . . . . . . . . . . . . . . . . . . 9
Adding a signature to a message . . . . . . . . . . . . . . . . . . . . . . . . . . . . . . . . . . . 10
Sending data from another application . . . . . . . . . . . . . . . . . . . . . . . . . . . . . 11
Setting Preferences . . . . . . . . . . . . . . . . . . . . . . . . . . . . . . . . . . . . . . . . . . . . . . . 12
SMS menus . . . . . . . . . . . . . . . . . . . . . . . . . . . . . . . . . . . . . . . . . . . . . . . . . . . . . 14
Support and troubleshooting . . . . . . . . . . . . . . . . . . . . . . . . . . . . . . . . . . . . . . . . 15
For your handheld . . . . . . . . . . . . . . . . . . . . . . . . . . . . . . . . . . . . . . . . . . . . . . . 15
For the SMS application . . . . . . . . . . . . . . . . . . . . . . . . . . . . . . . . . . . . . . . . . . 16
Index . . . . . . . . . . . . . . . . . . . . . . . . . . . . . . . . . . . . . . . . . . . . . . . . . . . . . . . . . 17
iii
Page 4

Contents
iv
Page 5

Short Message Service (SMS) technology enables you to send and receive short text
messages using your handheld and a GSM (Global System for Mobile
Communications) phone. Most GSM mobile phone service providers have
supported SMS technology for quite a while, and billions of SMS messages are
exchanged each month. However, because it is so difficult to enter text on a cell
phone keypad, many people don’t take advantage of this feature. Now, with SMS,
you can use Graffiti
quickly create SMS messages, and you have the added benefit of a larger display
when reading incoming messages.
SMS also enables you to receive records associated with your other Palm OS
applications. For example, your boss can send you a Date Book event for a meeting
you need to attend. When you receive the message, you can choose to add it to
your Date Book or view the information as a text message.
Installing SMS
To use SMS, you must install the software files located on the Software Essentials
CD-ROM.
SMS
®
2 characters or the onscreen keyboard on your handheld to
®
To install SMS (Windows):
1. Insert the Software Essentials CD-ROM into your computer’s CD-ROM drive.
2. From the categories listed on the left side of the Install screen, click the
Communications tab, and then click Telephony/SMS.
NOTE This step will automatically include the Phone Link application, as well
as the SMS application.
3. Click Install Now to send the files to Palm™ Quick Install.
NOTE If Palm Quick Install is not already open, a confirmation dialog box will
appear. In the User drop-down list, select the name that corresponds to your
handheld. Click OK to send the files to Palm Quick Install.
4. Connect your handheld to the cradle/cable and press the HotSync
button ™.
®
1
Page 6

SMS
To install SMS (Mac computer):
1. Insert the Software Essentials CD-ROM into your computer’s CD-ROM drive.
2. Double-click the Software Essentials CD, open the Communications folder and
then open the Telephony folder.
3. Select all files except the handbooks, and then double-click.
NOTE
application.
4. In the User drop-down list, verify that the user name corresponds to your
This step includes the Phone Link application, as well as the SMS
handheld.
NOTE
and then click Remove from List. Select the correct name and then begin again
from step 3.
5. Connect your handheld to the cradle/cable and press the HotSync button .
If the user name is not correct, reselect the files you selected in step 3
Configuring Phone Preferences
You need to configure the Phone Preferences for your handheld before using SMS.
You can do this by running the Phone Link application, which was automatically
included when you installed SMS. For more information, see the Phone Link
documentation on the Software Essentials CD-ROM.
NOTE
the Phone Link Updater, which may be included on your Software Essentials
CD-ROM. For more information, see the Phone Link Updater documentation on the
Software Essentials CD-ROM.
If you need updated phone drivers and settings, these can be obtained from
Making the connection
After you install the software on your computer from the Software Essentials CD,
configure the Phone Preferences, and perform a HotSync operation, you are ready
to start using SMS.
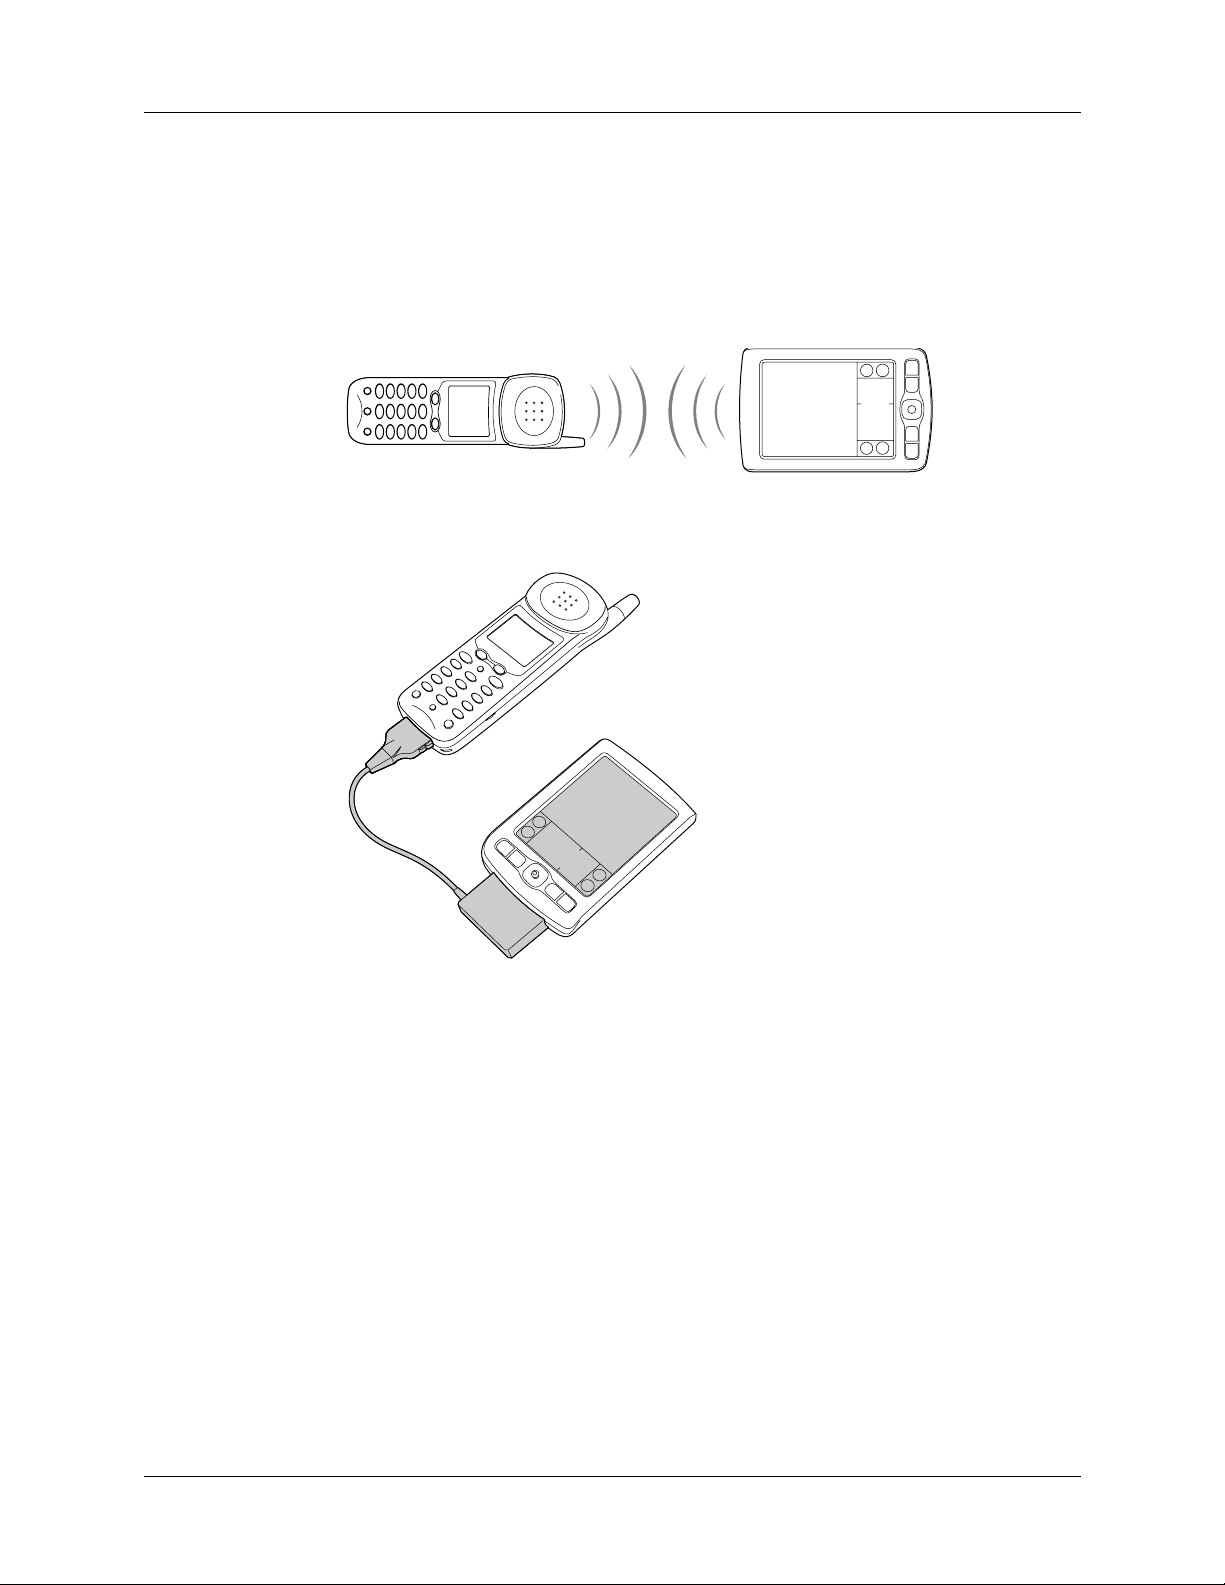
This section shows you how to connect your handheld and your mobile phone.
This is not a procedure that you perform by itself. You do this only when you are
ready to send or receive SMS messages as described in “Making the connection”
later in this handbook.
2
Page 7
Working with SMS
To prepare to connect:
1. Turn on your handheld and your mobile phone.
2. Do one of the following:
– Activate the infrared port on your phone, and align the infrared port on your
handheld with the infrared port on your phone.
– Connect the cable to your phone and handheld.
– Activate the Bluetooth™ discovery process to find your Bluetooth phone.
This option may not be available for all handhelds. Using this option
requires a Bluetooth card, which is sold separately.
Working with SMS
SMS is designed so that you can use the same skills you use in your basic handheld
applications.
Using the navigator
You can use the navigator on your handheld to work in SMS.
To navigate in SMS list screens:
■ Press Up or Down on the navigator to scroll an entire screen of messages.
■ Press and hold Up or Down to scroll quickly.
3
Page 8

SMS
Opening SMS
■ Press Select to insert a highlight.
■ When a message is highlighted, the navigator works as follows:
– Press Select again to view the selected message.
– Press Up or Down to scroll to the previous or next message.
– Press Left to remove the selection highlight.
To navigate in message screens:
■ Press Up or Down to scroll within the current message.
■ Press Right or Left to scroll to the previous or next message.
■ Press Select to return to the list screen.
When you install SMS on your handheld, it appears by default in the Main
category of the Applications Launcher.
To open SMS:
1. Tap the Home icon .
2. Tap the pick list in the upper-right corner of the screen.
3. Tap M ai n.
4. Tap the SMS icon .
Creating messages
When you create a message, the title bar indicates the number of characters the
message contains.
NOTE
160 characters, it is split into multiple messages. When the recipient receives the
message, it is reassembled into a single message (provided the recipient’s SMS
software supports assembling multipart messages).
Try to keep your messages shorter than 160 characters. If a message exceeds
4
Page 9

To create a message:
1. From any SMS list view, tap New.
2. Tap To .
Ta p To
Tap New Tap Send Ta p Ou t b ox
3. Tap the recipient’s name, and then tap Add.
To send a message to someone who isn’t in your Address Book, enter their
TIP
mobile phone number on the To line.
Working with SMS
4. Enter the message text.
5. Connect to your phone. See “Making the connection” earlier in this handbook
for details.
6. Tap Send to send the message now, or tap Outbox to send the message later.
NOTE
It sends only the current message.
Tapping Send does not send any of the other messages in your Outbox.
5
Page 10

SMS
Sending and receiving messages
You can send all the messages in your Outbox and retrieve all the new messages
from your mobile phone at the same time.
To send and receive messages at the same time:
1. Connect to your phone. See “Making the connection” earlier in this handbook
for details.
2. From any SMS list view, tap Send & Check.
Tap Send & Check
When the transmission finishes, a message appears that indicates the number of
new messages you received.
To send all messages in your Outbox:
1. Connect to your phone. See “Making the connection” earlier in this handbook
2. From any SMS list view, tap the Menu icon .
3. Tap Send from the Message menu.
To download all messages from your phone:
1. Connect to your phone. See “Making the connection” earlier in this handbook
2. From any SMS list view, tap the Menu icon .
3. Tap Check from the Message menu.
Viewing messages
SMS stores your messages in five different categories:
Inbox
for details.
for details.
Stores messages downloaded from your phone.
Outbox
Tr a s h
Stores messages waiting to be sent.
Stores messages you deleted. You can restore deleted messages to
their original category.
6
Page 11

Working with SMS
M
U
Archive
Draft
Files messages you want to keep.
Stores messages you want to change or review before you send
them.
In the Inbox and Outbox, icons appear next to the message to indicate whether it
has been read or sent. In the Inbox, additional icons indicate whether the message
is incomplete and whether it contains data other than text that requires another
application to read it.
To view text messages in your Inbox:
1. Tap the category pick list in the upper-right corner.
2. Tap I nb ox .
Read
message
nread
message
essage contains data
from an application
3. Tap the message you want to view.
4. Tap one of the following:
Done
Reply
Returns to the list view.
Creates a message to the sender and copies any selected text into
the new message.
Delete
Moves the message to the Trash category.
7
Page 12

SMS
To view data messages in your Inbox:
1. Tap the category pick list in the upper-right corner.
2. Tap I nb ox .
3. Tap the message you want to view.
4. Tap Yes to add the data to the appropriate application, or tap No to view the raw
data.
To view messages in your Outbox or Archive categories:
1. Tap the category pick list in the upper-right corner.
2. Tap Outbox or tap Archive.
Unsent
message
Sent
message
3. Tap the message you want to view.
4. Tap one of the following:
Done
Edit
Returns to the list view.
Opens the message so you can modify the contents.
Delete
8
Moves the message to the Trash category.
Page 13

To view messages in your Trash:
1. Tap the category pick list in the upper-right corner.
2. Tap Tr as h.
3. Tap the message you want to view.
4. Tap one of the following:
Working with SMS
Done
Restore
Working with draft messages
When you create a message, you can save it as a draft message. SMS does not send
draft messages when you transmit the messages in your Outbox. You can store
draft messages for as long as you like and review and edit them before you send
them.
To place a message in the Draft category:
1. Create or open the message you want to store in the Draft category.
2. From the Message view, tap the Menu icon .
3. Tap Draft from the Message menu.
To view or edit draft messages:
1. Tap the category pick list in the upper-right corner.
Returns to the list view without moving or changing the
message.
Moves the message back to the category it was in before you
deleted it.
2. Tap D ra ft .
3. Tap the message you want to edit.
9
Page 14

SMS
4. In the message view, tap Edit.
5. Edit the message.
6. Tap one of the following:
Send
Outbox
Cancel
Sends the message now.
Moves the message to the Outbox to be sent later.
Opens a dialog box that asks if you want to save the message in
the Draft category. Tap Yes to keep your changes and return the
message to the Draft category. Tap No to discard your changes
and return the message to the Draft category.
Adding a signature to a message
A signature is text that appears at the end of a message. You can define your own
personal signature and then add it to a message using menu commands.
To define a signature:
1. Tap the Menu icon .
2. Tap Options, and then tap Preferences.
10
Page 15

3. Enter your signature.
Working with SMS
NOTE
Try to keep your signature brief. If a message, including your signature,
exceeds 160 characters, it is split into multiple messages. When the recipient
receives the message, it is reassembled into a single message (provided the
recipient’s SMS software supports assembling multipart messages).
4. Tap O K.
To add your signature to a message:
1. Create or edit the message where you want to add your signature.
2. From the New or Edit Message view, tap the Menu icon .
3. Tap Options, and then tap Add signature.
Sending data from another application
In addition to creating text messages, you can create a message that contains data
from an application on your handheld. For example, you can send a Date Book
event to someone to remind them to add a meeting to their calendar. If the recipient
receives the message on a Palm OS handheld, they can transfer the message
directly to the appropriate application. If the recipient receives the message on
another device, the data will appear as text.
NOTE
Not all applications include a send command.
To send data from another application:
1. Open the record you want to send.
2. Tap the Menu icon .
3. Tap Send from the Record menu. (The name of the menu may be different,
depending on which application you’re sending data from. For example, tap
Send from the Note menu in Note Pad.)
4. Tap SMS, and then tap OK.
5. Tap To to select from a list of recent recipients, or tap Lookup to select a number
from your Address Book.
6. Tap S en d.
11
Page 16

SMS
Setting Preferences
The SMS Preferences screen enables you to customize several of the settings in the
SMS application.
To view or change SMS Preferences:
1. Tap the Menu icon .
2. Tap Options, and then tap Preferences.
3. Change any of the following options:
Sort by
Tap the pick list to sort messages in one of the following orders:
Alphabetic, Date, Phone Number, and Status.
Show Date
Alert Sound
To display dates in list views, select this check box.
Indicates whether new messages trigger an alert and which
alert they trigger. To trigger a new message alert, select this
check box. Tap the pick list to select one of the following
sounds: Alarm, Alert, Bird, Concerto, Phone, Sci-fi, and Wake
up.
When a new message triggers an alert sound, tap
Confirm
Deleted
Message
NOTE
anywhere on your handheld screen to stop the sound.
Indicates whether a confirmation message appears each time
you delete a message or you select the Empty Trash option from
the Message menu. To display confirmation messages, select
this check box.
Delete After
Transfer
Indicates whether data messages are deleted after you accept
the data in the appropriate application. To keep data messages
after you transfer them to the application, deselect this check
box.
12
Signature
Enables you to enter a personal signature that you can add to
your messages.
Page 17

4. Tap D et ai l s.
5. Change any of the following options:
Working with SMS
Leave Messages
on Phone
Return Receipt
Warn Over
Expires
Message Center
Indicates whether messages are deleted from your phone
after you download them to your handheld. To keep
messages on your phone after you transfer them to your
handheld, deselect this check box.
Determines whether you receive receipt confirmation
notices. Tap the pick list to select from the following options:
None and Requested.
Determines whether you receive a warning when multipart
messages exceed more than the specified number of parts.
Tap the pick list to select from the following options: 1 part,
3 parts, 5 parts, 10 parts, 50 parts, and Never warn.
Indicates how long unsent messages remain in your Outbox.
Tap the pick list to select from the following options: 4
Hours, 1 Day, 1 Week, 2 Weeks, 1 Month, and Max. Time.
Indicates whether your handheld obtains your mobile phone
service provider’s Message Center number directly from the
phone, or whether you need to enter the number manually.
If your phone is already configured to use SMS, you do not
need to change this setting. Tap the pick list to select from the
following options: Auto and Custom.
To restore all of these options to the original settings, tap Default.
TIP
6. Tap OK to close the Message Details dialog box.
7. Tap O K.
13
Page 18

SMS
SMS menus
SMS menus are shown here for your reference, and application features that are not
explained elsewhere are described here. For information about Edit commands,
see your handheld Handbook.
Message menu
Message view
Send
Check
Empty Trash
Archive
Options menu
New Message view
Phone Lookup
List view
Sends all messages in the Outbox.
Retrieves all messages stored on the phone.
Permanently removes all messages in the Trash category from
your handheld.
Moves the current message to the Archive category.
List view
Opens the Phone Lookup dialog box, where you can select a
mobile phone number where you want to send a message.
14
Font
About SMS
Opens the Font dialog box, where you can choose different fonts
for the list and message views.
Shows version information for the SMS application.
Page 19

Support and troubleshooting
If you experience problems with your handheld or with SMS, try these strategies
to solve them.
For your handheld
If you encounter a problem with your handheld or with the SMS application,
please do the following:
■ Check the troubleshooting information in your handheld Handbook.
■ Check the settings on your handheld.
■ Contact your mobile phone service provider.
If you still need assistance and you contact Palm technical support, please have the
following information ready:
■ The name and version of your computer operating system
■ The error message or problem you are experiencing
Support and troubleshooting
■ The steps you took to identify or reproduce the problem
■ The version of the handheld software you are using and the available memory
on the device
To find version and memory information:
1. Tap the Home icon .
2. Tap the Menu icon .
3. Tap App, and then tap Info.
4. Tap Version to see version numbers, and tap Size to see the amount of free
memory, in kilobytes.
You can access Palm technical support in the following ways:
■ Palm, Inc. web site, in the U.S.:
■ Palm, Inc. web site, outside the U.S.:
■ E-mail, in the U.S.: Use the form on the web site at
www.palm.com/support/contact/email_support.html
www.palm.com/support
www.palm.com/support/globalsupport
15
Page 20

SMS
For the SMS application
For problems encountered with the SMS application, review the following
information:
Problem Solution
I cannot connect to my
SMS center.
I get an error that says SMS
can’t connect to my phone
or that SMS is not
supported.
■ Confirm that you have configured your phone correctly. See
“Installing SMS” earlier in this handbook for instructions on
how to view the current phone driver.
■ You may need to enter the SMS center telephone number in the
SMS Preferences Details dialog box. To find this number,
check your mobile phone options screen or your service
provider’s web site. See “Setting Preferences” earlier in this
handbook for details.
Make sure that you are using the correct phone driver for your
mobile phone. If your Software Essentials CD-ROM includes
Phone Link Updater, you can use this application to install phone
drivers and settings. Updated phone drivers are also available
from the Palm website.
In the U.S., access the Palm, Inc. web site at
www.palm.com/support
support/globalsupport
.
. Outside the U.S., access
www.palm.com/
16
Page 21

Index
A
Addressing messages 5
Applications
sending data from 11
size in kilobytes 15
version of 15
Archive messages 8
Attachments 8
C
Categories 6
Connecting handheld and phone 2
Creating
messages 4
signature 10
Customer support 15
D
Default location of SMS 4
Downloading messages from phone 6
Draft messages 9
E
Entering data 3
I
Icons 7–8
Inbox 7
Installing SMS 1
M
Memory, amount of free 15
Menus 14
Messages
archive 8
creating 4
deleted 9
draft 9
filed 8
folders 6
icons 7–8
multi-part 4
navigating 3
outgoing 8
receiving 6
restoring deleted 9
selecting 3
sending 6
signature 10
viewing 6
Multi-part messages 4
F
Filed messages 8
Frequently asked questions 15
G
GSM 1
H
Handheld
connecting to phone 2
problems with 15
N
Navigator 3
O
Opening SMS 4
Outbox 8
17
Page 22

Index
P
Phone
connecting to handheld 2
downloading messages from 6
Preferences, SMS 12–13
Problems with handheld 15
R
Receiving messages 6
Records, number of 15
S
Sending
data from applications 11
messages 6
Settings. See Preferences
Signature 10
SMS
menus 14
overview 1
preferences 12–13
T
Technical support 15
Trash 9
Troubleshooting 15–16
V
Viewing
archive messages 8
deleted messages 9
draft messages 9
incoming messages 7
messages with attachments 8
messages, overview 6
outgoing messages 8
W
Web sites 15
18
 Loading...