

FA5523
2 |
3 |
4 |
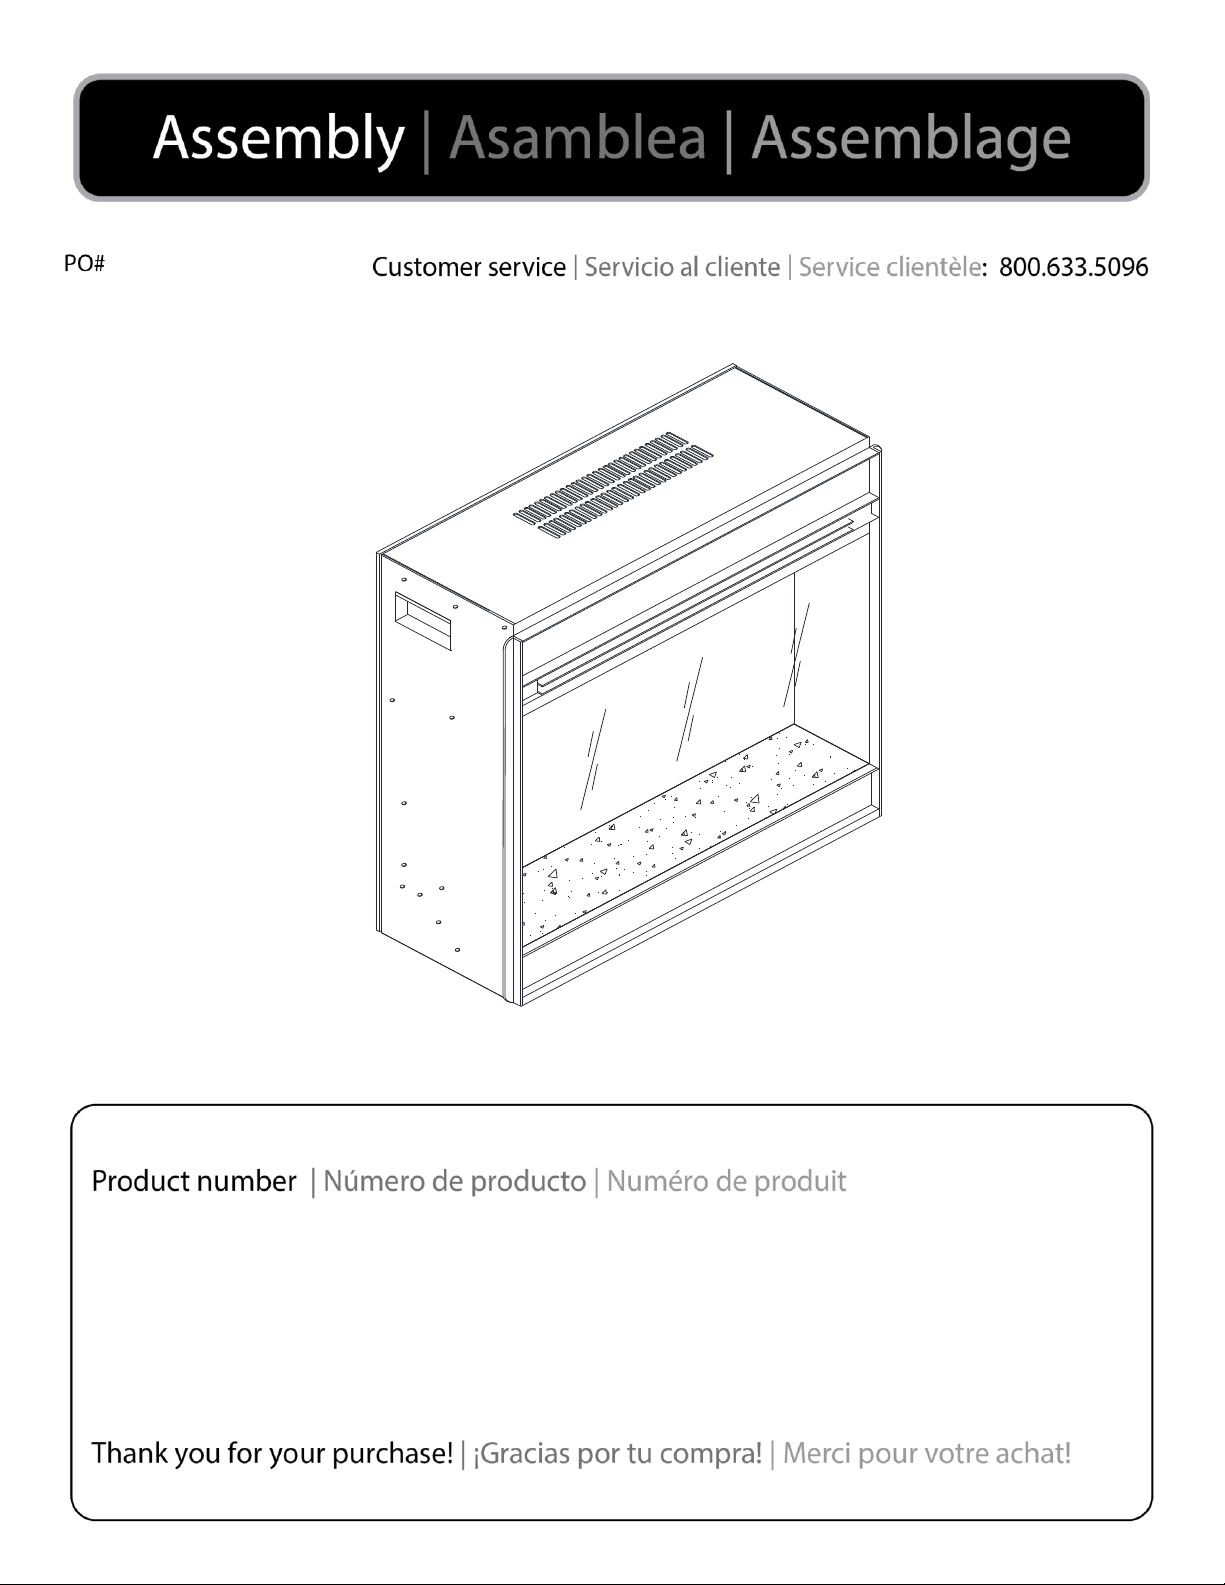
Electric Firebox Insert Cámara de combustión Foyer électrique
User’s Operating Manual eléctrica insertable encastrable
Manual de funcionamiento Guide de l'utilisateur
del usuario
Consumer Información de Information de sécurité
information: seguridad para el pour le consommateur:
Please read this manual before consumidor: Veuillez lire ce guide avant
installing and operating this Lea este manual antes de instalar y d'installer et d'utiliser cet appareil.
appliance. operar este artefacto.
WARNING!!! ¡¡¡ADVERTENCIA!!! AVERTISSEMENT!!!
If the information in this manual is Si no sigue correctamente las Le non-respect de l'information
not followed correctly, an electric instrucciones de este manual, se contenue dans ce guide peut
shock or fire may result in property puede producir una descarga entraîner un choc électrique ou un
damage, personal injury, or loss of puede producir una descarga incendie pouvant causer des
life. Do not store or use gasoline or eléctrica o un incendio que dommages matériels, des
other flammable vapors or liquids ocasione daños a la propiedad, blessures ou la mort.
near this appliance. lesiones corporales o muertes. No Ne pas entreposer ou utiliser de
almacene ni use gasolina ni otros l'essence ou d'autres vapeurs et
vapores o líquidos inflamables liquides inflammables près de cet
cerca de este artefacto. appareil.
Safety Feature:
This unit has an internal thermal
overload protector, when a Característica de seguridad: Dispositif de sécurité :
temperature that may cause Esta unidad tiene un protector de Cette unité comporte un dispositif
overheating is reached, the heater contra sobrecarga térmica interno; de protection de surcharge
will automatically shut off. cuando se alcanza una temperatura thermique interne. Lorsque
Operation can only resume when que puede causar l'appareil atteint une température
the unit is reset. (See instructions sobrecalentamiento, el calefactor pouvant entraîner une surchauffe,
below) se apaga automáticamente. La la fournaise s'éteint
unidad solo puede volver a automatiquement. L'appareil peut
funcionar si la restablece. (Consulte être remis en marche uniquement
To Reset Heater: las instrucciones a continuación) après une réinitialisation. (Voir les
Unplug the heater and wait 10 directives ci-dessous)
minutes for the unit to cool down. Para restablecer el
After 10 minutes, plug the heater calefactor:
again and follow the operating Desenchufe el calefactor y espere Pour réinitialiser la
instructions described in this 10 minutos para que se enfríe. fournaise :
manual. Después de 10 minutos, vuelva a Débranchez la fournaise et
enchufar el calefactor y siga las attendez 10 minutes jusqu'à ce
instrucciones de operación que se qu'elle soit refroidie. Après
describen en este manual. 10 minutes, branchez la fournaise
et suivez les directives d'utilisation
décrites dans le présent guide.
5 |
Important Operating and Instrucciones importantes Directives importantes
Safety Instructions: de operación y seguridad: concernant la sécurité et
l'utilisation :
CAUTION: PRECAUCIÓN: MISE EN GARDE :
High Temperatures! Keep draperies, Mantenga las cortinas, cables Tenir les draperies, les cordons
electrical cords, and other eléctricos y otros enseres a una électriques et tout ameublement à
furnishings at least 3 feet (.9 meters) distancia de al menos 3 pies del au moins 3 pieds de l'avant, des
from the front and away from the área delantera, los costados y el côtés et de l'arrière de la fournaise.
front, sides, and rear of the heater. área trasera del calefactor.
WARNING:
Risk of fire – keep combustible ADVERTENCIA: AVERTISSEMENT :
material away from the front of the Para evitar riesgos de que se Risque d'incendie, garder tout
electrical fireplace. Servicing should produzca un incendio, mantenga matériel combustible loin de l'avant
be done only while the electrical los materiales combustibles lejos du foyer électrique. L'entretien ne
fireplace is disconnected from the del área delantera de la chimenea doit être réalisé que lorsque le foyer
power supply. eléctrica. Solo se debe realizar électrique est débranché.
mantenimiento mientras la
chimenea eléctrica esté
desconectada del tomacorriente.
6 |
Important Operating and Safety Information:
When using electrical appliances, the following basic precautions should always be followed to reduce the risk of fire,
electric shock, and injury.
• Read all instructions before using this heater.
• Use this heater only as described in this manual. Any other use not recommended by the manufacturer may
cause fire, electric shock, or injury.
• Before connecting the appliance to the electric source, check that the current and power match those given on
the ratings plate.
• This heater is for use with a 120 Volt electrical outlet. The cord has a three-prong grounded plug, which must
be used in a properly grounded three-prong outlet.
• Avoid the use of an extension cord since the extension cord may overheat and cause a risk of fire, however, if
you must use an extension cord it has to be a grounded No. 16 AWG minimum size and rated for not less than
1875 watts.
• Do not run the cord under carpet. Do not cover cord with throw rug, runner, or similar items. Cord should be
placed away from traffic areas to prevent tripping hazard.
• Never use the cord to pull the appliance.
• Never leave the appliance unattended while it is in use.
• Turn controls to “off” before removing plug from outlet.
• Always unplug heater when not in use.
• Do not use outdoors.
• Only use heater on even and stable surface to prevent the appliance from tipping over.
• To prevent possible fire, do not block air intakes or exhaust in any manner. Do not use on soft surfaces, such
as a bed, where openings may be blocked.
• Do not use in rooms in which highly flammable materials such as gas, paints, gasoline, solvents, etc. are
stored.
• Keep minimum distance of 3 feet between the heater and curtains and other flammable materials.
• Do not place the appliance or the plug in water or any other liquid. Should the appliance accidentally fall into
water, unplug the appliance immediately and have it checked by a qualified person before using it again.
• Do not use the appliance with wet hands, on a damp floor, or when the appliance itself is wet.
• The appliance must not be used if the glass is damaged.
• Do not operate any heater with a damaged cord or plug, after the heater malfunctions or has been dropped or
damaged.
• The warm air vent becomes very hot during operation—do not touch. During operation, only touch the
appliance’s switches and handles.
• The appliance should not be moved when hot. Never touch the hot parts with your bare skin.
• Do not insert or allow foreign objects to enter any ventilation or exhaust opening as this may cause an electric
shock or fire, or damage to the heater.
• Please turn off the unit manually when leaving/not in use for extended period.
• Please turn off the unit manually when the power goes out.
• Please BEWARE that the plug may become hot.
SAVE THESE INSTRUCTIONS
7 |
Maintenance:
1. Cleaning your fireplace:
You may clean exterior of unit with a soft, damp, lint-free cloth.
WARNING: Before cleaning the exterior of the appliance, disconnect the unit from the power supply. Clean unit only after it
is cool to the touch.
2. Cleaning the front glass:
The front glass panel may become dirty or dusty. Dust can be removed by lightly rubbing the glass surface with a clean, lintfree cloth or paper towel. To remove fingerprints or other marks, use a soft, damp, lint-free cloth with a household glass
cleaner.
Helpful Advice for Installing Firebox into Mantel:
1. These instructions are provided in an easy to follow format. Simply follow the instructions to properly install unit.
2. Please retain all packaging until you have checked that there is no damage and your unit is working properly.
3. Small parts should be kept away from young children.
4. The area around the unit should be kept free of animal hair, lint, and other extraneous material that may be drawn into the
workings of the appliance and could affect its performance.
Positioning/Locating Your Electric Fireplace:
When choosing a location for your new fireplace, ensure that the general instructions are properly followed. For best result,
install the fireplace out of direct sunlight.
Mantenimiento:
1. Limpieza de su chimenea:
Puede limpiar el exterior de la unidad con un paño suave, húmedo y que no deje pelusas.
ADVERTENCIA: Antes de limpiar el exterior del artefacto, desconéctelo del tomacorriente. Limpie la unidad solo después
de comprobar que esté fría al tacto.
2. Limpieza del vidrio delantero:
El panel de vidrio delantero puede ensuciarse o acumular polvo. Para eliminar el polvo, frote suavemente la superficie de
vidrio con un paño limpio y que no deje pelusas o con una toalla de papel. Para limpiar las huellas digitales u otras marcas,
use un paño suave, húmedo y que no deje pelusas con un producto limpiavidrios de uso doméstico.
Conseils pratiques pour installer le foyer dans un manteau de cheminée :
1. Ces directives sont fournies dans un format facile à suivre. Vous n'avez qu'à respecter les directives pour bien installer
l'unité.
2. Veuillez conserver tous les éléments d'emballage jusqu'à ce que vous ayez vérifié que l'appareil n'est pas endommagé et
que l'unité fonctionne correctement.
3. Gardez les petites pièces hors de la portée des jeunes enfants.
4. L'espace autour de l'unité doit être exempt de poils d'animaux, de peluches et d'autres matières étrangères qui peuvent
être aspirés par l'appareil et nuire à son fonctionnement.
Positionnement et localisation du foyer électrique:
Au moment de choisir l'emplacement de votre nouveau foyer, assurez-vous de respecter les directives générales. Pour des
résultats optimaux, installez le foyer à l'abri de la lumière directe du soleil.
Entretien:
1. Nettoyage de votre foyer:
Vous pouvez laver l'extérieur de l'unité à l'aide d'un chiffon non pelucheux doux et humide.
AVERTISSEMENT: Avant de nettoyer l'extérieur de l'appareil, débranchez l'unité de la source d'alimentation. Nettoyez
l'unité seulement lorsqu'elle est froide au toucher.
2. Nettoyage de la vitre avant:
La vitre avant peut devenir sale ou poussiéreuse. Vous pouvez retirer la poussière en frottant légèrement la surface du verre
à l'aide d'un chiffon non pelucheux doux ou d'un essuie-tout. Pour effacer les traces de doigts ou toutes autres marques,

8 |
utilisez un chiffon non pelucheux doux et humide ainsi qu'un nettoyant pour vitres ménager.
Recomendación útil para instalar la chimenea en el espacio bajo la repisa de la chimenea:
1. Estas instrucciones se proporcionan en un formato de fácil comprensión. Solo sígalas para instalar correctamente la
unidad.
2. Conserve todo el embalaje hasta verificar que la unidad no presente daños y esté funcionando en forma correcta.
3. Debe mantener las piezas pequeñas fuera del alcance de los niños.
4. Debe mantener el área alrededor de la unidad libre de pelos de mascotas, pelusas y otros materiales extraños que
puedan ingresar a los componentes del artefacto y afectar su rendimiento.
Posición/colocación de su chimenea eléctrica:
Cuando elija una ubicación para su chimenea nueva, asegúrese de seguir correctamente las instrucciones generales. Para
obtener resultados óptimos, instale la chimenea lejos de la luz solar directa.
Installation Instructions:
Once the location has been prepared, the fireplace insert can be installed.
1. Make sure the unit is turned off (refer to the operating instructions).
2. Place the fireplace insert on the floor, directly behind your mantle. Make sure the backs of both the mantle and the
fireplace are facing you.
3. It is advisable to have 2 people place the fireplace insert into the mantle, as it is heavy. Gently slide it into the opening in
the mantle until the flange is flush against the inside of the fireplace. Make sure the insert is centered left and right in the
opening. Be careful when placing and adjusting the insert, the bottom of the insert could scratch the finish of the wood
base/hearth of your fireplace.
4. Attach the mounting brackets (found in the fireplace mantel box) with the supplied screws using a Phillips head
screwdriver. DO NOT OVER TIGHTEN.
5. With the help of an assistant, carefully lift completed unit and place it with the front facing out in the final location you have
chosen for your fireplace.
Directives d'installation :
Une fois que vous avez préparé l'emplacement, vous pouvez installer le foyer encastrable.
1. Assurez-vous que l'unité est éteinte (consultez les directives d'utilisation).
2. Placez le foyer encastrable sur le sol, tout juste derrière le manteau de cheminée. Veillez à ce que le dos du manteau et
du foyer soient face à vous.
3. Il est préférable que deux personnes placent le foyer encastrable dans le manteau de cheminée puisqu'il est lourd.
Glissez-le doucement dans l'ouverture du manteau de cheminée jusqu'à ce que la bride soit alignée à l'intérieur du foyer.
Assurez-vous que le foyer encastrable est centré dans l'ouverture. Soyez prudent lorsque vous placez et ajustez le foyer
encastrable, puisque sa base peut égratigner le fini en bois ou le centre du foyer.
4. Fixez les plaques de fixation (que vous trouverez dans la boîte du manteau de cheminée du foyer) à l'aide des vis
fournies et d'un tournevis cruciforme. NE PAS TROP SERRER.
5. Avec l'aide d'un assistant, soulevez soigneusement l'unité complète et placez-la, face orientée vers l'avant, à
l'emplacement final que vous avez choisi pour votre foyer.

9 |
Instrucciones de instalación:
Después de preparar el lugar de colocación, podrá instalar la chimenea insertable.
1. Compruebe que la unidad esté apagada (consulte las instrucciones de operación).
2. Coloque la chimenea insertable sobre el suelo, directamente detrás de la repisa de la chimenea. Asegúrese de que la
parte posterior de la repisa y de la chimenea miren hacia usted.
3. Recomendamos que entre 2 personas coloquen la chimenea insertable en el espacio de la chimenea, puesto que es
pesada. Deslícela con cuidado en el espacio de la repisa hasta que la brida quede apoyada contra el interior de la
chimenea. Asegúrese de que la unidad quede centrada entre la izquierda y la derecha del espacio. Tenga cuidado cuando
coloque y ajuste la unidad, puesto que la parte inferior de la unidad puede rayar el acabado de la base de madera/la
chimenea de su hogar.
4. Conecte los soportes de montaje (se encuentran en el espacio de la repisa de la chimenea) con los tornillos
suministrados utilizando un destornillador de cabeza Phillips. NO LOS APRIETE EN EXCESO.
5. Con la ayuda de otra persona, levante cuidadosamente la unidad y colóquela con la parte delantera orientada hacia
afuera en la ubicación final que escogió para su chimenea.

10 |
The electric fireplace without control button on the fireplace, and all operations by the remote
control. Please follow the instruction to operate your fireplace as below.
Note:
The remote control will display the current time no matter the fireplace “ON” or “OFF” . When the fireplace “ON”
the LED display will display the fireplace current status, such as flame level, temperature, and so on.
After the fireplace plugged in and turn “ON” the main power switch on the fireplace, please hold the flame and
temperature for 3 seconds to match the remote control and fireplace within 1 minute.
When the remote control display “bL” (it shows on the temperature logo) and flicking for 5 seconds, then return
to the current status.
Remark: When the fireplace plug in, the remote control under manufacture setting status. If the remote control 莫
no match the fireplace, please follow above instruction.
Operating Instructions:
When you plug in, please turn on the switch which on the right of the vent.
ELECTRICAL SPECIFICATIONS
Voltage:
120V, 60 Hz
Amps:
11.7 Amps
Watts:
1400 Watts
Lighting:
LED

11 |
Remote Control Operating Procedures:
(1) Main power
Press to turn the unit ON/OFF. When the fireplace “ON” the LED displays temperature 82℉,and flame F1,
log-set L1, no heating function. This is manufacture setting.
(2) Lower the temperature
When heat “ON” press it to turn down the temperature
(3) Main flame
Press to adjust the flame from F1-F2-F3-F4-F1(cycle),and from F1 to F4, the flame brightness from high to low
(4) Log brightness
Press to adjust the Log brightness from L1-L2-L3-L4-L1(cycle), and from L1 to L4 the log brightness from high to low.
(5) Down Light
Press to turn the down light ON/OFF.
(6) Setting button
“Timer” and “week timer” setting
(7) Raise the temperature
When heat “ON” press it to raise the temperature.
(8) Day setting
This button to choose the day from Monday to Sunday or week timer mode option. Option model:1-2-3-4-5-6-7-Auto-Off
(9) Heater
Press to turn the heater ON/OFF. Adjust the temperature rating as follows: 62°F -- 82 °F (17 °C --- 27 °C)
Please note, when the heater OFF, the fan will keep working 15 seconds then auto shutdown.
(10) Timer
Press to set your timer. (1H-2H-3H-4H-5H-6H-7H-8H-9H-OF and cycle) and per press add one hour.
Hold this button for 3 seconds enter “WEEK” time setting. Before your “week” time setting, please make sure your
current time is correct.
Please note: “Timer” only can set the time for current automatic shutdown, and press this button will not enter the “week”
setting.
Note: Before using the remote control, please install the battery, which have packed with remote control.

12 |
A. Clock setting
1. At standby state(after the unit is plugged in ), press the setting button on the remote control for 3 seconds, the
digital display would be “00:00” flashing.
2. Press “+” on the remote control to set hour , press the remote control “-” to set minute.
3. Press “Setting” again to enter setting of the week timer. Press “Day button” to select Sunday~ Saturday .
When the selection finished, press “Setting” to exit setting.
4. After the initial power on, you need to set the clock, otherwise the clock will remain “00:00” status and you can’t set the
week timer.
5. After you turn on the power, the clock will automatically light up, the clock automatically turn off after 5s. You can press
any button to wake up the clock, and the clock will automatically turn off after 5s again.
B. Heat setting
1. Press the heating button or remote control’s heater button to turn “ON” the heating function, then hold the heating button
for 3s and the LED display with flashing effect, then press heating button or remote control “+” “-” to set the
temperature.
Temperature range from 17℃→18℃→19℃→20℃→21℃→22℃→23℃→24℃→25℃→26℃→27℃→ON→17℃
62℉→63℉→64℉→65℉→66℉→67℉→68℉→69℉→70℉→71℉→72℉→73℉→74℉→75℉→76℉→77℉→78℉→79℉
→80℉→81℉→82℉→ON→62(℉)
Clock and week timer settings

13 |
C Timing switch on/off preset (Please adjust your current time and date before timing preset )
1. After set your current time, and the fireplace in standby mode, please hold the “Timer” for 3 seconds, then you will
enter the “Week” setting for fireplace auto ON/OFF .
2. While the LED display shows “1 NO”, the colock will be “01:00”, and press “+” to set hour, and press “-” to set minute .
3. Press to set week, per press on the will show SU, MO,TU,WE,TH,FR,SA and flash in turn, you can press the “+”
key to select the desired day (or cancel the current selection) , any desired day selected the △ shows under it.
4. Press the heat button to set the temperature, please press “+” “-” to choose the desired temperature .
1.Press “Setting” again to set timing switch off, the display shows “1 OFF” I, the timer displays “02:00” , press
“+” to set hour, press “-” to set minute .To set fireplace “OFF” with same operation for Date selection and Temperature
setting. Once the setting done the fireplace will automatic adjustment , can’t change it manually.
5. the date of the timer off keeps the same with the timer on, you can’t change it manually . After setting, press the
setting to enter model 2 setting “ON” “OFF”, which same operation like model 1. You can set model 1 to mode 7 as

14 |
above method. If the setting done, please press or hold Timer for 3 seconds, will auto save your setting and exit
the operation .
6. After the preset timing on/off switch, you can use Day button to select the desired timing mode 1-2-3-4-5-6-7-auto
option. After the option shows 5 seconds without any operation, it will save the selected option and enter the current
setting of the option, the timer logo of the display lighten and will automatically run the preset switch setting program.
You can individually select each setting of modes 1-7 for automatic on/off switching, or you can preset the desired
settings, and then select “ auto mode” for multiple preset series executions.
7. If you want to set the on/off switch and temperature setting for different periods of the week, then set the switching time
and temperature of each day from Sunday to Monday in mode 1 -7. After setting, press the “ok” button and the system
will run the week timer of 1-7 modes. You can also set 1-7modes within 1 day, use “auto mode” to run timing switch
on/off within 1 day. Be aware that when you use “auto mode”. You need to make sure the settings of times does not
overlap each other, otherwise the timer can go wrong.
8. After entering the set time, you can press to shutdown the Week setting or hold it for 3 seconds to exit week timer
mode. When it off, the will die out.
9. You can check the 1-7 timer setting by pressing the “Setting” button . For example, press the “Setting” button to
display ( 1 ON “01:00” temperature 27℃), press the “Setting” button again to display (1 OFF “02:00” temperature
27℃). Press the “Setting” button again to display (2 ON “03:00” temperature 26℃)...... then press the Setting button to
display (7 OFF “13:00” temperature 27℃ ). While displaying you can adjust setting according to step 1 and step 2.
While the fireplace is at week timer status, you can’t adjust setting of time and temperature.
Remark
Once your desired setting done it will be automatic, please make sure your remote control and fireplace
distance within 4 meters and no shielding. If the distance beyond the effective range the setting may not wor

15 |
Heater
It shows the heater ON/OFF
Main flame
It shows the flame effect ON/OFF
Timing Mode
It shows the week time mode selection
Timing setting status
It shows the week time status
Timer
Timer setting
Week
It shows each day of week
Day Selection
It indicates which days have a heating preset activated
Time
It shows the current time
Celsius
It shows the current temperature in Celsius
Fahrenheit
It shows the current temperature in Fahrenheit
Down light
It shows the down light ON/OFF
Log
It shows the Log’s status
Digital Display

16 |
Maintenance:
3. Cleaning your fireplace:
You may clean exterior of unit with a soft, damp, lint-free cloth.
WARNING: Before cleaning the exterior of the appliance, disconnect the unit from the power supply. Clean unit only after it
is cool to the touch.
4. Cleaning the front glass:
The front glass panel may become dirty or dusty. Dust can be removed by lightly rubbing the glass surface with a clean, lintfree cloth or paper towel. To remove fingerprints or other marks, use a soft, damp, lint-free cloth with a household glass
cleaner.
Helpful Advice for Installing Firebox into Mantel:
1. These instructions are provided in an easy to follow format. Simply follow the instructions to properly install unit.
2. Please retain all packaging until you have checked that there is no damage and your unit is working properly.
3. Small parts should be kept away from young children.
4. The area around the unit should be kept free of animal hair, lint, and other extraneous material that may be drawn into the
workings of the appliance and could affect its performance.
Positioning/Locating Your Electric Fireplace:
When choosing a location for your new fireplace, ensure that the general instructions are properly followed. For best result,
install the fireplace out of direct sunlight.
Installation Instructions:
Once the location has been prepared, the fireplace insert can be installed.
1. Make sure the unit is turned off (refer to the operating instructions).
2. Place the fireplace insert on the floor, directly behind your mantle. Make sure the backs of both the mantle and the
fireplace are facing you.
3. It is advisable to have 2 people place the fireplace insert into the mantle, as it is heavy. Gently slide it into the opening in
the mantle until the flange is flush against the inside of the fireplace. Make sure the insert is centered left and right in the
opening. Be careful when placing and adjusting the insert, the bottom of the insert could scratch the finish of the wood
base/hearth of your fireplace.
4. Attach the mounting brackets (found in the fireplace mantel box) with the supplied screws using a Phillips head
screwdriver. DO NOT OVER TIGHTEN.
5. With the help of an assistant, carefully lift completed unit and place it with the front facing out in the final location you have
chosen for your fireplace.

17 |
The remote control works with 2*AAA 1.5V standard batteries
NOTE: Please always dispose of batteries at a suitable recycling point
Self Regulating Heater
The heater will turn on when temperature is set higher than the room’s temperature and it will automatically
turn off when the room has reached the desired temperature.
REPLACING THE BATTERY

18 |
Troubleshooting
Problem
Cause
Solution
Heater doesn't turn on with the
power switch.
Main power supply switch is off.
Turn on the main power supply
switch.
Circuit breaker has tripped.
Too many appliances on this
circuit. Be sure that the electrical
supply for this unit is an individual
circuit.
Heater is unplugged from wall outlet.
Plug the cord into an outlet.
Power cord or power plug are damaged.
Contact a SEI customer service.
Power outlet for power plug prong is
loose.
Check the power outlet and
replace with a new one.
Loose wiring.
Contact SEI customer service.
Heater power switch is off.
Turn on the heater power switch.
Heater system is overheated.
Maybe the heater is covered, or air
inlet or air outlet is blocked, remove
the covering or the blockage and
turn off the power switch and
unplug it. Wait ten minutes, plug it
back in, then turn the heater on
again.
There is an odor coming from the
heater.
The heater may emit a slight, harmless
odor when first used. This is a normal
condition caused by initial heating of the
internal parts, and will not occur again.

19 |
Problem
Cause
Solution
Heater is on but no flame or low
flame intensity.
Flame adjusting knob is at low setting.
Turn the knob to maximum setting.
Loose wiring at the wall power outlet.
Contact a qualified electrician.
Flames are frozen.
Loose wiring at the wall power outlet.
Check all wiring for loose
connections. Contact a qualified
electrician.
Flame element is not attached to the
motor.
Contact SEI customer service
Rotation motor is defective.
Contact SEI customer service
Excessive noise in the lower portion
of the heater.
Flame element isn't seated properly.
Contact SEI customer service
Motor is defective.
Contact SEI customer service
"HEATER POWER" switch has been
flipped in the on position, but there is
no airflow.
The air inlet or air outlet is completely
blocked.
Move the unit and make sure to
leave adequate space around it.
Remove the blockage on or in front
of the air outlet.
The heater system is over heated, the
temperature limit thermostat is cut off.
Check the air inlet and outlet. Turn
off the power switch and unplug it.
Wait ten minutes, then plug it back
in and turn the heater on again.
Fan Motor is defective.
Contact SEI customer service
Fan blower is balanced badly.
Contact SEI customer service

20 |
GROUNDING INSTRUCTIONS
This product must be grounded. If it should malfunction or breakdown, grounding provides a path of least resistance for electric current to
reduce the risk of electric shock. This product
is equipped with a cord having an equipment-grounding conductor and a grounding plug.
The plug must be plugged into an appropriate outlet that is properly installed and grounded
in accordance with all local codes and ordinances.
This heater is for use on 120 volts circuit and has a grounded plug that looks like the one illustrated on Figure 1. See Figure 1 for
grounding instruction. An adapter as shown at C is available for connecting three-blade grounding type plugs to two-slot receptacles. The
green grounding plug extending from the adapter must be connected to a permanent ground such as a properly grounded outlet box. The
adapter should not be used if a three-slot grounded receptacle is available.
Improper connection of the equipment-grounding conductor can result in a risk of electric shock. Check with qualified
electrician or serviceman if you are in doubt as to whether the product is properly grounded. Do not modify the plug
provided with the product – If it will not fit the outlet; have a proper outlet installed by qualified electrician.

Caution: The user is cautioned that changes or modifications not expressly approved by the party responsible for compliance
could void the user's authority to operate the equipment.
This device complies with Part 15 of the FCC Rules. Operation is subject to the following two conditions: (1) this device may
not cause harmful interference, and (2) this device must accept any interference received, including interference that may
cause undesired operation.
NOTE: This equipment has been tested and found to comply with the limits for a Class B digital device, pursuant to Part 15
of the FCC Rules. These limits are designed to provide reasonable protection against harmful interference in a residential
installation. This equipment generates, uses and can radiate radio frequency energy and, if not installed and used in
accordance with the instructions, may cause harmful interference to radio communications. However, there is no guarantee
that interference will not occur in a particular installation.
If this equipment does cause harmful interference to radio or television reception, which can be determined by turning the
equipment off and on, the user is encouraged to try to correct the interference by one or more of the following measures:
-- Reorient or relocate the receiving antenna.
-- Increase the separation between the equipment and receiver.
-- Connect the equipment into an outlet on a circuit different from that to which the receiver is connected.
-- Consult the dealer or an experienced radio/TV technician for help.
21 |

22 |
 Loading...