

Page 1
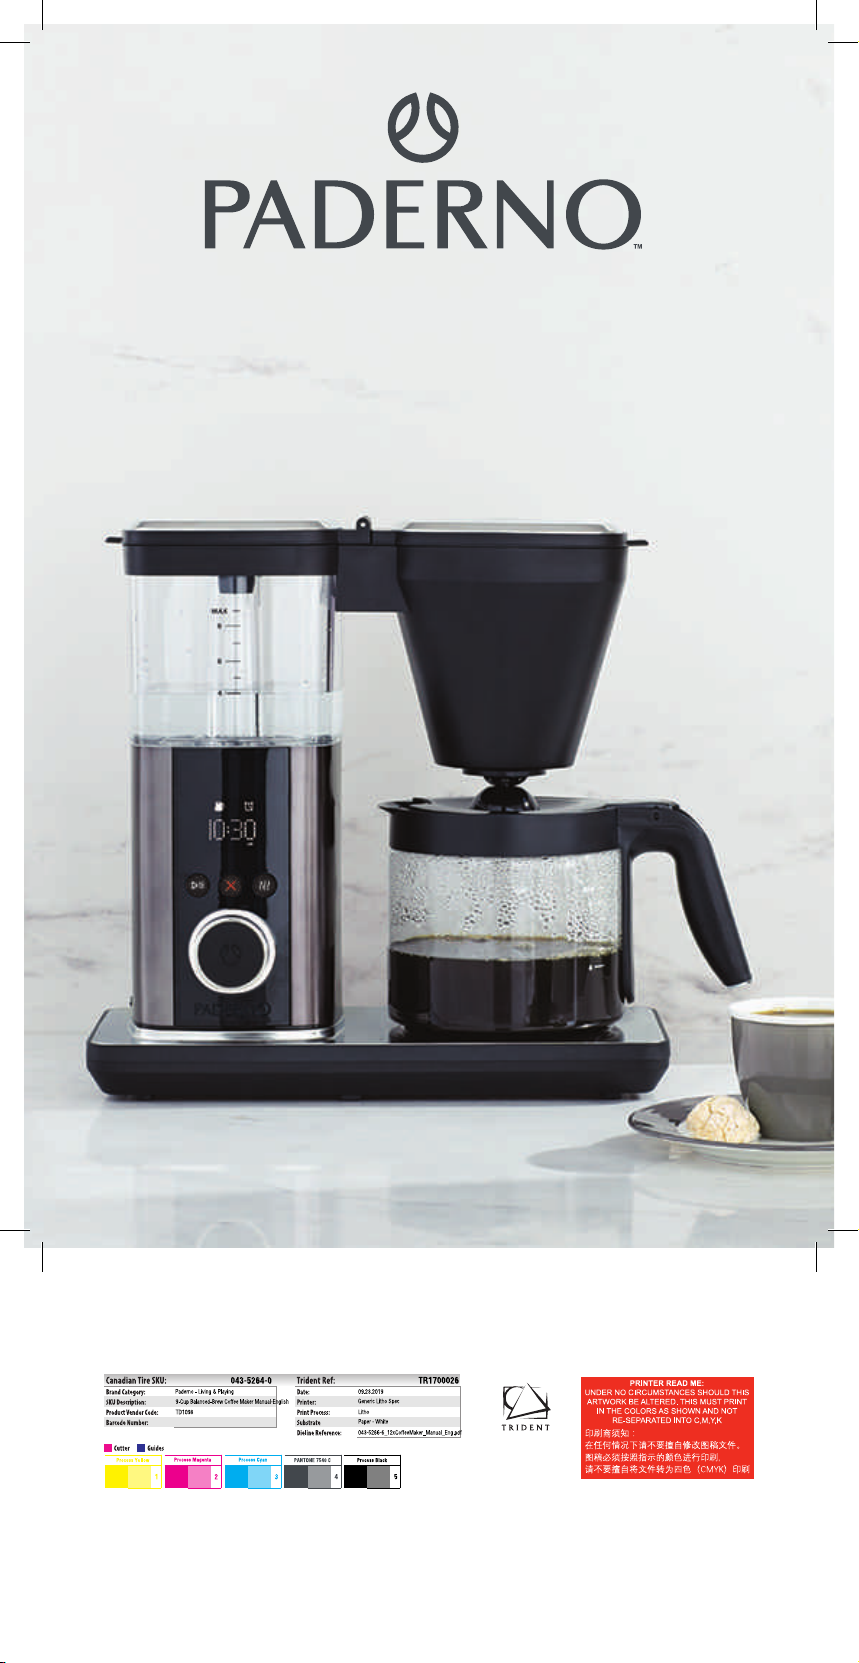
User Manual
9CUP BALANCEDBREW COFFEE MAKER
Model No. CMK021
Product No. 04352640
1
TR1700026_A.indd 1 9/25/19 7:44 AM
Page 2

Product No. 04352640
The PADERNOTM 9-cup Balanced-Brew
Coee Maker is designed with precise
brewing technology so that you can
enjoy the perfect cup of coee in
the comfort of your own home.
The intuitive dial interface and digital
display screen allows for easy
operation and programming. Its
performance has been certiied by the
Specialty Coee Association (SCA), who
has developed the standards for the
Gold CupTM of coee based on decades
of testing and research. Each of the
select few Certiied Home Brewers are
specially-designed to produce optimal
water temperature, brew time and
volume to ensure coee is rich,
delicious and consistently lavourful.
2
TR1700026_A.indd 2 9/25/19 7:44 AM
Page 3
1-800-263-9768 paderno.com
Table of
Contents
IMPORTANT SAFETY INSTRUCTIONS
Technical Information
Using Your Coee Maker
Cleaning and Maintenance
Our Guarantee
TR1700026_A.indd 3 9/25/19 7:44 AM
3
Page 4
IMPORTANT SAFETY INSTRUCTIONS
When using electrical appliances, basic safety precautions
should always be followed including the following:
1. Please read the instructions
carefully before using any
appliance.
2. Always ensure that the voltage on
the rating label corresponds to the
mains voltage in your home.
3. To protect against ire, electric
shock and injury to persons do not
immerse cord, plug, or appliance in
water or other liquid.
4. Close supervision is necessary
when any appliance is used by or
near children.
5. Unplug from power outlet when
either the appliance or display
clock is not in use and before
cleaning. Allow the appliance to
cool before attaching or removing
parts, and before cleaning the
appliance.
6. Do not operate any appliance with
a damaged cord or plug or after
the appliance malfunctions or has
been damaged in any manner. The
appliance should not be repaired or
opened by an unlicensed person.
Refer to the “Our Guarantee”
section regarding the product’s
warranty before returning the
appliance to the point of purchase.
7. The use of accessories not
recommended by the appliance
manufacturer may result in ire,
electric shock or injury to persons.
8. Do not use outdoors.
9. Do not let the cord hang over the
edge of a table or counter or touch
hot surfaces.
10. Do not place on or near a hot gas or
electric burner, or in a heated oven.
11. Do not use the appliance for other
than its intended use.
12. To disconnect, turn o the
appliance and remove plug from
the power outlet. Always hold the
plug when removing from the
power outlet. Never pull the cord.
13. The carafe is designed for use with
this appliance. It must never be
used on a stovetop.
14. Do not place a hot carafe on a wet
or cold surface.
15. Do not use a cracked carafe or a
carafe with a loose or weakened
handle.
16. Do not clean carafe with cleansers,
steel wool pads, or other abrasive
materials.
17. Scalding may occur if the cover is
removed during the brewing cycles.
Be careful not to get burned by the
steam.
18. Some parts of appliance are hot
when operated, so do not touch
parts with hand. Use handles or
knobs only.
19. Children must be supervised to
ensure that they do not play with
the appliance.
4
TR1700026_A.indd 4 9/25/19 7:44 AM
Page 5
1-800-263-9768 paderno.com
20. Do not let the coee maker operate
without water.
21. To reduce risk of ire or electric
shock, do not open. There are no
user-serviceable parts inside. The
appliance should not be repaired or
opened by an unlicensed person.
FOR HOUSEHOLD
USE ONLY
SAVE THESE
INSTRUCTIONS
TR1700026_A.indd 5 9/25/19 7:44 AM
5
Page 6
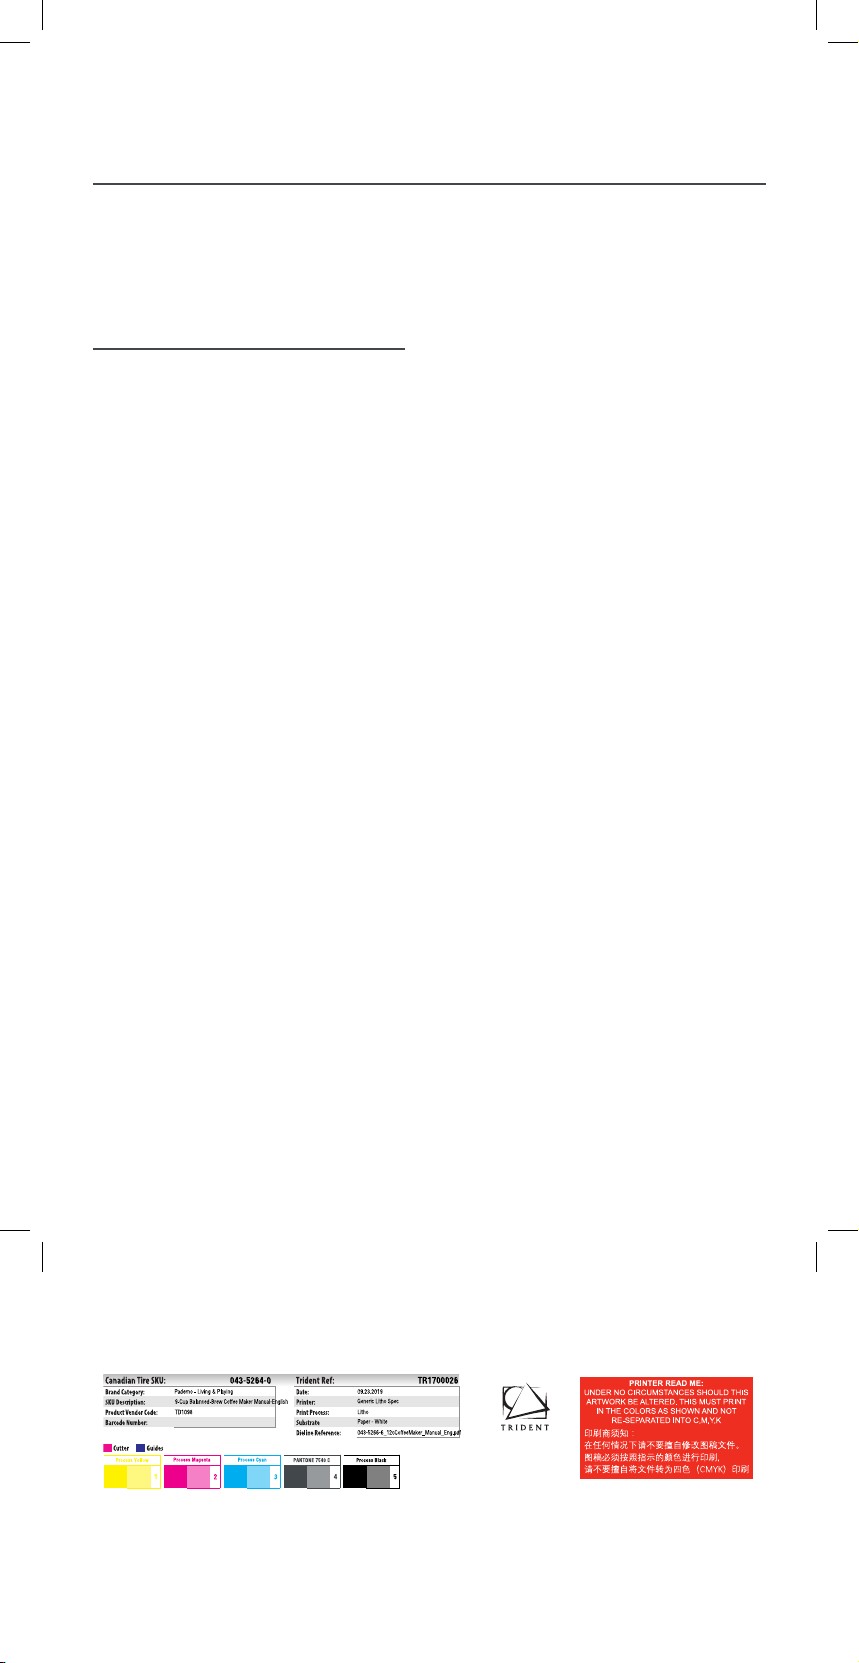
Filter
Water Tank
Display Screen
Dynamic Control Dial
Warming PlateWater
Boiler
Funnel
Support
Funnel
Carafe
Control Panel
(see below)
Keep Warm Button
Cancel/Return Button
Start/Pause Button
Coee Maker Parts
Control Panel
Technical Information
Polarized Plug
This appliance has a polarized plug
(one blade is wider than the other). To
reduce the risk of electric shock, this
plug is intended to it into a polarized
outlet only one way. If the plug does not
it fully into the outlet, reverse the plug.
If it still does not it, contact a qualiied
electrician. DO NOT modify the plug in
any way.
Notes on the Power Cord
A short power-supply cord (or detached
power-supply cord) is provided to
reduce risks resulting from becoming
entangled in or tripping over a long
cord. Longer detachable power-supply
cords or extension cords are available
and may be used if care is exercised in
their use.
If a long detachable power-supply cord
or extension cord is used:
• The marked electrical rating of the
detachable power-supply cord or
extension cord should be at least as
great as the electrical rating of the
appliance.
• If the appliance is of the grounded
type, the extension cord should be
a grounding-type 3-wire cord.
• The longer cord should be arranged
so that it will not drape over the
countertop or table top where it
can be pulled on by children or
trippe d ove r.
6
TR1700026_A.indd 6 9/25/19 7:44 AM
Page 7
1-800-263-9768 paderno.com
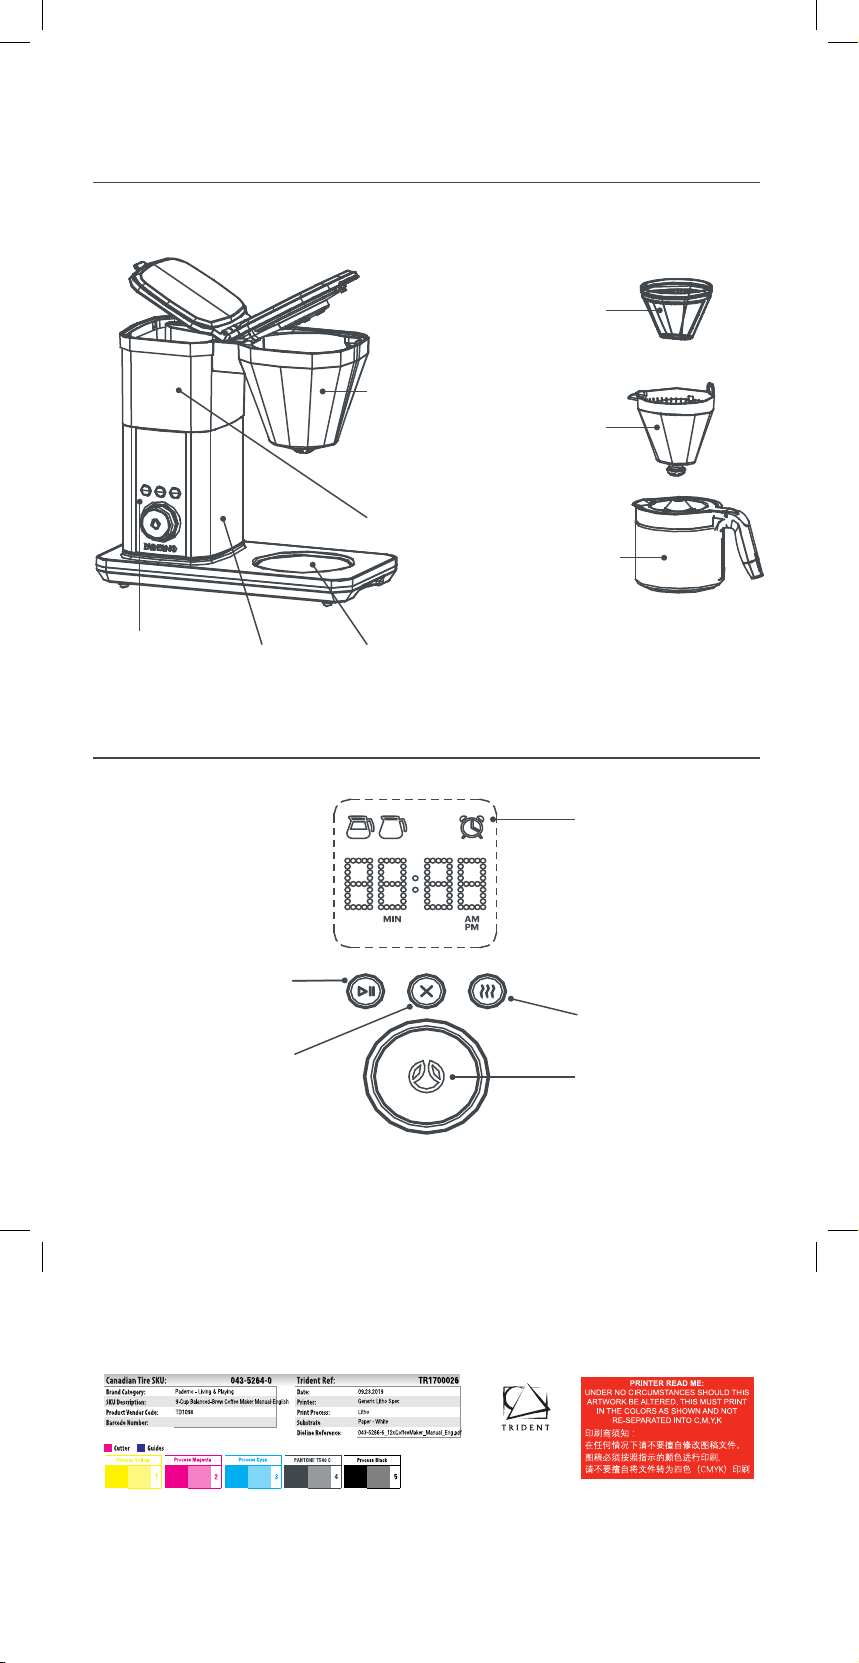
Funnel
Coee Maker Parts
Support
Water Tank
Filter
Funnel
Carafe
Control Panel
(see below)
Control Panel
Start/Pause Button
Cancel/Return Button
Boiler
Warming PlateWater
Display Screen
Keep Warm Button
Dynamic Control Dial
7
TR1700026_A.indd 7 9/25/19 7:44 AM
Page 8
Using Your Coee Maker
Clock Setting
old
Before First Use
1. Check that all accessories are
complete and the unit is not
damaged.
2. Add water into water tank to the
“MAX” level and brew water several
times without ground coee, to
remove any residue left from the
manufacturing process.
3. Discard water.
4. Clean all detachable parts
thoroughly with warm water.
Initial Set Up
1. Plug the power cord into the outlet.
The display screen will briely
display all the icons.
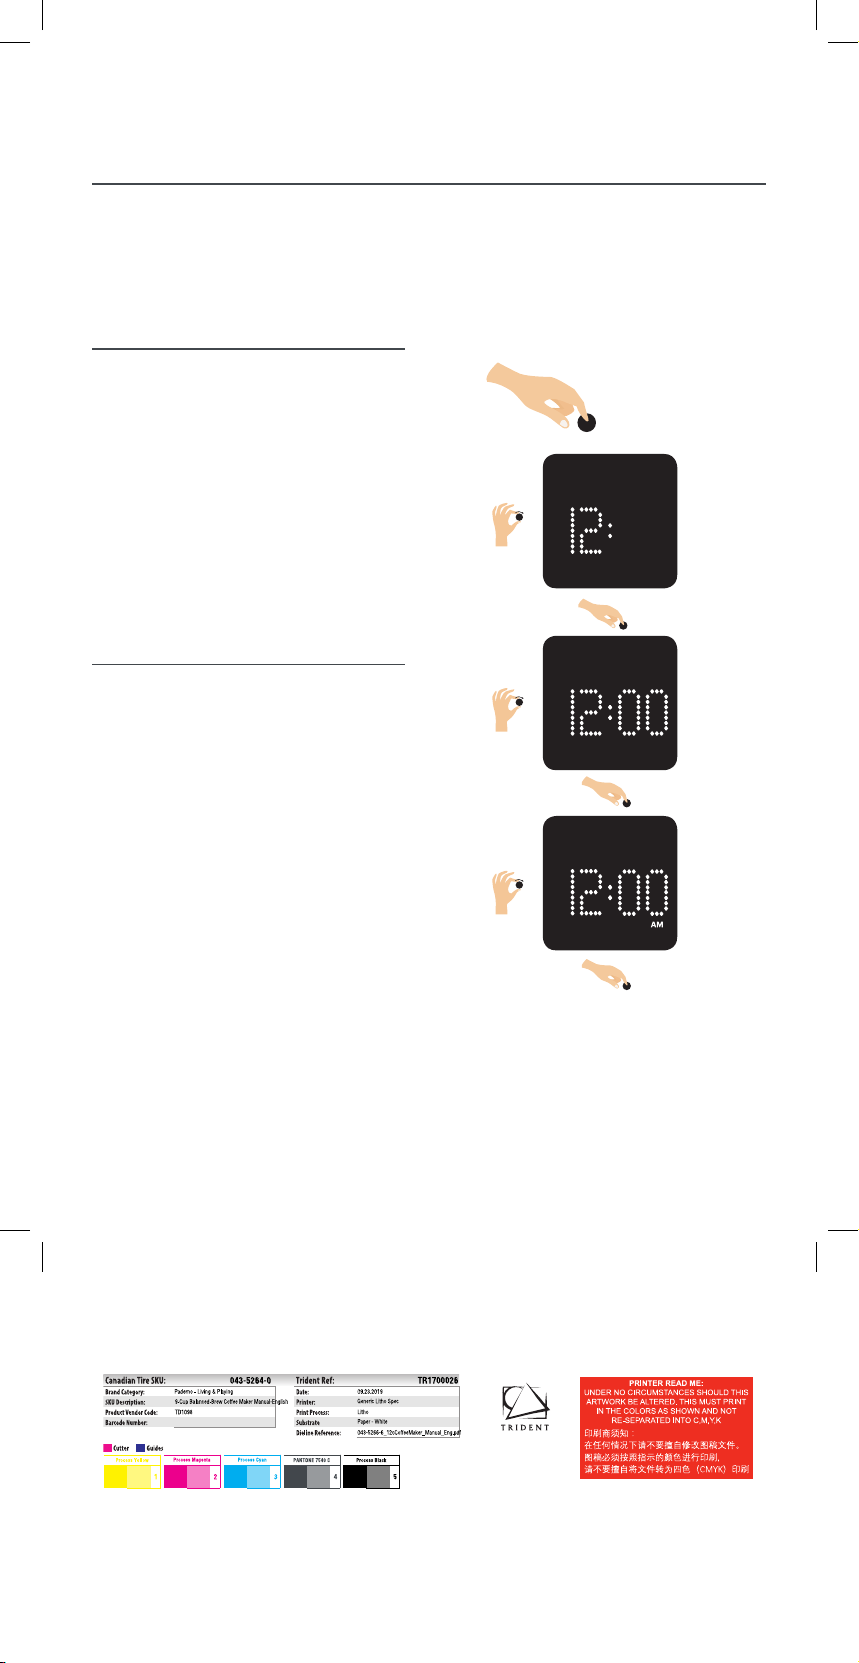
2. Click and hold the dial for 2
seconds to enter into the “Clock
Setting” mode. Rotate the dial to
adjust the “Hour”. To increase the
“Hour”, rotate the dial clockwise,
to decrease the “Hour”, rotate the
dial counterclockwise. After setting
the “Hour”, click the dial to conirm.
Note: The time cycle is 12 hours.
3. Rotate the dial to adjust “Minutes”
using the same process as previous
step. Click dial to conirm, as shown
in Fig. 1.
Fig. 1
Click + H
8
TR1700026_A.indd 8 9/25/19 7:44 AM
Page 9
1-800-263-9768 paderno.com
Selecting the Brew Size
Setting
Setting
Click
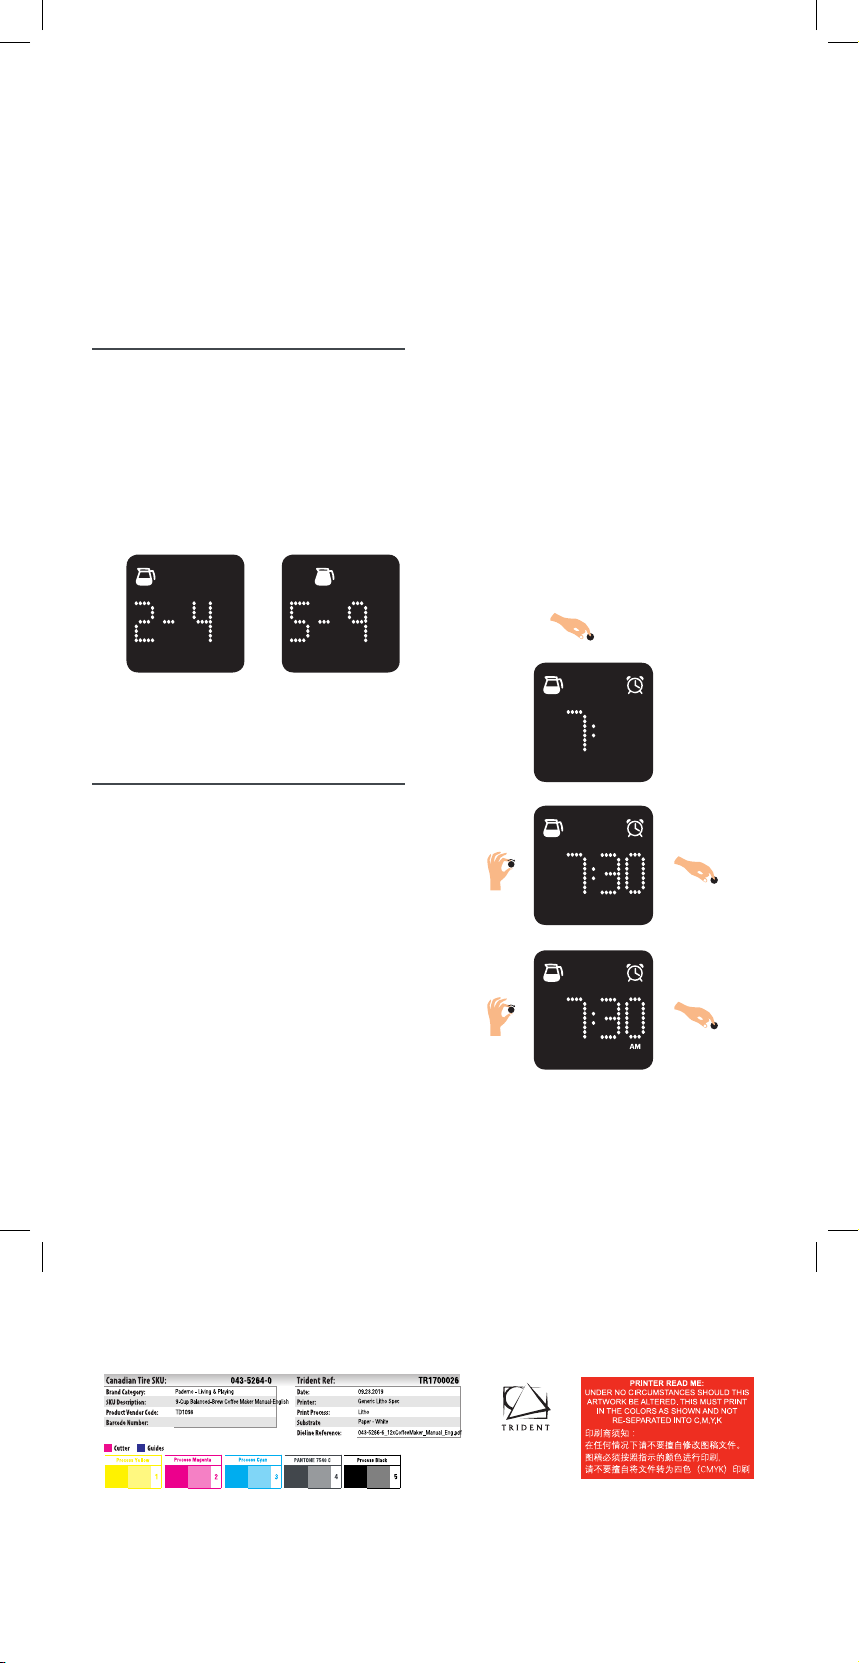
1. To enter “Brew Setting” mode, click
the dial.
2. When setting Brew Size, carafe
icons will blink on the digital display.
Rotate dial to choose between
“Small Batch” or “Full Batch”. Click
dial to conirm selection, as shown
in Fig. 2.
Small Batch
Fig. 2
Setting the Timer
1. When setting the timer to delay
brewing, the alarm clock icon will
blink. Rotate the dial to choose
between setting a timer, or not
setting a timer. Click the dial to
conirm selection.
2. If setting a timer is selected, the
“Hour” on the clock will blink.
Rotate the dial to set hour. Click the
dial to conirm selection, as shown
in Fig 3.
3. The “Minutes” on the clock will
blink after hour selection. Rotate
the dial to set minutes. Click the
dial to conirm selection, as shown
in Fig 3.
Full Batch
4. Press “Start/Pause” to inish setting
the timer, as shown in Fig 3. Set
time will appear on screen for 2
seconds and “Start/Pause” will
remain lit to indicate that the brew
cycle will start at the set time.
5. When brewing is completed, the
coee maker will enter the Keep
Warm function for 30 minutes.
NOTE: To begin brewing
immediately, select “Start/Pause”
again.
Fig. 3
9
TR1700026_A.indd 9 9/25/19 7:44 AM
Page 10
NOTE: Sleep mode is activated after
2 minutes if the coee maker is idle
and not brewing. The dial turns o
and only the clock will show on the
display screen. To wake the coee
maker, user can either click/rotate
the dial once or press any button.
The dial will become illuminated.
The display screen will then return
to the settings it was set at before
going into sleep mode.
Operating Instructions
1. Open the top lid and ill the water tank
with cold drinking water. The water
level should not exceed MAX level as
indicated on the water level gauge.
2. Place the funnel into the funnel
support and ensure that the funnel is
positioned correctly. Then place the
permanent ilter or paper ilter in the
funnel, and ensure that it is positioned
co rrec tl y.
3. Add ground coee into permanent
ilter or paper ilter. Usually a cup of
coee needs a level spoon of ground
coee, but you may adjust according
to your personal taste.
4. Insert the glass carafe on the warming
plate.
5. To reset brewing preferences, click
dial to enter “Brew Settings” mode.
6. To begin brewing immediately, press
“Start/Pause” button. The “Start/
Pause” and “Cancel/Return” buttons
will become illuminated. The display
screen will show the time count-up
during brewing process. The time
count-up indicates the elapsed time in
the brewing process.
NOTE: If there is no water in the
reservoir to begin brewing, the coee
maker will beep, and the batch size
icon will begin blinking. Add more
water and press “Start/Pause” again
to begin the brew cycle.
NOTE: The glass carafe can be
removed at any time during brewing
cycle. The appliance will stop dripping
automatically. The carafe should be
put back into position on the warming
plate within 30 seconds.
7. Press “Start/Pause” to temporarily
stop the brewing cycle. Press “Start/
Pause” again to resume the brewing
process.
8. When the brewing cycle is complete,
the coee maker will beep. The coee
maker will enter the “Keep Warm”
function, and the “Keep Warm” button
will become illuminated. The display
screen will show time count up to
indicate time elapsed in the “Keep
Warm” function. After 30 minutes,
the machine will beep and the “Keep
Warm” button will turn o.
NOTE: To deactivate “Keep Warm”
function, press the button again. If the
button is pressed after the 30 minutes
are done, “Keep Warm” function will
activate again.
9. Remove the glass carafe to serve
when brewing is inished (remove
10
TR1700026_A.indd 10 9/25/19 7:44 AM
Page 11
1-800-263-9768 paderno.com
about one minute after the coee
stops dripping).
NOTE: The coee you get will be
less than the water you have added,
as some water is absorbed by the
ground coee.
10. Always turn the coee maker o and
disconnect power supply when not
in use.
NOTE: Use caution when pouring
coee. Coee will be hot and may
cause injury.
Tips for Great-tasting Coee
• A clean coee maker is essential
for making great-tasting coee.
Regularly clean the coee maker
as speciied in the “Cleaning and
Maintenance” section of this user
manual. Always use fresh, cold
water in the coee maker.
• Store unused ground coee in a
cool, dry place. After opening a
package of ground coee, reseal it
tightly and store it in a refrigerator
to maintain its freshness.
• For an optimum coee taste, buy
whole coee beans and inely grind
them just before brewing.
• Do not reuse coee grinds since
this will greatly reduce the coee’s
lavour. Reheating coee is not
recommended as coee is at its
peak lavour immediately after
brewing.
• Clean the coee maker when
over-extraction causes oiliness.
Small oil droplets on the surface
of brewed, black coee are due to
the extraction of oil from the coee
grinds.
• Oiliness may occur more frequently
if heavily roasted coees are used.
Brewing the SCA Certiied Golden
Cup™ of Coee
To achieve the Gold Cup™ it is
recommended to use 75 grams (2.6 oz)
of coee beans for every 9-cup (1350 ml)
pot of coee, or 8.5 grams (0.3 oz) per
cup (150 ml), with beans freshly ground to
a medium grind. It is also recommended
to use a paper ilter for optimal lavor.
TR1700026_A.indd 11 9/25/19 7:44 AM
11
Page 12
Cleaning and Maintenance
Cleaning and Maintenance
CAUTION: Be sure to unplug this
appliance and allow it to cool down
before cleaning. To protect against
electrical shock, do not immerse cord,
plug or unit in water or liquid. After
each use, always make sure the plug is
irst removed from power outlet.
1. Clean all detachable parts after
each use with hot water and soap.
2. Wipe the appliance’s exterior
surface with a soft, damp cloth to
remove stains.
3. Water droplets may buildup in the
area above the funnel and drip onto
the appliance base during brewing.
To control the dripping, wipe o the
area with a clean, dry cloth after
each use.
4. Never use abrasive cleaners to
clean it.
5. Replace all parts and keep for next
use.
The appliance should not be repaired
or opened by an unlicensed person.
Refer to the “Our Guarantee” section
regarding the product’s warranty before
returning the appliance to the point of
purchase.
Removing Mineral Deposits
To keep your coee maker operating
eiciently, you should clean the mineral
deposits left by the water.
Follow these directions:
1. Fill the water tank with water
and descaler to the MAX level
in the proportion of 4 to 1 (Use a
“household descaler”, and refer to
the instructions on package of the
descaler. You can also use citric
acid instead of descaler).
2. Put the glass carafe on the warming
plate. Ensure that the centre line
of glass carafe aligns with that of
funnel.
3. Press the “Start/Pause” button
once. After a while, water will drip
out automatically.
4. After brewing the equivalent of one
cup, switch o the appliance by
pressing the “Start/Pause” button
once again.
5. Leave the solution to work for 15
minutes.
6. Repeat steps 35 again. Brew the
remaining solution until the water
tank is completely empty.
7. To remove solution, brew with water
only (no ground coee) at least 3
times.
12
TR1700026_A.indd 12 9/25/19 7:44 AM
Page 13
1-800-263-9768 paderno.com
Disposal of Appliance
DO NOT dispose of this product in
household waste. Many parts of this
product are recyclable. Dispose of
as per the requirements of your local
municipality.
TR1700026_A.indd 13 9/25/19 7:44 AM
13
Page 14
Our Guarantee
If you experience any issues with your PADERNOTM 9-cup
Balanced-Brew Coee Maker, please refer to the warranty
terms below to determine the corrective course of action.
2Year Limited Warranty
Padinox Inc. (“PADERNO”) has been fueling
your passion for cooking since 1979. This
iconic Canadian brand gives you outstanding
durability and performance, so you can
concentrate on the important things, like
what to make next.
That’s why we stand by all our products!
Starting from the date of purchase,
PADERNO warrants that your Kitchen
Appliance is free from any manufacturing
defects in materials or workmanship for a
period of 2 years.
This warranty is only oered on PADERNO
appliances sold and used in Canada. The
PADERNO warranty covers all costs related
to restoring the proven defective product
through the repair or replacement of any
defective part and necessary labour so that
it conforms to its original speciications.
A replacement product may be provided
instead of repairing a defective product at
PADERNO’s discretion.
The PADERNO warranty does not apply
to appliances that have been used
commercially or in non-household
applications. The warranty does not cover
damages resulting from misuse or abuse of
the product and/or uses inconsistent with
this Use and Care manual, attempts at repair,
theft, use with unauthorized attachments
or failure to follow the instructions provided
with the product. This warranty becomes
void if attempts at repair are made by
non-authorized third parties and/or if
spare parts, other than those provided by
PADERNO, are used. You may also arrange
for service after the warranty expires at an
additional cost. There are no other express
warranties except as set forth herein
and any applicable implied warranties
of merchantability and itness (or those
provided for by law) are limited in duration
to the period of coverage of this express
written limited warranty.
CO NTACT:
If you have any trouble with the product
during the warranty period, please visit us
online at www.PADERNO.com or contact us
at: 18002639768 or via email customer.
Padinox Inc. Toronto Canada M4P 2V8
A receipt indicating the purchase date is
required for any claims, so please keep it
in a safe place. We recommend that you
register your product on our website -
https://www.PADERNO.com/pages/
product-registration
Although greatly appreciated, the product
registration is not required to activate any
warranty and product registration does not
eliminate the need for the original proof of
purchase.
14
TR1700026_A.indd 14 9/25/19 7:44 AM
Page 15
1-800-263-9768 paderno.com
TR1700026_A.indd 15 9/25/19 7:44 AM
15
Page 16
TM
Cook. For life.
Valued by professional chefs and passionate
home cooks alike, PADERNOTM oers an
exceptional level of durability and
performance guaranteed.
Connect with us at PADERNO.com to learn more
and register your product.
For questions and concerns, please contact:
18002639768
16
TR1700026_A.indd 16 9/25/19 7:44 AM
 Loading...