
Pacesetter
BES Lettering 2
Instruction Manual

ii Pacesetter BES Lettering 2
Instruction Manual
Copyright
© Copyright 2011 Pulse Microsystems Ltd. All rights reserved.
This instruction manual and software are copyrighted by the
developer of the software, Pulse Microsystems Ltd. All rights
reserved. US Patent Nos. 5 270 939; 5 343 401; 5 430 658; 5
506 784; 5 510 994; 5 541 847; 5 668 730; 5 771 173; 5 809
921; 6 196 146; 6 216 618; 6 390 005; 6 968 255. European
Patent Nos. 0545773. Other patents pending.
Information in this document is subject to change without
notice.
The software described in this document is furnished under a
license agreement and/or nondisclosure agreement. The
software may be used or copied only in accordance with the
terms of those agreements. No part of this publication and the
software may be copied, photocopied, reproduced, translated,
or reduced to any electronic medium or machine-readable form
without the manufacturer’s written permission.
Commercial or industrial use of trademark and copyrighted
works (For example, books, paintings, drawings, photos,
fanciful characters, and so forth) owned by other companies or
persons, for creation of embroidery patterns without permission
is illegal and may result in either criminal or civil liability.
Microsoft®, Windows® XP, Windows® Vista, and Windows® 7
are registered trademarks of Microsoft Corporation. All other
product names are copyrighted and registered trademarks or
trademarks of their respective holders. All computer and
software names identified by TM or tm are trademarks of their
respective manufacturers.

Table of Contents
Learning about the Workspace...........................................5
Parts of the Workspace ...................................................................6
Title Bar .................................................................................... 6
Pacesetter Button..................................................................... 6
Quick Access Toolbar...............................................................7
Toolbar and Ribbon Buttons .......................................................... 13
Pacesetter Menu Tools........................................................... 13
Extra Tools.............................................................................. 14
Ribbon Tools...........................................................................14
The View Tab..........................................................................18
Simulator ................................................................................ 19
Status Line.............................................................................. 20
Color Palette........................................................................... 21
Using Scrollbars ..................................................................... 21
Correcting Mistakes................................................................ 22
Setting up your Workspace Environment ......................................22
Changing Machine Format Properties....................................23
Adjusting the View of the Workspace ............................................ 24
Magnifying and Reducing the View ........................................ 24
Hiding the Sequence and Properties Panels
Automatically .......................................................................... 25
Viewing Different Parts of the Workspace
(Panning) ................................................................................ 26
Taking Measurements ............................................................ 27
Displaying the Hoop ......................................................................27
Viewing and Hiding the Hoop ................................................. 28
Selecting a Hoop .................................................................... 28
Creating a Custom Hoop........................................................ 29
Getting Help................................................................................... 30
Opening the Help ...................................................................30
Using the Contents................................................................. 31
Using the Index .....................................................................31
Using Search..........................................................................31
Saving Favorite Help Topics...................................................32
Printing Help topics ................................................................ 33
1

2 Pacesetter BES Lettering 2
Instruction Manual
Creating Lettering...............................................................35
Creating Lettering .......................................................................... 36
Normal Text Tool ..................................................................... 36
Path Text Tool ......................................................................... 37
Custom Shapes for Text on a Path......................................... 39
Vertical Text Frame.................................................................41
Circle Text Tool....................................................................... 42
Creating Monograms .............................................................. 43
Text Frames - an Overview............................................................ 44
Adjusting Size of a Text Segment........................................... 44
Adjusting the Width of Text ..................................................... 45
Adjusting the Corners of Text Segments ................................45
Using the Envelope Handles .................................................. 46
Rotating Text........................................................................... 46
Adjusting the Slant of Text......................................................47
Adjusting the Size of Text in the Circle Frame........................ 48
Adjusting Text Width in the Circle Frame................................48
Changing the Diameter of the Circle Frame........................... 49
Working with Individual Letters...................................................... 50
Adjusting the Space between Letters (Kerning) .....................50
Moving Individual Letters........................................................51
Resizing Individual Letters......................................................51
Rotating Individual Letters...................................................... 52
Working with Color......................................................................... 53
Changing the Color of a Text Segment................................... 53
Creating Multi-color Text Segments ....................................... 53
Changing Colors in a Two-color Font ..................................... 55
Text Properties ...................................................................57
The Properties Panel.....................................................................58
Adjusting Text Properties............................................................... 58
Changing the Text .................................................................. 58
Changing the Font of Existing Text......................................... 60
Displaying a Font’s Available Characters............................... 61
Spell Checker ......................................................................... 62
Changing the Height of Lettering............................................ 63
Changing Font Spacing ..........................................................63
Width Percentage...................................................................64
Changing the Slant Setting.....................................................64
Applying an Envelope............................................................. 65

Drop Caps ..............................................................................66
Properties Specific to Particular Text Frames ......................... 67
Changing Properties with the Context Menu
(Right-click)............................................................................. 68
Text Styles Option.......................................................................... 70
Run Style Text ........................................................................ 70
Steil Style Text ........................................................................ 71
Appliqué Style Text ................................................................. 72
Adjusting Fill Settings ....................................................................78
Choosing a Fill Pattern ...........................................................79
Fill Density Setting.................................................................. 80
Carved Fill Properties............................................................. 81
Underlay Properties ....................................................................... 82
Selecting the Underlay Type .................................................. 83
Specifying the Underlay Density............................................. 83
Specifying the Underlay Stitch Length.................................... 84
Changing the Inset Distance .................................................. 84
Pull Compensation Settings...........................................................85
Displaying Special Characters.......................................................86
Editing Designs ..................................................................91
Creating New Designs................................................................... 92
Opening and Closing Designs ....................................................... 93
Opening Files with the Browser..................................................... 94
Choosing the Default Recipe..................................................97
Saving a Design ............................................................................ 98
Selecting and Moving Parts of a Design........................................ 99
The Select Tool.......................................................................99
Copying, Cutting, and Pasting Design
Components .........................................................................102
Aligning Items in the Design Horizontally
and Vertically........................................................................103
Moving Parts of a Design Manually ...................................... 104
Nudging Design Components............................................... 105
Deleting Design Components............................................... 105
Rotating Design Components............................................... 106
Working with the Color Palette .................................................... 107
Selecting a Thread Chart .....................................................107
Searching for a Specific Color.............................................. 107
Changing a Thread Color .....................................................108
3

4 Pacesetter BES Lettering 2
Instruction Manual
Special Design Tools ................................................................... 109
Merging Design Files............................................................ 109
Add Designs Feature.............................................................111
Distorting Segments ............................................................. 113
Working with Name Drops........................................................... 117
Adding Basting Stitches to Designs......................................120
Sequencing Outline Segments ....................................................121
Sequencing Segments ......................................................... 121
Inserting Segments Earlier in the Segment
Sequence .............................................................................122
Moving a Segment Forward or Backward ............................123
Moving a Segment to the Start or End of
the Design ............................................................................124
Moving a Segment to the nearest Matching
Color Group.......................................................................... 126
Using the Color Sort tool ...................................................... 128
Printing Designs ..........................................................................129
Previewing a Design before Printing ....................................129
Printing Design Worksheets ................................................. 130
Changing the Print Settings..................................................131
Foreign Language Fonts..................................................133
Greek font.................................................................................... 134
Greek Block font .......................................................................... 135
Greek Mixed font .........................................................................136
Hebrew Traditional font................................................................137
Russian font.................................................................................138
Glossary ...........................................................................139
Index..................................................................................145

CHAPTER 1:
Learning about the
Workspace
Before you start using the software, we recommend that you
understand the Pacesetter BES Lettering 2 design workspace
and learn a few of the basic components outlined in this section.
Topics covered in this chapter:
• Setting up the design workspace environment.
• Showing a hoop in the workspace, and choosing the size of
hoop to be displayed
• Creating your own customized hoop.
• Using the Pacesetter BES Lettering 2 help.
6 Pacesetter BES Lettering 2
Instruction Manual
Parts of the Workspace
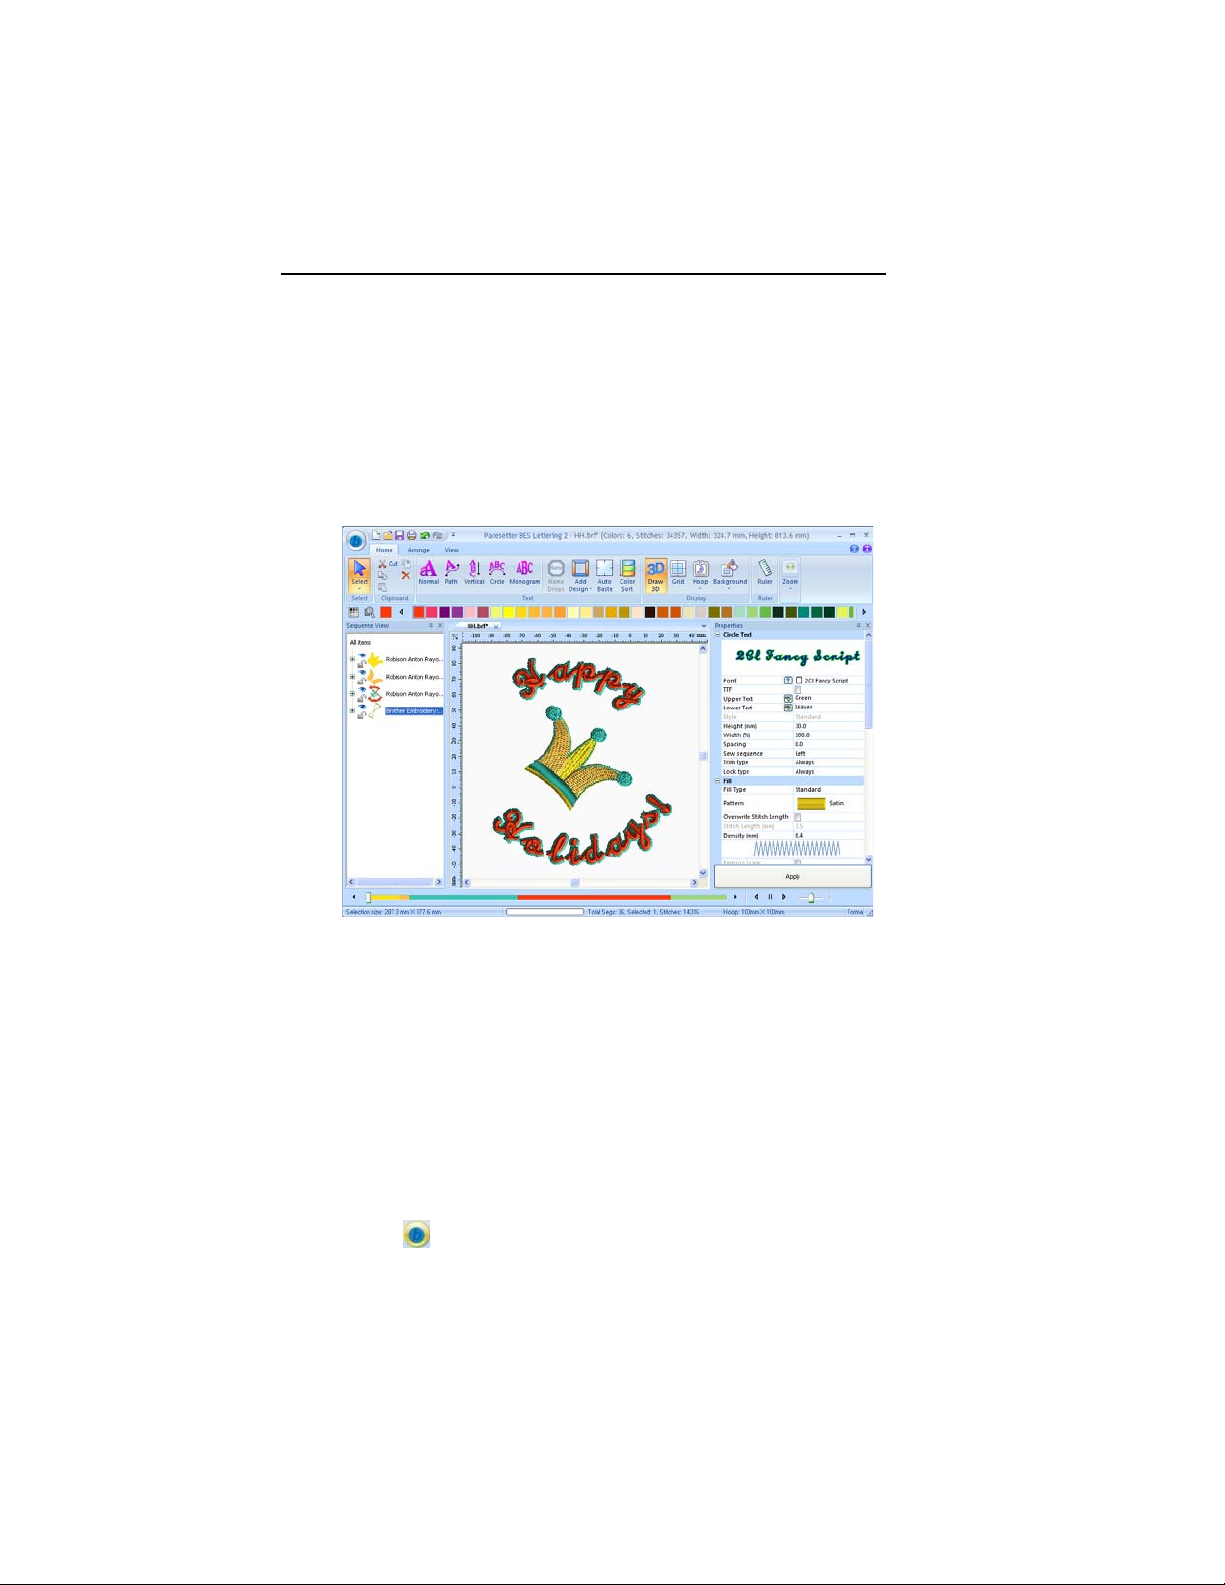
The Pacesetter BES Lettering 2 workspace contains a number
of different areas which have distinct functions. The sections
that follow give an overview of what each of these areas does,
and the kinds of information about the design that they contain.
Title Bar
The Title Bar appears at the top of the Pacesetter BES Lettering
2 design window. The Title bar displays information about the
design that is open in the workspace: its name, the number of
stitches and colors in the design, and the overall width and
height.
Pacesetter Button
At the top left-hand corner of the window is the Pacesetter
Button . Clicking on the Pacesetter Button to gives you
access to a menu of useful tools, such as New, Save, Print, and

Learning about the Workspace 7
several others. For a complete list of the tools available on this
menu, and a summary of their functions, see “Pacesetter Menu
Tools” in the next section.
When you open the Pacesetter Menu, you will also see
displayed a list of recent files that you have been using. Just
double-click on the file name to open it.
Tools available on the Pacesetter Menu.
Quick Access Toolbar
The Quick Access Toolbar is located right along the top of your
workspace, to the left of the Title Bar. This toolbar contains tool
buttons that you will commonly use, such as Open, Save, and
Print; but it is fully customizable, meaning that you can add the
tools you personally use most often, for easy access. See
“Customizing the Quick Access toolbar”.
8 Pacesetter BES Lettering 2
Instruction Manual
To start out, the following default tools are included on the Quick
Access toolbar: New, New/Recipe, Open, Merge, Save, Print
Preview, Direct Print, Undo, and Redo.
Customizing the Quick Access Toolbar
One important advantage of the Quick Access toolbar is that it
is fully customizable. This means that you are able to select
tools from any of the Pacesetter BES Lettering 2 toolbars and
add them to the Quick Access toolbar. You do this by way of the
Customize function, which is accessed by clicking the small
down arrow to the right of the Quick Access toolbar.
To customize the Quick Access toolbar:
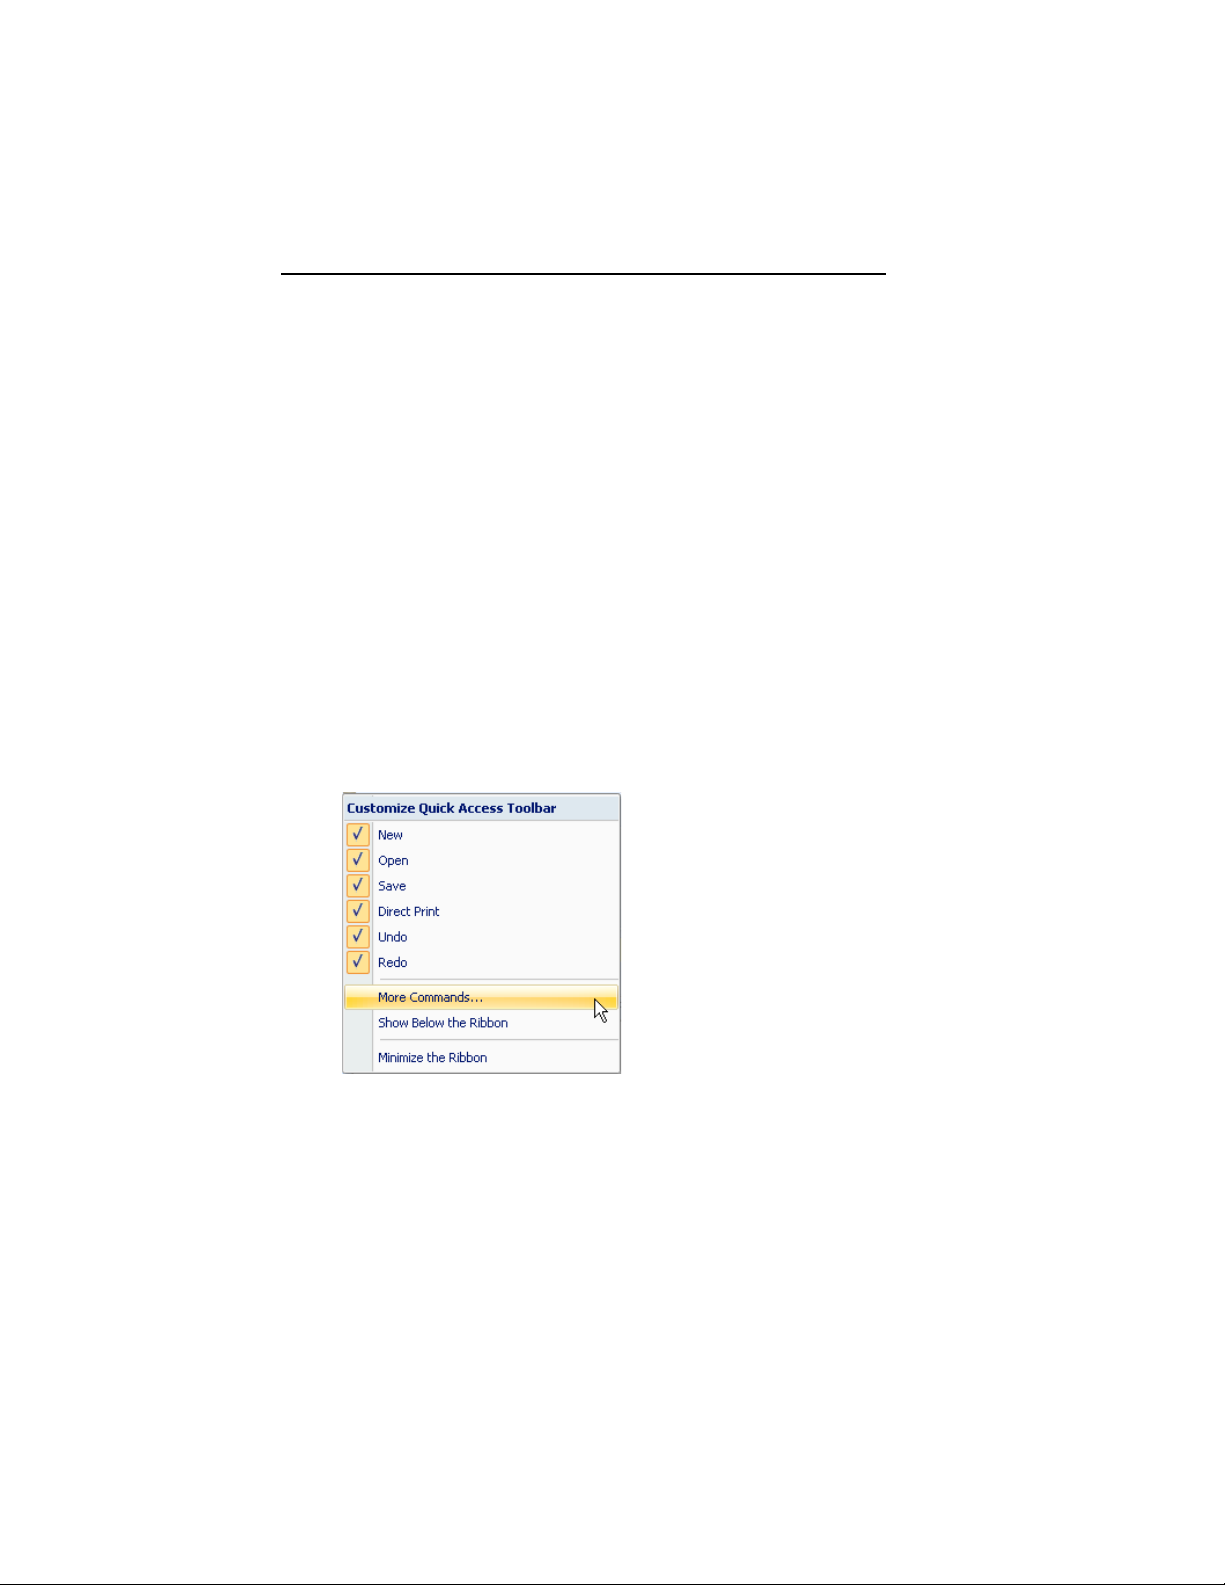
1 Click the down arrow at the right end of the Quick Access
toolbar.
You see a menu.
2 Click on More Commands...
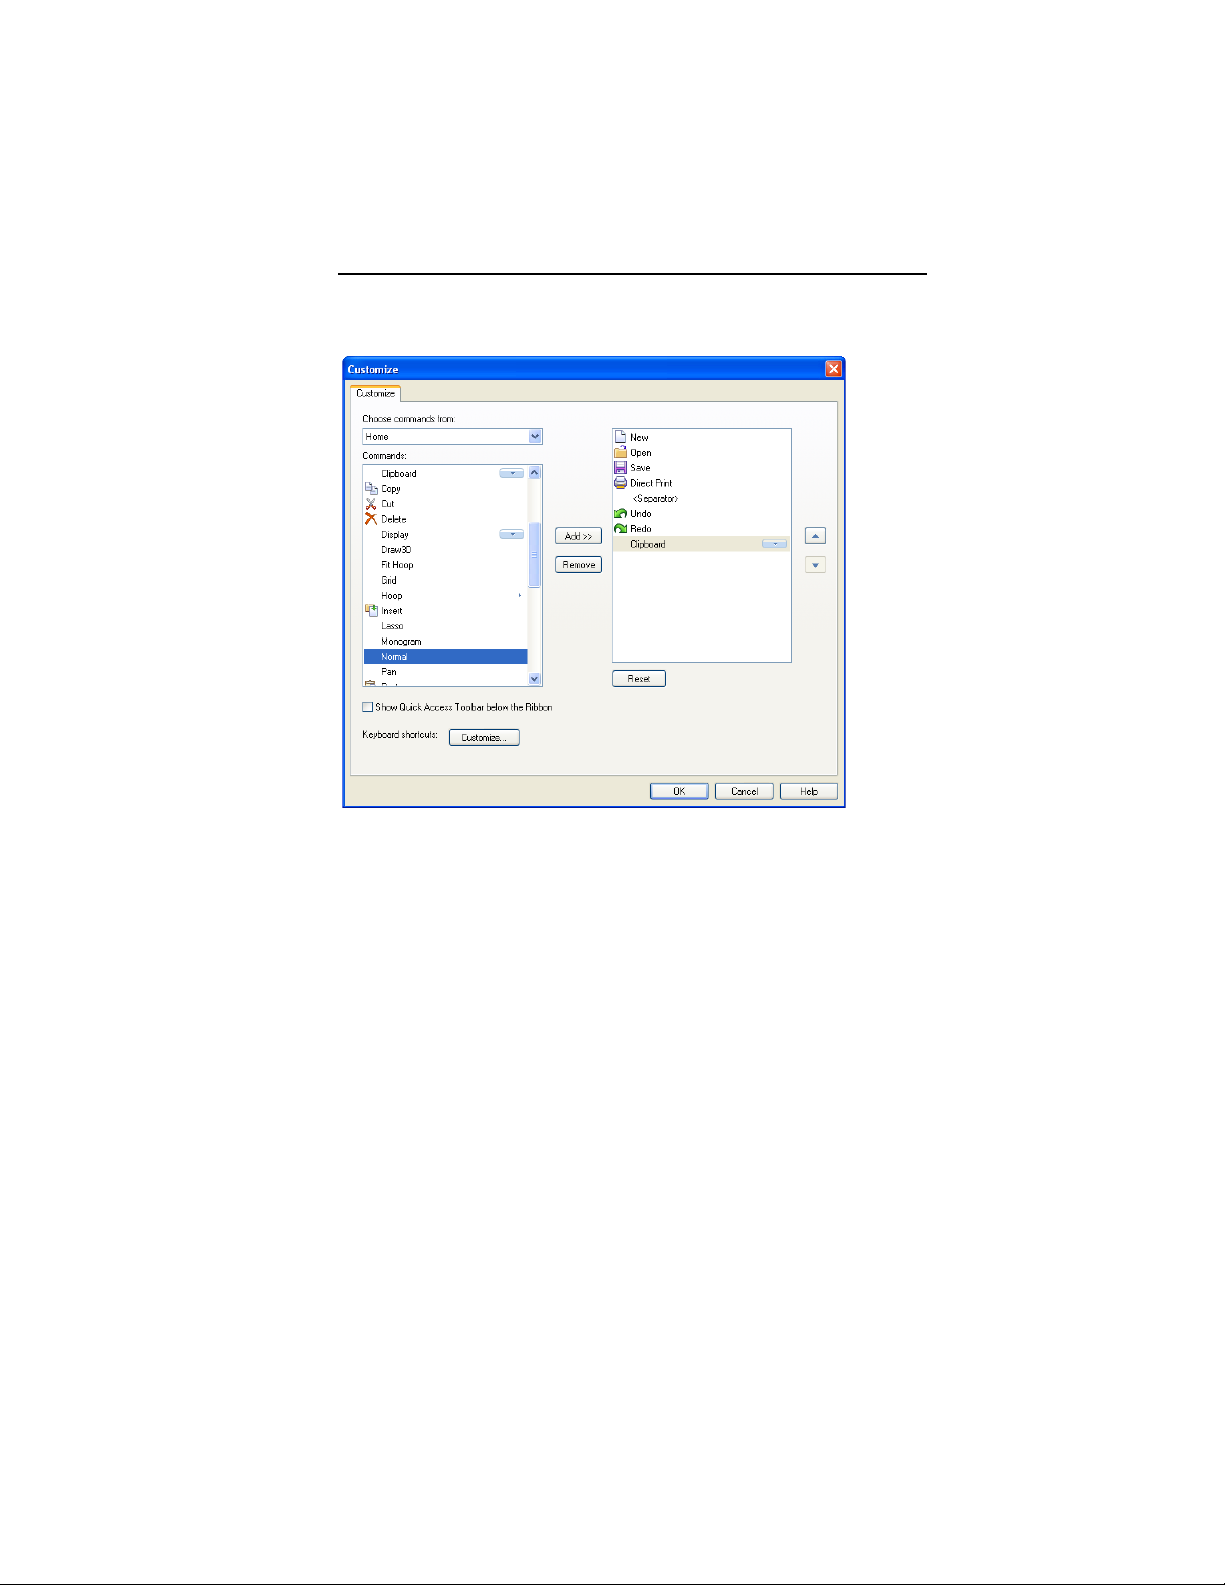
You see the Customize dialog.
Learning about the Workspace 9
3 From the “Choose Commands from:” list, select the toolbar
containing the command you want.
The list of tools on that toolbar now appears in the
“Commands” box.
4 Select the desired tool from within the “Commands” box, and
click Add>>.
The selected tool appears in the list of Quick Access toolbar
tools.
5 Repeat steps 3-4 until you have added all the tools you want
to the Quick Access toolbar.
6 If there is a tool on the Quick Access toolbar that you do not
want to have on there, select it in the right-hand box and
click on the Remove button in the dialog.
7 When you have added and/or removed all the buttons you
want, click OK.
The dialog will close; the Quick Access toolbar will be
changed accordingly.
10 Pacesetter BES Lettering 2
Instruction Manual
Adding Separators in the Quick Access
Toolbar
You have the option of also adding separators in the Quick
Access Toolbar. These are small vertical marks which appear
on the Quick Access Toolbar, and divide the commands into
groups for ease of use. A separator is added just the same way
as you add commands; select <separator> in the “Choose
commands” list and then click the Add >> button.
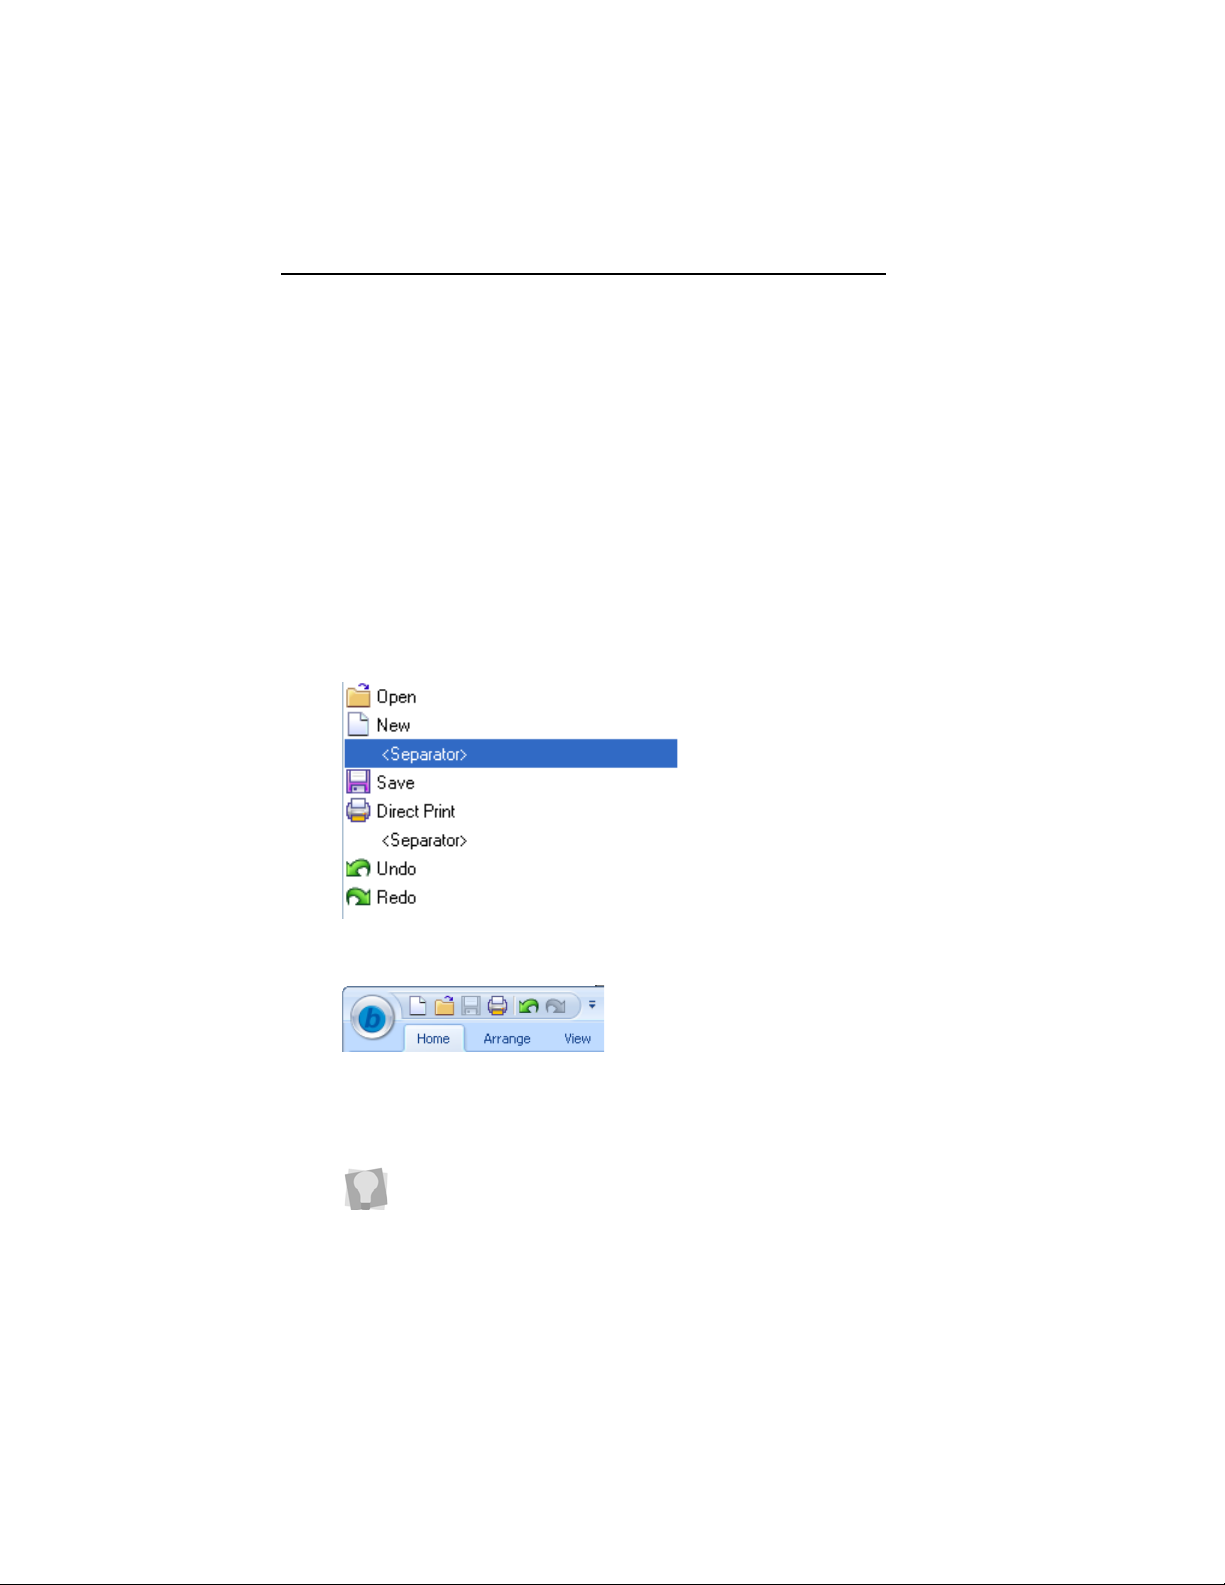
Here is an example of how the separators work. If you create an
arrangement of separators and commands in the Customize
dialog that looks like this,
The Quick access toolbar will be organized to look like this:
For more details, see the procedure outlined above,
“Customizing the Quick Access Toolbar.
You can change the position of a separator, or any command in
the Quick Access Toolbar. Select it in the box to the right in the
Customize dialog, and click the up and down arrows on the
right. This will move the command or separator relative to the
other commands in the Quick Access Toolbar.

Learning about the Workspace 11
Customizing Keyboard Shortcuts
Another useful feature of the More Commands menu item (on
the Quick Access Toolbar) is that it gives you the option of
assigning your own custom keyboard shortcuts. Keyboard
shortcuts can be very useful for those tools that you use most
often.
To assign keyboard shortcuts:
1 Click the down arrow at the right end of the Quick Access
toolbar.
You see a menu.
2 Click on More Commands...
You see the Customize dialog.
3 Click the Customize button.
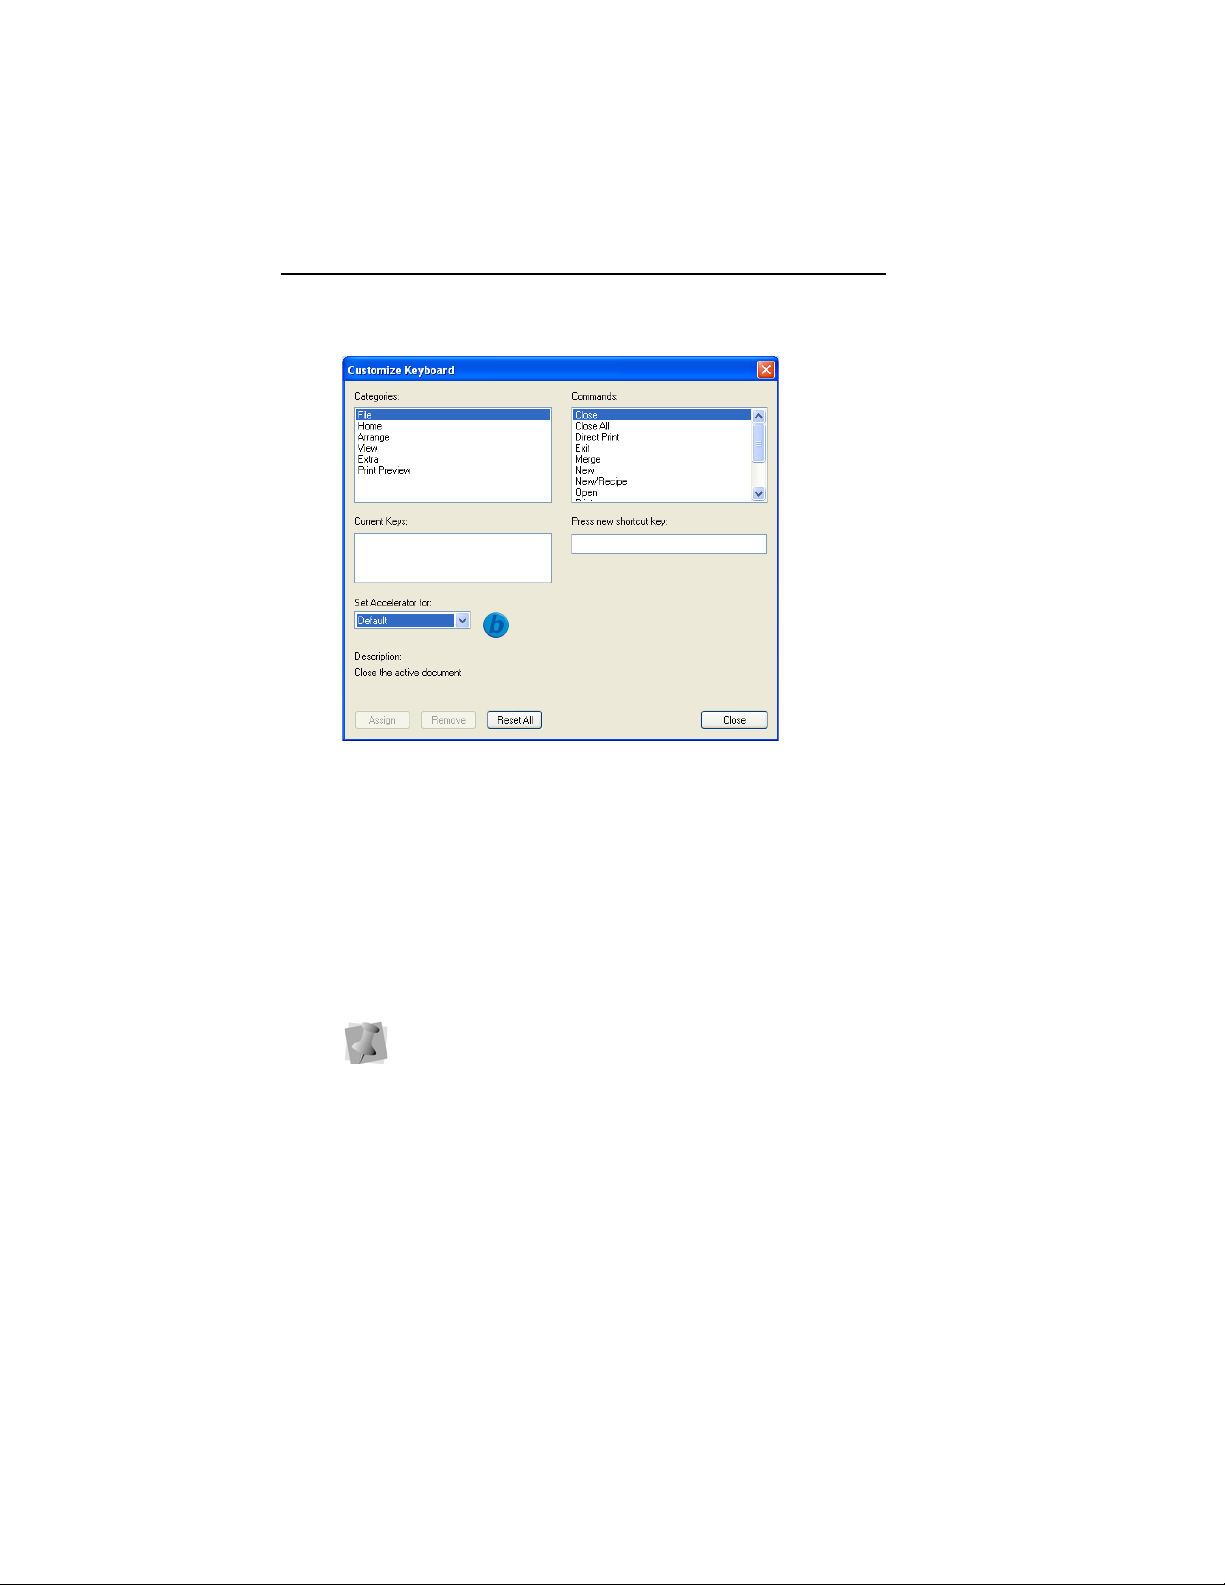
You see the Customize Keyboard dialog.
12 Pacesetter BES Lettering 2
Instruction Manual
4 From the “Categories” list, select the category containing the
command you want.
The corresponding list of commands appears in the
“Commands” box.
5 Select a command to which you would like to assign a
shortcut.
6 Click in the “Press new shortcut key” field.
7 On your keyboard, press the sequence of keys that you want
to use; these keystrokes will appear in the field.
If there are two or more keys used in the shortcut, a plus sign
(+) will be inserted between them, to indicate that they are to
be used in combination. The (+) on your keyboard is not part of
the shortcut sequence.
8 Click the Assign button to create the custom shortcut.
The shortcut sequence will be moved into the Current Keys
field.
9 Repeat steps 3 - 7 until you have created all the desired
keyboard shortcuts.
10 Click close.
Learning about the Workspace 13
Toolbar and Ribbon Buttons
You can access the tools available in Pacesetter BES
Lettering 2 through the Pacesetter Button and the various
toolbars. The tables below show the buttons, grouped by
location (i.e. whether they are on the Quick Access Bar, or on
one of the tabs on the ribbon). A brief description of what the
button does is also included. Note that within each tab, some
buttons are grouped together by function.
Pacesetter Menu Tools
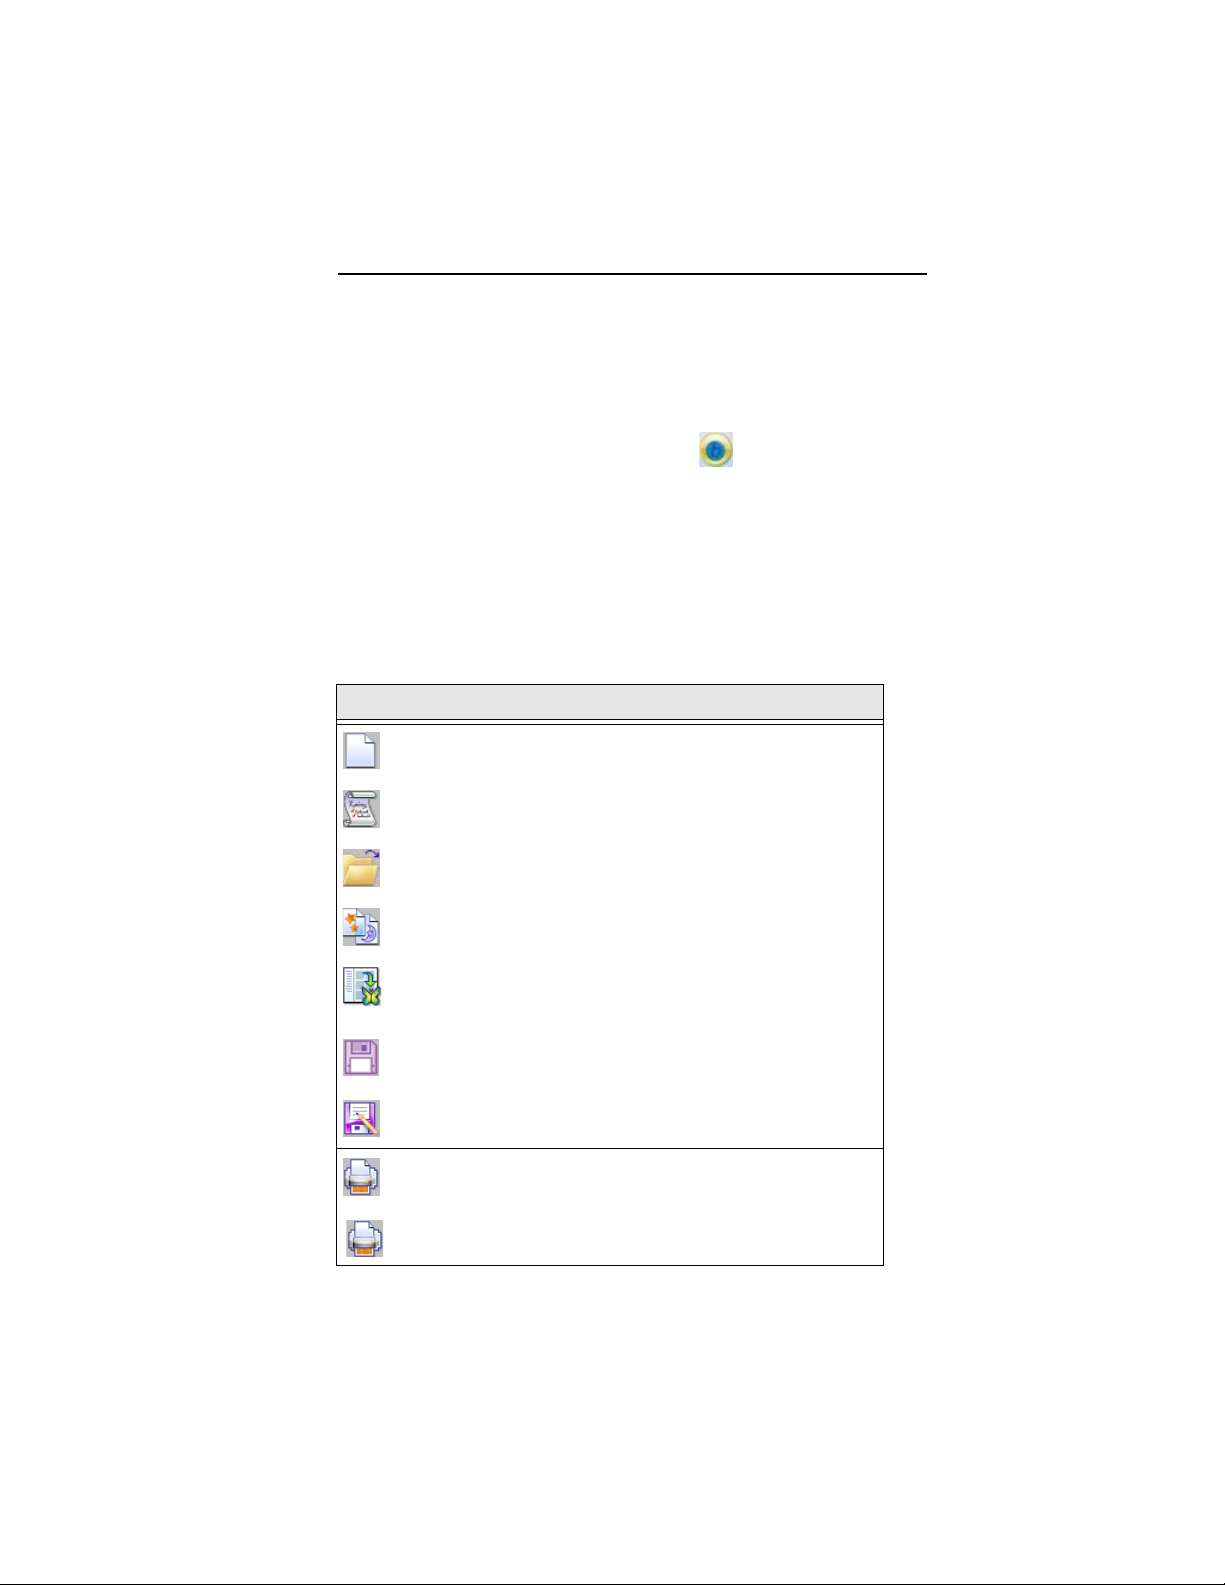
Tool What it means
New: Creates a new untitled design.
New/Recipe: Opens a new page and allows you to choose a
new recipe and machine format.
Open: Opens an existing design file.
Merge: Opens the Merge Design dialog, which you can use to
import existing stitch or outline files into the current design
Browser: Opens a the Browser window, a dialog box which
allows you to search all your computer’s disks and directories
for design files.
Save: Saves the current design.
Save As: Opens the Save As dialog, allowing you to choose
the destination and file type to save it as.
Print: Opens the printer dialog on your computer, allowing you
to choose your printer and adjust the printer’s properties.
Direct Print: Prints a copy of the design worksheet, bypassing
the printer dialog.
14 Pacesetter BES Lettering 2
Instruction Manual
Tool What it means
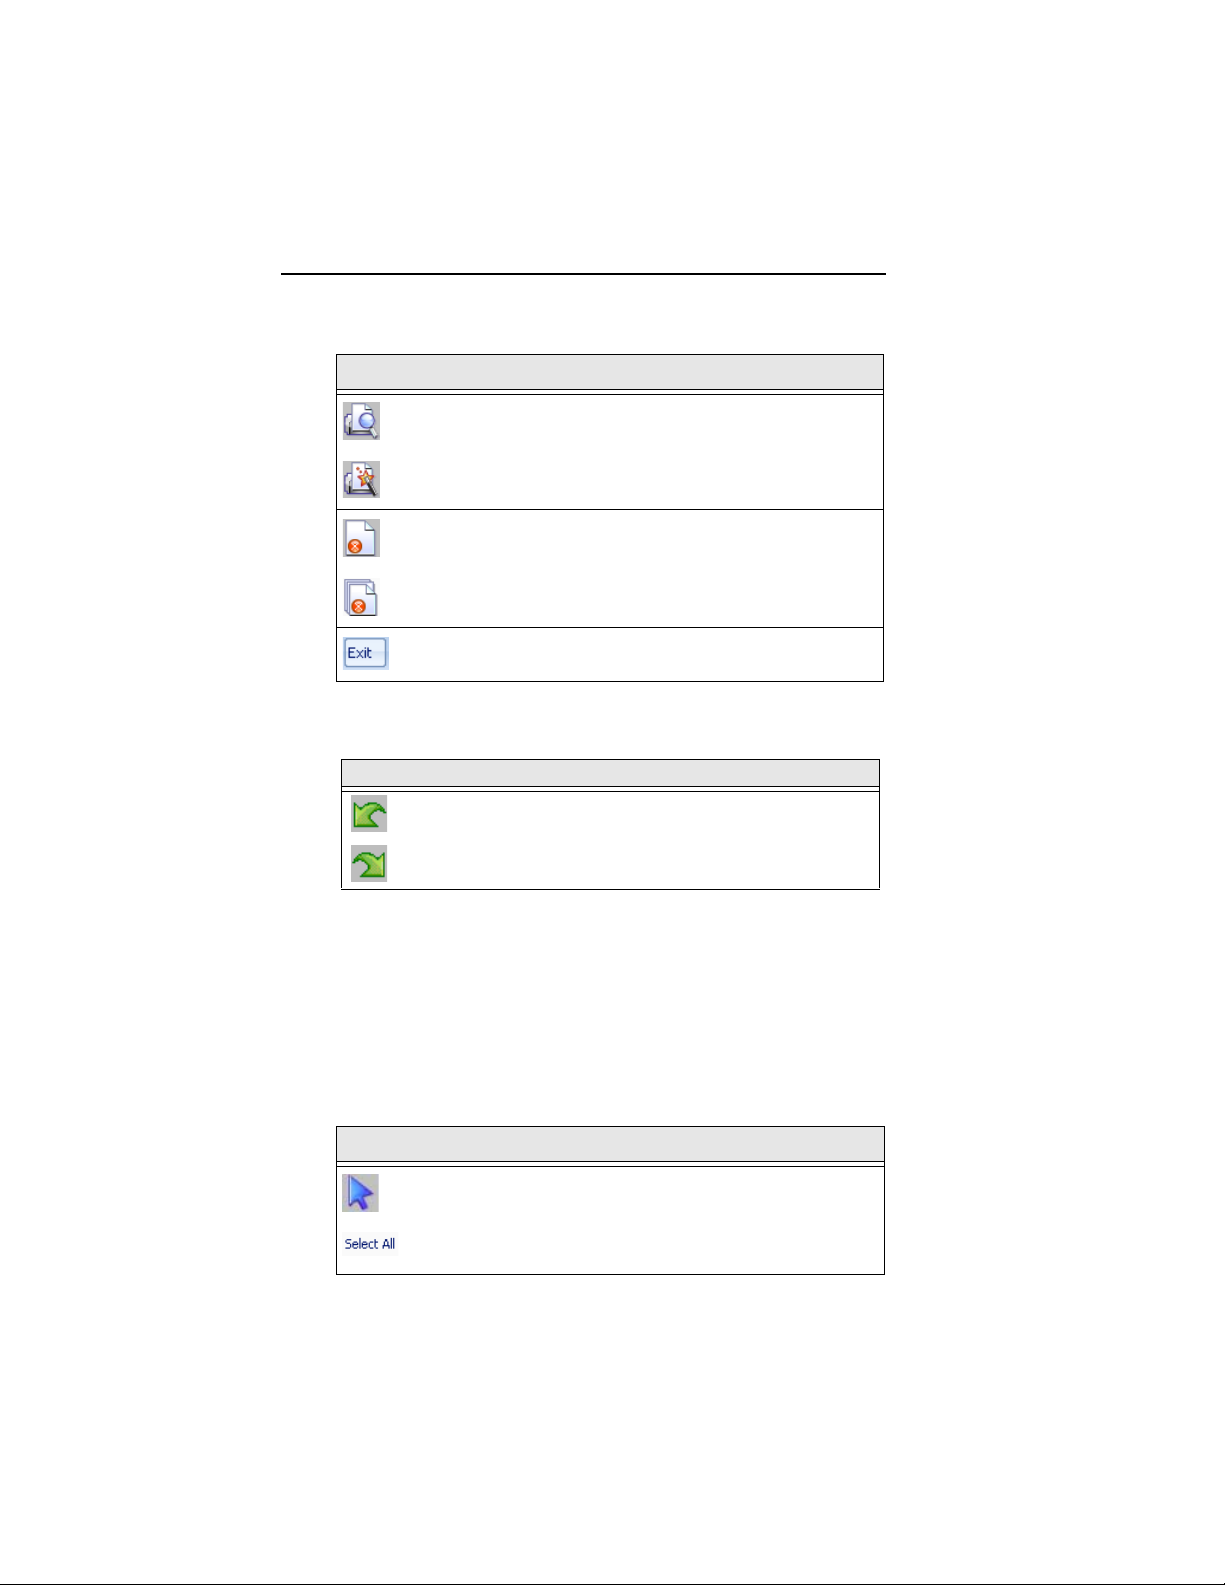
Print Preview: Opens the print preview window, which in turn
will let you print the current design.
Print Setup: Opens the print preview window, which in turn
will let you print the current design.
Close: Closes the file that you are currently working on (the
active file) leaving any other files open.
Close All: Closes all files that are open on your computer.
Exit: Closes all open files and shuts down Pacesetter BES
Lettering 2; you will be prompted to save any open files.
Extra Tools
Tool What it means
Undo: Reverses your last action.
Redo: Reverses the action of the Undo command.
Ribbon Tools
The Ribbon appears below the Title Bar. The Ribbon has three
tabs, the Home tab, the Arrange tab, and the View tab. Clicking
on the tabs displays all the buttons for the functions that are
under that tab.
Tools on the Home Tab
Tool What it means
Select: Selects objects in the design window.
Select All: Accessed via the drop-down menu from the
Select tool.Selects all items in the design workspace.
Learning about the Workspace 15
Tool What it means
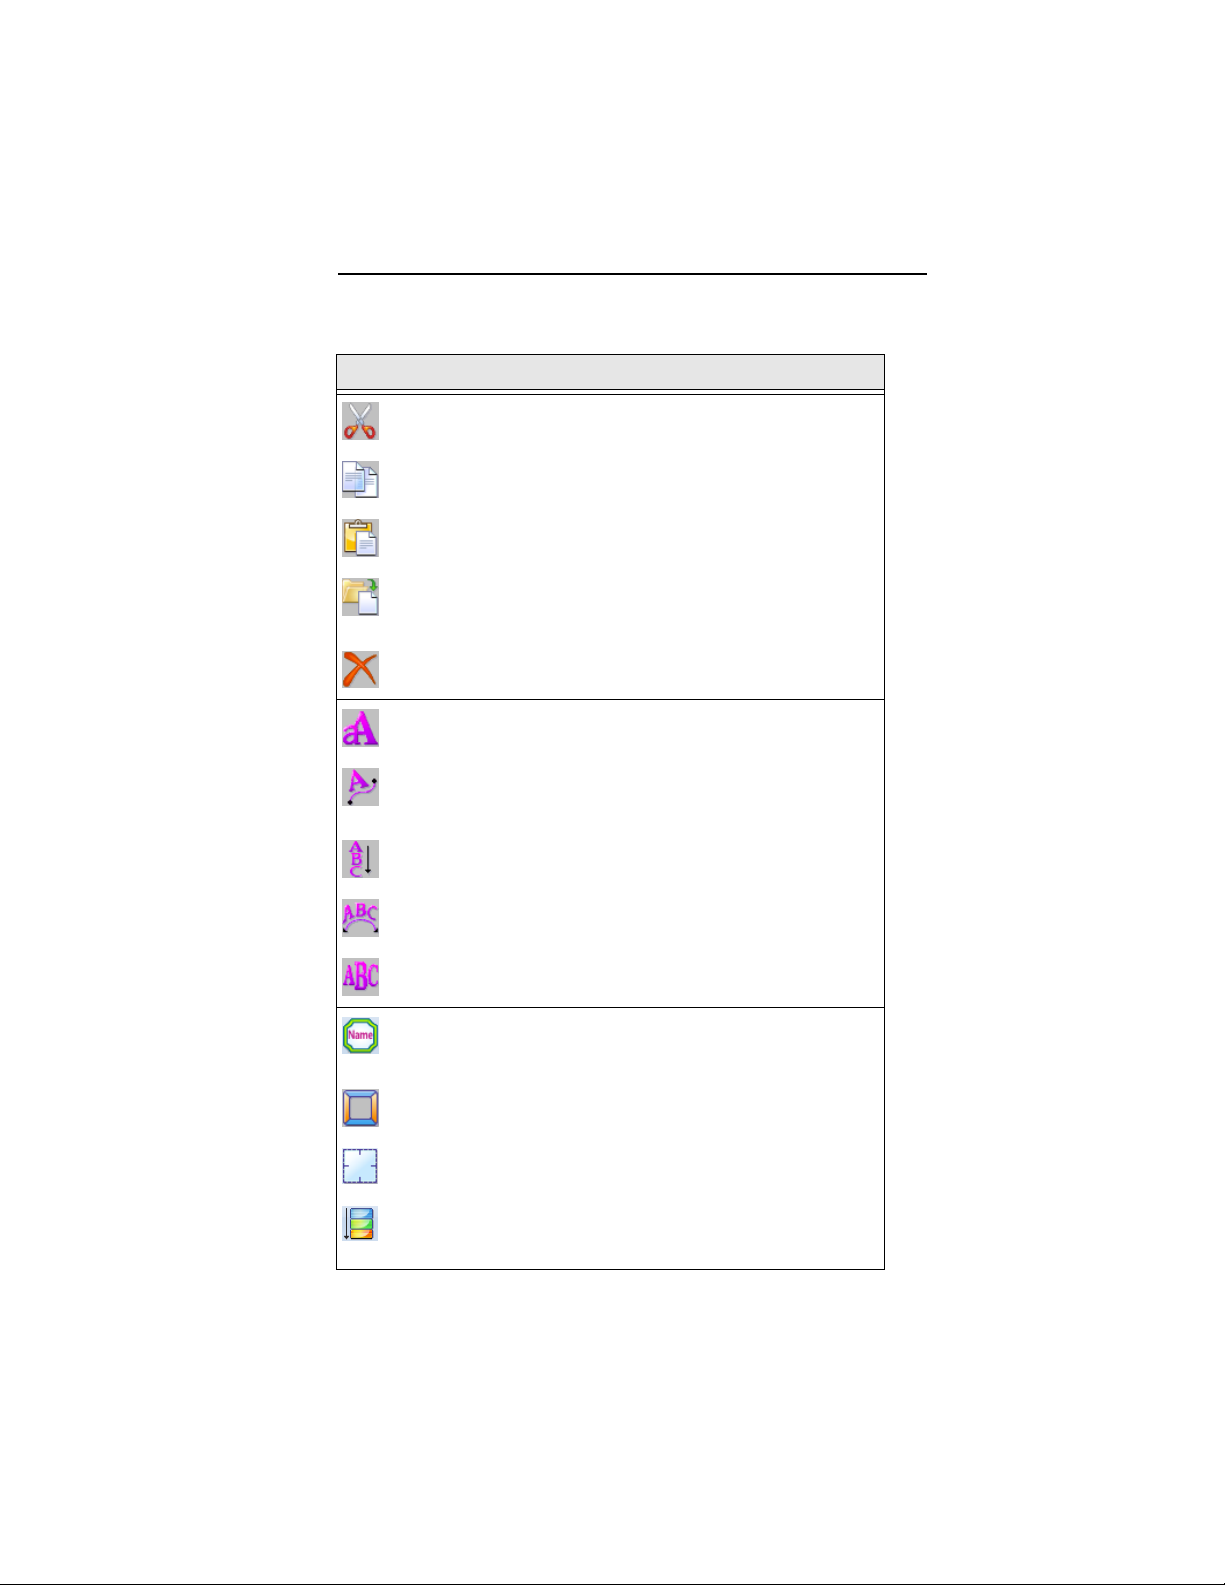
Cut : Cuts the selection and copies it to the clipboard.
Copy: Copies the selection to the clipboard.
Paste: Pastes the clipboard contents into the design, at
the end of the design sequence.
Insert: Pastes a copy of the clipboard selection into the
sewing sequence immediately following the selected
segment.
Delete: Removes the selected segment.
Text: Creates lettering placed along a straight baseline.
Text on Path: Creates text segment along a path. The
path may be chosen from a pre-defined list of shapes, or
you may create your own shape.
Vertical Frame: Creates vertical lettering.
Circle Frame: Creates lettering based on a circular
baseline.
Monogram Frame: Creates three-letter monogram text.
Name Drops: Quickly create a number of distinct
designs, based on a single design, but each with
different text string included.
Add Designs: Adds decorative features to your design accents, appliqués, borders, and frames.
Auto Baste: Automatically adds an outline of basting
stitches around the current design.
Color Sort: Automatically reduces the number of thread
changes that are required in a design, by re-arranging
the sewing sequence so that like colors are together.
16 Pacesetter BES Lettering 2
Instruction Manual
Tool What it means
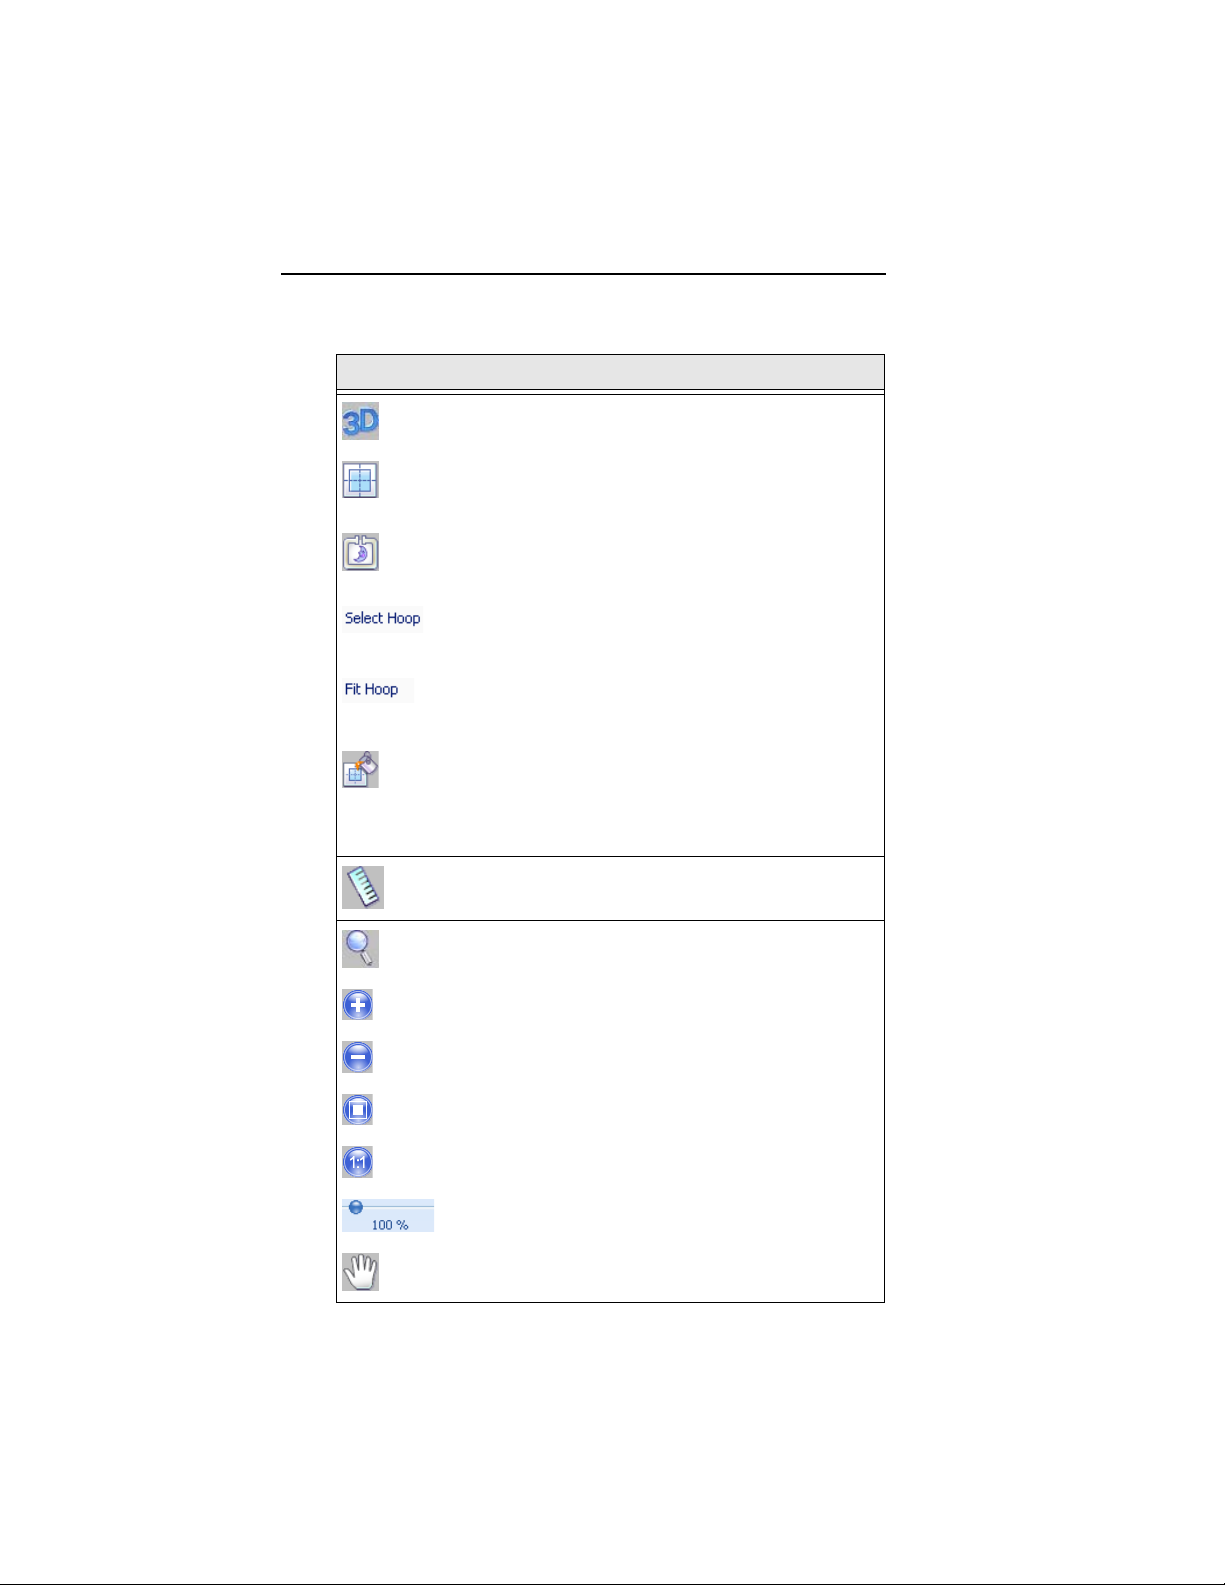
3D: Realistically renders your design onscreen.
Grid: Displays a background grid, which helps with
alignment. This grid can be used for the alignment of
items on the display.
Hoop: Displays the hoop as it fits relative to the
embroidery. Clicking this button a second time will turn
the view of the hoop off.
Select Hoop: Accessed via the drop-down menu from
the Hoop tool. Opens up the Select Hoop window, in
which you can choose a new hoop.
/fit Hoop: Accessed via the drop-down menu from the
Hoop tool. Scales the design up to the maximum size of
the selected hoop on the design window.
Background: Two options are available from this button,
Select Color or Select Fabric. Depending on which one
you choose, a dialog box will open in which you select
either the color, or the fabric pattern, that appears in the
background of the active design window.
Ruler: Measures the distance between any two points in
a design.
Zoom: Magnifies the design to fit a rectangle drawn by
the user with the mouse pointer.
Zoom in: Magnifies the view of the design by a fixed
amount.
Zoom out: Shrinks the view of the design by a fixed
amount.
Fit to Window: Displays the entire design and loaded
images in the window.
Back to 1:1: Returns design to original size.
Slider: Drag the slider to choose a specific level of
magnification; displays percentage of original size.
Pan: Allows you to move the design around in the
workspace window by clicking and dragging.
Tools on the Arrange Tab
Tool What it means
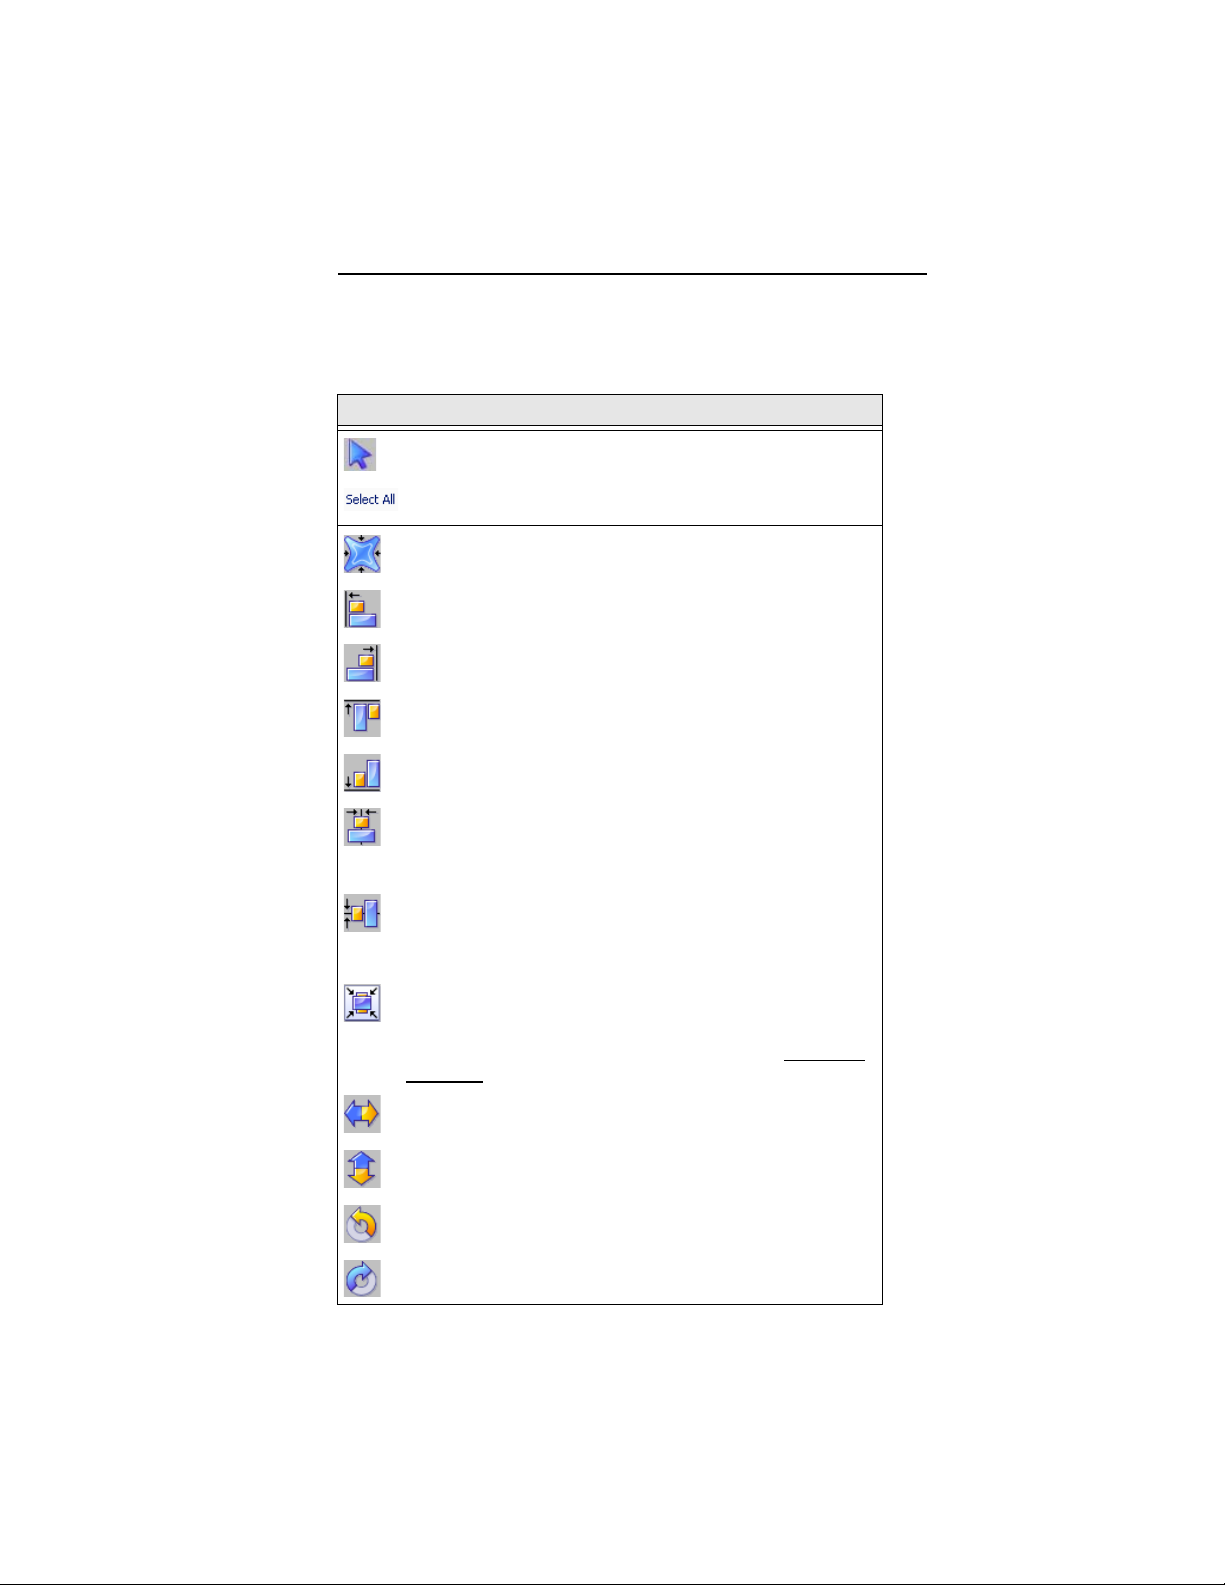
Select: Selects objects in the design window.
Select All: Accessed via the drop-down menu from the Select
tool. Selects all items in the design workspace.
Distort: Displays the Distortion dialog, which you can use to
add interesting effects to the selected design.
Align Left: Aligns all selected objects with the left-most item
selected.
Align Right: Aligns all selected objects with the right-most
item selected.
Align Top: Aligns all selected objects with the top-most item
selected.
Align Bottom: Aligns all selected objects with the bottom-
most item selected.
Horizontal Center: Takes all selected objects and centers
them in the selection box. The objects are moved so that they
are centered left-to-right with each other, but they are not
moved up or down.
Vertical Center: Takes all selected objects and centers them
in the selection box. The objects are moved so that they are
centered top-to-bottom with each other, but they are not
moved left or right.
Center: Centers one or more selected objects proportionally
within the current hoop. If more than one object is selected,
the entire group is moved together to the center of the hoop;
the objects selected remain in the same position relative to
each other as they had before being centered.
Flip Horizontal: Flips one or more selected objects
horizontally.
Flip Vertical: Flips one or more selected objects vertically.
Learning about the Workspace 17
Rotate Left: Rotates one or more selected objects to the left
by 90 degree increments.
Rotate Right: Rotates one or more selected objects to the
right by 90 degree increments.

18 Pacesetter BES Lettering 2
Instruction Manual
The View Tab
The controls on the View tab allow you to change what appears
on your workspace; which panels are displayed, whether or not
commands and stitch points are shown in the design, and so on.
The areas found on this tab are Windows, Show/Hide, and
Program Preferences.
Windows
In the windows area, check the box to show the corresponding
window or panel, and uncheck it to hide that window or panel.
• Sequence. Shows/hides the Sequence view.
• Palette. Shows/hides the thread palette.
• Properties. Shows/hides the properties panel.
• Simulator. Shows/hides the sewing simulator.
• Status. Shows/hides the status bar.
Show/Hide
Check the boxes to show the corresponding symbols in the
Design Workspace.
• Entry/Exit. Shows the position of the first and last points
in the sewing of a segment.
• Commands. Displays icons in the workspace that show
where the color changes and trims are.
• Stitch points. Shows the penetration points of the
stitches.
Program Preferences
Click on the Program Preferences button to open a dialog
in which you can set the default machine settings, change the
units of measure, and choose settings for the workspace grid.
For more information on this dialog, see “Setting up your
Workspace Environment”
Learning about the Workspace 19
Simulator
The Simulator makes it easy to see on-screen how your design
will sew out. You can use the Simulator to eliminate potential
sewing problems.
When you select Simulator from the View tab of the Ribbon, the
Simulator (scrollbar slider and the sewing simulator) will appear
at the bottom of the design space. The Simulator controls which
parts of the design are drawn in the design window.
You can also open and close the Simulator by pressing Ctrl + R.
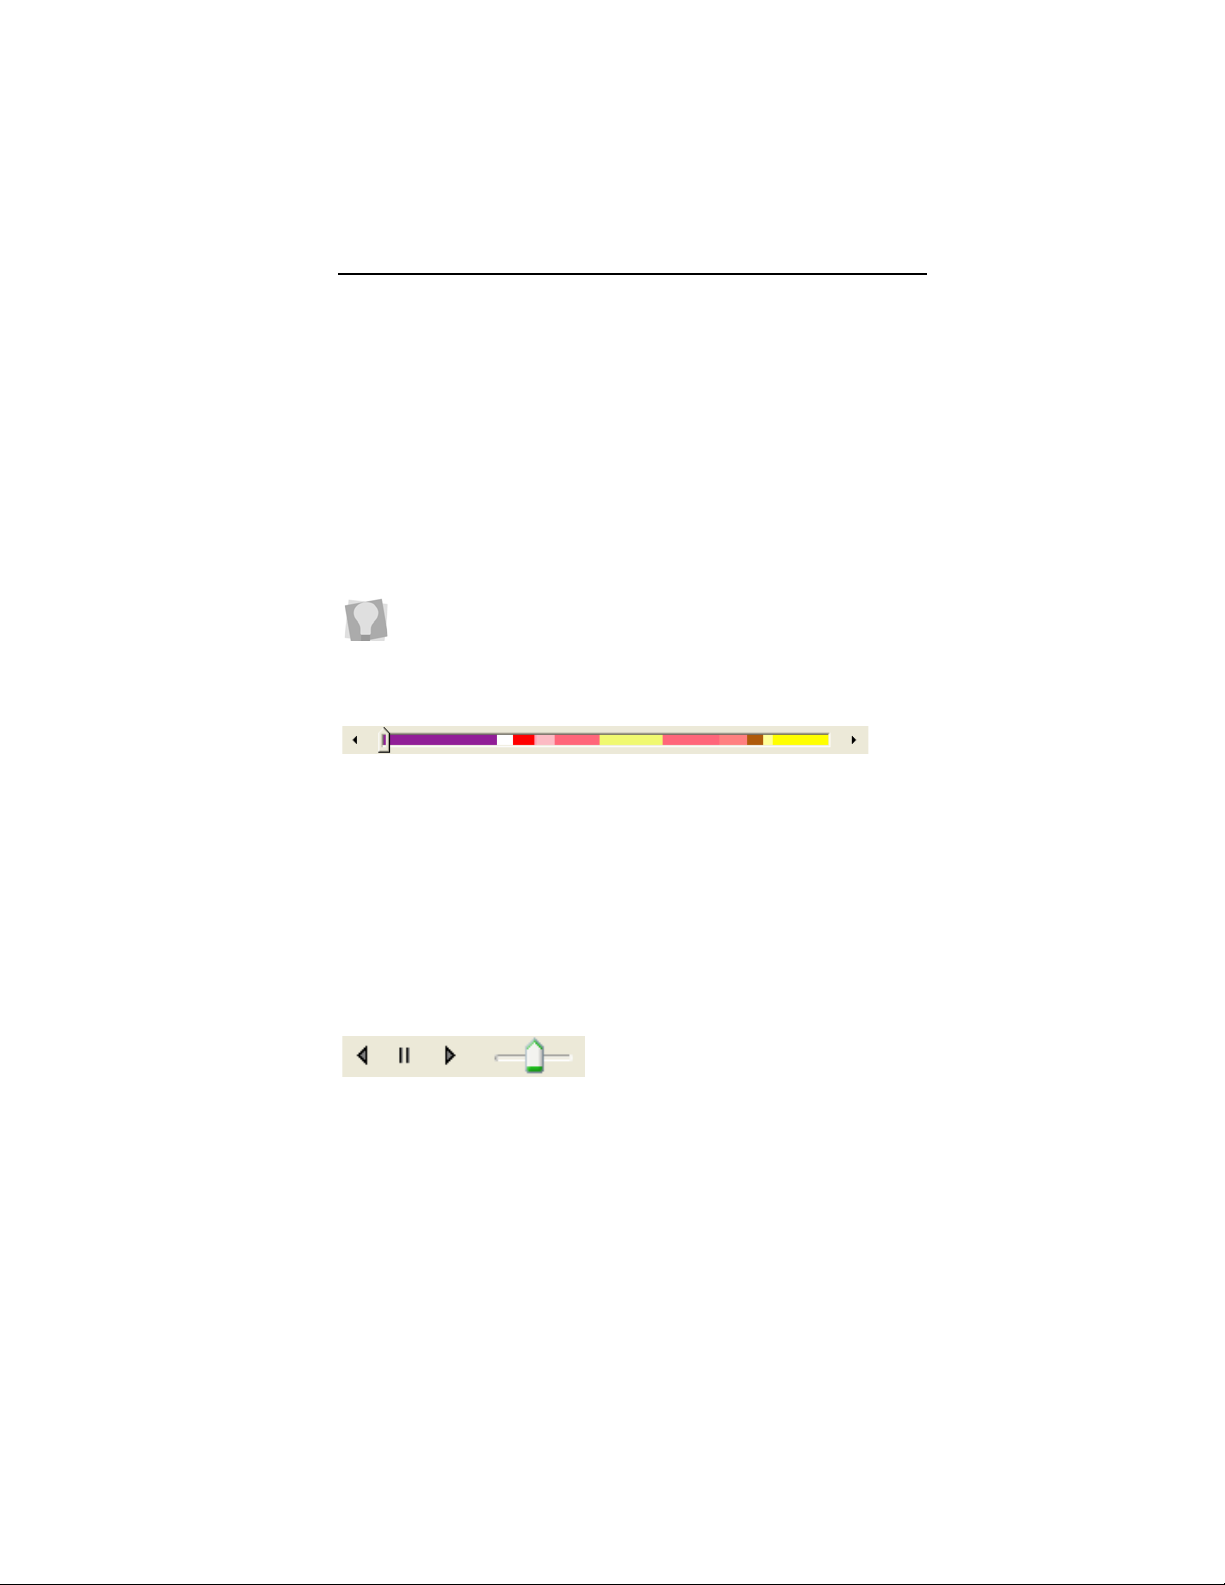
Scrollbar Slider
The length of the scrollbar slider represents all of the stitches in
the opened design. You can move the scrollbar slider by
dragging it to see a design as it will look sewn to a particular
point. The color display within the scrollbar indicates the thread
color that will be sewn when the scrollbar slider is positioned
over it. Clicking on the arrows at the ends of the scrollbar will
advance or retrace the design position by one stitch.
Sewing Simulator
The sewing simulator allows you to watch your design draw on
a stitch-by-stitch basis, simulating the sewing action of your
machine. The Simulator controls include pause, stop, sew
forward and sew backwards. You can push various control
buttons and slide the speed control to vary the rate of sewing.
20 Pacesetter BES Lettering 2
Instruction Manual
Using the Simulator
The following table explains how to use the Simulator in more
detail:
Tools What is does
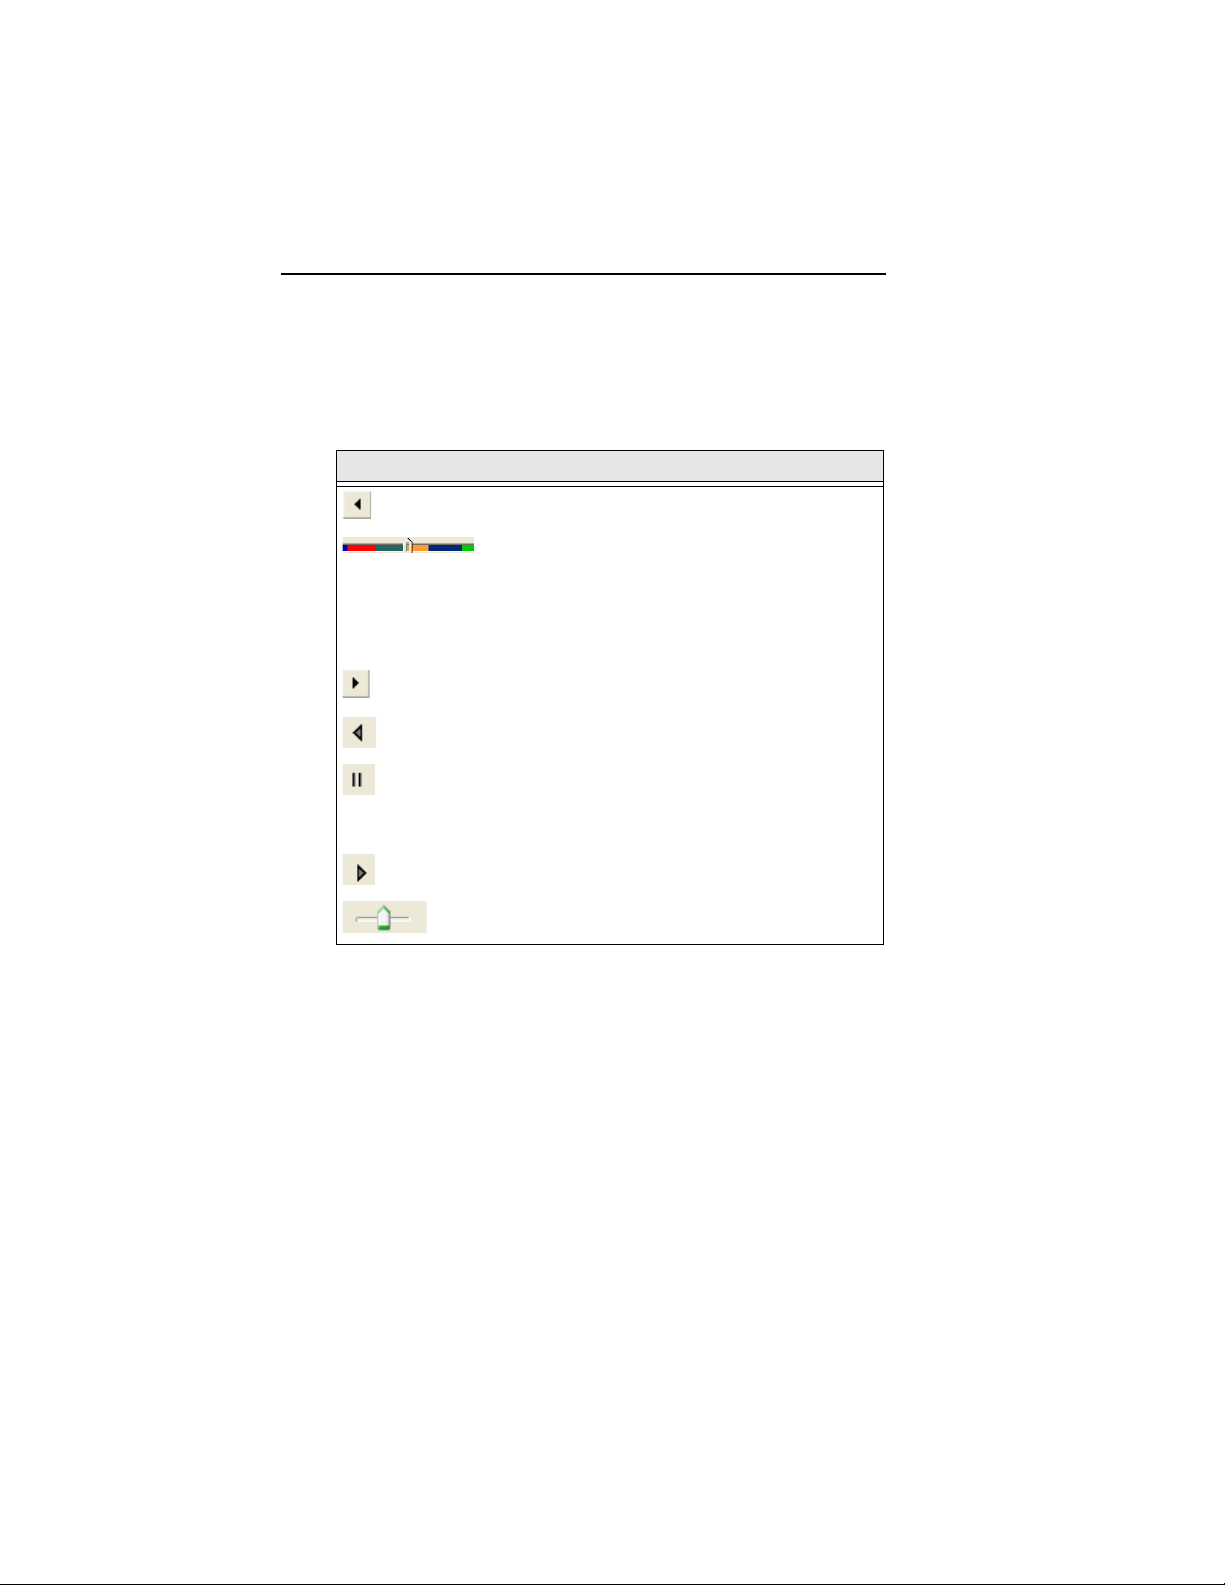
Previous Stitch: Move backward in the design by
one stitch.
Scrollbar slider: Drag the scrollbar slider to ad-
vance the design to a specific position. When the
scrollbar slider is positioned over a color, you will
see the specified thread color being sewn in the design. The entire length of the scrollbar slider represents the entire design.
Next Stitch: Move forward in the design by one
stitch.
Simulate Sewing (backward): Move backward
through the design.
Pause/Stop: Pause or stop the design while
drawing. When you play or resume sewing your
design, stitching will continue from the location of
the last stitch.
Simulate Sewing: Move forward through the
design.
Speed: Slide the speed control to vary the rate of
sewing.
Status Line
The Status Line appears at the bottom of the Pacesetter BES
Lettering 2 window. To show or hide the Status Line, go to the
Windows area of the View Tab and check or uncheck Status.
As you move the mouse over different sections of the
workspace, this indicator will tell you what that area or button
does. You will also find specific design information in other
areas of the status bar; it shows the total number of segments in
the design, the number of segments currently selected, the
machine format, the recipe used by the current design, the
number of stitches in the selected design components and the
hoop being used.
Learning about the Workspace 21
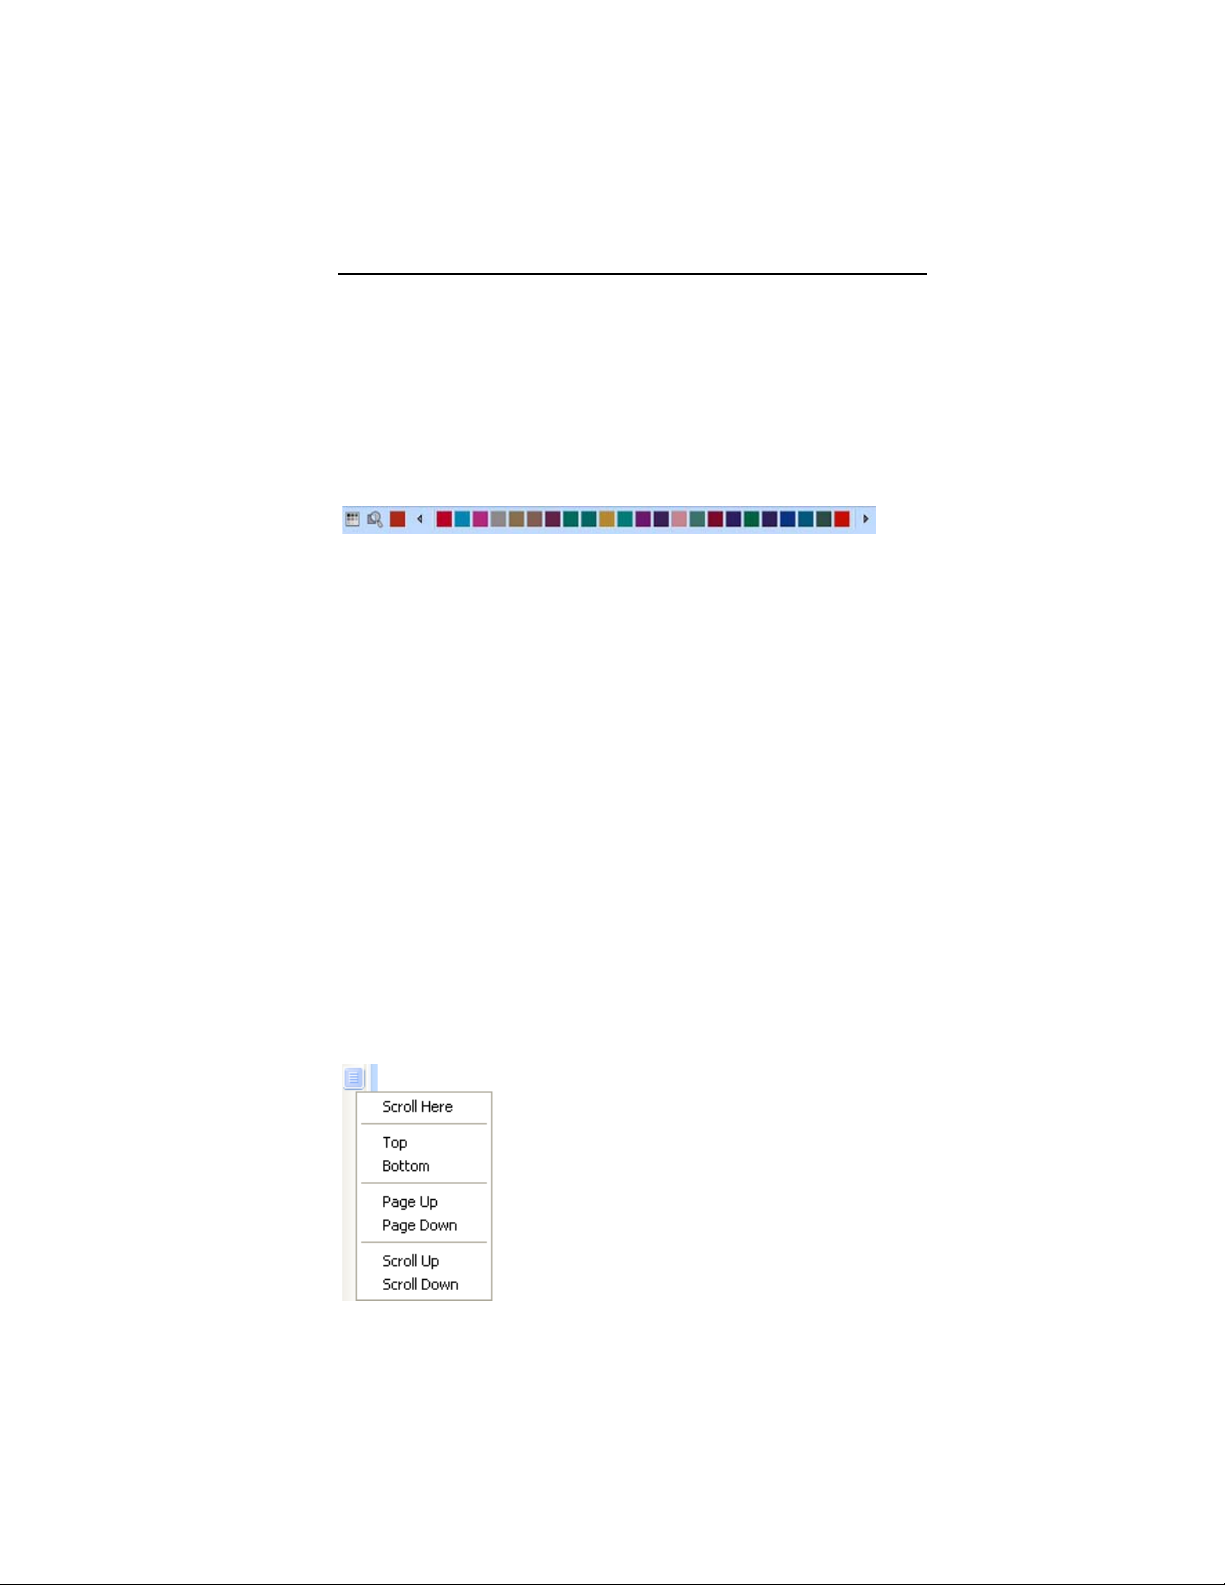
Color Palette
The thread colors for the design are shown in the Color Palette
located along the top edge of the workspace. To show the Color
Palette (if it is not already displayed), go to the Windows area of
the View tab and check the Palette box.
The color palette in Pacesetter BES Lettering 2.
For more information on the color palette, see “Changing
Thread Colors.”
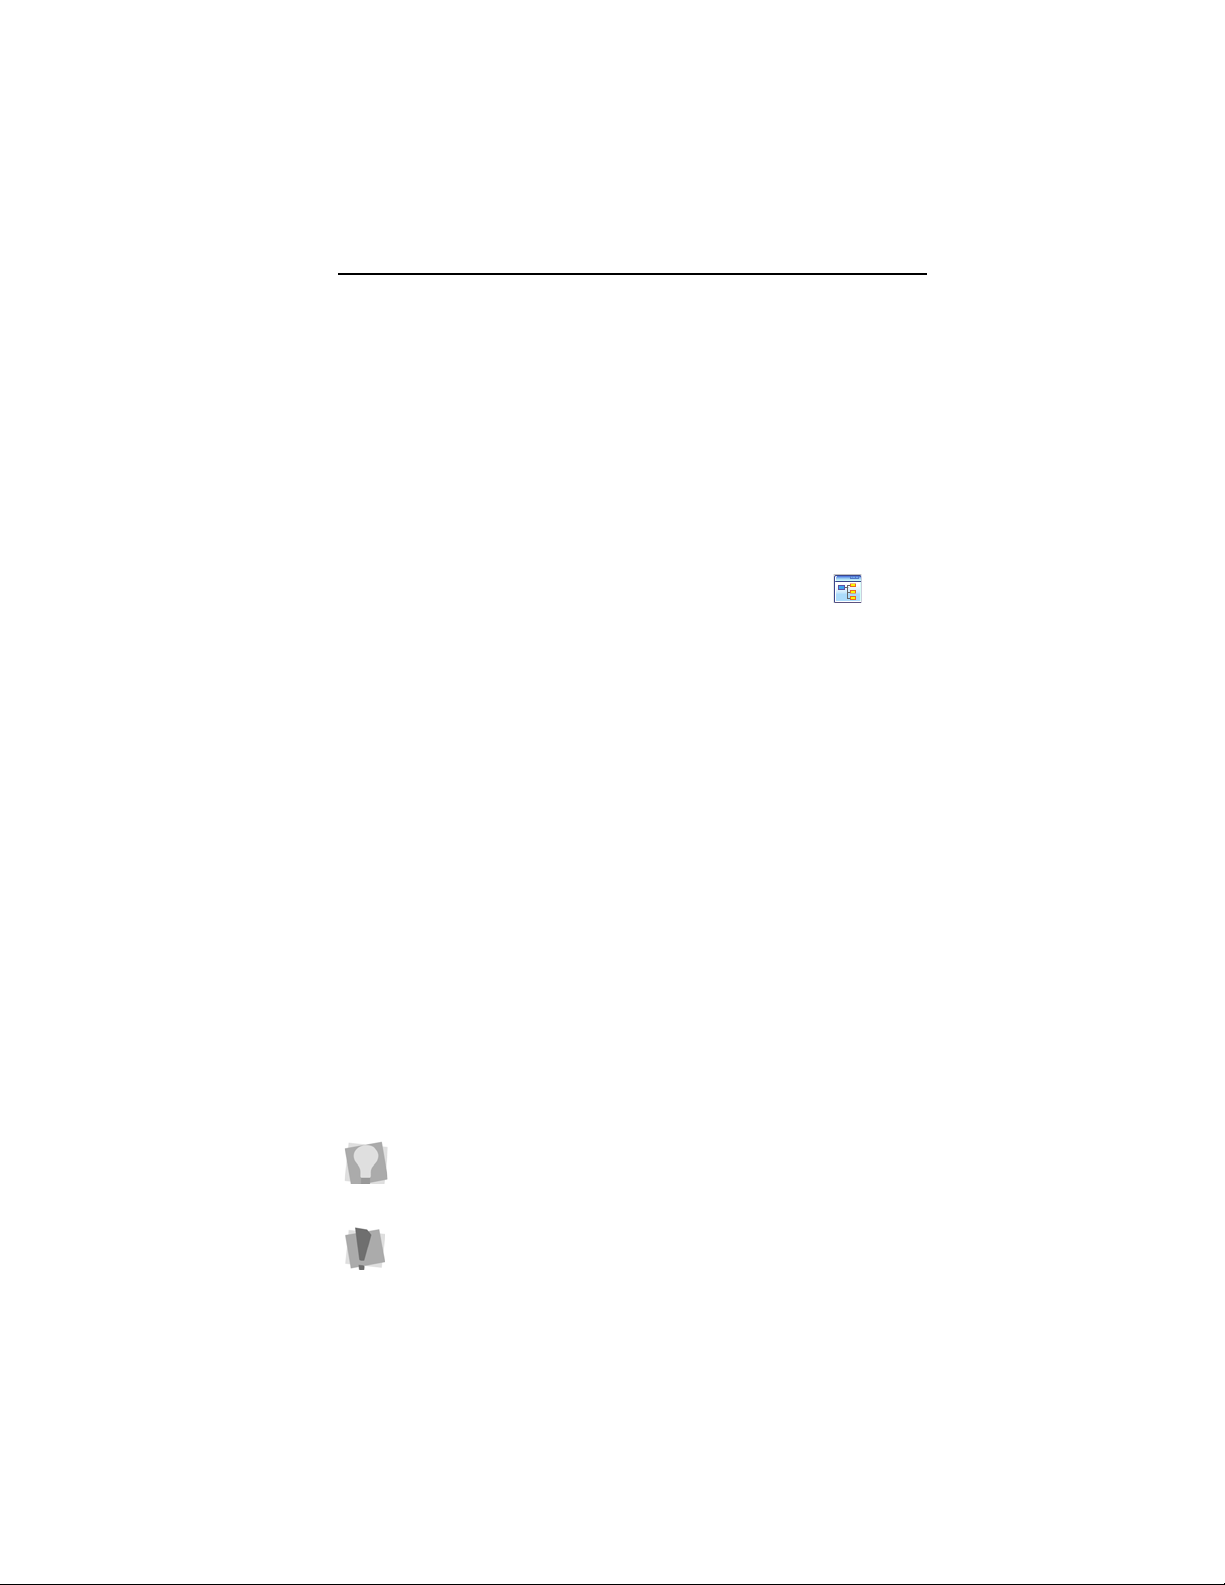
Using Scrollbars
Scrollbars are tools in the workspace that enable you to move
easily around within the displayed design. There are two
scrollbars, one for moving the view vertically, and one for
moving it horizontally.
How to use the scrollbars:
• To pan left/right, or up/down, click and drag the track button.
• Click on the small arrows at each end of the scrollbar to
move the design view incrementally.
• Click in the track of the scrollbar, to move the workspace
view by one whole screen
You can also right-click the scrollbar to display a pop-up menu
of scroll actions. The menu displays the following options:

22 Pacesetter BES Lettering 2
Instruction Manual
Correcting Mistakes
Undo and Redo are two significant features that allow you to
correct mistakes. If you make a mistake and change your mind
about an action you just made, Undo reverses the action. Redo
puts back the change. If Undo or Redo are grayed out, you
cannot Undo or Redo.
To use Undo:
• Do one of the following:
On the Quick Access toolbar click the Undo tool.
Press Ctrl+Z on your keyboard.
To use Redo:
• Do one of the following:
From the Quick Access toolbar, click the Redo tool.
Press Ctrl+Y on your keyboard.
Setting up your Workspace
Environment
Pacesetter BES Lettering 2 allows you to set up your design
workspace environment for all opened design files. You can
predetermine the units of measurement you want to use for your
designs.
The following sections describe the units of measurement that
can be used for designs opened in Pacesetter BES Lettering 2.
Metric
The dimensions in Pacesetter BES Lettering 2 can be displayed
in metric values. This is the default setting, which will appear
each time you run Pacesetter BES Lettering 2. It is generally
preferable for embroiderers to use the metric values because
many of the manufacturers of embroidery machines and
designs use metric values.
Learning about the Workspace 23
English vs. Metric
Pacesetter BES Lettering 2 displays inch measurements in
tenths of inches. If you think in inches, then you can to set the
software to use the inch system. Open the Preferences dialog
and click on the Environment tab, and select English from the
Units list.
To set up your workspace environment:
1 On the View tab of the Ribbon, select the Preferences
button.
You see the Preferences dialog box.
2 Click the Environment tab.
3 From the Units list, select the units of measurement you
want used for your designs: Metric or English.
4 Click OK.
Changing Machine Format
Properties
All designs in Pacesetter BES Lettering 2 have a machine
format. Machine formats have their own profile settings that
determine how embroidery information will be interpreted when
you save design files.
When you create a new design file, you can select the machine
format for the specific design. The selected machine format can
change how the design file is read. When you set machine
format properties in the Preferences dialog, all new designs will
use these machine format properties as the default settings.
If you open a design with the New/Recipe command, you can
select the recipe for the new design ins the New Page dialog.
This will override whichever recipe is set as the default in the
Preferences dialog.
Changing machine format properties after a design file has
been opened will not change the machine format of the
embroidery designs in that design.

24 Pacesetter BES Lettering 2
Instruction Manual
To change machine format properties:
1 On the View tab of the Ribbon, select the Preferences
button.
You see the Program Preferences dialog box.
2 Click the Formats tab.
3 From the Machine format list, select the machine format that
you want applied to new design files.
4 Click OK.
Adjusting the View of the
Workspace
Magnifying and Reducing the View
Use Zoom to magnify or reduce parts of your design. With
Zoom you can either left-click to enlarge your design or rightclick to make your design smaller.
When you select Zoom, the cursor changes to a small magnify-
ing glass . To use the Zoom tool, do one of the following:
• To zoom in on the spot where the mouse is currently
pointing, left-click.
• To zoom out again, right-click.
• To zoom in on a particular area, left-click and drag; the
display will expand to show only the area that you have
dragged over.
To use the Zoom Tool:
1 On the Ribbon, select the Home tab.
2 In the Zoom toolbar, click on the Zoom tool.
The pointer becomes a magnifying glass.
3 Do either of the following:
Left-click to make your design larger.
Right-click that area to make your design smaller.

Learning about the Workspace 25
To zoom-in on a specific area:
1 On the Ribbon, select the Home tab.
2 In the Zoom toolbar, click on the Zoom tool.
The pointer becomes a magnifying glass.
3 Click and hold your mouse button and drag it to form a
flexible box around the area you want to see in detail.
4 Do one of the following steps:
To increase the zoom, continue clicking and dragging the
flexible box.
From the Zoom toolbar, click on the down arrow under
the Zoom icon, and use the Zoom tool settings to zoom
back out.
Additional options on the Zoom Toolbar:
When you click on the down arrow underneath the Zoom Tool,
you will see an option menu. You can choose from any of the
following options on this menu:
• Zoom In to make your design larger.
• Zoom Out to make your design smaller.
• To Fi t to make the whole design the size of the design
window.
• To Selection to zoom to the size of the currently selected
embroidery segment, or set of embroidery segments if more
than one is selected.
• 1:1 to see the design at the actual size.
Hiding the Sequence and Properties
Panels Automatically
To increase the amount of space for your design window, you
can set the Sequence and Properties panels to the Auto hide
mode. When Auto hide is on, the panel will only be visible while
the mouse is over it; as soon as you remove the mouse, the
panel will collapse to a narrow sidebar.
To turn on Auto hide for these panels, click on the small push-
pin icon at the top-right of the panel. When the panel is in
26 Pacesetter BES Lettering 2
Instruction Manual
Auto hide mode, the small push-pin will be on its side, like this:
. Now, whenever you move the mouse to another part of the
screen, the panel will be hidden.
To turn Auto hide off, click on the icon again.
Viewing Different Parts of the
Workspace (Panning)
Sometimes you may want to work at a high level of
magnification, and some part of the garment or embroidery
you’re working on will not show up in the workspace.You can
move to parts of your design that go beyond the window’s
borders. In these situations, you can use keyboard arrows or
the pan tool to change your view of the project.
Panning using the keyboard:
• Use the key to move up.
• Use the key to move down.
• Use the key to move left.
• Use the key to move right.
Using the Pan Tool
Use the Pan tool to move the view of the design around in
the workspace by clicking and dragging. While you are using
the Pan tool, you will still be able to see the design in the
window. Note that the pan tool does not actually move parts of
the design around, just your view
You can right-click to switch back to whichever tool you were
using before you selected the Pan tool.
of them.
Learning about the Workspace 27
Taking Measurements
The Ruler tool lets you measure the distance between any
two points in your design workspace. When you measure from
one point to another, the distance is displayed in the status line
located at the bottom of the window. The status line shows the
horizontal and vertical distances the Ruler tool travels from the
x and y axes, the angle measured, and the total distances.
The ruler measurements are calculated in the units you set
under the Units tab of the Preferences dialog.
To measure Designs:
1 On the Ribbon, select the Home tab.
2 Click on the Ruler tool.
Your pointer changes to a ruler when in the Design
Workspace.
3 Click and drag your mouse until you are finished measuring
the item.
4 Let go of your mouse when you are finished measuring.
5 Look in the status line at the bottom of the workspace to see
the measurement.
6 Right-click to set the end point of your measurement.
The measurement is now displayed in the status bar.
Displaying the Hoop
Viewing the hoop or frame on the screen lets you ensure that
your design fits properly when you run it on the machine. The
hoop serves as a guide to help size and position your design in
the design window. Pacesetter BES Lettering 2 comes with
many pre-loaded hoop sizes.
28 Pacesetter BES Lettering 2
Instruction Manual
Viewing and Hiding the Hoop
Use the Hoop tool to show and hide the hoop in the display
window. Just click on the Hoop tool to show the hoop (if it is not
currently shown) and click it again to hide the hoop.
The hoop’s dimensions are determined by your settings under
the Hoops dialog in Pacesetter BES Lettering 2.
Using the Hoop tool may effect the magnification level of your
design. For example, if you are zoomed in on the design,
clicking the Hoop tool will cause the view to zoom out enough to
fit the entire hoop into the workspace.
Selecting a Hoop
You can select one of the pre-loaded hoops using the Hoops
dialog. You will notice that you can select hoops from different
file types in this dialog. This is useful when you want to make
sure that your design will fit for more than one kind of
embroidery machine.
To select a hoop using the Hoops dialog:
1 On the Home Tab click the down arrow under the Hoop tool.
2 From the menu that appears, click on Select Hoop.
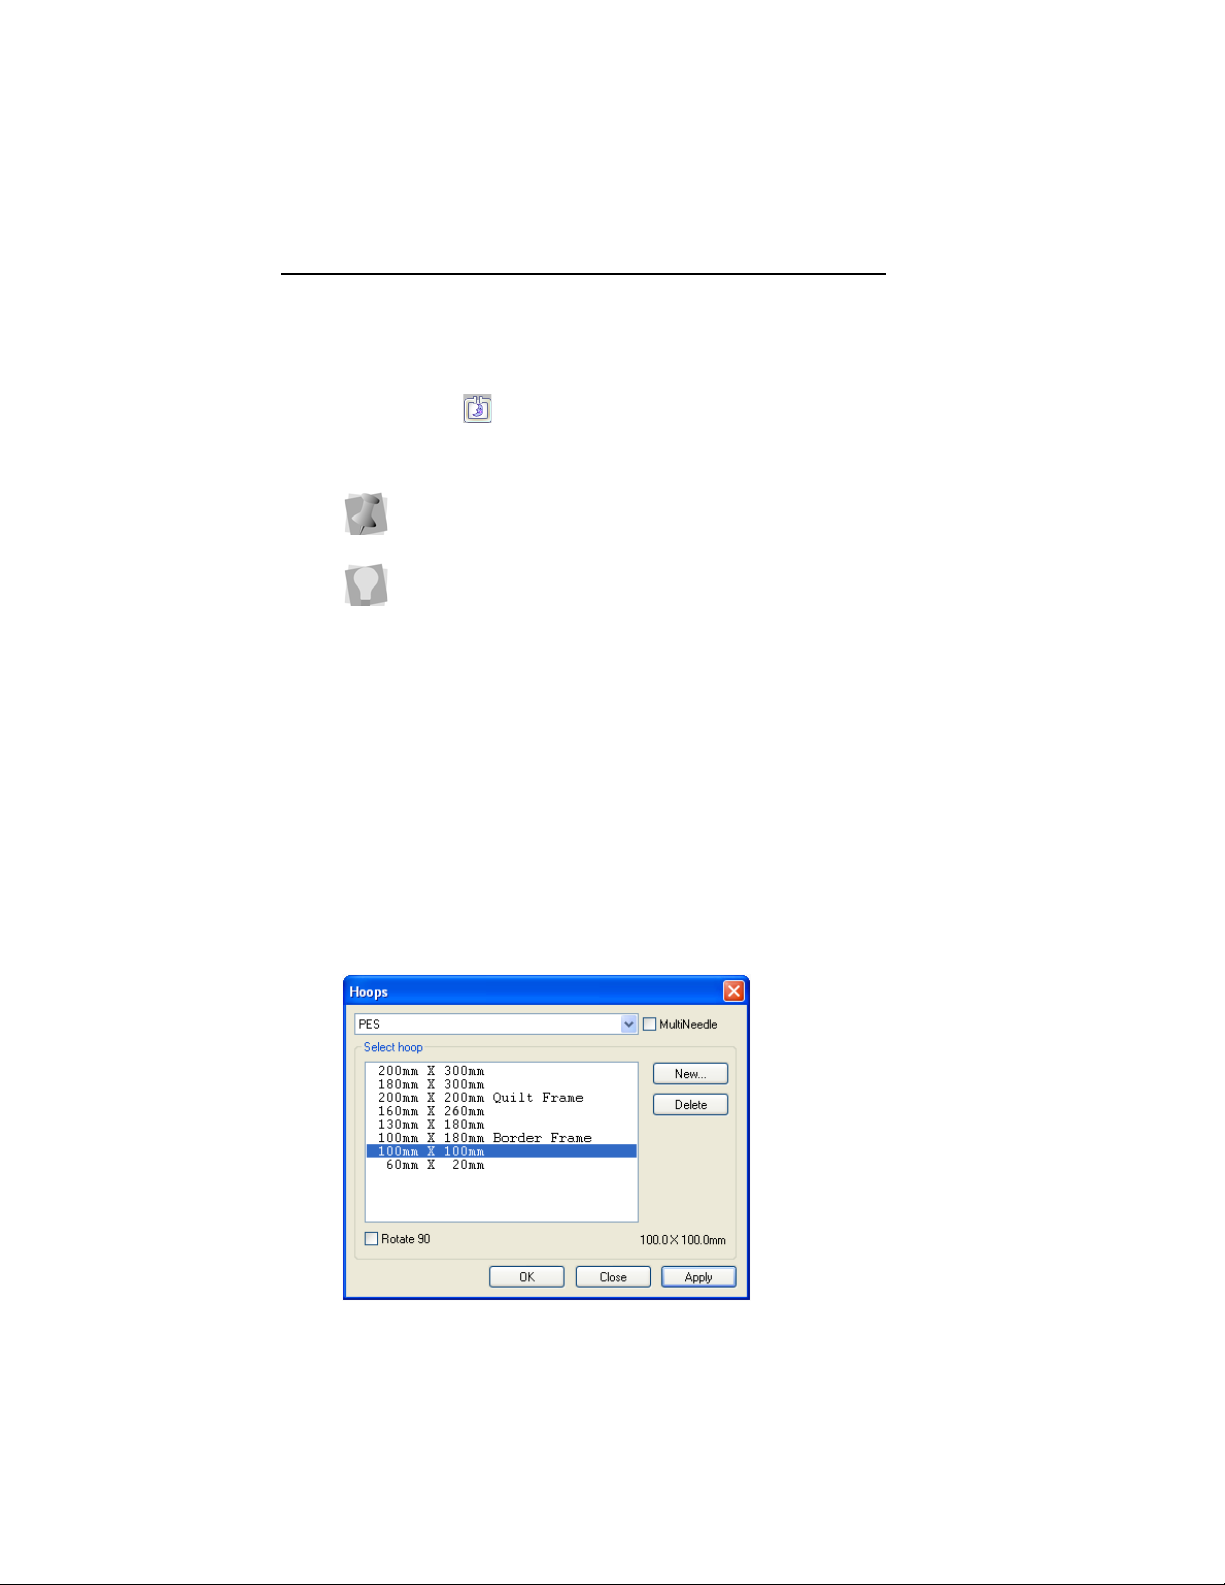
You see the Hoops dialog.

Learning about the Workspace 29
3 Select the machine format from the Format drop-down list.
If you choose the PES format, you will see that there is an
option to select “MultiNeedle” hoops. This applies only if you
have a MultiNeedle embroidery machine.
If you check this box, the list of hoop formats will change to a
list of hoops that are used with a MultiNeedle machine.
4 From the list of Hoops, choose a hoop size appropriate for
your design.
5 If needed, check the “Rotate 90” box to make the hoop fit
your design better.
6 Click OK.
Creating a Custom Hoop
You can also create your own custom-sized hoops using the
Hoops dialog. Once you have set the parameters for your hoop
and typed in a description, the custom hoop will be saved by the
Hoops dialog; it will be available for your use in future designs.
To add a custom hoop:
1 On the Home Tab click the down arrow under the Hoop tool.
2 From the menu that appears, click on Select Hoop.
You see the Hoops dialog.
3 Click the New button.
You see the New Hoop dialog.

30 Pacesetter BES Lettering 2
Instruction Manual
4 Enter the dimensions for your new hoop in the Width and
Height boxes.
5 In the Name box, type a name for your custom hoop.
6 Click OK.
The new hoop’s name will now be displayed in the list of
hoops that you can select from in the Hoops dialog.
7 Click on the name; the new hoop’s dimensions now appear
in the Hoops dialog on the lower right of the dialog.
8 Click Apply.
The new hoop shows in your design location.
Getting Help
The Pacesetter BES Lettering 2 Help is a quick way to find
answers to your questions and see step-by-step instructions.
Because a large number of topics exists, the Help allows you to
search for topics in various ways. You can search using the
table of contents, the index or a database of keywords. You can
also save the topics you visit most often.
The help is also available in document form (PDF).To view or
print the instruction manual as a PDF, insert your Installation CD
and select View Instruction Manual from the options.
Opening the Help
To open the Help:
1 Double-click the Pacesetter BES Lettering 2 icon on your
desktop.
You see the blank design workspace.
2 Click the Help tool.
You see the Help.

Learning about the Workspace 31
Using the Contents
The Help has a table of contents, with a list of book icons. Each
book contains a series of related topics.
To use the Contents:
1 Click the Help tool.
You see the Help.
2 Double-click the book you want to open.
3 Click the topic you want to see.
You see the topic in the right pane.
Using the Index
The Help index is similar to the index in a book.
To use the Index:
1 Click the Help tool.
You see the Help.
2 In the box, enter the word or words you want to search for.
In the list, you see the topics that most closely match your
query.
3 Click the term you want to learn more about.
If there is more than one topic for the keyword, you see a
menu.
4 Click the topic you want to see.
You see the topic in the right window pane.
Using Search
The Search tab lets you search using keywords or phrases in a
database of all the words found in the Pacesetter BES Lettering
2 Help.
To use Search:
1 Click the Help tool.

32 Pacesetter BES Lettering 2
Instruction Manual
You see the Help.
2 Select the Search tab.
3 In the ”Keyword” box, enter the word or phrase that you are
searching for.
4 Click the List Topics button.
In the list below, you see the topics that contain the words
you searched for.
5 Click the topic you want to view, and then click Display.
You see the topic in the right window pane.
Saving Favorite Help Topics
The Favorites tab lets you save the topics that you visit most
often and want to access quickly.
To save your favorite topics:
1 Click the Help tool.
You see the Help.
2 Double-click the book you want to open.
3 Click the topic you want to save as your favorite.
You see the topic in the right window pane.
4 Click the Favorites tab.
You see the selected topic in the Current topic area.
5 To add the selected topic to your favorites list, click Add.
You see the selected topic appear in the Topics area.
6 To display your favorite topic, do one of the following:
In the Topics area, select the favorite topic you want to
display and click Display.
In the Topics area, double-click the favorite topic you
want to display.
You see the topic in the right window pane.
7 To remove one of your favorite topics, do the following:
In the Topics area, select the favorite topic you want to
remove and click Remove.

Learning about the Workspace 33
Printing Help topics
You can print any of the topics in the Help.
To print topics:
1 Click the Help tool.
2 Click the topic you want to print.
The topic will appear in the Help window.
3 Click Print.
You see the Print Topics dialog box.
4 Select one of the following print options:
Print the selected topic
Print the selected heading and all subtopics
5 Click OK.
You see the Print dialog box.
6 Change any of the print settings, if necessary, and click OK.
The topic will be sent to your printer.

34 Pacesetter BES Lettering 2
Instruction Manual

CHAPTER 2:
Creating Lettering
You can add beautiful lettering to your designs using various
Pacesetter BES Lettering 2 tools. Generate unique embroidery
text in an array of shapes and sizes using our powerful Text
tools.
Topics covered in this chapter:
• Creating lettering with the Normal, Path, Vertical, and Circle
text tools.
• Using the Monogram Text tool to create monogram lettering.
• How to modify blocks of text, and individual letters within text
segments.
• Adjusting the spacing between individual letters.

36 Pacesetter BES Lettering 2
Instruction Manual
Creating Lettering
There are five different tools which are used to input your
lettering into a design: the Normal Text tool, the Path Text tool,
the Vertical Text tool, the Circle text tool, and the Monogram
tool. The following sections describe how to use these tools.
Normal Text Tool
Normal Text items are created using the Normal Text tool.
Normal text items start out with normal proportions for the font,
and can be adjusted.
To create normal text:
1 On the Ribbon, select the Home tab.
2 On the Text bar, click on the Normal Text tool.
3 Click once in the design window.
If another text item was already selected, your first click only deselected that item. You will have to click again to place a new
text segment.
An empty text frame appears in the workspace., and the
mouse pointer changes to an arrow with the letter A next to it
.
4 Type the desired text string. To create a multi-line text
segment, press ENTER, which will drop the cursor down
one line, and continue to enter your text.
5 Right-click to complete the text segment.
Your text appears in the design. You can now make any other
changes to the text segment in the Text Properties box.
6 To choose a new font (i.e., other than the currently selected
one) for the text string at this point, do the following:
In the Text area of Properties panel, click in the Font
field to select it.
Click on the down-arrow to the right of the font field.
You see a list of fonts.

Creating Lettering 37
Select the desired font from the list.
A preview of the newly selected font is now displayed at
the top of the properties panel.
Click Apply in the Properties panel.
For information on changing other text settings, see “Normal
Text Properties”.
Path Text Tool
The Path Text tool creates lettering that follows a set linear
path. For example, you can use the Path tool to create text that
bends to follow the curved edge of a garment.
Pacesetter BES Lettering 2 comes with a set of shapes already
installed for you to choose from, or you can create and save
your own shape, using the Edit Shape command.
See “Creating a Custom Text on a Path Shape”.
To create text along a path:
1 On the Ribbon, select the Home tab.
2 From the Edit tool bar, click the Path Text tool.
3 Click once in the design window.
If another text object was already selected, your first click only
de-selected that object. You will have to click again.

38 Pacesetter BES Lettering 2
Instruction Manual
You see the Select a text path dialog.
4 Select one of the paths from the Select a text path dialog.
The Select a text path box closes, and you see a blank text
frame of the chosen shape in the design window.
Select a font for you text by doing the following:
In the Text area of Properties panel, click the down-
arrow to the right of the font field.
You see a list of fonts.
Select the desired font from the list.
A preview of the newly selected font is now displayed at
the top of the properties panel.
Click Apply in the Properties panel.
Important: If you choose a new font, but do not click Apply at
this stage, the text will revert to the font previously in use when
it is generated.
5 Type the desired text string.
6 Right-click to complete the text segment.
Your text appears in the design. You can now make any other
changes to the text segment in the Text Properties box.

Creating Lettering 39
For more information on changing text settings, see “Text
Properties”.
7 Click Apply.
Your text will change accordingly.
Custom Shapes for Text on a Path
In addition to the Path Text shapes already installed with your
Pacesetter BES Lettering 2 software, you can create and save
your own shape, using the Edit baseline command.
You are also able to change the characteristics of the anchor
points when in Edit baseline mode; you can convert the anchor
point to Line, Cusp, Smooth, or Symmetrical. See “Changing
the Anchor Point Type”.
To create a custom path:
1 Select the Path Text tool and use it to create a text segment.
2 With the Path Text still selected, right-click and choose Edit
baseline from the options menu.
The baseline shape appears along the bottom of the text,
showing the anchor points (blue squares).
3 To add new anchor points to a Path Text baseline, do the
following:
Right-click on the line.
From the context menu that appears, select Add Point.
A new anchor point is added to your baseline.
4 Click and drag the anchor points and direction lines to
modify the shape of the baseline.

40 Pacesetter BES Lettering 2
Instruction Manual
5 Right-click to redraw the lettering so that it follows the new
curve.
6 To save your custom shape, right-click and choose “Export
Text Path” from the options.
You see a Save as dialog.
7 Type in a name for the new Text Path and click save.
The new Text Path will now appear in the Select paths dialog
when you use the Text on a Path tool.
Changing the Anchor Point Type
When you are editing the baseline of a Path Text segment, you
can select anchor points and change their type. An anchor point
can be a line, cusp, smooth or symmetrical point. The different
types change the way that the baseline curves.
To change an anchor point to line, cusp, smooth or
symmetrical:
1 Select a Path Text segment.
2 Right-click and choose Edit baseline from the options menu.
3 Hover over the anchor point you want to change (a blue dot
will appear next to the mouse pointer) and right-click.
You see a shortcut menu.
4 Choose one of the following types of anchor points
available:
Line: Removes the direction lines from the anchor point.
Creates a straight point without any curved properties.

Creating Lettering 41
Cusp: Allows editing of the direction line on one side of
the anchor point. Adds a sharp bend to a curve.
Smooth: Constrains the angle of the direction lines to
180º and allows you to vary the length of the direction
line on one side of the anchor point. Creates a smooth
transition between curved lines.
Symmetrical: Constrains the angle of the direction lines
to 180º so the direction lines have the same length on
each side of the anchor point. Creates some curvature
on both sides of the anchor point.
You see the segment change accordingly.
Vertical Text Frame
Vertical Text items are created using the Vertical tool.
Vertical text items are those that are created vertically. They
start out with normal proportions for the font, and can be
adjusted.
To create vertical text:
1 On the Ribbon, select the Home tab.
2 On the Text bar, click on the Vertical Text tool.
3 Click once in the design window.
If another text item was already selected, your first click only deselected that item. You will have to click again to place a new
text segment.
An empty vertical text frame appears in the workspace.
4 To choose a new font (i.e., other than the currently selected
one) for the text string at this point, do the following:
In the Text area of Properties panel, click the down-
arrow to the right of the font field.
You see a list of fonts.
Select the desired font from the list.
A preview of the newly selected font is now displayed at
the top of the properties panel.

42 Pacesetter BES Lettering 2
Instruction Manual
Click Apply in the Properties panel.
Important: If you choose a new font, but do not click Apply at
this stage, the text will revert to the font previously in use when
it is generated.
5 Type the desired text string.
6 Right-click to complete the text segment.
Your text appears in the design. You can now make any other
changes to the text segment in the Text Properties box.
Circle Text Tool
Text on a circular path is created using the Circle Text tool.
When the text is first created, it is given a default font height
and circle diameter, which can be adjusted using the text tools.
To create Circle Text:
1 On the Ribbon, select the Home tab.
2 On the Text bar, click the Circle Text tool.
3 Click once in the design window.
If another text item was already selected, your first click only deselected that item. You will have to click again to place a new
text segment.
An empty Circle Frame appears in the workspace.
4 Type the desired text into the “Upper Text” and “Lower Text”
fields in the Properties panel.
Text typed in the Upper Text field will by centered at the top of the
circle, and will run clockwise, while text typed in the Lower Text
field will be centered at the bottom, and run counter-clockwise.
For more information, see “Changing Text Direction” in the “Text
Properties” section of the manual.
5 Right-click to complete the text segment.
Your text appears in the design. You can now make any other
changes to the text segment in the Text Properties box.

Creating Lettering 43
6 To choose a new font (i.e., other than the currently selected
one) for the text string at this point, do the following:
In the Text area of Properties panel, click in the Font
field to select it.
Click the down-arrow to the right of the font field.
You see a list of fonts.
Select the desired font from the list.
A preview of the newly selected font is now displayed at
the top of the properties panel.
Click Apply in the Properties panel.
Creating Monograms
Monogram Text items are created with the Monogram Text
tool. When you create a Monogram text item, it is three letters
long by default (but this can be changed on the properties
panel). Decorations can be added to Monogram items for those
fonts that support them.
To create standard Monogram text :
1 On the Ribbon, select the Home tab.
2 On the Text bar, click on the Monogram frame tool.
3 Click once in the design window.
If another text item was already selected, your first click only deselected that item. You will have to click again to place a new
text segment.
A monogram text frame appears in the workspace, and the
mouse pointer changes to an arrow with the letter A next to it
.
4 Type the three letters of your monogram into the frame.
5 In the Monogram area of the Properties Panel, select the
font you wish to use in the in the Font field.
6 Click the Apply button at the bottom of the properties panel.
You can also make any other changes to the settings the
Properties box.

44 Pacesetter BES Lettering 2
Instruction Manual
Text Frames - an Overview
In Pacesetter BES Lettering 2, you can modify your lettering in
a number of different ways once you have created it. You can
change the overall size of the text, the height, the slant, the
spacing between letters (kerning), and so on.
There are two main methods of changing the size and shape of
a text segment: directly, by clicking and dragging on the outline
handles in the workspace, or indirectly, by changing the
parameters in the Text section of the Properties Panel. The
following sections will show you how to use handles for direct
text manipulation; for more information about how to use the
properties panel, see, “Adjusting Text Properties”.
Note that not all of the ways of adjusting the text will apply to all
types of text frames; for example, the Envelope function and the
Envelope handles, only apply to the Normal Text and Monogram
frames only.
Where applicable, the section will list the frame types to which
these handle can apply; if not stated, you can assume that the
handle is present for all frame types.
Adjusting Size of a Text Segment
To change the size of a text segment manually, you can use the
Proportional Sizing handle. This is the green arrow located on
the top-left corner of the text frame.
Click and drag on the Proportional Sizing Handle to change the
overall size of the text; up to increase the size, down to
decrease the size. Note that the size of the text changes
proportionally; that is, if you increase the size of the segment,
the letters will increase in height by the same degree that they
increase in width.

Creating Lettering 45
Adjusting the Width of Text
If you want to change the width of the text of segment, without
changing the height, use the frame’s Width Handle.
The Width Handle is the green arrow at the bottom-right of the
text frame. Click and drag the to right to increase the width, and
to the left to decrease the width
If you want to adjust the height of a design, it can be done in the
Height box in the Text tab. Enter the new size and click Apply.
Adjusting the Corners of Text
Segments
Use the Corner Handles to change the shape of a text
segment. The Corner Handles are at each corner of the text
frame, and are pink in color.
When you click and drag these handles up or down, they
change to position of the selected corner of the text frame;
when you release the mouse button, the embroidery is
regenerated to match the change in shape. This gives you the
ability to create text that slopes up or down.
These handles are applicable only to Normal Text frames and
Monogram Text frames.

46 Pacesetter BES Lettering 2
Instruction Manual
Using the Envelope Handles
These handles apply only to Normal Text and Monogram text
items. These two types of text are surrounded by a flexible
bounding box, called an envelope. You can adjust this shape by
moving the Envelope Handles.
The Envelope Handles are the pink circles, located at the midpoint of the top and bottom borders of the text frame. Click and
drag these handles to make the top and/or bottom of the frame
concave (“bowed in”) or convex (“bowed out”)
You can also apply an envelope shape to a text segment
through the Properties Panel. You can use the Envelope
property in the Text area to apply a predefined envelope to a
Normal Text or Monogram text item.
For more information see “Applying an Envelope” in the
“Lettering Properties” section.
Rotating Text
Use the Rotation handle to change the angle of a text segment.
This is the orange circle at the top-left corner of the text frame.
To rotate a segment, first position the mouse over this handle so
that the cursor will changes to a circle-arrow handle . Then,
drag the handle to rotate the segment to the desired angle.
Drag up to rotate counter-clockwise, and down to rotate
clockwise. Notice that, as you rotate, the tool displays an outline
preview of the lettering, showing how far you are rotating it.
Release the mouse button to “drop” the segment, and generate
the stitches at the new angle.

Creating Lettering 47
For Circle Frames, note that the rotation handle is appears on
the inner circle of the frame, centered under the top text string.
See “Rotating Circle Text”.
Dragging this handle rotates the design to any angle. You will
see an outline of the design rotate onscreen as you are dragging, and the text will be regenerated when you release the
mouse.
Adjusting the Slant of Text
The angle of the letters in a text object can be adjusted with the
Slant Handle. The Slant Handle is the square blue handle
located to the lower-left of the selection box.
To adjust the slant of text, select the text object you want to
adjust, click the Slant Handle and drag. To add a forward
(positive) slant to the letters, drag to the right and to add a
backward (negative) slant, drag to the left.
If, after performing any of the adjustments above, you wish to
return the frame to its original size and shape, right click on the
workspace and choose Reset Frame from the option menu.
The frame will reset itself.

48 Pacesetter BES Lettering 2
Instruction Manual
Adjusting the Size of Text in the
Circle Frame
The size of text items can be adjusted using the Proportional
Sizing Handle. This handle is at the top of the lettering and
appears as a blue circle.
Select the Circle Text tool and place your mouse pointer over
this handle; you will see that it changes to a small cross.
As you drag this handle, you will see the design scale
proportionally, which means that as you make the text taller, it
also gets wider.
Adjusting Text Width in the Circle
Frame
You can adjust the overall spacing between letters in Circle Text
with the Width Handle. This handle appears as a blue circle at
the lower-right side of your text.
To adjust the width, select the Circle Text tool, and click on the
text to select it. When you place your pointer in the Width
Handle, you will see that it changes to a small cross. By
dragging this handle, you will be able to adjust the width of the
text segment.

Creating Lettering 49
Note that the spacing between the lettering changes
proportionally as you increase and decrease the size of the
segment. To adjust the spacing between letters individually, see
“Adjusting the spacing between letters (kerning)” in the
“Working with individual letters” section of the manual.
To change the height and width at the same time, see “Adjusting
the size of text in the Circle Frame”
Changing the Diameter of the Circle
Frame
You can change the overall diameter of the baseline of your
Circle Text using the Rotation Handle. This is the orange circle
on the inner edge of the Circle Text frame. Place your mouse
over this handle and the pointer will change to a circle-arrow
handle . Then, drag in or out along a radius to increase or
decrease the diameter of your Circle Text segment.

50 Pacesetter BES Lettering 2
Instruction Manual
If, after performing any of the adjustments above, you wish to
return the frame to its original size and shape, right-click on the
workspace and choose reset frame from the option menu. The
frame will reset itself.
Working with Individual Letters
The text tools allow you to make changes to individual letters
within the text segments in your designs.
You are able to select a letter, and move it, rotate it, and resize
it by using the handles that surround the letter when it is
selected. You can also change the spacing of letters within the
word with the special kerning handles.
Adjusting the Space between Letters
(Kerning)
The space between individual letters can be adjusted using the
Kerning Handles.

Creating Lettering 51
Kerning Handles are blue diamonds, located between the
letters of your text segment. You can drag these horizontally to
adjust the spacing of the text.
When you move a kerning handle in a word, you adjust the
space between only the two letters on either side of the handle
you are moving; the spacing between the other letters remains
the same. So, if you add space, you will see the whole length of
text expand by this amount.
Moving Individual Letters
Individual letters can be moved using the Letter Handles. These
appear as blue squares, centered on each letter in the segment.
To select a letter, click on its Letter Handle; once the individual
letter is selected, you can adjust its position by dragging with
the mouse.
Selecting a letter also activates the Letter Frame around that
letter. This frame displays handles that allow you to resize or
rotate it; see following sections.
Resizing Individual Letters
When an individual letter has been selected, you can resize it
by clicking and dragging the Letter Size handles. The Letter
Size handles are green squares that are located in the corners
of the letter frame.

52 Pacesetter BES Lettering 2
Instruction Manual
When you hover over these handles, a double-ended arrow
appears; by dragging up or down on this handle, you increase
or decrease the size
Rotating Individual Letters
When you select an individual letter with its Letter Handle, you
can rotate it by clicking and dragging the Letter Rotation
Handles. The Letter rotation handles are the green circles at the
corners of the Letter Frame. When you hover over these
handles, the mouse pointer will become a circle with arrows,
like this.
Drag up to rotate counter-clockwise, and down to rotate
clockwise. As you rotate, the tool displays an outline preview of
the letter, showing how far you are rotating it..
When the cursor is placed over the text function handles, the
cursor changes for the different functions.

Creating Lettering 53
Working with Color
With Pacesetter BES Lettering 2, you are able to choose a text
item’s color from a large variety of thread colors. You apply the
color by selecting from the colors available in your currently
loaded thread palette.
For more information on how to use the thread palette, and how
to change the current thread palette, see “Working with the
Color Palette.”
Changing the Color of a Text
Segment
The following procedure applies to situations where you want to
simply change the thread color of an existing text segment to a
new color.
To change a the thread color of a Text item:
1 Do one of the following.
Select the text item in the workspace, using either the
Select tool or one of the text tools.
Click on the text item in the Sequence view.
2 In the Color Palette, click the color box with the thread color
you want to use.
If you hover over a color square on the Palette, the thread type
and number will show beside the mouse pointer.
Creating Multi-color Text Segments
When you are creating design compositions involving lettering,
you may find that you want to have two or more colors in a
single line of text. In Pacesetter BES Lettering 2, this can be
easily done using the Properties panel.
You accomplish this by inserting a special character, the tilde
(~) into your text. Inserting these characters divides your text
segment into sub-segments; each of the sub-segments that are
created this way gets its own color identifier label (Color1,

54 Pacesetter BES Lettering 2
Instruction Manual
Color2, etc.) and can then be assigned its own thread color from
the Color Palette.
To insert thread color changes within a text segment:
1 Select the text segment.
2 In the Text field of the Text Properties panel, type a tilde (~)
between letters in each position that you want a color
change to occur.
3 Click Apply.
You see the colors change for all text sub segments after the
first one, which retains the original color.
The text segment, as it appears initially, after being divided into sub
segments. The first subsegment retains the original color, and the
subsequent ones are assigned arbitrary “placeholder” colors (until you
chose your own).
4 To apply your choice of colors to the sub-segments, move
the mouse pointer to the desired color in the Color Palette
and left-click.
A context menu appears, listing the text sub-segment color
identifiers in the order they appear in yo ur text.

Creating Lettering 55
Selecting the colors for the individual sub-segments; in this example,
applying a red thread color to the first segment, the word ‘Multi”.
5 From the context menu, click on the subsegment identifier to
apply the chosen thread color to it.
The subsegment changes to the chosen color.
6 Repeat step 5) for each subsegment in your list.
The text segment with new thread colors applied.
The example outlined above demonstrates two color changes
being applied between words, but you can apply changes in
exactly the same way between individual letters in a word. Note
that the tildes do not add any space between characters or
words in your text.
Changing Colors in a Two-color Font
You can also choose the thread color for each of the
components (that is, the fill and the border) of a two-color font.
You apply the color to each by selecting the color you want to
use for each from the color palette.
To change colors in a two-color font:
1 Create a text segment, using any of the Text tools.
2 In the Properties box, select a two-color font (e.g. 2Cl Team
Medium) and click apply.
The text segment, appears in the workspace; colors for the fill
and border are chosen arbitrarily.

56 Pacesetter BES Lettering 2
Instruction Manual
3 Find the color you wish to apply to the fill of the lettering
segment in the color palette, and left-click on it.
You see the following Options menu.
4 In the Options menu, click on Color 1.
The fill color of the lettering changes to the chosen color.
5 Find the color you wish to apply to the border of the lettering
segment in the color palette, and left-click on it.
6 From the Options menu, click on Color 2.
The border color of the lettering changes to the chosen color.
You can also apply the border color first, and then the fill color;
the order you make the change in makes no difference.

CHAPTER 3:
Text Properties
Topics covered in this chapter:
• Editing text objects using Properties panel settings.
• Using the Styles feature to give a different look to your
lettering.
• How to know what characters are available in each font.
• The Spell Checker feature.
• Using the color palette.

58 Pacesetter BES Lettering 2
Instruction Manual
The Properties Panel
The Pacesetter BES Lettering 2 Properties Panel appears on
the right of the workspace. This panel displays, and allows you
to modify, all the properties associated with the lettering in your
designs. These properties include the text properties, the fill
properties, underlay properties, and pull-compensation
properties. Each of these types of properties has its own section
in the Properties Panel, and each will be discussed in detail in
its own section to follow.
If you need to make room in the Properties Panel in order to
see some of the fields better, you can collapse one or more
areas by clicking the small minus sign next to its name; the box
will then display a small plus sign. Clicking on the plus sign
expands that area again.
Adjusting Text Properties
The Properties Panel allows you to modify various properties of
the currently selected text segment. You can use this area of
the panel to change text itself, choose a font, and select the
height, alignment, and spacing of the letters. You can also alter
the sewing sequence, and determine how trims and lock
stitches will be applied to the segment.
The property fields you see in the text area may be different,
depending on which kind of text frame is selected; for example,
when a Circle frame is selected, this area will show two places
where you can input text, labelled ‘Upper’ and ‘Lower’.
The properties that you will see displayed will be slightly
different depending on which type of text (Normal, Path,
Vertical, Circle or Monogram) is currently selected.
Changing the Text
As well as being able to type directly on the screen (see appropriate sections under “Creating Text”), you can also input your
text by typing in into the Text field on the Properties Panel.

Text Properties 59
Note, however, that there is some variation on what you can
type, depending on which kind of Frame is selected. For example, multi-line text segments can only be entered when a Normal Text frame is selected.
To edit text in the Properties panel:
1 Select the text object you want to edit.
2 In the Text area of the Properties panel, click in the Text field
to select it.
If the Properties panel is not already visible, you can display it
quickly by pressing Alt + Enter on your keyboard.
3 Type the desired text into the Text field.
4 Click Apply to save your changes.

60 Pacesetter BES Lettering 2
Instruction Manual
Changing the Font of Existing Text
You can change the font type of text objects using the dropdown list of fonts in the Properties Panel. At the top of the area,
you see a preview image showing a sample of the selected font.
You can choose from two types of fonts at the outset; embroi-
dery fonts or TrueType fonts. The default list of fonts you see in
the Text area will be embroidery fonts; to show the TrueType
fonts, check the box next to TTF.
When TrueType fonts are used for embroidery letters, the satin
stitches that comprise them will sew out horizontally.
Note that, depending on the embroidery font you choose, there
are different minimum and maximum height recommendations.
For more information, see “Displaying font properties.”
To change a font type:
1 Select the text segment you want to alter.
2 In the Text Properties area, in the TTF field, do one of the
following:
To choose from the selection of Embroidery fonts, leave
the TTF checkbox unchecked.
To choose from the selection of TrueType fonts, check
the TTF checkbox.
The list of available fonts will change accordingly.
3 From the Font list, select the font you want to use.

Text Properties 61
You can preview the fonts available by clicking the arrow to the
right of the font name. This will display a drop-down list of the
available fonts; scroll through the list by dragging the track
button. You can click on each font name to display a preview of
the font in the Text area.
4 Click Apply to save your changes.
You see your text’s font type altered accordingly.
Displaying a Font’s Available
Characters
In Properties Panel, there is a tool which displays all the characters (keystrokes) that can be entered for available embroidery
fonts. For example, some fonts only allow you to enter uppercase characters, while other fonts allow you to enter both
uppercase and lowercase characters. The available characters
box also tells you the minimum and maximum recommended
heights for sewing out the font.
To display an embroidery font’s ava ilable keystrokes:
1 Display the Properties Panel, if it is not already visible.
2 In the Text area, select the font you want to use in the Font
field.
3 Do one of the following:
Hover the mouse pointer over the font preview list.
Click on the available characters button to the
immediate left of the font field.
A new window displays all the available keystrokes.

62 Pacesetter BES Lettering 2
Instruction Manual
Spell Checker
The Spell Checker feature is found in the Properties Panel in
Pacesetter BES Lettering 2. You can check the spelling of text
segments created in any of the Text, Vertical Text, Path Text or
Circle Text modes.
Note that Spell Checker uses the Microsoft Word spell check
function, so it only works on computers that have Microsoft
Word installed.
To use the Spell Checker feature:
1 Create a Normal, Multi-line, Path, or Circle Text segment.
2 Click the Spell Checker button in the Text field on the
Properties panel.
The spell check dialog appears. Any word that is misspelled
will be shown in red.
3 To see a list of suggested correct spellings, right-click in the
text entry box next to the incorrect word.
A list of alternatives appears beside the mis-spelled word.

Text Properties 63
4 Click on the correct word that you want to replace the
incorrect one, or directly type over the incorrect word to
replace it.
Your choice replaces the incorrect word.
5 Click Apply to create the text segment in your workspace.
The corrected text appears in your workspace.
Changing the Height of Lettering
With Pacesetter BES Lettering 2, it is easy to change the height
of any lettering. Height refers to the tallest character in the
desired lettering. So, when a text segment contains both
uppercase and lowercase letters, it is the size of largest
uppercase letters (usually) that is set by this property.
To change the height of lettering:
1 Select the text object you want to alter.
2 In the Text area of the Properties panel, select the Height
field.
The property label (Height) is highlighted in blue.
3 Type in the height you want your letters to be.
4 Click Apply to save your changes.
You see your text’s height altered accordingly.
Changing Font Spacing
The font spacing property controls the horizontal spacing
between letters in a text segment. The normal (default) value for
the font spacing is zero. You can set the font spacing to a
negative or a positive value. If you set the value to less than
zero, then the spacing between letters decreases; if you set the
value to greater than zero, then the spacing increases.

64 Pacesetter BES Lettering 2
Instruction Manual
Notice that the spacing property applies to the whole segment.
If you want to change the spacing selectively, to individual gaps
between letters, you can use the Kerning Handles. See
“Adjusting the Space between letters.”
To change font spacing:
1 Select the text object you want to alter.
2 In the Text area of the Properties panel, click in the Spacing
field to select it.
3 Enter the font spacing value you want to use.
4 Click Apply to save your changes.
You see your text’s letter spacing altered accordingly.
Width Percentage
The Width Percentage changes the overall width of a text
segment. You can adjust the Width percentage to alter the
appearance of the text object, or to allow it to fit the hoop better.
When you change the width of a segment using the Width
Handle, the Width Percentage of the selected segment will be
adjusted automatically to reflect the change.
To change width percentage:
1 Select the text object you want to alter.
2 In the Text area of the Properties panel, select the Width
field.
3 Enter the width percentage value you want to use.
4 Click Apply to save your changes.
You see your text’s width percentage altered accordingly.
Changing the Slant Setting
Pacesetter BES Lettering 2 allows you to use the Slant setting
to create a slanted effect in text objects. Slant changes the
degree value of the slant on your lettering. A negative value
slants your lettering to the left; a positive value slants it to the
right.

Text Properties 65
Negative slant to the left and positive slant to the right.
To change slant settings:
1 Select the text object you want to alter.
2 In the Text area of the Properties panel, select the Slant
field.
3 Enter the slant value you want to use. To slant your lettering
to the left, enter a negative value. To slant your lettering to
the right, enter a positive value.
4 Click Apply to save your changes.
You see your text altered accordingly.
Applying an Envelope
One way to vary the shape of your text segment is to use the
Envelope setting. This allows you to apply a predefined
envelope to change the shape of a Normal Text or Monogram
text item.
To apply one of the pre-determined envelope shapes:
1 Select the item with the Text tool, and press ALT + Enter to
show the Properties Panel, if it is not already visible.
2 In the Text area of the Properties panel, click on the Select
button next to “Envelope.”
The Envelope window (below) will open.

66 Pacesetter BES Lettering 2
Instruction Manual
3 Select one of the envelope shapes from the list.
The selected envelope shape will be applied to your l etteri ng.
Drop Caps
Drop Caps is a property that can be modified through the Text
area of the Properties panel. It can be used to change the to
height and vertical alignment of the letters at the beginning of
the selected text. There are two settings relating to the Drop
Caps Property - Alignment and Percentage.
Use the Alignment option to determine the position of the
baseline of the relative to the main lettering. See the examples
below, showing Top and Baseline alignment respectively.
The Percentage property determines how much bigger than the
main segment the Drop Cap letter will be. This value is

Text Properties 67
expressed as a percentage, with 100% being equal in size to
the main lettering.
Some of the fonts that are installed with the software do not
have the capability of working with Drop Caps; for these, the
setting will be inactive in the Properties panel.
Properties Specific to Particular Text
Frames
Decor for Monograms
Most of the properties of a Monogram are the same as the ones
that appear for Normal text; the exception is the Line Spacing
property, which does not apply.
There is an additional feature unique to the Monogram
properties section, called Decor. Decor consists of pre-designed
embroidery that frames the monogram text.
Some example of the monograms made using the Decor Monogram fonts.
Decor is only available when the Monogram is created using the
special monogram fonts that support it; these are the ones
labelled Decor Monogram in the list of fonts.
You can create a monogram font using another kind of font, but
in this case, the Decor option will be unavailable.

68 Pacesetter BES Lettering 2
Instruction Manual
If you create your monogram using one of the special monogram fonts, you will see that the Decor Field is active. To
choose the decor type for your monogram, you first create a
monogram segment, and choose a Decor Monogram style in the
font area (see “Creating Monograms” in the “Creating Lettering”
section of this manual). Click the down-arrow to the right of the
decor field, select a decor from the list, and then click Apply.
If you want to use one of the Decor monogram fonts without
the decor, there is the option to do so; just select decor option
“00”, which is at the top of the list, and essentially means that
no decor is added.
Line Spacing
The Line Spacing parameter only applies to the Normal text
mode. This property controls the spacing between lines in multiline text segments. This quantity is expressed as percentage of
the Letter Height value.
Align
The Align setting is found only in Normal text mode and can be
applied to lettering segments with more than one line. This
property is equivalent to the alignment of paragraphs in wordprocessors; you can align your text on the left, right, or center.
Changing Properties with the
Context Menu (Right-click)
You can right-click on any text object, regardless of its type, and
an edit menu will appear. This menu allows you to change
several important text properties, such as changing or resetting
frames.
Changing Text Modes
The Text Mode can be changed for an existing text object in
Pacesetter BES Lettering 2. You can change an existing text
item to Normal Frame, Path Frame, Vertical Frame, Circle

Text Properties 69
Frame, or Monogram Frame. Right-click the text object and
select a text mode from the menu.
This feature is useful when the text is already in position, but
you want to change the frame that is applied to it. For instance,
you may create a normal text object, but then realize you want it
to be an Circle text object instead.
Resetting the Frame
The Reset Frame command is useful when you have altered
your text object a bit too much and want to start over.
Resetting Individual Letters
If you are have selected a single letter in a text segment, the
context menu will have an additional option, the Reset Letter
command. Use this command in cases where you have
manipulated a letter and want to reset it so that it looks as it
would if it was never individually adjusted.
This command is available when you activate individual letter
size handles and right-click the individual letter with your cursor.
Changing Text Direction
The text direction setting is applicable only to text segments in
the Circle frame.

70 Pacesetter BES Lettering 2
Instruction Manual
Initially, when you create a Circle text segment, the letters will
start at the top, and read clockwise around the circle (this is
‘Text Direction Normal’). However, if you want the text to start at
the bottom and read counter-clockwise instead, you can change
to this condition by right-clicking the segment and choosing Text
Direction Reverse from the menu that appears.
To get text that goes in both directions, within a single Circle
text segment, type text directly into the Circle text properties
page: ‘Normal’ direction into the Upper text box, and ‘Reverse’
text into the Lower text box.
If you have text in both the upper and lower text fields,
changing the text direction will swap the positions of the two
text strings, so you will not have to re-enter them manually.
Text Styles Option
There is the option in the Properties Panel, for those fonts that
support it, to change the style of the embroidery that is used to
draw your lettering. Text Styles is an extra option which you can
use to expand the creative possibilities of embroidery lettering.
The default style that is generated when you create lettering is
the Satin stitch. However, you can also choose from among five
other styles to apply to your lettering: Run, Steil, Appliqué, and
Spira l.
Applying the different styles to text will not always produce
good results for all letter heights.
Styles cannot be applied to all the available Pacesetter BES
Lettering 2 fonts.
Run Style Text
When you apply the Run style to the text segment, it converts
the outline of the lettering to a run stitch. The potential options
are stitch length, and style of Run.
There are four different possible Run styles; single, double,
bean, and motif.

Text Properties 71
•A Single Run stitch is a simple forward-moving stitch that
looks like any straight stitch produced by a sewing machine.
•A Double Run stitch sews over the line twice: once forward,
and once backward, thus it ends up where it starts.
•The Bean stitch is also known as a Three Ply stitch and is a
running stitch where the machine sews over each stitch
three times (forward, back, forward again) before it moves to
the next stitch. The result is a heavy running stitch.
•The Motif Run is a decorative, programmed stitch which
usually has an open, ‘lacy’ look. When you select the Motif
run option, the list of Motif patterns at the bottom of the Run
area in the Properties becomes active. Scroll down the list to
select the Motif you want.
Steil Style Text
The Steil stitch is a constant-width satin stitch which follows the
outer contour of each letter. The properties specific to Steil are
width and density.
The standard lettering properties, such as fill, underlay, and
pull-compensation also apply to Steil. For more information
about these properties, see “Changing Lettering Properties”.

72 Pacesetter BES Lettering 2
Instruction Manual
Appliqué Style Text
If you need to create large letters, Appliqué Style text is one
way to reduce the number of stitches required. With Appliqué
lettering, you use cut pieces of fabric in place of large fill stitch
areas.
There are three different embroidery segments for each letter in
appliqué style text:
• Positioning stitches. These sew onto the garment first, and
serve as a guide for placing the appliqué fabric.
• Tack-down stitches. Once you have place the appliqué
fabric, the tack-down stitches hold it in place.
• The Appliqué border. Border stitches run all the way around
the outline of each letter to securely attach the Appliqué
fabric to the garment.
There are three different kinds of border stitches possible,
Satin, Motif, and Blanket. For more information about the
settings for each of these types, see the procedures for each
type, below.
Changing colors in Appliqué Text
In order to stop the machine so that you can place the fabric
pieces to be sewn on to the garment, the Appliqué Style
lettering segment inserts a color change between each
positioning, tack-down, and border segment. This means that,
when first generated, the lettering segment will display many
colors.
You can change the colors of lettering in a Appliqué segment by
selecting a color from the list on the Color Palette.

In the normal sewing-out of a Appliqué text segment, the
machine will not stop between the border stitches of one letter
and the positioning stitches of the subsequent one; so, the last
color of one letter (the border stitches) will be the same as the
first color of the next (that letter’s positioning stitches).
However, you can force the segment to stop between letters by
inserting the tilde symbol (~) between letters. (In the example
below, you would type B~E~S.) If you add these stops, there
will be three stops for each letter, and changing every third
thread color will change the color of the corresponding letter.
To change the color of letters in an Appliqué Text
segment:
1 Select the Appliqué Text segment.
Text Properties 73
2 In the color palette, find the color you wish to apply to the
first of the letter of segment, and click on it.
You see the a menu of colors.
3 To set the color of the first letter, in the Options menu, click
on Color 3. (In the first letter of an Appliqué-style text
segment, Color 1 refers to the positioning stitches, and

74 Pacesetter BES Lettering 2
Instruction Manual
Color 2 to the tack-down stitches; Color 3 is the thread color
of the visible border stitches).
The first letter changes to the chosen color.
4 Choose the color you wish to apply to the next letter and
click on it.
5 From the menu, click on Color 5. (For the second letter of
the appliqué segment, the positioning stitches will be sewn
using thread color 3, and the tack-down stitches color 4).
The second letter will change to the chosen color.

Text Properties 75
6 Repeat steps #4 and #5 for each letter in the segment,
changing every other color in the appliqué segment, until
you have changed all the colors required.
Adjusting Satin Settings for Appliqué Style
Text
You can modify the settings and make all changes to the satin
stitches in the Appliqué box.
To adjust Satin stitch settings for Appliqué:
1 Select the Appliqué text segment.
2 In the Properties panel, in the Appliqué type field, select
Satin.
3 Adjust any of the following settings in the Properties panel:
In the Stitch Length box, enter the stitch length of the
positioning and tack down runs.
In the Appliqué Width box, enter the width of the satin
stitching.
In the Appliqué Density box, enter the density of the
Satin stitching.
In the Inset box, select a percentage to inset the edge of
the appliqué border, relative to the outline of the
lettering.
4 Click Apply.
Adjusting Blanket Settings for Appliqué Style
Text
After you select the Appliqué stitch type, you can adjust any of
the default settings available. You must make all changes to the
Appliqué stitches from the Appliqué box.
To adjust blanket settings for Appliqué:
1 Select the Appliqué text segment.
2 In the Properties panel, in the Appliqué type field, select
Blanket.
3 Adjust any of the following settings in the Properties panel:

76 Pacesetter BES Lettering 2
Instruction Manual
In the Stitch Length box, enter the stitch length of the
positioning and tack down runs.
In the Appliqué width box, enter the width of the blanket
stitching.
In the Blanket density box, enter the spacing for the
Blanket stitching.
4 Click Apply.
Adjusting Motif settings for an Appliqué
Border
After you select the Appliqué stitch type, you can adjust any of
the default settings available.
You must make all changes to the Appliqué stitches from the
Appliqué box.
To adjust Motif settings for Appliqué:
1 Select the Appliqué text segment.
2 In the Properties panel, in the Appliqué Type field, select
Motif.
3 Adjust any of the following settings in the Properties panel:
In the Stitch Length box, enter the stitch length of the
positioning and tack down runs.
In the Inset box, select a percentage to inset the edge of
the appliqué border, relative to the outline of the
lettering.
From the Motif list, select a Motif pattern that will be
used as the Appliqué stitching.

Text Properties 77
In the Motif Stitch Length box, enter the motif stitch
length. The motif stitch length affects the size of the
motif and represents the length (width) of each motif
pattern.
4 Click Apply.
Fabric Backgrounds in Appliqué Style Text
You have the option of selecting a fabric background to display
within the appliqué border. You can select either from a list of
fabric images provided with Pacesetter BES Lettering 2, or
import your own image file to use as a background.
To display a fabric background in an Appliqué segment:
1 Select the Appliqué text segment.
2 In the Appliqué area of the Properties panel, select the
Fabric field.
3 Click the down arrow to the right of the Fabric field.
You see a list of available fabrics,
4 Choose one of the fabrics from the list by clicking on it.
5 Click Apply.
The selected fabric image appears within the Appliqué
border.

78 Pacesetter BES Lettering 2
Instruction Manual
The fabric image you apply in the Properties box will also be
visible in the print-out of the design.
To import an image for an Appliqué background:
1 Select the Appliqué Style segment.
2 Open the properties box and select the Appliqué tab.
3 Click the button next to the Appliqué Fabric list.
The Import Fabric dialog will open.
You can scan your own images of fabric swatches for use in
your design projects. For best results, scan them with a
resolution of 300 dpi. A 1 in. × 1 in. piece of fabric should be
sufficient for your sample.
4 Browse to the location of the image you wish to use as a
fabric.
5 Select this image and click Open.
The image appears within the Appliqué border, and it is
added to your Appliqué Fabric list.
The fabric image you import will also be visible in the print-out
of the design.
Adjusting Fill Settings
In the properties panel, you can customize the parameters used
by Pacesetter BES Lettering 2 when it generates the fill stitching for the segment. You have the option to add a pattern type
and change the text object’s density settings.

Text Properties 79
Choosing a Fill Pattern
When you install Pacesetter BES Lettering 2, a wide variety of
Standard and Carved patterns are installed along with the
software. You can select which Standard or Carved pattern to
use in the Properties box.
To choose the fill pattern:
1 Select the Lettering segment.
2 In the Fill area of the Properties box, in the field labelled Fill
Type, select either Standard or Carved.
3 Click on the down arrow on the right of the Pattern field to
display a drop-down list of patterns.
You see a list of patterns; the patterns that are displayed
depend on the type of fill you chose in step 2.

80 Pacesetter BES Lettering 2
Instruction Manual
4 From the Pattern list, select a pattern.
5 Click Apply.
The fill of your text segment is altered accordingly.
Fill Density Setting
Fill density is the distance between individual lines of
embroidery. Density is measured in millimeters.
Note that the density setting is given in millimeters. Therefore,
larger values correspond to a lower density, while lower values
correspond to a higher density. For more details on stitch
density units, see “Density” in the Glossary.
Use the density setting to adjust your fill to suit the fabric you
are sewing on. For example, fabrics with a very loose weave are
less able to hold a large density of stitches; in cases such as
this, you can lower the density of the fill.
If you are unsure what setting to use, try the standard setting of
0.4. This setting works well almost universally, as long as you
have not exceeded the font’s size recommendations.

Text Properties 81
In the Fill area, the image beneath the Density setting will
change as you adjust the setting. These are not precise images;
rather, they are intended to provide you with visual cues to what
you are doing as you change the settings.
A general rule is to go for full-fabric coverage, but add extra
stabilizer if you want to support a high-density fill on a lowdensity fabric.
If the letters in the text segment are large (i.e., above the maximum recommended height for the font) it is better to use a
choose a fill, rather than satin, for the lettering. Fill stitches are
the type you would normally find filling an area in an embroidery
design. With Fill stitches, each line across is made up of two or
more individual stitches.
Carved Fill Properties
In addition to the density and stitch-length settings described
above there are a few extra fill settings that apply only to the
Carved fills. You can adjust these Carved pattern settings in the
Properties box. The settings allow you to change a fill pattern’s
characteristics such as the size and angle of the fill pattern.
The following figures show some different effects you can
create using the Carved Fill settings.
Original (scale at 100%) Emboss Scale at 50%
To change the Emboss Scale of a Carved patt ern:
1 Select a Carved fill segment

82 Pacesetter BES Lettering 2
Instruction Manual
2 In the Fill area of the Properties Panel, do the following:
Click the Emboss Scale box to select this property.
In the Emboss Scale field, enter a percentage value to
adjust the scaling.
3 Click Apply.
To change the Emboss Angle of a Carved patte r n:
1 Select a Carved fill segment
2 In the Fill area of the Properties Panel, do the following:
Click the Emboss Angle box to select this property.
In the Emboss Angle field, enter a percentage value to
adjust the angle.
3 Click Apply.
You see your segment altered accordingly.
Underlay Properties
Underlay stitches are laid down before the visible, or “top”
stitches, to help stabilize stretchy fabrics. They can also help to
tack down wales or naps (on fabrics such as corduroy).
There are a variety of possible underlay types available; the
following image gives a schematic view of how the different
types of underlay are sewn.
The Underlay Area in the Properties panel.

Text Properties 83
Selecting the Underlay Type
You can select underlay types for various types of stitches.
Choose from Contour, Perpendicular, Lattice, Full Lattice,
Parallel, or Zig-Zag. You can combine underlay types to get
maximum coverage
Note that not all underlay types will be available for text; in
particular, Lattice and Full Lattice underlay will not be available
for text segments.
To select an underlay type:
1 Select the segment.
2 In the Properties Panel, scroll down to the Underlay area.
3 Select one or more of the available underlay types.
When you select underlay types, you will be able to see what
your underlay type will look like in the Preview area.
4 Adjust any of the other settings. Refer to the related
procedures for more information.
5 Click Apply.
.
Specifying the Underlay Density
You can specify the density for underlay stitches.
To set the underlay density:
1 Select the segment.
2 In the Properties Panel, scroll down to the Underlay area.
3 Select one or more of the available underlay types.
4 In the Density box, enter a density value.
5 Adjust any of the other settings. Refer to the related
procedures for more information.
6 Click Apply.

84 Pacesetter BES Lettering 2
Instruction Manual
Specifying the Underlay Stitch
Length
You can specify the stitch length for your underlay stitches. You
can increase or decrease the length according to your underlay
needs.
To specify the underlay stitch length:
1 Select the segment.
2 In the Properties Panel, scroll down to the Underlay area.
3 Select one or more of the available underlay types.
When you select underlay types, you will be able to see what
your underlay type will look like in the Preview area.
4 In the Stitch Length box, enter the stitch length that you want
for your underlay stitches.
5 Adjust any of the other settings. Refer to the related
procedures for more information.
6 Click Apply.
Changing the Inset Distance
You can change the inset distance. Pacesetter BES Lettering 2
calculates the inset distance (the distance the underlay stitches
are placed from the edge of the top stitching.) Inset distance
changes the amount of underlay coverage. The smaller the
inset distance, the more coverage you have.
To change the inset distance:
1 Select the segment.
2 In the Properties Panel, scroll down to the Underlay area.
3 Select one or more of the available underlay types.
When you select underlay types, you will be able to see what
your underlay type will look like in the Preview area.

Text Properties 85
4 In the Inset box, enter the amount of distance you want.
Enter a zero value if you want to place the underlay directly
on the edge of the segment.
5 Click Apply.
Pull Compensation Settings
Pacesetter BES Lettering 2 allows you to adjust the pull
compensation in your design. In the Properties panel, you can
use the settings available in the Pull Compensation area to
adjust the pull compensation of text objects.
There are two types of pull-compensation, which differ in the
way that the pull compensation is determined.
• A percentage pull-compensation calculates the change
made to the stitches’ width based on their original width.
• An absolute pull compensation is simply an extra amount of
width which is added to the stitches regardless of their
original length.
When you use percentage pull-compensation, you can also
enter a value in the Max range box of the Pull Compensation
area. This value sets an absolute maximum limit on the size of
the pull compensation. If the calculated pull compensation
value goes over this length, the actual stitches that are
generated will be limited to this length.
To adjust the pull compensation:
1 Select the item you want to adjust.
2 Press ALT + Enter to display the Properties panel, if it is not
already visible.
You see the Properties panel.
3 In the Pull Compensation Area of the Properties panel, click
the down arrow to the right of the Type field.
4 A list of options is displayed.
5 Select one of the following options:
None. Makes no adjustments to pull compensation.

86 Pacesetter BES Lettering 2
Instruction Manual
Percentage. Enter the percentage in the Value % box
and, if necessary, enter the maximum value of pullcompensation in the Max Range box.
You can also adjust the value % number using the value %
slider.
Absolute. Enter the amount of absolute pull-
compensation (in mm) in the Absolute Value box.
6 Click Apply.
Displaying Special Characters
When you create lettering, you can enter characters available
on your keyboard. You can also enter characters using ASCII
numbers, a feature that is available for you to use if needed. An
ASCII number is a code number, four digits long, which
represents a character that does not have a key to represent it.
For instance, ™ or ® are symbols that exist in some fonts but
are not type-able on a standard US/English keyboard.
Due to Windows constraints, you must enter the numbers on
the keyboard’s numeric keypad for this to work.
If you are working from a laptop computer, you will have to
enable the keypad in order to use it to input special characters;
see you computer’s documentation.
Please note that not all fonts contain all of the special
characters. To see which characters are available in any given
font, check the font preview information for that font.
You can see the list of available characters for a font by press-
ing on the button in the Font field of the Text Properties
panel, or by hovering your mouse over the font preview.

Text Properties 87
Special Characters List
The following lists the special characters that may be available
in Pacesetter BES Lettering 2.
Character Key Code
€ Alt + 0128
‘ Alt + 0145
’ Alt + 0146
“ Alt + 0147
” Alt + 0148
Alt + 0149
— Alt + 0151
Alt + 0153
¡ Alt + 0161
¢ Alt + 0162
£ Alt + 0163
¤ Alt + 0164
¥ Alt + 0165
¦ Alt + 0166
§ Alt + 0167
Alt + 0168
© Alt + 0169
- Alt + 0173
® Alt + 0174
¯ Alt + 0175
¿ Alt + 0191
À Alt + 0192
Á Alt + 0193
 Alt + 0194
à Alt + 0195
Ä Alt + 0196
Å Alt + 0197

88 Pacesetter BES Lettering 2
Instruction Manual
Character Key Code
Æ Alt + 0198
Ç Alt + 0199
È Alt + 0200
É Alt + 0201
Ê Alt + 0202
Ë Alt + 0203
Ì Alt + 0204
Í Alt + 0205
Î Alt + 0206
Ï Alt + 0207
Ð Alt + 0208
Ñ Alt + 0209
Ò Alt + 0210
Ó Alt + 0211
Ô Alt + 0212
Õ Alt + 0213
Ö Alt + 0214
× Alt + 0215
Ø Alt + 0216
Ù Alt + 0217
Ú Alt + 0218
Û Alt + 0219
Ü Alt + 0220
Ý Alt + 0221
Þ Alt + 0222
ß Alt + 0223
à Alt + 0224
á Alt + 0225
â Alt + 0226
ã Alt + 0027
ä Alt + 0028
Character Key Code
å Alt + 0029
æ Alt + 0230
ç Alt + 0231
è Alt + 0232
é Alt + 0233
ê Alt + 0234
ë Alt + 0235
ì Alt + 0236
í Alt + 0237
î Alt + 0238
ï Alt + 0239
ð Alt + 0240
ñ Alt + 0241
ò Alt + 0242
ó Alt + 0243
ô Alt + 0244
õ Alt + 0245
ö Alt + 0246
÷ Alt + 0247
ø Alt + 0248
ù Alt + 0249
ú Alt + 0250
û Alt + 0251
ü Alt + 0252
ý Alt + 0253
þ Alt + 0254
ÿ Alt + 0255
Text Properties 89
To type special characters:
1 In the text frame, position the cursor where you want to
insert the special character.
2 Press and hold down the ALT key on your keyboard.

90 Pacesetter BES Lettering 2
Instruction Manual
3 Type the corresponding key code for the special character
from the number pad located on the right side of the
keyboard.
To view a list of special characters and their corresponding
key codes, see "Special Characters List".
4 Release the ALT key on your keyboard.
You see the special character.

CHAPTER 4:
Editing Designs
Once you have learned to create your own designs, you will
want to create and save them as files to output to your machine.
Pacesetter BES Lettering 2 allows you to save to a number of
machine formats.
You can also use the Merge feature to add a stitch file to your
lettering. For designs with multiple components (that is, more
than one text segment, or a text segment plus a merged design
file), you can select the text components and edit them
individually.
Topics covered in this chapter:
• Saving designs, and the different stitch file types that are
available.
• Selecting, copying, and pasting components of the design.
• Moving and aligning items in your workspace.
• Combining lettering with other designs using the Merge
Design Files feature.

92 Pacesetter BES Lettering 2
Instruction Manual
Creating New Designs
When you open Pacesetter BES Lettering 2, you can
immediately begin creating a new, untitled design in the design
window. The design window automatically opens using the
default recipe and machine format settings specified in the
Preferences dialog. For more information on default settings,
see “Setting up your Workspace Environment”.
If you want to open a design and apply a different recipe to it
(that is, not the default recipe), you will want to open using the
New/Recipe tool.
To create a new design using the recipe dialog:
1 Click the Pacesetter Button , and then click the New/
Recipe tool.
If you select the New tool from the Quick Access toolbar, you
will bypass the recipe selection dialog. A new design window
will open using the default recipe and machine format settings.
You see the New Page dialog.
2 In the Recipe list, select the recipe you want to use for your
design.
The Recipe description box in the dialog gives you a brief
description of each recipe as you scroll through the list in the
Recipe drop-down list.
3 In the Machine format list, select the machine format that
you want applied to the design when created.
4 Click OK.
You see a new design window.

Editing Designs 93
Opening and Closing Designs
Pacesetter BES Lettering 2 allows you to open designs in a
wide variety of file formats. When you open a design file in the
design window, your single design file retains the stitches for
that design.
To open an existing design:
1 Do one of the following:
Click the Open tool on the Quick Access toolbar
Click the Pacesetter Button and select Open from
the menu.
You see the Open Design dialog box.
2 In the Look in list, browse to the location of the file you want
to open.
3 In the Files of type list, select the format for the design you
want to open.
4 In the File name box, enter the file name, or select the file
you want to open by clicking the file.
5 Select Preview to view a thumbnail (a small representation)
of the design.
6 Click Open.
To view the contents of a zip (compressed) file, select the zip
file and click Open. Select the design you want to open from
the unzipped file list and click OK.
To open a file you have recently worked on, click the Pacesetter
Button and locate it in the “Recently used designs” list.
To close a design:
• Click the Pacesetter Button , and select Close or
Close All from the menu.

94 Pacesetter BES Lettering 2
Instruction Manual
Opening Files with the Browser
The Browser is a very convenient way to search for and open
files. It allows you to search for and open embroidery files from
multiple directories simultaneously.
So, if you have design files stored on a number of different
media - for example, a CD, a USB device, as well as on your
hard drive - it is possible to look in all of these places at once
with the Browser feature. The Browser displays a preview
image of the design in its preview pane, as well as the design’s
name, overall dimensions, stitch count, and the number of
colors that it uses.
You can also use the Browser dialog to merge a design into the
current design. (For more information, see “Merging Design
Files.”)
To open files using the Browser:
1 Click the Accelerator button, and then click the Browser
tool.
You see the (empty) Browser window.

Editing Designs 95
2 Click in the check boxes next to the directories you want to
browse for designs; to look in multiple locations, simply
check more boxes.
When you use the Browser, you can speed up your search by
restricting it to folders where you know your designs to be.
To narrow the scope of the search, click the small plus + sign
next to a folder to expand it. This will display the sub-folders it
contains; you can then check only those sub-folders that
contain the design files you want to browse.
3 By default, the search will only
include those folder that are
checked in the list on the left of the browser window.
However, you can use the following options to expand the
scope of the Browser’s search:
To include all folders nested within
the selected folders,
check the “Include subfolders” box at the bottom of the
dialog.
To expand the search to include compressed “ZIP” files,
check the “Include ZIP flies” box at the bottom of the
dialog.
If “Include sub-folders” is checked, this may add a significant
amount of time to the search, depending on how many files are
in the folder or folders you have selected.
If possible, it is better to narrow down you search first, in step
2), to the folder or folders that contain your designs.
Similarly, looking in ZIP files may increase the time needed to
search for design, so it is advisable to check this option only if
you expect that the designs you need are in a “zipped” folder.
If the search does seem to be taking too long, you can always
press the Esc key to cancel it, and start a more limited search.
The preview pane shows a thumbnail image of each design
present in the directory or directories you have selected.

96 Pacesetter BES Lettering 2
Instruction Manual
4 Do one of the following:
To select a single design, click on the thumbnail image.
To select a number of separate designs, click on each
individually while holding down Ctrl.
To select a series of designs, click the first thumbnail,
then shift + click on the final thumbnail in the range.
The selected files are highlighted.
5 Do one of the following:

Editing Designs 97
To open the selected file or files in a new window, click
the Open button.
The selected design or designs open in your workspace; if
multiple designs were opened, each will open in its own
tab.
To merge the selected file or files into the current design,
click the Merge button.
The embroidery file (or files) will open.
Choosing the Default Recipe
You choose one of the pre-installed recipes through the New
design dialog each time you open a new design. The NORMAL
recipe is the default for new designs; however, you can set the
default to a different recipe through the Preferences dialog box.
To open the Preferences dialog box, go to the View tab on the
ribbon and click on the Preferences button.
The recipe you choose then becomes the default for all
subsequent design files that you open. The recipes containing
fabric settings are applied to all the lettering you create in that
design.

98 Pacesetter BES Lettering 2
Instruction Manual
You can also change the recipe (style) of a design, or part of a
design, after it has been created. With the Select tool active,
select part of the design (or, use Ctrl+A to select all of the
design) and then right-click; from the context menu that opens,
chose Apply Style, and then select the desired recipe from the
list.
Saving a Design
The Save As command lets you save an alternative version of
the design with a different name, location, or file format. Save
As is used when you want to keep your original design and
create another design with slight modifications. The Save
command saves the changes you make to the current design.
To save a design:
1 Pacesetter Button Do one of the following:
Click the Pacesetter Button , and choose Save As
from the menu
On the Quick Access Toolbar, choose the Save As tool.
You see the Save As dialog box.
2 In the Save in list, browse to the location you want to save
your file.
3 In the File Name box, enter the file name for the design you
want to save.
4 In the Save As type list, select the file type you want the
design to be saved as.
5 Click Save.
To save changes to the current design:
• Do one of the following
Click the Pacesetter Button , and choose Save
from the menu.
On the Quick Access Toolbar, click the Save button.
 Loading...