

Page 1
Page 2

Page 3
Contents
Safety
Emergency
Controls
Driving
Maintenance
Information
Index
1
2
3
4
5
6
7
Page 4

Contents
©2013 Paccar Inc - All Rights Reserved
This manual illustrates and describes the operation of features or equipment which may be either standard or optional on
this vehicle. This manual may also include a description of features and equipment which are no longer available or were
not ordered on this vehicle. Please disregard any illustrations or descriptions relating to features or equipment which are
not on this vehicle.
PACCAR reserves the right to discontinue, change specications, or change the design of its vehicles at any time without
notice and without incurring any obligation.
The information contained in this manual is proprietary to PACCAR. Reproduction, in whole or in part, by any means is strictly
prohibited without prior written authorization from PACCAR Inc.
Page 5

Safety
Introduction
Safety Alerts . . . . . . . . . . . . . . . . . . 1-3
Foreword . . . . . . . . . . . . . . . . . . . 1-5
Important Reference Number . . . . . . . . . . . 1-6
Illustrations. . . . . . . . . . . . . . . . . . . 1-7
General Safety Instructions. . . . . . . . . . . . 1-7
1
(07/19/2013) Y53-1181-1B1 1-1
Page 6

Page 7
Introduction
Introduction
Safety Alerts
Please read and follow all of the
safety alerts contained in this manual.
They are there for your protection
and information. These alerts can
help you avoid injury to yourself, your
passengers, and help prevent costly
damage to the vehicle. Safety alerts
are highlighted by safety alert symbols
and signal words such as "WARNING",
"CAUTION", or "NOTE". Please do not
ignore any of these alerts.
WARNING
WARNING!
The safety alert following this symbol
and signal word provides a warning
against operating procedures which
could cause death or injury. They could
also cause equipment or property
damage. The alert will identify the
hazard, how to avoid it, and the
probable consequence of not avoiding
the hazard.
Example:
WARNING!
Do not carry additional fuel containers
in your vehicle. Fuel containers, either
full or empty, may leak, explode, and
cause or feed a re. Do not carry extra fuel containers. Even empty ones
are dangerous. Failure to comply may
result in death, personal injury, equipment or property damage.
1
(07/19/2013) Y53-1181-1B1 1-3
Page 8
Introduction
CAUTION
1
CAUTION
The safety alert following this symbol
and signal word provides a caution
against operating procedures which
could cause equipment or property
damage. The alert will identify the
hazard, how to avoid it, and the
probable consequence of not avoiding
the hazard.
Example:
CAUTION
Continuing to operate your vehicle
with insufcient oil pressure will cause
serious engine damage. Failure to
comply may result in equipment or
property damage.
NOTE
NOTE
The alert following this symbol and
signal word provides important
information that is not safety related
but should be followed. The alert
will highlight things that may not be
obvious and is useful to your efcient
operation of the vehicle.
Example:
NOTE
Pumping the accelerator will not assist
in starting the engine.
1-4 Y53-1181-1B1 (07/19/2013)
Page 9

Introduction
Foreword
This manual contains information for
the correct operation and maintenance
of your PACCAR engine. Read and
follow all safety instructions. Refer
to the WARNING in the “General
Safety Instructions” beginning on
page 1-7. Keep this manual with
the equipment. If the equipment is
traded or sold, give the manual to
the new owner. The information,
specications, and recommended
maintenance guidelines in this manual
are based on information in effect
at the time of printing. PACCAR
reserves the right to make changes
at any time without obligation. If you
nd differences between your engine
and the information in this manual,
contact your local PACCAR Authorized
Repair Location or write to PACCAR
c/o PACCAR Engines, PO Box 1518,
Bellevue, WA 98009. The latest
technology and the highest quality
components were used to produce this
engine. When replacement parts are
needed, we recommend using only
genuine parts from PACCAR.
1
(07/19/2013) Y53-1181-1B1 1-5
Page 10
Introduction
Important Reference
1
Number
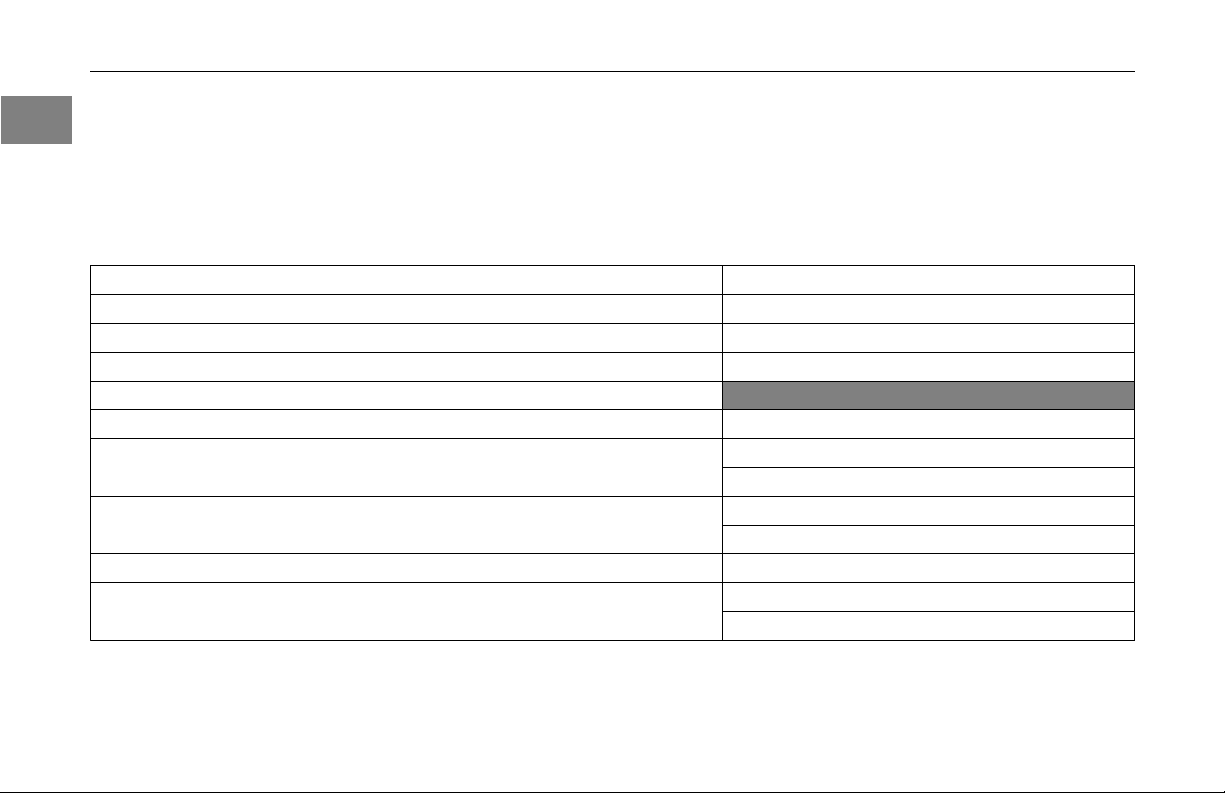
Fill in the part name and number in the blank spaces provided below. This will give you a reference whenever service or maintenance is required.
Part Name Number
Engine Model
Engine Serial Number (ESN)
Oil Type (Use API CJ-4 oil only)
Filter Part Numbers:
Air Cleaner Element
Lubricating Oil
Fuel (Use ultra-low sulfur diesel fuel only)
Coolant
Belt Part Numbers:
1-6 Y53-1181-1B1 (07/19/2013)
Page 11
Introduction
Illustrations
General Information
Some of the illustrations throughout
this manual are generic and will not
look exactly like the engine or parts
used in your application.
The illustrations are intended to show
repair or replacement procedures.
The procedure will be the same for all
applications, although the illustration
can differ.
General Safety Instructions
Important Safety Notice
WARNING!
Improper practices, carelessness, or
ignoring any warnings may cause
death, personal injury, equipment or
property damage.
Before performing any repair, read and
understand all of the safety precautions
and warnings. The following is a list of
general safety precautions that must
be followed to provide personal safety.
Failure to follow these instructions
may cause death or injury. Special
safety precautions are included in the
procedures when they apply.
• Use the proper tool for manually
rotating the engine. Do not attempt
to rotate the crankshaft by pulling
or prying on the fan. This practice
can cause death, personal injury,
equipment damage, or damage to
the fan blades, causing premature
fan failure.
• Work areas should be dry, well lit,
ventilated, free from clutter, loose
tools, parts, ignition sources and
hazardous substances.
• Wear protective glasses and
protective shoes when working.
• Do not wear loose-tting or torn
clothing. Remove all jewelry when
working.
• Before beginning any repair,
disconnect the battery (negative
[-] cable) and discharge any
capacitors.
• Put a "DO NOT OPERATE" tag in
the operator's compartment or on
the controls.
• Allow the engine to cool before
slowly loosening the coolant ller
cap to relieve the pressure from
the cooling system.
1
(07/19/2013) Y53-1181-1B1 1-7
Page 12

Introduction
1
stands to support the vehicle
or vehicle components before
performing any service work.
Do not work on anything that is
supported only by lifting jacks or
a hoist.
Always use blocks or proper
•
• Before removing or disconnecting
any lines, ttings, or related items,
relieve all pressure in the air, oil,
fuel, and cooling systems. Remain
alert for possible pressure when
disconnecting any device from a
system that contains pressure.
High pressure oil or fuel can cause
death or personal injury.
• Always wear protective clothing
when working on any refrigerant
lines and make sure that the
workplace is in a well ventilated
area. Inhalation of fumes can
cause death or personal injury.
To protect the environment,
liquid refrigerant systems must
be properly emptied and lled
using equipment that prevents
the release of refrigerant gas.
Federal law requires capturing
and recycling refrigerant.
• When moving or lifting any heavy
equipment or parts, make sure
to use proper techniques and
assistance. Ensure all lifting
devices such as chains, hooks, or
slings are in good condition and
are of the correct load capacity.
Make sure any lifting devices are
positioned correctly.
• Corrosion inhibitors and lubricating
oils may contain alkali. Do not get
the substance in eyes and avoid
prolonged or repeated contact
with skin. Do not swallow. In
case of contact, immediately wash
skin with soap and water. In case
of harmful contact, immediately
contact a physician. Always keep
any chemicals OUT OF REACH
OF CHILDREN.
• Naptha and Methyl Ethyl Ketone
(MEK) are ammable materials
and must be used with caution.
Follow the manufacturer's
instructions to ensure safety when
using these materials. Always
keep any chemicals OUT OF
REACH OF CHILDREN.
• When working on the vehicle,
be alert for hot parts on systems
that have just been turned off,
exhaust gas ow, and hot uids in
lines, tubes, and compartments.
Contact with any hot surface may
cause burns.
• Always use tools that are in good
condition. Make sure you have
the proper understanding of how
to use the tools before performing
any service work. Use only
genuine replacement parts from
PACCAR.
1-8
Y53-1181-1B1 (07/19/2013)
Page 13

Introduction
• Always use the same fastener
part number (or equivalent) when
replacing items. Do not use
a fastener of lesser quality if
replacements are necessary.
• Do not perform any repair when
impaired, tired, fatigued or after
consuming alcohol or drugs that
can impair your functioning.
• Some state and federal agencies
in the United States of America
have determined that used engine
oil can be carcinogenic and can
cause reproductive toxicity. Avoid
inhalation of vapors, ingestion,
and prolonged contact with used
engine oil.
• Coolant is toxic. If not reused,
dispose of coolant in accordance
with local environmental
regulations.
• California Proposition 65 Warning
- Diesel engine exhaust and some
of its constituents are known to
the State of California to cause
cancer, birth defects, and other
reproductive harm.
• The catalyst substrate located
in the Diesel Particulate Filter
contains Vanadium Pentoxide.
Vanadium Pentoxide has been
determined by the State of
California to cause cancer. Always
wear protective clothing and eye
protection when handling the
catalyst assembly. Dispose of the
catalyst in accordance with local
regulations. If catalyst material
gets into the eyes, immediately
ood eyes with water for a
minimum of 15 minutes. Avoid
prolonged contact with skin. In
case of contact, immediately wash
skin with soap and water. In case
of harmful contact, immediately
contact a physician.
CAUTION
Corrosive chemicals can damage the
engine. Do not use corrosive chemicals on the engine. Failure to comply may result in equipment or property
damage.
1
(07/19/2013) Y53-1181-1B1 1-9
Page 14

Page 15

WHAT TO DO IF...
You Need Roadside Assistance . . . . . . . . . . 2-3
Stop Engine Lamp Turns On . . . . . . . . . . . 2-3
Engine Oil Pressure Lamp Turns On. . . . . . . . 2-4
Check Engine Lamp Turns On . . . . . . . . . . 2-5
Engine is Overheating . . . . . . . . . . . . . . 2-5
EMERGENCY
2
(07/19/2013) Y53-1181-1B1 2-1
Page 16

Page 17

WHAT TO DO IF...
WHAT TO DO IF...
You Need Roadside Assistance
Call toll-FREE to talk to someone at
the PACCAR Customer Center:
• Kenworth customers,
call 1-800-KW-ASSIST
(1-800-592-7747).
• Peterbilt customers, call
1-800-4-PETERBILT
(1-800-473-8372).
• Open 24-7-365 days a year.
• They can help you get roadside
assistance.
• They have a custom mapping
system which locates authorized
PACCAR engine dealers and
Independent Service Providers
(ISPs) near you and lists types
of services offered, hours of
operation and contact information.
• They can assist with jump and
pull starts, tires, trailers, nes and
permits, chains, towing, hazardous
clean-up, out of fuel (roadside),
mechanical repairs and preventive
maintenance services.
• They have multilingual agents and
access to a translation service
to ensure quality assistance
for customers who speak any
language.
• They can’t answer your warranty
questions but can get you in
contact with an authorized dealer
who can.
• The PACCAR Customer Center
service is FREE.
Stop Engine Lamp Turns On
Stop Engine Lamp - If the
Stop Engine warning lamp
illuminates, it means you
have a serious engine system
problem.
WARNING!
This should be considered an emergency. You should stop the vehicle as
safely as possible and turn OFF the ignition. The vehicle must be serviced
and the problem corrected before driving again. Failure to do so may result
in personal injury, severe engine damage, equipment or property damage.
2
(07/19/2013) Y53-1181-1B1 2-3
Page 18
WHAT TO DO IF...
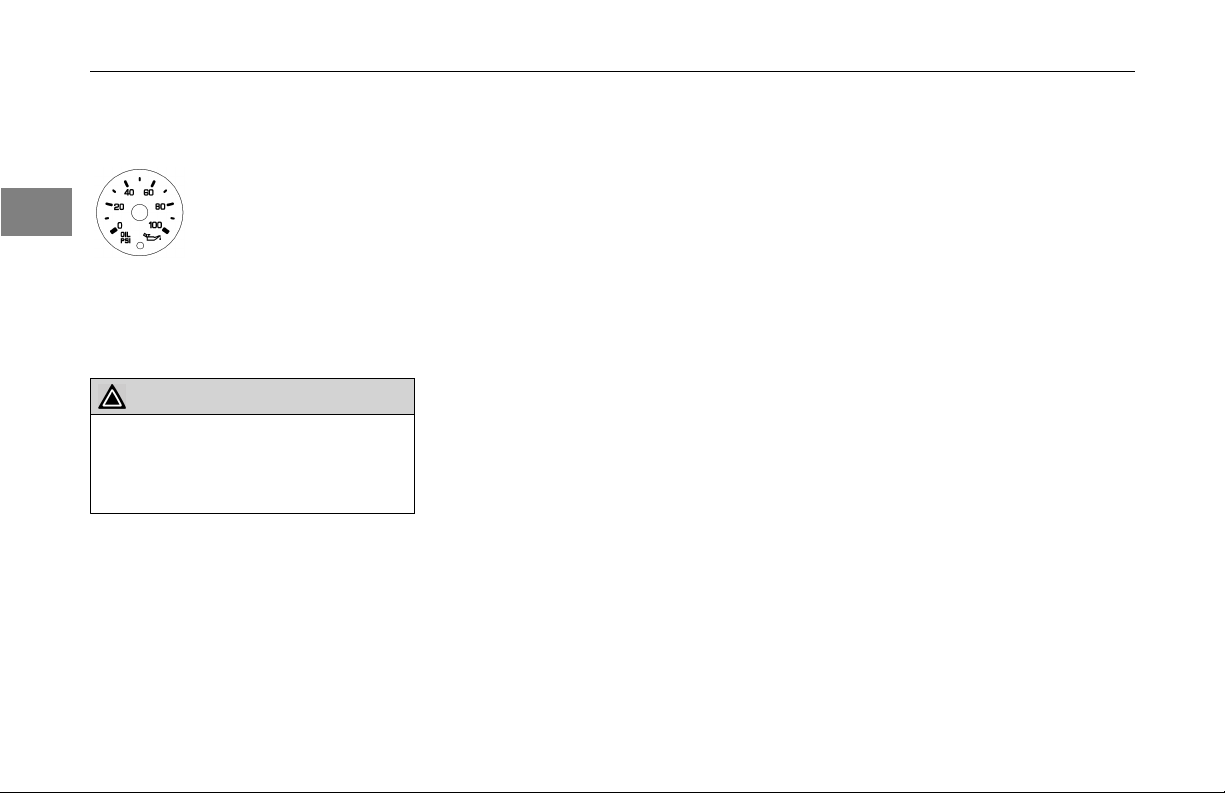
Engine Oil Pressure Lamp Turns On
Engine Oil Pressure Gauge
- It is important to maintain
2
Continuing to operate your vehicle
with insufcient oil pressure may
cause severe engine damage, equipment or property damage.
oil pressure within acceptable
limits. If oil pressure drops
below the minimum psi a
Red Warning Lamp on the oil
pressure gauge and the Stop
Engine Lamp will come ON.
CAUTION
• If the oil pressure fails to rise within
10 seconds after the engine starts,
stop the engine and determine the
cause.
• See Lubricating Oil System on
page 5-12, for the correct oil
pressure ranges for your vehicle's
engine.
• If the oil pressure suddenly drops,
or the audible alarm and engine
oil pressure warning light come on
while driving, do the following:
1. Slow down carefully.
2. Move a safe distance off the road
and stop.
3. Place the transmission in
neutral and set the parking
brake. (See Parking Brake
Valve and OPERATING THE
TRANSMISSION in your
vehicle Operator's Manual,
for transmission shifting and
parking brake information.)
4. Turn OFF the engine.
5. Turn ON the emergency asher
and use other warning devices to
alert other motorists.
6. Wait a few minutes to allow oil
to drain into the engine oil pan,
and then check the oil level. (See
Inspection of the Engine Oil Level
on page 5-4.)
7. Add oil if necessary. If the problem
persists, contact an authorized
PACCAR engine dealer as soon
as possible.
2-4
Y53-1181-1B1 (07/19/2013)
Page 19
WHAT TO DO IF...
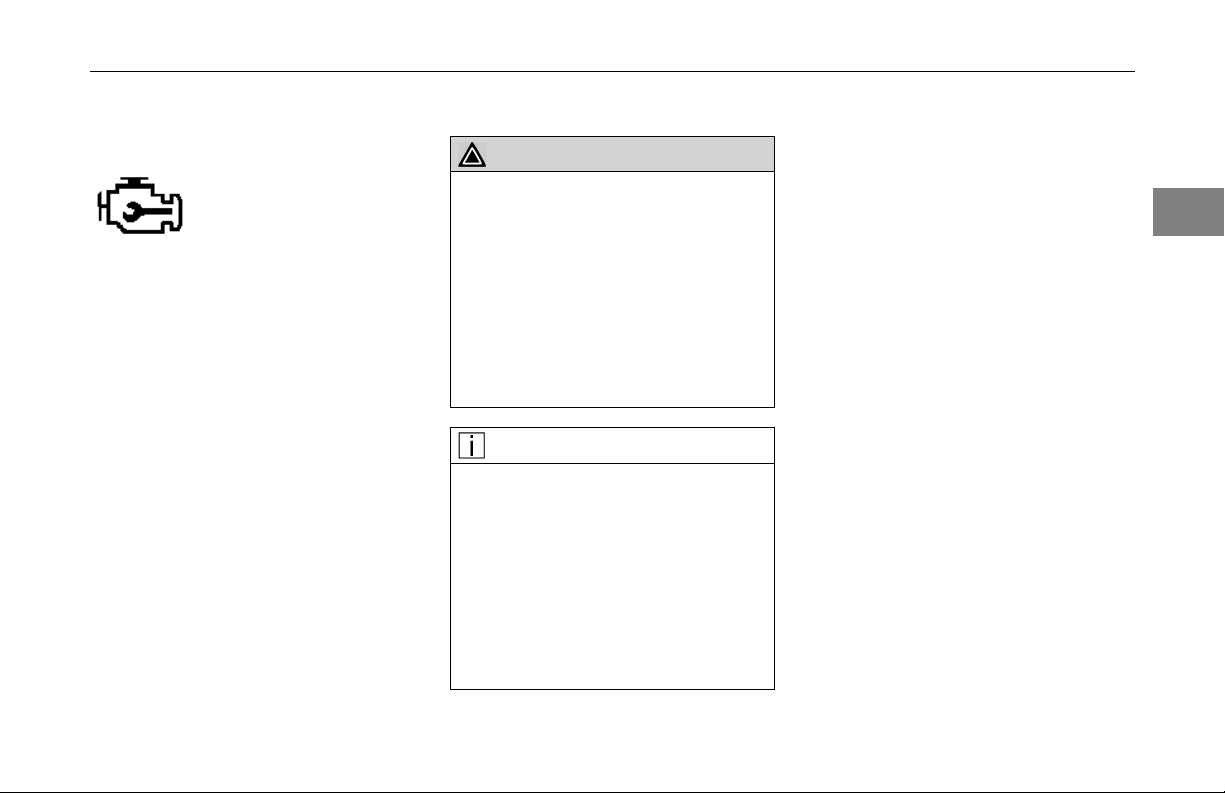
Check Engine Lamp Turns On
Check Engine Lamp - Turns
on when a problem exists, but
the vehicle can still be safely
driven. Vehicle should be
serviced to correct the problem
but the situation should not be
considered an emergency.
Engine is Overheating
CAUTION
The cooling system may overheat
if the engine coolant is at the minimum level. A sudden loss of coolant,
caused by a split hose or broken hose
clamp could also lead to an overheat
condition. Always inspect to ensure
hoses and clamps are not cracked,
worn, or loose. Failure to comply may
result in equipment or property damage.
NOTE
The system may also temporarily overheat during severe operating conditions such as:
• Climbing a hill on a hot day.
• Stopping after high-speed/highload driving.
• Debris blocking air ow through
the cooling module (radiator).
If the engine coolant temperature
warning lamp comes on and the
audible alarm sounds showing an
overheat condition, or if you have any
other reason to suspect the engine
may be overheating, DO NOT TURN
OFF THE ENGINE unless a low water
warning device indicates a loss of
coolant. Follow these steps:
• Reduce engine speed or stop.
When stopped, place the
transmission in neutral and set the
parking brake. See the vehicle
operator's manual for instructions
on transmission shifting and
parking brake information.
• Check to ensure that the oil
pressure gauge reads normal.
• Increase the engine speed to
1,100 to 1,200 rpm maximum for
2-3 minutes.
2
(07/19/2013) Y53-1181-1B1 2-5
Page 20
WHAT TO DO IF...
• Monitor the engine temperature.
After the temperature returns to
normal, allow the engine to idle
3–5 minutes before shutting it off.
2
This allows the engine to cool
gradually and uniformly.
• If the overheating came from
severe operating conditions, the
temperature should have cooled
by this time.
• Check the coolant level at the
cooling module surge tank.
WARNING!
To reduce the chance of personal injury and/or vehicle damage caused by
engine overheating, never leave the
engine idling when the vehicle is unattended. If the engine overheats, immediate action is required to correct
the condition. Continued unattended
operation of the engine, even for a
short time, may result in serious engine damage or a re. Failure to comply may result in death, personal injury,
equipment or property damage.
WARNING!
Removing the ll cap on a hot engine
can cause scalding coolant to spray
out and burn you badly. If the engine has been in operation within the
previous 30 minutes, be very careful in removing the ll cap. Protect
face, hands, and arms against escaping uid and steam by covering the
cap with a large, thick rag. Do not
try to remove it until the surge tank
cools down or if you see any steam
or coolant escaping. In any situation,
remove the cap very slowly and carefully. Be ready to back off if any steam
or coolant begins to escape. See the
vehicle operator's manual for instructions on checking and lling the cooling module surge tank.
2-6 Y53-1181-1B1 (07/19/2013)
Page 21
WHAT TO DO IF...
CAUTION
Prolonged periods of idling after the
engine has reached operating temperatures can decrease engine temperature and could cause engine damage
from inadequate lubrication. The normal torsional vibrations generated can
also cause transmission wear. An idle
shutdown feature, available on PACCAR engines, can be programmed to
shut the engine down after a period of
low idle operation with no driver activity. A ashing warning lamp will inform
the driver of an impending shutdown.
Failure to comply may result in equipment or property damage.
CAUTION
If the truck is equipped with PTO
equipment, the engine shutdown system can be deactivated when the PTO
is operational; however, engine idle
periods should not exceed 5 minutes
whenever possible. Failure to comply
may result in equipment or property
damage.
2
(07/19/2013) Y53-1181-1B1 2-7
Page 22

Page 23

Operating Instructions
Engine Warning Lamps . . . . . . . . . . . . . 3-3
Engine Operating Range . . . . . . . . . . . . . 3-6
Engine Braking System . . . . . . . . . . . . . 3-7
Controls
3
(07/19/2013) Y53-1181-1B1 3-1
Page 24

Page 25
Operating Instructions
Operating Instructions
Engine Warning Lamps
General Information
The following engine warning lamps
cover only the lamps controlled by the
engine’s Electronic Control Module
(ECM). Please refer to the vehicle
Operator's and Engine Aftertreatement
Systems manual for additional warning
lamp information.
Check Engine Lamp
The check engine warning lamp will
illuminate when a problem exists,
but the vehicle can still be safely
driven. The vehicle should be serviced
to correct the problem, but the
situation should not be considered an
emergency.
The lamp will also illuminate when a
DPF regeneration or addition of Diesel
Exhaust Fluid is required. Another
function of the check engine lamp is to
warn the operator of an impending idle
shutdown. When the idle shutdown
timer is 30 seconds from expiring, the
engine ECM begins ashing the check
engine warning lamp once per second.
When the timer expires, the ECM will
turn off the warning lamp and shut
down the engine.
3
(07/19/2013) Y53-1181-1B1 3-3
Page 26
Operating Instructions
Stop Engine Lamp
The stop engine warning lamp will
3
illuminate, and an audible tone will
sound, when a major engine problem
exists.
WARNING!
This should be considered an emergency. You should stop the vehicle as
safely as possible and turn OFF the ignition. The vehicle must be serviced
and the problem corrected before driving again. Failure to comply may result
in personal injury, severe engine damage, equipment or property damage.
For engines with the engine protection
shutdown feature enabled, the
stop engine lamp will begin to
ash 30 seconds before the engine
automatically shuts down. The
warning lamp alerts the operator to the
impending shutdown.
The lamp will also illuminate when
the Diesel Exhaust Fluid (DEF) tank
is almost empty or the soot level in
the DPF is at full capacity. At this
level warning, regeneration cannot be
performed and engine power will be
derated.
Engine may automatically shut down
if the Check Engine light and Stop
Engine light are illuminated and the
operator does not correct the condition.
NOTE
The Malfunction Indicator Lamp
(MIL) will illuminate if the OBD (Onboard Diagnostics) system detects
a possible emissions system failure.
The vehicle should be brought in
for service at the next opportunity to
ensure the condition is corrected.
3-4 Y53-1181-1B1 (07/19/2013)
Page 27
Operating Instructions
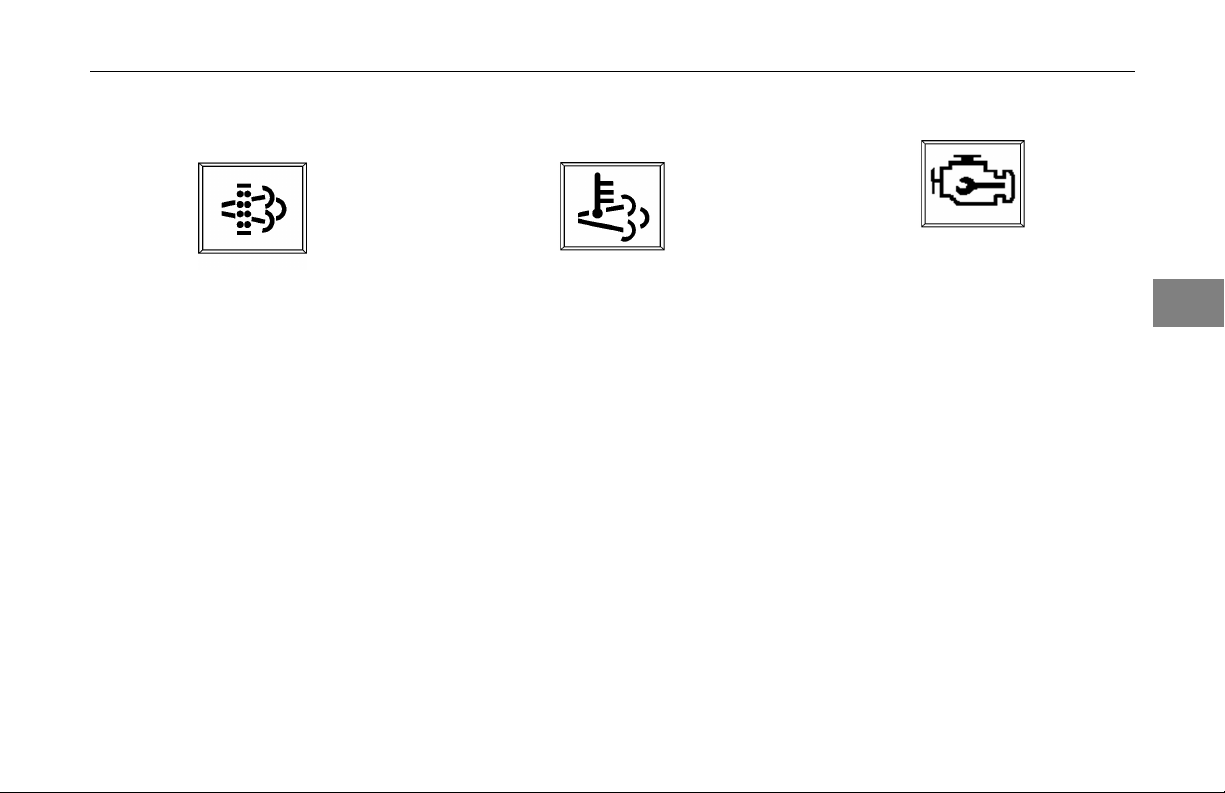
Diesel Particulate Filter (DPF)
Warning Lamp
DPF Warning Lamp
Refer to Engine Aftertreatment
Systems Operator's Manual for
additional information.
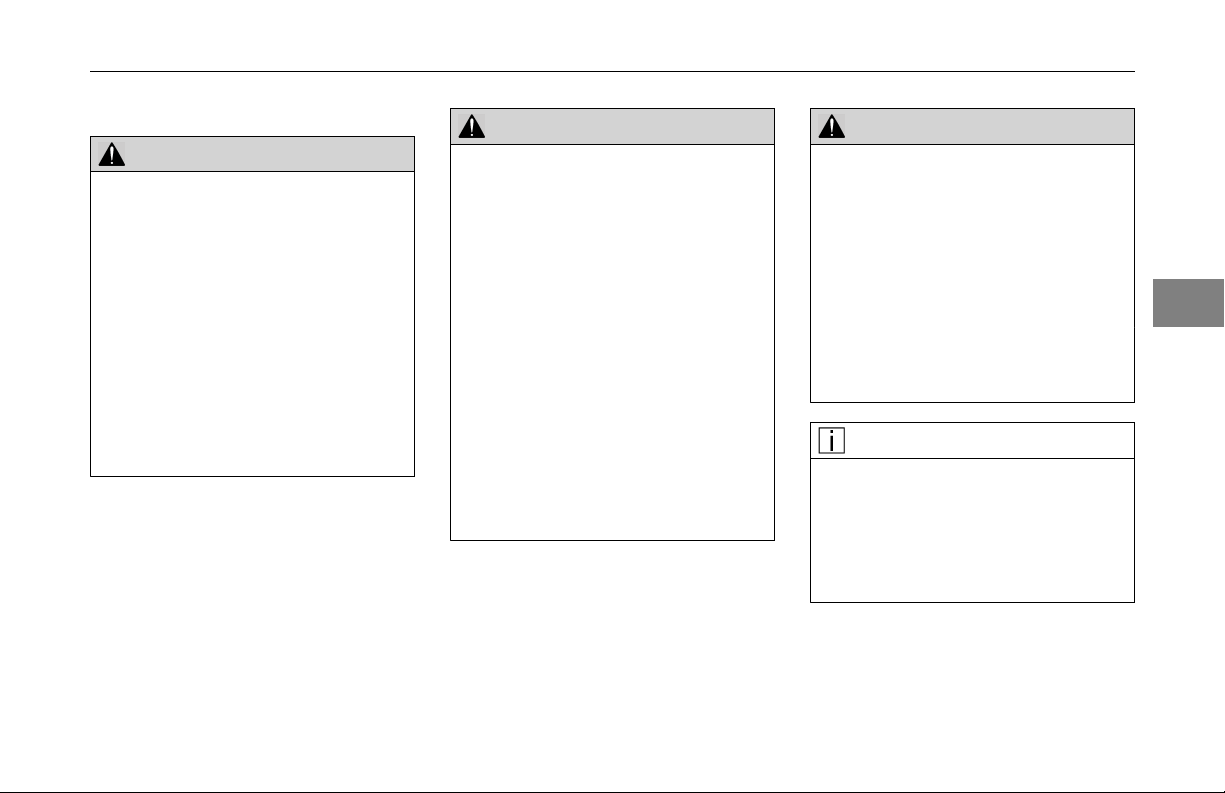
High Exhaust System Temperature
(HEST) Warning Lamp
HEST Warning Lamp
Refer to Engine Aftertreatment
Systems Operator's Manual for
additional information.
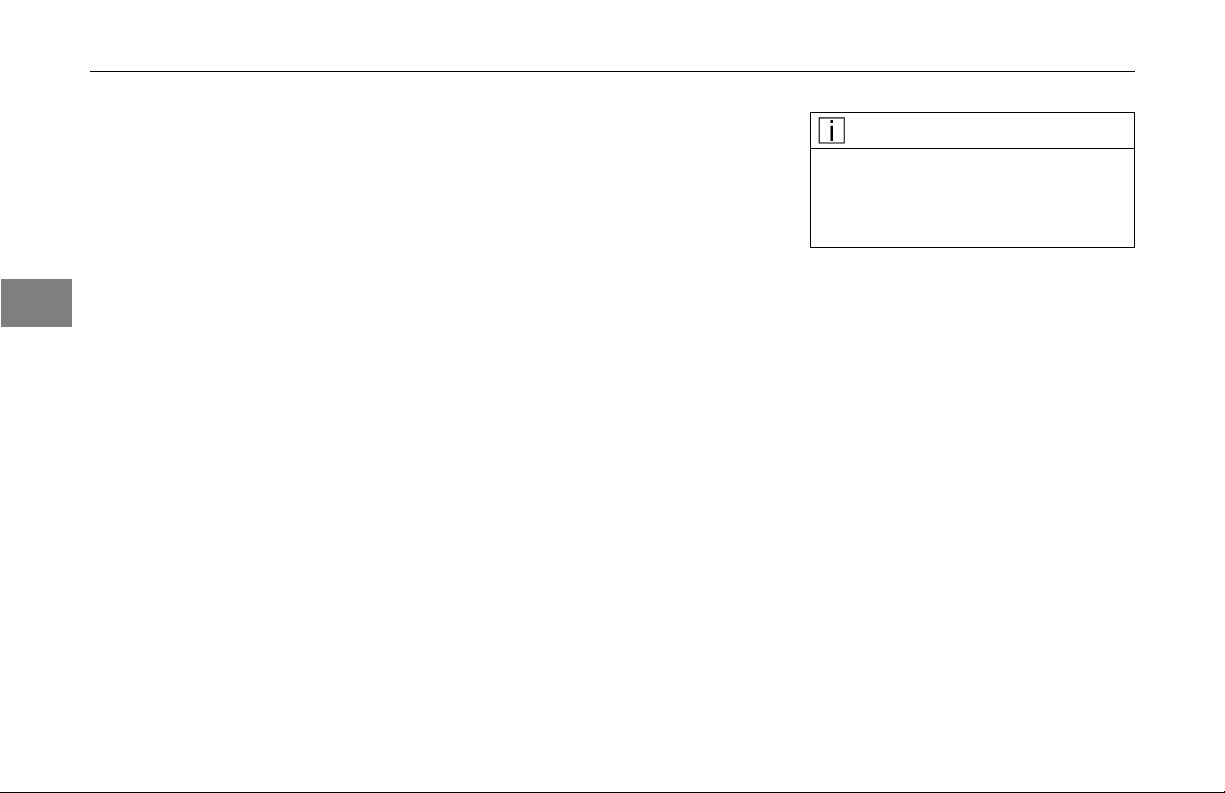
Check Engine Lamp (CEL)
Check Engine Lamp
Refer to Engine Aftertreatment
Systems Operator's Manual for
additional information.
3
(07/19/2013) Y53-1181-1B1 3-5
Page 28

Operating Instructions
Diesel Exhaust Fluid (DEF) Lamp
Diesel Exhaust Fluid (DEF) Lamp
Refer to Engine Aftertreatment
3
Systems Operator's Manual for
additional information.
Engine Operating Range
General Information
CAUTION
Operating the engine at full throttle below peak torque will shorten engine
life to overhaul, can cause serious engine damage, and is considered engine abuse. Do not operate the engine
at full throttle operation below peak
torque rpm for more than 30 seconds.
Failure to comply may result in equipment or property damage.
PACCAR engines are designed to
operate at full throttle under momentary
conditions down to peak torque engine
speed. This is consistent with
recommended operating practices.
CAUTION
Operating the engine beyond the maximum engine speed can cause severe
engine damage. Use proper operating
techniques for the vehicle to prevent
engine overspeed. The maximum engine speed specication is listed in
the “General Engine Specications” on
page 5-12. Failure to comply may result in equipment or property damage.
NOTE
For applications with high idle time,
to help reduce soot loading in the aftertreatment system, avoid long periods of idling. If idling is required
increase idle speed using the cruise
control function.
3-6 Y53-1181-1B1 (07/19/2013)
Page 29
Operating Instructions
Engine Braking System
WARNING!
Do not operate the engine compression brake when driving/operating
your vehicle bobtail or with a loaded
or unloaded trailer on road surfaces
with poor traction (wet, icy, or snow
covered roads) or in heavy trafc.
Braking caused by the normal operation of the engine compression brake
could cause you to lose control of the
vehicle resulting in an injury accident.
Failure to comply may result in death,
personal injury, equipment or property
damage.
WARNING!
The service brakes must be used in
an emergency. The engine compression brake alone might not stop the vehicle fast enough to prevent an accident. The engine compression brake
is NOT intended as the primary brake
for the vehicle, nor is it an emergency
brake. The engine compression brake
only helps the service brakes by using
engine backpressure to slow the drivetrain. Use the service brakes for quick
stops. You could be seriously injured
if you relied only on the engine compression brake to stop the vehicle in
an emergency. Failure to comply may
result in death, personal injury, equipment or property damage.
WARNING!
Do not use the compression brake
when operating on road surfaces with
poor traction (such as wet, icy, or
snow covered roads or gravel). Compression brakes can cause the wheels
to skid on a slippery surface. You
could lose control of the vehicle and/or
jackknife if the wheels begin to skid,
resulting in an accident. Failure to
comply may result in death, personal
injury, equipment or property damage.
NOTE
If your vehicle is equipped with antilock brakes (ABS), operation of the
compression brake (if turned ON) may
be interrupted if the ABS system detects wheel slip due to operation on
slippery surfaces.
3
(07/19/2013) Y53-1181-1B1 3-7
Page 30
Operating Instructions
An engine compression brake is
standard on the PACCAR MX-13
engine. When activated, the engine
compression brake creates a braking
effect on the drive wheels. This
device uses engine power to slow
the vehicle down. Because it can
help keep your vehicle’s brakes from
3
overheating, it can save wear and tear
on the service brakes. However, the
engine compression brake is not an
emergency brake.
Ideally (on normal road surfaces),
you should slow your vehicle with the
compression brake (where permitted
by law) and use the service brakes only
for stopping completely. Operating this
way will greatly prolong the life of the
service brakes.
Compression Brake
With the compression brake switch
ON, the brake automatically creates its
braking effect when you remove your
foot from the accelerator pedal.
The brake switch is located on the
accessory dash panel. It controls
whether the brake is ON (ready to slow
the vehicle down) or OFF (no braking
action).
• Do not use the engine
compression brake to slow
the vehicle down when you are
bobtailing or pulling an empty
trailer.
• Make sure the brake is OFF before
starting the engine.
• After the engine is started, warmed
up, and you are ready to get under
way, turn the engine compression
brake switch ON for added braking
effect.
NOTE
If your vehicle is equipped with the
Eaton Vorad® system, operation of the
compression brake may be automatically activated.
3-8 Y53-1181-1B1 (07/19/2013)
Page 31

Operating Instructions
Compression Brake Controls
Two (2) switches on the dash panel
control the engine compression brake.
A master switch turns the system ON
or OFF. A second switch, located
next to the master switch, controls
the braking effect. This switch allows
you to choose progressively stronger
braking to slow the vehicle down.
Engine compression brake controls
include:
• On/Off switch.
• 3-position selector switch.
• Clutch switch.
• Throttle sensor.
• Service brake pressure switch.
• Eaton Vorad® Anti-Lock Braking
System.
Engaging conditions for the engine
compression brake are:
• Engine speed must be above
1,000 rpm.
• Coolant temperature must be
above 59°F (15°C).
Deactivation conditions for the engine
compression brake are:
• Accelerator pedal is depressed.
• Clutch pedal is depressed.
• Engine speed falls below 800 rpm.
• ABS control is active.
• Engine ECM recognizes a system
problem.
CAUTION
Operating the engine with a compression brake that will not automatically
deactivate (i.e. when the dash switch
is off, clutch pedal is depressed or
throttle is applied) will cause severe internal engine damage. Do not operate
the engine if the compression brake
will not deactivate. Failure to comply
may result in equipment or property
damage.
3
(07/19/2013) Y53-1181-1B1 3-9
Page 32
Operating Instructions
Engine Compression Brake Level
Switch Operation
There are 2 switches that control your
vehicle’s engine compression brake.
One switch turns the system on/off and
the second switch controls the braking
level. These switches are located on
the dash switch panel.
3
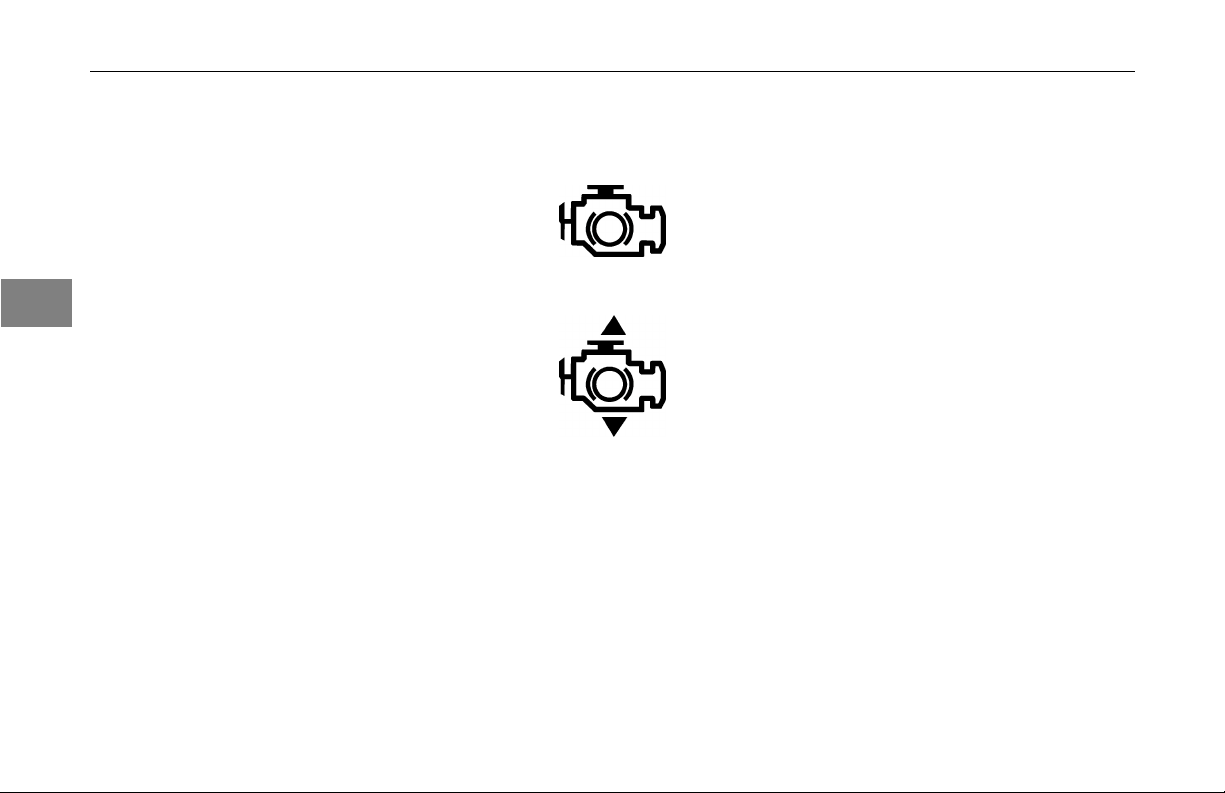
For the 3-position engine compression
brake level switch, there will be 100%
engine braking when the switch is in
the up (HIGH) position. In the middle
(MEDIUM) position, there will be 66%
engine braking. In the down (LOW)
position there will be 33% engine
braking.
With the compression brake switch
ON, the compression brake will be
engaged when the service brake is
applied.
If the cruise control is operated in
conjunction with the compression
brake, the compression brake will
engage to maintain the cruise set
speed.
On/Off Switch Symbol
Compression Brake Level Switch
Symbol
3-10 Y53-1181-1B1 (07/19/2013)
Page 33

Operating Instructions
General Information . . . . . . . . . . . . . . . 4-3
Normal Starting Procedure . . . . . . . . . . . . 4-4
Cold Weather Starting . . . . . . . . . . . . . . 4-5
Starting Procedure After Extended Shutdown or Oil
Change . . . . . . . . . . . . . . . . . . . 4-5
Operating the Engine . . . . . . . . . . . . . . 4-6
Engine Shutdown . . . . . . . . . . . . . . . . 4-6
Electromagnetic Interference (EMI) . . . . . . . . 4-6
Driving
4
(07/19/2013) Y53-1181-1B1 4-1
Page 34

Page 35

Operating Instructions
Operating Instructions
General Information
Correct care of your engine will result
in longer life, better performance, and
more economical operation.
Follow the daily maintenance checks
listed in “Maintenance Schedule” on
page 5-4.
Check the engine oil pressure and
engine coolant gauges, warning lights,
and other gauges daily to make sure
they are operational.
WARNING!
Combustible vapors near the air intake
system could be ingested into the engine, causing the engine to suddenly
accelerate and overspeed. This condition could result in operator losing control of the vehicle if an unexpected increase in engine rpm occurs. Combustible vapors could also cause a re.
Do not operate your vehicle in an area
where combustible chemicals or vapors may be present. Failure to comply may result in death, personal injury,
equipment or property damage.
IT IS THE RESPONSIBILITY OF
THE OWNER AND OPERATOR TO
OPERATE THE VEHICLE IN A SAFE
ENVIRONMENT.
4
(07/19/2013) Y53-1181-1B1 4-3
Page 36

Operating Instructions
Normal Starting Procedure
Starting
1. Ensure the parking brake is set
ON and the transmission shift
lever is in neutral. For automatic
transmissions that have park
position, place the shift lever in
park.
2. With the accelerator pedal in the
idle position, turn the ignition key
to the START position.
3. Release the key after 10 seconds
4
if the engine does not start. Then
wait 10 seconds and try again.
NOTE
If the engine is running, do not increase engine speed (rpm) or operate
the vehicle until the low oil pressure
warning lamp turns off.
CAUTION
Engaging the starter motor for more
than 30 seconds in any 5 minute period may cause it to overheat and can
damage the starter motor.
• If starter is engaged continuously
for 30 seconds, you must wait 5
minutes before trying to start the
engine to allow the starter motor
to cool down.
If the engine does not start, or runs
erratic, follow the procedure under
“Starting After the Fuel Tank Has Run
Dry”, see on page 5-30.
With the key in the ON position, the
engine warning lamps will come on
momentarily and then go out. The
engine warning lamps include:
1. Check engine lamp; yellow in
color.
2. STOP engine lamp; red in color.
3. Diesel Particulate Filter (DPF)
status indicator; yellow in color.
4. High Exhaust System Temperature
(HEST); amber in color.
4-4 Y53-1181-1B1 (07/19/2013)
Page 37
Operating Instructions
Cold Weather Starting
General Information
Follow the “Normal Starting Procedure”
on page 4-4.
Refer to the vehicle operator's manual
instructions for any additional cold
weather starting procedures.
If starting a cold engine, slowly
increase the engine speed. This
provides adequate lubrication to the
bearings and gives ample time to allow
the oil pressure to stabilize.
The use of cold starting aids are
not recommended for ambient
temperatures above 0° F (-18° C).
If an engine must idle for an extended
period of time, it should be done at
a fast idle (1000 rpm maximum) at
coolant temperatures below 150° F
(70° C).
For coolant temperatures below 150°
F (70° C), use a low gear and drive
at moderate engine speed until the
engine coolant has reached operating
temperature. Do not let the engine idle
longer than necessary.
CAUTION
Do not operate the engine at low idle
for long periods of time when the
coolant temperature is below the normal operating range. This could result
in the following:
• Fuel dilution of the lubricating oil
• Carbon buildup in the cylinder
• Sticking of the valves in the
cylinder head
• Reduced performance
• Damage to aftertreatment
components
Starting Procedure After
Extended Shutdown or Oil
Change
General Information
Follow the “Normal Starting Procedure”
on page 4-4.
4
(07/19/2013) Y53-1181-1B1 4-5
Page 38
Operating Instructions
Operating the Engine
Normal
Monitor the oil pressure and coolant
temperature gauges frequently. Refer
to “Lubricating Oil System” and
“Cooling System” for recommended
operating pressures and temperatures.
Shut off the engine if any pressure
or temperature does not meet the
specications.
4
Engine Shutdown
Before Stopping the Engine
NOTE
Do not shut off the engine immediately.
A hot engine stores a great amount of
heat and it does not cool down immediately after it is shut off. Always cool
the engine down before shutting it off.
You will greatly increase its service life.
Idle the engine at 1,000 rpm for 4
minutes. Then low idle for 30 seconds
before shutdown. This will allow
circulating coolant and lubricating oil
to carry heat away from the cylinder
head, valves, pistons, cylinder liners,
turbocharger, and bearings. This way
you can prevent engine damage that
may result from uneven cooling.
Electromagnetic Interference (EMI)
General Information
If not installed correctly, some vehicle
accessories (CB radios, mobile
transmitters, etc.) can generate and
use radio frequency energy that may
cause electromagnetic interference
(EMI) between the accessory and
the electronic controlled fuel system.
Under these conditions, PACCAR
is not liable for any performance
problems with either the fuel system or
the accessory. EMI is not considered
by PACCAR to be an engine failure
and therefore is not warrantable.
4-6 Y53-1181-1B1 (07/19/2013)
Page 39

Operating Instructions
System EMI Susceptibility
PACCAR products are designed
and tested for minimum sensitivity
to incoming electromagnetic energy.
The fuel system EMI susceptibility
has been designed with a high
tolerance against EMI and in most
normal circumstances, if not all,
electromagnetic energy-emitting
devices that meet the Federal
Communications Commission legal
requirements should cause no
interference.
System EMI Radiation Levels
Electronic components are required
to pass various PACCAR and industry
EMI specications. Our testing
has shown that when the engine is
properly installed and maintained, it
will not interfere with properly installed
onboard communication equipment.
If any interference condition is noticed,
follow these suggestions to reduce the
amount of EMI:
1. Locate the accessory receiving
antenna further away.
2. Check with the accessory supplier
representative in your area to:
° Accurately calibrate the
accessory for proper
frequency, power output,
and sensitivity.
° Determine the optimum
antenna location by obtaining
antenna reective energy data
measurements.
° Ensure that the optimum
antenna type and mounting
arrangement is being used.
° Ensure the accessory
equipment is properly
constructed for maximum
ltering to reject incoming
electromagnetic noise.
4
(07/19/2013) Y53-1181-1B1 4-7
Page 40

Page 41

Maintenance Guidelines
Overview . . . . . . . . . . . . . . . . . . . 5-3
Maintenance Schedule . . . . . . . . . . . . . 5-4
Maintenance Specications
General Engine Specications . . . . . . . . . 5-12
Lubricating Oil System . . . . . . . . . . . . . 5-12
Cooling System . . . . . . . . . . . . . . . . 5-13
Filter Specications . . . . . . . . . . . . . . 5-14
Fuel Recommendations . . . . . . . . . . . . 5-14
Warranty and the Use of Biodiesel Fuel . . . . . 5-16
Lubricating Oil Recommendations and Specications 5-17
Coolant Recommendations and Specications . . 5-18
Maintenance Procedures
Oil Pan Drain Plug . . . . . . . . . . . . . . 5-21
Inspection of the Engine Oil Level . . . . . . . . 5-21
Topping Up the Engine Oil . . . . . . . . . . . 5-22
Replacing Engine Oil Filters . . . . . . . . . . 5-23
Maintenance
5
(07/19/2013) Y53-1181-1B1 5-1
Page 42

5
Maintenance
Replacing Fuel Filter . . . . . . . . . . . . . 5-27
Replacing Coolant Filter . . . . . . . . . . . . 5-31
Emergency Repairs . . . . . . . . . . . . . . 5-35
5-2 Y53-1181-1B1 (07/19/2013)
Page 43

Maintenance Guidelines
Maintenance Guidelines
Overview
General Information
PACCAR recommends that the
engine be maintained according to the
maintenance schedule in this section.
If the engine is operating in ambient
temperatures below 0°F (-18°C)
or above 100°F (38°C), perform
maintenance at shorter intervals.
Shorter maintenance intervals are also
required if the engine is operated in a
dusty environment or if frequent stops
are made.
Some of these maintenance
procedures require special tools
or must be completed by qualied
personnel. Contact your local
PACCAR authorized repair location for
detailed information.
If your engine is equipped with
a component or accessory not
manufactured by PACCAR Inc, refer
to the component manufacturer's
maintenance recommendations.
Oil Drain Intervals
Oil drain interval recommendations are
based on vehicle application or engine
duty cycle. PACCAR recommends
the use of high quality lubricating oil
as indicated in the Lubricating Oil
Recommendations in the Maintenance
Specications Section.
5
(07/19/2013) Y53-1181-1B1 5-3
Page 44

Maintenance Guidelines
Severe Duty
Fuel Consumption
Miles per Gallon
Kilometers per Liter
Gross Vehicle Weight
Oil Drain and Filter Interval 25,000 miles/40,000 km
**Vocational vehicle applications include: Agriculture, Concrete Mixers, Construction, Crane, Dumps, Emergency/Fire, Heavy Equipment, Loggers,
Mining, Oil Field, Refuse, Pick-up & Delivery, Snowplows, and Wrecker
Vocational**
Less than 6 MPG
Less than 2.6 km/L
More than 80,000 lb
More than 36,300 kg
800 hours or 12 months
Normal Duty
Line Haul
6 MPG or greater
2.6 km/L or greater
80,000 lb or less
36,300 kg or less
Less than 20% idle time:
60,000 miles/96,000 km
1200 hours or 12 months
More than 20% idle time:
40,000 miles/64,000 km
1200 hours or 12 months
Maintenance Schedule
General Information
5
Perform maintenance at whichever
interval occurs rst. At each scheduled
maintenance interval, perform all
previous maintenance checks that are
due for scheduled maintenance.
This maintenance schedule is for a
Normal Duty Cycle engine operation.
Severe Duty / Vocational applications
will need to adjust mileage, kilometer,
hour, or time interval based on the Oil
Drain Interval Guidelines listed above.
NOTE
NOTE
The crankcase ventilation is good for
the life of the engine.
5-4 Y53-1181-1B1 (07/19/2013)
Page 45

Maintenance Guidelines
Daily or Refueling – Maintenance
Check
• Engine Lubrication Oil Level -
Check/Correct:
To check engine oil level, park
vehicle on level ground and wait 15
minutes after shutting off engine.
° Remove dipstick and wipe it
off with a clean, lint free rag.
° Reinsert dipstick all the way in
and pull it out again to check
oil level.
° Correct oil level is between
the low (L) and high (H) marks
on the dipstick.
• Engine Fuel Filter / Water
Separator – Automatic water
drain, no maintenance required
• Chassis Fuel Filter / Water
Separator – Drain trapped water
(if equipped)
• Air Intake Piping – Inspect:
° Hose/Pipe condition –
deterioration/signs of leaking
° Hose clamps for tightness
° Clearance to other
components
° Check Air Restriction Gauge
• Aftertreatment Exhaust Piping –
Inspect:
° Cracks
° Clearance to other
components (i.e. electrical
harnesses, etc.)
° Hose/pipe condition –
deterioration/signs of leaking
• Cooling Fan – Inspect:
° Cracks
° Clearance to other
components
5
(07/19/2013) Y53-1181-1B1 5-5
Page 46

Maintenance Guidelines
• Engine Coolant Level –
Check/Correct:
With the engine off and
temperature cool:
° Check coolant level. It should
be visible through the clear
plastic surge tank.
° Add coolant as necessary by
removing the pressure cap on
the neck of the surge tank or
sight glass.
° Replacement or top up
coolant should have the same
antifreeze concentration and
5
corrosion inhibitor content
as the original coolant in the
cooling system.
° Always dilute antifreeze to
the correct concentration
based on freeze protection
before adding it to the cooling
system. Adding or using 100%
antifreeze in a cooling system
may result in cooling system
plugging and overheating
problems.
• Diesel Exhaust Fluid (DEF) Level
– Check/Top Up:
NOTE
It is recommended to top up DEF when
refueling. See Engine Aftertreatment
Systems Operator’s Manual for DEF
information.
• Check for any signs of uid
leaks
• Ensure all access caps/covers are
installed and tight.
5-6 Y53-1181-1B1 (07/19/2013)
Page 47

Maintenance Schedule
Maintenance Guidelines
Maintenance Interval Miles Kilometers Hours Months
A 30,000 48,000 900 6
B 60,000 96,000 1,800 12
C
D 180,000 290,000 4,500 24
E 240,000 380,000 5,400 24
F 300,000 480,000 6,750 24
G
H 750,000 1,200,000 12,000
A 12,500 20,000 400 6
B 25,000 40,000 800 12
C
D 160,000 256,000 5,120 24
E 200,000 320,000 6,400 24
F 300,000 480,000 9,000 24
G
H 750,000 1,200,000 12,000
(07/19/2013) Y53-1181-1B1 5-7
120,000 190,000 3,600 24
480,000 770,000 13,500
40,000 64,000 1,280 24
480,000 770,000 13,500
Maintenance Schedule – Normal Duty/Line Haul
48 (4 years)
48 (4 years)
Maintenance Schedule – Severe Duty/Vocational
48 (4 years)
48 (4 years)
5
Page 48

Maintenance Guidelines
Perform maintenance at whichever previous maintenance checks that are
interval occurs rst. At each scheduled due for scheduled maintenance.
maintenance interval, perform all
Recommended Preventative Maintenance Interval
Component
Aftertreatment
System
Air System &
Compressor
5
Maintenance Task
• Aftertreatment Diesel Particulate Filter (DPF) – Clean using DPF cleaning machine.
NOTE
The aftertreatment DPF clean/replace interval is based on the use of lubricating oils that
meet the SAE 10W30 API CJ–4 oil specication.
• Aftertreatment Diesel Exhaust Fluid (DEF) Dosing Unit (DEF Module) Filter – Replace
Air Compressor – Check/Correct for carbon buildup
Air Cleaner – Check/Correct for restriction:
• Service lter element when air cleaner restriction gauge (option) locks in the extreme
high position.
• Hose/pipe condition – deterioration/ signs of leaking
• Hose clamp torque
Recommended Preventative
Maintenance Interval
A B
•
•
D E F
C
G
•
•
H
5-8 Y53-1181-1B1 (07/19/2013)
Page 49

Component
Charge Air System Charge Air Piping – Check/Correct:
Charging /
Cranking System
Cooling System Antifreeze – Check
Maintenance Task
• Hose/pipe condition – deterioration/signs of leaking
• Hose clamps for tightness
• Clearance to other components
Charge Air Cooler – Check/Correct:
• Cracked tubes or header
• Clogged ns/tubes
• Hose/pipe condition – deterioration/signs of leaking
• Hose clamp torque
Electrical Harness/Cables – Check:
• Inspect for loose connections, corrosion, chang, and broken retention clips.
Batteries, Cables, and Connections – Check:
• Condition – electrolyte level, cracks, signs of leaking, overcharging
• Hold–downs – Tightness
• Battery Box Mounting Bolt – Torque
• Coolant composition
• Coolant level
• Coolant protection
Radiator Hoses – Check
• Hose condition, deterioration/signs of leaking
• Hose clamp torque
• Replace Coolant Filter
• Change Extended Life Coolant*
See Extended Life Coolant on page 5-18.
Maintenance Guidelines
Recommended Preventative
Maintenance Interval
A B
•
•
•
•
•
D E F
C
•
H
G
•
•
5
(07/19/2013) Y53-1181-1B1 5-9
Page 50

Maintenance Guidelines
Component
Crankshaft Vibration Damper – Check:
Drive Belts
Engine Lubrication
– Line Haul
Engine Lubrication
– Severe Duty
5
Fuel System • Fuel Filter, Canister and Spin–on Type – Replace
Mounting Bolts Engine Mounting Bolts – Visual check
Valves – Initial
Service
Valves
Maintenance Task
• Inspect for cracks, nicks, leakage
• Check fastener torque
Belts – Check/Correct:
• Condition, signs of wear/ deterioration
• Alignment
Fan Belt Tensioner – Check/Correct:
• Mounting bolt torque
• Tensioner maintains proper belt tension
Poly-v Belts – Replace
Filters and Oil – Change:
• Oil lters
• Oil, less than 20% idle time – every 60,000 mi (96,000 km)
• Oil, greater than 20% idle time – every 40,000 mi (64,000 km)
Filters and Oil – Change:
• Oil lters
• Oil, every 25,000 mi (40,000 km; 800 hours or 12 months)
Valve Clearance:
• Inspect and adjust if necessary
• Valve cover gasket seal – Replace
(Next required service interval: D)
Valve Clearance:
• Adjust
• Valve cover gasket seal – Replace
Recommended Preventative
Maintenance Interval
A B
•
•
•
•
•
•
D E F
C
•
G
•
•
•
H
5-10 Y53-1181-1B1 (07/19/2013)
Page 51

Maintenance Guidelines
Recommended Preventative
Component
* Extended Life Coolant A heavy–duty extended life coolant (ELC) that meets ASTM D 6210 chemical composition specications must be used.
The change interval is 750,000 miles (1,200,000 km) or 12,000 hours on–road use (8 years or 15,000 hours off–highway use) on initial ll with
no extender added. The change interval is 1,000,000 miles (1,600,000 km)/20,000 hours/8 years with an extender addition at 500,000 miles
(800,000 km)/10,000 hours/4 years. Antifreeze is essential for freeze, overheat, and corrosion protection. The use of supplemental coolant
additives (SCAs) is not recommended.
Maintenance Task
NOTE
Follow the manufacturers' recommended maintenance procedures for the starter, alternator, batteries, electrical components, radiator, air compressor, air cleaner, refrigerant compressor, and fan clutch.
Maintenance Interval
A B
D E F
C
G
H
5
(07/19/2013) Y53-1181-1B1 5-11
Page 52

Maintenance Specications
Maintenance
Specications
General Engine
Specications
Horsepower
Firing Order
Crankshaft Rotation (viewed from front of engine) Clockwise
Displacement
Bore and Stroke 5.12 in. (130 mm) × 6.38 in. (162 mm)
Dry Weight (excludes Flywheel and Air Compressor) 2,600 lb. (1,179 kg.)
Idle Speed
Maximum Loaded Engine Speed
Maximum Governed No-Load Engine Speed
Maximum Engine Compression Brake Speed
Lubricating Oil System
5
Oil Pressure At Low Idle (minimum allowable) 27 psi (187 kPa) at 191°F (88°C) oil temperature
Regulated Oil Pressure 72 psi (496 kPa) at 223°F (106°C) oil temperature
Total System Capacity (Oil Pan and New Oil Filters) 42 qt (40.0 liters)
At Road Speed 900-1,900 rpm (minimum
allowable)
See EPA label on top of the valve cover or on the mixer manifold.
See EPA label on page 6-5.
1, 5, 3, 6, 2, 4
784 CID (12.9 liters)
Approximately 650 rpm
1,900 rpm
2,200 rpm
2,100 rpm
40 psi (276 kPa) at 215°F (102°C) oil temperature
5-12 Y53-1181-1B1 (07/19/2013)
Page 53

Cooling System
Maintenance Specications
Coolant Capacity Approximately 14 to 15 gallons (53 to 57 liters) depending on chassis
Minimum Recommended Pressure Cap 15 psi (103 kPa)
Maximum Top Tank Coolant Temperature 111°F (44°C) above outside temperature
WARNING!
Coolant is toxic. Do not get the uid
in eyes. If contact with the eyes occurs, ood eyes with large amounts
of water for 15 minutes. Avoid prolonged or repeated contact with skin.
In case of contact, immediately wash
skin with soap and water. Do not take
internally. If swallowed, seek immediate medical attention. Do not induce
vomiting. Failure to comply may result
in death, personal injury, equipment or
property damage.
Coolant is harmful to the environment.
Unused coolant must be stored as a
toxic hazardous material in leakproof
containers. Used coolant must be processed as industrial chemical waste.
Please follow HAZMAT guidelines with
both used and unused coolants.
model and cab/ sleeper heater options
NOTE
5
(07/19/2013) Y53-1181-1B1 5-13
Page 54

Maintenance Specications
Filter Specications Fuel Recommendations
General Information
WARNING!
PACCAR is not responsible for
problems caused by non-genuine lters
that do not meet PACCAR performance
or durability requirements.
Contact your local PACCAR authorized
repair location for specic part
numbers.
CAUTION
Use of non-genuine oil lters
cause severe engine damage.
can
The use of diesel fuel that has been
mixed with other fuels may cause an
explosion. Do not mix gasoline, alcohol, or gasohol with diesel fuel. Make
sure you know your fuel source and
use the recommended diesel fuel as
indicated in this section of the manual.
Failure to comply may result in death,
personal injury, equipment or property
damage.
5
CAUTION
Dirt or water in the fuel system can
cause severe damage to both the fuel
pump and the fuel injectors. Due to
the precise tolerances of diesel injection systems, it is extremely important
that the fuel be kept clean and free of
dirt or water. Know your fuel source
and make sure all steps are taken for
dispensing or using clean fuel in your
vehicle. Failure to comply may result
in equipment or property damage.
CAUTION
Lighter fuel can reduce economy or
possibly damage fuel system components. Lighter fuels typically do not
have enough lubricity elements in the
fuel to properly lubricate the fuel injection system. Be sure you follow
the fuel recommendations as indicated
in this section of the manual. Failure
to comply may result in equipment or
property damage.
5-14 Y53-1181-1B1 (07/19/2013)
Page 55
Maintenance Specications
CAUTION CAUTION
Using diesel fuels blended with lubri- If ultra-low-sulfur diesel fuel is not PACCAR recommends that the cetane
cants may cause damage to your ex- used, the engine may not meet emis- number of diesel fuel be a minimum
haust aftertreatment system. Service sion regulations, and damage may oc- of 45 for engines that are expected to
intervals for aftertreatment systems cur to the exhaust aftertreatment sys- operate at temperatures below 32°F
will be reduced. Do not use diesel fuel tem. The use of high-sulfur diesel fuel (0°C) and a minimum of 42 for enblended with lubricating oil in engines will damage the exhaust aftertreat- gines that are operated at temperaequipped with an aftertreatment sys- ment system and impact the engine tures above 32°F (0°C).
tem. Failure to comply may result in emission. Ultra-low-sulfur diesel fuel
equipment or property damage. is required for correct operation of
the aftertreatment system. The en-
CAUTION
Do not use high-sulfur diesel fuel as
it will damage the exhaust aftertreatment system. Also, the engine will
not meet emission regulations. Use
only ultra-low-sulfur diesel (ULSD)
fuel. Failure to comply may result in
equipment or property damage.
gine has been optimized for use with
an aftertreatment system to meet the
2013 U.S. Environmental Protection
Agency regulations. Failure to comply
may result in equipment or property
damage.
Using diesel fuel with a
lower-than-recommended cetane
number can cause hard starting,
instability, and excessive white smoke.
To maintain satisfactory operation
at low ambient temperatures, it is
important to specify diesel fuel of the
correct cetane number.
PACCAR requires all permissible
fuels to have adequate fuel lubricity.
Lubricity can be determined by ASTM,
specication D6079, ISO 12156, High
Frequency Reciprocating Rig (HFRR)
in which the fuel must have a wear scar
diameter of 0.02 in. (0.5 mm) or less.
NOTE
5
(07/19/2013) Y53-1181-1B1 5-15
Page 56

Maintenance Specications
The use of Ultra-Low-Sulfur diesel
fuel is required for this engine in
order to meet emission regulations
and to prevent damage to the engine
and exhaust system. The use of
other grades of diesel fuels other
than Ultra-Low-Sulfur diesel fuel will
be considered a use of incorrect
fuel for the engine. PACCAR is not
responsible for failures caused by the
use of incorrect fuel, oil or catalytic
reagent or by water, dirt or other
containments in the fuel or catalytic
reagent.
5
Warranty and the Use of Biodiesel Fuel
PACCAR Inc approves the use of
biodiesel fuel blends up to 5% by
volume in diesel fuel that meets all of
the following three conditions:
• The biodiesel used in the blend
meets ASTM Standard D 6751 or
EN 14214 specications.
• The biodiesel used in the blend
is sourced from a BQ-9000
Accredited Producer.
• The nished blend meets the fuel
properties of ASTM Standard D
975 or EN 590 specications.
The use of approved biodiesel fuel
does not affect the PACCAR engine
warranty. Failures caused by the use
of nonapproved biodiesel fuels or other
fuel additives that are of unacceptable
quality or do not meet specied
industry standards are not considered
as defects of parts or workmanship
by PACCAR and therefore will not
be covered by the PACCAR engine
warranty.
5-16
Y53-1181-1B1 (07/19/2013)
Page 57
Maintenance Specications
Lubricating Oil
Recommendations and
Specications
General Information
CAUTION
Extending the oil and lter change interval beyond the recommendations
will decrease the engine life due to
factors such as corrosion, deposits,
and wear. Engine oil lters capture
dirt and remove deposits from the oil
to prolong the life of internal moving
components. Follow the oil and lter
change intervals as recommended in
this section of the manual. Failure
to comply may result in equipment or
property damage.
A major factor in maintaining engine
performance and durability is the
proper use of quality engine lubricating
oils used in conjunction with the
appropriate oil drain and lter change
intervals. Attempting to extend the oil
and lter change interval beyond the
manufacturers recommendations may
decrease engine life.
NOTE
It is the operator’s responsibility to
abide by these recommendations to
ensure that the engine warranty does
not get affected.
PACCAR recommends the use of
high-quality SAE 10W30 API CJ-4
heavy-duty engine oil.
The primary PACCAR
recommendation is for the use of
10W30 multigrade lubricating oil
for normal operation at ambient
temperatures above 5°F (-15°C).
For ambient temperatures below
5°F (-15°C) SAE 5W30 may be
used, provided it meets API CJ-4
oil specications and biodiesel or
biodiesel blended fuel is not used as
fuel for the engine. Using a multigrade
oil helps improve engine cranking in
low-temperature conditions, reduces
deposit formation and increases
engine durability.
New Engine Break-In Oils
PACCAR does not approve the use of
special “break-in” engine lubricating
oils for new or rebuilt PACCAR
engines. It is recommended to use
the same lubricating oil for engine
break-in that will be used during normal
operation.
5
(07/19/2013) Y53-1181-1B1 5-17
Page 58
Maintenance Specications
Aftermarket Oil Additive Usage
PACCAR does not recommend the use
of aftermarket oil additives. Today's
high-quality engine lubricating oils are
very sophisticated. Most oils already
contain precise amounts of additives
blended into the lubricating oil to meet
stringent performance requirements.
These oils meet performance
characteristics that conform to the
lubricant industry standards and
are sufcient protection when used
according to the recommendations.
Aftermarket lubricating oil additives are
not necessary to enhance engine oil
5
performance and may in some cases
reduce the oil's capability to protect
the engine.
Coolant Recommendations
and Specications
The cooling system in your vehicle
was factory lled with Extended Life
Coolant (ELC) that meets or exceeds
all ASTM D 6210 requirements.
PACCAR recommends only using a
50/50 mixture of distilled water and
ELC when cooling system service
is required. A 50/50 mixture of ELC
and distilled water will provide freeze
protection down to -34°F (- 36.7°C),
which is adequate for most locations
in North America. For extremely cold
operating conditions, a 60/40 mixture
(coolant/water ratio) can be used to
provide freeze protection down to
-62°F (-52.2°C).
Your engine is also equipped with a
Coolant Filter designed to capture
and remove harmful deposits from the
cooling system to help prolong system
life.
CAUTION
Use of non-genuine coolant lters can
cause severe engine damage.
5-18 Y53-1181-1B1 (07/19/2013)
Page 59

Maintenance Specications
Checking Coolant Condition Recommended Extended Life Cooling System Sealing Additives
To ensure the Extended Life Coolant
(ELC) in your vehicle always provides
maximum freeze protection, perform
the following tests:
1. Check the coolant color at every
maintenance interval. It should be
a bright red with no signs of debris
or any oil.
2. Test the freeze point at least two
times a year. A refractometer or
test strips can be used to measure
the protection level.
Coolant Suppliers
Brand Name
TRP® Authorized PACCAR
Supplier
Engine Dealer
CAUTION
The use of sealing additives in the
cooling system can cause damage to
the engine. Sealing additives can plug
various areas of the radiator, EGR system and oil cooler. The plugging of
the cooling system can hamper heat
transfer, causing internal engine damage. Do not use sealing additives in
the cooling system. The use of sealing additives can:
• Build up in coolant low-ow areas.
3. Keep the cooling system at full
levels by topping-up using ELC
pre-diluted to 50/50 blend.
• Plug the radiator and oil cooler.
• Damage the water pump seal.
Failure to comply may result in equip-
ment or property damage.
(07/19/2013) Y53-1181-1B1 5-19
5
Page 60

Maintenance Specications
Cooling System Soluble Oils
CAUTION
The use of soluble oils in the cooling
system can cause damage to the engine. Soluble oils in the cooling system can:
• Damage heat transfer surfaces.
• Damage seals and hoses.
Failure to comply may result in equip-
ment or property damage.
5
5-20 Y53-1181-1B1 (07/19/2013)
Page 61

Maintenance Procedures
Maintenance
Procedures
Oil Pan Drain Plug
After draining the oil, discard the
washer and replace with a new copper
sealing washer, torque the bolt to 44
lb-ft (60 Nm).
Inspection of the Engine Oil Level
NOTE
It takes approximately 15 minutes for
all the oil to run into the sump when the
engine is ‘warm.’ If the level is checked
immediately after switching off the engine, the dipstick will show a low oil
level.
1. Make sure that the vehicle frame
rail is standing on a at and level
surface.
2. Make sure that the vehicle is
horizontal, both lengthwise and
crosswise. Check this carefully
on a vehicle with air suspension.
Note that the engine may be
inclined up to 4° depending on the
vehicle model and wheelbase.
3. Twist the dipstick handle to unlock
it, then pull the dipstick out of the
holder.
4. Wipe the dipstick clean with a
lint-free cloth.
5. Place the dipstick back into the
holder.
6. Pull the dipstick out again and
check the oil level. The oil level
should always be between the 2
marks on the dipstick.
5
(07/19/2013) Y53-1181-1B1 5-21
Page 62

Maintenance Procedures
7. Reinstall the dipstick and twist to
lock it in place.
5
1. Engine Oil High Level
2. Engine Oil Low Level
Topping Up the Engine Oil
1. Top up with oil, if necessary, via
the ller opening. Use the correct
grade in the correct quantity.
2. After topping up, wait 1 minute and
check the oil level again.
3. Reinstall the oil ll cap and twist
to lock it in place.
NOTE
PACCAR recommends the use of
high-quality SAE 10W30 API CJ-4
heavy-duty engine oil.
5-22 Y53-1181-1B1 (07/19/2013)
Page 63
Maintenance Procedures
Replacing Engine Oil Filters
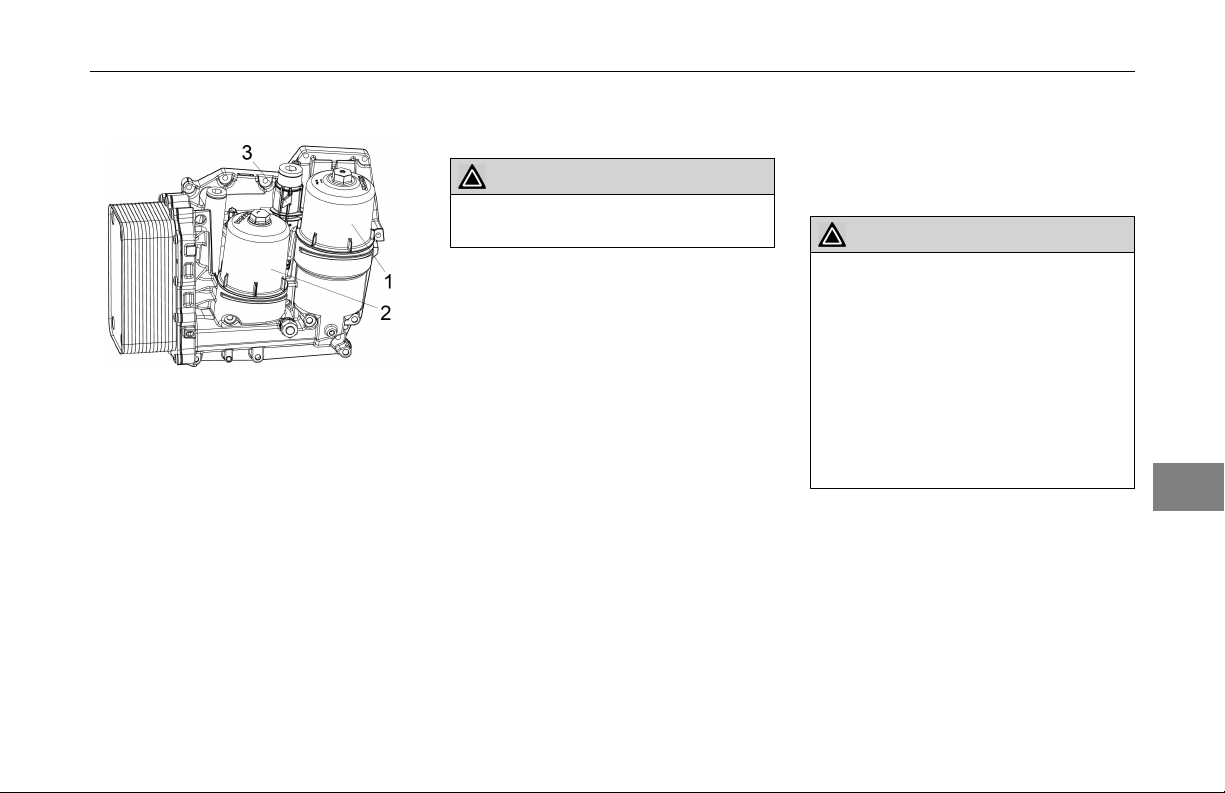
1. Full-Flow Oil Filter
2. Centrifugal Bypass Oil Filter
3. Oil Filter Cap Lock
Your engine is equipped with a full-ow
oil lter and centrifugal bypass oil lter.
Both lters are designed to capture
contaminants and remove deposits
from the oil to prolong the life of
internal moving components. Always
use quality engine lubricating oils in
conjunction with the appropriate oil
drain and lter change intervals. Refer
to “Maintenance Schedule” beginning,
on page 5-4, for the recommended oil Oil Filter Removal Preparation
and lter change service interval.
CAUTION
Use of non-genuine oil lters
cause severe engine damage.
can
1. Disconnect the chassis battery
cable at the negative battery
terminal.
CAUTION
Before beginning to remove and/or
disconnect any components, wait at
least 5 minutes after the key switch
is turned OFF for the aftertreatment
Diesel Exhaust Fluid (DEF) dosing
system to purge the DEF from the
system. The DEF system purges to
prevent damage from freezing. Failure to comply may result in equipment
or property damage.
5
(07/19/2013) Y53-1181-1B1 5-23
Page 64

Maintenance Procedures
WARNING!
Electrical shock hazard: Never disconnect the battery clamp when the
engine is running. Disconnecting the
battery clamps while the engine is running may result in death, personal injury or equipment damage from electrical arcing or damage to electrical components.
5
WARNING!
Turn off the engine and place the ignition switch in the OFF position before disconnecting the battery clamps.
Do not place any tools or other materials on top of or close to the batteries. This can cause a dangerous
high current short circuit and, in the
worst case, a battery explosion. Keep
all objects away from the battery terminals. Always break the contact between the battery clamp and the negative terminal before working on the
vehicle. Working on a vehicle while
the battery is connected may result in
electrical injury or damage. Always
disconnect the battery at the negative
terminal when performing service procedures. Failure to comply may result
in death, personal injury or equipment
damage.
Centrifugal Bypass Oil Filter
Removal
1. Remove the cap of the centrifugal
oil lter. Use a hexagonal socket
to avoid damaging the oil lter cap.
2. Remove the centrifugal lter.
3. Remove the O-ring from the screw
cap.
2. Place an oil collection pan directly
under the oil lter.
5-24 Y53-1181-1B1 (07/19/2013)
Page 65

Maintenance Procedures
WARNING!
Lubricating oil can cause skin irritation
or skin injury. To prevent skin injury,
avoid unnecessary contact with the lubricating oil. Wear protective clothing,
eye wear and gloves when handling lubricating oil. Failure to comply may result in personal injury.
Centrifugal Bypass Oil Filter
Installation
1. Lightly lubricate the O-ring (1) with
engine oil.
2. Fit the new O-ring (1) onto the cap
(2).
3. Mount the centrifugal lter (3) with
its top side in the bearing of the
screw cap (2).
4. Check to ensure the centrifugal
lter (3) can rotate freely.
5. Position the screw cap carefully
onto the oil module.
6. Tighten the screw cap by hand
until it reaches the end position.
7. Tighten the screw cap to 354 lb-in
(40 Nm). Use a hexagonal socket
to avoid damaging the oil lter cap.
5
(07/19/2013) Y53-1181-1B1 5-25
Page 66
Maintenance Procedures
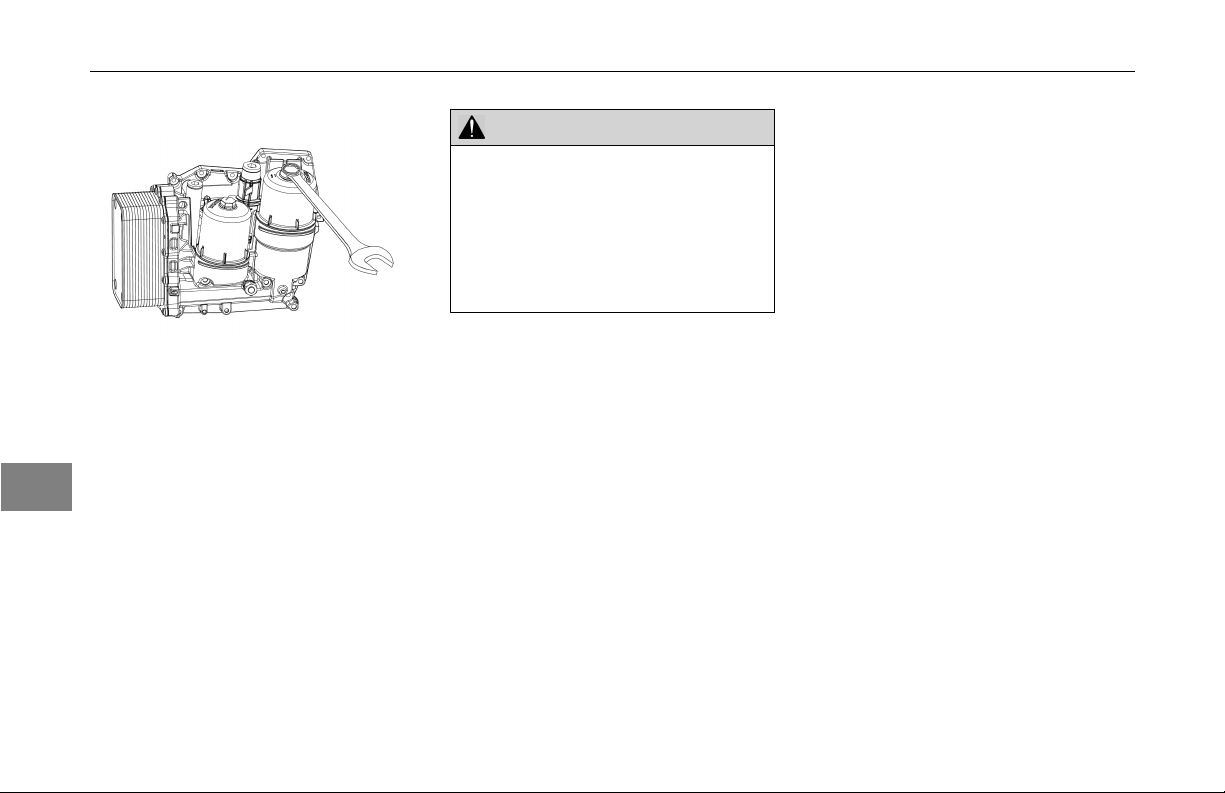
Full-ow Oil Filter Removal
1. Unscrew the cap a few turns
and drain the lter housing. Use
a hexagonal socket to avoid
damaging the oil lter cap.
2. Remove the cap, with the oil lter
5
cartridge, from the lter housing.
Then remove the oil lter cartridge
from the screw cap.
3. Remove the O-ring from the screw
cap.
WARNING!
Lubricating oil can cause skin irritation
or skin injury. To prevent skin injury,
avoid unnecessary contact with the lubricating oil. Wear protective clothing,
eye wear and gloves when handling lubricating oil. Failure to comply may result in personal injury.
Full-ow Oil Filter Installation
1. Lightly oil the new O-ring.
2. Install a new O-ring onto the screw
cap.
3. Install the screw cap, with the
oil lter cartridge, onto the lter
housing. Tighten the screw
cap to 354 lb-in (40 Nm). Use
a hexagonal socket to avoid
damaging the oil lter cap.
5-26 Y53-1181-1B1 (07/19/2013)
Page 67

Maintenance Procedures
After Replacing Oil Filter(s)
1. Reconnect the chassis battery
cable at the negative battery
terminal. See Warnings at
Centrifugal oil lter removal
preparation.
2. Add approved engine oil SAE
10W30 API CJ-4 to the maximum
level marked on the dipstick.
3. Start and run the engine for ve
to ten minutes and check for any
oil leaks.
4. Remove oil collection pan and
dispose of any spillage properly.
5. Check engine oil level and top up
as necessary.
° chassis must be on level
surface
° wait at least ve minutes if the
engine has been hot
° pull the dipstick and wipe with
a clean, lint free cloth
° reinsert the dipstick, then
remove and check the oil level
° add approved engine oil
SAE 10W30 API CJ-4 to the
maximum level marked on the
dipstick
Replacing Fuel Filter
WARNING!
When removing the fuel lter, a quantity of fuel will escape. Do not smoke
or allow an open ame in close proximity. Failure to do so could ignite a re
or cause an explosion which could result in serious injury to you and/or bystanders. Failure to comply may result
in death, personal injury, equipment or
property damage.
NOTE
The fuel lter and the hand pump are
located on the left-hand side of the engine.
5
(07/19/2013) Y53-1181-1B1 5-27
Page 68

Maintenance Procedures
Description
The fuel lter / water separator module
provides ne particle ltration, water
separation, water in fuel sensing,
automatic water draining, lifetime
purication of drained water with a
charcoal lter, 12v preheating and
system manual priming in a singular
easy to service module.
NOTE
The engine and fuel module should be
operated in cold climates with acceptable cold climate fuel blends which noticeably reduces wax gelling of the fuel
lter cartridge. The fuel module in-
5
cludes a 12 - volt preheater to support
preheat of the fuel for initial start-up in
mild climates. Failure to operate with
acceptable cold climate fuel may result
in insufcient fuel ow to the fuel injection system.
Removal
1. Fuel Filter Cap
2. Fuel Filter
3. Manual Priming Pump
4. Fuel Filter Housing
1. Loosen the fuel tank cap to relieve
any pressure in the fuel tank.
2. Clean the fuel lter cap and
surrounding area to ensure dirt
does not fall in to the fuel module.
CAUTION
Dirt in the fuel system can lead to signicant damage to the fuel system.
Failure to comply may result in equipment or property damage.
3. Remove the fuel lter cap by
rotating it counter-clockwise with a
wrench, automatic draining of fuel
will be initiated, wait 5 minutes for
complete fuel draining to prevent
fuel from leaking or dripping on the
starter motor
NOTE
The fuel lter cartridge is a disposable lter and may not be cleaned and
reused. Dispose of the lter as chemical waste.
4. Remove the fuel lter cartridge.
5-28 Y53-1181-1B1 (07/19/2013)
Page 69

Maintenance Procedures
Installation
1. Verify the sealing o-ring that
is supplied with the lter kit is
installed on the fuel lter cap and
lightly coat the o-ring with fuel.
2. Install the new fuel lter cartridge
to the cap, then insert in to the fuel
module.
3. Tighten the fuel lter cap by
rotating it clockwise until the lter
cap o-ring makes contact with the
fuel module. Then tighten the
lter cap to 29 ft-lbs (40 Nm) as
specied on the lter cap.
4. Loosen the fuel priming pump knob
by rotating it counter-clockwise.
5. Operate the priming pump by
moving the knob in and out until
pumping resistance increases
noticeably, may require up to 90
strokes. Then tighten the knob by
rotating it clockwise.
CAUTION
Operate priming pump at a maximum
rate of 30 strokes per minute to prevent damage to pump.
6. Check for leakage at the fuel lter
cap. Tighten if necessary.
WARNING!
Check the fuel lter for signs of leakage. Do not smoke or allow an open
ame in close proximity. Failure to do
so could ignite a re or cause an explosion which could result in serious injury
to you and/or bystanders. Failure to
comply may result in death, personal
injury, equipment or property damage.
7. Start the engine and run it at idle
speed for several minutes. This
will allow any air in the system
to escape. Check the system for
leakage while idling. Then turn the
engine off and check the system
again for leakage.
5
(07/19/2013) Y53-1181-1B1 5-29
Page 70

Maintenance Procedures
• If the engine does not start, or
runs erratic, follow the procedure
under “Starting After the Fuel Tank
Has Run Dry”.
5
Starting After the Fuel Tank Has
Run Dry
CAUTION
The following instructions should only
be used in emergency situations when
the fuel tank has run dry. Failure to
follow the starting instructions below
may damage the starter motor.
1. Loosen the fuel primer pump knob
by rotating it counter-clockwise.
2. Operate the primer pump by
moving the knob in and out until
pumping resistance increases
noticeably. Then tighten the knob
by rotating it clockwise.
3. Operate the starter motor until the
engine starts.
NOTE
The maximum time the starter motor
can be switched on at any given time
is 30 seconds.
CAUTION
Engaging the starter motor for more
than 30 seconds in any 5 minute period may cause it to overheat and can
damage the starter motor.
• If starter is engaged continuously
for 30 seconds, you must wait 5
minutes before trying to start the
engine to allow the starter motor
to cool down.
5-30 Y53-1181-1B1 (07/19/2013)
Page 71

Maintenance Procedures
4. If the engine does not start within
this time, allow the starter motor
to cool down for at least 5 minutes
before repeating the procedure.
WARNING!
Do not loosen any fuel line ttings in
order to bleed the fuel system of air.
The system is under high pressure
which, when relieved, could cause
death, personal injury, equipment or
property damage.
Replacing Coolant Filter
Your engine may be equipped
with a Coolant Filter designed to
capture and remove harmful deposits
from the cooling system to help
prolong system life. Refer to the
“Maintenance Schedule” beginning for
the recommended coolant lter change
service interval.
WARNING!
Do not remove the radiator cap on
a hot engine. It can cause scalding
coolant to spray out and you could be
burned. If the engine has been operated within the last 30 minutes, be very
careful in removing the radiator cap.
Failure to comply may result in death,
personal injury, equipment or property
damage.
• Protect face, hands, and arms
against escaping uid and steam
by covering the cap with a large,
thick rag.
WARNING!
Handle coolant and antifreeze carefully. Ethylene glycol antifreeze is poisonous. Store in original uid container only, and always keep out of the
reach of children. Failure to comply
may result in death, personal injury,
equipment or property damage.
• Also, never remove the cap on
the surge tank while the engine
is still hot. Wait until the coolant
temperature is below 120°F
(50°C). Scalding steam and uid
under pressure may escape and
cause serious personal injuries.
5
(07/19/2013) Y53-1181-1B1 5-31
Page 72
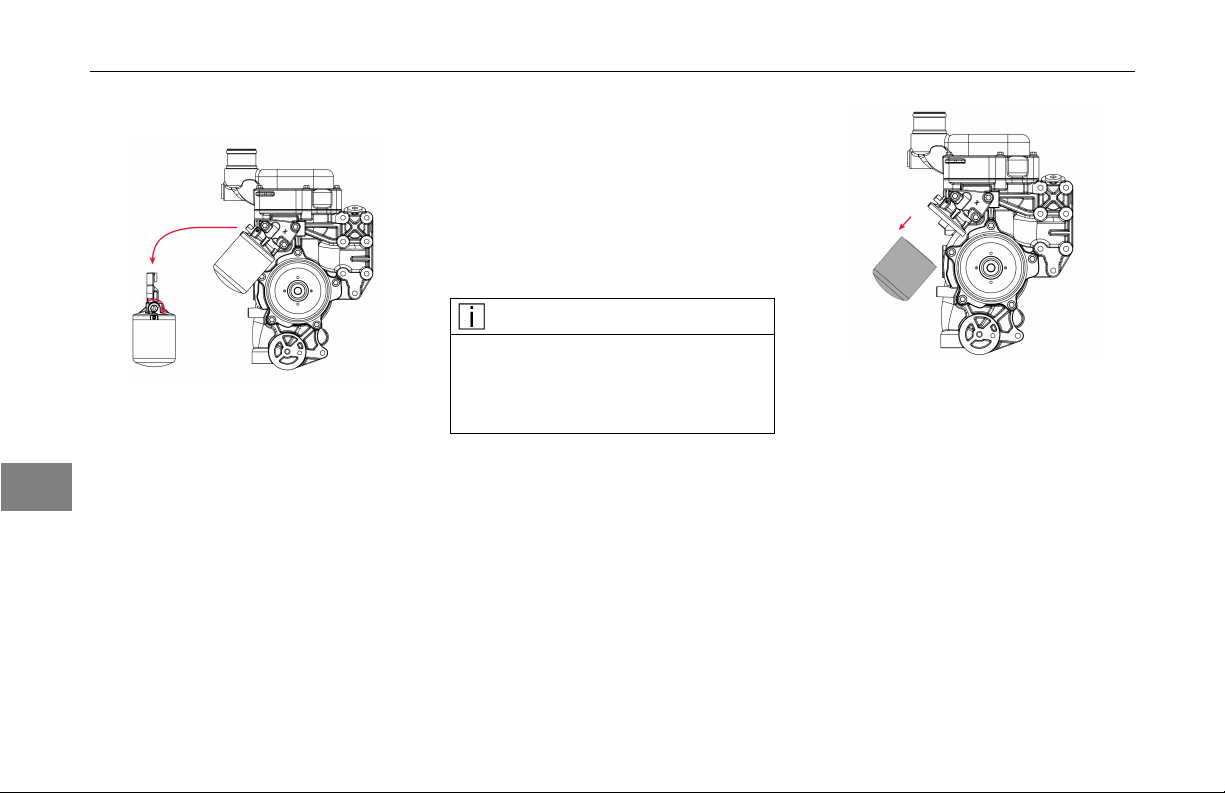
Maintenance Procedures
Removal
1. Slowly loosen the radiator cap to
relieve any pressure in the cooling
system.
5
2. Close the coolant lter shutoff
valve by rotating the hex key
clockwise and away from the “O”
position.
3. Clean the coolant lter and
surrounding area.
4. Remove the coolant lter by
rotating it counter-clockwise. Use
a lter wrench to remove.
° A small amount of coolant
could leak out when the lter
is loosened. Use a suitable
container to catch any drips.
NOTE
The coolant lter cartridge is a disposable lter and may not be cleaned and
reused. Dispose of the lter as chemical waste.
5. Remove the O-ring from the
coolant lter housing, if it has not
been removed already.
5-32 Y53-1181-1B1 (07/19/2013)
Page 73

Maintenance Procedures
Installation Radiator Fill Procedure
1. Apply a small amount of coolant to
the sealing ring of the new coolant
lter.
2. Install the lter, rotating it
clockwise until the sealing ring
makes contact with the lter
housing. Then tighten by hand ½ ¾ of a revolution.
3. Turn the shutoff valve to the Open
position.
4. Reinstall the radiator cap.
5. Start the engine and run at idle
speed for several minutes. Check
for leaks.
Follow the procedure below to ll
coolant. Failure to follow this procedure and maintain proper coolant level
can cause engine damage.
1. Remove the surge tank ll cap
(1). Do not remove the surge tank
pressure cap (2).
CAUTION
2. Fill the system with premixed
coolant through the surge tank ll
neck.
3. Start the engine and idle at low
RPM for 2 minutes.
4. Top-off surge tank to base of ller
neck while idling.
5. Run engine at higher idle until
engine fan turns on and allow
thermostat to open.
6. Reduce idle to low RPM and top
off surge tank to base of ller neck.
7. Run engine a higher idle for 10
minutes.
8. Reduce idle to allow RPM and top
off surge tank to base of ller neck.
9. Allow engine to cool and top off
surge tank to base of ller neck if
necessary.
10. Replace the surge tank ll cap.
5
(07/19/2013) Y53-1181-1B1 5-33
Page 74

Maintenance Procedures
NOTE
If the coolant frequently needs topping
up or there are any signs of coolant
leakage, consult a PACCAR Service
dealer.
5
5-34 Y53-1181-1B1 (07/19/2013)
Page 75

Maintenance Procedures
Emergency Repairs
Replacing Belts
1. Accessory Belt 4. Tensioners 7. Alternator
2. Fan Belt 5. Engine Dampener
3. Water Pump
NOTE
Always t the same type of belts as the ones replaced.
6. A/C Compressor
5
(07/19/2013) Y53-1181-1B1 5-35
Page 76

Maintenance Procedures
Poly V-belt and Fan Drive
Removal
1. Disconnect the electrical ground
wire from the battery.
5
2. Reach between the fan blades and
remove the fan blade mounting
bolts using a 9/16” socket to
remove the mounting nuts.
3. Place a ex-bar with a 15-mm
socket on the automatic belt
tensioner roller fastener as shown.
Rotate the ex-bar as shown in
the diagram to relieve belt tension.
4. With the belt tensioner pressure
relieved, remove the poly V-belt
from the pulleys.
° The tensioner can be
temporarily blocked with
a 0.16-0.2 inch (4-5 mm) thick
pin (bore). This facilitates
removal and installation of the
poly V-belt.
5. After removing the belt, carefully
allow the belt tensioner to spring
back to the stop (if it had not been
temporarily blocked).
6. Inspect the pulleys for damage,
rust, and grease deposits. Clean
or replace as necessary.
Installation
1. Place the new poly V-belt over the
pulleys, making certain the belt
falls into all the belt pulley grooves.
NOTE
When installing the belts do not wrap
belt around the tensioner until after
the belt has been wrapped around all
other pulleys and idlers.
2. After installing the belt, carefully
allow the belt tensioner to spring
back to its normal position. If the
tensioner had been temporarily
blocked, relieve tensioner
pressure enough to remove
the locking pin, then allow the
tensioner to spring back to its
normal position.
NOTE
Do not reuse nylon patch lock nuts.
Replace with new lock nuts when reinstalling parts.
3. Reinstall fan blade using fan blade
bolts and new 9/16" nylon patch
lock nuts.
5-36 Y53-1181-1B1 (07/19/2013)
Page 77

Maintenance Procedures
4. Reconnect the electrical ground
wire to the battery.
Poly V-belt, Alternator,
Air-Conditioning Compressor
Drive and Coolant Pump Drive
Removal
1. Remove the poly V-belt from the
fan and coolant pump drive as
described in “Poly V-belt and Fan
Drive” “Removal”.
NOTE
Removing the fan blade is not necessary if only the accessory belt is removed. After removing the fan drive
belt from its pulleys the accessory belt
can be removed over the fan blade.
2. Next, place a ex-bar with a
15 mm socket on the alternator
and air conditioning compressor
drive belt tensioner roller fastener
as shown. Move the bar in the
direction shown to relieve pressure
on the belt tensioner.
3. With the belt tensioner pressure
relieved, remove the poly V-belt
from the pulleys.
° The tensioner can be
temporarily blocked with
a 0.16-0.2 inch (4-5 mm) thick
pin (bore). This facilitates
removal and installation of the
poly V-belt.
4. After removing the belt, carefully
allow the belt tensioner to spring
back to the stop (if it had not been
temporarily blocked).
5. Inspect the pulleys for damage,
rust and grease deposits. Clean
or replace as necessary.
5
(07/19/2013) Y53-1181-1B1 5-37
Page 78
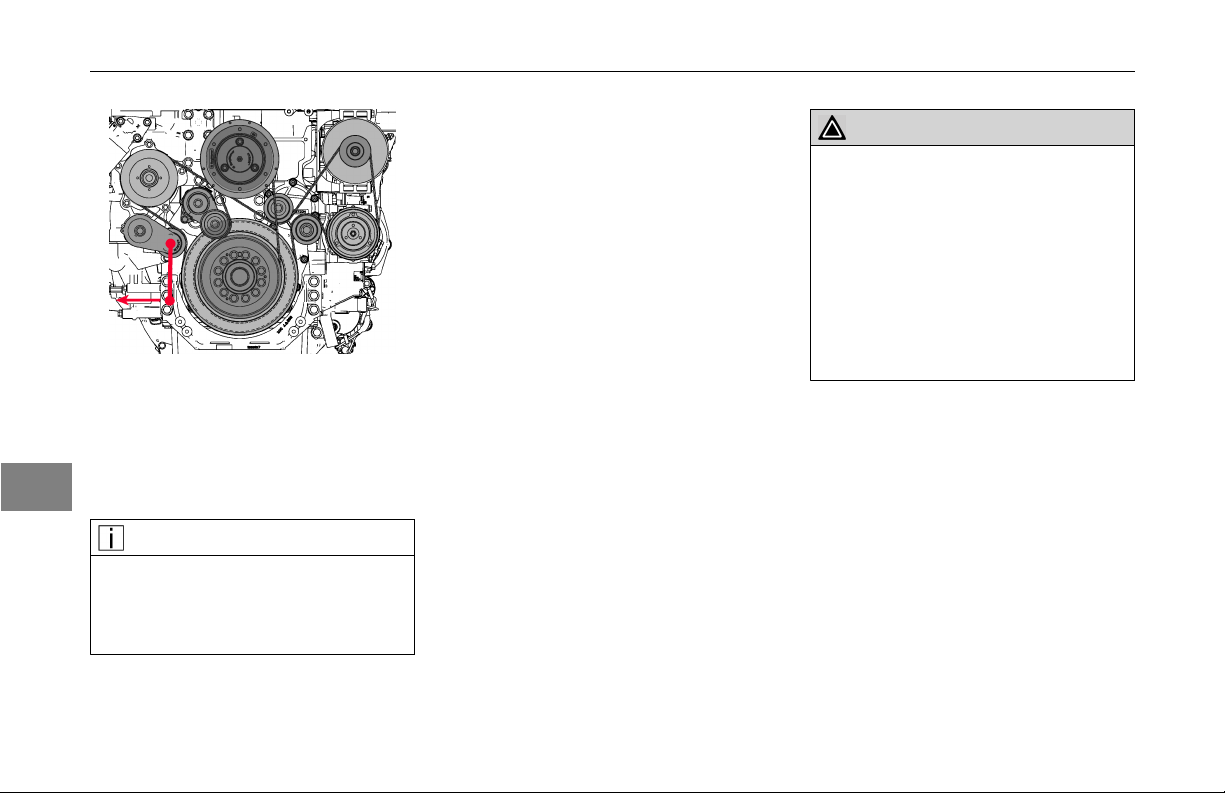
Maintenance Procedures
Installation
1. Place the new poly V-belt over the
pulleys, positioning the new belt
5
so that it falls into all the belt pulley
grooves.
NOTE
When installing the belts do not wrap
belt around the tensioner until after
the belt has been wrapped around all
other pulleys and idlers.
2. After installing the belt, carefully
allow the belt tensioner to spring
back to its normal position. If the
tensioner had been temporarily
blocked, relieve tensioner
pressure enough to remove
the locking pin, then allow the
tensioner to spring back to its
normal position.
3. Reinstall the fan drive poly V-belt
as previously described in “Poly
V-belt and Fan Drive” “Installation”.
4. Reconnect the electrical ground
wire to the battery.
Cleaning the Engine
When cleaning the engine, follow
the instructions from the vehicle
manufacturer Operator's Manual and
observe all environmental protection
regulations.
CAUTION
Do not direct water onto electrical
components, plug connectors, seals
or exible hoses on the engine. Water
may enter the part causing electrical
damage or contaminating oil. To prevent damage to engine components,
keep the water moving at all times
while cleaning the engine. Failure to
comply may result in equipment damage.
5-38 Y53-1181-1B1 (07/19/2013)
Page 79

Engine Identication
Engine Component Locations . . . . . . . . . . 6-3
EPA Label . . . . . . . . . . . . . . . . . . . 6-5
Warranty
United States and Canada PACCAR MX-13 Engine
Coverage . . . . . . . . . . . . . . . . . . 6-6
United States and Canada Fire Apparatus Truck
Applications Coverage . . . . . . . . . . . . 6-11
Emission Warranty . . . . . . . . . . . . . . 6-15
California Emission Control System Warranty,
On-Highway . . . . . . . . . . . . . . . . 6-18
Information
6
(07/19/2013) Y53-1181-1B1 6-1
Page 80

Page 81
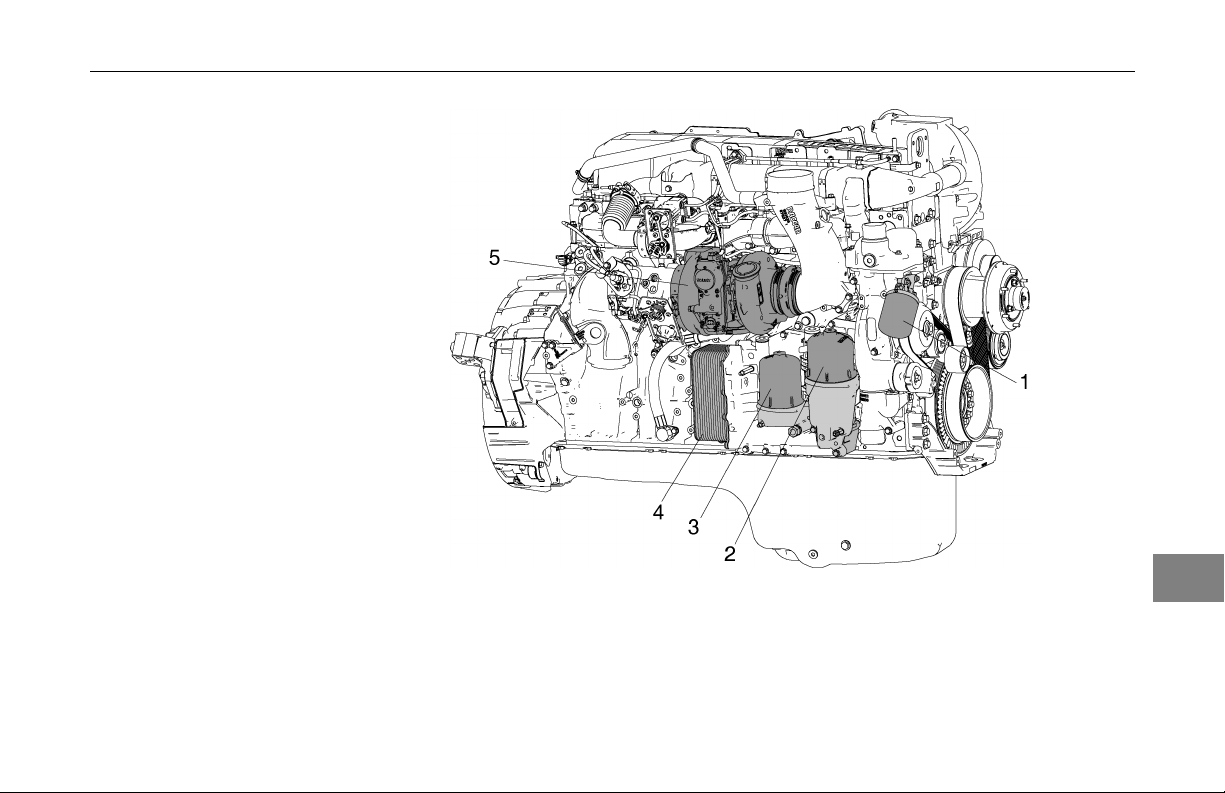
Engine Identication
Engine Component Locations
1. Coolant Filter
2. Full-ow Oil Filter
3. Centrifugal Bypass Oil Filter
4. Oil Cooler
5. Turbocharger
Engine Identication
Right Side of Engine
(07/19/2013) Y53-1181-1B1 6-3
6
Page 82

Engine Identication
6
Left Side of Engine
6. Oil Fill
7. Fuel Filter
8. Air Compressor
9. Starter
10. Power Steering Pump
11. Low Pressure Fuel Pump
12. Electronic Control Module (ECM)
13. Crankcase Vent
14. A/C Compressor
15. Alternator
16. Dipstick
6-4 Y53-1181-1B1 (07/19/2013)
Page 83

Engine Identication
EPA Label
The EPA label provides important facts
about the engine. The EPA label is
located on top of the engine valve
cover or on the mixer manifold. The
engine EPA label must not be changed
unless approved by PACCAR.
EPA Label Location
The EPA label provides many details
regarding the engine. Some facts that
are found on the EPA label include the
following:
• Fuel rate
• Idle speed
• Maximum rated speed
• Valve lash
• Maximum power rating
• Date of manufacture
• Engine displacement
6
(07/19/2013) Y53-1181-1B1 6-5
Page 84

Warranty
Warranty
United States and Canada
PACCAR MX-13 Engine
Coverage
Products Warranted
This warranty applies to new PACCAR
MX-13 Engines sold and used in the
United States or Canada and operated
in on-highway applications with one
exception – there is different warranty
coverage for engines used in the re
apparatus truck applications.
The PACCAR MX-13 Engine is
warranted directly to the rst purchaser
or rst lessee by PACCAR.
6
Base Engine Warranty
This warranty covers any failures of the
Engine which result, under normal use
and service, from a defect in material
or factory workmanship (Warrantable
Failure). This coverage begins on the
date of delivery and ends two years or
250,000 miles (400,000 kilometers) or
6,250 hours, whichever occurs rst,
after the date of delivery of the Engine
to the rst purchaser or rst lessee.
Additional coverage is outlined in the
Emission Warranty section.
Major Engine Components Warranty
There is an Engine Warranty period
of 60 months, 500,000 miles (800,000
kilometers) or 12,500 hours, whichever
occurs rst, after the date of delivery of
the Engine to the rst purchaser or rst
lessee for the following Engine parts:
• Cylinder Block Casting
• Main Bearing Bolts
• Cylinder Head Casting
• Cylinder Head Bolts
• Crankshaft
• Camshaft
• Cam Follower Assemblies
• Connecting Rod Assemblies
• Crankshaft Gear
• Camshaft Gear
• Camshaft Idler Gear
6-6
Y53-1181-1B1 (07/19/2013)
Page 85

Warranty
•
Lube Pump Gear
• Flywheel Housing
• Water Pump Housing
• Thermostat Housing
PACCAR Responsibilities
PACCAR will pay for all parts and labor
needed to repair the damage to the
Engine resulting from a Warrantable
Failure.
PACCAR will pay for the lubricating
oil, antifreeze, lter elements, belts,
hoses, and other maintenance items
that are not reusable due to the
Warrantable Failure. PACCAR will pay
for reasonable labor costs for Engine
removal and reinstallation when
necessary to repair a Warrantable
Failure.
PACCAR will pay during the base
engine warranty period of two years or
250,000 miles (400,000 kilometers) or
6,250 hours, whichever occurs rst.
Reasonable costs for towing a vehicle
disabled by a Warrantable Failure to
the nearest authorized repair station.
In lieu of the towing expense and
in its sole discretion, PACCAR may
pay reasonable costs for a mechanic
to travel to and from the location of
the vehicle when an engine repair is
performed at the site of the failure.
6
(07/19/2013) Y53-1181-1B1 6-7
Page 86

Warranty
Owner Responsibilities
Owner is responsible for the operation
and maintenance of the Engine as
specied in the applicable PACCAR
Operator’s Manual. Owner is also
responsible for providing proof that all
recommended maintenance has been
performed.
Before the expiration of the applicable
warranty, Owner must notify a
PACCAR authorized engine dealer of
any Warrantable Failure and make
the engine available for repair by
such facility. The Warrantable Failure
must be brought to the attention of a
PACCAR authorized engine dealer
within 30 days of discovery. Owner
must also deliver the Engine to the
authorized engine repair facility during
6
the warranty period unless deliver is
impossible because the Engine has
been disabled by a Warrantable failure.
Owner is responsible for the cost
of lubricating oil, antifreeze, lter
elements and other maintenance
items provided during warranty repairs
unless such items are not reusable
due to the Warrantable Failure. Owner
is responsible for communication
expenses, meals, lodging and similar
costs incurred as a result of a
Warrantable Failure.
Owner is responsible for non-Engine
repairs and for "downtime" expenses,
cargo damage, nes, all applicable
taxes, all business costs and other
losses resulting from a Warrantable
Failure.
Limitations
Your sole and exclusive remedy
against PACCAR and the Selling
Dealer arising from your purchase and
use of this Engine is limited to the
repair or replacement of “warrantable
failures” at authorized United States
and Canadian PACCAR Engine
Dealers, or an authorized PACCAR
Engine facility where applicable,
subject to PACCAR’s time, mileage,
and hour limitations of the engine
warranty. The maximum time, mileage
and hour limitations of the engine
warranty begin running on the Date of
Delivery to the rst purchaser or rst
lessee. The accrued time, mileage, or
hours is calculated when the engine is
brought into an Authorized Dealer for
correction of warrantable failures.
PACCAR is not responsible for
failures or damage resulting from
what PACCAR determines to be
abuse or neglect, including, but not
6-8
Y53-1181-1B1
(07/19/2013)
Page 87

Warranty
limited to: damage due to accident;
operation without adequate coolants or
lubricants; overfueling; overspeeding;
lack of maintenance of lubricating,
cooling or intake systems; improper
storage, starting, warm-up, run-in or
shutdown practices; unauthorized
modications of the Engine. PACCAR
is also not responsible for failures
caused by incorrect oil or fuel or diesel
exhaust uid or by water, dirt or other
contaminants in the fuel, oil, or diesel
exhaust uid. Failure of replacement
parts used in repairs due to the above
non-warrantable conditions is not
warrantable.
This warranty does not apply to
accessories supplied by the vehicle
OEM which are covered by the OEM
vehicle warranty.
Failures resulting in excessive oil
consumption are covered for the
duration of the coverage or 250,000
miles (400,000 kilometers) or 6,250
hours from the date of delivery of the
Engine to the rst purchaser or rst
lessee, whichever occurs rst. Before
a claim for excessive oil consumption
will be considered, Owner must submit
adequate documentation to show
that consumption exceeds PACCAR
published standards.
Failures of belts and hoses supplied by
PACCAR are covered for the rst year
from the date of delivery of the Engine
to the rst purchaser or rst lessee.
PACCAR does not warrant antifreeze,
lubricants, lters, lter elements, or
any other part which is considered a
maintenance item.
Parts used to repair a Warrantable
Failure may be new parts, approved
rebuilt parts, or repaired parts.
PACCAR is not responsible for
failures resulting from the use of parts
not approved by PACCAR. A new
approved or rebuilt part used to repair
a Warrantable Failure assumes the
identity of the part it replaced and is
entitled to the remaining coverage
hereunder.
PACCAR is not responsible for
damage or loss resulting from Engine
horsepower/torque upgrades.
PACCAR reserves the right to
interrogate Electronic Control Module
(ECM) data for purposes of failure
analysis.
PACCAR DOES NOT COVER WEAR
OR WEAROUT OF COVERED
PARTS.
THIS WARRANTY AND THE
EMISSION WARRANTY SET FORTH
HEREINAFTER ARE THE SOLE
WARRANTIES MADE BY PACCAR
IN REGARD TO THESE ENGINES.
THIS LIMITED WARRANTY IS
THE SOLE WARRANTY MADE
6
(07/19/2013) Y53-1181-1B1 6-9
Page 88

Warranty
BY PACCAR AND THE SELLING
DEALER. EXCEPT FOR THE ABOVE
LIMITED WARRANTY, PACCAR AND
THE SELLING DEALER MAKE NO
OTHER WARRANTIES, EXPRESS
OR IMPLIED. PACCAR AND THE
SELLING DEALER EXPRESSLY
DISCLAIM ANY WARRANTY
OF MERCHANTABILITY OR
WARRANTY OF FITNESS FOR A
PARTICULAR PURPOSE.
PACCAR AND THE SELLING
DEALER SHALL NOT BE
LIABLE FOR INCIDENTAL OR
CONSEQUENTIAL DAMAGES
INCLUDING, BUT NOT LIMITED
TO: LOSS OF INCOME OR LOST
PROFITS; ENGINE OR VEHICLE
DOWNTIME; THIRD PARTY
DAMAGE, INCLUDING DAMAGE
6
OR LOSS TO OTHER ENGINES,
VEHICLES OR PROPERTY,
ATTACHMENTS, TRAILERS AND
CARGO; LOSS OR DAMAGE
TO PERSONAL CONTENTS;
COMMUNICATION EXPENSES;
LODGING AND/OR MEAL
EXPENSES; FINES; APPLICABLE
TAXES OR BUSINESS COSTS OR
LOSSES; ATTORNEYS’ FEES; AND
ANY LIABILITY YOU MAY HAVE IN
RESPECT TO ANY OTHER PERSON
OR ENTITY.
This warranty gives you specic legal
rights, and you may also have other
rights which vary from state to state.
6-10 Y53-1181-1B1 (07/19/2013)
Page 89

Warranty
United States and Canada
Fire Apparatus Truck
Applications Coverage
Products Warranted
This warranty applies to new PACCAR
MX-13 Engines sold and used in the
United States or Canada and operated
in re apparatus truck applications.
Base Engine Warranty
The Base Engine Warranty covers
any failures of the Engine which
result, under normal use and service,
from a defect in material or factory
workmanship (Warrantable Failure).
This coverage begins on the date of
delivery to the rst purchaser or rst
lessee and ends after ve years or
100,000 miles (160,000 kilometers),
whichever occurs rst.
Additional coverage is outlined in the
Emission Warranty section.
PACCAR Responsibilities
PACCAR will pay for all parts and labor
needed to repair the damage to the
Engine resulting from a Warrantable
Failure.
PACCAR will pay for the lubricating
oil, antifreeze, lter elements, belts,
hoses and other maintenance items
that are not reusable due to the
Warrantable Failure. PACCAR will pay
for reasonable labor costs for Engine
removal and reinstallation when
necessary to repair a Warrantable
Failure.
PACCAR will pay reasonable costs
for towing a vehicle disabled by a
Warrantable Failure to the nearest
authorized repair location. In lieu
of the towing expense and at its
sole discretion, PACCAR will pay
reasonable costs for a mechanic to
travel to and from the location of
6
(07/19/2013) Y53-1181-1B1 6-11
Page 90

Warranty
the vehicle when its engine repair is
performed at the site of the failure.
6
Owner Responsibilities
Owner is responsible for the operation
and maintenance of the Engine as
specied in PACCAR Operator’s
Manual. Owner is also responsible for
providing proof that all recommended
maintenance has been performed.
Before the expiration of the applicable
warranty, Owner must notify a
PACCAR authorized engine dealer of
any Warrantable Failure and make
the engine available for repair by
such facility. The Warrantable Failure
must be brought to the attention of a
PACCAR authorized engine dealer
within 30 days of discovery. Except
for Engines disabled by a Warrantable
Failure, Owner must also deliver the
Engine to the repair facility.
Owner is responsible for the cost
of lubricating oil, antifreeze, lter
elements and other maintenance
items provided during warranty repairs
unless such items are not reusable
due to the Warrantable Failure.
Owner is responsible for
communication expenses, meals,
lodging and similar costs incurred as a
result of a Warrantable Failure.
Owner is responsible for non-Engine
repairs and for downtime expenses,
cargo damage, nes, all applicable
taxes, all business costs and other
losses resulting from a Warrantable
Failure.
Owner is responsible for a $100 (U.S.
Dollars) deductible per each service
visit under this plan in the 3rd, 4th, and
5th years of base engine warranty.
The deductible will not be charged
during the rst two years of the base
engine warranty.
6-12 Y53-1181-1B1 (07/19/2013)
Page 91

Warranty
Limitations
Your sole and exclusive remedy
against PACCAR and the Selling
Dealer arising from your purchase and
use of this Engine is limited to the
repair or replacement of “warrantable
failures” at authorized United States
and Canadian PACCAR Engine
Dealers, or an authorized PACCAR
Engine facility where applicable,
subject to PACCAR’s time, mileage,
and hour limitations of the engine
warranty. The maximum time, mileage
and hour limitations of the engine
warranty begin running on the Date of
Delivery to the rst purchaser or rst
lessee. The accrued time, mileage, or
hours is calculated when the engine is
brought into an Authorized Dealer for
correction of warrantable failures.
PACCAR is not responsible for
failures or damage resulting from
what PACCAR determines to be
abuse or neglect, including but not
limited to: damage due to accident;
operation without adequate coolants or
lubricants; overfueling; overspeeding;
lack of maintenance of lubricating,
cooling or intake systems; improper
storage, starting, warm-up, run-in or
shutdown practices; unauthorized
modications of the Engine. PACCAR
is also not responsible for failures
caused by incorrect oil, fuel or diesel
exhaust uid or by water, dirt or other
contaminants in the fuel, oil or diesel
exhaust uid. Failure of replacement
parts used in repairs due to the above
non-warrantable conditions is not
warrantable.
This warranty does not apply to
accessories supplied by PACCAR
which are covered by the OEM vehicle
warranty.
Failures resulting in excessive oil
consumption are not covered beyond
the duration of the coverage or 100,000
miles (160,000 kilometers) or 6,250
hours from the date of delivery of the
Engine to the rst purchaser or rst
lessee, whichever occurs rst. Before
a claim for excessive oil consumption
will be considered, Owner must submit
adequate documentation to show
that consumption exceeds PACCAR
published standards.
Failures of belts and hoses supplied
by PACCAR are not covered beyond
the rst year from the date of delivery
of the Engine to the rst purchaser or
rst lessee.
PACCAR does not warrant antifreeze,
lubricants, lters, lter elements, or
any other part which is considered a
maintenance item.
Parts used to repair a Warrantable
Failure may be new parts, approved
rebuilt parts, or repaired parts.
PACCAR is not responsible for failures
resulting from the use of parts not
approved by PACCAR. A new or
6
(07/19/2013) Y53-1181-1B1 6-13
Page 92

Warranty
approved rebuilt part used to repair
a Warrantable Failure assumes the
identity of the part it replaced and is
entitled to the remaining coverage
hereunder.
PACCAR is not responsible for
damage or loss resulting from Engine
horsepower/torque upgrades.
PACCAR reserves the right to
interrogate Electronic Control Module
(ECM) data for purposes of failure
analysis.
PACCAR DOES NOT COVER WEAR
OR WEAROUT OF COVERED
PARTS.
THIS WARRANTY AND THE
EMISSION WARRANTY SET FORTH
HEREINAFTER ARE THE SOLE
6
WARRANTIES MADE BY PACCAR
IN REGARD TO THESE ENGINES.
THIS LIMITED WARRANTY IS
THE SOLE WARRANTY MADE
BY PACCAR AND THE SELLING
DEALER. EXCEPT FOR THE ABOVE
LIMITED WARRANTY, PACCAR AND
THE SELLING DEALER MAKE NO
OTHER WARRANTIES, EXPRESS
OR IMPLIED. PACCAR AND THE
SELLING DEALER EXPRESSLY
DISCLAIM ANY WARRANTY
OF MERCHANTABILITY OR
WARRANTY OF FITNESS FOR A
PARTICULAR PURPOSE.
PACCAR AND THE SELLING
DEALER SHALL NOT BE
LIABLE FOR INCIDENTAL OR
CONSEQUENTIAL DAMAGES
INCLUDING, BUT NOT LIMITED
TO: LOSS OF INCOME OR LOST
PROFITS; ENGINE OR VEHICLE
DOWNTIME; THIRD PARTY
DAMAGE, INCLUDING DAMAGE
OR LOSS TO OTHER ENGINES,
VEHICLES OR PROPERTY,
ATTACHMENTS, TRAILERS AND
CARGO; LOSS OR DAMAGE
TO PERSONAL CONTENTS;
COMMUNICATION EXPENSES;
LODGING AND/OR MEAL
EXPENSES; FINES; APPLICABLE
TAXES OR BUSINESS COSTS OR
LOSSES; ATTORNEYS’ FEES; AND
ANY LIABILITY YOU MAY HAVE IN
RESPECT TO ANY OTHER PERSON
OR ENTITY.
This warranty gives you specic legal
rights, and you may also have other
rights which vary from state to state.
6-14 Y53-1181-1B1 (07/19/2013)
Page 93

Warranty
Emission Warranty
Products Warranted
This emission warranty applies to
new PACCAR Engines marketed
by PACCAR that are used in the
United States in vehicles designed for
transporting persons or property on a
street or highway.
Coverage
PACCAR warrants to the rst
purchaser or rst lessee and each
subsequent purchaser that the Engine
is designed, built and equipped so
as to conform at the time of sale
by PACCAR with all U.S. Federal
emission regulations applicable at
the time of manufacture and that it is
free from defects in material or factory
workmanship which would cause it not
to meet these regulations within the
longer of the following periods: (A)
Five years or 100,000 miles (160,000
kilometers) of operation, whichever
occurs rst, as measured from the
date of delivery of the Engine to the
rst purchaser or rst lessee or (B) The
Base Engine Warranty.
If the vehicle in which the Engine
is installed is registered in the state
of California, a separate California
Emission Warranty also applies.
Replacement Parts
PACCAR recommends that any
service parts used for maintenance,
repair or replacement of emission
control systems be new or genuine
approved rebuilt parts and assemblies,
and that the engine be serviced
by an authorized PACCAR Engine
dealer. Your vehicle contains air,
fuel, and electrical components that
may affect engine emission controls.
The use of non-genuine engine or
vehicle replacement parts that are not
equivalent to the PACCAR engine or
OEM vehicle manufacturer’s original
part may impair the engine and vehicle
emissions control system from working
or functioning effectively, and may
jeopardize your emissions warranty
coverage.
6
(07/19/2013) Y53-1181-1B1 6-15
Page 94

Warranty
Limitations
Your sole and exclusive remedy
against PACCAR and the Selling
Dealer arising from your purchase and
use of this Engine is limited to the
repair or replacement of “warrantable
failures” at authorized United States
and Canadian PACCAR Engine
Dealers, or an authorized PACCAR
Engine facility where applicable,
subject to PACCAR’s time, mileage,
and hour limitations of the engine
emission warranty. The maximum
time, mileage and hour limitations of
the engine emission warranty begin
running on the Date of Delivery to the
rst purchaser or rst lessee. The
accrued time, mileage, or hours is
calculated when the engine is brought
into an Authorized Dealer for correction
6
of warrantable failures.
Failures, other than those resulting
from defects in material or factory
workmanship, are not covered by this
Warranty. PACCAR is not responsible
for failures or damage resulting from
what PACCAR determines to be
abuse or neglect, including, but not
limited to: damage due to accident;
operation without adequate coolants or
lubricants; overfueling; overspeeding;
lack of maintenance of lubricating,
cooling or intake systems; improper
storage, starting, warm-up, run-in or
shutdown practices; unauthorized
modications of the Engine. PACCAR
is also not responsible for failures
caused by incorrect oil, fuel or diesel
exhaust uid or by water, dirt or other
contaminants in the fuel, oil or diesel
exhaust uid. Failure of replacement
parts used in repairs due to the above
non-warrantable conditions is not
warrantable.
PACCAR is not responsible for
non-Engine repairs, downtime
expenses, cargo damage, nes, all
applicable taxes, all business costs
or other losses resulting from a
Warrantable Failure.
THIS LIMITED EMISSION
WARRANTY IS THE SOLE
WARRANTY MADE BY PACCAR
RELATING TO THE EMISSION
EQUIPMENT. EXCEPT FOR THE
ABOVE LIMITED WARRANTY,
PACCAR MAKES NO OTHER
WARRANTIES, EXPRESS OR
IMPLIED. PACCAR EXPRESSLY
DISCLAIMS ANY WARRANTY
OF MERCHANTABILITY OR
WARRANTY OF FITNESS FOR A
PARTICULAR PURPOSE.
PACCAR AND THE SELLING
DEALER SHALL NOT BE
LIABLE FOR INCIDENTAL OR
CONSEQUENTIAL DAMAGES
INCLUDING, BUT NOT LIMITED
TO: LOSS OF INCOME OR LOST
PROFITS; ENGINE OR VEHICLE
DOWNTIME; THIRD PARTY
DAMAGE, INCLUDING DAMAGE
6-16
Y53-1181-1B1 (07/19/2013)
Page 95

OR LOSS TO OTHER ENGINES,
VEHICLES OR PROPERTY,
ATTACHMENTS, TRAILERS AND
CARGO; LOSS OR DAMAGE
TO PERSONAL CONTENTS;
COMMUNICATION EXPENSES;
LODGING AND/OR MEAL
EXPENSES; FINES; APPLICABLE
TAXES OR BUSINESS COSTS OR
LOSSES; ATTORNEYS’ FEES; AND
ANY LIABILITY YOU MAY HAVE IN
RESPECT TO ANY OTHER PERSON
OR ENTITY.
Warranty
6
(07/19/2013) Y53-1181-1B1 6-17
Page 96

Warranty
California Emission
Control System Warranty,
On-Highway
Products Warranted
This Emission Control System
Warranty applies to diesel engines
(hereafter, engines) certied with
the California Air Resources Board
beginning with the year 2013,
marketed by PACCAR, and registered
in California for use in on-highway
applications.
6
Your Warranty Rights and
Obligations
The California Air Resources Board
and PACCAR are pleased to explain
the emission control system warranty
on your 2013 and subsequent model
year diesel engine. In California,
new motor vehicle engines must
be designed, built, and equipped to
meet the State’s stringent anti-smog
standards. PACCAR must warrant
the emission control system on your
diesel engine for the periods of
time listed below provided there has
been no abuse, neglect or improper
maintenance of your diesel engine.
Your emission control system may
include parts such as the fuel injection
system and engine electronic control
module. Also included may be hoses,
connectors and other emission related
assemblies.
If an emission-related part on your
engine is found to have a defect in
material or factory the part will be
repaired or replaced by PACCAR.
This is your emission control system
defects warranty.
6-18 Y53-1181-1B1 (07/19/2013)
Page 97

Warranty
Manufacturer's Warranty Coverage
This warranty coverage is provided for
ve years or 100,000 miles (160,000)
km or 3,000 hours of engine operation,
whichever rst occurs from the date
of delivery of the engine to the rst
purchaser or rst lessee. Where
a Warrantable Condition exists,
PACCAR will repair your engine at no
cost to you including diagnosis, parts
and labor.
Owner's Warranty Responsibilities
As the engine owner, you are
responsible for the performance of the
required maintenance listed in your
PACCAR Operator’s Manual. You
are responsible for presenting your
engine to an authorized PACCAR
Engine Dealer as soon as a problem
exists. The warranty repairs should be
completed in a reasonable amount of
time, not to exceed 30 days.
PACCAR recommends that you retain
all receipts covering maintenance on
your engine, but PACCAR cannot
deny warranty solely for the lack of
receipts or for the failure to ensure
the performance of all scheduled
maintenance.
As the engine owner, you should also
be aware that PACCAR may deny you
warranty coverage if your engine or a
part has failed due to abuse, neglect,
improper maintenance or unapproved
modications.
If you have any questions
regarding your warranty rights
and responsibilities, you should
contact the vehicle OEM manufacturer
at the customer center telephone
number provided with your vehicle
operating instructions or the California
Air Resource Board at 9528 Telstar
Avenue, El Monte, CA 91731.
A warranted part which is scheduled for
replacement as required maintenance
is warranted up to the rst scheduled
replacement point.
Prior to the expiration of the applicable
warranty, Owner must give notice of
any warranted emission control failure
to an authorized PACCAR Engine
dealer and deliver the engine to such
facility for repair.
6
(07/19/2013) Y53-1181-1B1 6-19
Page 98

Warranty
Owner is responsible for incidental
costs such as: communication
expenses, meals, lodging incurred by
Owner or employees of Owner as a
result of a Warrantable Condition.
Owner is responsible for downtime
expenses, cargo damage, nes, all
applicable taxes, all business costs,
and other losses resulting from a
Warrantable Condition.
6
Emissions Components Statement
for PACCAR MX-13 Engine (2013)
Emissions Engine Coverage
This list of emission control parts may
be covered by the Emission Control
System Warranty under certain failure
modes.
Aftertreatment System
• Electronic Control Unit
• Diesel Oxidation Catalyst
• Diesel Particulate Filter (DPF)
• Selective Catalytic Reduction
(SCR) Catalyst
• DPF Air / Fuel Manifold Assembly
• DPF Fuel Injector including air,
fuel, and coolant lines
• DPF Fuel Pressure Sensor
• DPF Air Supply Pressure Sensor
• Pressure protection valve and
plumbing to DPF Fuel Injector
• DPF Temperature Sensors and
Signal Conditioner
• DPF Pressure Sensors
• SCR Temperature Sensor
• NOx Sensor
• NH3 Sensor
• Decomposition Pipe and Pipe
Elbows
• Exhaust piping from turbocharger
to last aftertreatment device
Diesel Exhaust Fluid (DEF) System
• DEF Tank, Heater, and associated
plumbing
• DEF Pump Module and associated
plumbing
6-20 Y53-1181-1B1 (07/19/2013)
Page 99

Warranty
DEF Dosing Module with Injection
•
Nozzle and wiring harness
• DEF Level/Temperature Sensor
• DEF Lines and Heating elements
• DEF Line Heater Control Relay
• DEF Tank Heater Coolant Control
Valve
Dash Lamp
• DEF Lamp
• Malfunction Indicator Lamp (MIL)
Crankcase Ventilation System
• Crankcase Ventilation Separator
and associated plumbing
Intake System
• Air Intake Pipe Mixer
• Pressure/Temperature/Humidity
Sensor before Turbocharger
• Charge Air Cooler and associated
plumbing
• Turbocharger and associated
plumbing
Electronic Control System
• Engine Control Module
• Coolant Temperature Sensor
• Intake Manifold Pressure and
Temperature Sensor
• Turbocharger Speed Sensor
• Exhaust Gas Recirculation (EGR)
Temperature Sensor
• Camshaft Speed Sensor
• Crankshaft Speed Sensor
• NOx Sensor
• Ambient Temperature Sensor
• Lambda Sensor
• Exhaust Manifold Pressure Sensor
• Temperature after Turbocharger
• Vehicle Speed Sensor
• Engine Oil Temperature Sensor
• Water Pump Speed Sensor
• Fuel Pressure Sensor
• Fuel Temperature Sensor
• Pressure Sensor after Exhaust
Throttle Valve
• Wiring harnesses connected at
both ends to emission warranty
components
Exhaust Gas Recirculation System
(EGR)
• EGR Valve and associated
plumbing
• EGR Cooler and associated
plumbing
6
(07/19/2013) Y53-1181-1B1 6-21
Page 100

Warranty
Engine
• Exhaust Manifold
• Exhaust Throttle Valve and
plumbing
Fueling System
• Injectors
• Fuel Pumps and associated
engine plumbing
6
Replacement Parts
PACCAR recommends that any
service parts used for maintenance,
repair or replacement of emission
control systems be new or genuine
approved rebuilt parts and assemblies,
and that the engine be serviced
by an authorized PACCAR Engine
dealer. Your vehicle contains air,
fuel, and electrical components that
may affect engine emission controls.
The use of non-genuine engine or
vehicle replacement parts that are not
equivalent to the PACCAR engine or
OEM vehicle manufacturer’s original
part may impair the engine and vehicle
emissions control system from working
or functioning effectively, and may
jeopardize your emissions warranty
coverage.
The owner may elect to have
maintenance, replacement or repair of
the emission control parts performed
by a facility other than an authorized
PACCAR Engine dealer and may elect
to use parts other than new or genuine
approved rebuilt parts and assemblies
for such maintenance, replacement
or repair; however, the cost of such
service or parts and subsequent
failures resulting from such service or
parts will not be covered under this
emission control system warranty,
except for Emergency Repairs as
described below.
6-22 Y53-1181-1B1 (07/19/2013)
 Loading...