

PAC Audio PMM7333PL User Manual
PMM-7333-PL
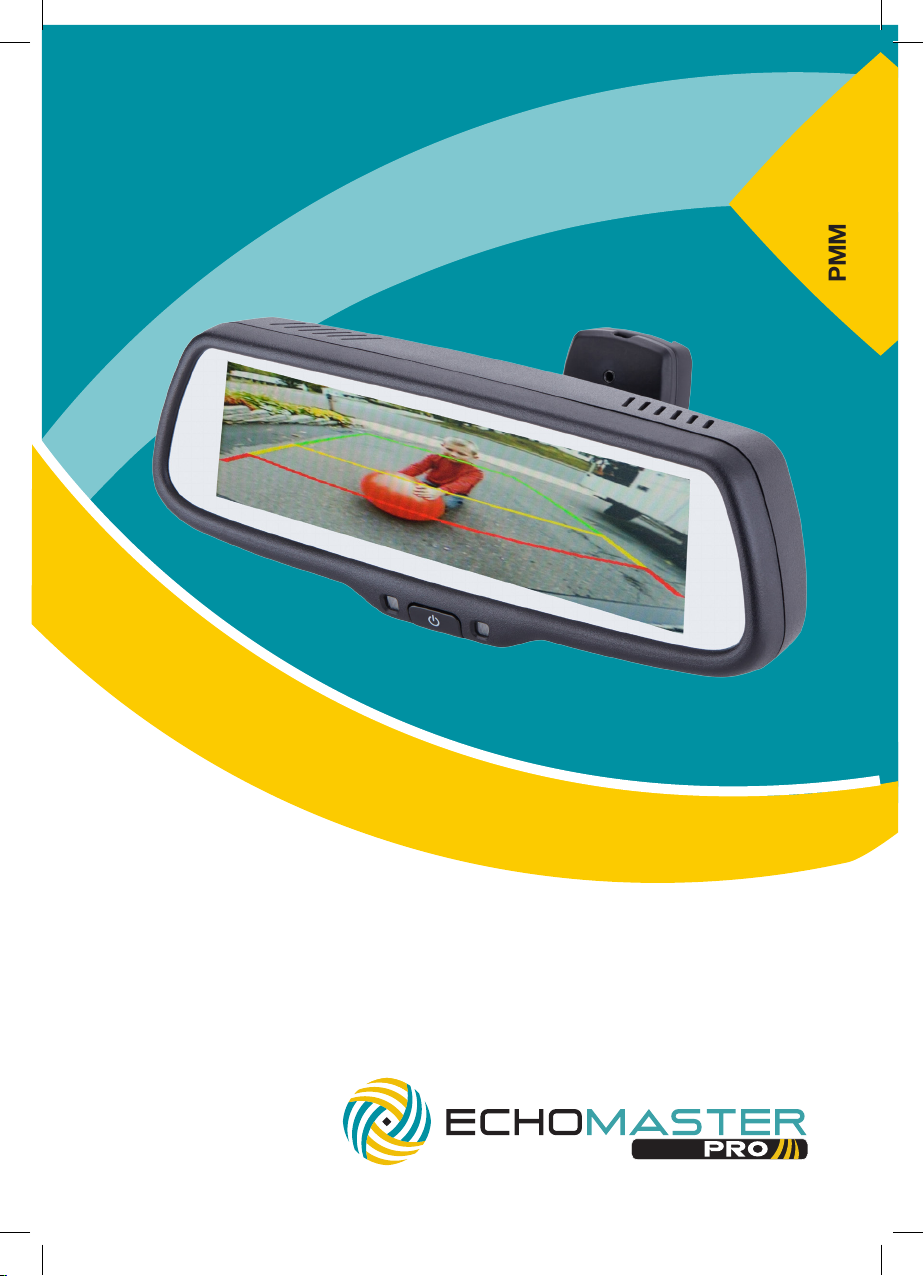
7.3” Factory Mount Mirror Monitor with 3 Video
Inputs, 3 Triggers and Adjustable Parking Lines
User Manual

email - support@aampglobal.com (US)
tel - 1-800-477-2267 (East Coast) - 1-888-883-2790 (West Coast)
email - technical.eu@aampglobal.com (Europe)
Installation Guide
Installation Guide
email - support@aampglobal.com (US)
tel - 1-800-477-2267 (East Coast) - 1-888-883-2790 (West Coast)
email - technical.eu@aampglobal.com (Europe)
PMM-7333-PL
7.3” Factory Mount Mirror Monitor
with 3 Video Inputs, 3 Triggers and
Adjustable Parking Lines
Introduction
Thank you for purchasing your EchoMaster Pro automotive monitor.
Your monitor displays a clear, high resolution image of the area
surrounding your vehicle, meaning your maneuvering and vehicle
awareness will be greatly improved.
Please ensure you read and understand all aspects of this manual before
tting or using your EchoMaster monitor.
Box Contents
u User Guide
u Mirror Monitor
u Main Harness
u Remote Control
Key Features
u 3 video inputs
u 3 triggers
u Remote control included
u Adjustable parking lines
u Auto-dimming display
PMM-7333-PL
7.3” Factory Mount Mirror Monitor
with 3 Video Inputs, 3 Triggers and
Adjustable Parking Lines
Fitting Instructions
The PMM-7333-COM-PL will replace your factory tted rearview mirror.
Remove the original mirror from the vehicle and replace with the
PMM-7333-COM-PL.
Once the unit is in place, run the connections cable across the headliner of
the vehicle and down the A pillar.
Please ensure that you do not impede the operation of any airbags that may
be located in the A pillar of the vehicle. Any cable passing these airbags
should be run behind the airbag and not in front of it.
Once the cable has been routed down to the dashboard, connect the
camera inputs and power connections as shown in the wiring diagram
section of this manual.
2
Operating Instructions
The vehicle ignition is required to be on for the unit to operate.
To turn it on press the POWER button.
To switch between video display modes touch the black area to the left side
of the screen and you will see 3 touch buttons appear. The center of these
will switch the video input.
The bottom symbol will adjust the image setting to one of 4 preset settings.
The top ‘R’ button will instantly switch to the reverse input.
3
 Loading...