

P1PE P72800A, P73200A, PGP200PWA, P73200T, PGX200PWT User Manual
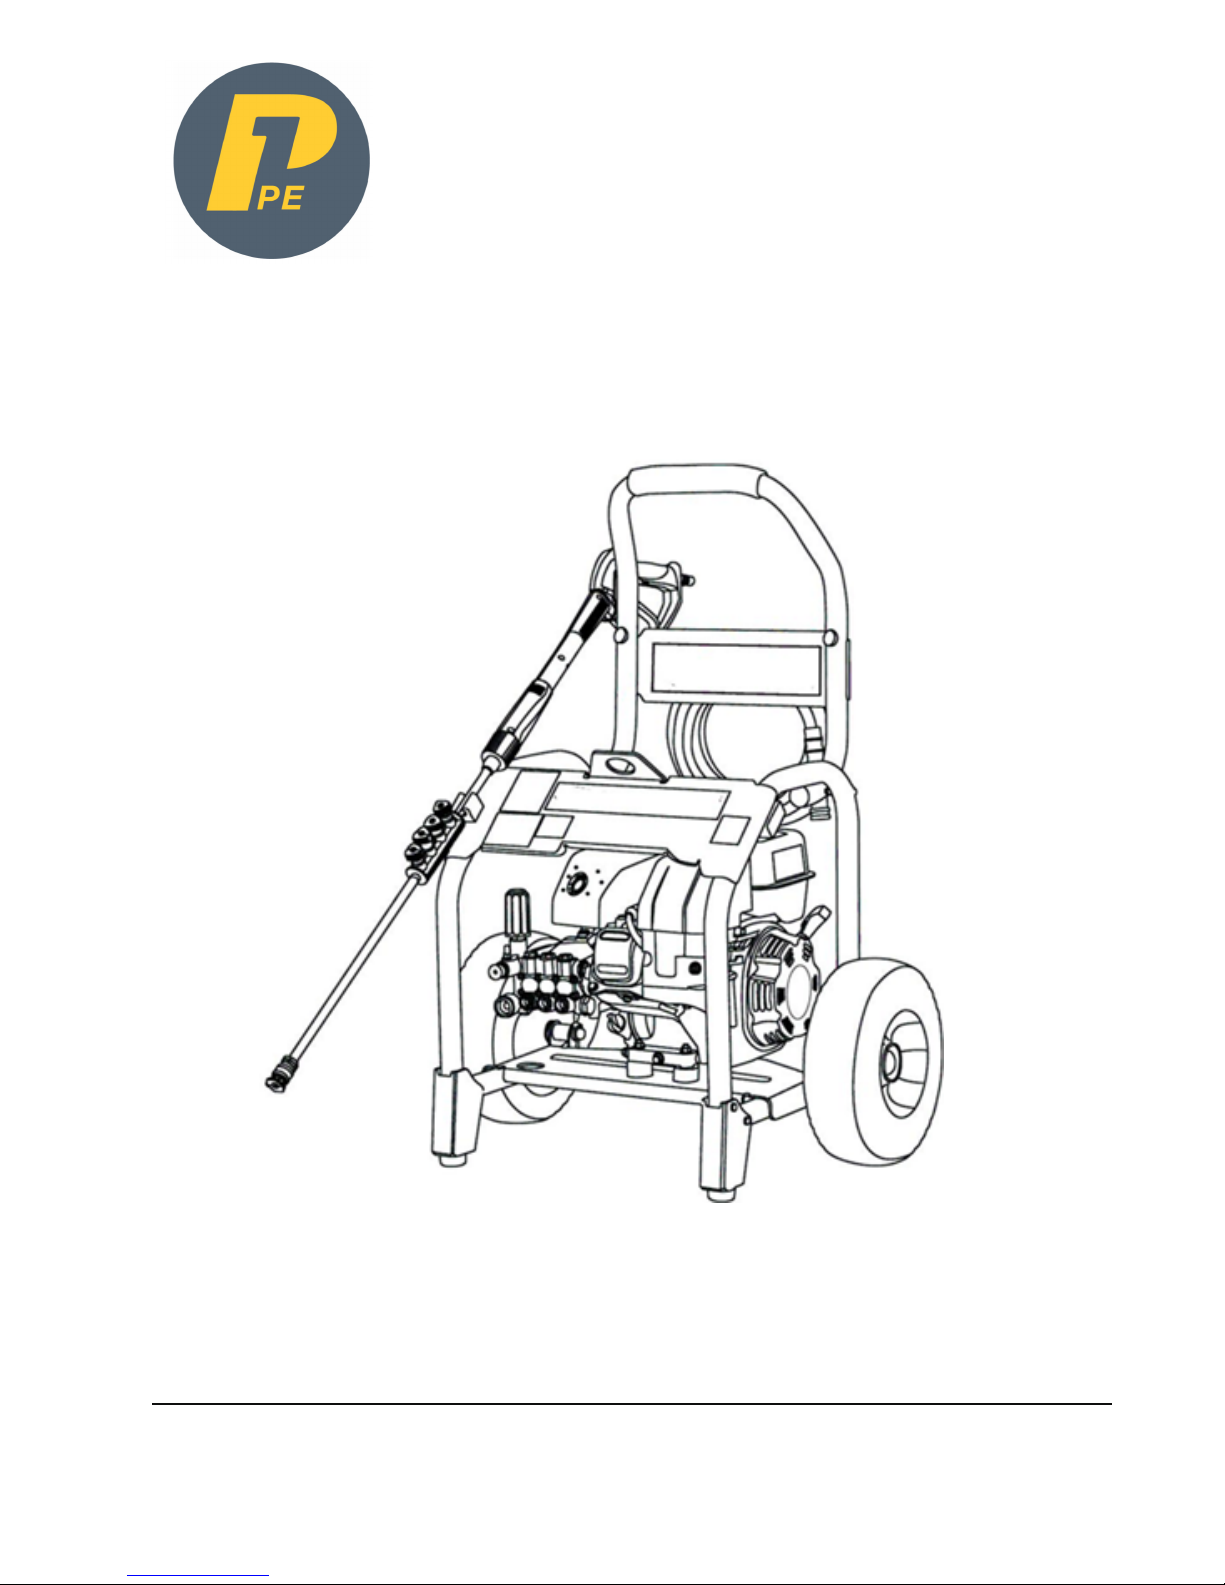
PETROL PRESSURE WASHER
Models P72800A, P73200A, P73200T, PGP200PWA
& PGX200PWT
User Manual

Page 2
First edition - April 2017

Page 3
First edition - April 2017
CONTENTS
4 - 6
7 - 12
13 - 14
15
16 - 18
19 - 24
25
26
27
28
29
29
29
1. SAFETY
2. QUICK START
3. STARTING PROCEDURE
4. STOPPING - SHUTDOWN PROCEDURE
5. USING THE MACHINE
6. MAINTENANCE
7. TROUBLESHOOTING
8. SPECIFICATION
9. PART LOCATIONS
10. DECLARATIONS OF CONFORMITY
11. RECYCLING & PRODUCT DISPOSAL
12. CONTACT DETAILS
13. MANUAL UPDATES
14. WARRANTY 29
1. SAFETY
1.1. General safety notes.
1.1.1. The operator of the machine is
responsible for, and has a duty of care in
making sure that the machine is operated
safely and in accordance with the instructions
in this user manual. Keep the manual safe and
pass it on if the machine is loaned or sold to
another user.
1.1.2. Please note the following safety
points.
1.1.2.1. The machine should never be left it in
a condition which would allow an untrained or
unauthorised person/s to operate this
machine.
1.1.2.1.1. All due care and diligence
should be taken by the operator for the safety
of, and with regard to those around whilst
using the machine.
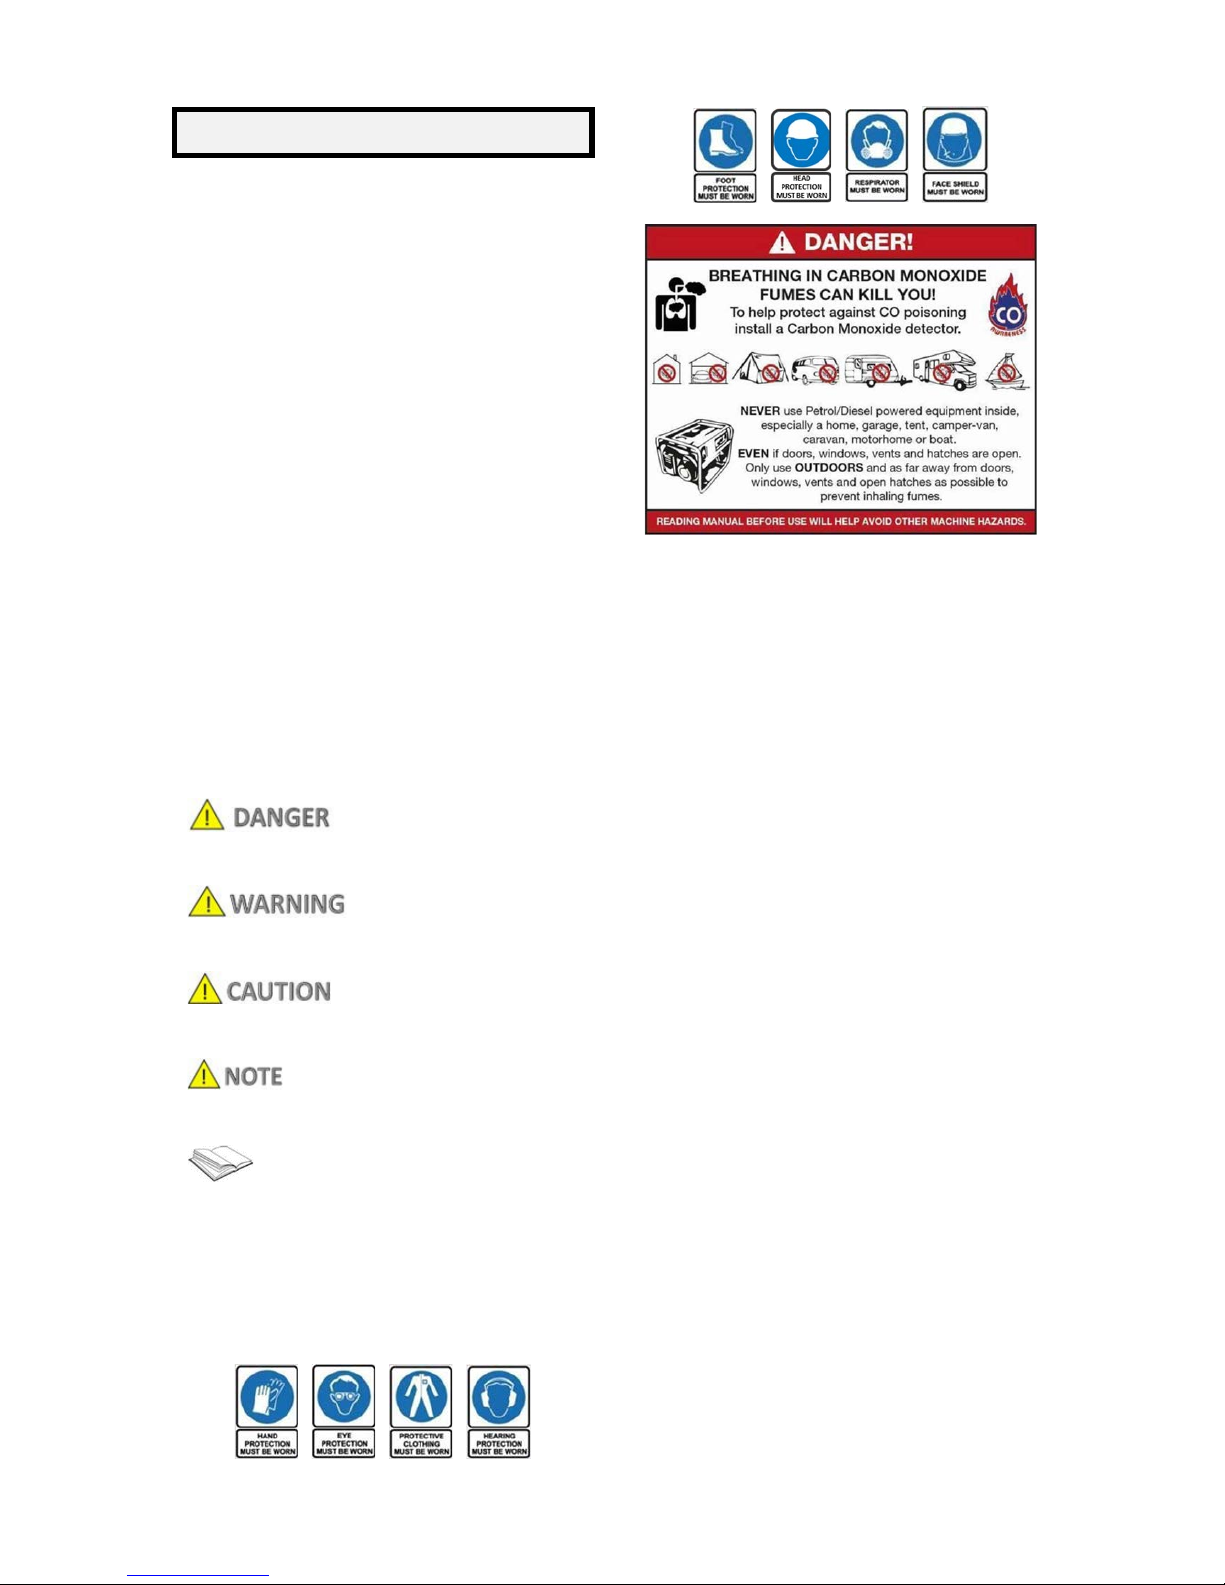
1.1.2.1.2. Some or all of the following warning signs, symbols and/or PPE pictograms
may appear throughout this manual. You
MUST adhere to their warning/s. Failure to do
so may result in personal injury to yourself or
those around you.
Ind
icates a hazard, which, if not avoided, could
result in serious injury or death.
Indicates a hazard, which, if not avoided, could
result in serious injury.
Ind
icates a hazard which, if not avoided, might
result in minor or moderate injury.
Ind
icates a situation that could easily result in
equipment damage.
READ a
nd keep the manual safe and pass it on
if the machine is loaned or sold to another
user. You MUST fully read instructions to make
sure you use and operate machine safely.
Appropriate Personal Protective Equipment
(PPE), MUST be worn at all times when
Machine is in use or being repaired.
1.2. Carbon monoxide (where applicable).
1.2.1. Carbon monoxide is a colourless and
odourless gas. Inhaling this gas can cause
death as well as serious long term health
problems such as brain damage.
1.2.2. The symptoms of carbon monoxide
poisoning can include but are not limited to
the following; Headaches, dizziness, nausea,
breathlessness, collapsing or loss of
consciousness.
1.2.2.1. Carbon monoxide poisoning
symptoms are similar to flu, food poisoning,
viral infections and simply tiredness. It is quite
common for people to mistake this very
dangerous poisoning for something else.
1.2.2.2. To avoid carbon monoxide poisoning
DO NOT use Petrol/Diesel- powered
equipment inside any of the following; Home,
garage, tent, camper van, mobile home,
caravan or boat.
This list is not exhaustive and if you are in any
doubt contact your dealer.
1.2.3. If you think you have or someone
around you has been affected by carbon
monoxide poisoning;
1.2.3.1. Get them fresh air immediately, by
leaving the affected area or by opening doors
and windows. If safe and practical to do so
make sure that the machine is turned off. DO
NOT enter a room you suspect of having
carbon monoxide present – instead call the
emergency services.
1.2.3.2. Contact a doctor immediately or go to
hospital - let them know that you suspect
carbon monoxide poisoning.
Page 4
First edition - April 2017
1.2.4 DO NOT use in an enclosed area or a
moving vehicle.
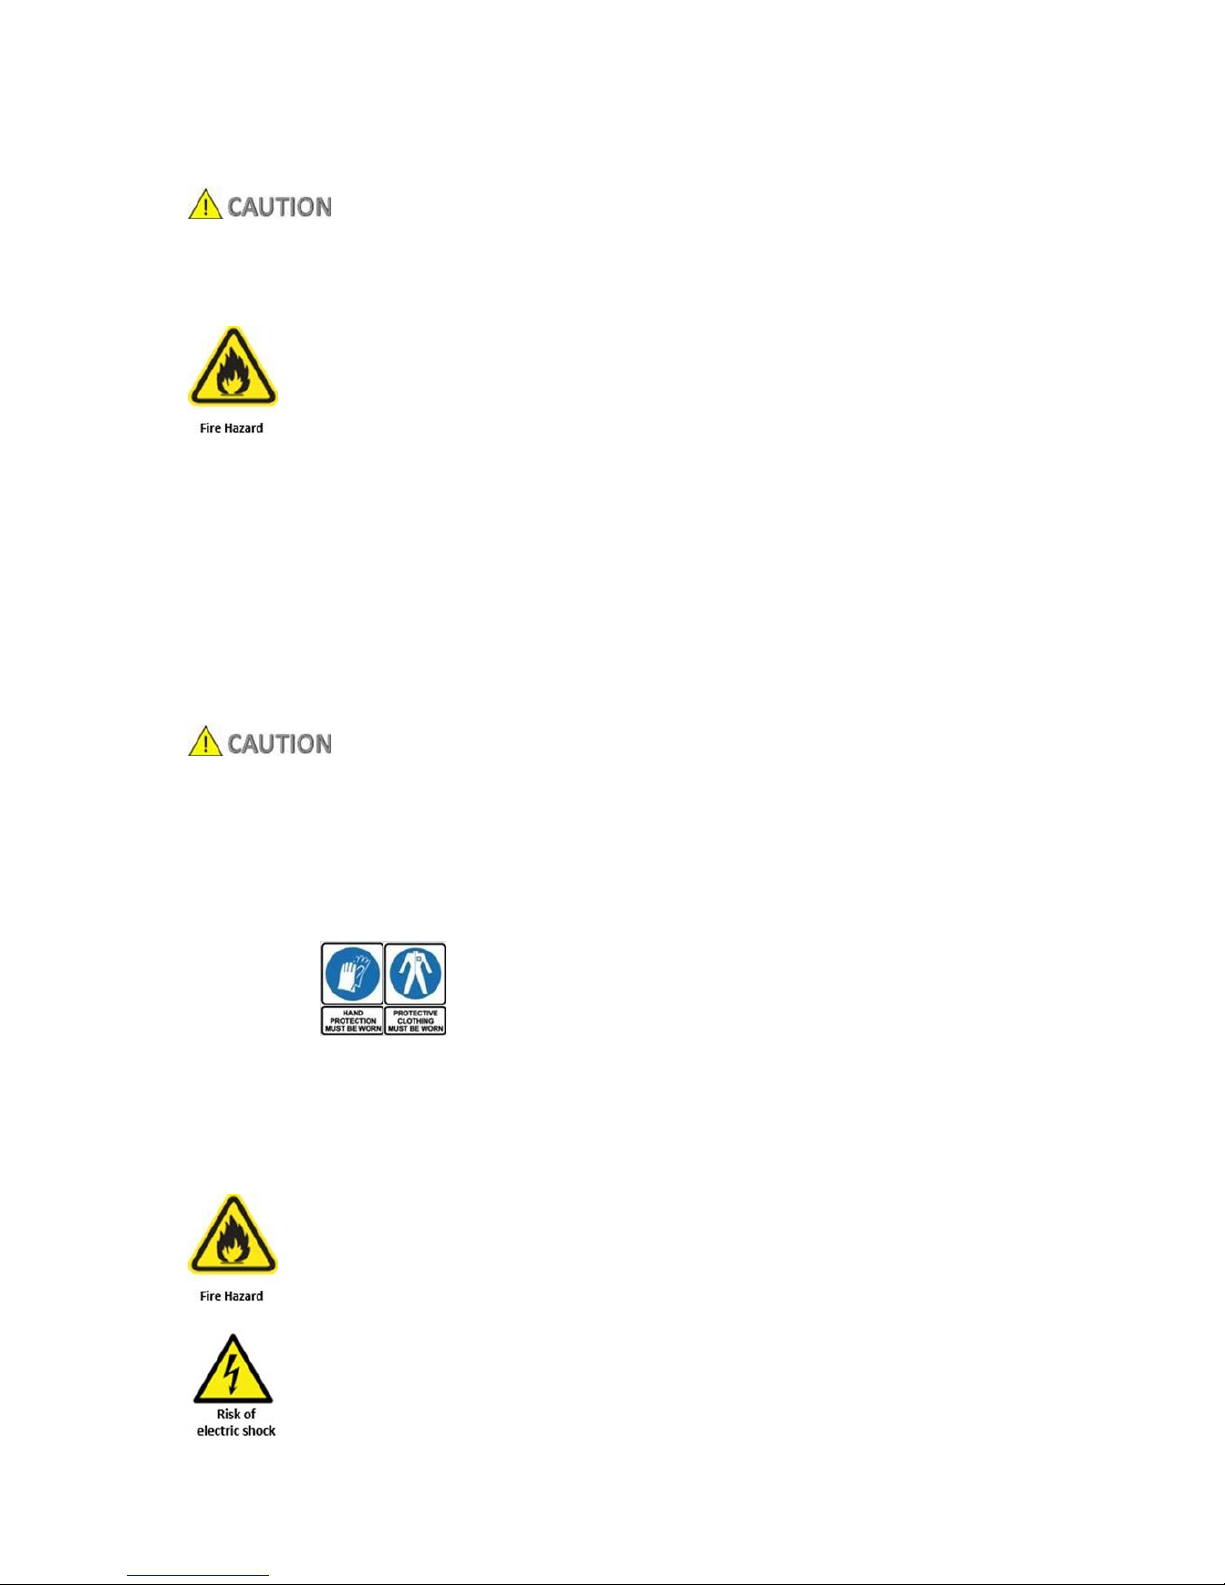
1.3. General fuel safety.
ALL FUELS ARE FLAMMABLE
1.3.1. Fire hazard - keep fuel away from all
sources of ignition for example heaters, lamps,
sparks from grinding or welding.
1.3.2. D
O NOT carry out hot work on tanks
that have contained fuel it is extremely
dangerous.
1.3.3. ALWAYS keep work area clean and
tidy.
1.3.4. ALWAYS clean up all spills promptly
using correct methods i.e. absorbent granules
and a lidded bin.
1.3.5. ALWAYS dispose of waste fuels
correctly.
1.4. Fueling/De-fueling.
ALL F
UELS ARE FLAMMABLE
1.4.1. ALWAYS fuel and defuel in a wellventilated area outside of buildings.
1.4.2. ALWAYS wear correct, suitable and fit
for purpose Personal Protective Equipment
(PPE), suggested items are but not limited to
safety gloves and overalls.
1.4.3. W
hen fueling/de-fueling ALWAYS
avoid inhaling fumes
1.4.4. When de-fueling ALWAYS use a
propriety fuel retriever.
1.4.5. ALWAYS carry fuel in the correct and
clearly marked container.
1.5. El
ectrical safety.
1.5.1. E
lectricity can kill - NEVER use
pressure washer jet to come into contact with
LIVE or ENERGISED equipment. It can also
cause severe burns.
1.5.2. NEVER work on or near electricity with
wet hands, wet clothing, and wet gloves.
1.6. Vibrations.
1.6.1. Prolonged use of hand held (operated)
machines will cause the user to feel the effects
of/from vibrations. These vibrations can lead
to white finger (Raynaud's phenomenon) or
carpal tunnel syndrome. This condition
reduces the ability of the hand to feel and
regulate temperature, causing numbness and
heat sensations and may cause nerve damage
and circulatory tissue death.
1.6.2. Not all factors that lead to white finger
disease are known, but cold weather, smoking
and other diseases that affect blood vessels
and blood circulation as well as large and longlasting impact of shocks are considered factors
in the formation of white finger. Note the
following to reduce the risk the white finger
and carpal tunnel syndrome:
1.6.2.1. Wear gloves and keep your hands
warm
1.6.2.2. Take regular breaks
1.6.3. All of the above precautions may help
reduce the risk of white finger disease but not
rule out carpal tunnel syndrome. Long-term
and regular users are therefore recommended
to observe the condition of your hands and
fingers. Seek medical attention immediately if
any of the above symptoms should occur.
1.8. Noise.
1.8.1. The operating noise of the machine
can damage your hearing. Wear hearing
protection such as earplugs or ear defenders
to protect your hearing. Long- term and
regular users are advised to have hearing
checked regularly. Be especially vigilant and
cautious when wearing hearing protection
because your ability to hear alarm warnings
will be reduced.
1.8.2. Noise emissions for this equipment is
unavoidable. Carry out noisy work at approved
times and for certain periods. Limit the
working time to a minimum. For your personal
protection and protection of people working
nearby it is also advisable for them to wear
hearing protection.
Page 5
First edition - April 2017

1.8.3. See CERTIFICATE of CONFORMITY
section for Outdoor Noise declaration of
conformity.
1.9. Ma
chine specific safety.
1.9.1. N
EVER direct the outlet of the
pressure washer jet towards anyone, which
includes adults, children, all pets and livestock
or other objects that can be damaged.
1.9.2. You MUST know how to STOP the
machine quickly. You MUST also know how to
safely bleed the built up pressure.
1.9.3. To reduce the risk of injury, close
supervision is necessary when a product is
used near children.
1.9.4. You MUST be thoroughly familiar with
the controls.
1.9.5. Stay alert – watch what you are doing.
1.9.6. DO NOT operate the product when
fatigued or under the influence of alcohol or
drugs.
1.9.7. Keep operating area clear of all
persons not involved in the pressure washing
process.
1.9.8. DO NOT overreach or stand on
unstable support. You MUST maintain good
footing and balance at all times. Be careful
that you do not slip on any water residue. You
MUST keep working surface free of excess
water
1.9.9. Follow the maintenance instructions
specified in the manual.
1.9.10. DO NOT leave the pump running for
longer than 1 minute without using the pump
will overheat. Damaged caused in this way will
invalidate any warranty.
1.9.11. DO NOT let the unit freeze. You MUST
always empty the machine of all water after
use and before storage – this is especially
important in very cold weather or at times
when the weather gets down to freezing
temperatures.
1.9.12. Only operate the machine outdoors.
1.9.13. NEVER use the pressure washer to
spray dangerous liquids such as petrol, acids
etc.
1.9.14. The exhaust will be HOT during and
shortly after use – You MUST keep all body
parts and flammable materials clear of the
exhaust at all times.
1.9.15. NEVER under any circumstance
attempt to repair the high pressure hose. You
MUST instead replace any damaged hose or
other high pressure components.
1.9.16. Under NO circumstances should you
modify or alter the Pressure Washer in any
way. Modifications can create serious safety
hazards and will also void the warranty.
Page 6
First edition - April 2017
2. QUICK START
2.1. This guide is meant to serve as a quick reference for operating your Pressure washer it is for
convenience and the user should read the safety section first.
FOR OUTDOOR USE ONLY.
This Pressure washer produces carbon monoxide - a poisonous, colourless & odourless gas that can
cause death or serious injury. Petrol is highly flammable, always handle with extreme care and in a
well ventilated area.
Always remove HT lead from spark plug when checking machine or changing parts.
2.2. This product comes partially assembled and carefully packaged and should include, 2 x rubber
feet, 2 x Fixed wheels, 2 x Axles, 2 x Large flange nuts, 1 x Spanner set, 1 x Bracket, 4 x Flange bolts, 4
x Small flange nuts, 1 x Spray gun, 1 x Lance c/w 5 nozzles, 4 x Large washers, 1 x High pressure hose,
User manual, Warranty registration form.
2.3. At this
point, check that you have all of the included items listed above. If any are missing or
damaged, call 01646 687 880 or email service@genpower.co.uk.
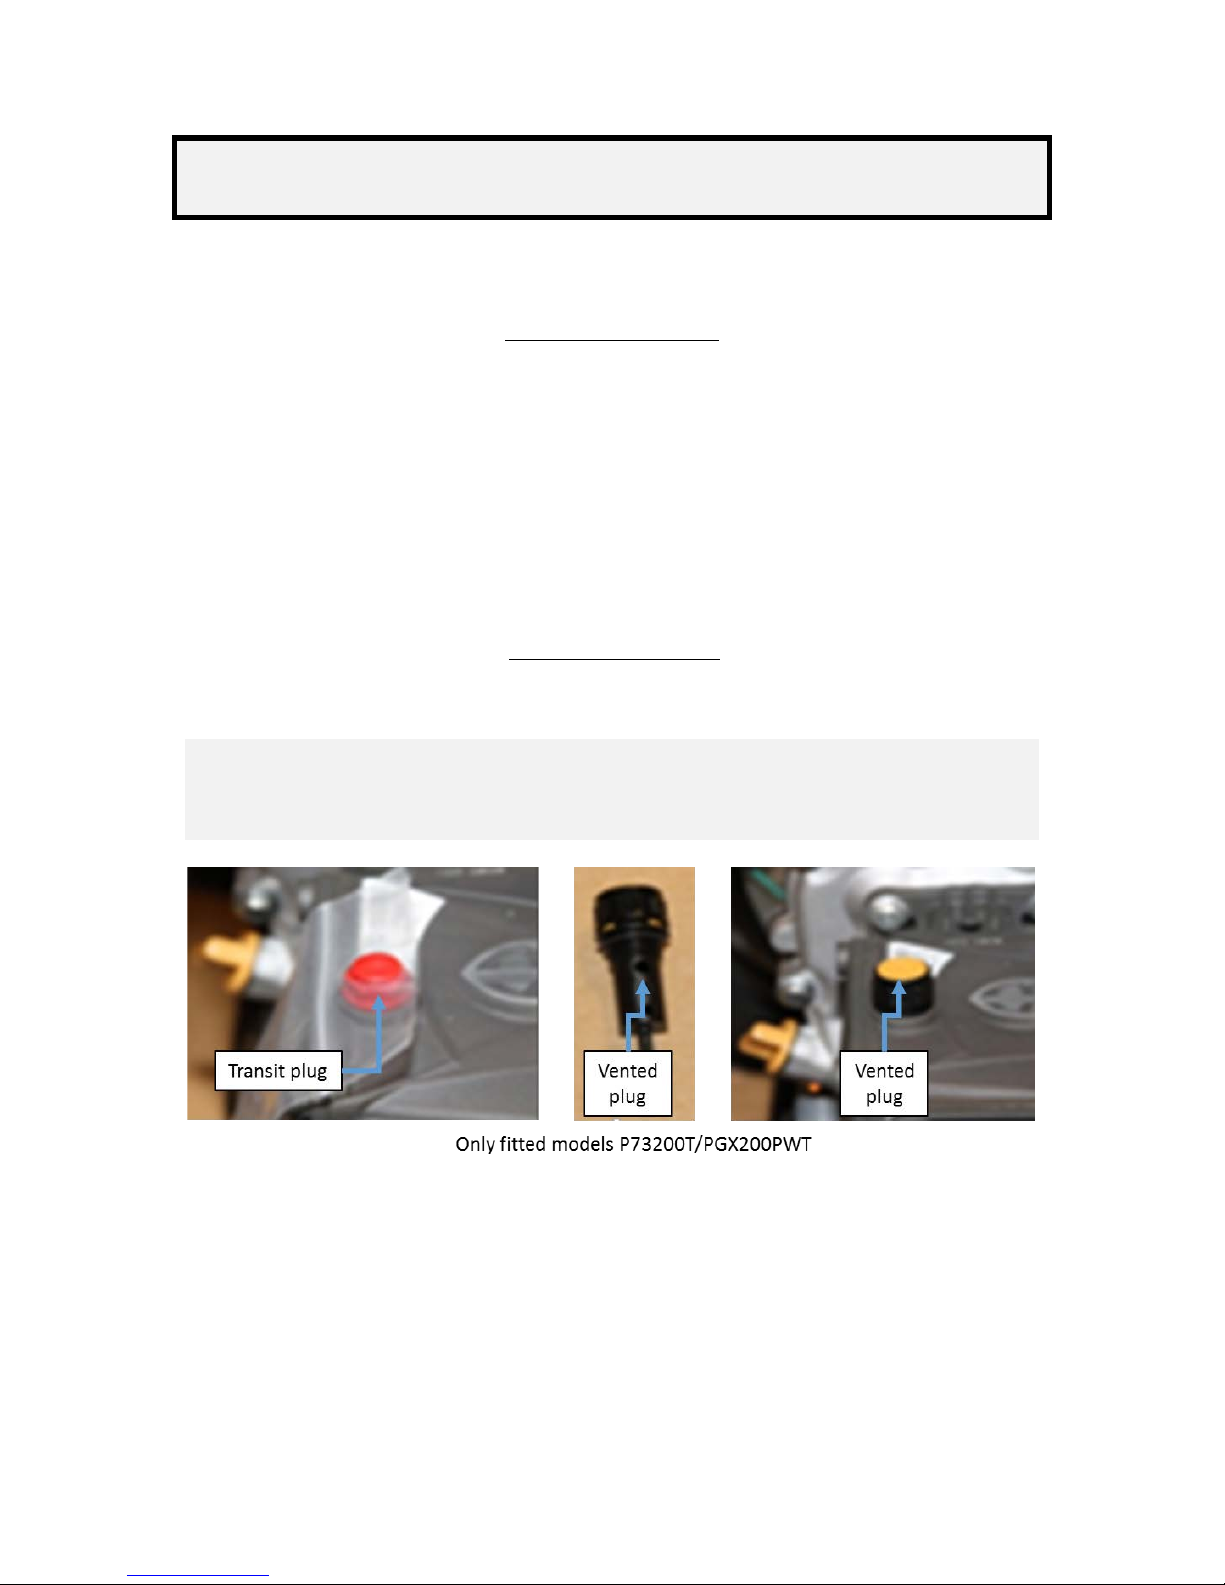
2.4. Shipping plug.
Important, do not run the pump with the red transit plug installed, this will void
your warranty!
Remove the red shipping plug (fitted on pump) and install the vented operating plug.
Using a 11/16 inch/18mm spanner carefully remove the red shipping plug from the pump as shown.
Remove the vented plug from the bag attached to the red shipping plug. Install the vented plug as
shown. Install by hand and secure finger tight.
Page 7
First edition - April 2017

2.5. Rubber feet assembly.
Using the bolts supplied attach the brackets with the rubber feet on to the frame. Insert the bolts from
the outside of the unit towards the inside and secure the bolts with the cap nuts provided using 10mm
wrenches. Do not over-tighten. A second person should steady the frame for this step. Repeat the
process for both feet.
2.6. Axle and wheel assembly.
Place large diameter washer on to the axle shaft and insert the axle into the wheel/tyre assembly as
shown, you may have to use a rubber mallet to tap the axle through the wheel opening.
Slide the axle wheel assembly onto the frame assembly and place a washer onto the axle and
secure with a supplied nut. Tighten using suitable spanner and socket. Tighten securely but DO NOT
overtighten. A second person should steady the frame for this step.
Page 8
First edition - April 2017

2.7. Handle assembly.
The handle assembly is folded down for transportation, pull handle upwards and lock into position using
the knob on the right hand side of the machine as viewed from the rear of machine. To undo knob pull
outwards, raise the handle and release knob so that it locates the hole in frame.
2.8. Upper support assembly.
Using the 4 bolts provided, insert the bolts through the front of the frame handle support. Next hold
the Upper support against the back of the frame handle support and secure the bolts using a large
Phillips head screwdriver into the Upper Support. Be careful to make sure the bolt does not cross-
thread into the upper support. Do not over-tighten.
Page 9
First edition - April 2017

2.9. Wand/Gun – trigger assembly.
Attach the wand into the handle as shown below. Start off gently so that you do not cross thread the
attachments. Screw into place in a clockwise direction. Tighten using a suitable spanner but DO NOT
over tighten.
Attach the high pressure hose to gun/trigger as shown below. Start off gently so that you do not cross
thread the attachments. Screw into place in a clockwise direction. Tighten by hand, DO NOT over
tighten.
Attach the high pressure hose to the pump as shown below. Start off gently so that you do not cross
thread the attachments. Screw into place in a clockwise direction. Tighten by hand, DO NOT over
tighten.
Page 10
First edition - April 2017
 Loading...