

Page 1
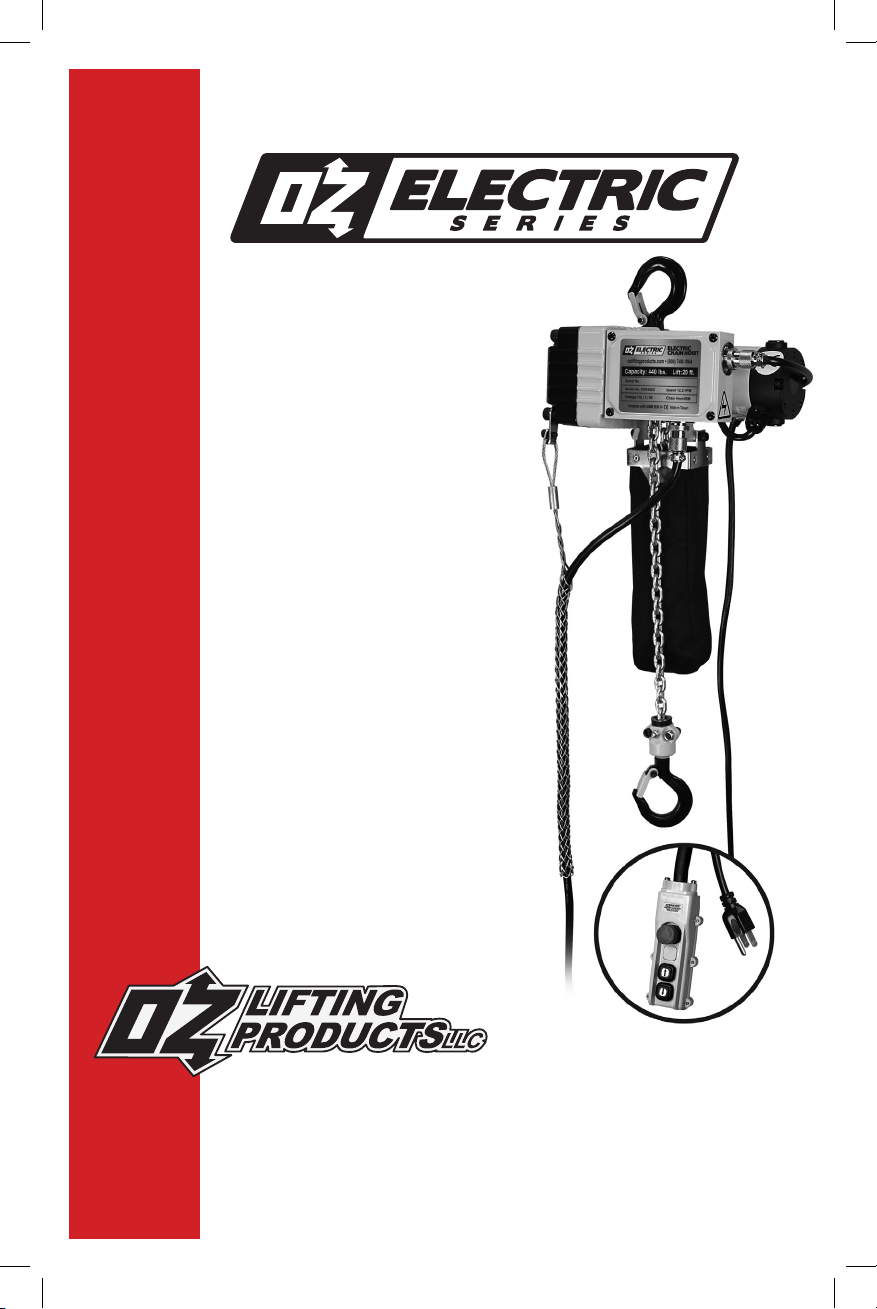
OPERATOR’S MANUAL
ELECTRIC
CHAIN HOIST
H2 DUTY CLASS
Overload Protected
MODEL:
OZ440EC
Capacity: 440 lbs.
Lift: 20 Feet
Speed: 12.5 FPM
pg.1
P.O. Box 845, Winona, MN 55987
Phone (800) 749-1064
(507) 474-6250
Tech Support (507) 457-3346
Fax (507) 452-5217
www.ozliftingproducts.com
Page 2
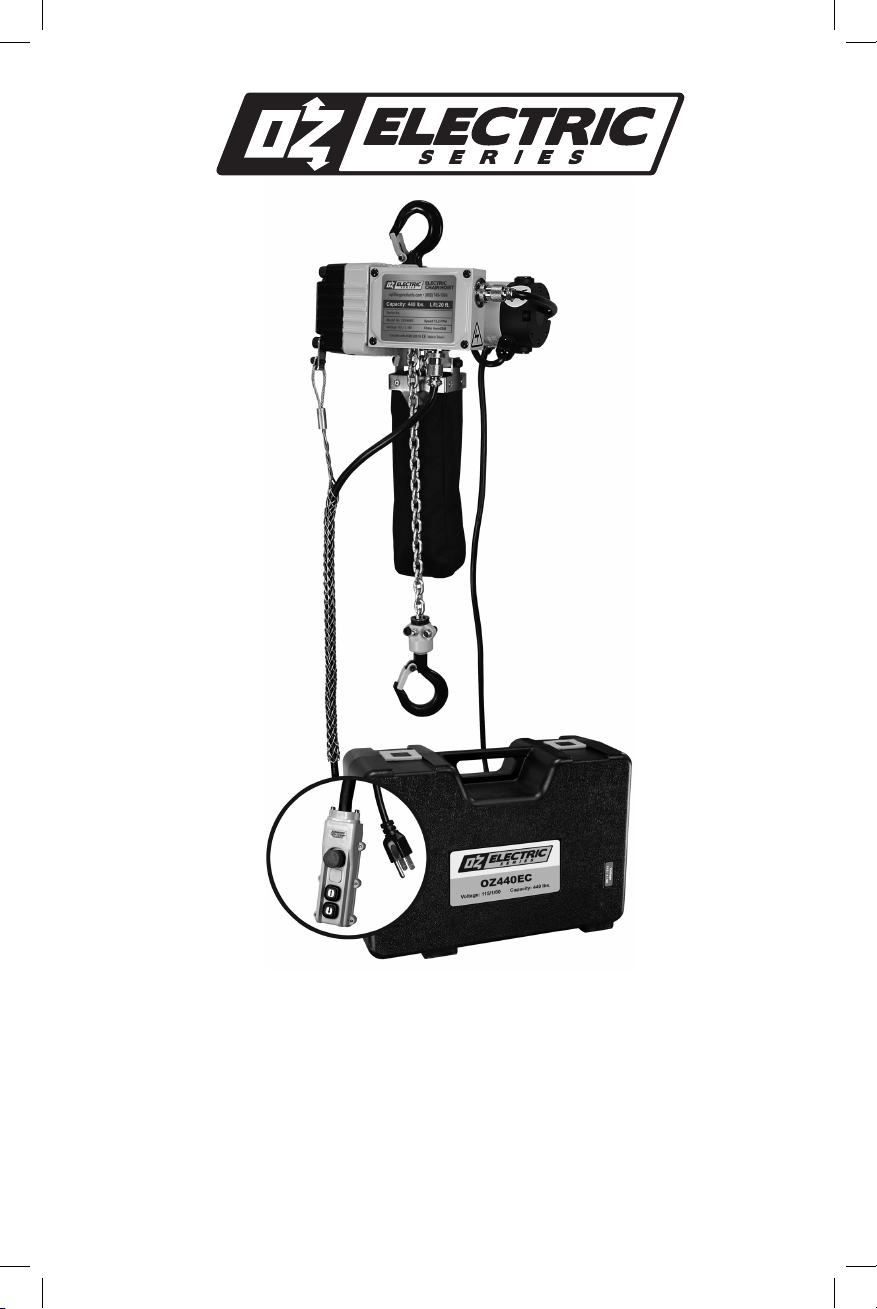
The OZ440EC is an ultra-lightweight, advanced electric chain hoist. At
only 18 lbs, this compact and powerful hoist is easy to install and operate.
With a carrying case for easy to transport and the ability to connect to
a standard 110VAC outlet, the OZ440EC combines convenience with
top-of-the-line design.
pg.2
Page 3

Table of Contents
Pg.4 ....................Warranty
Pg.5 ....................Introduction / Specications
Pg.6 ....................Installation – Wiring
Pg.7 ....................Installation – Chain Hoist
Pg.8 ....................Operation
Pg.10 ...................Maintenance, Cleaning and
. . . . . . . . . . . . . . . . . . . . . . . . Storage / Inspection
Pg.11 ...................Warnings
Pg.12 ...................Parts Breakdown
Pg.14 ...................Service Notes
Pg.16 ...................Contact Information
pg.3
Page 4

Warranty
OZ Lifting Products LLC® guarantees this product to be free of defects in materials and workmanship
for one year from the date of shipment.
This warranty does not apply to products that show signs of misuse, overloading, alteration, improper
maintenance or negligence. The normal wear and tear of moving parts is excluded from the warranty.
Moving parts are dened as brake discs, wire rope and other wear components that are subject to
use conditions. This warranty does not cover any costs related to removal of this product, lost time, or
any other incidental or consequential damages/costs resulting from the claimed defects.
If this product fails during the rst year of operating due to defective materials or workmanship, it
will be repaired or replaced at the discretion of OZ Lifting Products LLC®. Any product subject to
a warranty claim must be returned, prepaid, to an authorized OZ Lifting Products LLC® warranty
depot along with proof of purchase. Upon repair, the product will be returned to the customer free of
charge. If no defect is found, the customer will be responsible for return shipping costs. The product’s
warranty will be effective for the remainder of the original warranty period (one year from shipment
date).
OZ Lifting Products LLC® will not be held liable for the following arising from the use of this product:
injuries to persons or property, death, incidental, consequential, or contingent damages, whether
negligent or deliberate. It is the sole responsibility of the owner to install and operate the product
properly and safely.
This is OZ Lifting Products LLC®‘s only written warranty. This warranty is in lieu of all other warranties
implied by law such as merchantability and tness. The sale of products from OZ Lifting Products
LLC® under any other warranty or guarantee, expressed or implied, is not authorized.
NOTE: OZ Lifting Products LLC® has the right to alter the design of or discontinue the
production of any product without prior notice.
For more information please contact:
P.O. Box 845, Winona, MN 55987
Phone (800) 749-1064
(507) 474-6250
Tech Support (507) 457-3346
Fax (507) 452-5217
[email protected]
www.ozliftingproducts.com
pg.4
Page 5
Introduction
Thank you for purchasing your OZ Lifting Products LLC® OZ440EC. This manual contains general
instructions dealing with the normal installation, operation, and maintenance of the product described
herein only. This manual is not intended to provide instruction on the usage of any other component.
It is the user’s responsibility to ensure that all components are suitable for use and are used correctly.
The information provided should not be expected to prepare the user for all possible circumstances.
This product should not be installed, operated, or maintained by any person who has not read all
the contents of these instructions. Failure to read and comply with these instructions, warnings, or
limitations noted might result in bodily injury, death, or property damage. Contact the distributor for
further explanation if information is not fully understood.
It is the responsibility of the owner/user to install, test, maintain, and operate these products in
accordance with OSHA regulations, other federal, state, and local regulations.
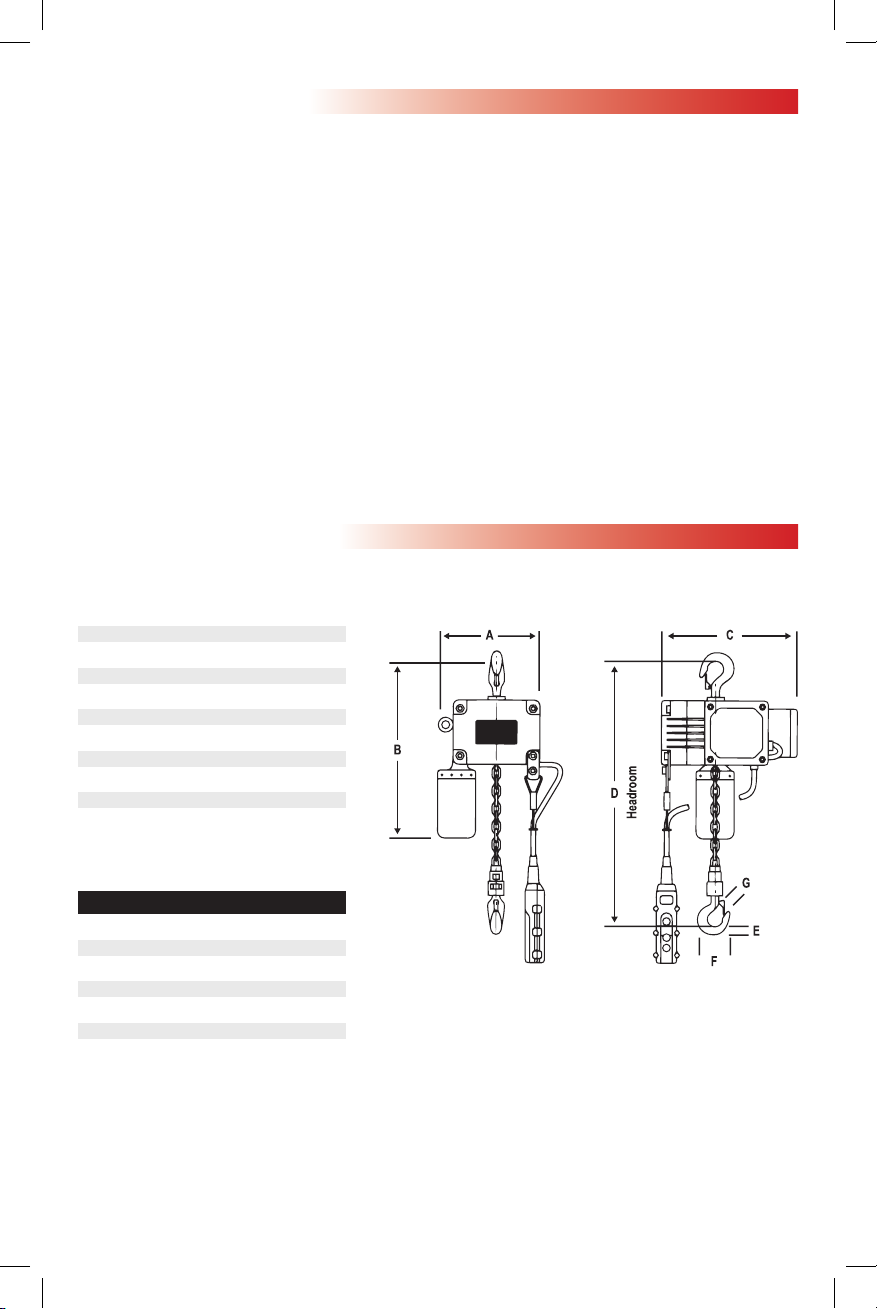
Specications
Model OZ440EC
Voltage 115 / 1 /60
Capacity 440 lbs.
Speed 12.5 FPM
Chain 4mm X6M
Duty Cycle 15 min.
Pendant 15’
Power cord 15’
Lift 20’ *Custom lifts available
Net Weight 18 lbs.
Measurements
A 5”
B 15”
C 9.5”
D 11”
E 0.6”
F 2.5”
G 0.75”
pg.5
Page 6
Installation
Check for damage during shipment prior to installation. Do not install or use a damaged product. Be
sure to maintain records of all accompanying product information. Contact your OZ Lifting Products
LLC® dealer if there are any problems or questions. Read and comply with all instructions and
warnings furnished with or attached to the product as applicable.
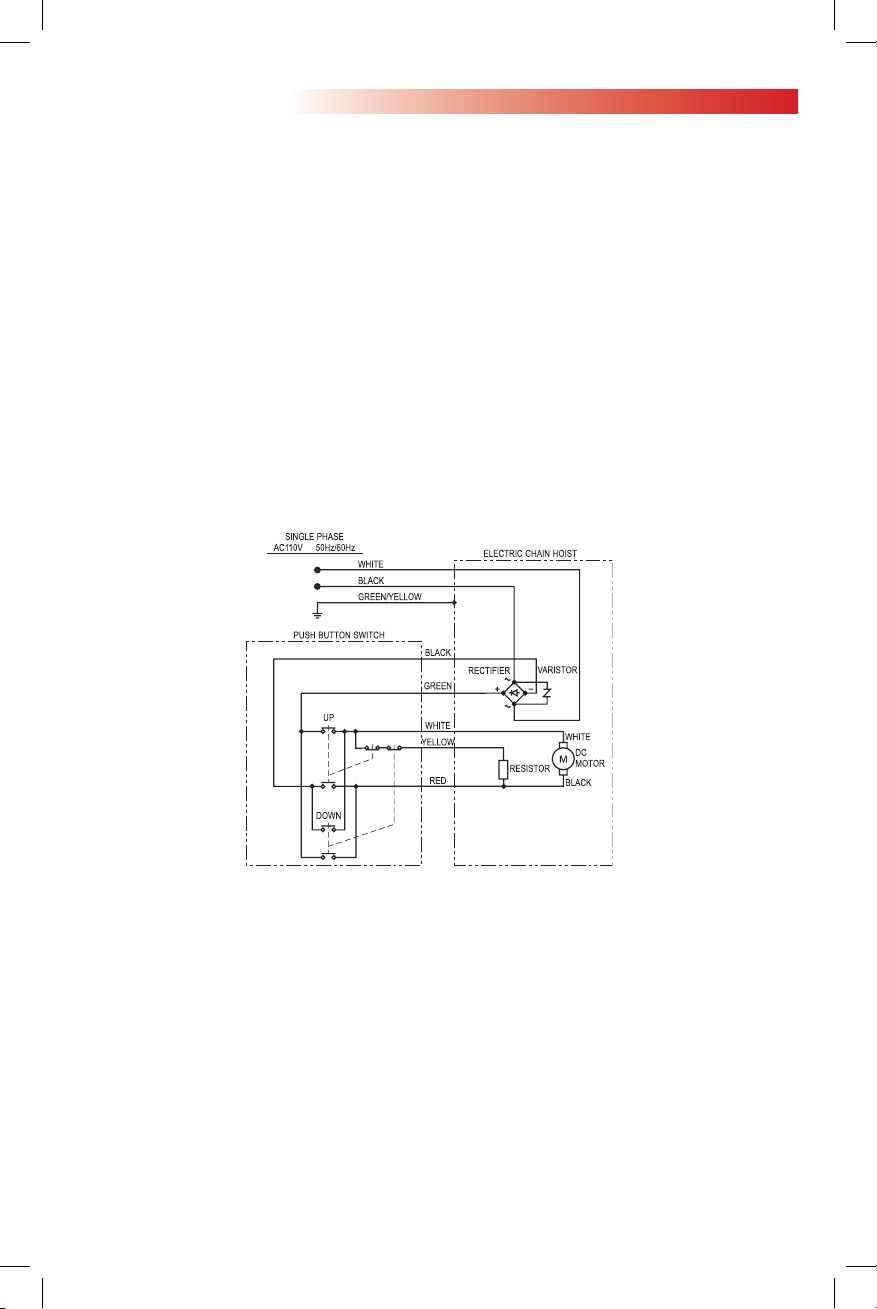
Wiring
Follow all electrical engineering and indoor wiring standards. Use of a qualied electrical contractor is
highly recommended for completing this portion of the installation.
NOTE: Before connecting the power source to the hoist, conrm that the power source voltage
matches the applicable power source voltage for the product.
When using:
• A 110 V single phase power source - Install a plug with a ground pin or lead on the power cable.
• A 220 V power source - See a qualied electrical contractor.
• A single-phase power source from an engine-driven generator - Conrm that it has a rated output
of at least 1 kVA. Be sure to connect a grounding lead.
Wiring Diagram
Setting the power cable/cord
When selecting a power cable for use with the OZ440EC, do not use an excessively thin power
cable or a power source that outputs reduced voltage. This may cause the hoist to fail or the cable to
overheat.
When using an extension cable, follow the guidelines below:
14AWG cable may be used up to a length of 165’
16AWG cable may be used up to a length of 100’
If the resistance of the cable between the power source and the OZ440EC and also that of other
electricity supply equipment is large, the voltage supplied to the hoist will fall markedly. As a result,
the OZ440EC may fail to function normally, or the power cable may overheat or burn out.
pg.6
Page 7
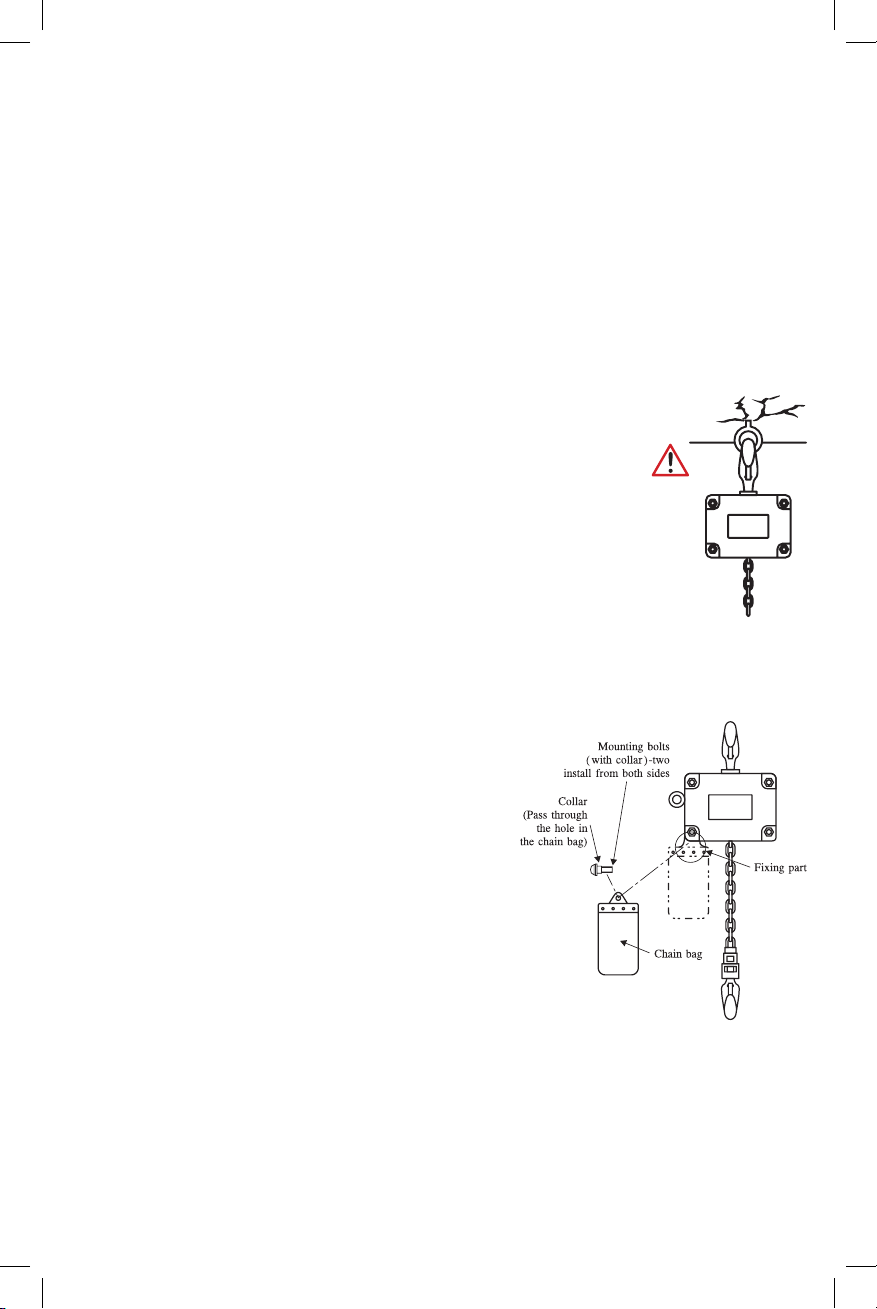
Chain Hoist
Ensure that the following are observed prior to installation:
• Install only in a place where there is no danger of the OZ440EC falling.
• Suspend the hoist in such a way that it swings freely. Failure to do so could result in damage and/or injury.
• Never operate the OZ440EC when the body of the unit is not suspended or when it is tilted to an
excessive degree.
• Remove the vinyl band and the caution tag before operating the chain hoist. Failure to do so could
result in damage.
• Conrm that the load chain has correctly passed through the inside of the body of the unit.
• Conrm that the bottom surface of the body of the unit is separated by at least 12 inches from the
ground to ensure that the load chain can enter and exit the unit smoothly.
• Check the safety latch, and ensure that it is not broken.
Using the chain hoist as a hook suspension type
1. The attachment point to which the top hook of the OZ440EC is to
be attached must have sufcient strength to enable it to withstand a
load of at least 5 times the rated load.
2. The cross-sectional shape of the hook attachment must be adequately
rounded and free of sharp angles. Also, apply grease or another
lubricant to the contact aces of the hook and the ring.
3. Upon completion of installation of the OZ440EC, ensure that the safety
latch of the top hook is completely closed.
NOTE: If the hook attachment point has insufcient strength or is worn, it is liable to break, causing
the suspended load and the chain hoist to drop.
Installing the chain bag
The chain bag should be installed prior to using the OZ440EC.
Incorrect installation may result in damage or injury. Ensure that
the chain bag matches the length of the load chain and do not
insert the entire load chain into the bag at once.
1. To install the chain bag, rst run the hoist so that there is
about 6 inches of chain extending from the hoist on the
no-load side of the hoist. This will help to align the bag in
the proper position.
2. Install and secure the two mounting bolts at the top of the bag.
Carry out a hoisting operation so that the chain on the no-load
side enters the chain bag.
NOTE: When using the chain hoist in a very dusty location, in a place where foreign matter is liable to
enter the bag, or when the chain is rusty, the chain may sometimes spill over. Keep the bag and the
chain clean and always keep the chain oiled.
pg.7
Page 8
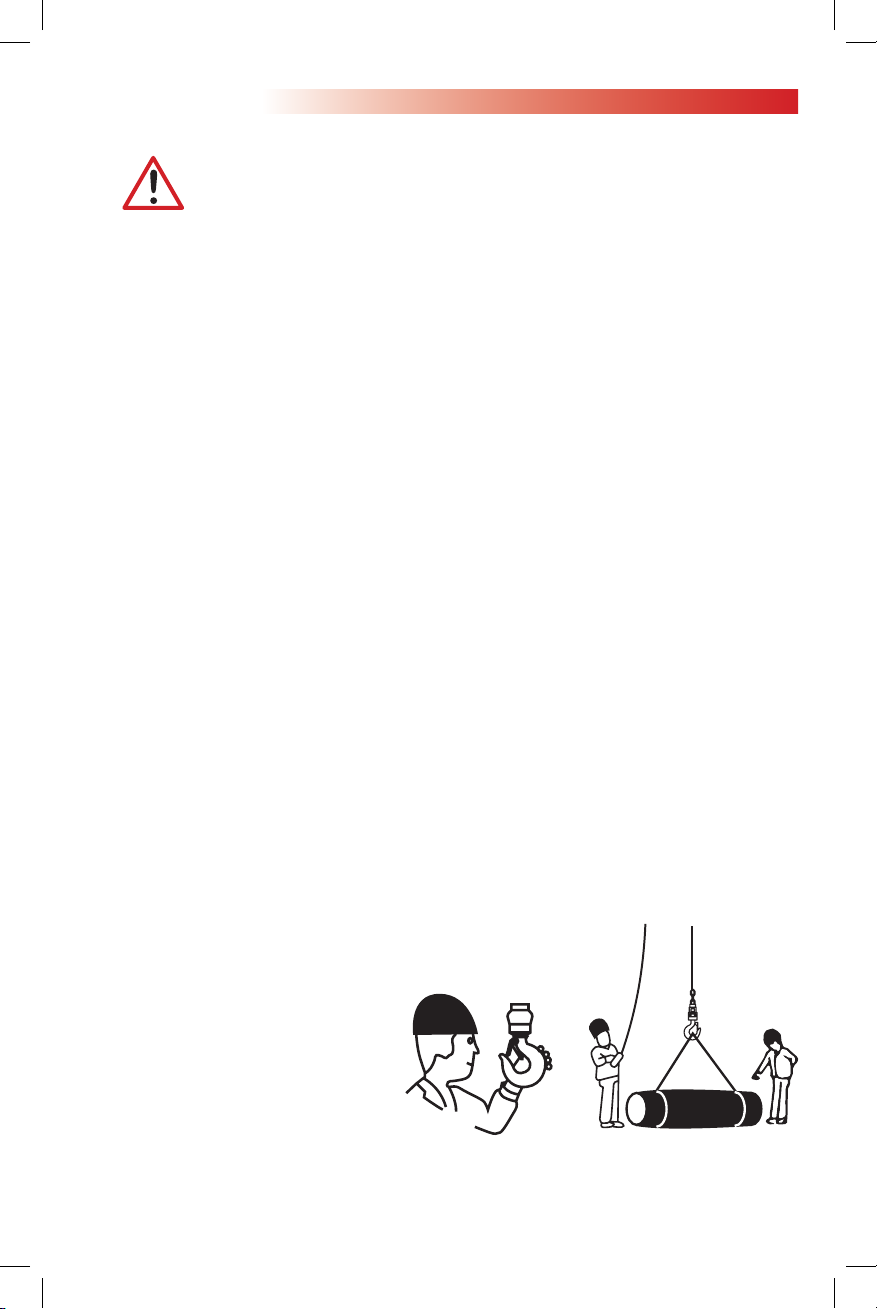
Operation
Warning: OZ440EC operators should read and fully comprehend this
entire manual and all warnings on the hoist before use. If this manual is
not read and followed completely, injuries may occur.
All Persons MUST: Be trained in proper operation and in dealing with potential malfunctions of lifting
equipment. Abstain from use of alcohol, medications, or drugs while operating. Avoid operation while
tired or distracted. Avoid operation if they have a history of seizures or other medical issues that may
interfere with operation.
NOTE: Prior to operation, ensure that the hoist is in proper working condition and maintenance
records are up to date.
Hoisting the Load
To prevent damage and injury, it is vital that the following precautions are adhered to when performing
hoisting operations:
• Never suspend a load that exceeds the rated capacity.
• Do not suspend the hoist from a large capacity hoisting machine to lower a load.
• Do not raise or lower the load at an angle.
Overtravel prevention
This hoist is equipped with an overtravel prevention and overload protection system. When the load
chain end-stop contacts the hoist body, this system will slip, preventing damaging loads from being
applied to the chain. This system will also prevent loads from being lifted that exceed the capacity of
the hoist.
Do not continue to attempt to move the load once the chain end-stop has contacted the hoist and the
overtravel system has engaged. Continued operation in this condition will cause premature wear of
the overtravel/overload system. This system should only be tested during inspection. Do not add or
modify the chain end-stops.
Complete the following steps before raising the load to any signicant degree:
1. Move the hoist to a point immediately above the load.
2. Lift the load slightly.
3. When the load chain of the hoist is taut, check for:
• Proper load connection
• Proper load balance
• Proper braking function
pg.8
Page 9
Only use the OZ440EC when it is in a naturally suspended condition. The body of the chain hoist is
designed to be suspended from a hook or a trolley. It swings very slightly along with the rotation of the
polygonal load sheave. This transmits drive force to the load chain.
Impeding this natural swing could cause injury or damage. If while lowering the load it begins to
swing, stop the hoist until it subsides.
NOTE: The motor and the body of the OZ440EC can be hot both during and after use.
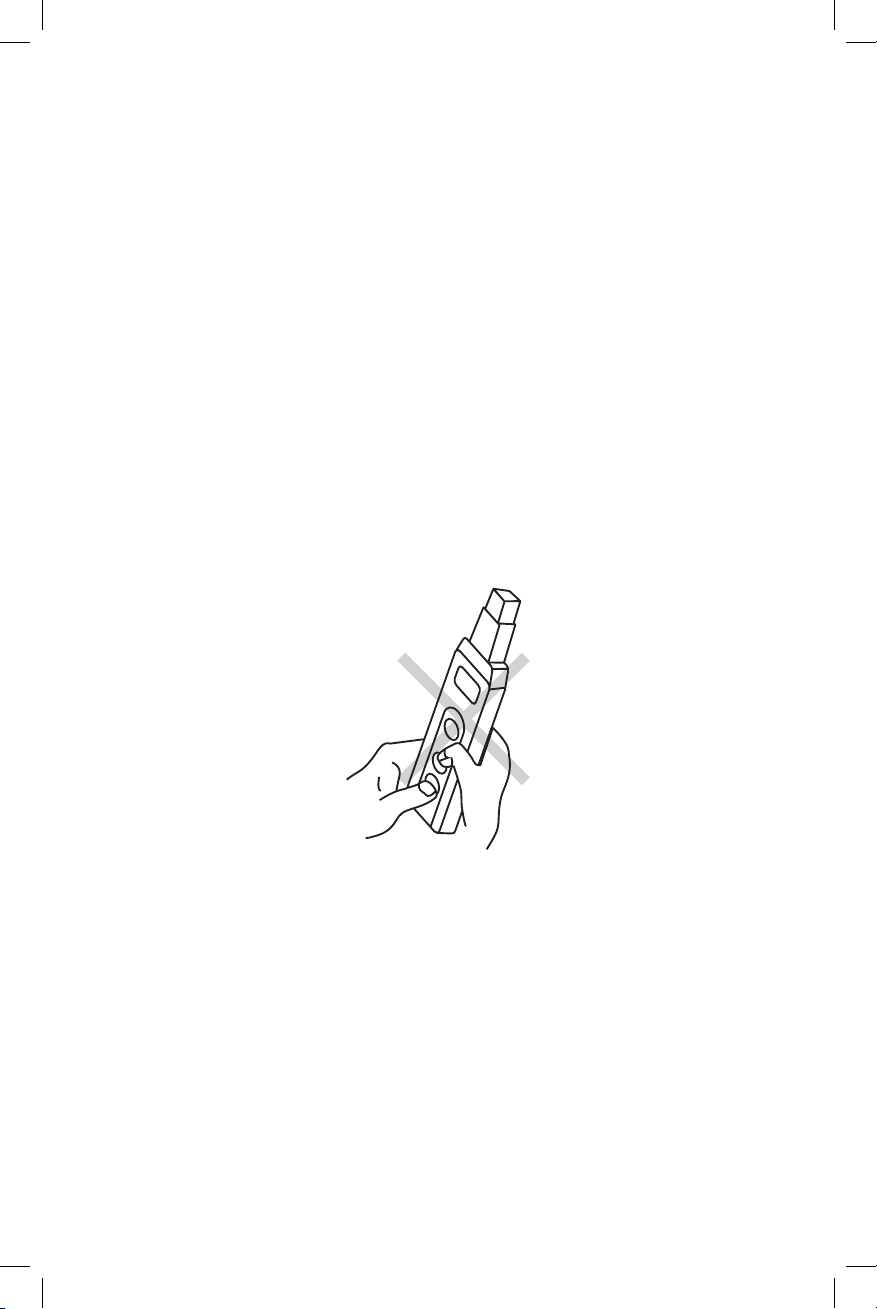
Operating the pushbutton switches
1. Before using the OZ440EC, check that the pushbuttons operate smoothly.
2. Push in the pushbutton rmly until you feel a response.
NOTE: Do not operate the hoist if it moves in the reverse direction to that indicated on the
pushbutton switch.
3. Push the pushbutton rmly to the position where a response is felt, and then
promptly release. Do not operate the hoist with the pushbutton held in a half-pressed condition.
4. After operating, return the pushbutton switch case to the position where it hangs down naturally
from the hoist before releasing it. This is to prevent unforeseen damage or a malfunction.
5. If you need to reverse operation, rst allow the suspended load to stop, and then proceed. Abrupt
reversing can impact the life of the hoist.
Keep the vicinity of the pushbuttons clean to prevent the accumulation of dust and sand.
If the event that the pushbutton switch unit is cracked, damaged or extremely dirty, contact your
OZ Lifting Products LLC® dealer for a replacement.
If the reinforced plastic case of the pushbutton switch unit is exposed to a high temperature, it is liable
to become deformed.
pg.9
Page 10

Maintenance, Cleaning and Storage
Ensure that the work area is free of debris, rot, rust, decay, cracking, explosive substances and
hazardous materials. A stable work area is required for use. Dirt, corrosives, and contaminants should
be cleaned with water as necessary. Mild soap can be used if necessary, though a thorough rinse
and dry is mandatory. Lightly lubricate all moving parts after cleaning. Never clean the hoist with
corrosive substances. Always store your hoist where it will not be subjected to heat, light, excessive
moisture, chemicals, or other elements. If it is necessary to use the product in hot (40+ C), cold (-10
C) or very humid (90%+) conditions, please contact your local OZ dealer. When it is necessary to use
the product outdoors, be sure to provide a cover in order to protect the body of the unit from wind and
rain, or snow.
Inspection
In order to maintain quality operation of the product, a regular inspection schedule should be followed
by each operator. Operators should inspect hoist before each usage. Each hoist must pass an
inspection by a qualied person every six months to remain in service. Inspect for wear, damage,
cuts, cracks, corrosion, impact damage, pits, burrs, rough surfaces, sharp edges, rust, paint buildup, excessive heating, alteration, and missing or illegible labels. During any inspection, also test that
the hoist functions smoothly and that the load is held securely. If any problems are observed, the
hoist should be placed out of service until it can be repaired. Use only OZ Lifting Products LLC® for
replacement parts. The hoist should be taken annually to an authorized repair center for professional
inspection.
Ensure that maintenance and inspection or repair is carried out only by persons possessing
specialized knowledge designated by the contractor.
When carrying out maintenance and inspection or repair of the OZ440EC, ensure that it is not
suspending a load.
If the hoist does not operate properly during maintenance and inspection, remove it from service until
it can be repaired.
Before carrying out maintenance and inspection or repair, be sure to follow all applicable lock-out/tagout procedures. Ensure the hoist is not energized or under any type of load before beginning any type
of service or maintenance.
pg.10
Page 11

Warnings
DO NOT use this hoist as an elevator.
DO NOT lift people or loads over people.
DO NOT leave a load unattended.
DO NOT operate the chain block in a way that causes the load or the hook block to swing.
DO NOT continuously operate the upper and lower limit slip mechanisms in order to stop the hoist.
DO NOT pull a load at an angle.
DO NOT attempt to invert a suspended load.
DO NOT operate the hoist if it is damaged or if it generates abnormal noise or vibration.
DO NOT carry out electric welding on a suspended load.
DO NOT connect the ground terminal of a welding machine to the load chain.
DO NOT use the hoist at a voltage other than that for which it is rated.
DO NOT attach the suspended load to another structure or an electric cable.
DO NOT attach the cord of the pushbutton switch unit to another object, or pull on the cord using
a large force.
DO NOT allow the hoist to collide with any end-stops or structure present.
DO NOT wind the load chain directly around the load.
DO NOT allow the load chain to touch sharp edges.
DO NOT allow the chain bag to be thrust up by the load or the sling.
DO NOT use if the warning or caution nameplate or label has been removed or is illegible.
DO NOT attempt to use multiple OZ440EC Hoists for one load.
DO NOT use the hoist while something is touching the body of the hoist, or when body of the hoist
has been xed.
NEVER use the OZ440EC in excess of its short-time rating, load time efciency and starting
frequency.
NEVER suspend a load that exceeds the rated load.
NEVER operate the hoist if the load chain is twisted or entangled, cracked or damaged,
is not correctly engaged, is stretched past the specied length or is very worn.
NEVER bring a welding electrode into contact with the load chain.
NEVER use the hoist if the safety latch is broken.
NEVER modify the product or its accessories.
NEVER use parts other than those provided by OZ Lifting Products LLC©
NEVER cut the load chain or extend its length.
NEVER stand or work on a suspended load.
NEVER use the hoist when the load chain is bundled.
ALWAYS switch off the power before carrying out maintenance and inspection or repair.
ALWAYS ground the OZ440EC. This is necessary for preventing the possibility of electric shock.
ALWAYS ensure that the installation location has adequate strength.
ALWAYS give complete attention to operating the load.
ALWAYS move the hoist to a position that is directly above the load before operation.
ALWAYS check the operation of the pushbuttons prior to hoisting.
ALWAYS check the operation of the brake prior to operation.
WARNING: Failure to read and comply with these safety warnings may
result in a hazardous situation that could lead to death, serious injury,
or property damage.
pg.11
Page 12
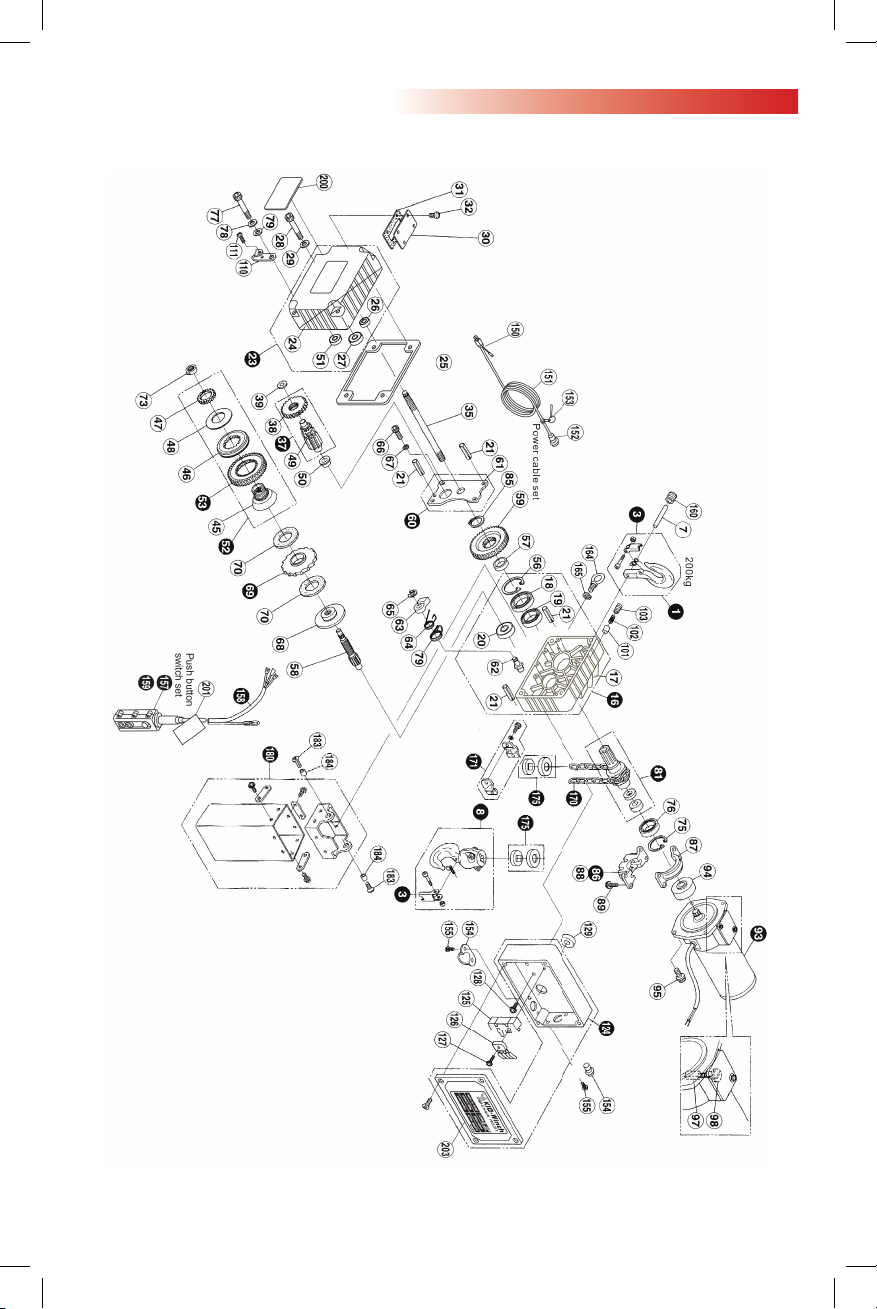
Parts Breakdown
OZ440EC
pg.12
Page 13

1 Top hook ass’y
3 Safety latch ass’y
7 Top hook pin
8 Bottom hook ass’y
16 Main body case set
17 Main body case
18 Ball bearing
19 Oil seal
20 Ball bearing
21 Spring pin
23 Gear case ass’y
24 Gear case
25 Main body case packing
26 Ball bearing
27 Ball bearing
28 Bolt w/hex. hole
29 Spring washerg
30 Oil cap
31 Oil cap packingt
32 Round head screw w/cross holer
35 1st gear
37 2nd & 3rd gear ass’ye
38 2nd gear
39 Simring
45 Disc hub B
46 Disc hub C
47 Adjusting nut
48 Disc springe
49 3rd gear
50 Ball bearing
51 ball bearing
52 Friction clutch set
53 4th gear set
55 C-clip (for hole)
57 Collar for Sixth gear
58 5th gear
59 6th gear
60 Middle plate set
61 Middle plate
62 Pawl pin
63 Pawl
64 Pawl spring
65 E ring
66 Bolt w/hex. hole
67 Spring washer
68 Disc hub A
69 Rachet wheel set
70 Brake lining
73 Check washer
75 C-clip (for hole)
76 Ball bearing
77 Bolt w/hex. hole
78 Spring washer
79 Pawl spring B
81 Load sheave set
85 C-clip (for shaft)
86 Chain guide set
87 Chain guide (upper side)
88 Chain guide (down side)
89 Bolt w/hex. hole & washer
93 Single phase motor set
94 Motor shaft joint
95 Bolt w/hex. hole & washer
97 Carbon brush
98 Brush cap
101 Lining for motor brake
102 Spring for motor brake
103 Hexagon socket screw
110 Push button hanger tting
111 Round head screw w/cross hole
124 Electric equipment case set
125 Cement resistor
126 Rectier
127 Round head screw w/cross hole
128 Round head screw w/cross hole
129 Grommet
130 Harness
131 Hex. nut
150 Power cable set
151 Power cable
152 Power quick connector (male)
153 Shackle
154 Power cord connector quick connector (female)
155 Hex. bolt w/cross hole
157 Push button switch set
158 Push button cable set
159 Push button switch
160 Hexagon socket screw
164 Eye bolt
165 Spring washer
170 Load chain
171 Chain stopper ass’y
175 Buffer ass’y
180 Chain bag ass’y
183 Round head screw w/cross hole
184 Collar
200 Name plate
201 Warning tag
203 Type name label
pg.13
Page 14

Service Notes
pg.14
Page 15

Service Notes
pg.15
Page 16
P.O. Box 845, Winona, MN 55987
Phone (800) 749-1064
(507) 474-6250
Tech Support (507) 457-3346
Fax (507) 452-5217
www.ozliftingproducts.com
Rev. 11/29/18
 Loading...