

Ozito TCS-115 Instruction Manual
Tile Cutting Saw
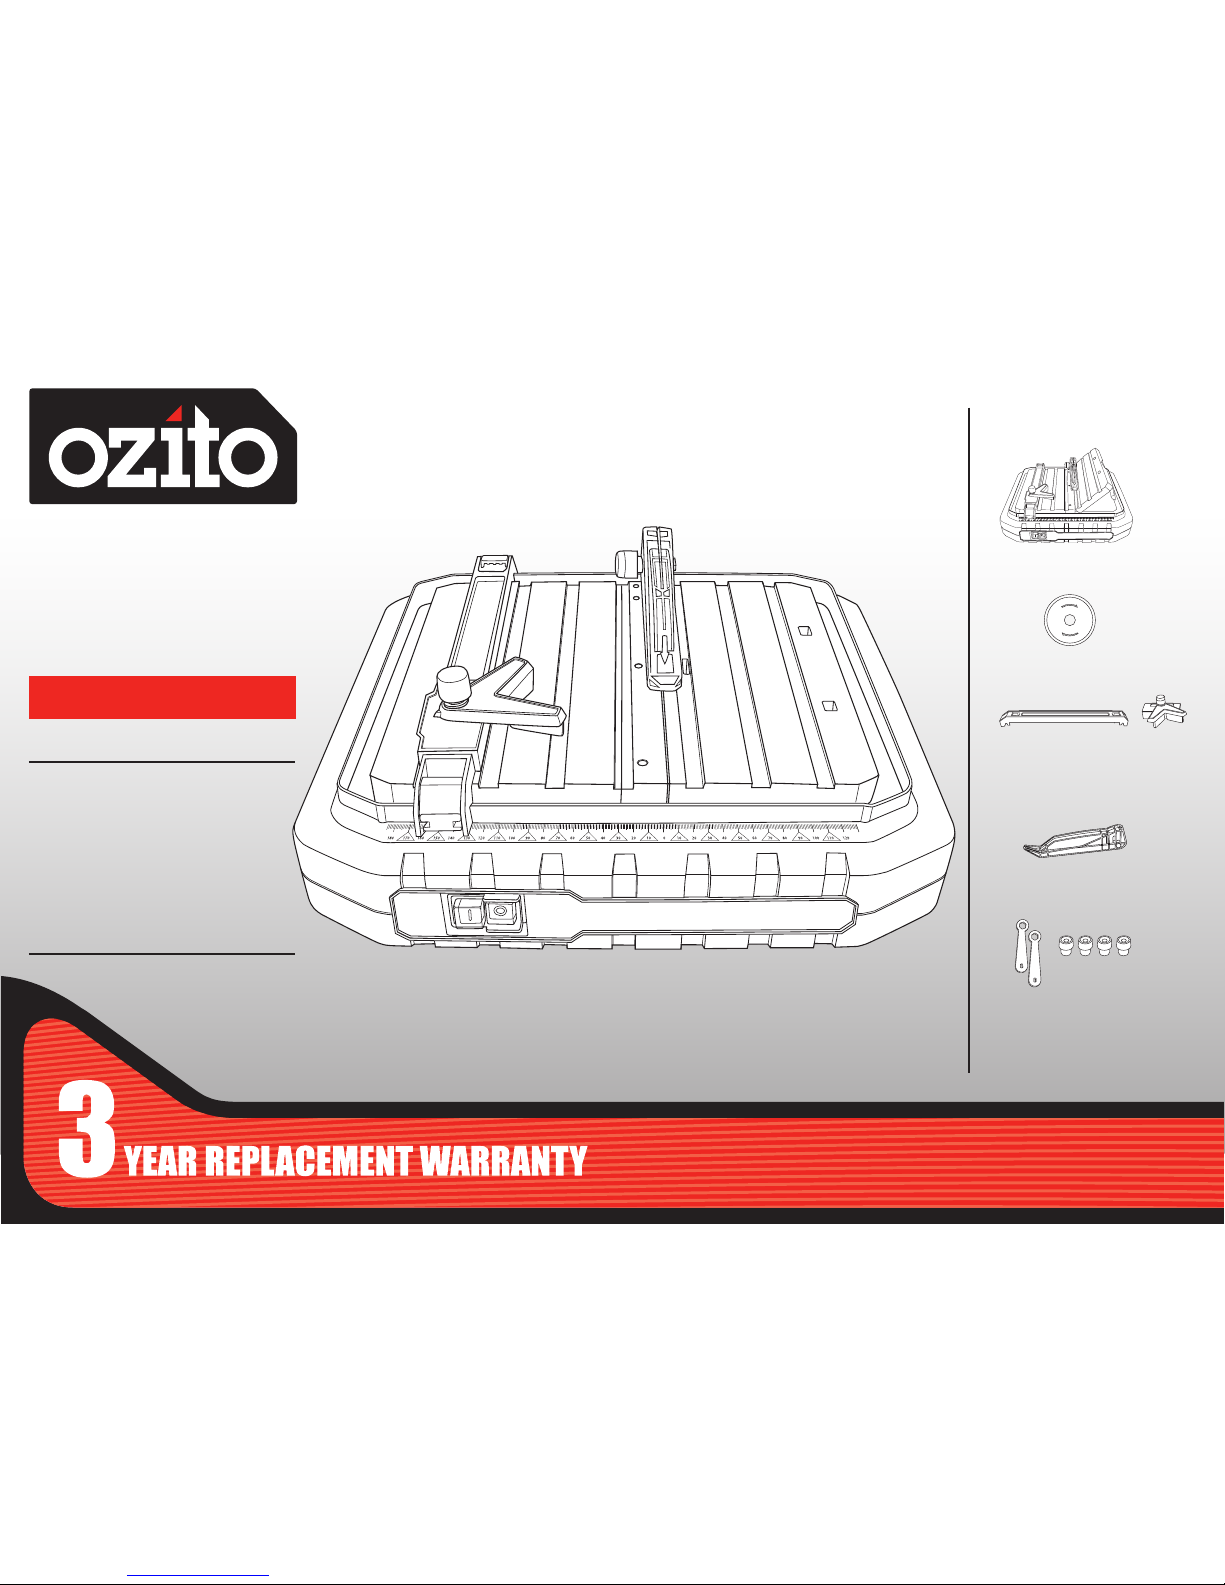
Spanners x 2, Rubber
Feet x 4
Diamond Blade
Parallel Fence &
Mitre Guide
Blade Guard
Spanners
x 2
Diamond
Blade
Mitre Guide
45° Vertical fence
Blade Guard
Rubber feet x 4
Metal
bracket
Parallel Guide
TILE
CUTTING
SAW
500W 115mm
INSTRUCTION MANUAL
SPECIFICATIONS
Motor: 500W
Input: 230 – 240V~50Hz
No Load Speed: 5,200min
¯1
Blade: Ø115 x Ø22.2mm
Max. Depth Of Cut: 24mm
Table Size: 330 x 360mm
Weight: 5.9 kg
TCS-115
WHAT’S IN THE BOX
ozito.com.au
3
ONLINE MANUAL
Scan this QR Code with your
mobile device to take you to
the online manual.
6 7
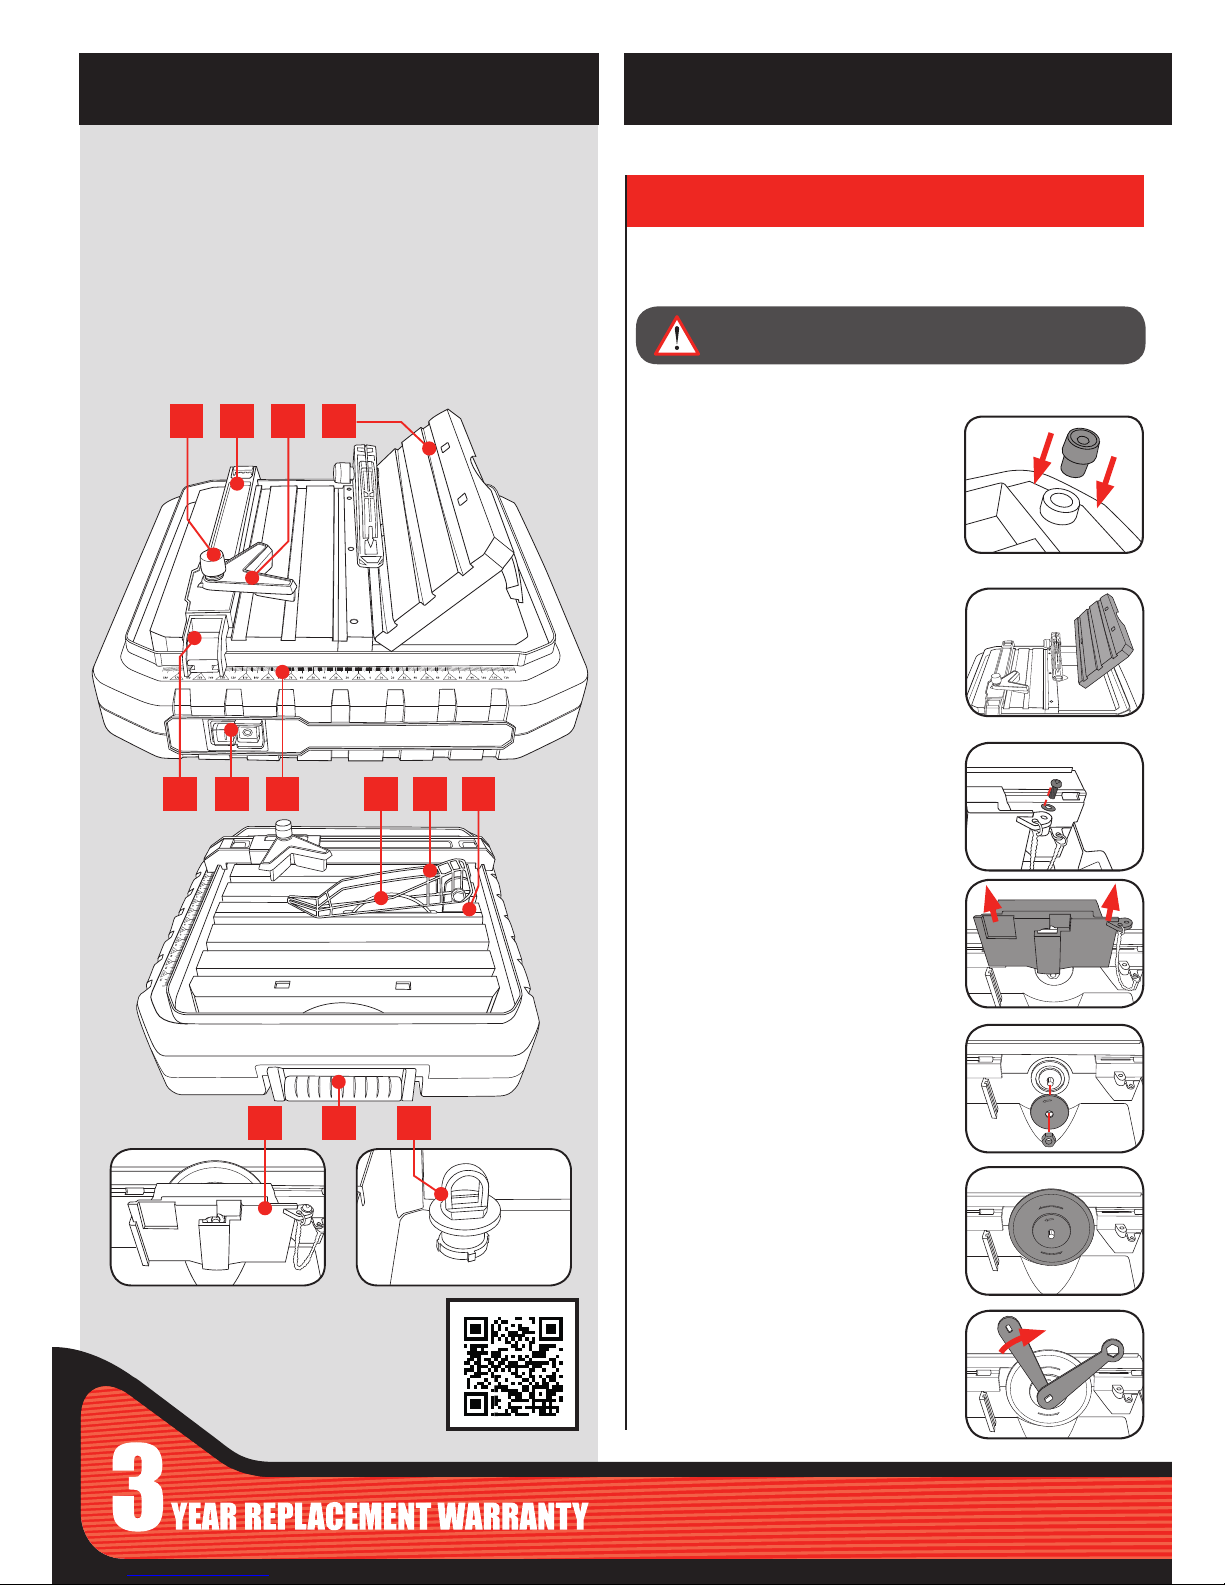
1. Mitre guide locking knob
2. Parallel fence
3. Mitre guide
4. 45° Fence
5. Parallel fence locking clips
6. On/Off switch
7. Guide ruler
8. Diamond blade
9. Blade guard
10. Blade guard bracket
11. Blade cover
12. Carry handle
13. Water reservoir plug
TILE CUTTING SAW
KNOW YOUR PRODUCT
1. ASSEMBLY
Prior to using the Tile cutting saw, the rubber feet, diamond blade, blade
guard and parallel fence will need to be installed.
Fitting the rubber feet
1. Insert the 4 rubber feet into the holes
on the base of the tile saw.
Fitting the diamond blade
1. Remove the 45° fence.
2. Remove the screw and washer from
the blade guard.
3. Lift the blade cover out of its notch.
4. Remove the blade nut and outer ange
from the spindle.
5. Place the diamond blade on the
spindle, so that it aligns centrally on
the inner ange. Then place the outer
ange on the spindle.
Note: Ensure that the blades direction of
rotation corresponds to the arrow marked
on the housing.
6. Replace the blade nut. The unit is
supplied with 2 spanners, stop the spindle
from rotating with one spanner while
tightening the blade nut with the other.
SETUP & PREPARATION
WARNING!: ENSURE THE TOOL IS DISCONNECTED
FROM THE POWER SUPPLY BEFORE ASSEMBLY .
1
8 95
11 12 13
2 3 4
10
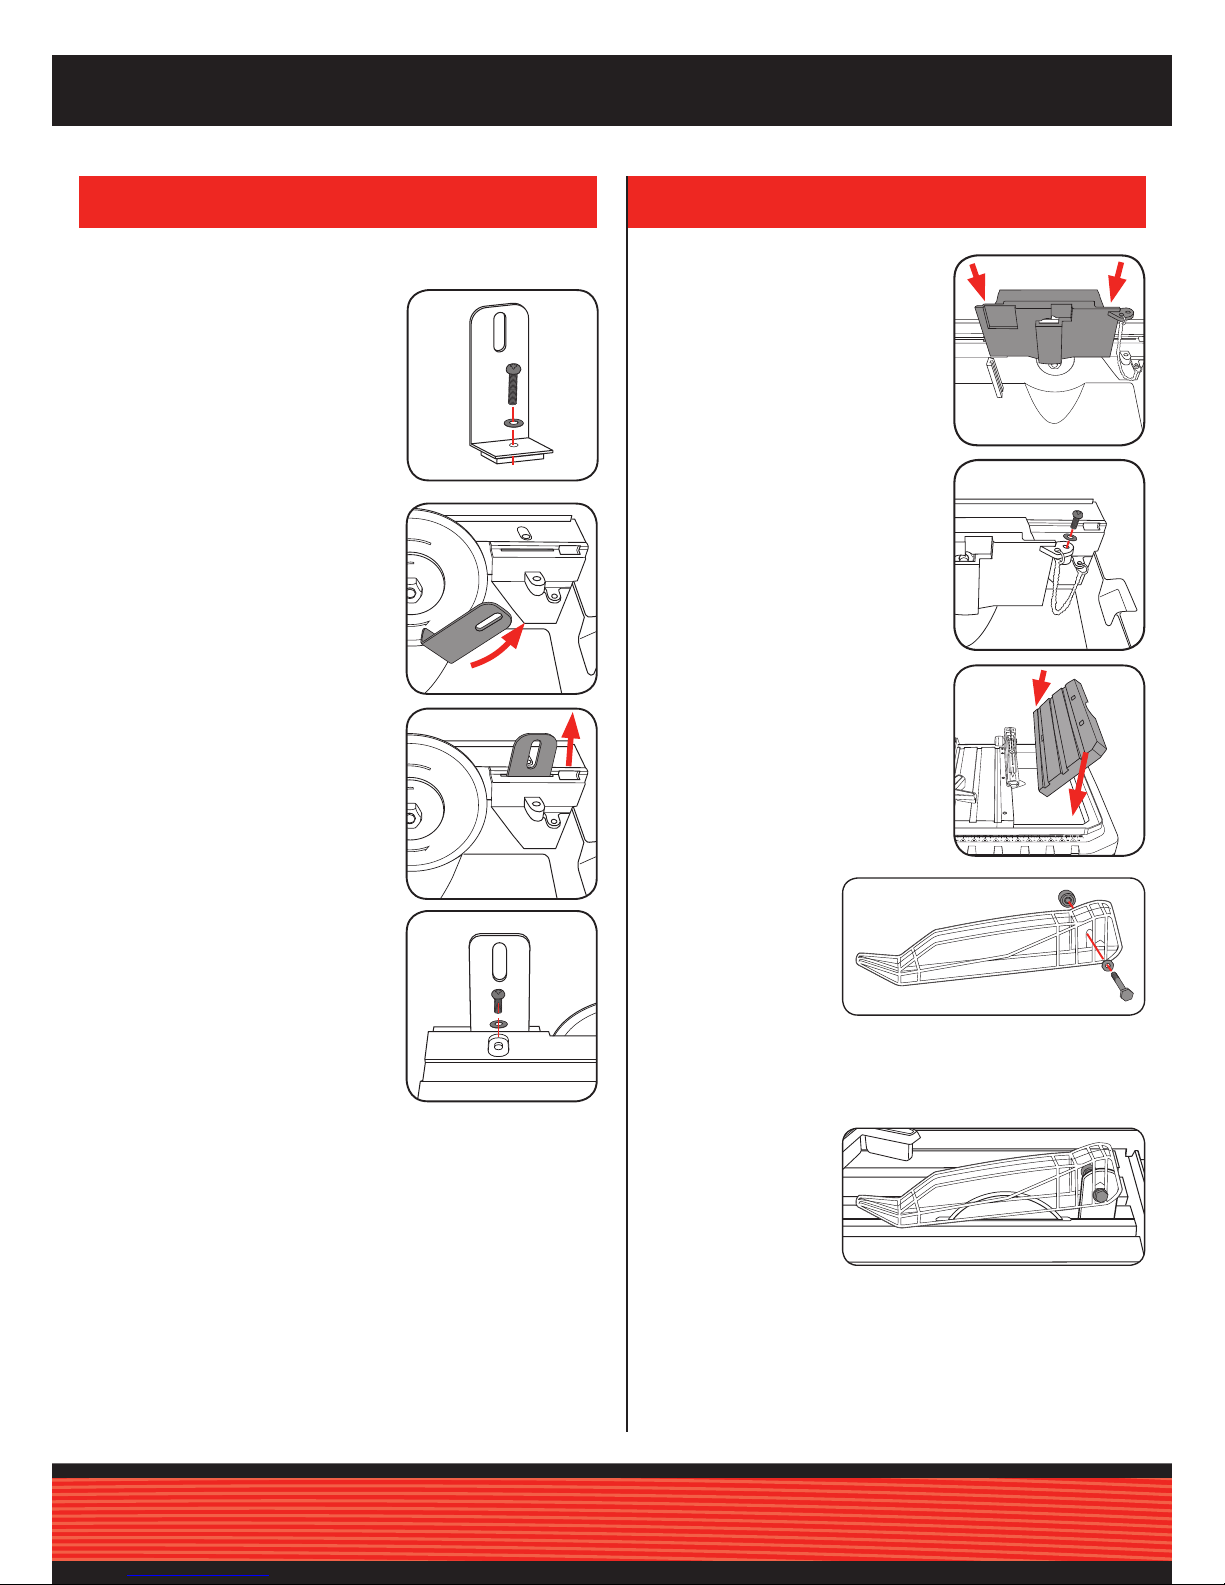
5. Slide the blade cover back into
its original position.
6. Fasten the blade cover in place with
the washer and screw.
7. Ret the 45° fence.
8. Remove the knob,
bolt and washer
from the blade
guard.
9. Place the blade guard onto the blade guard bracket. Secure it
in place with bolt, washer and knob. Tighten knob sufciently
as to allow the blade guard to rest on the table but lift when the
workpiece is pushed into the diamond blade.
Fitting the blade guard
1. Remove the screw and washer
from the blade guard bracket.
2. Position the blade guard bracket
within the water reservoir. The ‘L’ of
the bracket should point towards the
centre of the table.
3. Slide the blade guard bracket up
into the slot behind the diamond
blade, at the rear of the table.
4. While holding the blade guard
bracket upwards and in position,
fasten it to the table top with the
screw and washer.
Note: Ensure the blade guard bracket
aligned to the centre of the diamond
blade.
 Loading...