

Ozito SDL-4000 Instruction Manual

CORDLESS
SCREWDRIVER
3.6V Lithium Ion
INSTRUCTION MANUAL
SPECIFICATIONS
Voltage: 3.6V
Chuck Size: 6.35mm Keyless
No Load Speed: 200/min
Torque Settings: 8
Max Torque: 3Nm
Battery: 1.3Ah Li-ion
Charge Time: 3-5 Hours
Weight (tool only): 0.42kg
SDL-4000
WHAT’S IN THE BOX
Cordless Screwdriver
Driver Bits x 15
Charging Adaptor
Docking Station
ozito.com.au
ONLINE MANUAL
Scan this QR Code with your
mobile device to take you to
the online manual.
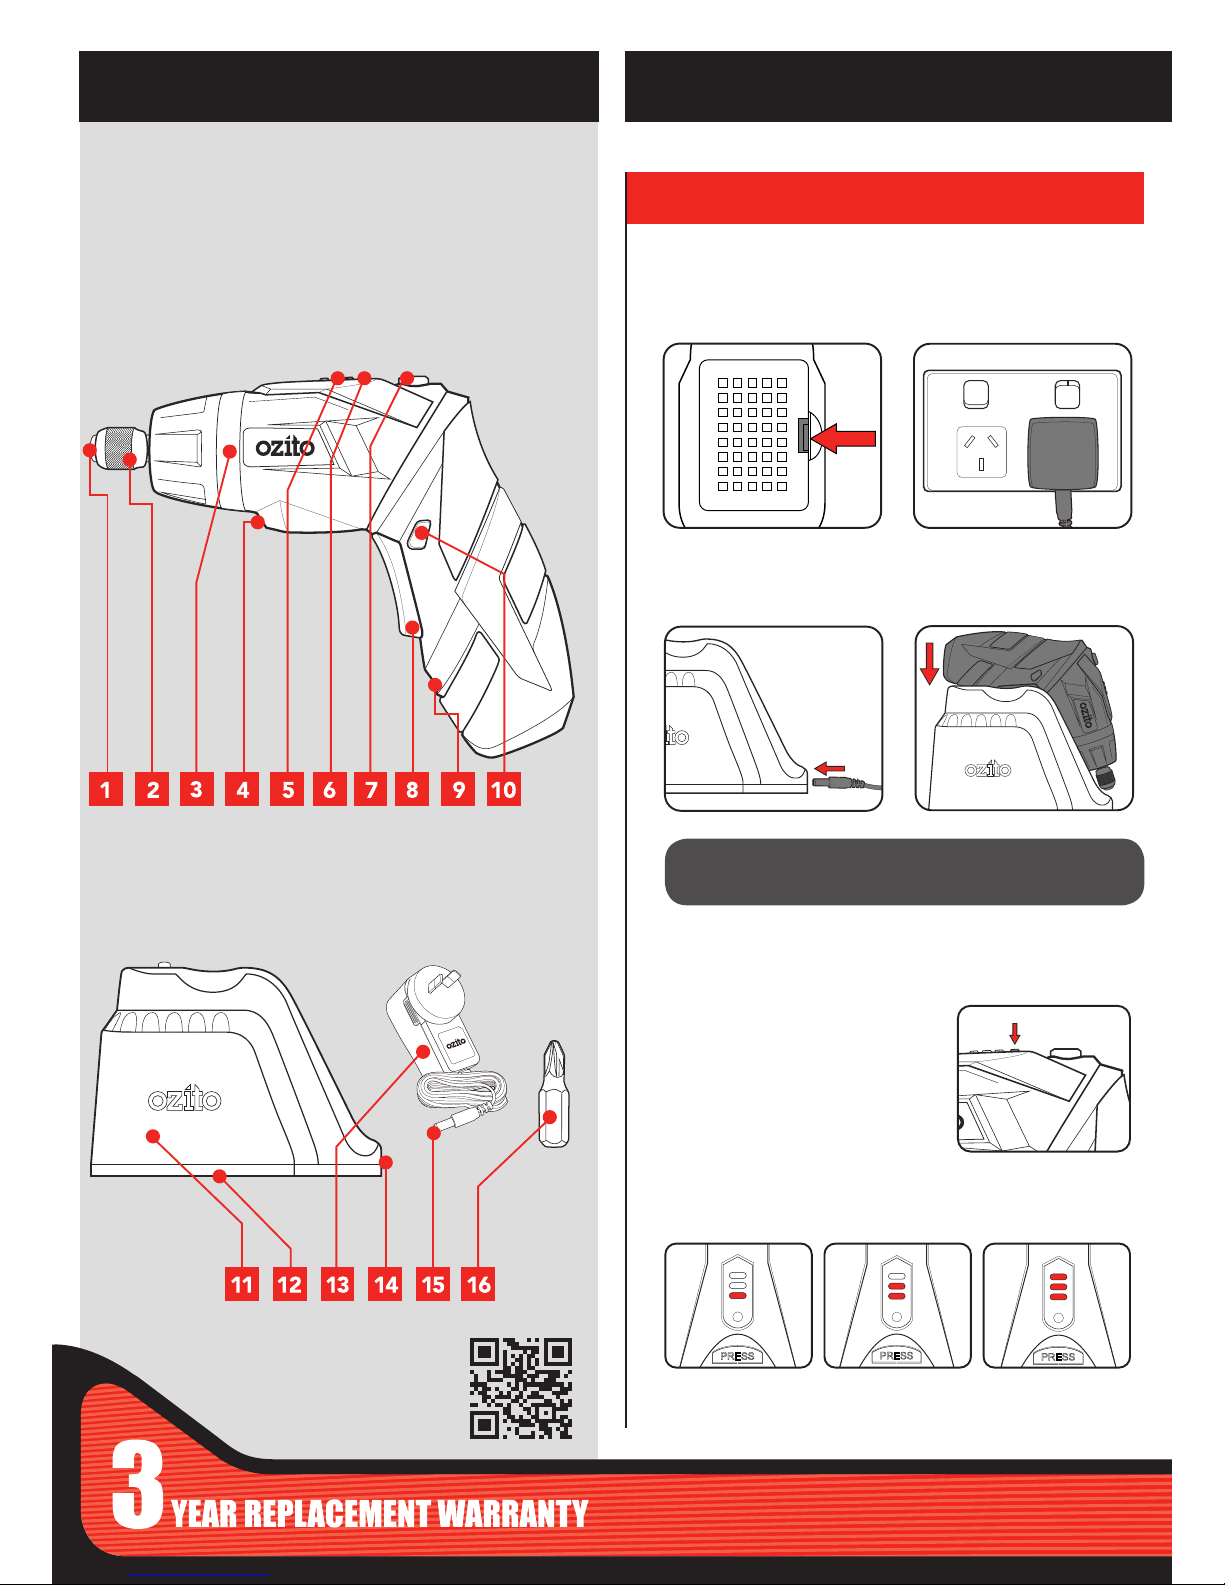
2. Plug charging adaptor into
power socket.
4. Place the Screwdriver on the
docking station for charging.
1 Bit Holder
2 Quick Connect Chuck
3 Torque Collar
4 LED Worklight
5 Charge Check Indicator
6 Charge Check Button
7 Handle Lock Button
8 On/off Trigger
9 Charging Socket on Driver
10 Forward/ Reverse Lever
CORDLESS SCREWDRIVER
KNOW YOUR PRODUCT
1. CHARGING
1. Remove charging adaptor from
the base of docking station.
3. Insert the charging jack into the
charging socket on the docking
station.
Charge Check LED Indicator
1. Depress the charge check button.
2. Observe which charge check LED illuminates for a reading on your
battery’s charge.
11 Docking Station
12 Docking Station Storage
Cover
13 Charging Adaptor
14 Charging Socket on Dock
15 Charging Jack
16 CRV Bits x 15
ACCESSORIES
SETUP & PREPARATION
To reduce the risk of electric shock, a residual current device
(rated 30mA or less) must be used.
Flat Battery Low Charge Full Charge
NOTE: A RED LIGHT ON TOP OF THE SCREWDRIVER WILL
ILLUMINATE WHEN PROPERLY CONNECTED AND CHARGING.

2. CHANGING DRIVER BITS
3. SWIVEL HANDLE
Installing CRV Bits
1. Insert the CRV bit directly into the bit holder until it clicks into place.
Removing CRV Bits
1. Pull the quick connect chuck back to release the CRV bit.
2. Whilst holding the chuck back, pull the CRV bit to remove from the
bit holder.
Inline Position
1. Hold the handle locking
button down.
2. Rotate the handle clockwise until it clicks into position.
Angled Position
1. Hold the handle locking
button down.
2. Rotate the handle anti-clockwise until it clicks into position.
 Loading...