

Ozito ROU-5000 Instruction Manual
ROUTER
850W
INSTRUCTION MANUAL
SPECIFICATIONS
Voltage: 230-240V ~ 50Hz
Input: 850W
No Load Speed: 11,500-32,000/min
Collet Size: 6.35mm (1/4”)
Plunge Depth: 30mm
Turret Stops: 3
Weight: 3.3kg
ROU-5000
WHAT’S IN THE BOX
Router
ozito.com.au
Guide Fence
Dust Extraction
Adaptor
Template Guide

ONLINE MANUAL
Scan this QR Code with your
mobile device to take you to
the online manual.
1 Depth Rod
2 Depth Rod Adjustment Knob
3 Turret Depth Stop
4 Spindle Lock Button
5 Lock On Slide Switch
6 Handles
7 Variable Speed Dial
8 Plunge Lock Lever
9 Router Fixing Nut
10 Collet Nut
11 Base
12 Fence Locking Knob
ROUTER
KNOW YOUR PRODUCT
1. ASSEMBLY
1. Put together the side handle
assembly: screw, spring
washer, washer, side handle.
2. Loosen the collet nut with
provided spanner. Do not
remove completely.
13 Spanner
14 Dust Extraction Adaptor
15 Template Guide
16 Hex Key
17 Side Handle Screws
18 Guide Fence Rod Screws
19 Dust Extraction Adaptor Screws
20 Guide Fence
21 Guide Fence Rods
ACCESSORIES
SETUP & PREPARATION
2. Align the handles to the
xing square on sides of
router.
1. Depress and hold the
spindle lock button.
press
& hold
3. Fully insert the router bit
into the collet.
4. Tighten collet nut using
the spindle lock button
and spanner.
hold
Side Handles
4. Insert cover buttons to
cover the screws.
Fitting Router Bits
3. Fasten into place by
tightening screw with a no 2
Phillips head screwdriver.
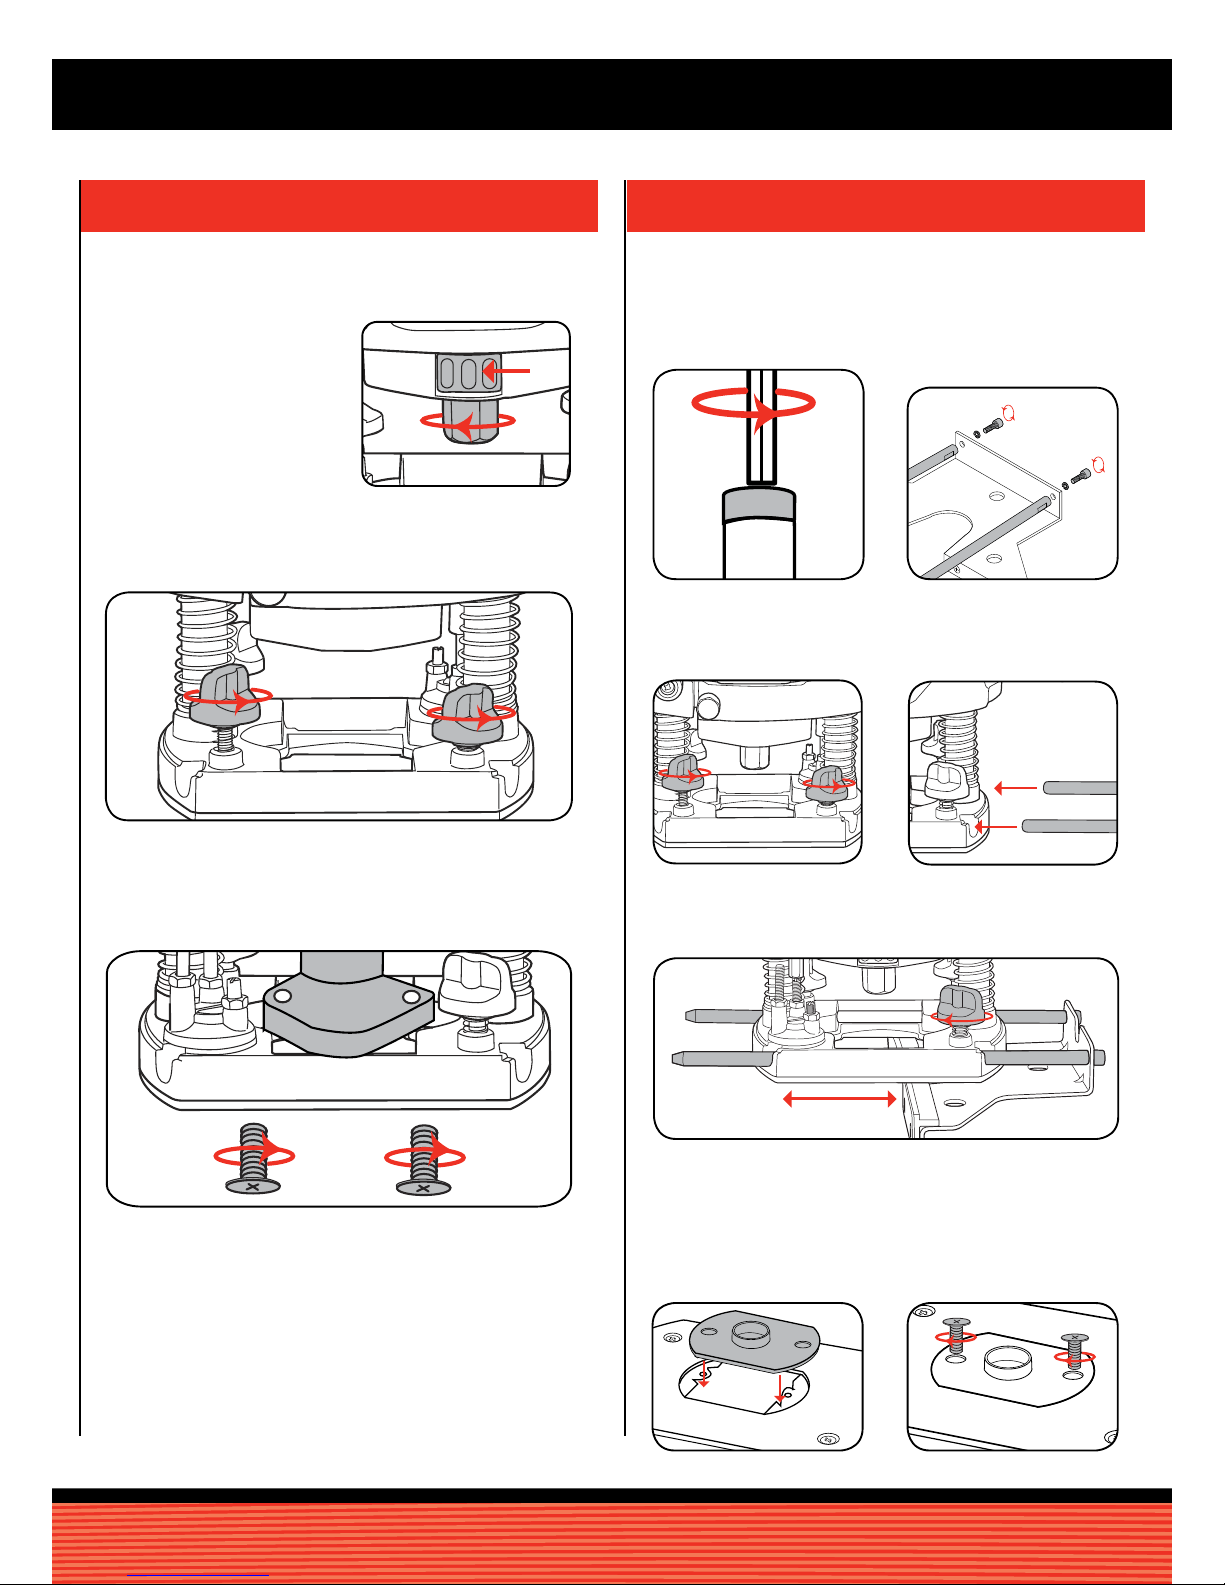
2. DUST EXTRACTION ADAPTOR 3. GUIDE FENCE & TEMPLATE GUIDE
1. Depress spindle lock button
and loosen collet nut.
Remove the collet nut and
collet completely.
1. Loosen screws on the end
of guide rods with hex key.
2. Remove the 2 fence locking knobs from the rear of the router.
The dust extraction adaptor allows you to connect a vacuum cleaner
or dust extractor to the router.
hold
3. Insert the dust extraction adaptor from the rear of the tool. Secure
with the two dust extraction adaptor screws.
5. Re-assemble the router and replace the router bit.
2. Line the guide rods up with
the holes in the guide fence.
Secure in place with the
fence screws.
4. Loosen guide fence locking
knobs.
6. Adjust the guide fence until it is the correct distance from the
router bit and the cut to be made. Tighten guide fence locking
knobs to fasten guide fence in place.
Adjust Distance
The guide fence is an effective aid when cutting in a straight line
when chamfering or grooving.
The template guide makes it possible for you to easily cut in the
shape of any template. It must be tted in conjunction with the
dust extractio adaptor.
1. Fit the template guide to
the bottom of the router.
2. Secure using the two dust
extraction adaptor screws.
5. Feed the guide fence rods
through the holes in the
router base.
 Loading...