

Ozito 18V Li-ion, PHT2-018 Instruction Manual

2
CORDLESS
POLE PRUNER & HEDGE
TRIMMER
18V Li-ion
INSTRUCTION MANUAL
SPECIFICATIONS
Input: 18V
Battery: 1.5Ah Li-Ion
Charge Time: 90 Minutes
Pole Pruner Bar Length: 200mm (8”)
Chain Pitch: 9.53mm (3/8”)
Chain Gauge: 1.3mm (0.050”)
Hedge Trimmer Blade Length: 400mm
Cutting Capacity: 15mm
Pivoting Head: 10 position
PHT2-018
WHAT’S IN THE BOX
Shoulder Strap, Hex Key/
Screwdriver, Blade Cover &
Chain Cover
Power Handle
Hedge Trimmer
Attachment
18 Volt Battery & Charger
Pruner Attachment
ozito.com.au

2
ONLINE MANUAL
Scan this QR Code with your
mobile device to take you to
the online manual.
KNOW YOUR PRODUCT SETUP & PREPARATION
POWER HANDLE
1 Collar
2 Shaft
3 Secondary Handle
4 Mounting Bracket
5 Soft Grip
6 Wire Loop
7 Lock Off Switch
8 Battery
9 On/Off Trigger Switch
10 Handle
PRUNER ATTACHMENT
17 Guide Bar
18 Chain
19 Oil Level Window
20 Chain Bar Oil Cap
21 Shaft
22 Shaft Connector
1. ASSEMBLY
1. Fit the mounting bracket
onto the power handle
shaft. Do not over ex as
this can damage or break
the mounting bracket.
6. Attach shoulder strap. Adjust
the shoulder strap to a length
that is suitable to you.
4. Pass the bolt through the
adjustable secondary
handle and mounting
bracket then screw the
locking knob onto the bolt.
3. Fit secondary handle
2. Position the mounting
bracket
SETUP & PREPARATION
Attaching poles
1. Align the arrows and connect
the shafts.
2. Rotate the collar to tighten.
5. Select the most comfortable
position and nger tighten, so that
the handle is rm on the shaft.
Tighten
Bolt
Head
HEDGE TRIMMER ATTACHMENT
11 Rotating Head
12 Dual Action Cutting Blades
13 Safety Guard
14 Release Button
15 Shaft
16 Shaft Connector
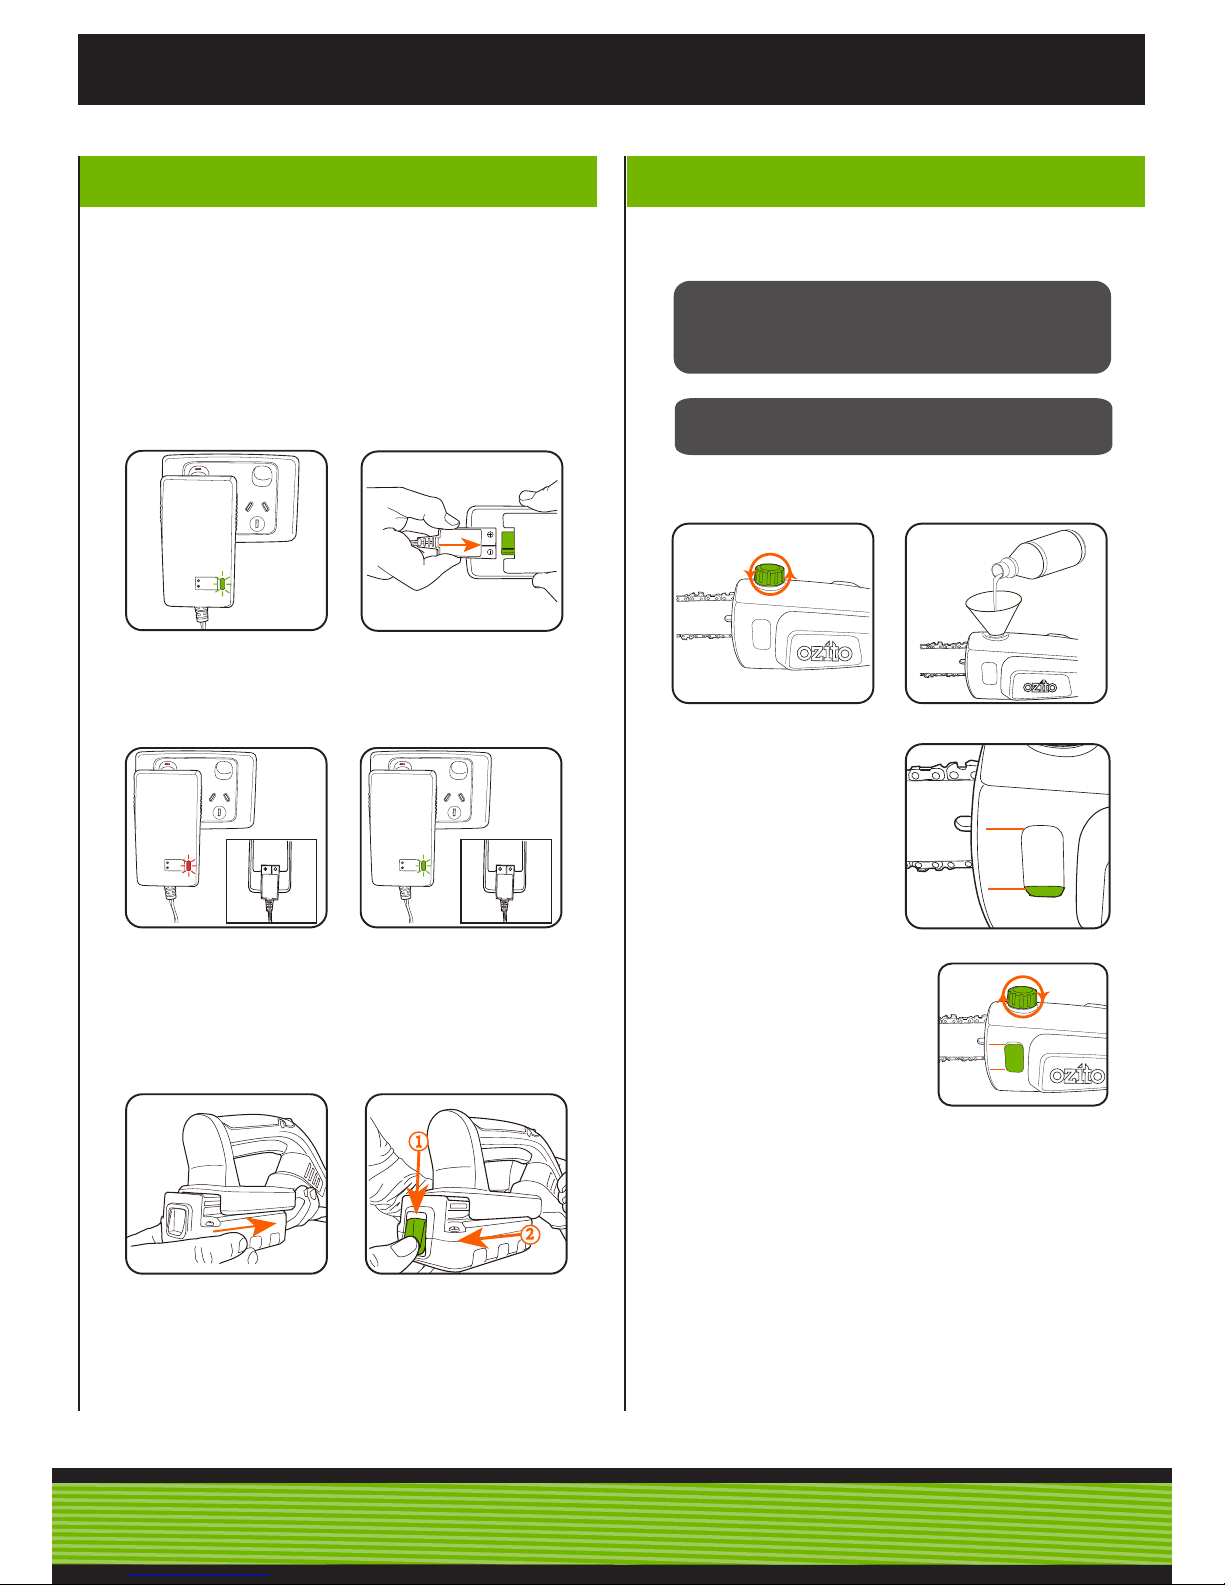
2. BATTERY & CHARGER
1. Plug the charger adaptor
Into a mains power outlet.
Charger LED will illuminate
green showing power is
being supplied
2. Fit charger connector.
CHARGED OK
CHARGING
This charger is recommended for use with a residual current
device with a rated residual current of 30mA or less.
Charging
Note: Do not charge for more than 5 hours.
Installing and removing the battery
Slide the battery until it clicks
into place.
Hold down the battery release
button and slide the battery out.
2
1
3. POLE PRUNER PREPARATION
WARNING!: Pole pruner comes from the factory
with no chain bar oil added. Oil level should also be
checked after every 15 minutes of use and relled
as needed.
NOTE: Only use oil that is expressly labelled
“CHAIN BAR OIL”.
1. Remove green chain bar oil cap and pour the chain oil into
the tank. Chain Bar Oil Tank Capacity: 60ml
Low
Full
2. Check and ll the oil tank
when oil line is low. Repeat as
needed.
Running in the chain
Prior to operation, a new chain should be run in for 2–3 minutes
and then it’s tension should be checked as the chain may
loosen slightly when warm. Make Adjustments as detailed in
“MAINTENANCE”.
Chain bar oil
3. Charger LED will illuminate
red showing the battery is on
charge
CHARGED OK
CHARGING
CHARGED OK
CHARGING
4. When fully charged, the LED
on the charger adaptor will
illuminate green.
Low
Full
3. Fasten the chain bar oil cap
and clean any oil spillage.
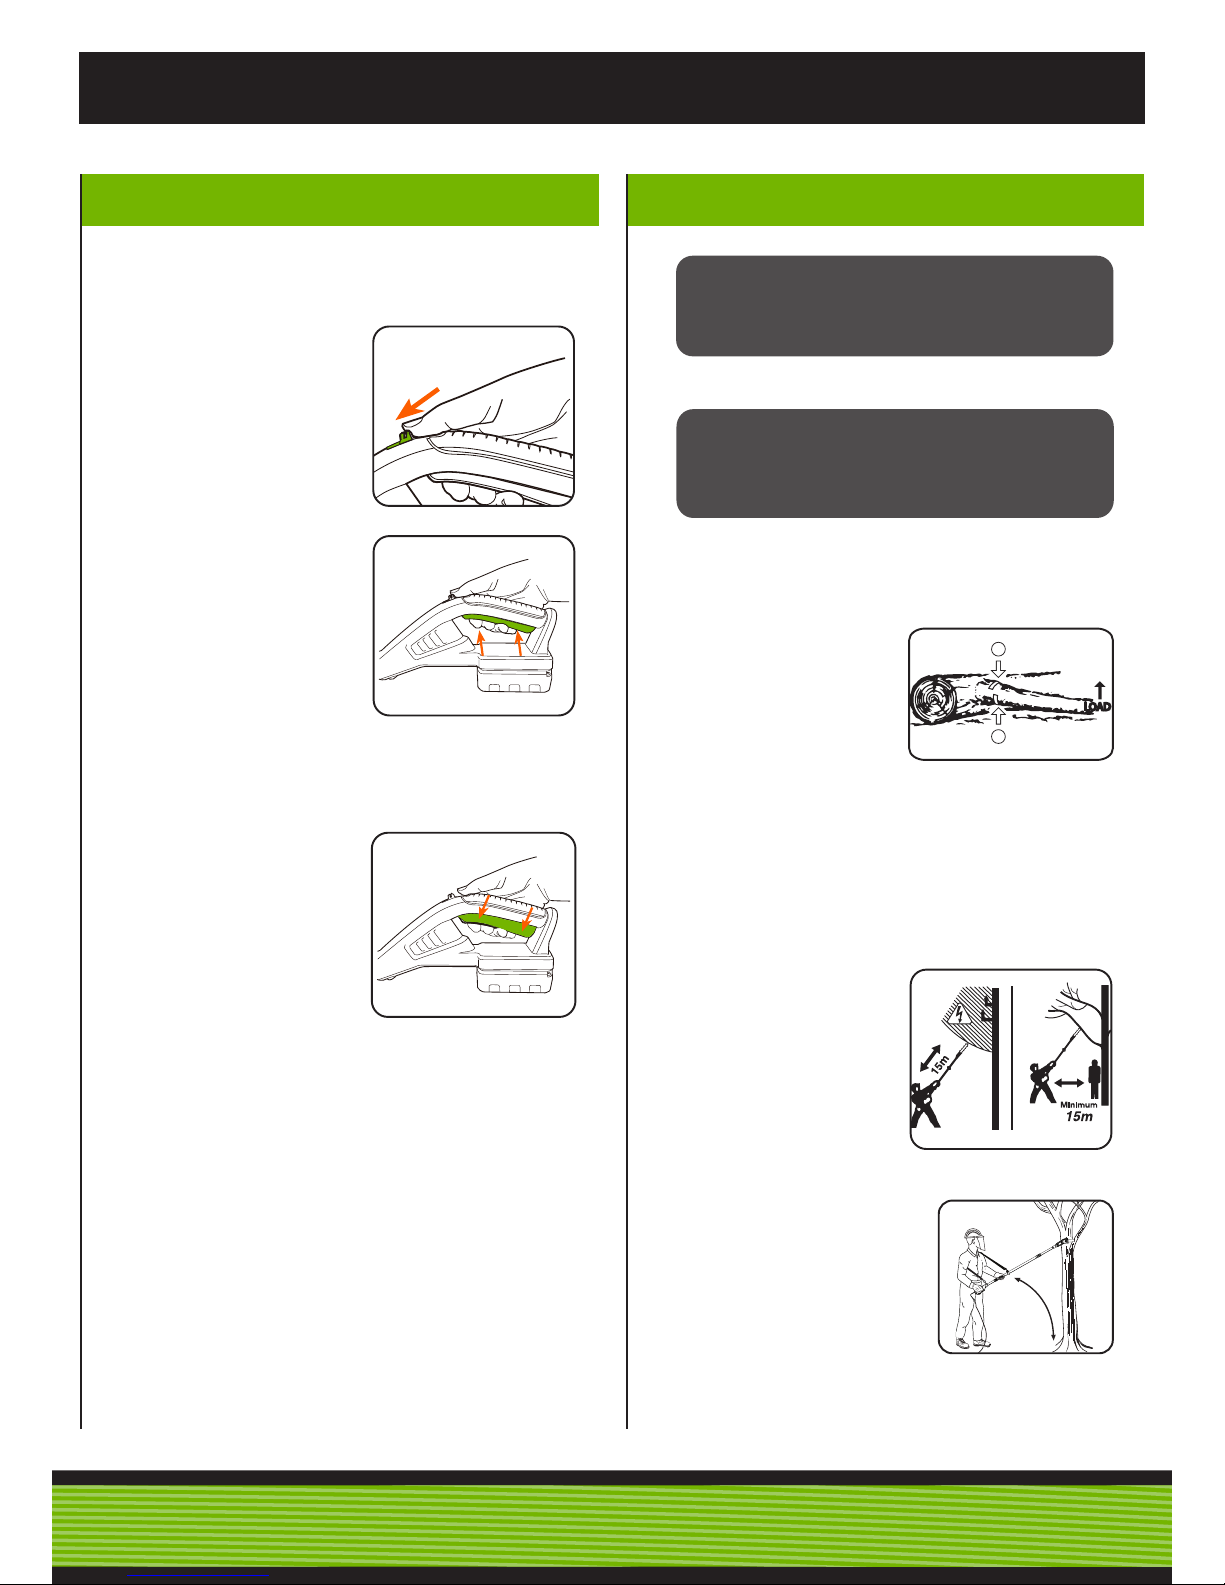
4. ON/OFF SWITCH
OPERATION
5. POLE PRUNER
1
2
LOAD
1. To turn on push the lock off
switch forward and hold
Note: You can release the pressure on the lock-off switch once the
tool has started.
To turn off, release the on/off
trigger switch
For your safety the power handle is designed with a safety lock
off mechanism. This prevents accidental starting.
WARNING!: Never start work unless the chain and bar are
lubricated. If the pruner is used without oil, the chain and
bar may become very hot and may wear out very quickly
due to the strong friction, potentially causing kick back of
the guide bar and possible chain breakage.
WARNING!: Never use the pole pruner when standing on
a ladder or uneven ground. If the chain comes in contact
with a hard object, visually inspect the chain & bar for
damage. If the chain or bar is damaged, do not continue
to operate the pole pruner.
This unit is designed for trimming small branches and limbs up to
150mm in diameter.
Limbing
Limbing is the process of
removing the branches from a
fallen tree. Check the direction
in which a branch will bend
before cutting it. Always cut on
the opposite side to the bending
direction so that the guide bar is
not pinched in the cut.
For large limbs that cannot be removed in one cut, make an initial
cut from the bent side and nish by sawing from the opposite
direction. Do not remove limbs that are supporting the fallen tree
on the ground until the tree has been cut into lengths.
Pruning
Pruning is the removal of a limb or branch from a standing tree.
60°MAXIMUM
The most typical cutting
application is to position the unit at
an angle of 60° or less, depending
on the specic situation. As the
angle of the pruner shaft to ground
increases, the difculty of making
the rst cut (from the underside of
limb) increases.
To prevent electrocution, do not
operate within 15m of overhead
electrical lines.
Keep bystanders at least 15m.
away.
2. Squeeze the on/off trigger
switch.
 Loading...