

Ozito PCS-406A Instruction Manual

1
PETROL
CHAINSAW
41cc - 406mm
INSTRUCTION MANUAL
SPECIFICATIONS
Engine: 41cc 2 Stroke
Power: 1.5 kW
Bar Type: Oregon 406mm (16”)
Chain Pitch: 9.53mm (3/8”)
No Load Speed: 11000/min
Chain Speed: 21 m/s
Fuel Mix 40:1
Fuel Tank Capacity: 260ml
Chain Oil Tank Capacity: 210ml
Weight: 5.40 kg
PCS-406A
WHAT’S IN THE BOX
ozito.com.au
Chain Saw
Side Cover
Chain
Chain Bar Cover
Guide Bar
Spark Plug Wrench Screwdriver
Fuel Mixing
Bottle
1
ONLINE MANUAL
Scan this QR Code with your
mobile device to take you to
the online manual.
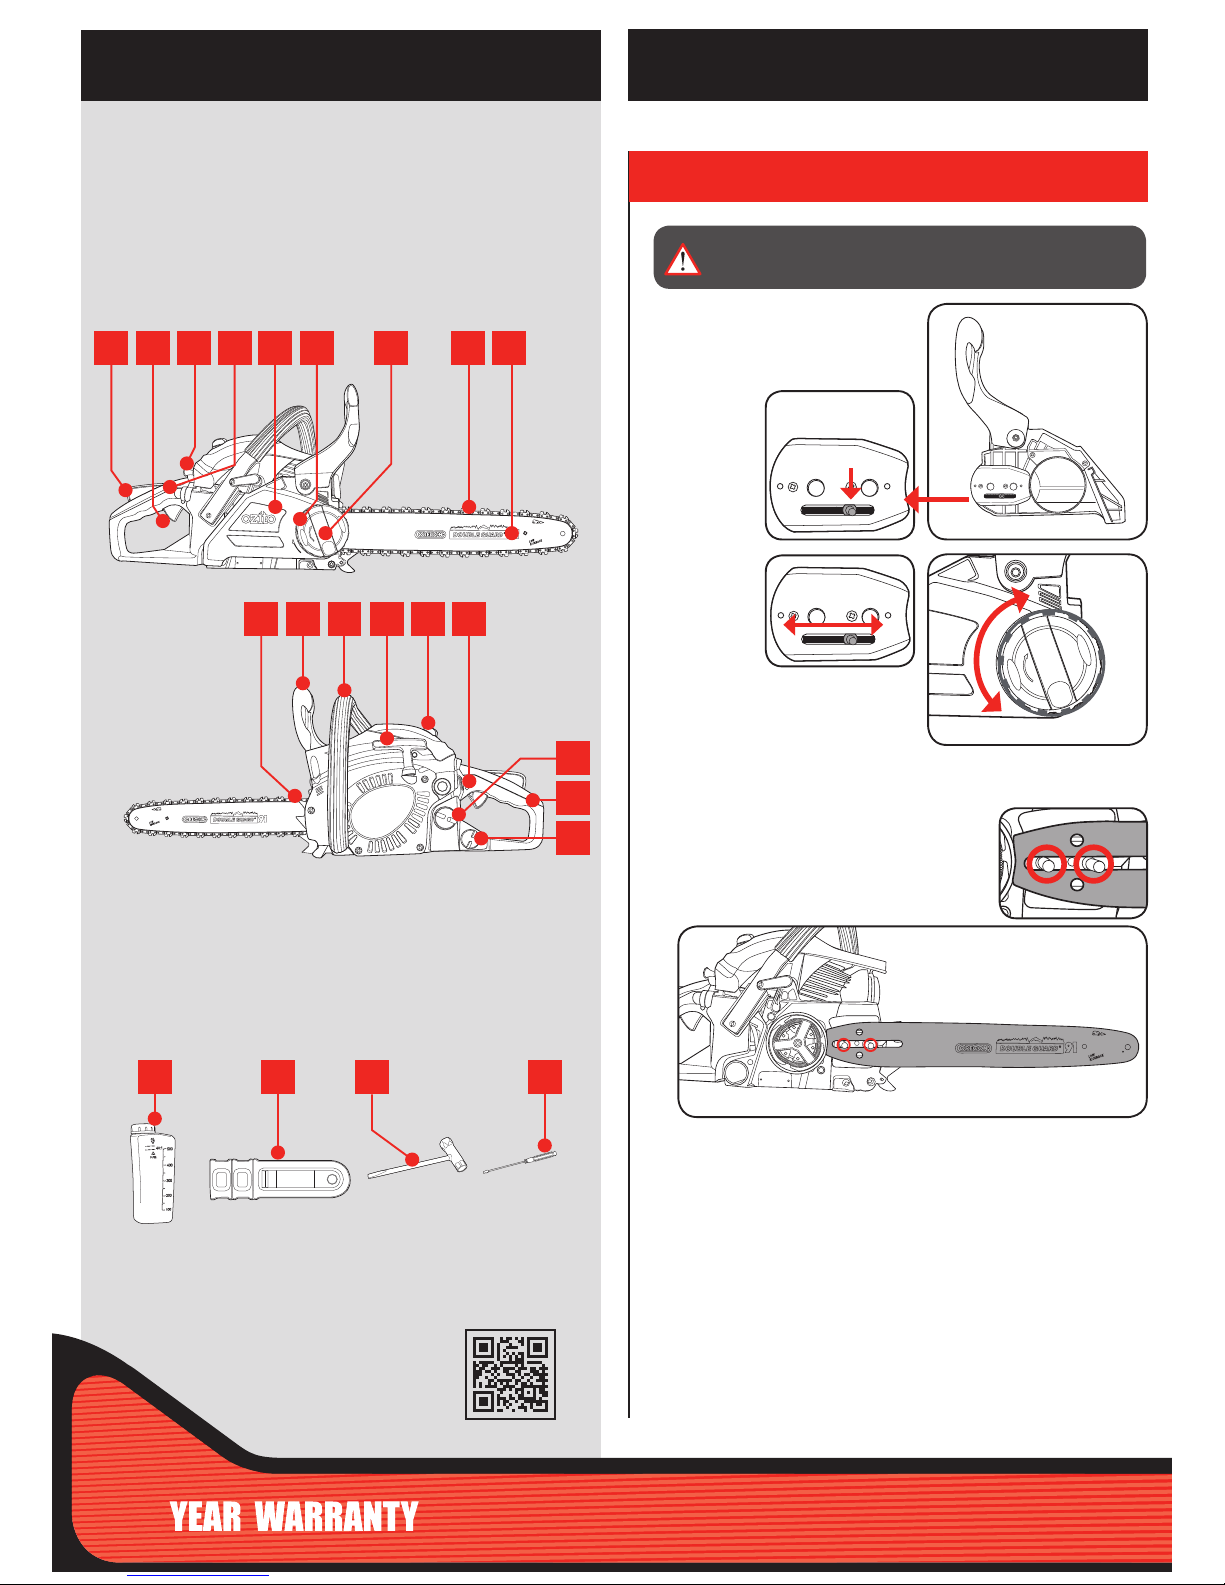
1. The rst step is to correctly position
the chain tensioning pin on the
inside of the side cover.
2. The chain
tensioning
pin can be
adjusted
by turning
the chain
tension dial.
When the dial is turned ANTI
CLOCKWISE, the pin moves
towards the rear of the chainsaw.
When the dial is turned
CLOCKWISE, the pin moves towards the front of the chainsaw.
3. Fit the open end of the guide bar
over the die bar pins.
KNOW YOUR PRODUCT
ASSEMBLY
1. Throttle Safety Lock
2. Throttle Trigger
3. Choke Control
4. Priming Bulb
5. Side Cover
6. Chain Tension Dial
7. Side Cover Locking Lever
8. Chain
9. Guide Bar
1. FITTING THE CHAIN BAR
PETROL CHAINSAW
ACCESSORIES
1
10 11 12 13 14 15
16
17
18
2 3 4 5 6 7 8 9
WARNING!: DO NOT START THE ENGINE UNTIL THE
CHAINSAW IS FULLY ASSEMBLED.
CORRECT
POSITION
10. Bucking Spikes
11. Chain Brake
12. Handle
13. Recoil Starter
14. Filter Cover Knob
15. Ignition Switch
16. Fuel Tank Cap
17. Rear Handle
18. Chain Bar Oil Cap
19. Fuel Mixing Bottle
20. Chain Bar Cover
21. Spark Plug Wrench
22. Screwdriver
19 20 21 22
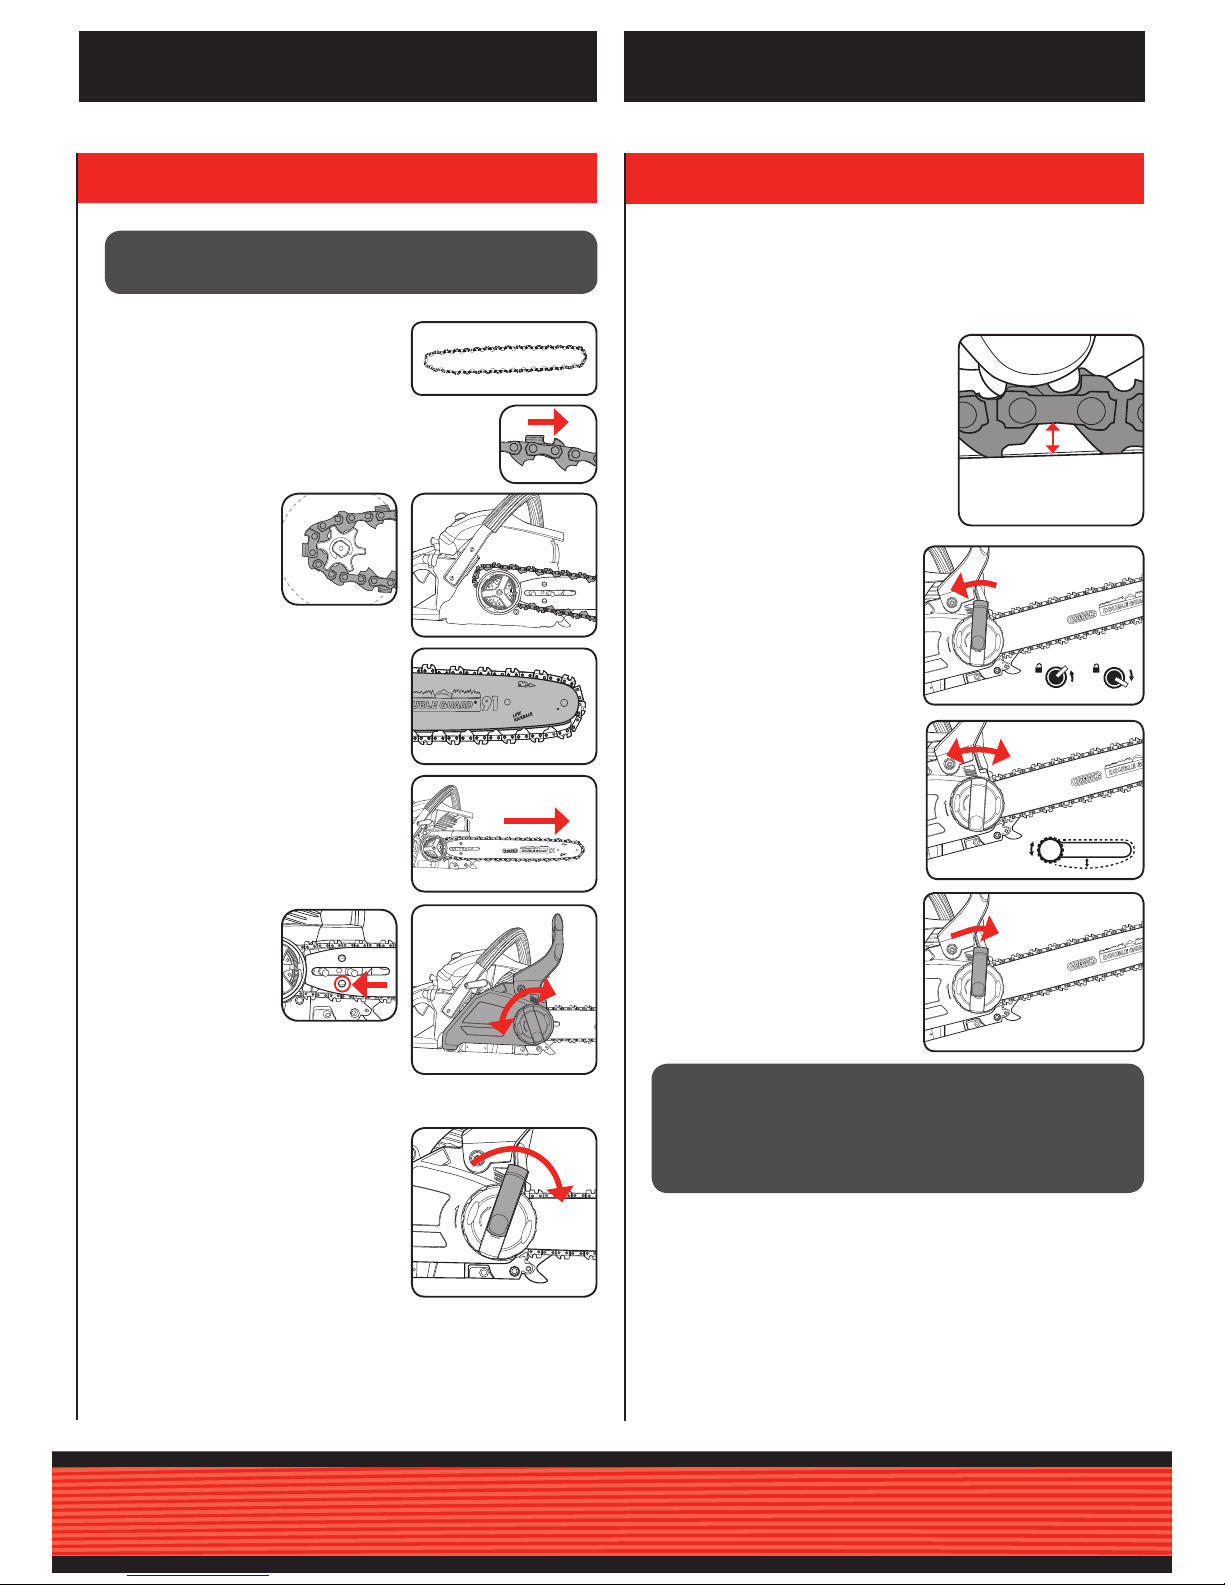
2. INSTALLING THE CHAIN
3. ADJUSTING THE CHAIN TENSION
1. Spread the chain out in a loop with the
cutting edges pointing CLOCKWISE
around loop.
2. Slip the chain behind
the clutch and around
the sprocket. Make
sure that the links t
between the sprocket
teeth.
3. Guide the drive links into the groove and
around the end of the bar.
Note: The chain may droop slightly on the
lower part of bar. This is normal.
4. Pull the chain bar forward until the chain
is closely seated. Make sure that all the
drive links are in the groove of the bar.
5. Place the side cover
onto the chainsaw.
Make sure that the
chain tensioning pin
ts into the chain bar.
If it does not t, it can
be adjusted slightly
with the chain tensioning dial.
The chain must not slip off the bar when
you do this.
6. Pull out the side cover locking lever
and turn it in a clockwise direction. This
action will x the side cover in place.
SETUP & PREPARATION
Note. Proper tension of the chain is extremely important and must be
checked before starting, as well as during any cutting operation.
Taking the time to make adjustments to the chain will result in
improved cutting performance and prolonged chain life.
Correct tension
For the correct chain tension, pull up on
the chain from the top and middle of the
exposed guide bar. The bottom tip of the
links should only just stay in the track.
Adjusting tension
1. Loosen the side cover locking dial
slightly.
2. Hold the nose of guide bar
up and turn the adjustment
dial CLOCKWISE to increase
chain tension. Turning dial
COUNTERCLOCKWISE will
decrease amount of tension on the
chain. Ensure the chain ts snugly
all the way around the guide bar.
3. After making the adjustment, and
while still holding nose of bar in the
uppermost position, tighten the side
cover locking dial securely.
CAUTION!: WEAR PROTECTIVE GLOVES AT ALL TIMES
WHEN HANDLING THE CHAIN.
CAUTION!: RECHECK THE TENSION AFTER A FEW
MINUTES OF CUTTING AS THE CHAIN MAY STRETCH
AFTER INITIAL USE. A LOOSE CHAIN MAY CAUSE
WEAR TO BOTH THE CHAIN AND THE GUIDE BAR AND
BECOME A MAJOR SAFETY HAZARD.
5 - 6mm gap is
the ideal tension
 Loading...