

Ozeri CardioTech BP2M Instruction Manual
DIGITAL BLOOD PRESSURE MONITOR
Premium Series
Model BP2M
Table of Contents
Introduction 3
Important Safety Information 3
Health and Blood Pressure Values 4
Suggestions Before Measuring
Blood Pressure 5
Device Description 6
Description of Control Buttons 6
Description of LCD Display Symbols 7
Installing/Replacing Batteries 7
Programming Date and Time 8
Using the Wrist Cuff 9
Correct Measurement Position 10
Measuring your Blood Pressure 12
About Blood Circulation 13
Irregular Heartbeat? 14
What is Arrhythmia? 15
Using the Memory Feature 15
Recall/Review previous measurements 16
Using the Average Feature 17
Deleting Individual Measurements 17
Deleting All Measurements 18
Troubleshooting 18
Error Messages 22
23
Care and Maintenance 26
Warranty Information 27
2

Introduction
Thank you for purchasing an Ozeri Fully
Automatic Wrist Blood Pressure Monitor.
The device uses the oscillometric method of
blood pressure measurement. This method
detects the movement of your blood through
your brachial artery, and converts your blood
pressure into a digital reading. The unit is
simple to use because no stethoscope is
needed while using an oscillometric monitor.
This device automatically stores 1197 sets of
measurement values with date and time data
for 3 users (1197 measurements total). You can
access the stored data simply by pressing the
MEMO button.
Important Safety Information
To assure the correct use of this product, basic
safety measures should always be followed,
including the precautions listed below:
• Read all information in the instruction manual
and any other literature included in the box
before using this device.
• Consult your physician before measuring
blood pressure, especially if you have any
of the following conditions: hypertension,
diabetes, arteriosclerosis, kidney or
vascular disease, or any conditions
affecting circulation.
3
• Operate this device only as it is intended. Do
not use this device for any other purpose.
• This device is intended for use in measuring
blood pressure and heart rates for adults only.
Do not use on infants or persons who cannot
express their intentions.
• Do not use a cellular phone near this device.
Cell phones may inhibit the accuracy of this
device.
• Do not disassemble or attempt to repair this
device or any of its components. Doing so will
void the warranty.
•
gases (such as anesthetic gas, oxygen or
alcohol) are present.
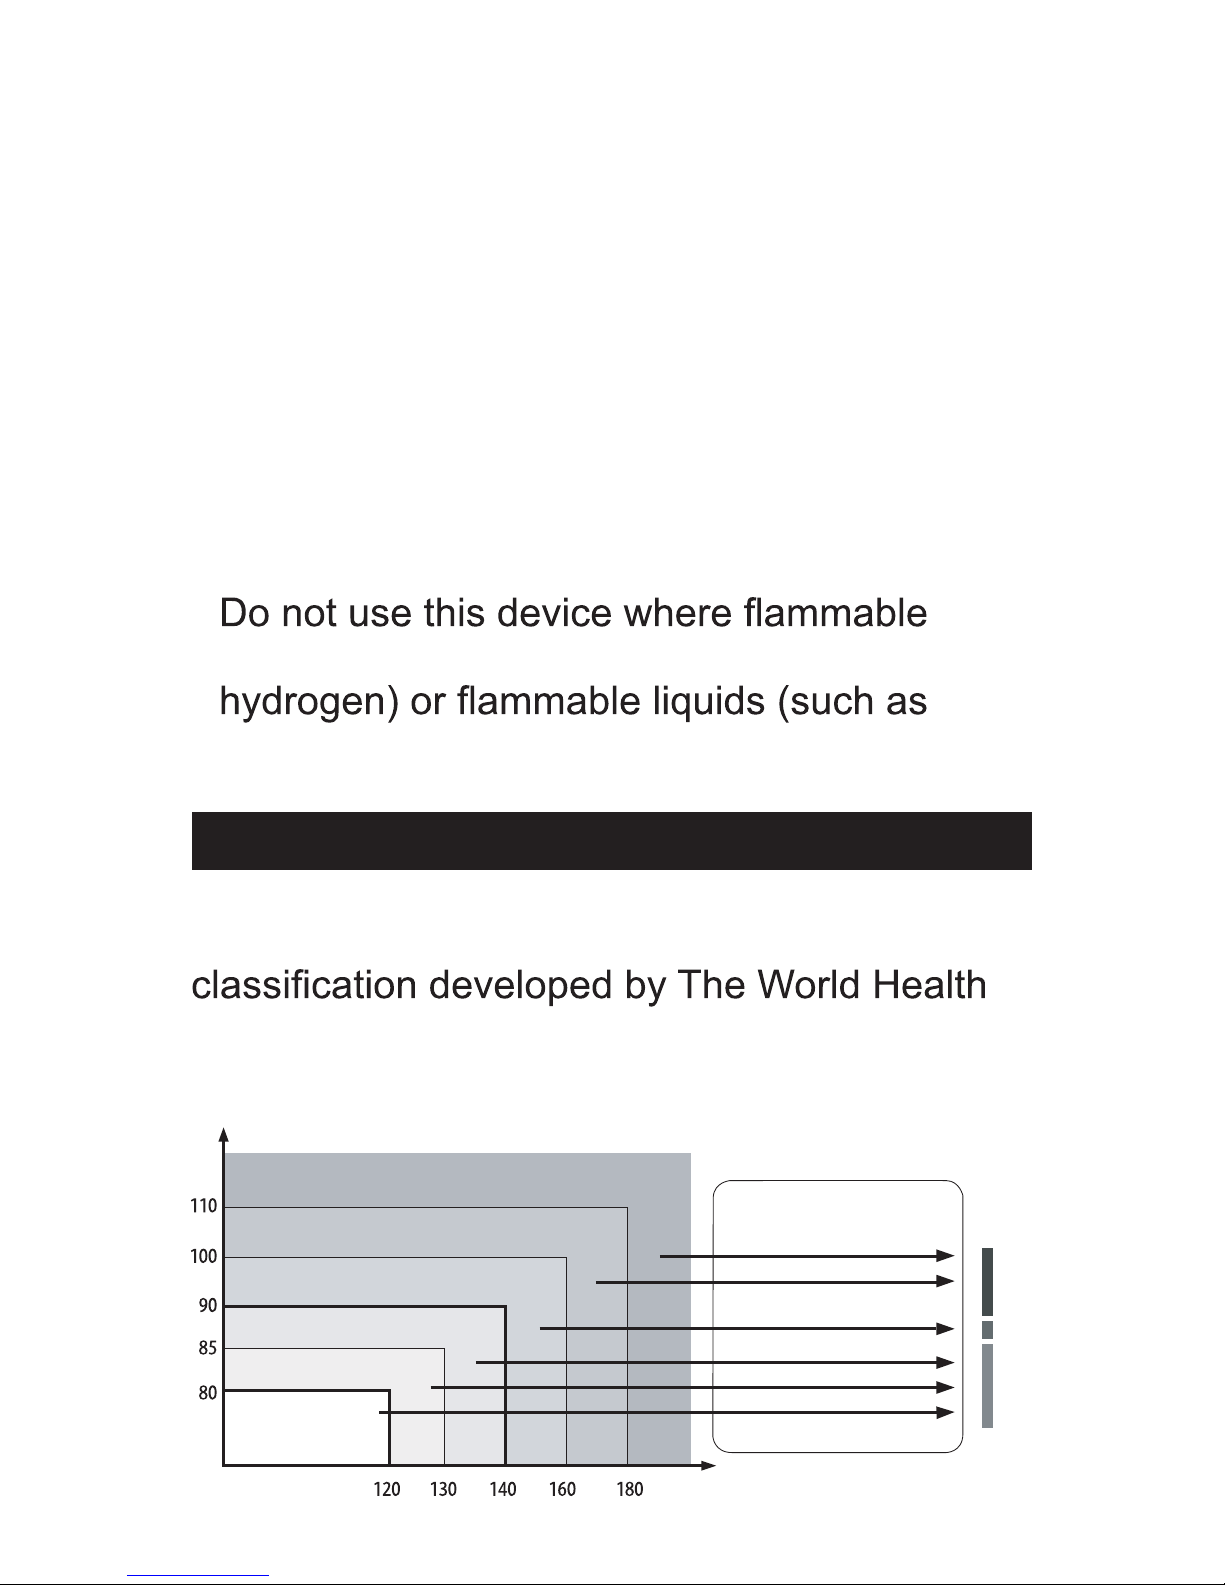
Understanding Blood Pressure Values
This device refers to a blood pressure
Organization (WHO) and the International
Society of Hypertension (ISH).
4
WHO
Red
Systolic Blood Pressure (mmHg)
Optimal
blood pressure
(target value)
Normal blood pressure
Normal systolic value
Mild hypertension
Moderate hypertension
Severe hypertension
Diastolic Blood Pressure (mmHg)
Orange
Green

Suggestions before Measuring Blood
Pressure
1. Rest for at least 5-10 minutes before taking
your blood pressure.
2. Avoid eating, smoking, exercising, bathing
and drinking (especially alcohol, caffeine or
tea) for at least 20-30 minutes before taking
a measurement, and avoid talking while
measuring your blood pressure.
3. Make sure the wrist cuff is at heart level.
4. Stress raises blood pressure. Try to keep
calm before and during the measurement
process.
5. Wait 2-3 minutes before retaking your blood
pressure measurement.
6. Keep the records for your physician and
refer to your physician for guidance.
Remember that one reading does not
provide a true blood pressure value;
only long-term records will reveal a more
accurate picture of your blood pressure. Try
to take your measurement at the same time
each day to stay consistent.
5
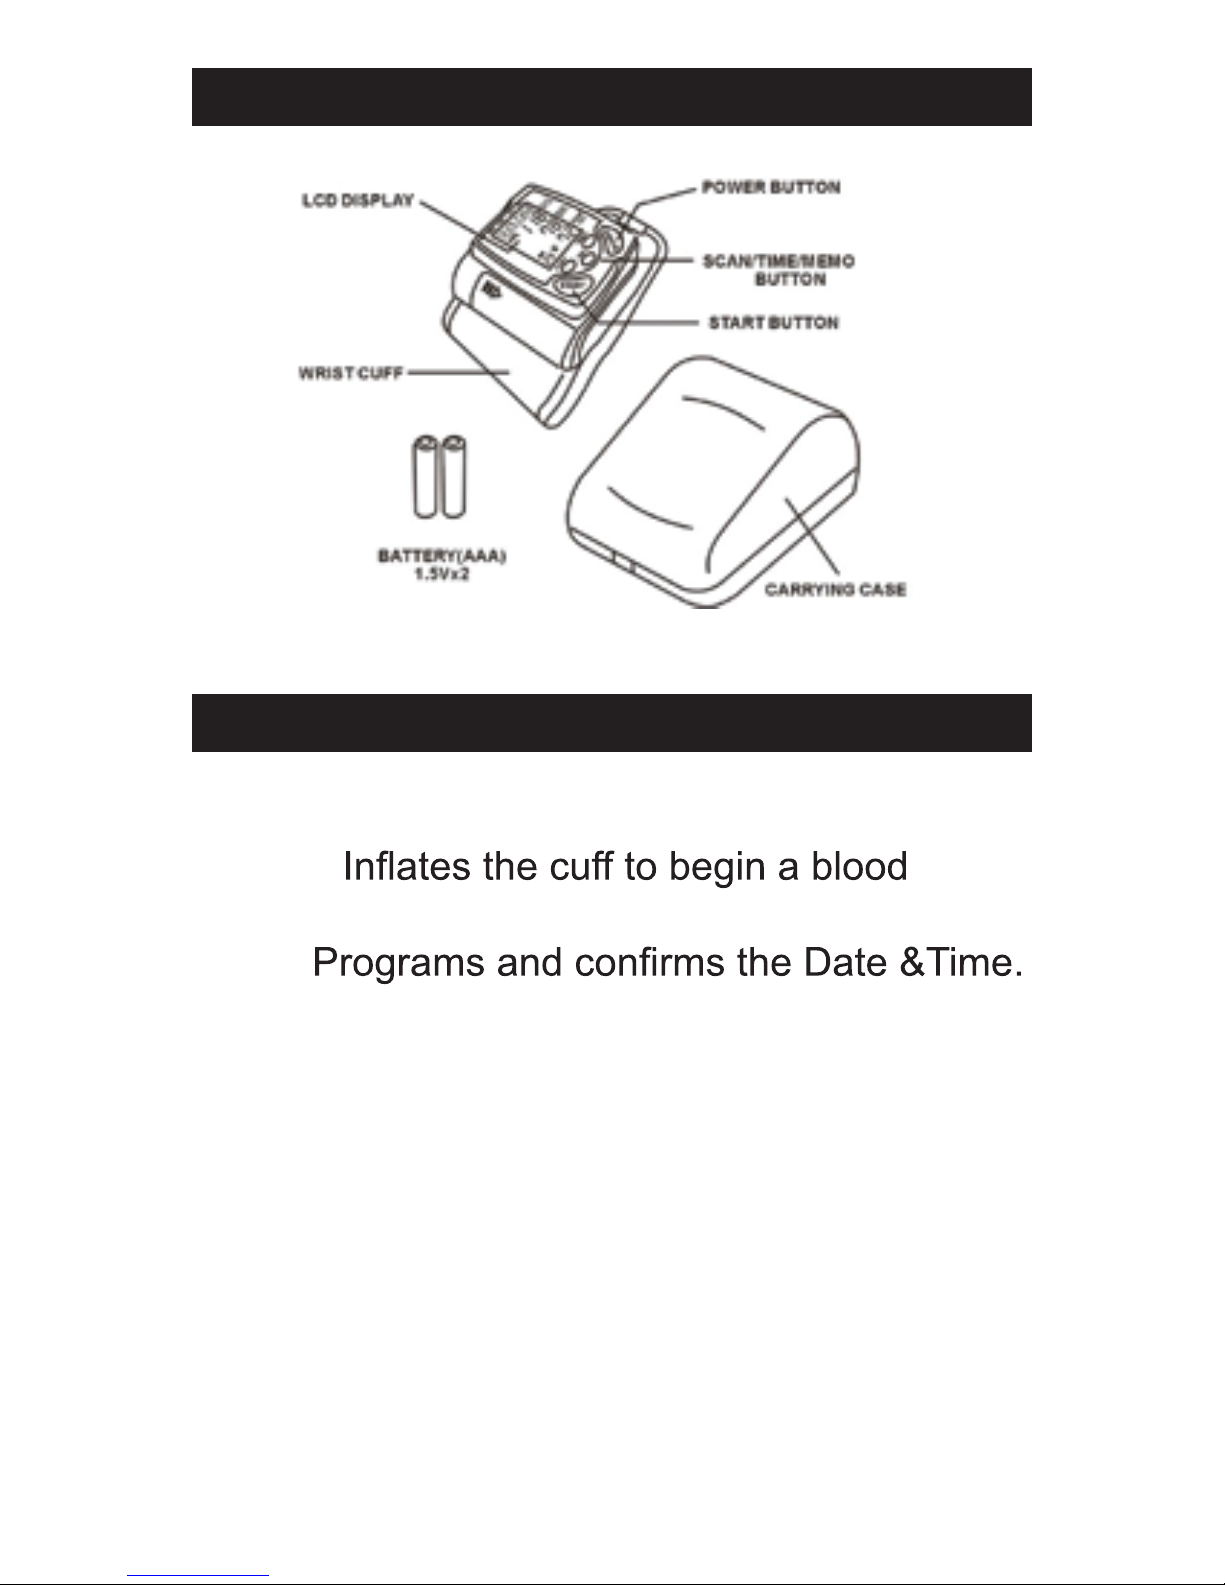
Device Descriptions
Description of Control Buttons
Description of Control Buttons
POWER: Turns the unit on or off.
START:
pressure and pulse measurement.
TIME:
MEMO/▲: Displays the previously recorded
blood pressure reading. This button is also
used to change the Date & Time during
programming.
SCAN/▼: Displays all previously measured
record(s) in 10 measurement increments from
the device’s memory. This button is also used
to change the Date & Time during programming.
6
7
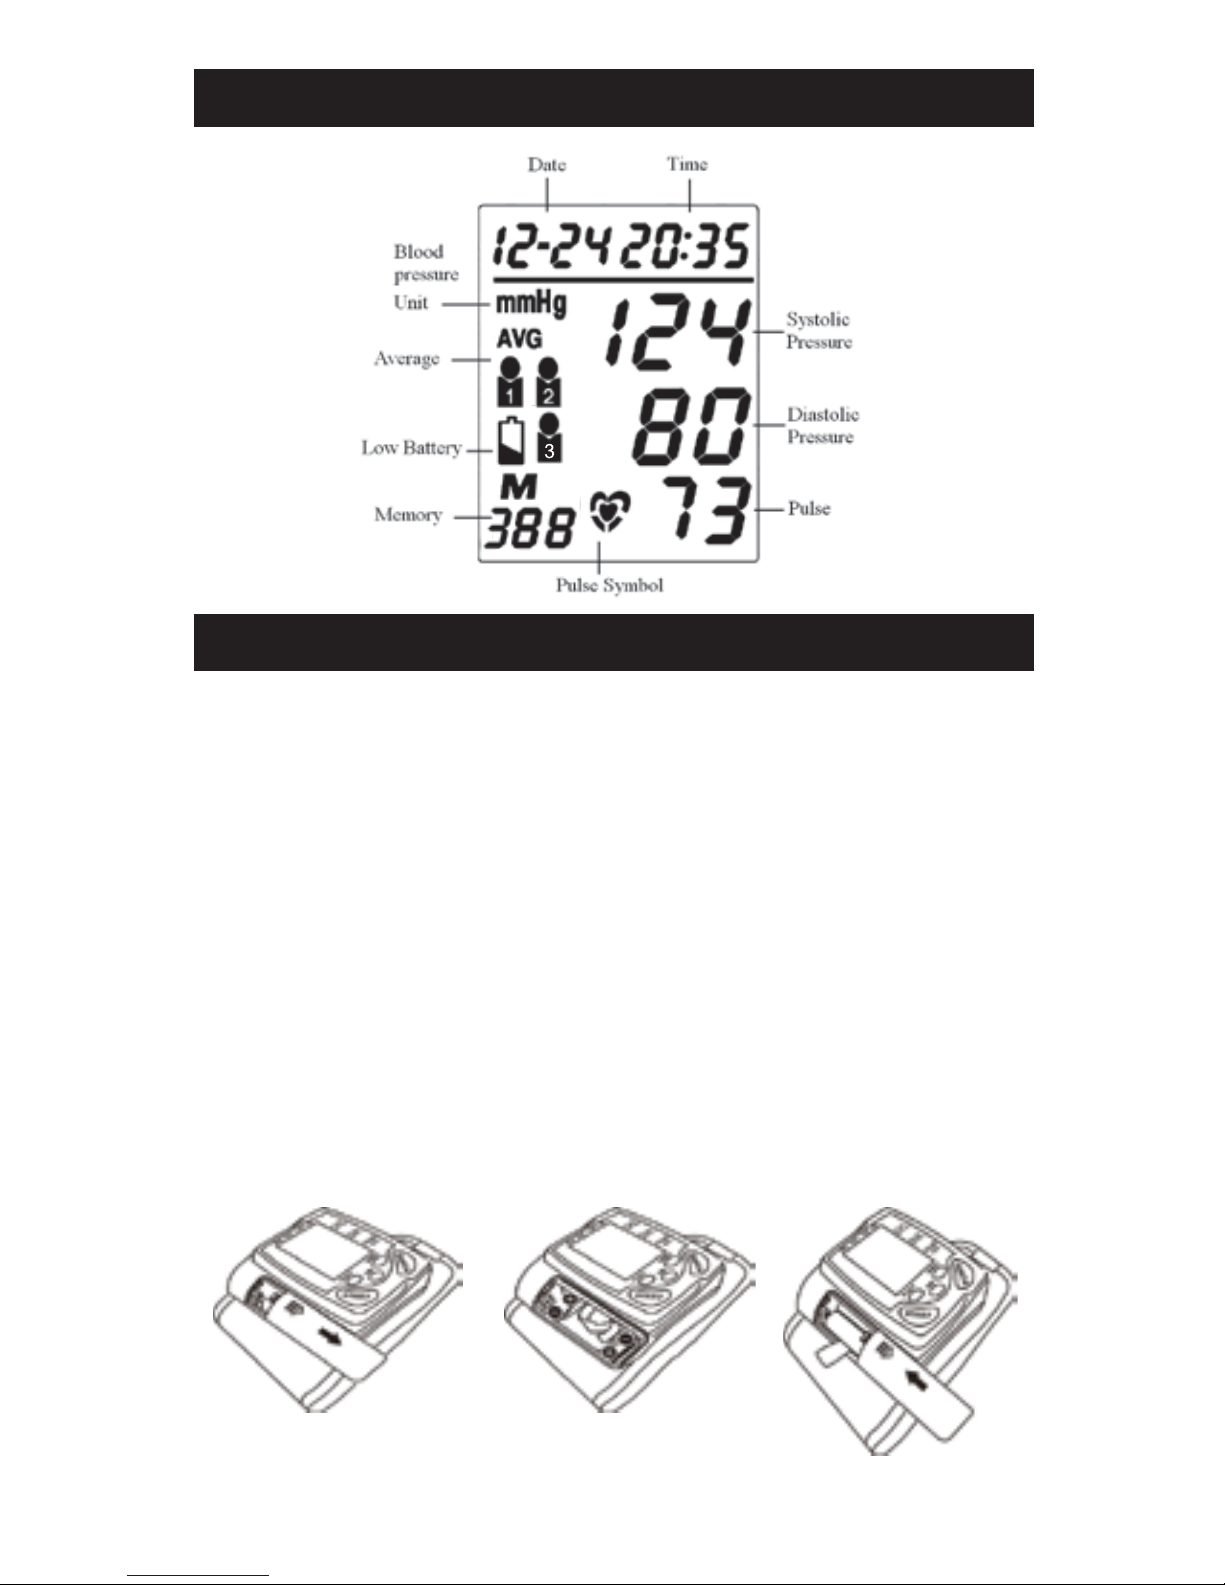
Description of LCD Display Symbols
Installing/Replacing Batteries
To prevent the accidental deletion of the blood
pressure readings stored in Memory, make
sure the device is turned off before installing /
replacing the batteries.
1. Remove the battery cover by sliding it in the
direction indicated by the arrow.
2. Install 2 new AAA alkaline batteries, following
the +/- polarity indicators marked inside.
3. Replace the battery cover.

8
Note:
a. When (Low Battery Indicator) appears on
the display, the batteries are low in charge.
Change the batteries as soon as possible.
A low battery charge can affect the ability of
this device to take correct measurements.
b. Replace old batteries with new ones
immediately.
c. Replace with new ALKALINE batteries for
best performance and longevity.
d. Remove and store the batteries if this device
will not be used for an extended period of
time (i.e., 3 months). The batteries can leak
chemicals which can destroy electronic
components in this device.
Programming Date and Time
1. Press and hold TIME button for 2 seconds
until the display shows 2012 and starts to
2. Press MEMO/▲ button or SCAN/▼ button
until the number representing the current
Year appears on the screen. Note: pressing
and holding the MEMO/▲ or SCAN/▼
button for about 2 seconds will cause Year to
increase or decrease at a faster speed.
9
3.
setting. The number representing the Month
4. Follow the same instructions as above to set
the Month, Date, Hour and Minute settings.
Note: After replacing batteries, always
proceed to use the blood pressure monitor.
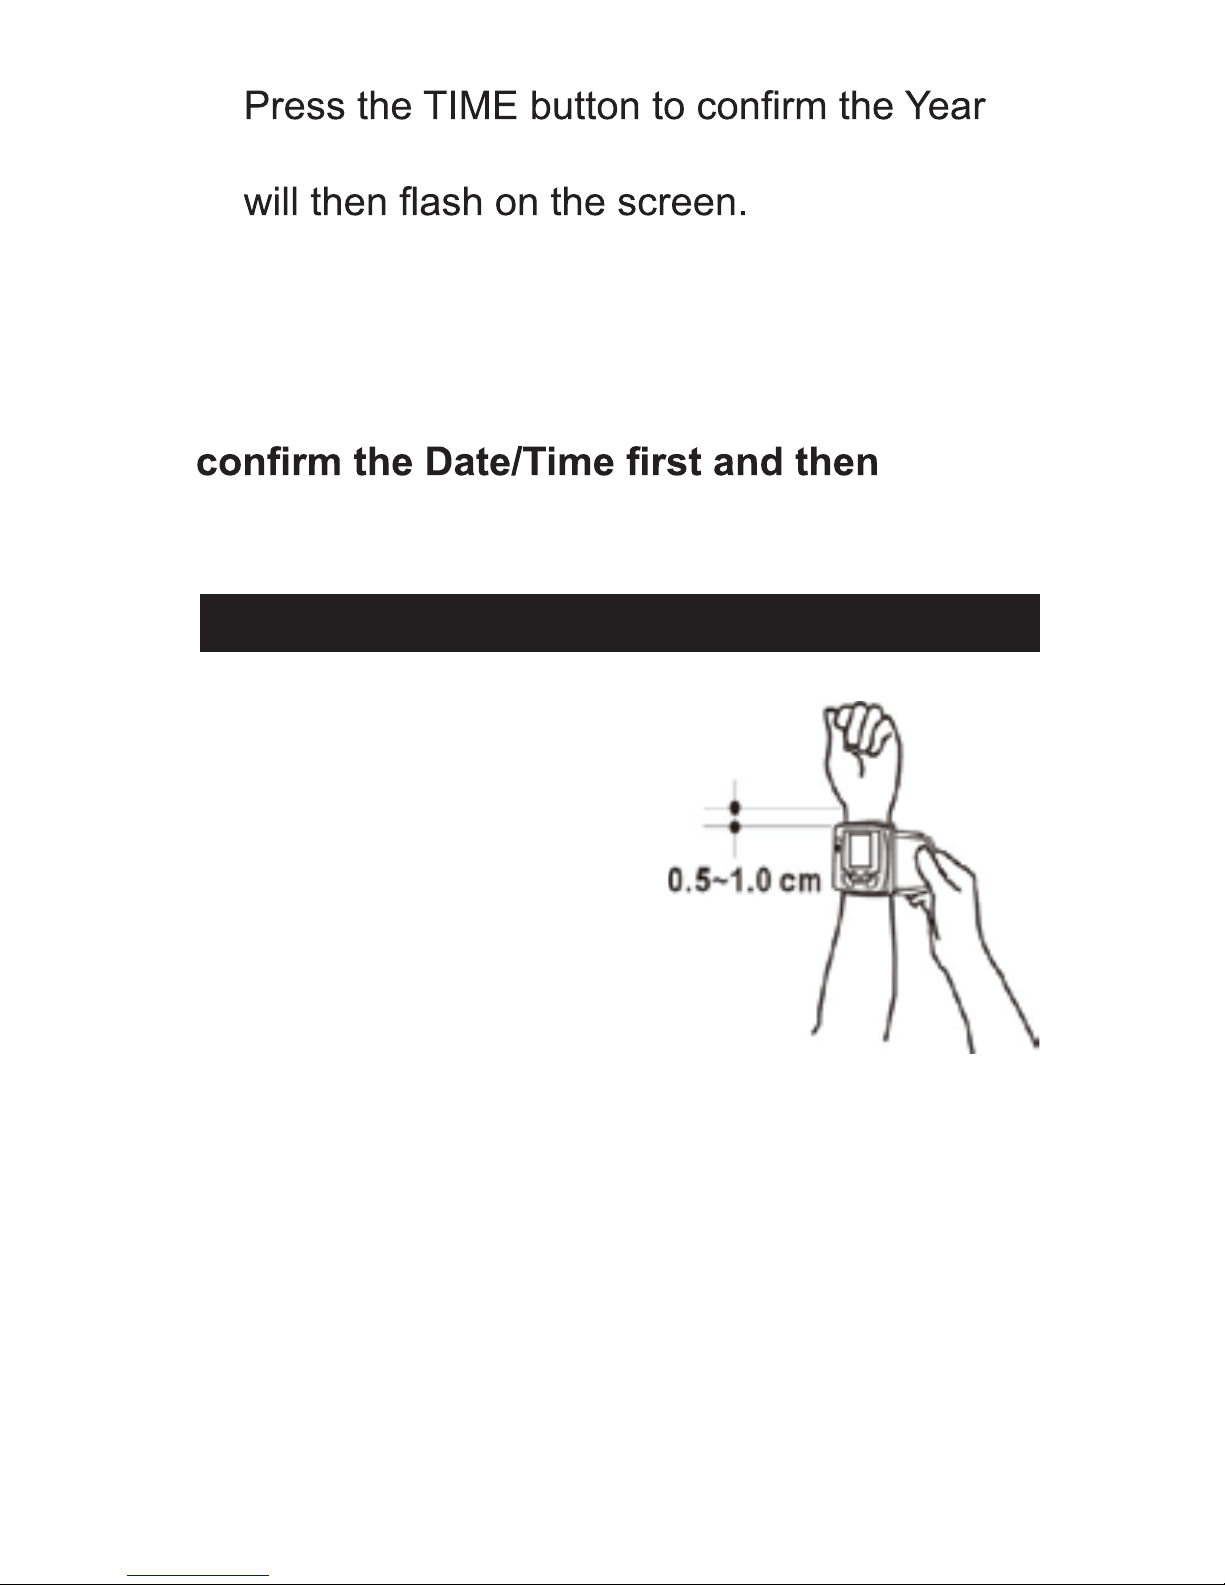
Using the Wrist Cuff
1. Remove all clothes from
your arm allowing the
cuff to make direct
contact on your skin.
2. Hold your left arm in front
of you with your palm
facing up. Apply the wrist
cuff so that the monitor is on the inside wrist
facing upwards towards you so that the
screen is in clear view.
3. As shown in the image below, enclose the
wrist cuff leaving 1/4”~1/2” (0.6 cm - 1.3 cm)
between the edge of the cuff and the palm
of your hand.
 Loading...