

Page 1
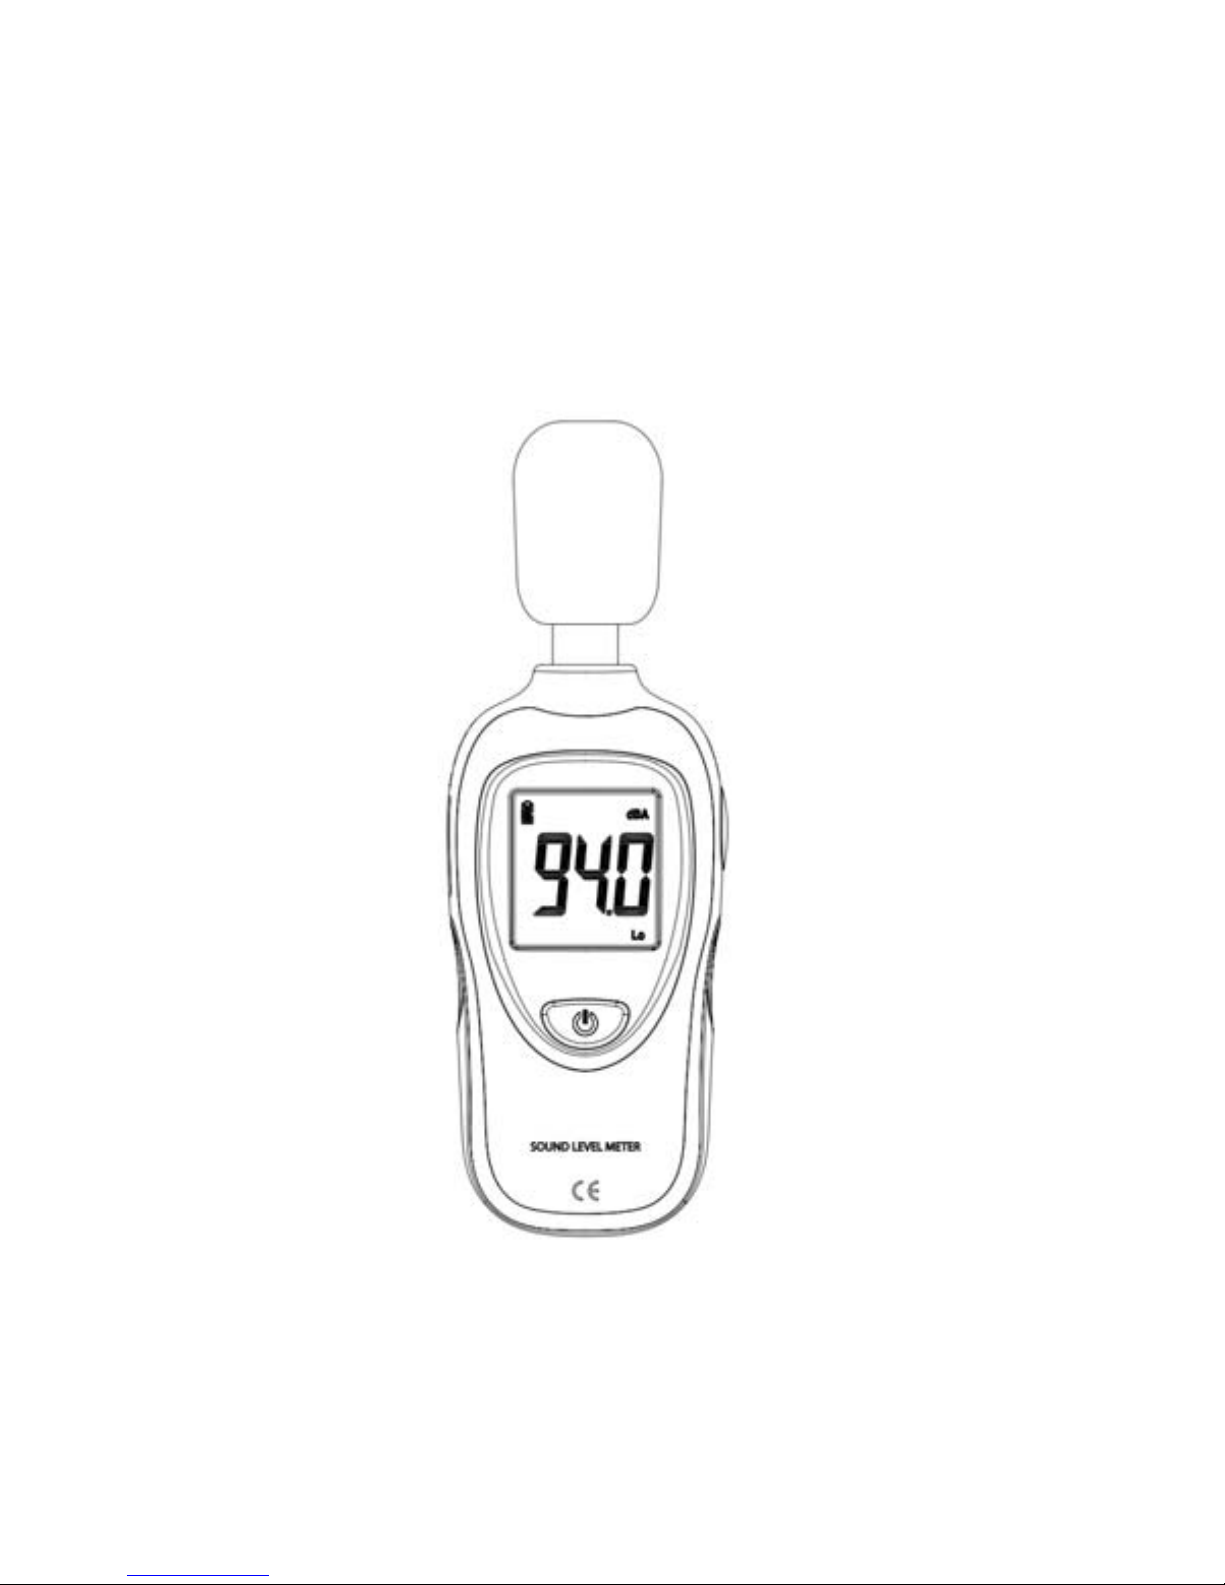
User's Manual
Mini Sound Level Meter
Please read this user's manual thoroughly before using this
unit and keep it properly for your future reference
.
Page 2

1
Contents
1. Safety......................................................... 2
2. General Description ...................................... 2
3. Specifications .............................................. 3
4. Meter Description ......................................... 5
5. LCD Display Description................................ 7
6. Operation Instruction………………………………8
7. Basic Operation ........................................... 9
8. Operation Instruction..................................... 9
9. Operation Precautions................................. 10
10. Accessories ............................................. 10
Page 3

2
1. Safety
Read the following safety information carefully before
attempting to operate or service the meter.
Use the meter only as specified in this manual;
otherwise, the protection provided by the meter may be
impaired.
▲ Environment conditions:
n Altitude up to 2000 meters
n RH≤90%(Non-Condensation)
n Operating Temperature: -20~60℃
▲ Maintenance
n Repairs or servicing not covered in this
manual should only be performed by qualified
personnel.
n Wipe the unit with a dry soft cloth. Do not use
abrasives or solvents on this instruments.
▲ Safety Symbol
Comply with EMC
2. General Description
This Sound Level Meter is designed to meet the
measurement requirements of safety Engineers, Health,
Industrial safety offices and sound quality control in various
environments like factory, school, construction, etc.
Page 4
3
n Comply with IEC61672-1 CLASS2 Standard
n Max/Min Record
n With one equivalent weighted sound pressure level A
n Screen lock function
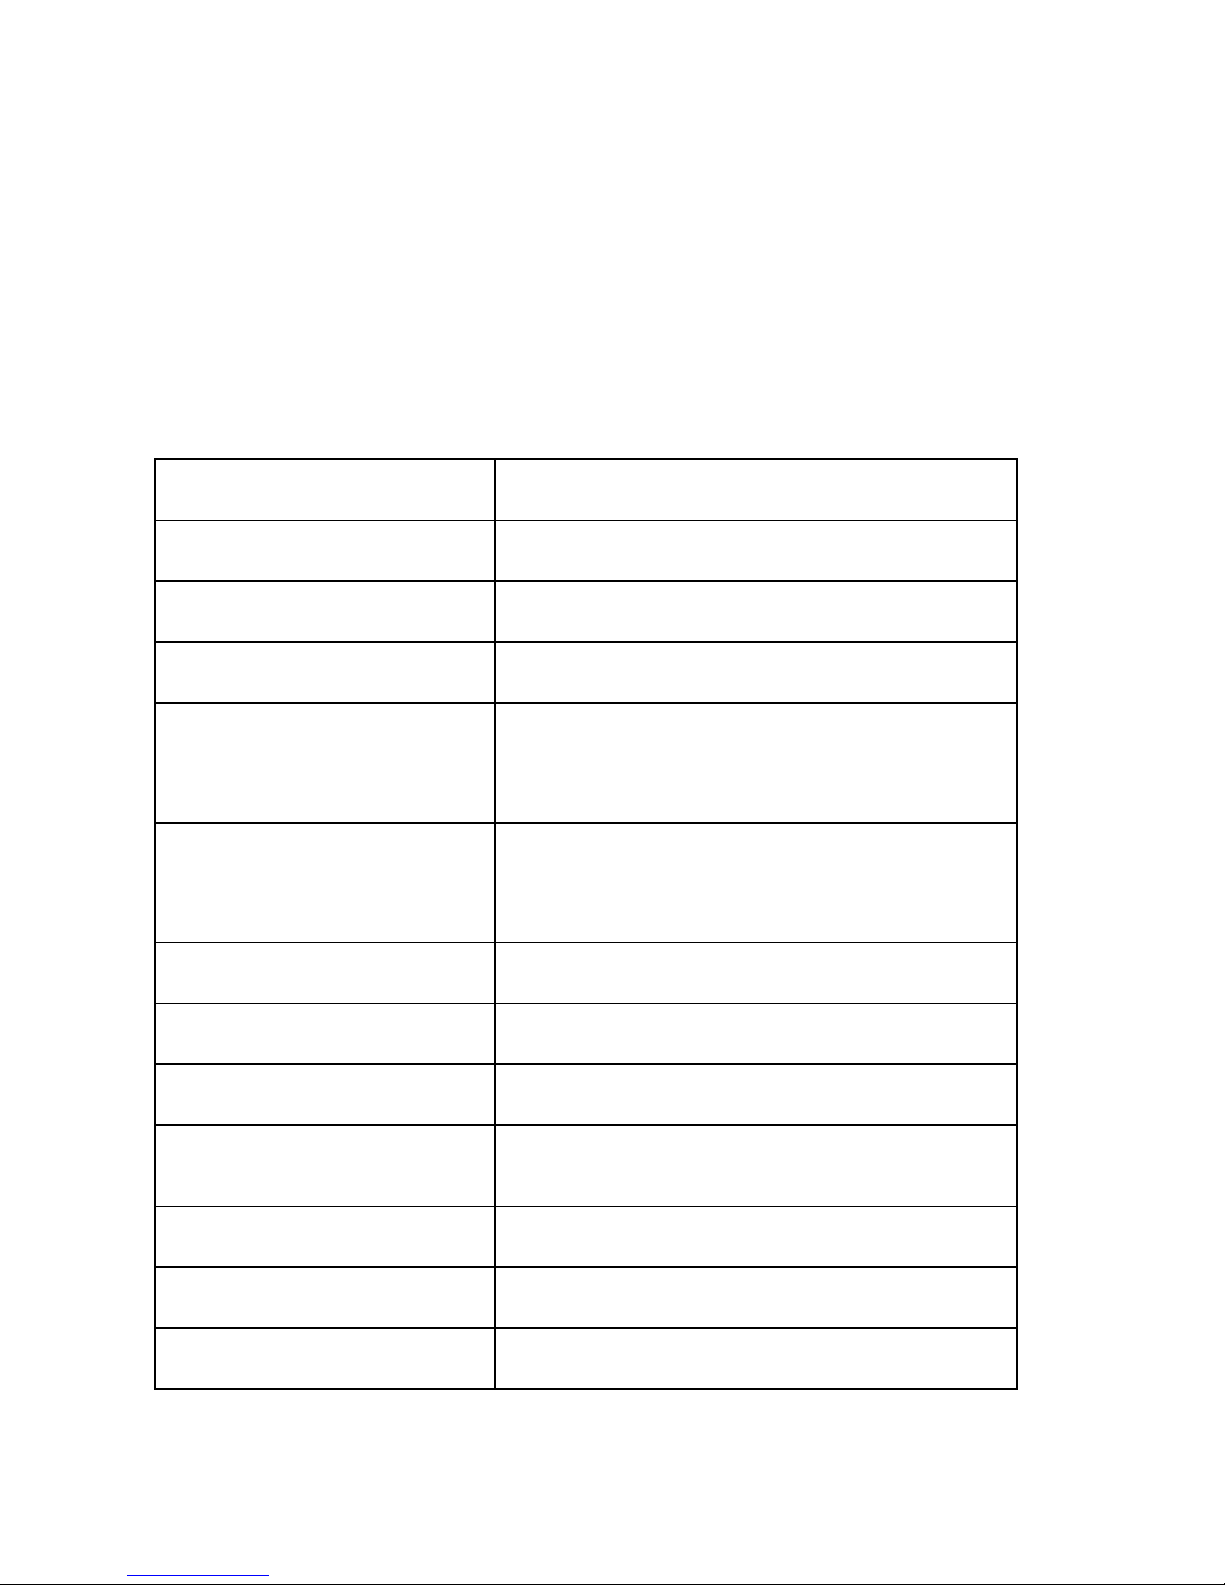
3. Specifications
A
pplied standard IEC61672-1 CLASS2
A
ccuracy
±1.4dB
Frequency range
31.5Hz ~ 8KHz
Dynamic range 50dB
Measuring level
range
30dB ~ 130dB
Frequency
weighting
dBA
Microphone 1/2 inch electret condenser
Display
3 1/2 digits,
Resolution 0.1dB
Data update:
0.5 sec
Max Hold MAX
Min Hold MIN
Screen Lock
HOLD
Page 5
4
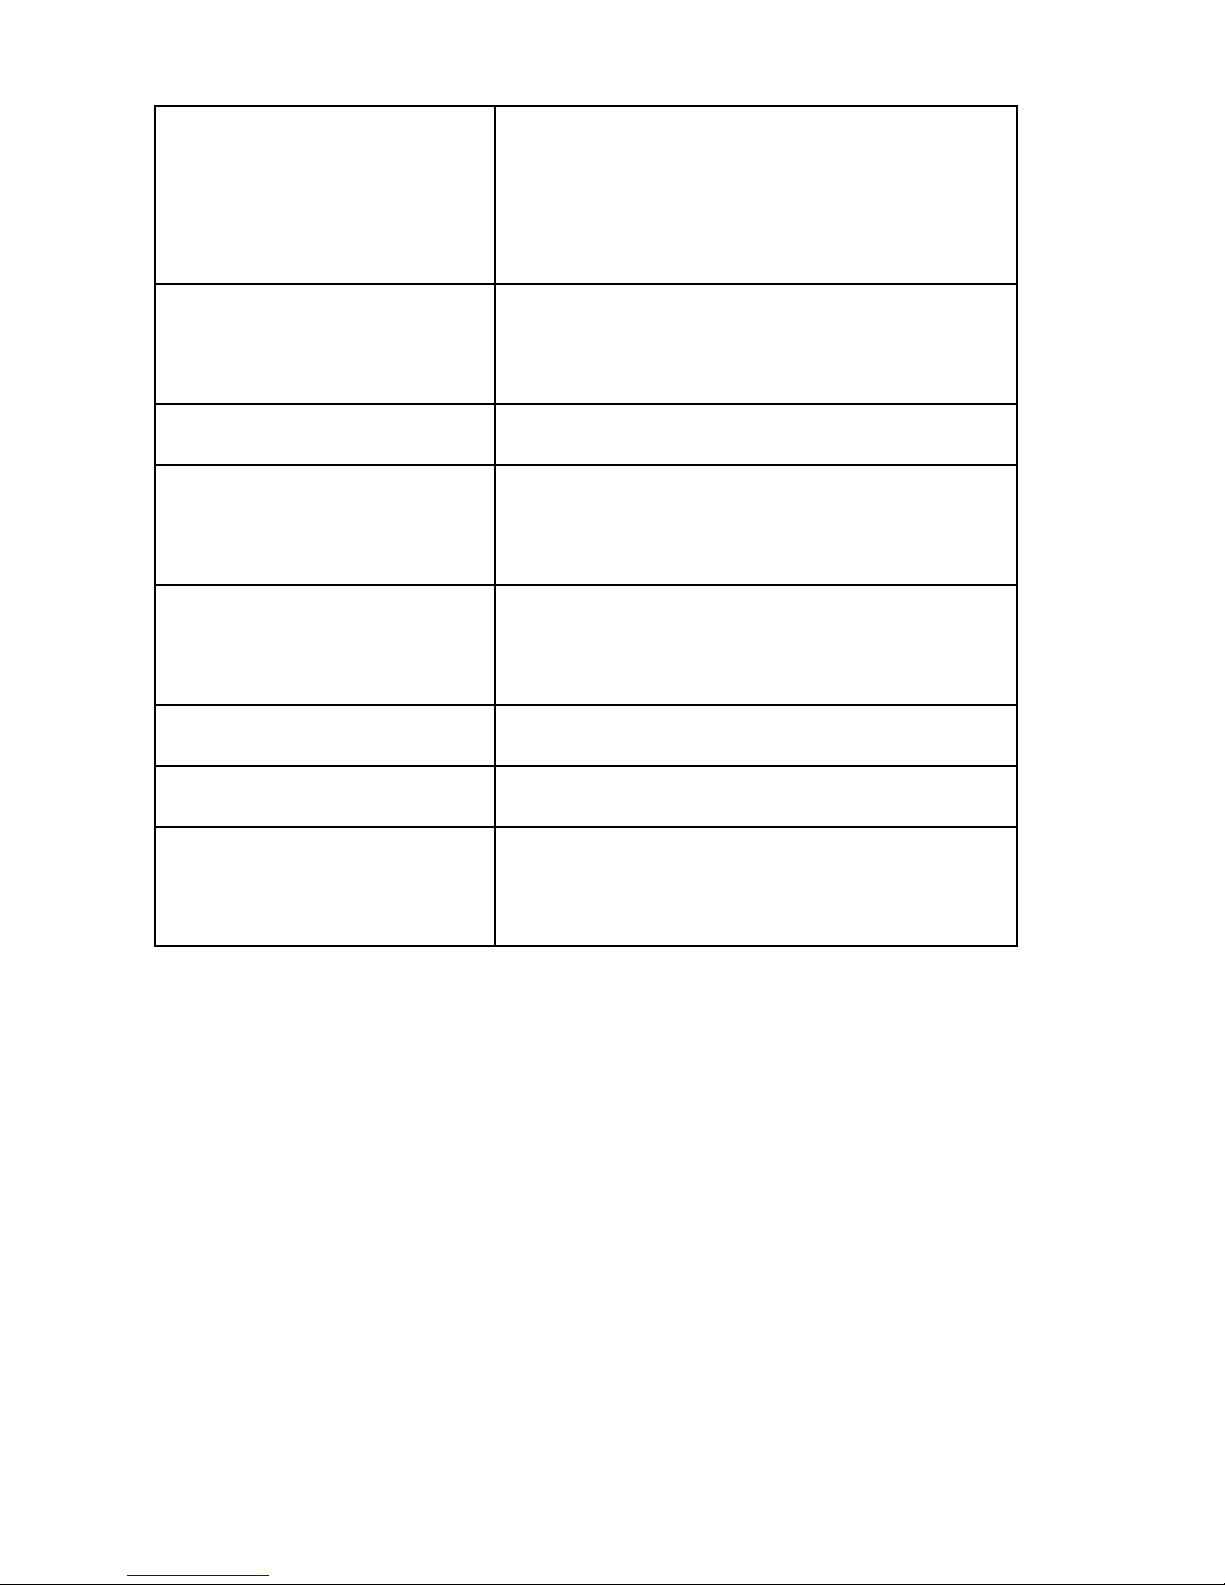
Auto power off
Meter automatically shuts down
after approx. 15 minutes of
inactivity.
Power supply
One 9V battery, 006P or IEC
6F22 or NEDA 1604.
Battery life at least 30 hours
Operating
conditions
- 20℃~60℃,
10%RH~90%RH
Storage conditions
-20℃~60℃,
10%RH~75%RH
Dimension(L*W*H) 144* 55* 38mm
Weight: 90g
Accessories:
User's Manual, 9V battery and
windscreen
Page 6
5
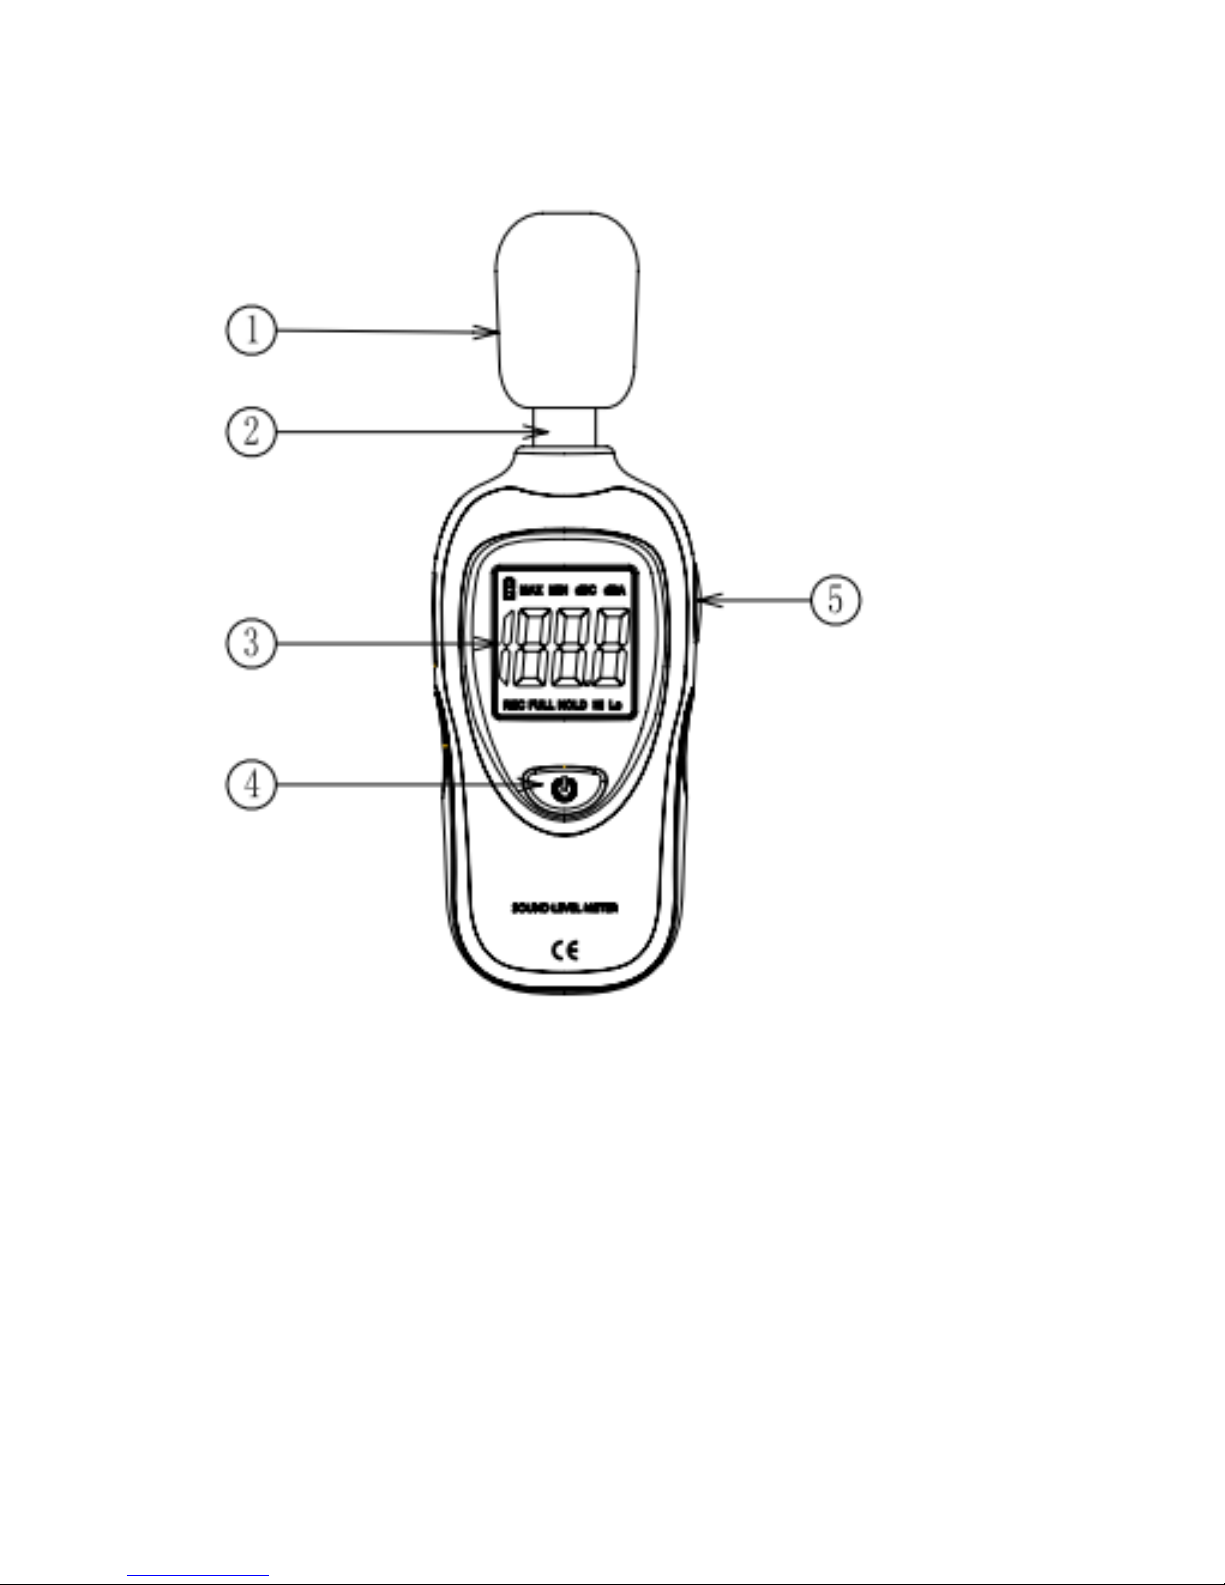
4. Meter Description
Page 7
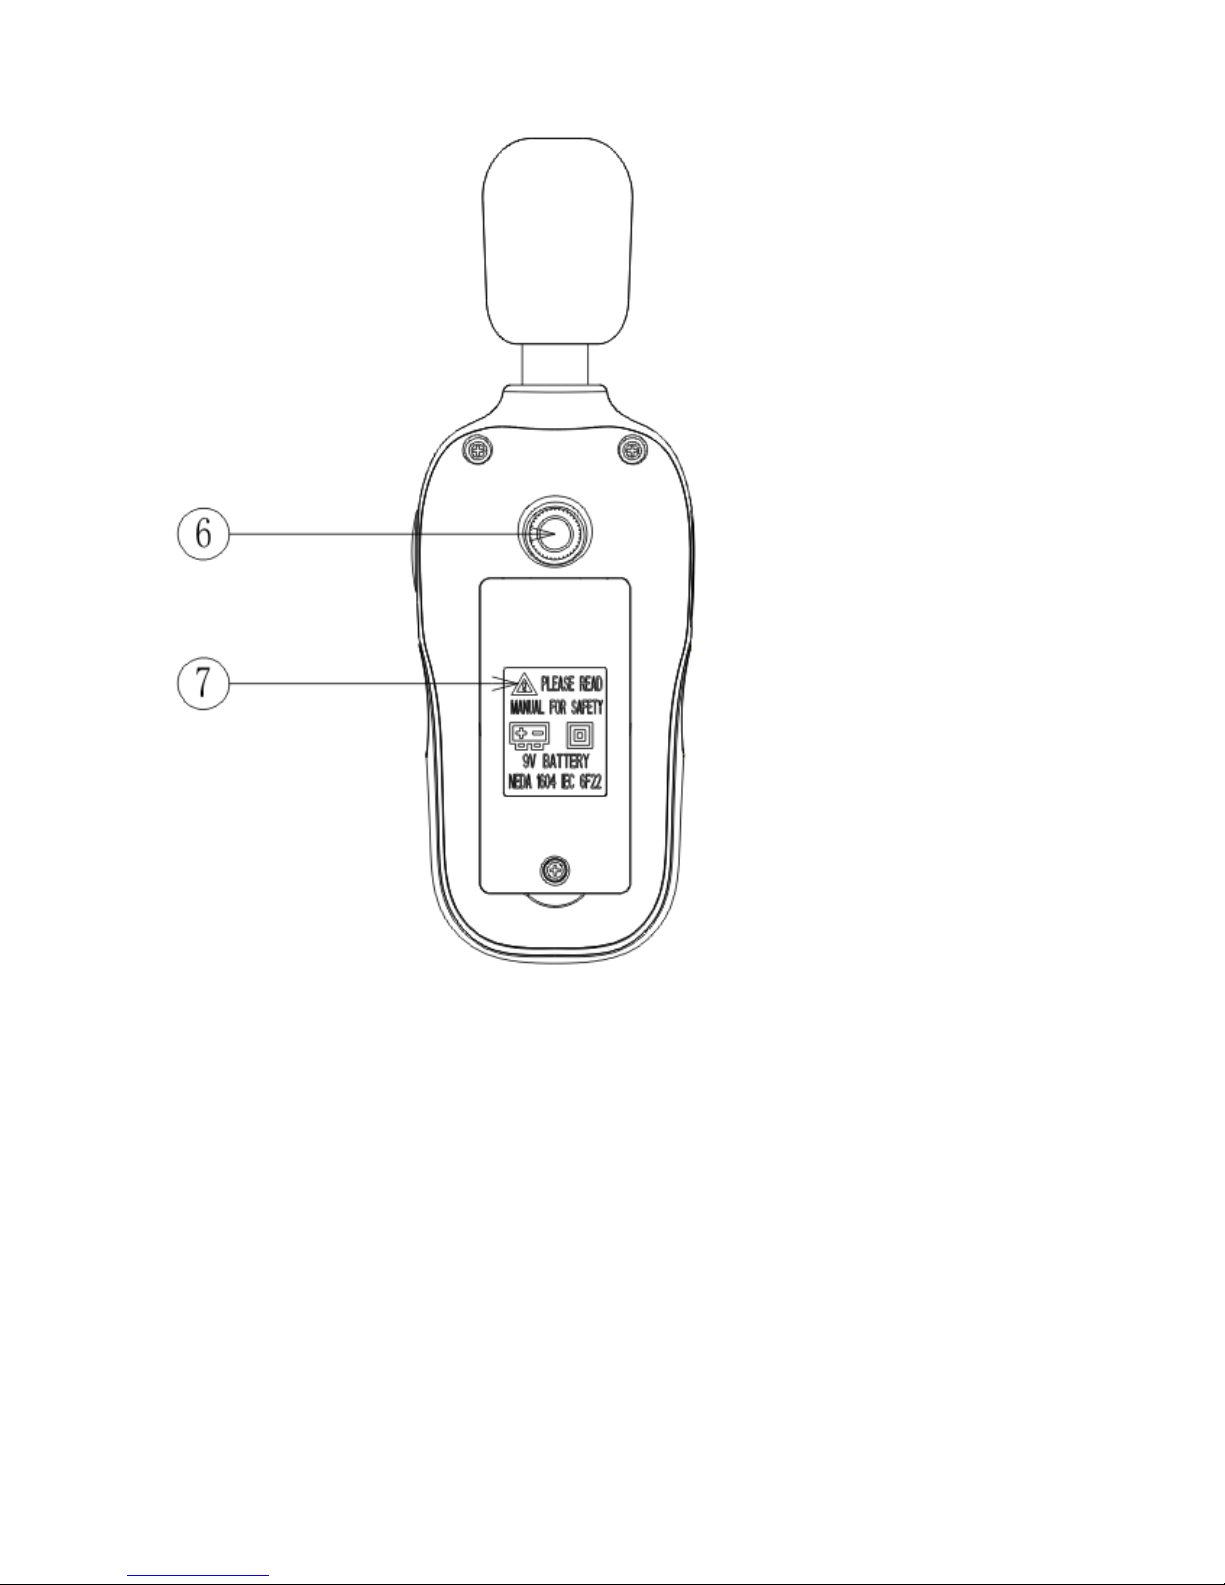
6
⑴ Windscreen microphone cover
⑵ Microphone
⑶ LCD display
⑷ Power ON/OFF button
⑸ MAX/MIN button
⑹ Tripod nut
⑺ Battery compartment
Page 8
7
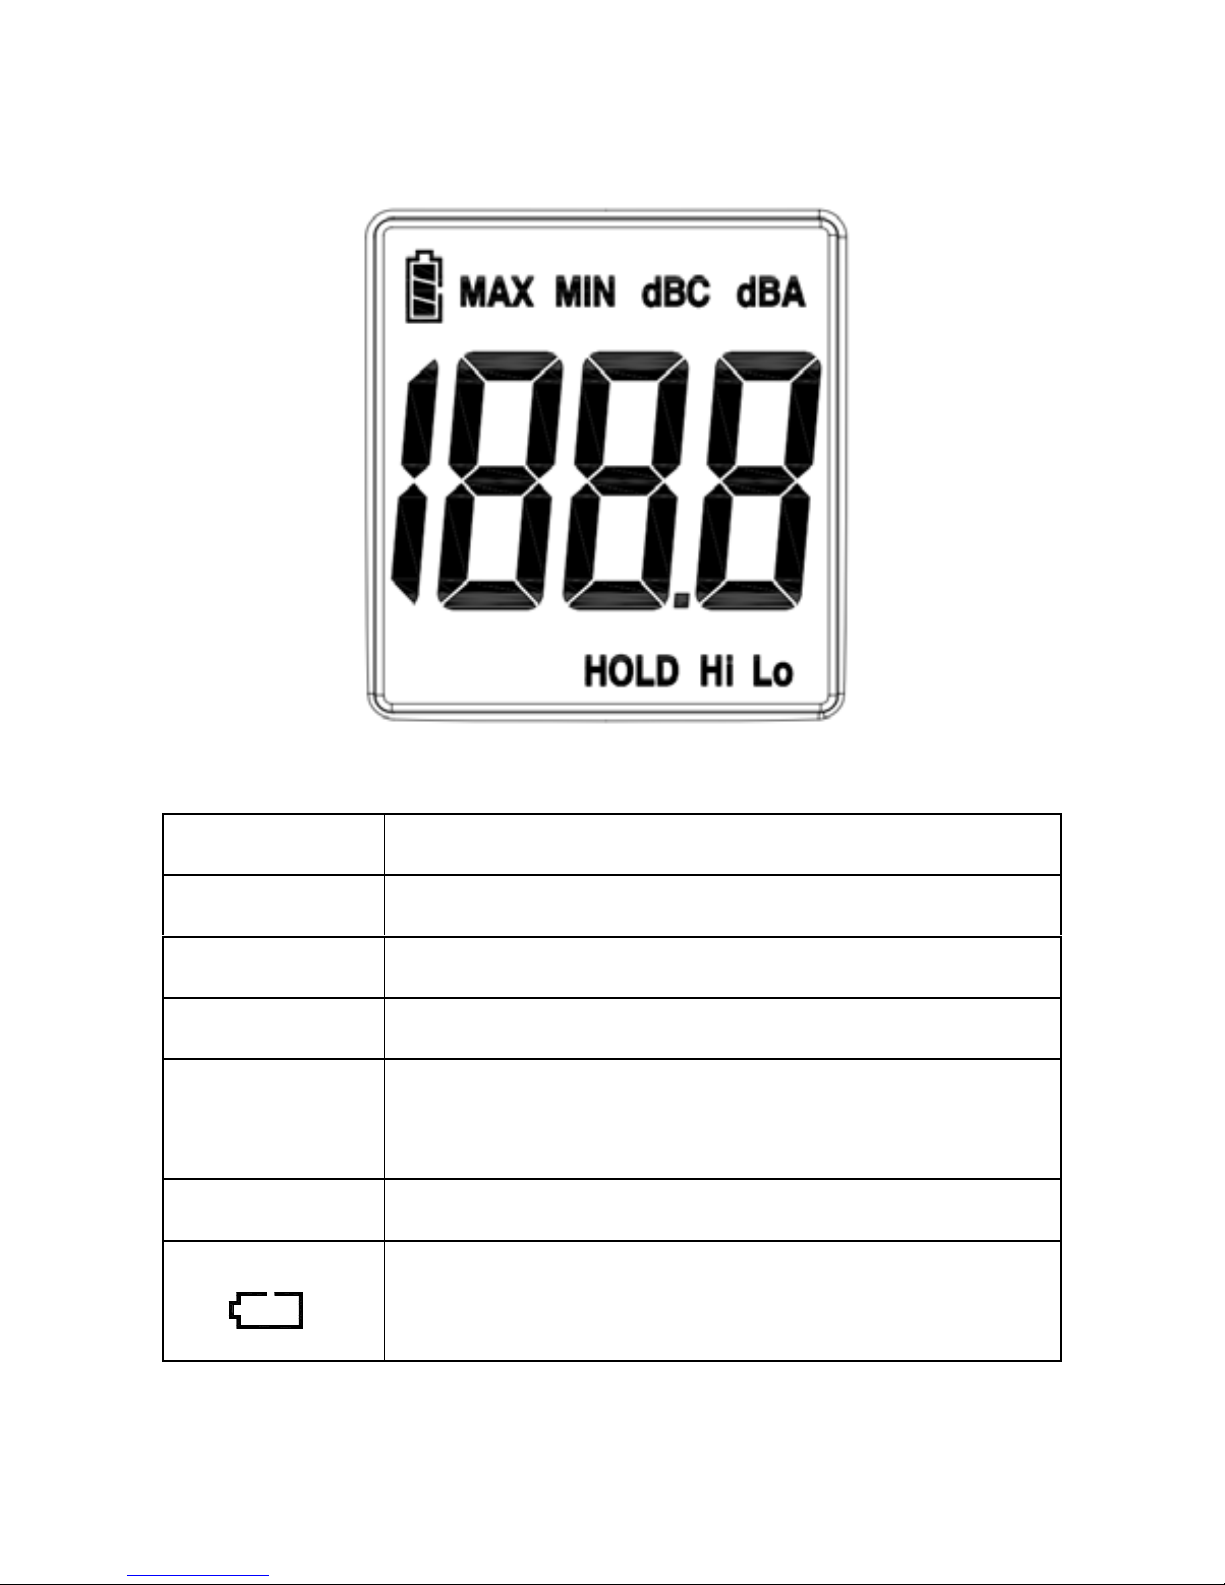
5. LCD Display Description
Icon Function
LCD 3 1/2 digits
MAX Max value hold
MIN Min value hold
dBA
A frequency weighting ( the noise that
human ear can hear)
HOLD Data hold
Low battery indication
Page 9

8
6. Operation Instruction
① Backlit & Power ON/OFF Function
Power ON
:Turn the meter on by pressing button" " for 1
second until the LCD is lighted, then loose the button.
Power OFF:Turn the meter off by pressing and holding
button"
" for approx. 3 seconds until the LCD is
switched off, then loose the button.
Backlit:After turning the meter on, momentarily press button
"
", the backlit will be on/off, it will automatically
turn off after approx. 30 seconds of inactivity.
HOLD & MAX/MIN Function
HOLD: After turning the meter on, momentarily press
"
" button , "HOLD" icon will appear on the LCD,
which indicates the data is freezed. To release the
held reading, press the button again.
MAX/MIN: Press and hold "
" button for at least 3
seconds until "MAX" icon appears on the LCD to view
the current MAX reading, press the button again,
"MIN" icon will appears to view the current MIN
Page 10

9
reading. To exit the MAX/MIN mode, press and hold
the button "
" for 3 seconds.
7. Basic Operation
Open battery cover and install a 9-volt battery in the
battery compartment.
Close the battery compartment.
When the low battery icon "
" appears, replace
the meter's battery.
8. Operation Instruction
Power the meter on.
The meter will conduct measurement and select
measurement range automatically. Measuring level
range:30dB ~ 130dB.
To freeze a displayed reading, momentarily press the
"
" button, the "HOLD" icon will appear. To
release the held reading, press the button again.
Press and hold button "
" for at least 3 seconds
until "MAX" icon appears on the LCD to view the
current MAX reading, press the button again, "MIN"
icon will appears to view the current MIN reading. To
Page 11

10
exit the MAX/MIN mode, press and hold the button
"
" for 3 seconds to normal operation mode.
Hold the meter in hand or use the tripod to affix the
meter in the desired location. The best measuring
distance is 1~1.5m away from the microphone to the
sound source.
9. Operation Precautions
① Do not store or operate the meter in areas of high
temperature or humidity.
② Remove the battery when the meter is to be stored for
long periods of time to avoid battery leakage.
③ Wind blowing across the microphone increases the
noise measurement. Use the supplied windscreen to cover
the microphone when appliance.
④ Keep microphone dry and avoid severe vibration.
10. Accessories
① User's manual
② Windscreen
Page 12

 Loading...