

User Manual
USER MANUAL Model No: 3826
Ab Roller

Never carry out any alterations or modifications to this product.
This product is not a toy, and is only to be used for its designated purpose.
This product is intended for indoor use only.
Only use this product on stable, level and dry ground.
This product is for domestic use only.
This product contains small parts that could be a choking hazard if swallowed.
Keep these items away from children.
If at any time during use you feel faint, dizzy, experience pain, stop and consult
your physician or doctor.
Before using the product, make sure all fastenings are tightly in place and that
everything is in order, and checked periodically by an adult.
This product is not intended for use by persons (including children) with reduced
physical, sensory and mental capacities, or lack of experience and knowledge,
unless they have been given supervision or instruction concerning use of the
product by persons responsible for their safety.
Clean only with a damp cloth. Do not use strong industrial cleaning substances or
abrasive materials as these will damage the product.
If the product is damaged or has any defects, please contact cservice@oypla.com
USER MANUAL Model No: 3826
Safety Instructions
Notice: Ensure you read and fully understand instructions before use
While every attempt is made to ensure the highest degree of protection in all equipment, we cannot
guarantee freedom from injury. The user assumes all risk of injury due to use. All merchandise is sold on
this condition, which no representative of the company can waive or change.
USER MANUAL Model No: 3826
Assembly Instructions
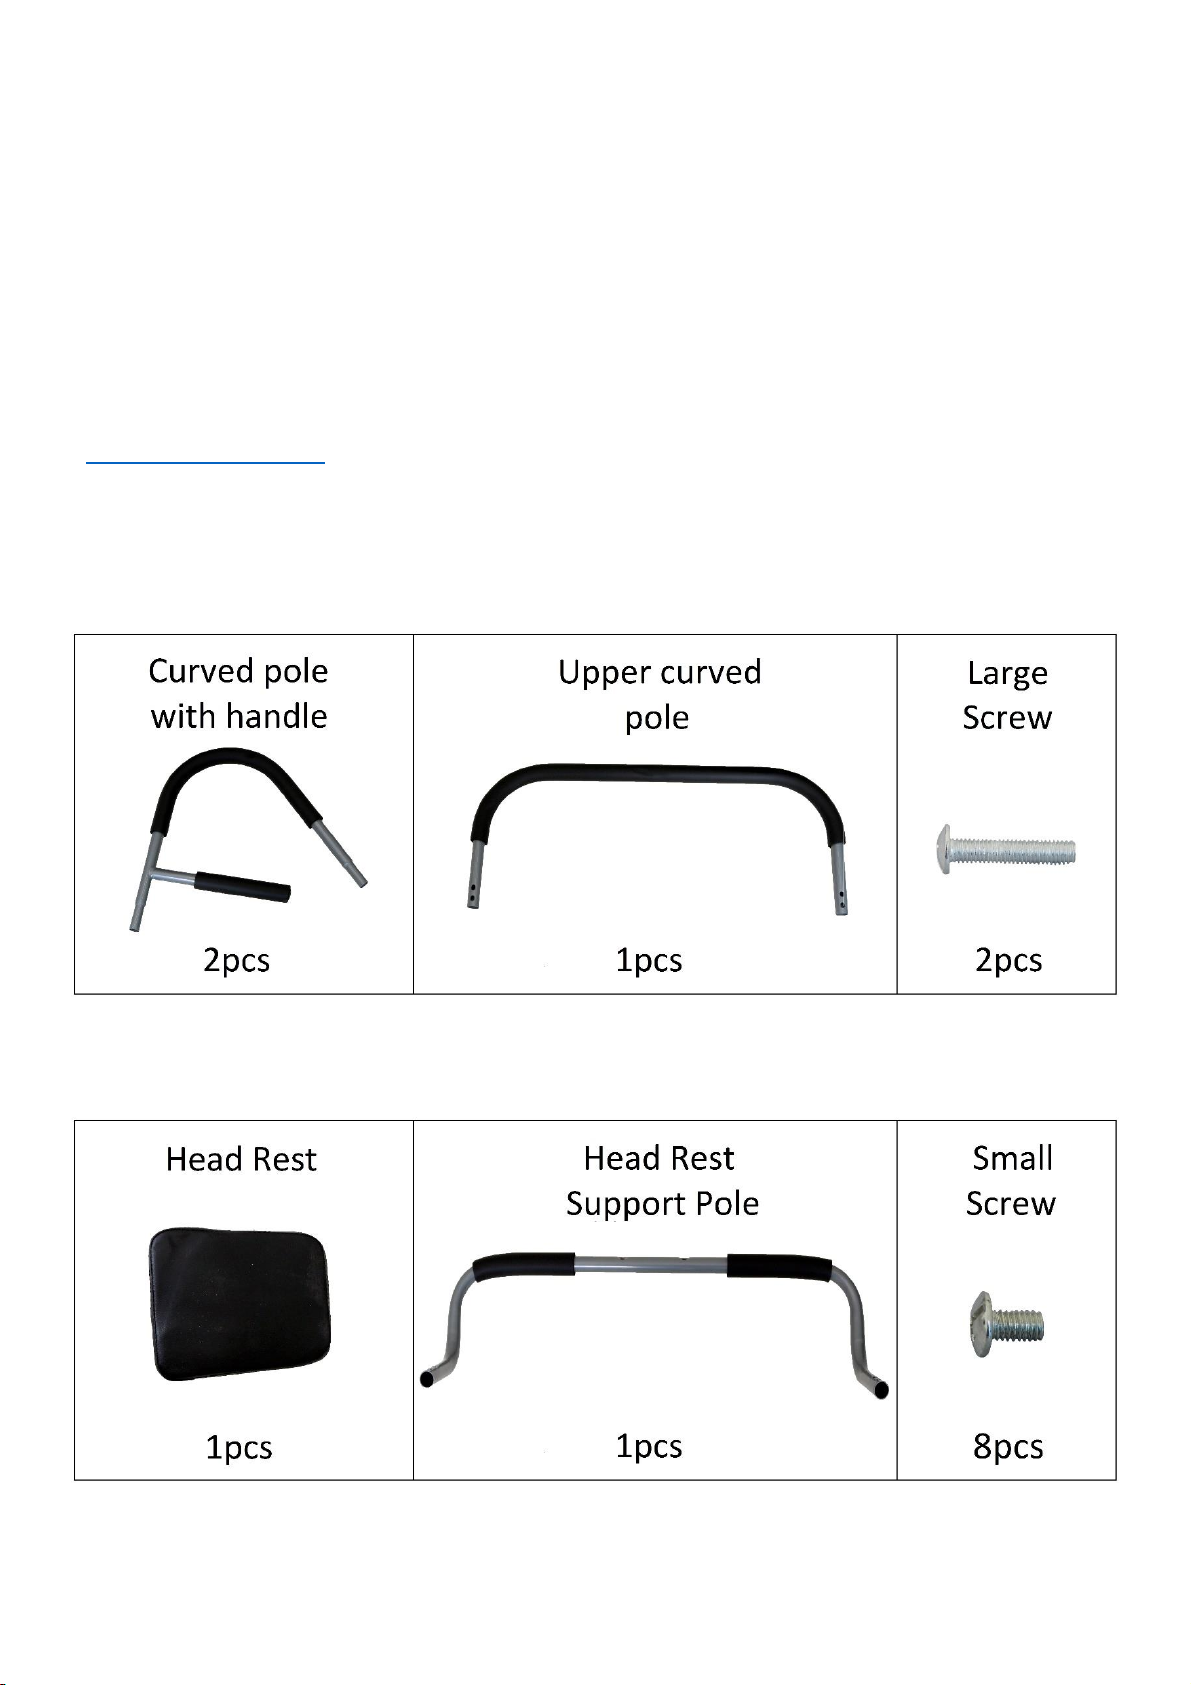
Parts List:
Please check you have all parts below before attempting to assemble this product.
If you are missing any of the below parts, please contact Oypla customer services:
cservice@oypla.com
Please be aware you will be referring to this parts list throughout the assembly process.
**AN ALLEN KEY IS PROVIDED**
USER MANUAL Model No: 3826
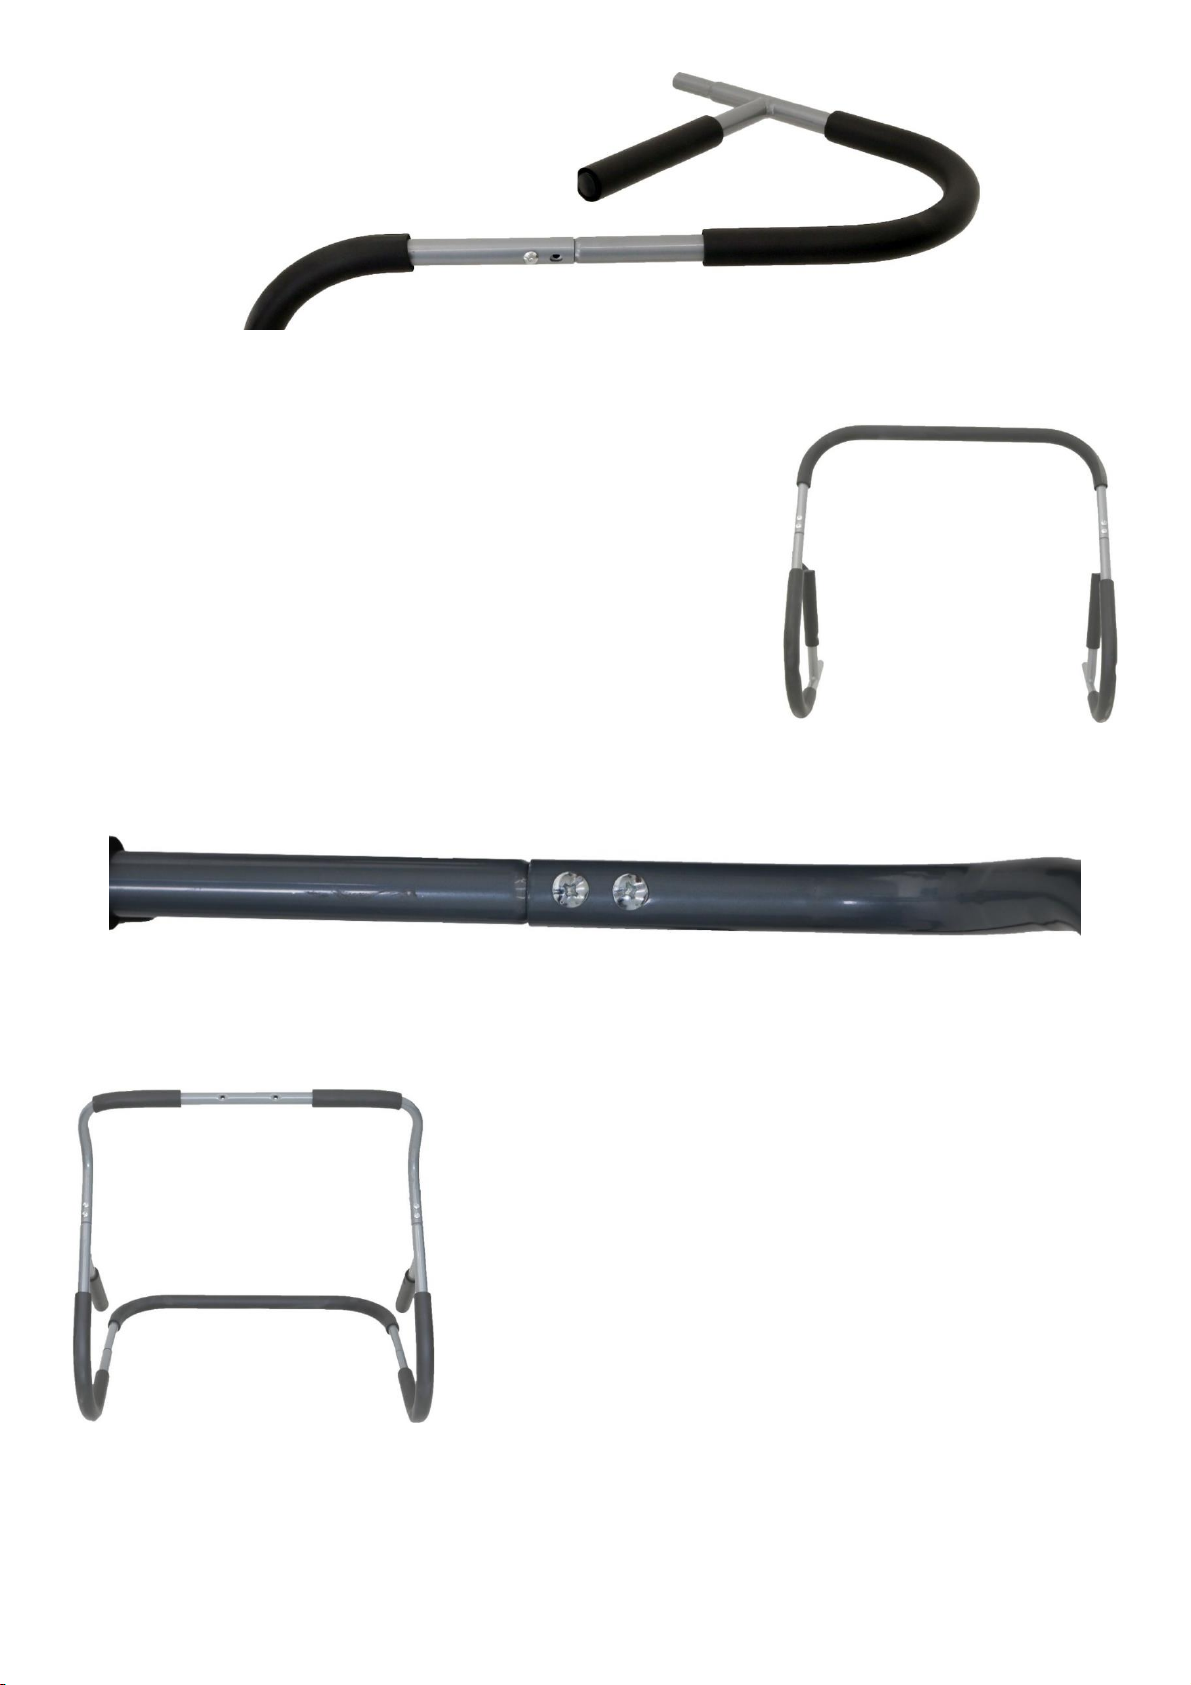
1. Slide a curved pole with handle into the upper curved pole,
ensuring that you put in the correct end (the furthest from the
handle) and align the holes in both the curved pole with handle
and the upper curved pole. Secure these together using a screw
for each hole (as seen in the image above. Repeat this step on
the opposite side of the upper curved pole. Please see the image
to the right to see what the ab roller should look like after this
step.
2. Push the head rest support pole into the other end of the
curved pole with handle, ensuring that it goes as far as
possible and that the holes in both the head rest support pole
and the curved pole with handle are aligned. Secure the head
rest support pole into place using two small screws (as seen in
the image above). Repeat this with the opposite pole. Please
see the image to the left to see what the ab roller should look
like after this step.

USER MANUAL Model No: 3826
3. Place the head rest against the head rest support
pole, ensuring that the holes in the head rest align with
the holes in the head rest support pole. Secure these
tightly together using the two large screws. Please see
the image to the right.
 Loading...