

OXO TOT CUBBY Instruction Manual

Stroller
Instruction Manual
IMPORTANT! KEEP FOR FUTURE REFERENCE

Congratulations on your purchase of the OXO Tot Cubby™ Stroller, a Stroller that will be the perfect
companion for all your big adventures with your little explorer.
The word “Cubby” is a snug and comfortable word, like the cozy space our Stroller provides for your little
one. A cubby can also be a place to store things; there’s a handy little cubbyhole underneath the Stroller,
with a pop-out extension for extra storage, convenient pockets in the back to store diapers and wipes,
and even an easy-access pocket on the rear flap for storing cell phones, keys, loose change and more.
What’s more, the Stroller folds up compactly and stand up with the handle held away from the dirty
ground, meaning you can tuck it into almost any space.
The Cubby Stroller features a one-handed opening, durable materials, a sandal-friendly brake, and
so much more. The Cubby Stroller solves pet peeves from storage to convenience and everything in
between, giving you high-quality performance without sacrificing style.
Each OXO Tot product, from our sippy cups to our strollers, is tested in real homes with real parents and
children (including our own!) to ensure that we provide only the best-designed products possible—those
that fit the needs and stand up to the use and abuse of all who will use them. We put the Cubby Stroller
through this same process, looking for ways to make improvements that would be most meaningful to
parents and children alike.
Please read these instructions carefully before using your Cubby Stroller.
Complies with ASTM F833-15 and SOR/85-379
1

TABLE OF CONTENTS
Assembling the Stroller ............................................................. 3
Included .................................................................... 4
Assembly ...................................................................4
Using the Stroller.......................................................................5
Folding & Unfolding Stroller ........................................5
Safety Harness Attachment ........................................5
CubbyFeatures .....................................................7–8
Safety Harness Shoulder Height Adjustment ................9
Cleaning Stroller Fabric Parts ..................................................... 9
Canopy Removal (for cleaning only) ...........................9
Canopy Reattachment .............................................. 10
Seat Fabric Removal ......................................... 10–11
Seat Fabric Reattachment ...................................12–13
Cleaning & Care ......................................................................14
Limited Warranty ....................................................................15
Registration ............................................................................15
Contact Us ..............................................................................15
Notes .............................................................................. 16–17
2

ASSEMBLING CUBBY STROLLER
!
WARNING
Failure to follow all warnings and instructions could result in SERIOUS INJURY or DEATH.
• NEVER leave child unattended.
• AVOID serious injury from falling or sliding out. ALWAYS use safety harness to secure child.
• The product may become unstable if a parcel bag, other than the one recommended by the
manufacturer, is used.
• Unstable, hazardous conditions may exist if package carrying accessories are added onto the product.
• Product will become unstable if a parcel bag or rack is used when there is no provision for one.
• ALWAYS make sure the Stroller is fully opened and locked into position before use.
• ALWAYS keep fingers away from moving parts when folding, unfolding or adjusting the Stroller
to prevent entrapment or pinching.
• The Stroller is only intended for the use of one child in the seat.
• The Stroller is suitable for children beginning at 6 months (and when children have ample head
and neck control).
• Product will become unstable if the manufacturer’s recommended load is exceeded.
• DO NOT use this Stroller with a child who weighs more than 50 lbs (23 kg).
• DO NOT overload the basket – Maximum weight in the basket is 10 lbs (4.5 kg). Overloading the
basket may cause the Stroller to become unstable.
• DO NOT overload the easy-access storage pocket. Maximum weight in easy-access storage pocket
is 1 lb (0.45 kg).
• DO NOT overload the seat back storage pockets. Maximum weight per pocket is 1 lb (0.45 kg).
Excessive weight may cause a hazardous, unstable condition to exist.
• This Stroller is not suitable for running or skating.
• DO NOT let your child play with this product.
• The child must remain seated at all times while in the Stroller.
• ALWAYS close basket before folding Stroller.
• DO NOT hang or place items on the Stroller handle or frame, except for those approved by OXO.
They may cause the Stroller to become unstable.
• NEVER use Stroller on stairs or escalators.
• ALWAYS activate brake before removing child from Stroller and when Stroller is not in use.
• ONLY use accessories and replacement parts approved by OXO.
• Regularly inspect the Stroller for any signs of wear or damaged parts. Contact OXO for replacement parts
if needed at 1-800-545-4411.
3
Included
A
Stroller
Frame
B
Assembly
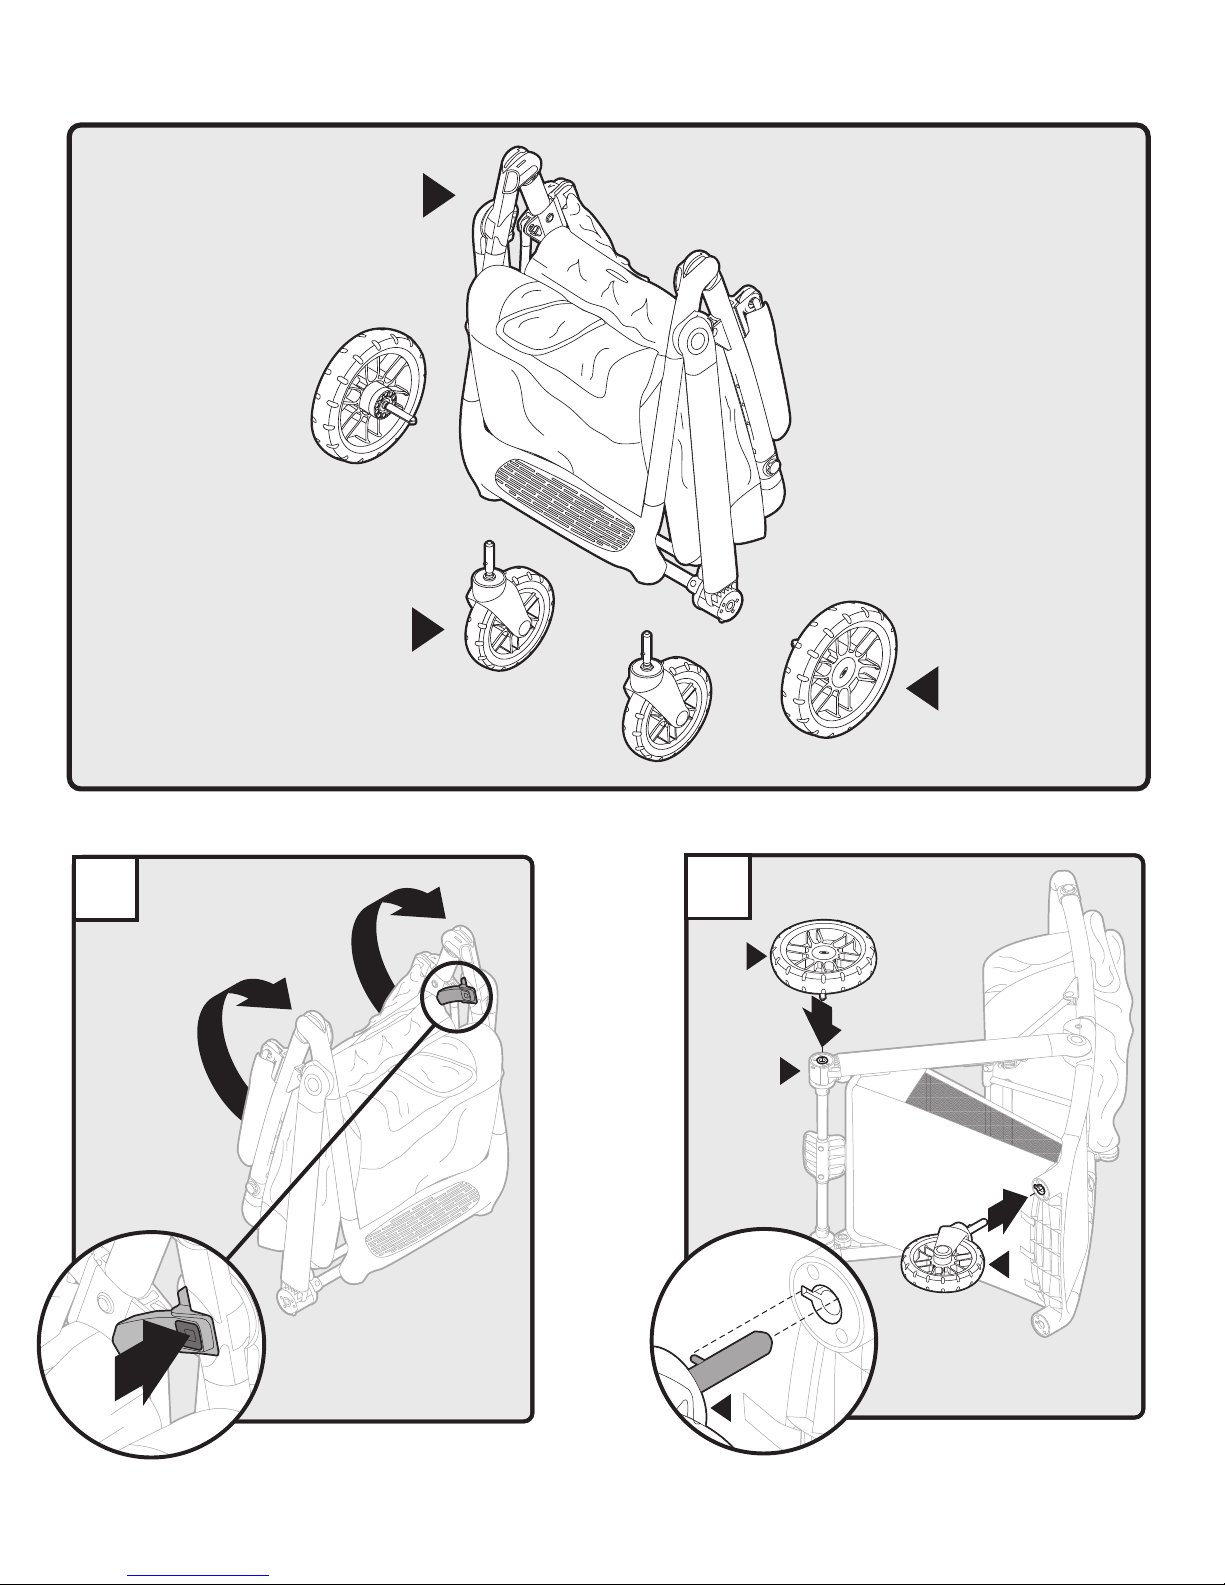
1
Front Wheel
2
C
Rear Wheel
2
2
C
1
A
3
1
Press release lock and unfold Stroller by pulling up on handlebar. Attach rear wheel (C) to Stroller frame (A). Line up pin on front wheel
B
2
B
(B) with notch on Stroller frame and attach front wheel. Repeat for
remaining wheels.
4
USING THE STROLLER
Folding & Unfolding Stroller
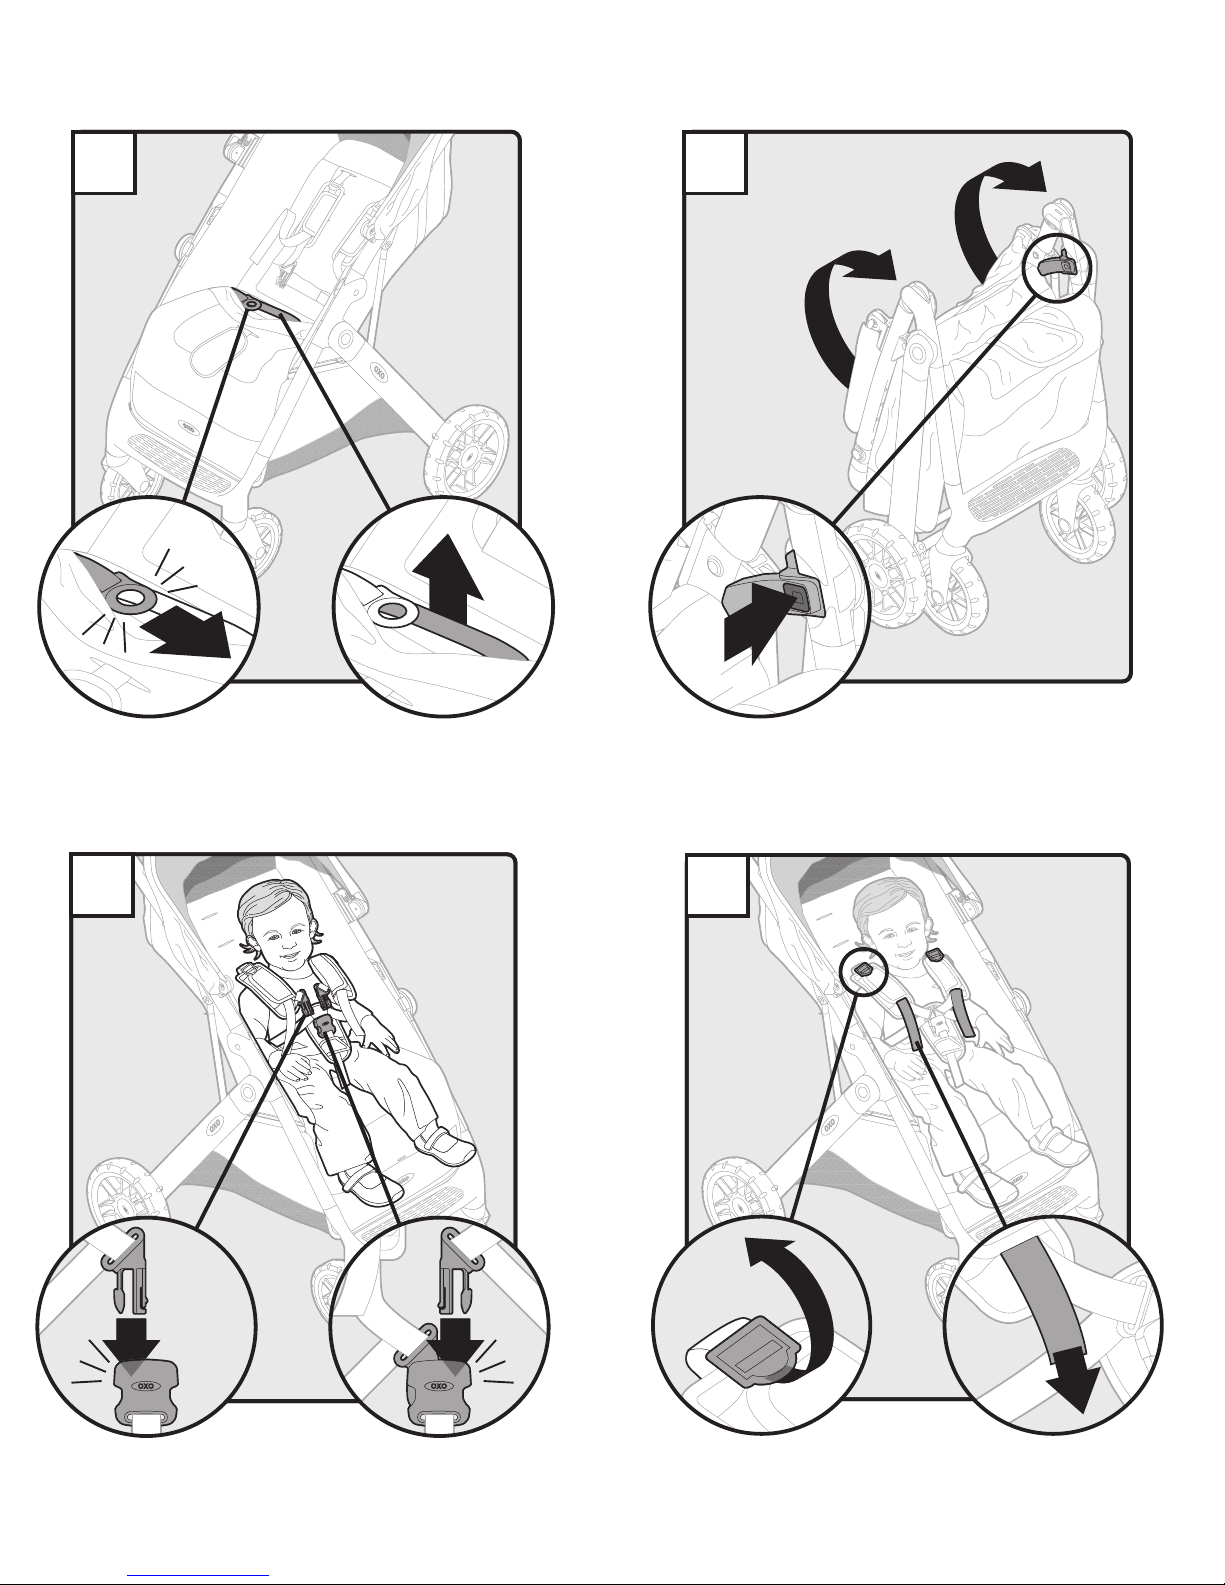
1
2
1
To fold Stroller, pull release ring until it clicks. Pull black center strap
upwards. Stroller will fold in half and will stand on its wheels with
handlebar away from the ground.
Safety Harness Attachment
2
2
2
1
To unfold Stroller, press release lock and pull up on handlebar. You will
hear a “click” when secure.
Note: Make sure both sides of Stroller are locked into place.
1
1 2
Place child’s arms through shoulder straps. Ensure straps are not twisted.
Place left clip into buckle. Repeat for right clip. You will hear a “click”
when buckles lock.
5
2
1
2
To loosen, put finger under tab and pull buckles upward on each side to
lengthen straps. To tighten, pull free end of strap downward on each side.
 Loading...