

Oxford Quickfit User Instruction Manual

English
User Instruction Manual
Oxford® Quickfit Glide Sling
To avoid injury, read user manual prior to use.
WARNING
• OXFORD RECOMMENDS THE USE OF GENUINE OXFORD PARTS. Oxford sling and lift products
are designed to be compatible with one another. For countr y specific guidance on sling use and
compatibility, please refer to the sling label or contact your local market distributor or Joerns
Healthcare.
• For the safety of the patient and carer; before using a sling a full risk assessment must be conducted
to ensure that the correct sling choice, method of positioning in the sling and procedure for transfer
has been determined for the patient.
• CHECK sling and stitching before each use. Using bleached, torn, cut, frayed or broken slings is
unsafe and could result in serious injury or death to the patient.
• DO NOT alter slings. Destroy and discard worn slings.
• NEVER leave a patient unattended.
• DO NOT exceed the rated capacity of the sling or lift.
• DO NOT attempt to re-position a patient by pulling on the sling loops.
Oxford
®
Quickfit Glide Sling
English
2
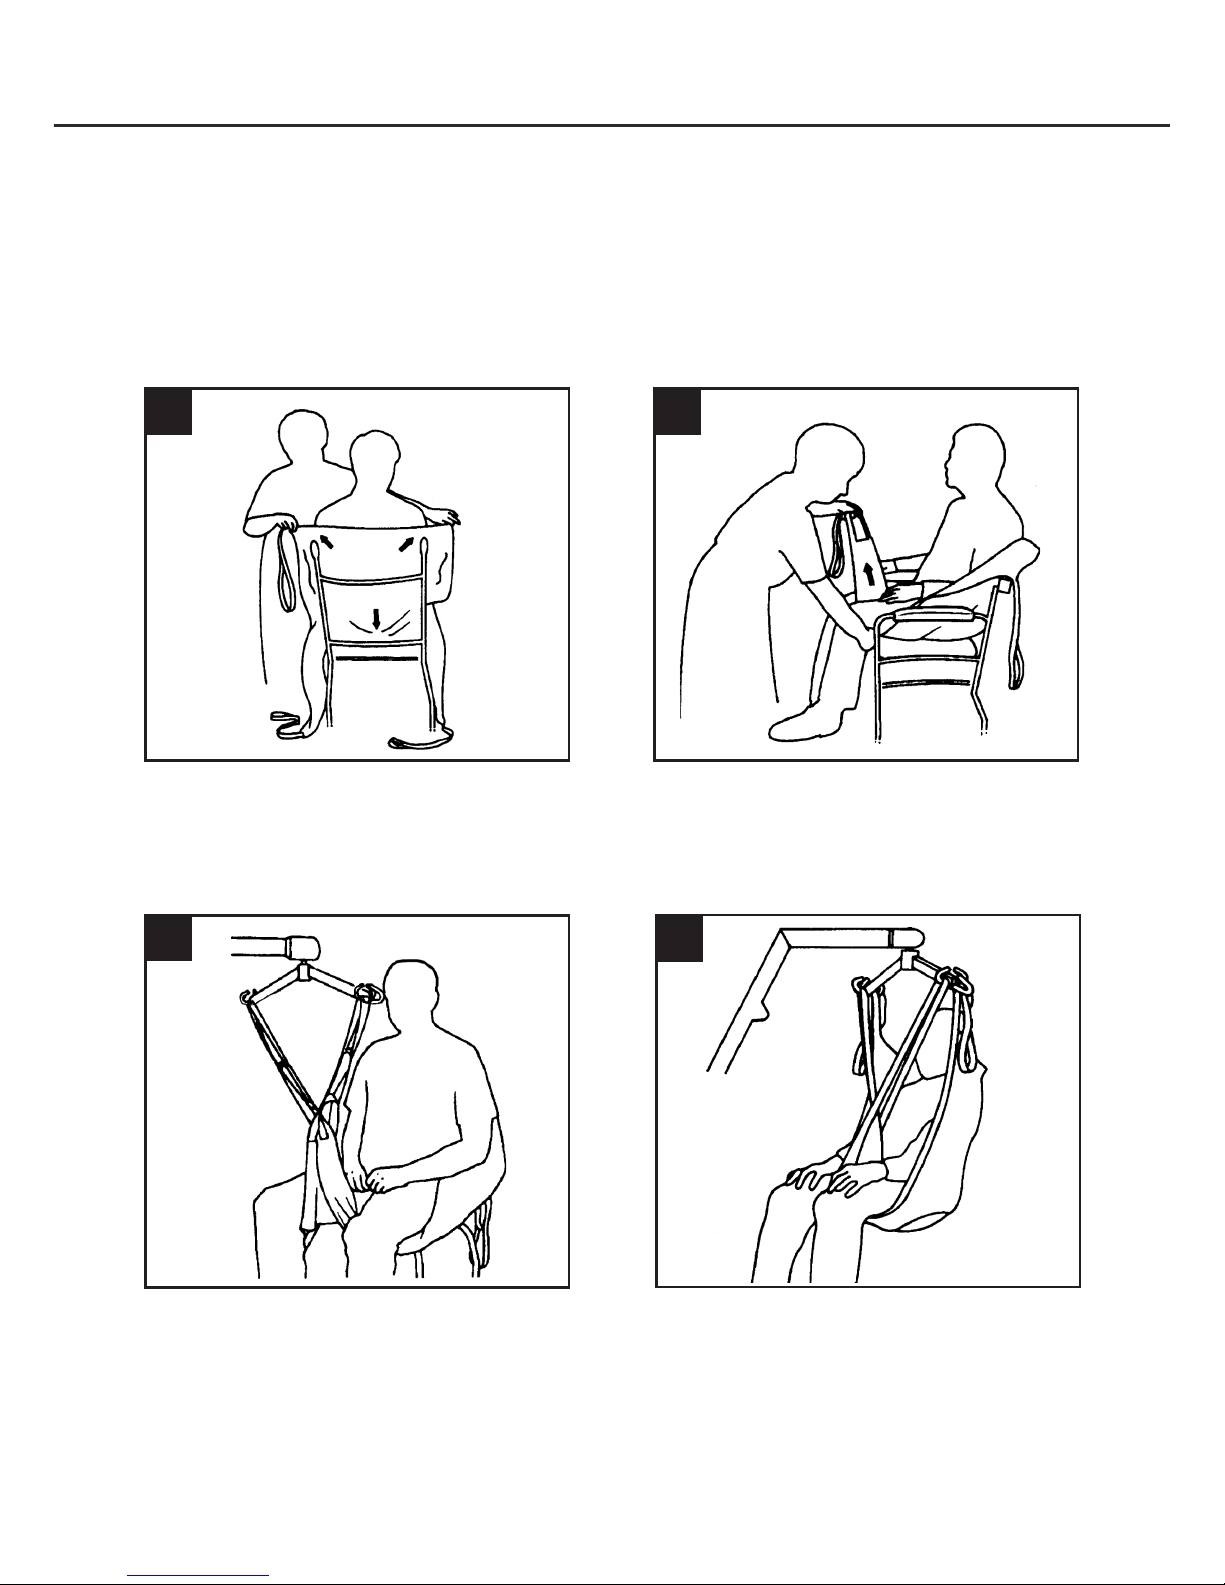
Ensure the sling positioning handles and label are
on the outside and feed the sling down the back of
the client, leaving the lower edge of the sling body
at the base of the spine. Check the sling is square
at the shoulders.
Move the hoist into position before crossing over
the leg straps and attaching to the hoist on the front
hooks of the spreader bar. An integrated modesty
loop on the leg section is also available for increased
patient dignity.
Introduction
The Oxford Quickt Glide sling is a general-purpose sling designed for quick and easy application. The leg and
spine sections incorporate Oxford’s Silkt™ material providing a low friction surface for ease of tment. The Quickt
Glide sling is available with or without head support.
Fitting the Sling from a Seated Position
2
3
1
Raise the client’s leg and carefully feed the leg
section under and up between the legs. Ensure that
the sling is positioned comfortably and not twisted
or creased under the thigh. Repeat this procedure
for the other leg.
Ensure the sling remains comfortable under the
legs and raise the hoist slightly if required before
attaching the shoulder straps to maintain an upright
seated position. The hoist may move towards the
client as you do this. When reseating the client, use
the sling positioning handles to help achieve a safe
and comfortable position.
NOTE: Sling positioning handles are designed for
turning a patient only and must not be used for lifting.
4
 Loading...