

Page 1
THUNDERBOLT 3 10G ETHERNET ADAPTER
User Guide
Page 2

CONTENTS
Introduction ............................................................................ 1
1.1 Minimum System Requirements
1.2 Package Contents
1.3 About This Manual
Usage Notes .......................................................................... 2
2.1 Mac Usage Notes
2.2 Windows Usage Notes
2.3 General Usage Notes
2.4 Cable Replacement
Support Resources ................................................................. 4
Table of Contents OWC Thunderbolt 3 10G Ethernet Adapter
Page 3

INTRODUCTION
1.1 Minimum System Requirements
Operating System
• macOS 10.13.4 or later
• 64-bit Windows 10 or later
• Version 1709 or later
Hardware
• Any computer with a Thunderbolt 3 port
Compatible RJ-45 Connection Types
• 10GbE, 5GbE, GbE, 100MbE
1.2 Package Contents
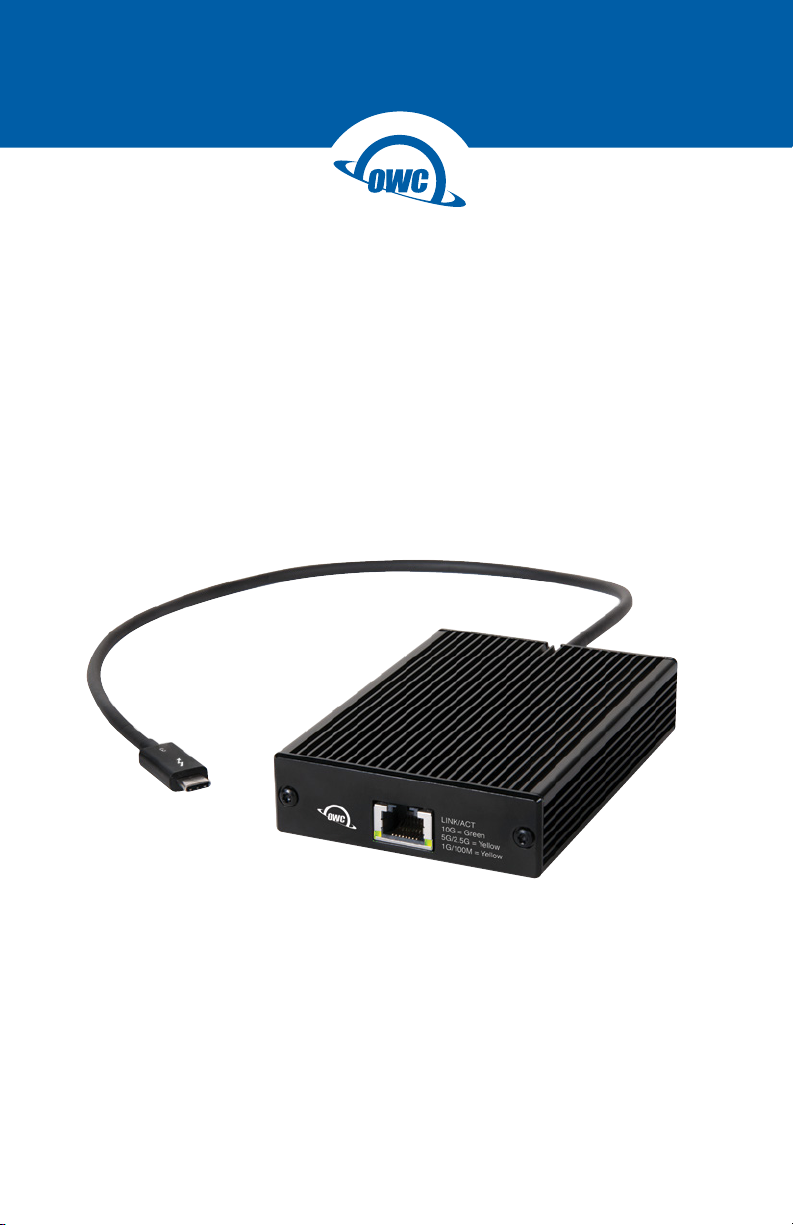
• OWC Thunderbolt 3 10G Ethernet Adapter
• Thunderbolt 3 cable (captive)
• Quick Start Guide
1.3 About This Guide
The images and descriptions may vary slightly between this guide and the unit shipped.
Functions and features may change depending on the rmware version. Please visit
the product web page for the most current information. OWC’s Limited Warranty is not
transferable and subject to limitations.
1
OWC Thunderbolt 3 10G Ethernet Adapter Introduction
Page 4

USAGE NOTES
2.1 macOS Usage Notes
• The drivers required to support the OWC Thunderbolt 3 10G Ethernet Adapter are
installed as part of macOS 10.13.4 and later. The adapter is ready for use when you
power on your computer.
• Fine-tuning System Preferences for maximum performance (requires connected network
switch or router to support the settings mentioned):
1. Open System Preferences, and then click Network.
2. In the Network preferences panel, click the OWC 10G adapter (Thunderbolt
Ethernet, Slot x) in the left panel, and then click Advanced; a new panel appears.
3. In the new panel, click Hardware. From the Congure drop- down menu,
select “Manually”. In the Speed drop-down menu, leave the setting at or select
“10GbaseT” (or “5000baseT” or “2500baseT” if either is the top speed your
network connection supports). In the Duplex drop-down menu, select “full-duplex”
(not “full duplex, ow-control”). In the MTU drop-down menu, select “Jumbo
(9000)” or select “Custom,” and then enter “9000” in the box below.
4. When you’ve nished changing the settings, click OK.
5. Back in the main Network window, click Apply after you’ve completed changing
the settings.
2.2 Windows Usage Notes
• After starting your computer, the drivers that enable the Thunderbolt 3 10G Ethernet
Adapter should be installed automatically.
• The rst time you connect the adapter to the computer, an ‘Approve New Thunderbolt
Devices’ window will appear. From the drop-down menu select ‘Always Connect,’ then
click OK.
2.3 General Usage Notes
• Due to the adapter’s design, the case may become very warm to the touch while
transferring large les or transferring data over an extended period of time. This is
normal and does not indicate a malfunction. The adapter may also operate at a higher-
than-expected temperature when connected to a long cable run.
2
OWC Thunderbolt 3 10G Ethernet Adapter
Usage Notes
Page 5

2.4 Cable Replacement
If you expereience problems with the OWC Thunderbolt 3 10G Ethernet Adapter, and they
cannot be resolved with the information in this guide, please contact our Technical Support
team. They may determine that the Thunderbolt 3 cable needs to be replaced. In that case,
once you have the recommended replacement cable (not all Thunderbolt 3 cables will t
inside the case), please use the steps shown below to replace the original cable.
Note: you do not need to return the original cable to OWC unless the Technical Support
team requests that you do so.
1. Remove the two screws on the back of the
device (shown at right).
2. Note that the cover has a cut-out on one side;
separate the cover from the cable, then set the
cover aside.
3. Carefully unplug the Thunderbolt 3 cable then
connect the approved replacement cable in the
same location. Note: this device only accepts
Thunderbolt 3 cables with plugs that are 7/8 inch
(~ 2.2 cm) long. Other Thunderbolt 3 cable plug
types will not t.
4. Reseat the cover on the back of the device so
that the cable is sitting within the cut-out, then
re-ax the two screws you removed in Step 1.
This completes the cable replacement process.
3
OWC Thunderbolt 3 10G Ethernet Adapter
Usage Notes
Page 6

SUPPORT RESOURCES
Customer Support
Phone: M–F, 8am–5pm Central Time
(866) 692-7100 (N. America) | +1 (815) 338-4751 (Int’l)
Chat: M–F, 8am–8pm Central Time
www.owcdigital.com/support
Email: Answered within 48 hours
www.owcdigital.com/support
© 2018 Other World Computing, Inc. All rights reserved. OWC and the OWC logo are trademarks of New Concepts
Development Corporation, registered in the U.S. and/or other countries. Mac and macOS are trademarks of Apple,
Inc. registered in the United States and/or other countries. Thunderbolt and the Thunderbolt logo are trademarks of
Intel Corporation or its subsidiaries in the U.S. and/or other countries. Microsoft and Windows are either registered
trademarks or trademarks of Microsoft Corporation in the United States and/or other countries. Other marks may be the
trademark or registered trademark property of their owners.
R1 07/26/18 DM
4
OWCUGTB310GBE R1
 Loading...