

Page 1
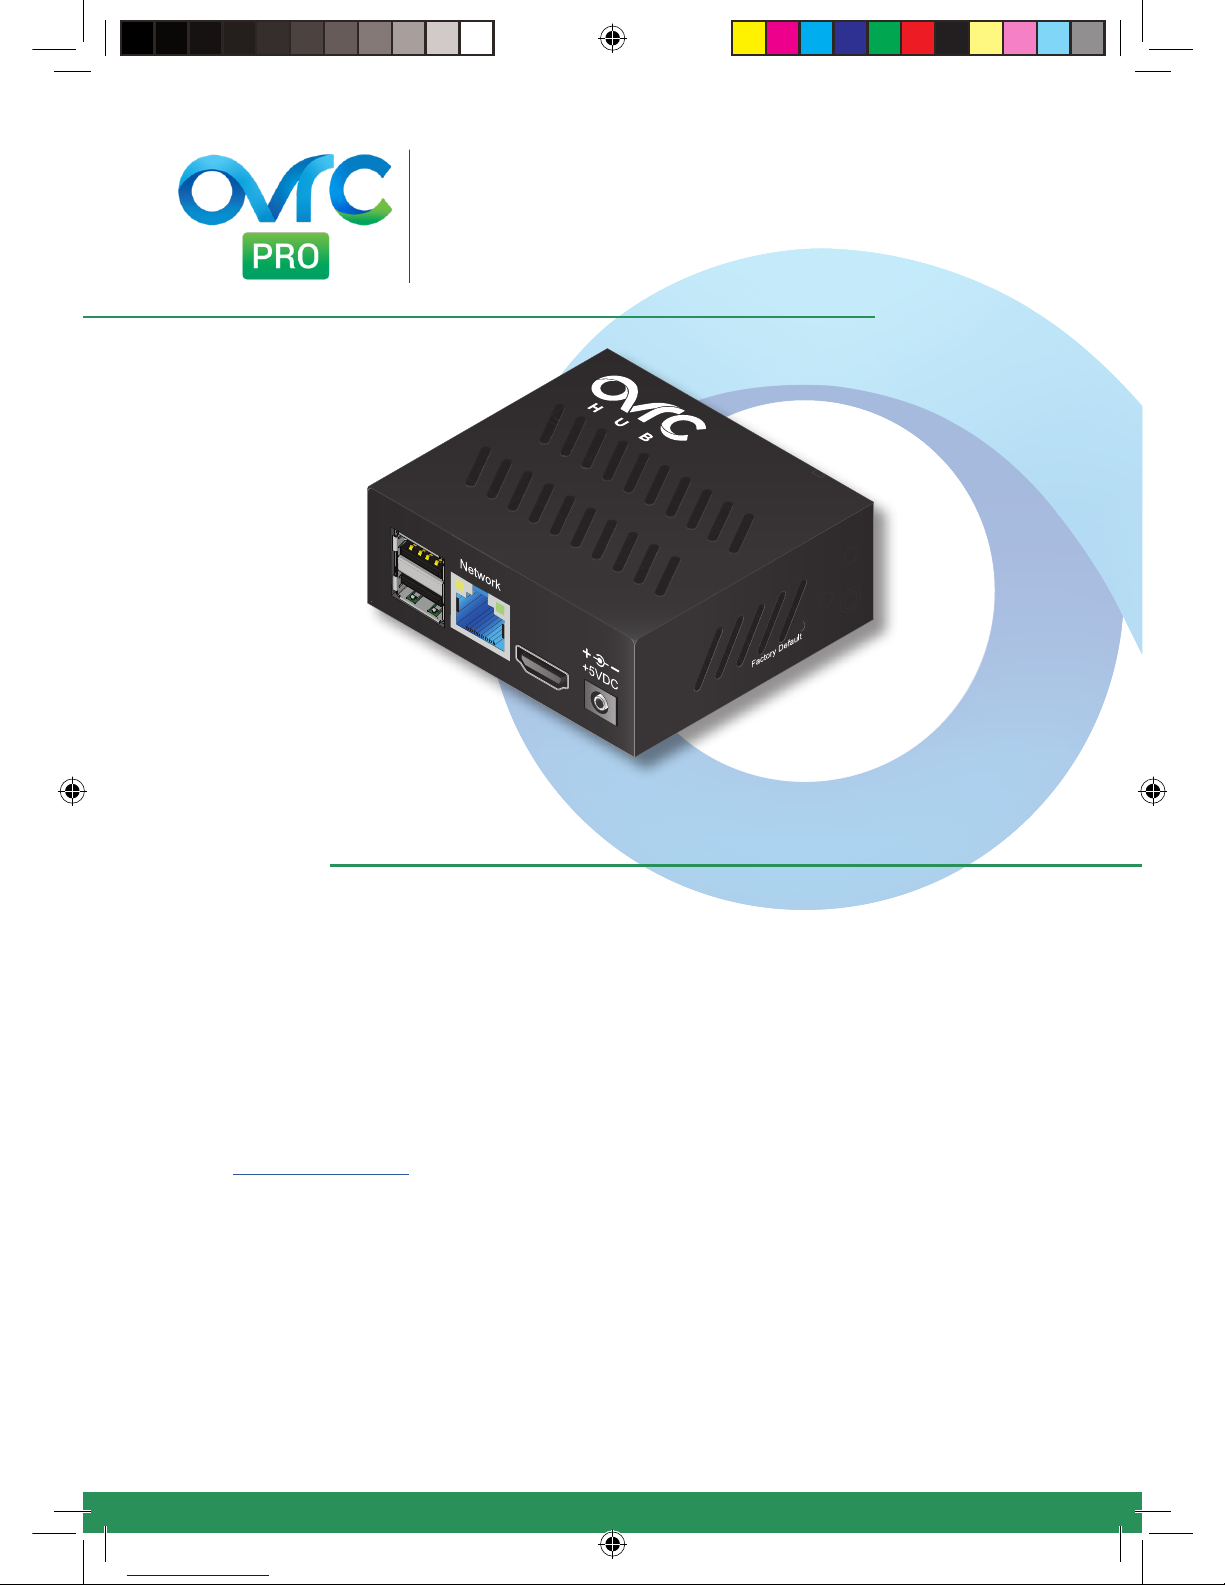
Welcome to OvrC Pro
Thank you for choosing the OvrC Pro Hub, the top-rated remote
management solution. Once this is installed, OvrC.com provides you
extensive diagnostics as well as remote access to every IP device on this
network, making support easy and eliminating unnecessary truck rolls.
Visit www.ovrc.com to learn more about all of the features and to create
your own account.
Package Contents
• (1) OvrC-300-Pro
• (1) 5V DC power supply (not pictured)
• Mounting Hardware (not pictured, includes side brackets and attachment screws for shelf,
surface, or rack mounting)
OVRC-300-PRO
Quick Start Guide
OVRC-300-PRO_QSG_180703-1700.indd 1 7/5/2018 8:13:17 AM
Page 2
Support: 866.838.5052 | [email protected]
Note: The Hub LAN port should negotiate a 1000Mbps connection speed for optimum
performance. Check the settings and specs for the connected port if a 100Mbps speed is
negotiated (the yellow Ethernet port LED is off).
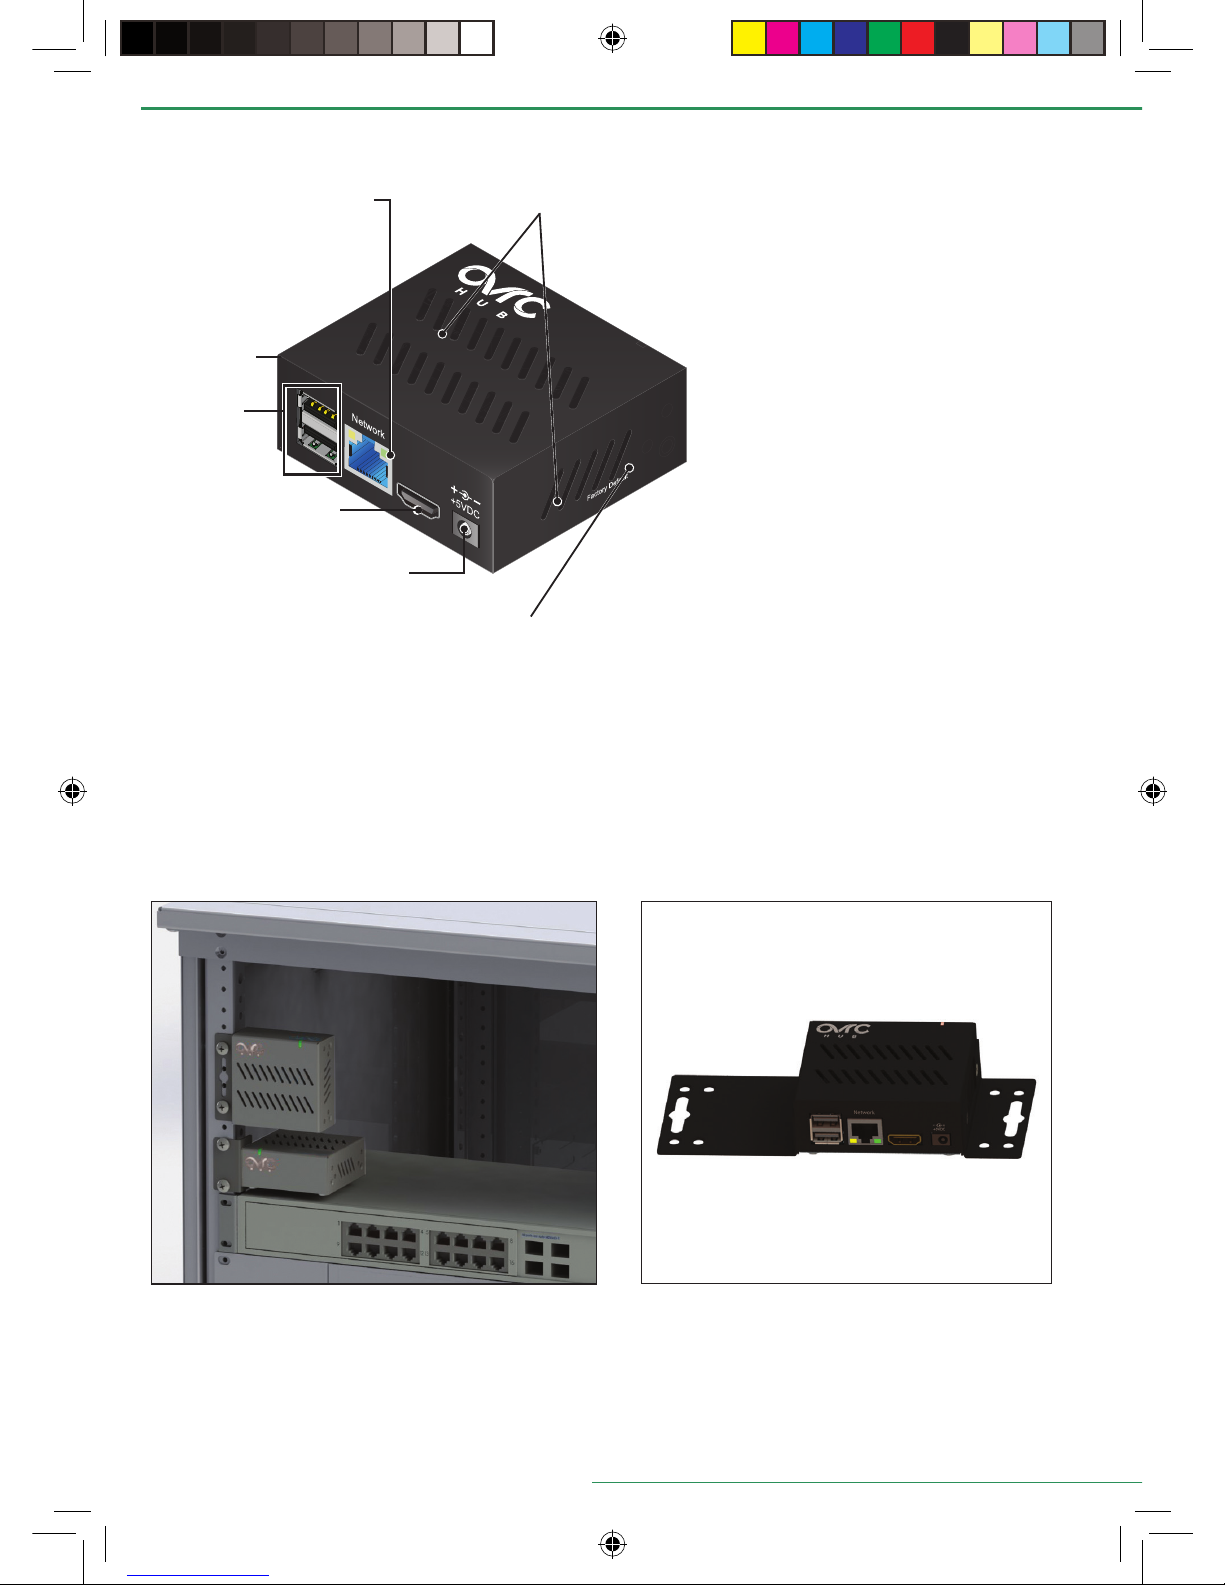
Mounting Options
Attach the included mounting ears to the Hub depending on the desired install location and
conguration. A few options are shown above, including 2U/1U conguration on the rack or
at on a structured wiring can.
Hardware Connections
Status LEDs: The Hub boots up in 1-2
minutes. Watch the LEDs to determine
if the power and network connection
are working correctly.
PWR
(Red)
On=booting up
Heartbeat Flash=running
normally
Off=no power
Ethernet
(Yellow)
On=1000Mbps connection
Off=100Mbps connection
Ethernet
(Green)
On=link established, ashes
indicate network activity
Off=no LAN connection
detected
DC Power Input
Connect 5V DC power
supply to 120V AC
power outlet
HDMI port for
future use
Do not cover vents
USB for
future use
Reboot
Button
Factory Default Press
to reset device to
factory settings
Gigabit Ethernet Port
Connect to a LAN port in
the monitored VLAN
Structured Wiring Can Conguration
OVRC-300-PRO_QSG_180703-1700.indd 2 7/5/2018 8:13:19 AM
Page 3
©2018 OvrC | Ver. 180703
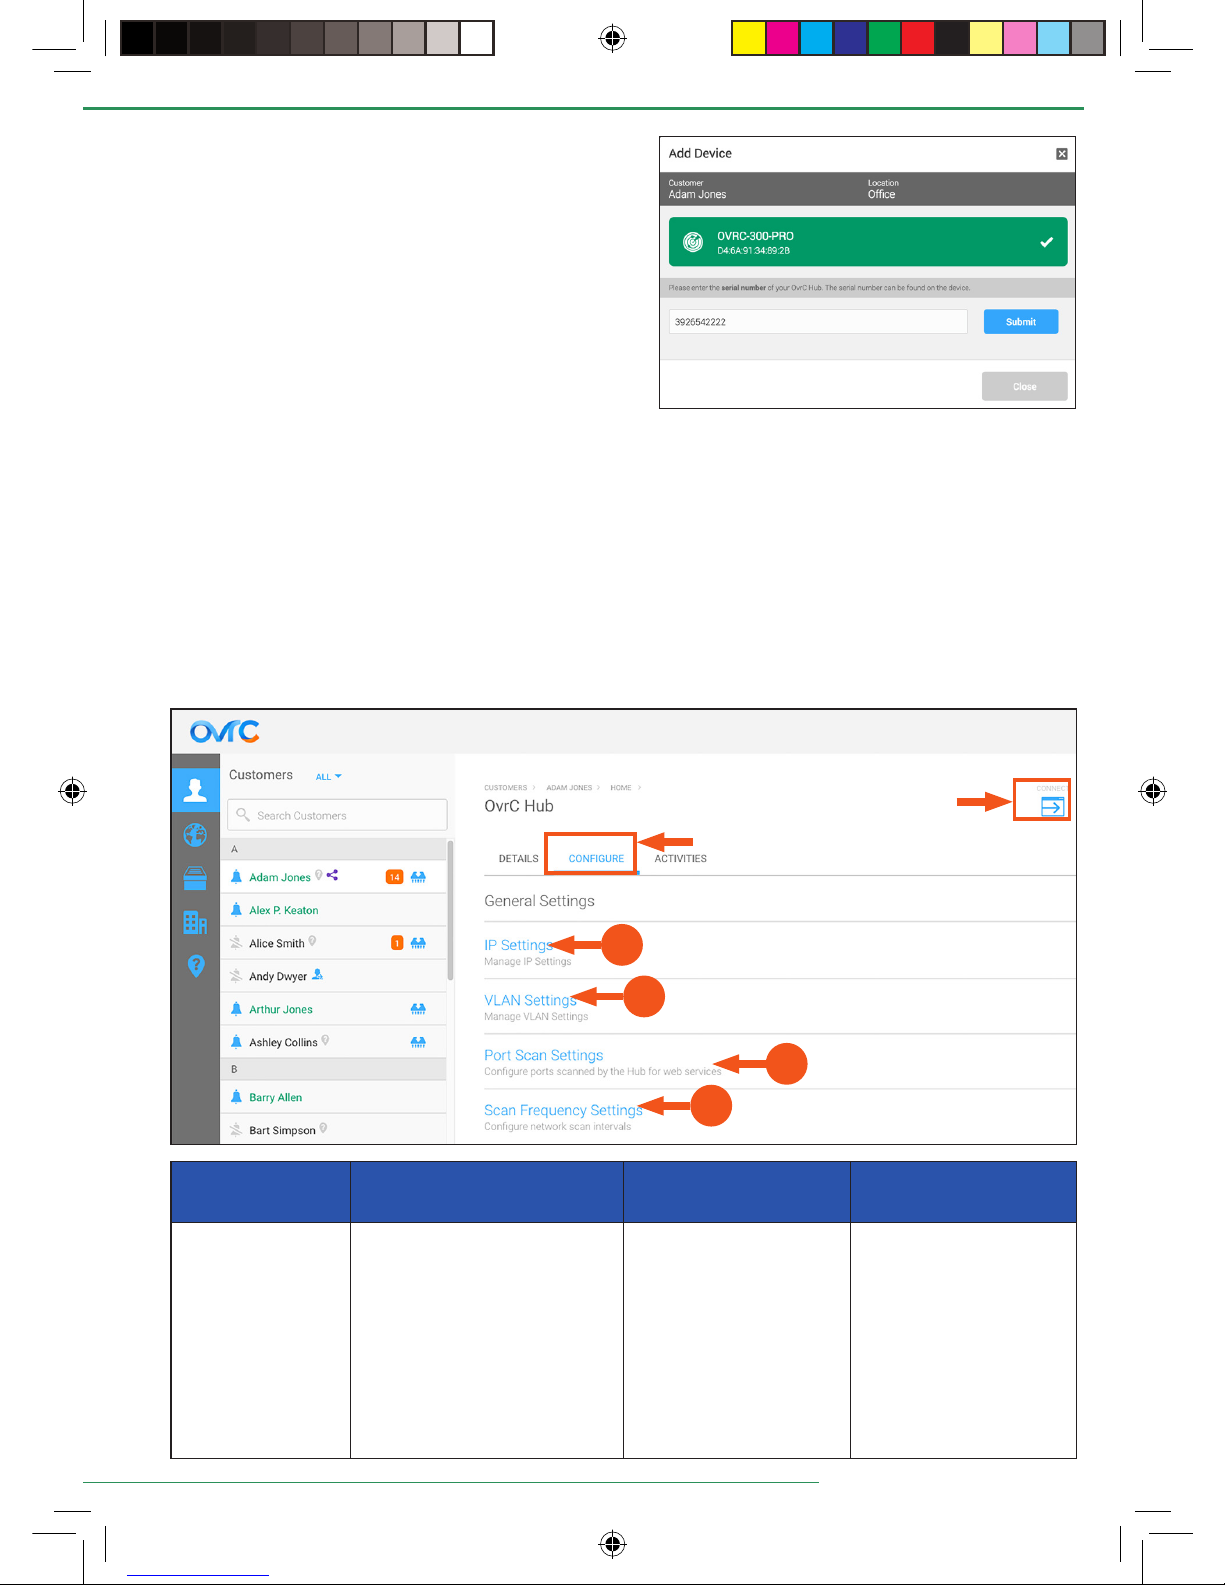
Step 1. Install and Claim the Hub
A. Connect the Hub to the LAN.
B. Log in to your account at app.ovrc.com or the
OvrC iOS or Android mobile application.
C. Open the Customer Location where the Hub
will be installed.
D. Click +Device in the Device List and follow the
prompts to claim the Hub.
Note: On rst claim, the Hub will automatically scan for other devices on the network. The
Hub’s default setting is to scan for net new devices once an hour and check scanned devices
every 5 minutes.
Step 2. Congure Hub Settings
Congure the Hub settings from OvrC once the hardware is up and running. Click on the
Hub from the Device List view of the location to access the hub settings, then click on the
Congure tab as shown.
Click on Connect to access the local interface of the Hub. Type “ovrc” in both the Username and
Password elds, then change the default password as a security best practice.
A
B
C
D
Connect
Congure Tab
A. IP Settings B. VLAN Settings C. Port Scan Settings D. Scan Frequency
Settings
For the best
performance and
reliability, leave
the Hub set to
DHCP mode and
reserve its system
IP address in the
router.
Congure your Hub to scan
across multiple VLANs (in
addition to the VLAN the Hub
is on). Enter the VLAN ID, a
static IP address for the Hub
to use on that VLAN, and
nally, the VLAN ID’s subnet
mask (usually 255.255.255.0).
Use a unique IP address to
avoid conicts.
Manage the ports the
Hub scans for to give
you additional access
to LAN devices. To add
a new port in addition
to the default set, enter
a description, the port
number, and select which
access protocol to use.
Select how often you
want the Hub to scan
for new devices on the
network and check the
status of the scanned
devices.
OVRC-300-PRO_QSG_180703-1700.indd 3 7/5/2018 8:13:23 AM
Page 4
Using OvrC Pro Features
OvrC Pro gives you access to enhanced network troubleshooting capabilities and diagnostic
data that makes remote support of connected systems easier than ever.
View System Health
The Location Dashboard view displays a quick snapshot of a location’s system
health for vital troubleshooting clues.
Network Diagnostics
View ISP speed trends and understand the source of the network latencies to
identify whether an issue is internal or external.
Scan & Monitor Devices
Find all IP devices on the network and relay relevant device information to OvrC
and regularly ping their online status.
Advanced Remote Access to Devices
Automatically scan the ports and services available on devices and make them
accessible with a click of a button, all without port forwarding, VPN, or any
other network setup.
Product Integration
Get enhanced diagnostics data and troubleshooting capabilities from an evergrowing list of supported products.
To learn more, visit www.ovrc.com
Product and Service Support
See the information bubbles located throughout the OvrC experience or visit the product
page Support tab where the Hub was purchased for more help with OvrC Pro.
Support: 866.838.5052 | [email protected]
Two-Year Limited Warranty
This OvrC product has a Two-Year limited warranty that includes parts and labor repairs on
all components found to be defective in material or workmanship under normal conditions
of use. This warranty shall not apply to products that have been abused, modied or
disassembled. Products to be repaired under this warranty must be returned to a designated
service center with prior notication and an assigned return authorization number (RA).
OVRC-300-PRO_QSG_180703-1700.indd 4 7/5/2018 8:13:23 AM
 Loading...