

Page 1
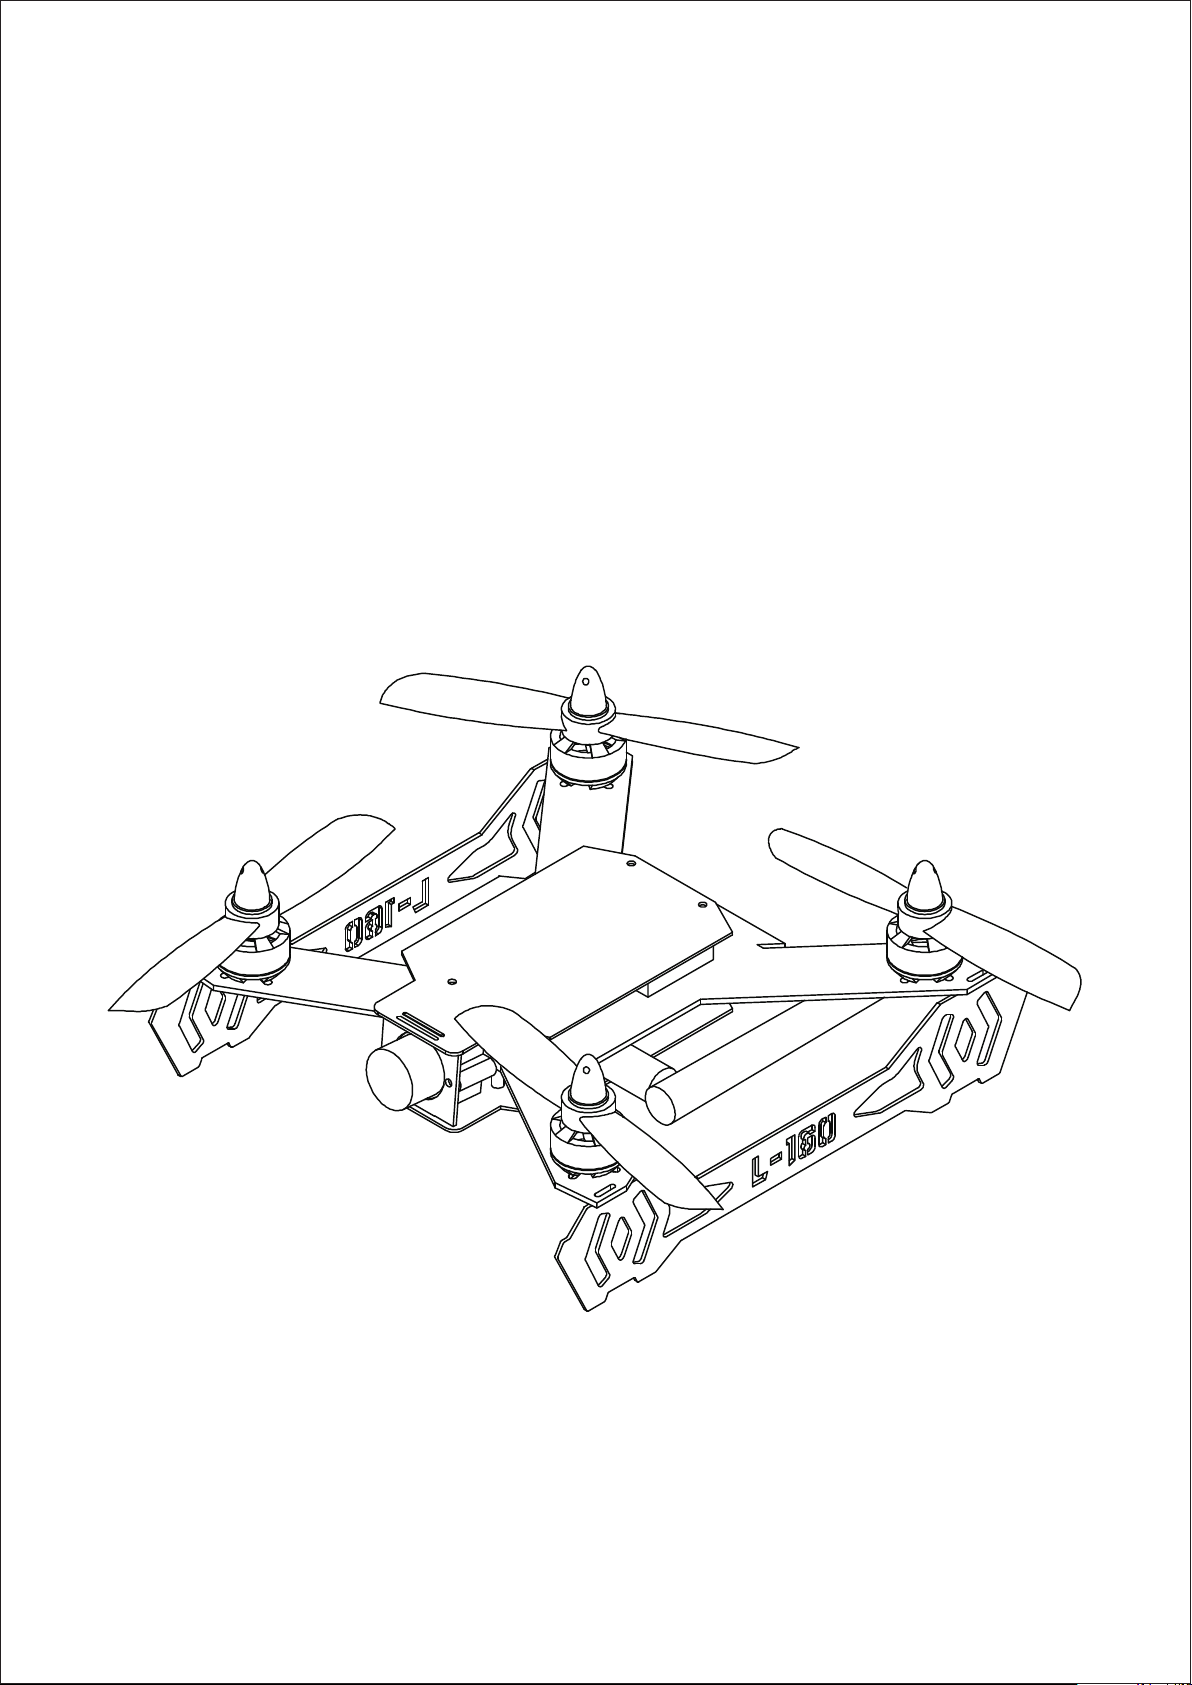
L160-1
INSTRUCTION
Page 2
C A T A L O G
1.0 Wha t is quadcopter
2.0 Par ameters
3.0 Saf ety o f flight
1.0 what is quadcopter
1、 nice des ign to protect ele ctronic speed contro ller
and motors, looks pretty.
2、 3K carbon fiber composit, high agil ity, flexibility
2
3
3
and pressurepro of.
3、5.8G live transmission system which g ive you new
sight experience.
4、 it can flip for ward-backward,left-righ.you can do
lots of acrobatics. .
4.0 How t o charge
5.0 Assembly
5.1 Mon itor
5.2 Pro pellers
5.3 Bat ter ies
6.0 Pre pare for flight
6.1 Turn r adio on
6.2 Loc k/unlock
7.0 Ope rations
8.0 End s
9.0 Addition al instruc tio n
9.1 4.3 i nch integrate d video rece ive r & monitor in str uction
4
4
4
5
5
2
3
7
6
5
2
4
6
8
6
7
8
10
10
10
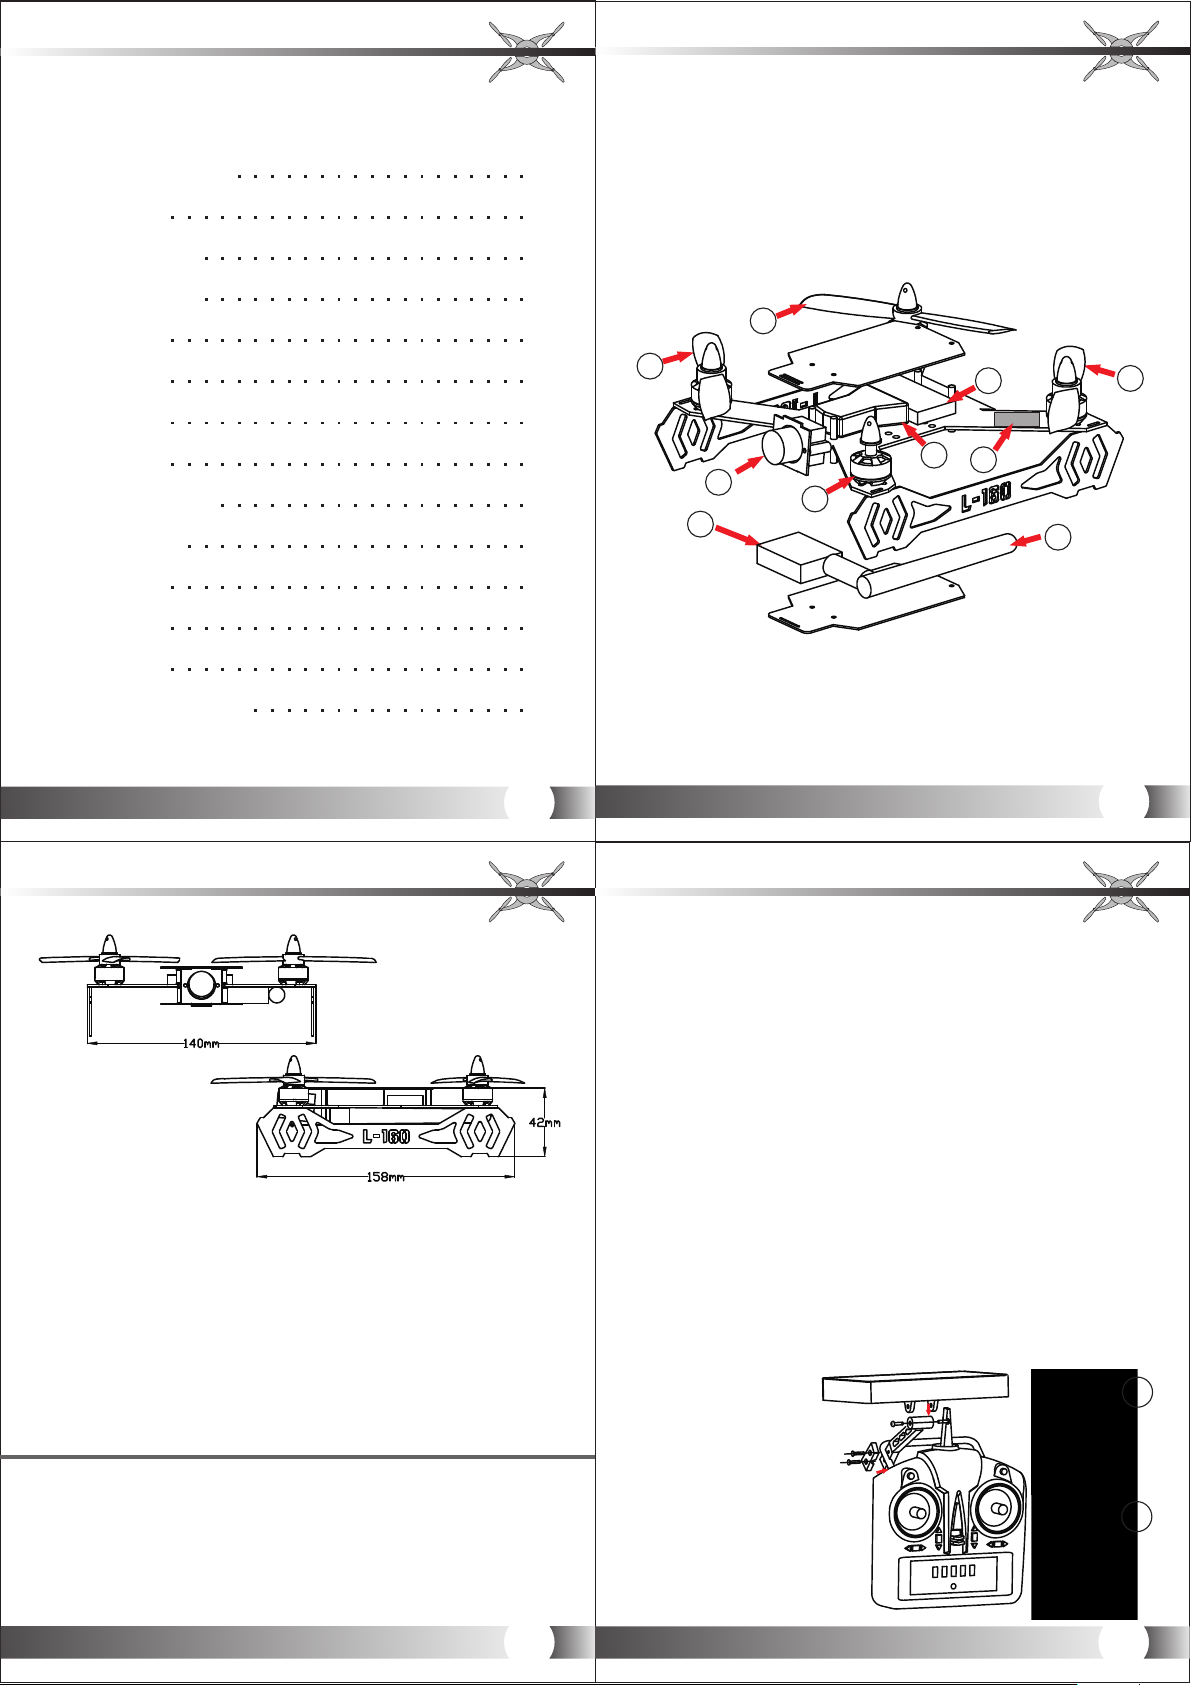
1. Motor
2. CCW Prop eller
3. CW Prope ller
4. Camera
5. ESC (Sim onk )
6. Flight c ontro ller
1
1
9
7. Receiv er
8. Vide o transmission
9. Mushro om ante nna
2
2.0 Parameters
1、Quadcopter
Name:L160-1
Propell er:4045
Body(length*widt h*height) :185 mm*14 0mm*42mm
Take-off weight: 23 0g(B atter ies included)
Tra nsmitter: H-4S 6CH
Flight co ntrol ler: CC3D
Video t ransmission: 25-1000mw
Motor: 1306-3100K V
Brushle ss Elec tronic speed con troll er:6A ESC
Battery (for qu adcopter): 3S
Flight ti me:7 to10 min utes
Environ ment te mperature : -10°to +40°
2. Monito r(Video receiver bu ilt inside)
Resolut ion: 1080P
Type: PAL/NT SC
Power inp ut:8.4~12 V
Video r eceiver channe l: 8CH
Tra nsmission dist ance: 200m -300m
Dimensi on:4.3 inch
3、Camera
Resolut ion: 720TV L
Type: PAL/NT SC
Input: DC 12V
Camera an gles: 127°
3.0 safety of flight
.
1 Anyone wh o is expe riential in mode l-control and no less
than four teen is s uggested to fly it.
.
2 Please d on't fl y under bad weathe r,for
instanc e,win dy,rainy.s nowy,lightn ing etc
3. Please f ly at bro ad ground where th ere is li ttle people.
.
4 Please m ake sur e the quadcopter i s more th an one meter
away from p eople .
.
5 Please d on't fl y under high volta ge
wire,te lecom munication bas e stati on or transmitte r
tower. avo id inte rference
.
6 Please d on't fl y in where it is illeg al to fly.
4.0 how to charge
1,Inser t B3 char ger adapter into p ocket (100~240V
50/60HZ ) ,the ad apter will output to B3 cha rger, led will turn
constan t blue if c onnected.
2,conne ct the ch arger and batter y with ba lance connecto r
3,led wil l be red wh en charging, tur n blue wh en finish.
Note:Any problem ple ase refer B3 charger deta iled
5.0 Assembly
5.1 Monitor
1. Assembl e the hol der
to the supp orter o n the
transmi tter an d screw
the other s ide to th e
monitor
2. Screw an tenna .
3. attach b atter y with
Velcro to th e backw ard
of the moni tor.
。
2
3
3
4
Page 3
5.2 Prope ller
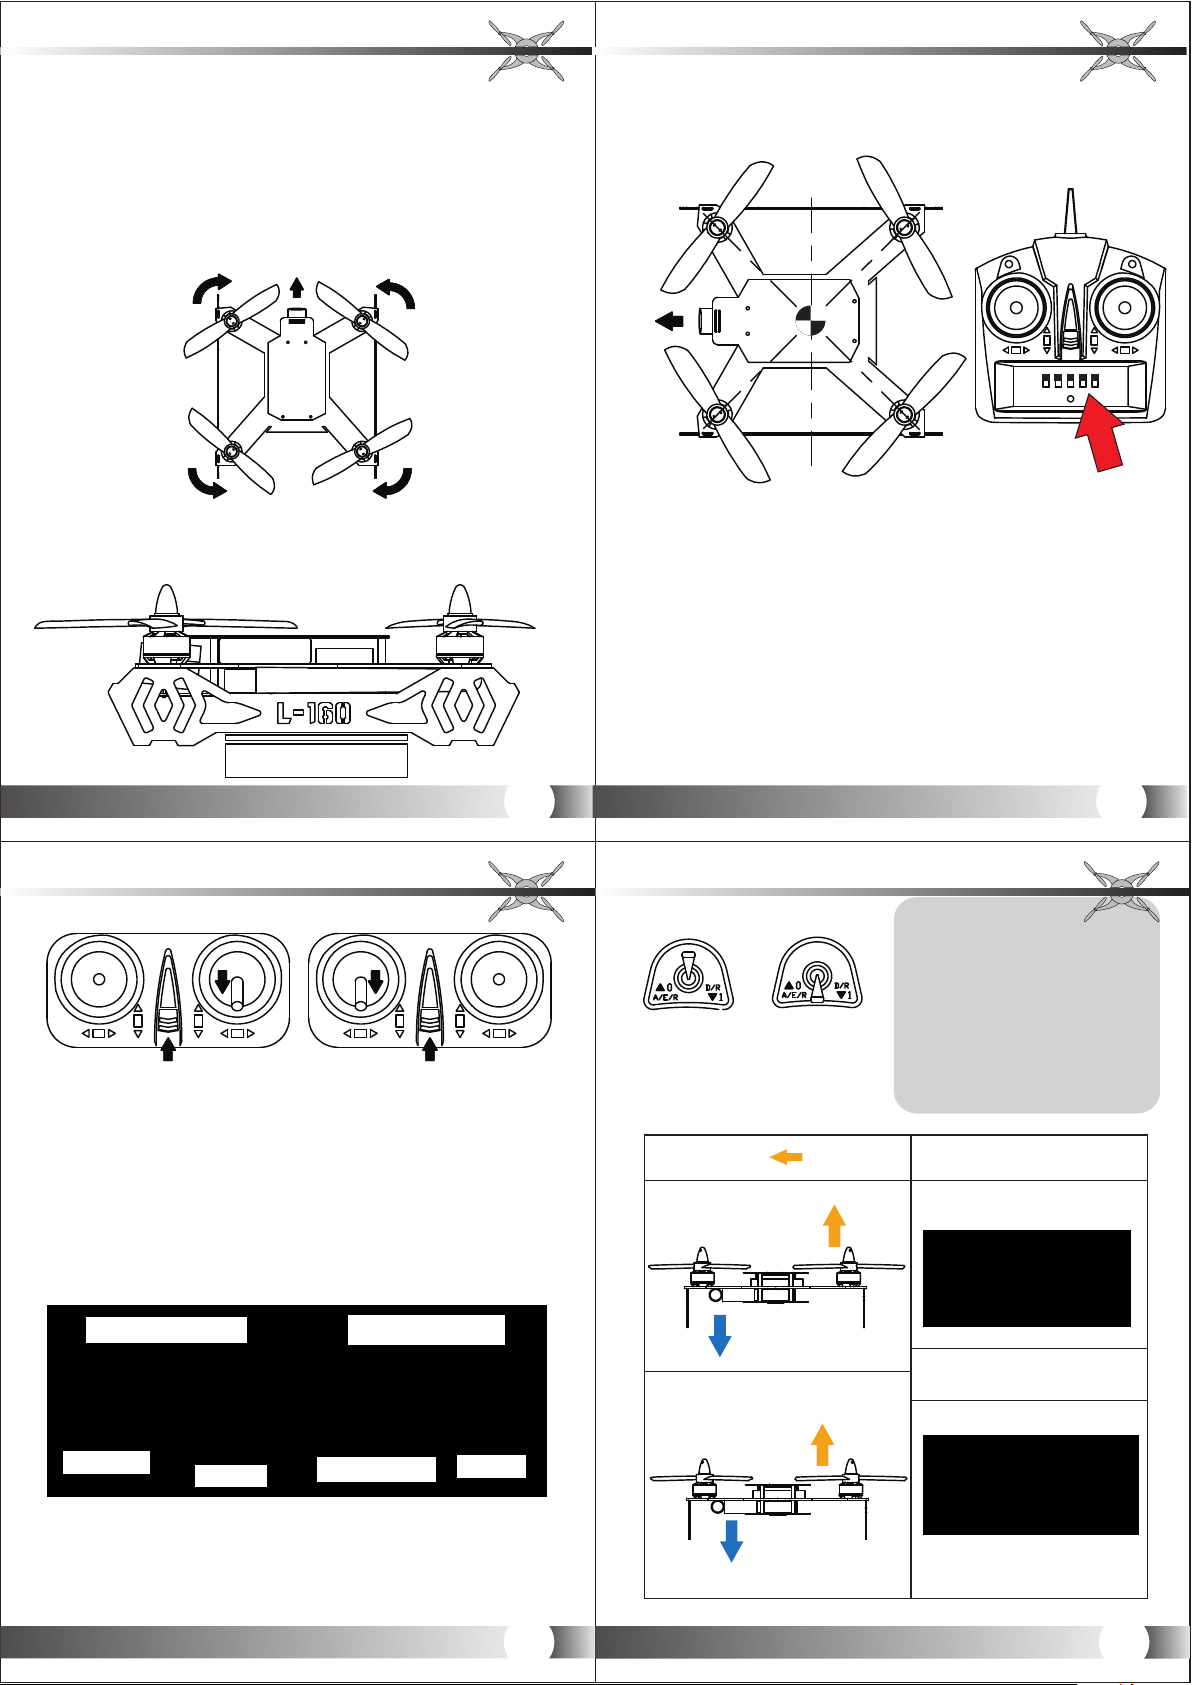
Screw counte r clockwise propellers which be prin ted
6045 to
right front of quadcopter and left rear of quadcop ter.
similar ly
s crew clo ckwis e propel lers whi ch be pri nted 604 5R to
left front of quadcopter and right rear of quadcopter.
like the pic ture shows.please make sure every thing
propell ers be sc rewed correctl y and tig htly.
Head
5.4 how to balance q uadco pter ?
hang quadcop ter a t the center of the quadcop ter, i f it
tilt forw ard,please mov e battery backwa rd then try again.
similar ly if i t tilt backward, please mo ve batt ery for ward
and try aga in.
Center
4045R
4045
5.3 Batte ry
Paste li po batt ery(can range from 10 00mah to
2200mah , 3 S or 4 S capabl e) to the top plate with
Velcro, make the hea d and r ear balanced . Then chain
the batte ry with s trap tightly.。
Battery
4045
4045R
Head
6 Prepare f or flig ht
6.1 Turn t ransm itter /monitor on
Transmit ter
1.turn al l funct ions switch upward, tur n the throttle stick
lowest. t urn tra nsmitter on .mode 1 stand s for right throttle
while mod e 2 stand s for left throttle.
2、put the qua dcopt er on the ground hor izont ally, power
the quadc opter o n
3、if the quad copte r tweet and the rece iver tu rn
constan t green , the transmitter has suc ceeded to
connect t o the qua dcopter. It's ready to go. I f failed,
please re fer XX pa ge
4、Power on mo nitor
5
6
Mode 2Mode 1
Mode 2Mode 1
6.2 Unlock/lock
Unlock:
turn t he throttle sti ck lowest, turn direc tion stick to right
and l ast more than 5 minutes. It will be unlo cked when
light tur n blue. motors wil l rotate if y ou turn thr ottle
upward.
Mode 1(ri ght thr ottle)
directi on stic k
throttl e stick
Mode 2(le ft thro ttle)
throttl e direc tion stick
Rotatio n stick
7.0 Operating instructions
Ch5 Nov ice /self-le veling
mode wh en sw itch “0”
CH5 Advanced mode wh en
switc h “1”
direction control( indicate head)
up/down
up/down
Note:
1、 Advanced mode re qui res a
broad groun d.
2、 Advanced mode is
recommended to e xpe rie nti al
pilot
Advanced mode ma kes q uad cop ter
fly more bitt er, so p lea se tu rn
throttle up war d app rop ria tely when
quadcopte r is lo w, tur n thr ott le
downward ap pro pri ate ly when
quadcopte r is hi gh
Tra nsmitter(m ode 1)
Tra nsmitter(m ode 2)
7
8
Page 4
direction control( indicate head)
forward /back ward
forward /back ward
Tra nsmitter(m ode 1)
Tra nsmitter(m ode 2)
direction control( indicate head)
Tra nsmitter(m ode 1 or 2)
left/ri ght
Counter c lockw ise/clockwis e
8.0 END
1. quadc opter land ing。 2 .P ower off quadco pte r。
3 .Turn off trans mitter 4. Pow er off mon itor
9.0 Additional ins truction
1. 4.3 in ch integrated v ideo recei ver & m onitor ins tru ction
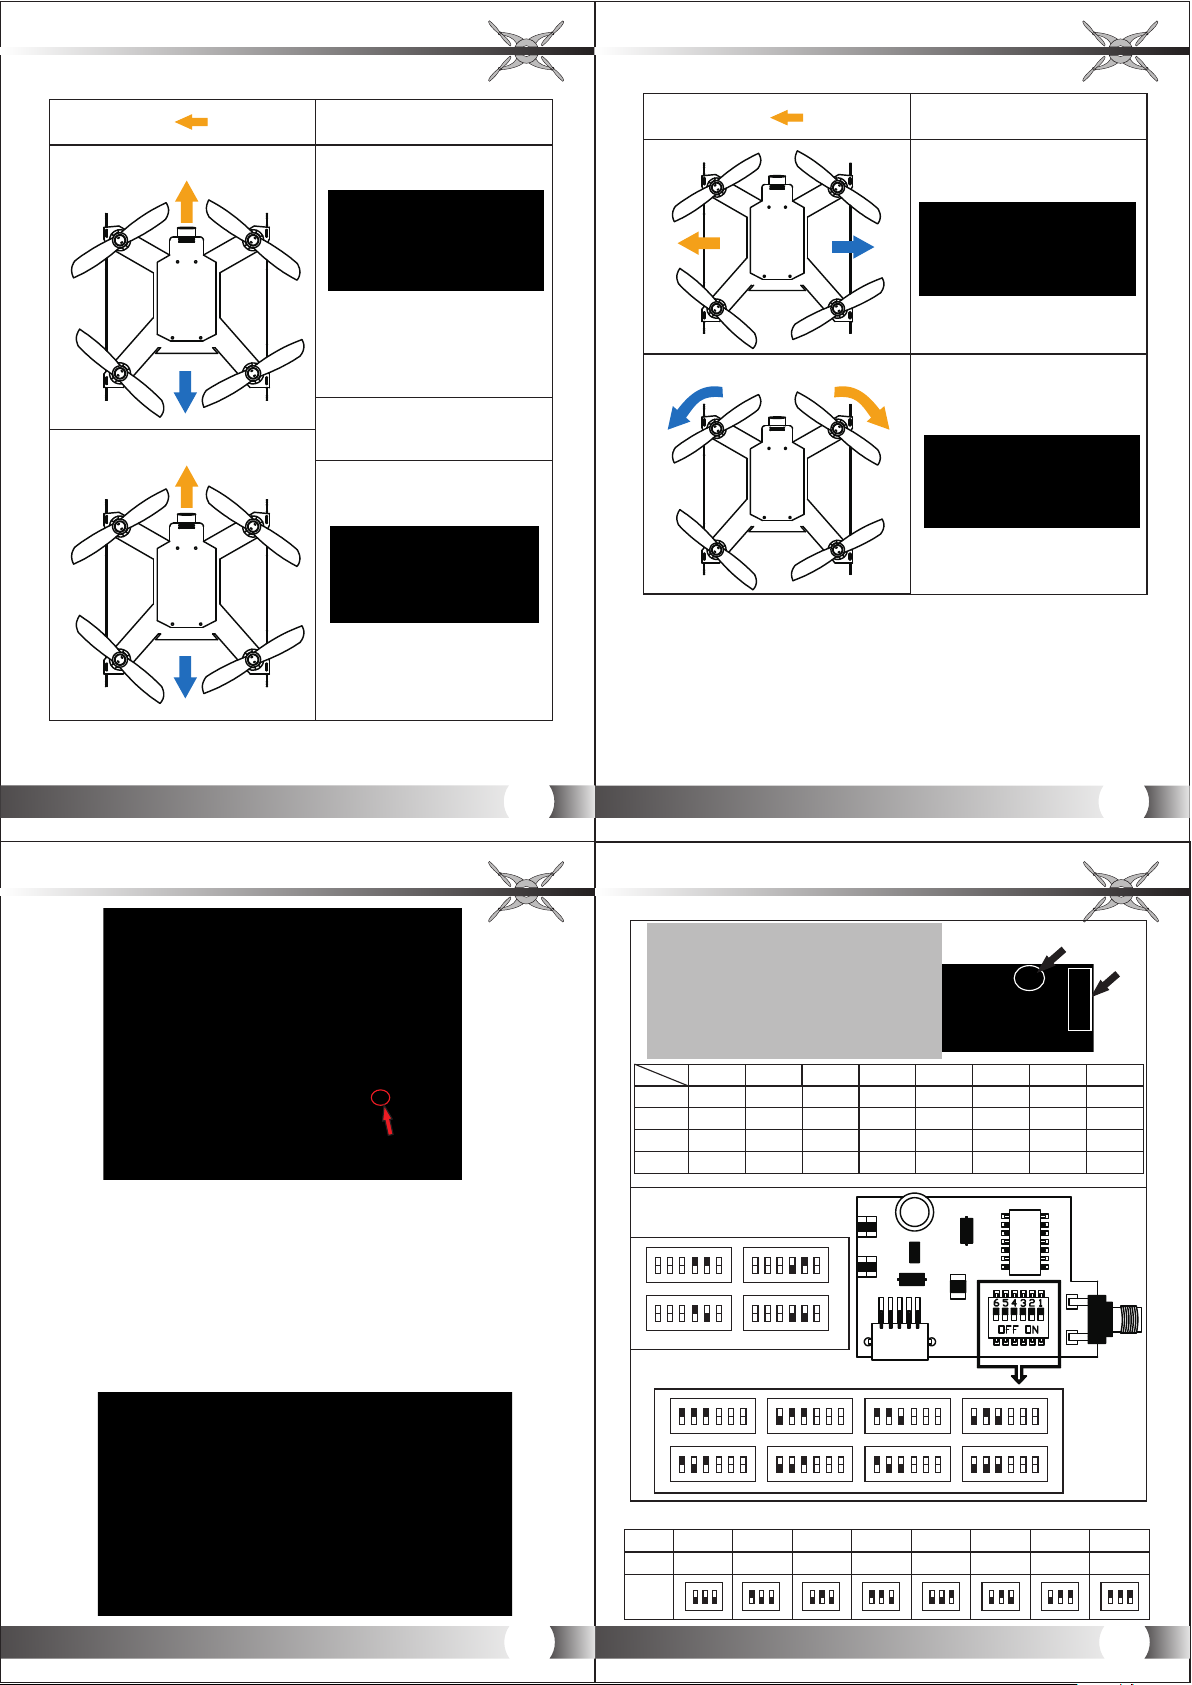
There a re 8 optional rec eive chann els . choose whi ch is best for
video t ransmission .
Follo wing form shows t hese 8 chann els
9
Tune radio
Tur n transmitter on ,turn t hrottle stick down at low est.power
on quadco pter,t he light on receiv er will t urn red.press th e
button on r eceiv er and don't leave u ntil th e light turn green .it
indicat es tran smitter has
For Mushroom
pasted in TX to video transmissi on, screw the other one
pasted in R X to vide o receiver built i n monit or
antenna s, plea se screw one which
Figure the launch
A: 12 LE D indi cato rs sh ow fre quen cy ba nd
and chan nel
B: But ton
Defaul t powe r on freque ncy is F 1
Long pre ss rig ht bu tton t o chan ge ba nd
LED : A- B-E -F ci rcul arl y Shor t pres s rig ht
button t o chan ge channe l LED: 1- 2-3 -4- 56- 7-8 c irc ular y Powe r off me mor y for la st
fre que ncy
CH
FR
Fr1 o r (A)
Fr1 o r (B)
Fr1 o r (E)
Fr1 o r (F)
CH1 CH2
5865
5733
5705
5740
CH3
5845
5752
5685
5760
FR
FR1( A)
1 2 3 4 5 6
FR3( E)
1 2 3 4 5 6
FR2( B)
1 2 3 4 5 6
FR4( F)
1 2 3 4 5 6
CH
CH1
1 2 3 4 5 6
CH3
1 2 3 4 5 6
CH2
1 2 3 4 5 6
CH4
1 2 3 4 5 6
1 0
A
CH4 CH5 CH6 C H7 CH8
58055825
5785
5765
5745
5725
57905771
5809
5828
5847
5866
56455665
5885
5905
5925
5945
58005780
5820
5840
5860
5880
CH5
1 2 3 4 5 6
CH7
1 2 3 4 5 6
CH6
1 2 3 4 5 6
CH8
1 2 3 4 5 6
B
1 1
Figure and receive
Channe l
Fre quency
Switch ers
Positi on
1 2 3 4 5 6 7 8
59 45 MHz 59 25M Hz 5 905 MH z 58 85M Hz 56 45M Hz 56 65 MHz 56 85M Hz 5 705 MH z
ON ON ON ON ON ON ON ON
1 2 3 1 2 3 1 2 3 1 2 3 1 2 3 1 2 3 1 2 3 1 2 3
1 2
 Loading...