

English
Beltpack
User Guide
FCC ID : 2ANZJDEDPS1
IC : 23304-DEDPS1
DE-DPS Beltpack
Version 25-03-2019

USER GUIDE Beltpack
TABLE OF CONTENTS
1 - DESCRIPTION OF THE Beltpack
2 - HOW TO...
2 - 1 ...Turn on the Beltpack
2 - 2 ...Unlock the Beltpack
2 - 3 ...Modify the Volume
2 - 4 ...Connect to a Tx-Box
2 - 5 ...Connect to a Digitear network
2 - 6 ...Change the channel used by the Beltpack
2 - 7 ...Pair an In-Ear
2 - 8 ...Activate Eco mode
2 - 9 ...Delete the list of registered In-Ears
2 - 10 ...Change the battery
3 - ADVANCED FUNCTIONNING OF THE Beltpack
3 - 1 Beltpack start up
3 - 2 Txboxes menu
3 - 3 Wlan menu
3 - 4 Lock menu
3 - 5 Update menu
3 - 6 Connect IE menu
3 - 7 Find IE menu
3 - 8 Mic menu
3 - 9 Channel menu
3 - 10 Low battery display
4 - TECHNICAL FEATURES
5 - WARRANTY
6 - CERTIFICATIONS
User guide available at www.digitear.eu
Overline-Systems - www-digitear.eu - digitear-support@overline-systems.com
Page 1/19
1 - DESCRIPTION OF THE Beltpack
7
USER GUIDE Beltpack
1
2
6
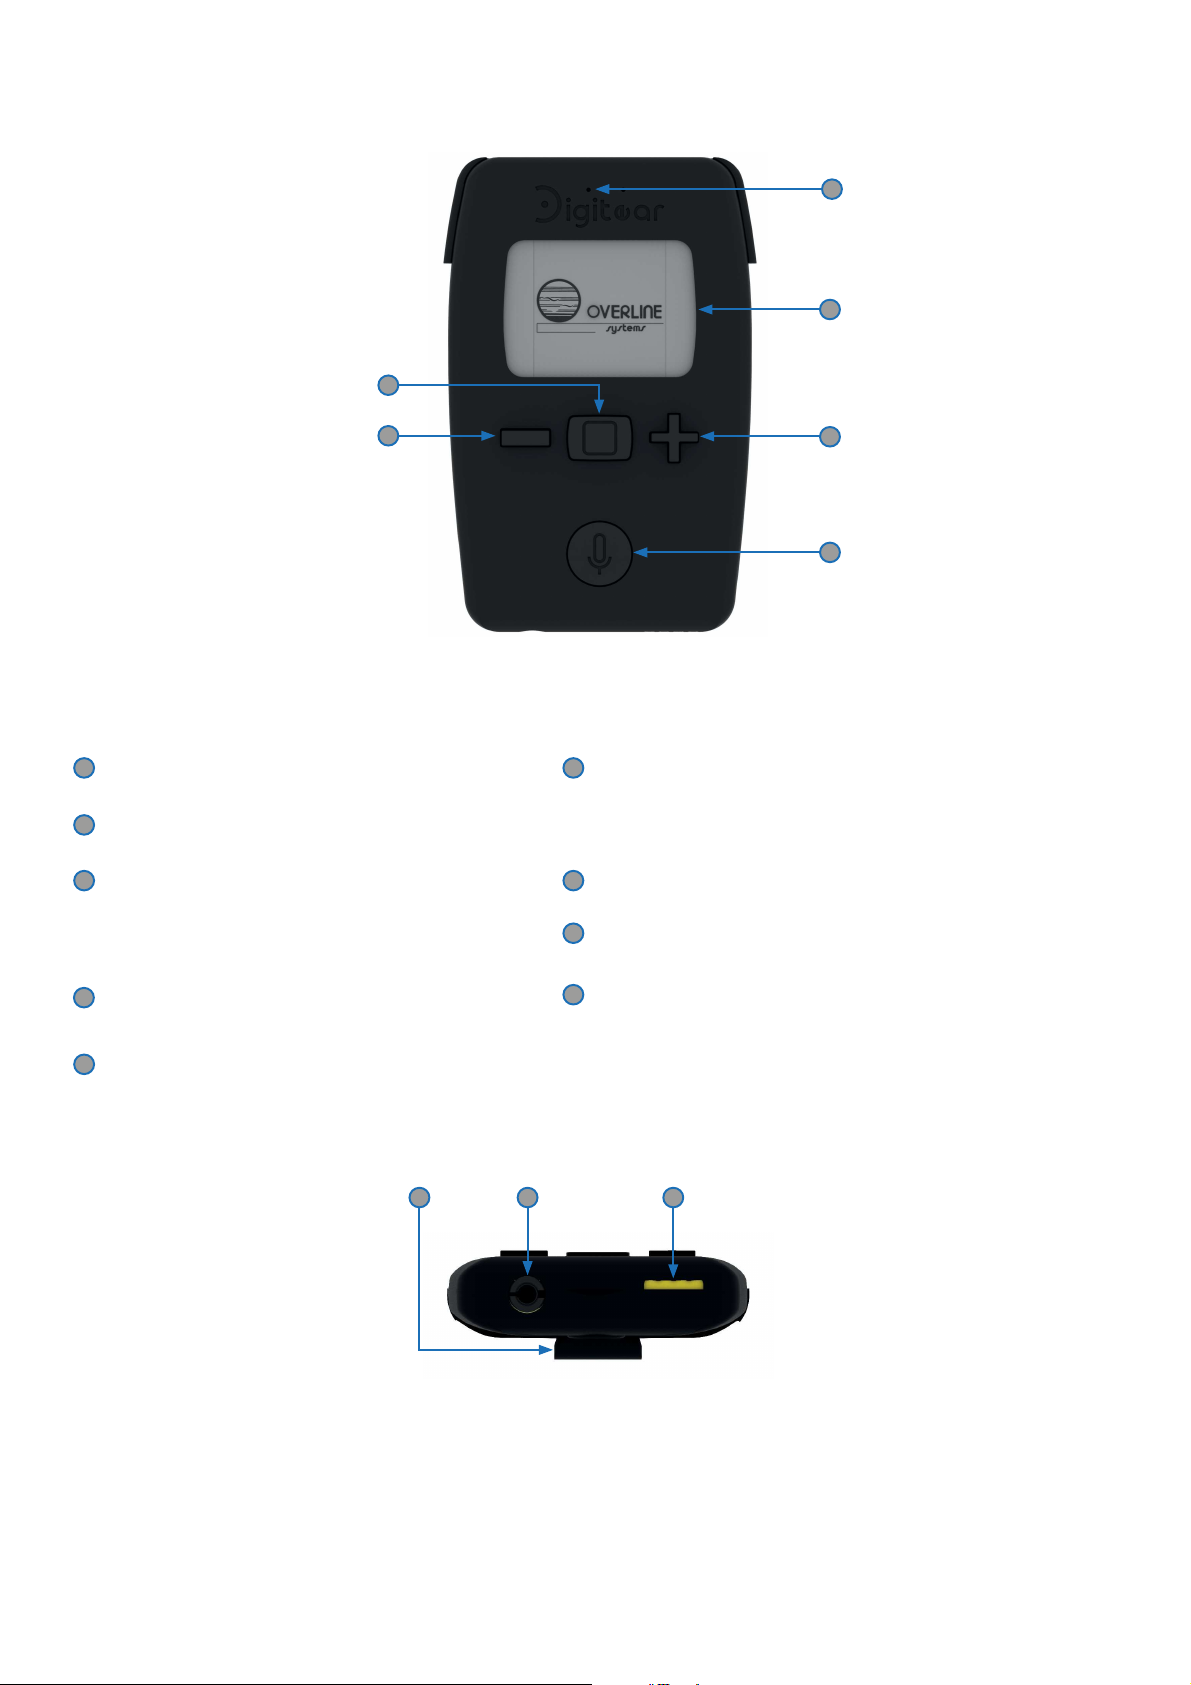
Microphone
1
2
LCD screen
3
‘+’ Key
Allows you to navigate within the menus or
to increase a level (volume, gain...)
4
‘MIC’ Key
3
4
6
‘-’ Key
Allows you to navigate within the menus or to diminish / a level (volume, gain...).
7
‘HOME’ Key
8
3.5mm - 4 points JACK
Battery charge connector
9
5
Belt clip
5
8 9
Overline-Systems - www-digitear.eu - digitear-support@overline-systems.com
Page 2/19

USER GUIDE Beltpack
2 - HOW TO...
2 - 1 ...Turn ON the Beltpack
To turn on the Beltpack, press and hold the central key until the Overline Systems logo appears.
2 - 2 ...Unlock the Beltpack
Press and hold the central key to unlock the Beltpack and to gain access to the menus.
Hold for
menu
Menu
Select
Txbox
Menu
Overline-Systems - www-digitear.eu - digitear-support@overline-systems.com
Page 3/19
USER GUIDE Beltpack
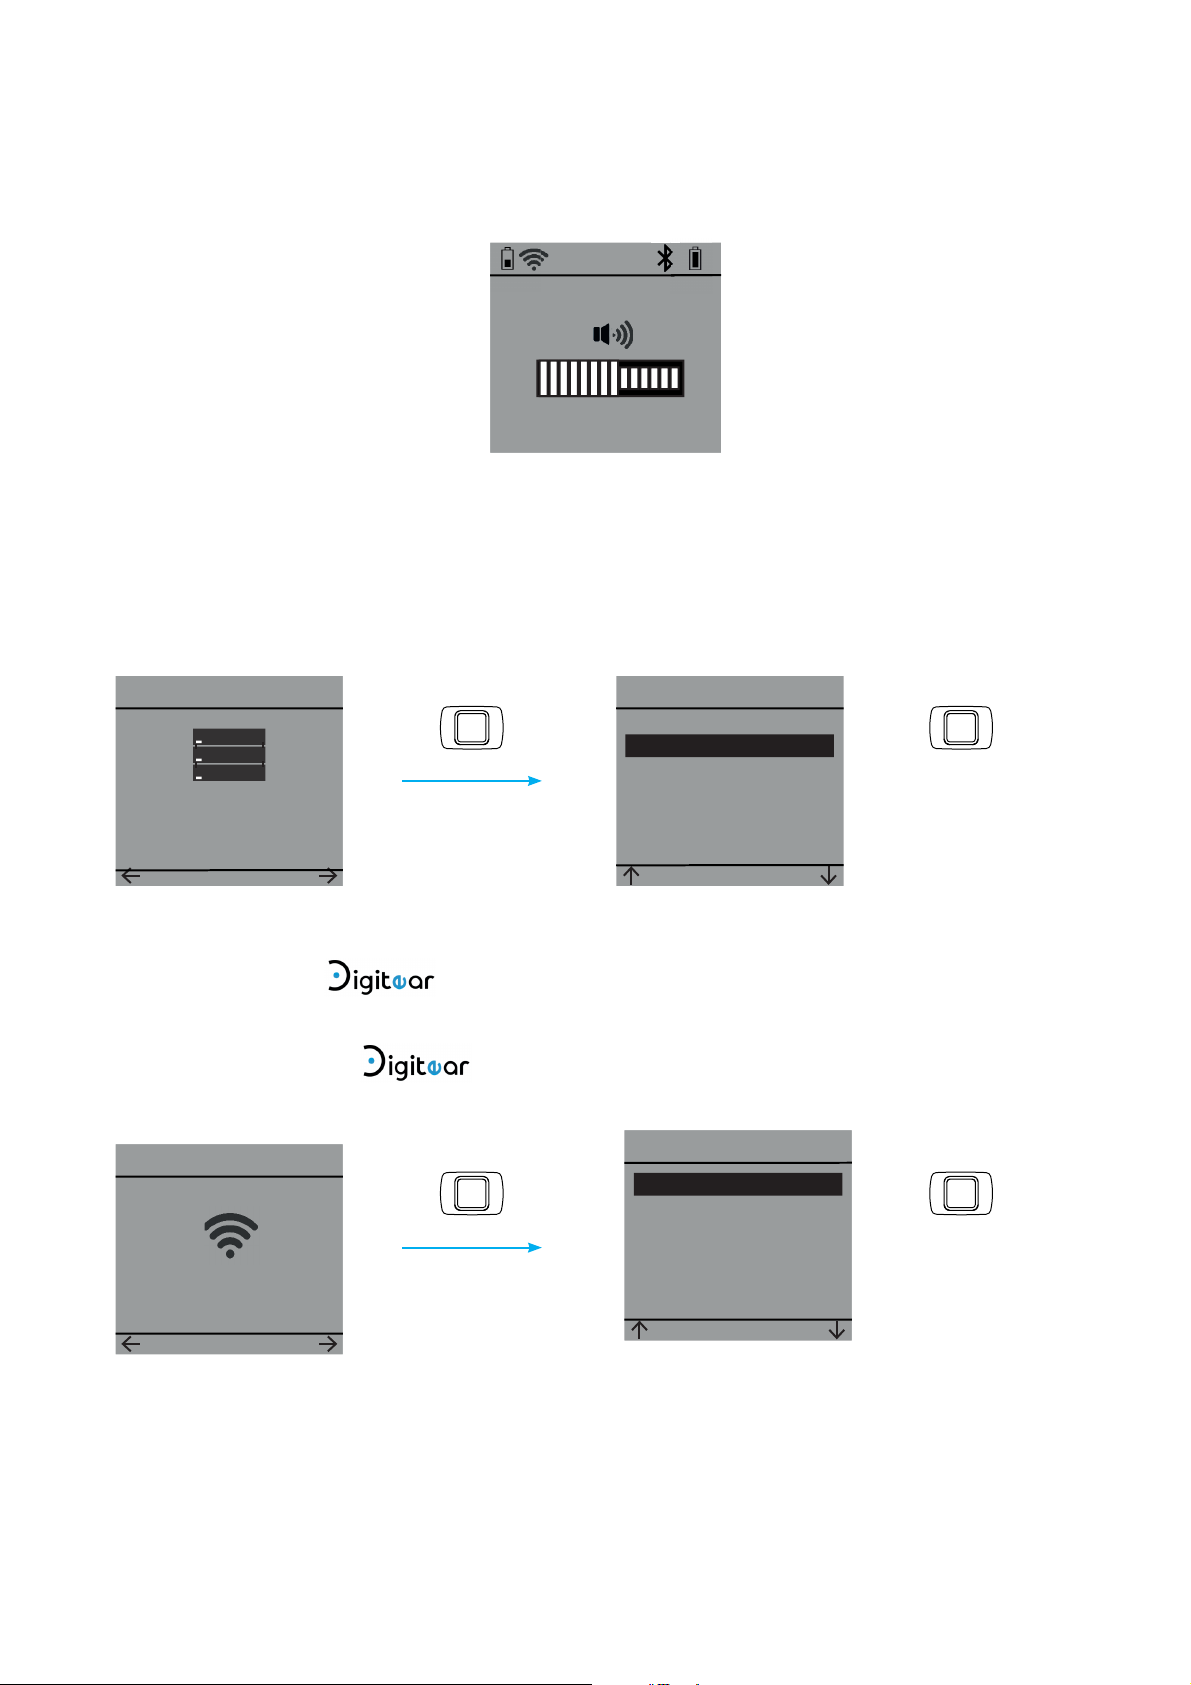
2 - 3 ...Modify the volume
On the main screen, use the + and - keys in order to change the volume. Once the right level is chosen,
confi rm using the central key.
-
2 - 4 ...Connect to a Tx-Box
To change or connect to a Tx-Box, press on the menu labeled «TxBoxes»
Menu
OK
+
Pair
> TX Box 1
Confi rm
Txboxes
SET
2 - 5 ...Connect to a network
Back
SET
Confi rm
To change or to connect to a network, click on the menu labeled «Wlan». If there is more than
one accessible network, the screen will display all the possible choices.
WiFi
Menu
> Digitear
Wlan
SET
Confi rm
Back
SET
Confi rm
Overline-Systems - www-digitear.eu - digitear-support@overline-systems.com
Page 4/19
USER GUIDE Beltpack
2 - 6 ...Change the channel used by the Beltpack
From the Beltpack, you can change the channel on which the TX-Box was associated to by default during
the initial connection.
To do this you must access the «Channel» menu.
Menu
Channel
SET
2 - 7 ...Pair a In-Ear
To pair a In-Ear to the Beltpack, you need to go into the «Connect IE» menu.
Once you confi rm this choice the Beltpack will connect itself to the nearest In-Ear.
Note :
- The In-Ear needs to be in «discoverable» mode (See In-Ear User Manual).
- The Beltpack can transmit an audio stream to two In-Ears at a time. The two In-Ears must be paired
during their fi rst use. This will be done automatically (See In-Ear User Manual).
Menu
-
Menu
< Ch 8 >
OK
+
Connect IE
SET
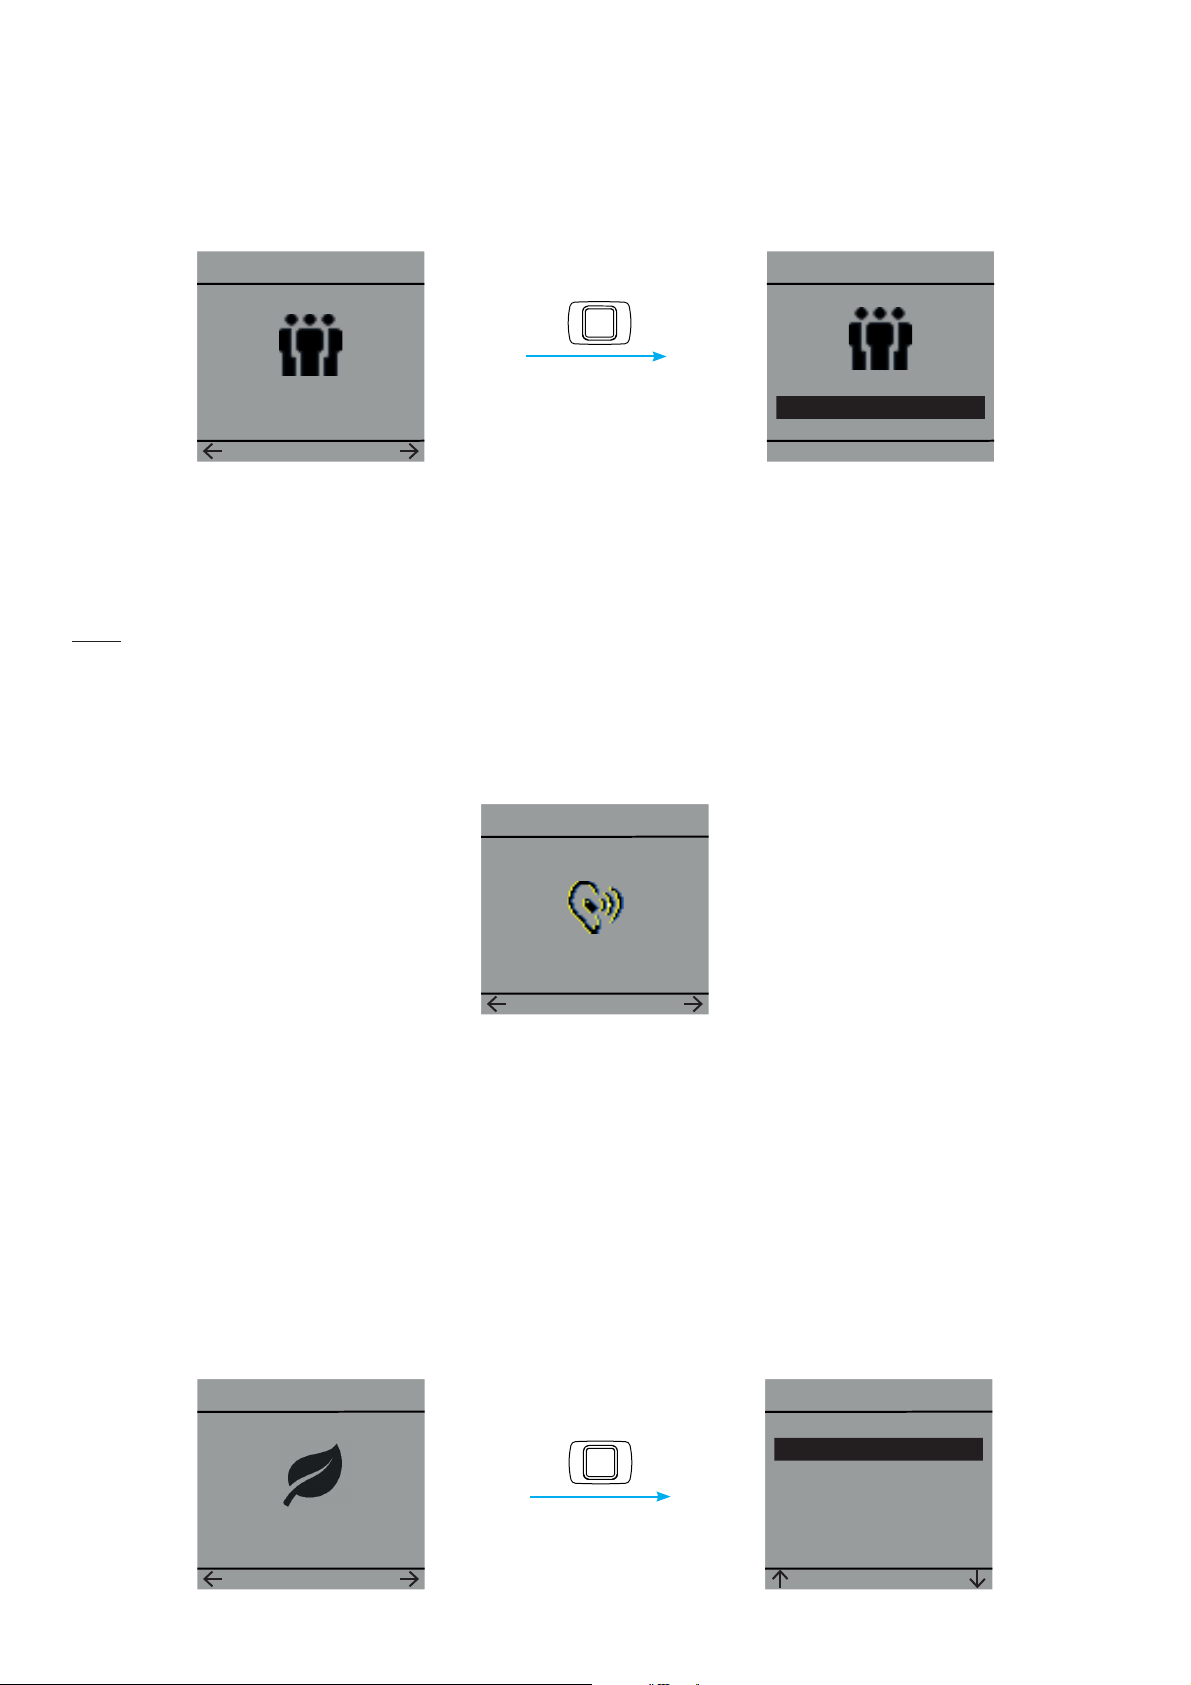
2 - 8 ...Activate Eco mode
Eco mode allows the optimization of the In-Ear battery’s life.
The principle is to stop the stream between the In-Ear and the Beltpack when no signals are transmitted
from the Beltpacks. A calibration of the noise threshold is done automatically at each activation of the
Eco mode.
The key «Calibrate» allows you to redo a new calibration.
You must perform the calibration during a ambiant silence, or else you will have to redo the calibration
procedure.
Menu
Eco Mode
Enable
Calibrate
Eco Mode
Back
SET
SET
Overline-Systems - www-digitear.eu - digitear-support@overline-systems.com
Page 5/19

USER GUIDE Beltpack
2 - 9 ...Delete the list of registered In-Ear
To delete the list, you must go into the «ClearPDL» menu. The list is then emptied out and you can connect
two new In-Ears to the Beltpack.
Menu
Clear PDL
SET
2 - 10 ...Change the battery
A spare battery is provided with the Beltpack.
To change it you must open the Beltpack’s rear cover.
Only this provided battery type must be used.
Battery : Li-ion, BL-5C
Overline-Systems - www-digitear.eu - digitear-support@overline-systems.com
Page 6/19

USER GUIDE Beltpack
3 - ADVANCED FUNCTIONNING OF THE Beltpack
3 - 1 Beltpack start up
Ch 2
Menu
Press the central key
The status bar may be diff erent following the connection state and status.
2
1
1
Beltpack’s battery level.
2
Strength of network signal. If the sign is empty the Beltpack is not connected to any
4
3 5
6
7
network.
3
A headset is connected to the 3.5mm Jack.
4
The internal microphone is off :
The confi guration of the «Latency Mode» does not permit the use of the Beltpack’s microphone.
(See User guide of the Tx-Box)
5
Eco Mode is ON, it will replace the bluetooth sign.
6
A In-Ear is connected.
7
The connected In-Ear’s battery level.
Select
TxBox
Menu
The Beltpack is connected to a
network, but is not
The Beltpack is not connected to a
Connecting
Digitear
Menu
network.
connected to a TX-Box.
Overline-Systems - www-digitear.eu - digitear-support@overline-systems.com
Page 7/19

USER GUIDE Beltpack
3 - 2 Txboxes menu
Review of the possible actions in the «TxBoxes» menu.
Menu
Txboxes
SET
Pair
No txbox
Back
SET
Pair
TX Box 1
Back
SET
Pair
No TX-Box is available on the
network.
Txboxes
Connected !
OK
Txboxes
> TX Box 1
Back
TX Box 1
Back
If «Timeout» appears :
- Check the
- Check the confi guration of the TX-Box.
network.
SET
Pair
SET
Disconnecting
Txboxes
Timeout !
OK
Overline-Systems - www-digitear.eu - digitear-support@overline-systems.com
Page 8/19

USER GUIDE Beltpack
3 - 3 Wlan menu
Review of the possible actions in the «Wlan» menu.
Menu
Wlan
SET
WLAN
Scanning
Digitear
Back
WiFi
SET
WiFi
Connecting
WiFi
> Digitear
Back
SET
WLAN
Timeout !
OK
if «Timeout» appears :
- Check the
- Check the ACCESS POINT confi guration.
network.
Overline-Systems - www-digitear.eu - digitear-support@overline-systems.com
Page 9/19

3 - 4 Lock menu
USER GUIDE Beltpack
Menu
On
SET
Menu
Locked
Lock
<On>
OK
+
Lock
+
<Off >
OK
Menu
Unlocked !
Two diff erents ways to unlock the Beltpack:
- Off : Pressing and holding the central key will give direct access to the menus.
- On: Pressing and holding the central key and validating with the + key will give access to the menus.
Overline-Systems - www-digitear.eu - digitear-support@overline-systems.com
Page 10/19

USER GUIDE Beltpack
3 - 5 Update menu
This menu gives the user the possibility to update the Beltpack’s software.
The Beltpack will see the update after it is extracted from the USB drive on the TX-Box.
(See User manual of the TX-Box)
At the end of the update, the Beltpack will restart.
Menu
Update
SET
Update
Checking
Update
No updates
OK
YES
Update
Updating ?
NO
Overline-Systems - www-digitear.eu - digitear-support@overline-systems.com
Page 11/19

3 - 6 Connect IE menu
Menu
Connect IE
SET
USER GUIDE Beltpack
Connect IE
Connecting
Connect IE
Connected !
OK
Connect IE
Timeout !
OK
Menu
Disconnect
SET
Connect IE
Disconnected !
OK
If «Timeout» appears:
- Check that the In-Ear you wish to pair is in «connectable» mode.
- Empty the Beltpack’s storage in order to have space for the In-Ear.
- Check that the In-Ear is not charging, an In-Ear that is charging cannot be paired (See In-Ear User Guide).
- If it just got disconnected, wait 10 seconds before attempting a new connection.
Overline-Systems - www-digitear.eu - digitear-support@overline-systems.com
Page 12/19

USER GUIDE Beltpack
3 - 7 Find IE menu
This menu gives the user the possibility to search for the In-Ear that is connected to the Beltpack.
The In-Ear’s light will fl ash for 10 seconds.
Menu
Find IE
SET
Find IE
Find IE
Not connected
OK
Blinking
OK
Overline-Systems - www-digitear.eu - digitear-support@overline-systems.com
Page 13/19

USER GUIDE Beltpack
3 - 8 Mic menu
This menu gives the user the possibility to search for the In-Ear that is connected to the Beltpack. The InEar’s light will fl ash for 10 seconds.
Menu
Mic
SET
Gain
Device
Back
Gain
Device
Back
Mic
SET
Mic
SET
+
-
> Auto
Internal
Back
Gain
50%
OK
Device
SET
+
+
Device
Auto
> Internal
Back
SET
> Auto
> Internal
With this option the Beltpack will go from the internal microphone to the
external microphone when the user connects a microphone on the 3.5mm Jack.
With this option the Beltpack will not go onto the external microphone when
the user connects a microphone on the 3.5mm Jack.
Overline-Systems - www-digitear.eu - digitear-support@overline-systems.com
Page 14/19

3 - 9 Channel menu
Menu
Channel
SET
USER GUIDE Beltpack
Menu
Menu
Menu
+
< Ch 7 >
-
3 - 10 Low battery display
When the Beltpack’s battery level becomes very low, it lets you know with this display.
From then on you have less than 5 minutes of usage left.
OK
+
Changing
-
< Ch 8 >
OK
+
BELTPACK
battery low
OK
Overline-Systems - www-digitear.eu - digitear-support@overline-systems.com
Page 15/19

4 - TECHNICAL FEATURES
Bluetooth
USER GUIDE Beltpack
WiFi
Battery
Version
Class
Frequency range
Functionning distance
Standard
Frequencies
Type
Bluetooth 4.2
2
2 400 MHz - 2 483 MHz
<10 meters
802.11n
5 GHz
Version CE :
5180MHz, 5200MHz, 5220MHz, 5240MHz
Version FCC/IC :
5745MHz, 5765MHz, 5785MHz, 5805 MHz, 5825MHz
Lithium - Ion, BL-5C
Materials
Autonomy
Complete charge
Rated capacity
Nominal voltage (DC)
Operating voltage (DC)
Terms of use
Recommended Accessories Sennheiser CX275s
Type
Weigth
Heigth
1200 mAh (4,4 Wh)
3,3 V et 4,2V
60g with battery
(13x53x93)mm
~6 h
~3 h
3,7 V
+5 à +45°C
ABS-PC
Terms of use
+5 °C to +45°C
Overline-Systems - www-digitear.eu - digitear-support@overline-systems.com
Page 16/19

USER GUIDE Beltpack
5 - WARRANTY
Elements NOT covered by the warranty
This warranty only covers fautly parts and the manufacturing of the product. This warranty does not
cover:
- Periodical maintenance and reparations or replacements of parts due to normal wear and tear
- Shipping and handling costs and the risks associated with the transportation and the retrieval of the
product by the fi nal customer
- All adaptations of the product which would be necessary to make it comply with the technical and/
or security standards in a country other than the one for which the product was originally designed and
manufactured for
- Consumable elements: elements that are scheduled to be replaced periodically during the life of the
equipment ( for example: ear tips, batteries over 12 months after the purchase date, and connection
cables)
The deteriorations or defects of the product resulting in:
- A poor usage or installation of the product ( for example: using the product in a way not intended,
installation or usage not standard to ‘s instructions and to the technical standards or security
in the country where it is used)
- Maintenance of the product non-compliant to Overline Systems’ instructions or negligence in
maintenance of the product
- Any mishandling of the product (ex: false maneuvre, fall, shock, impact, immersion ) or an inappropriate
environment (ex: bad aeration, vibrations, exposure to humidity or excessive heat, contacts with a
product (material or software), consumable, accesssory or device non compatible or defective, an
adaptation of the product towards its end of being put to conformity with technical or security standards
in a country other than the one the product was originally designed and manufactured for
- A modifi cation or a reparation of a product not made by a third party approved by Overline Systems
- Sinister (ex: fi re, fl ood, earthquake, lightenning)
Produit:
(TX-Box, Charger Box, Beltpack, In-Ear)
24 months pieces or workshop labor
Battery: 12 months (starting the purchase date)
ACCESS POINT: covered by the manufacturer’s initial warranty
Accessories alone will not be taken in by our reparation centers.
Overline-Systems - www-digitear.eu - digitear-support@overline-systems.com
Page 17/19

USER GUIDE Beltpack
6 - CERTIFICATIONS
Produit destiné à une utilisation en intérieur.
This product is recommanded for indoor use only.
Tout changement ou modifi cation apporté à cet équipement non expressément approuvé par OVERLINE
Systems peut annuler l’autorisation d’utiliser cet équipement.
Any changes or modifi cations made to this equipment not expressly approved by OVERLINE Systems may void the
authorization to operate this equipment.
Dans la bande de fréquences 5150-5250MHz, les WAS/RLAN sont limités à une utilisation intérieure des
bâtiments.
Operations in the 5,15 - 5,25GHz band are restricted to indoor usage only.
Item (HVIN) : DE-DPS BELTPACK
Type identifi cation : DE-DPS-001
PMN : Digitear
Version EUROPE
CE
L’équipement est conforme aux exigences suivantes :
This product complies to the following requirements :
Radio :
ETSI EN 300328 V2.1.1
ETSI EN 301893 V1.8.1
Compatibilité électromagnétique :
ETSI EN 301 489-1 V2.2.0 (DRAFT)
ESTI EN 301 489-17 V3.2.0 (DRAFT)
Sécurité :
IEC 62368-1: 2014 (2.Edition) and Cor. 1: 2015
EN 62368-1: 2014/AC: 2015/A11: 2017
Exposition RF (DAS) :
EN 50666:2013/AC:2014
EN 62209-2 (2010)
1999/519/EC
DoC disponible sur : www.digitear.eu
DoC available : www.digitear.eu
Version FCC/IC
FCC ID : 2ANZJDEDPS1
IC : 23304-DEDPS1
Overline-Systems - www-digitear.eu - digitear-support@overline-systems.com
Page 18/19

USER GUIDE Beltpack
L’équipement est conforme aux exigences suivantes :
This product complies to the following requirements :
47 CFR Part 15
RSS-247 Issue 2
RSS-Gen Issue 4
Le présent appareil est conforme aux CNR d’Industrie Canada applicables aux appareils radio exempts de
licence. L’exploitation est autorisée aux deux conditions suivantes:
(1) l’appareil ne doit pas produire de brouillage, et
(2) l’utilisateur de l’appareil doit accepter tout brouillage radioélectrique subi, même si le brouillage est
susceptible d’en compromettre le fonctionnement.
NOTICE : This device complies with Part 15 of the FCC Rules and with Industry Canada licence-exempt RSS standard(s).
Operation is subject to the following two conditions:
- this device may not cause harmful interference, and
- this device must accept any interference received, including interference that may cause undesired operation.
Dans la bande de fréquences 5150-5250MHz, les WAS/RLAN sont limités à une utilisation intérieure des
bâtiments.
Operations in the 5,15 - 5,25GHz band are restricted to indoor usage only.
Exposition RF (DAS)
RF exposure :
IEEE 1528-2013
RSS-102 Issue 5
Radiofrequency radiation exposure Information:
This equipment complies with FCC radiation exposure limits set forth for an uncontrolled environment.
This transmitter must not be co-located or operating in conjunction with any other antenna or
transmitter.
Radiofrequency radiation exposure Information:
The radiated output power of the device is far below the FCC radio frequency exposure limits.
Nevertheless, the device shall be used in such a manner that the potential for human contact during
normal operation is minimized.
Overline-Systems - www-digitear.eu - digitear-support@overline-systems.com
Page 19/19
 Loading...