

Page 1
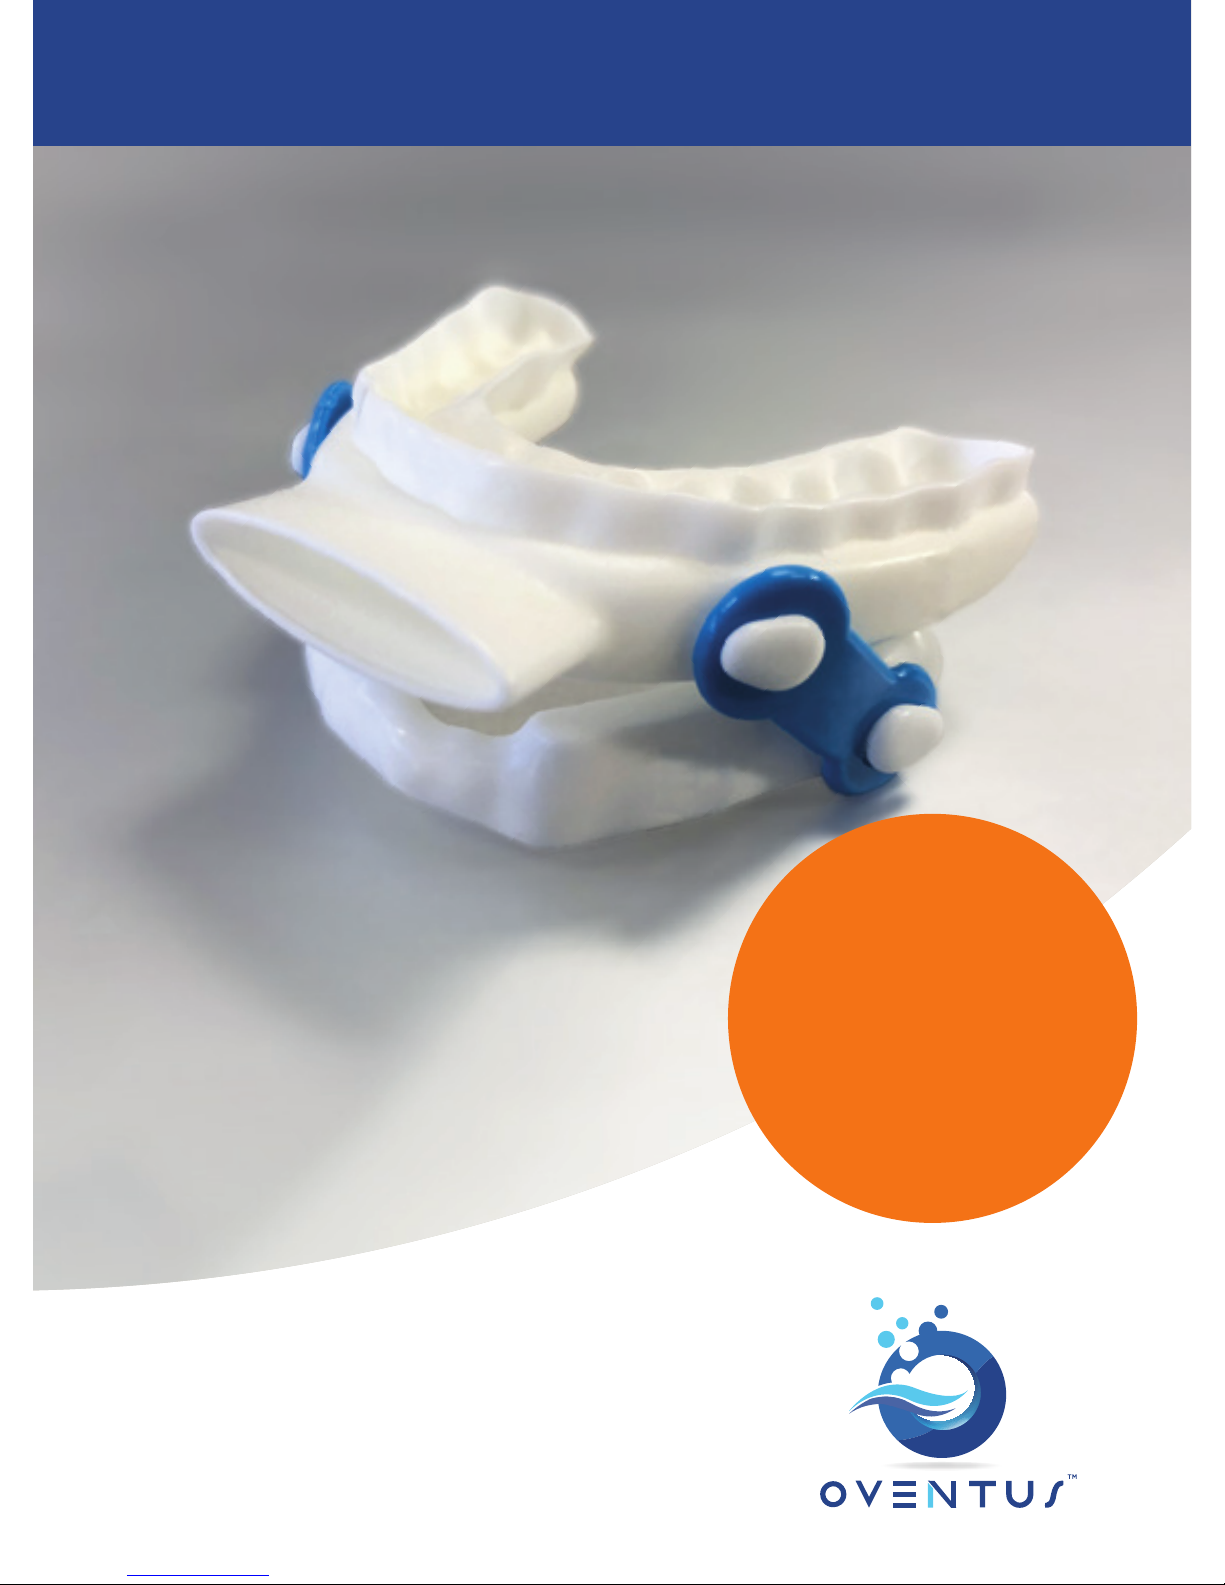
ORAL APPLIANCE
FOR SLEEP APNOEA
THERAPY
O2VENT
OPTIMA
™
INSTRUCTIONS FOR USE – AUSTRALIA
Page 2

Name of User
Name of Sleep Physician
Name of Dentist
Serial No. of Device
Date of rst tting/purchase
Connector band starting titration length
Date of follow up with Physician/Dentist
Page 3

1
OVENTUS
INSTRUCTIONS FOR USE FOR O2VENT OPTIMA
™
CONTENTS
Introduction 2
Optima Description 3
Your Optima kit 4
How Your Optima Device Works 5
Using your Optima 8
Inserting your Optima 8
Removing your Optima 8
Finding the right titration setting 9
What are the Risks of OSA 11
Contraindications 11
Cleaning Instructions 12
General Warnings and Precautions 14
Maintenance 15
Replacing connector bands 16
Keep a Log of your Titration 17
Page 4

2
OVENTUS
INTRODUCTION
Congratulations, you have taken the rst steps to
improve your sleep and well-being!
Your Healthcare Professional has chosen the
O2Vent Optima™ (Optima) specically for your
snoring and/or obstructive sleep apnoea (OSA)
therapy. OSA is a condition where a suerer
experiences repetitive episodes of partial or
complete blockage of the upper-airway during sleep.
This is caused by obstructions of the nose, soft
palate and tongue.
The Optima is a removable oral appliance that is
tted in the mouth and is intended to reduce or
alleviate snoring and mild to moderate OSA. The
Optima is indicated for use during sleep to aid in the
treatment of these conditions. Intended for adult
patients 18 years or older. The Optima device is for
prescription use only.
Page 5
3
OVENTUS
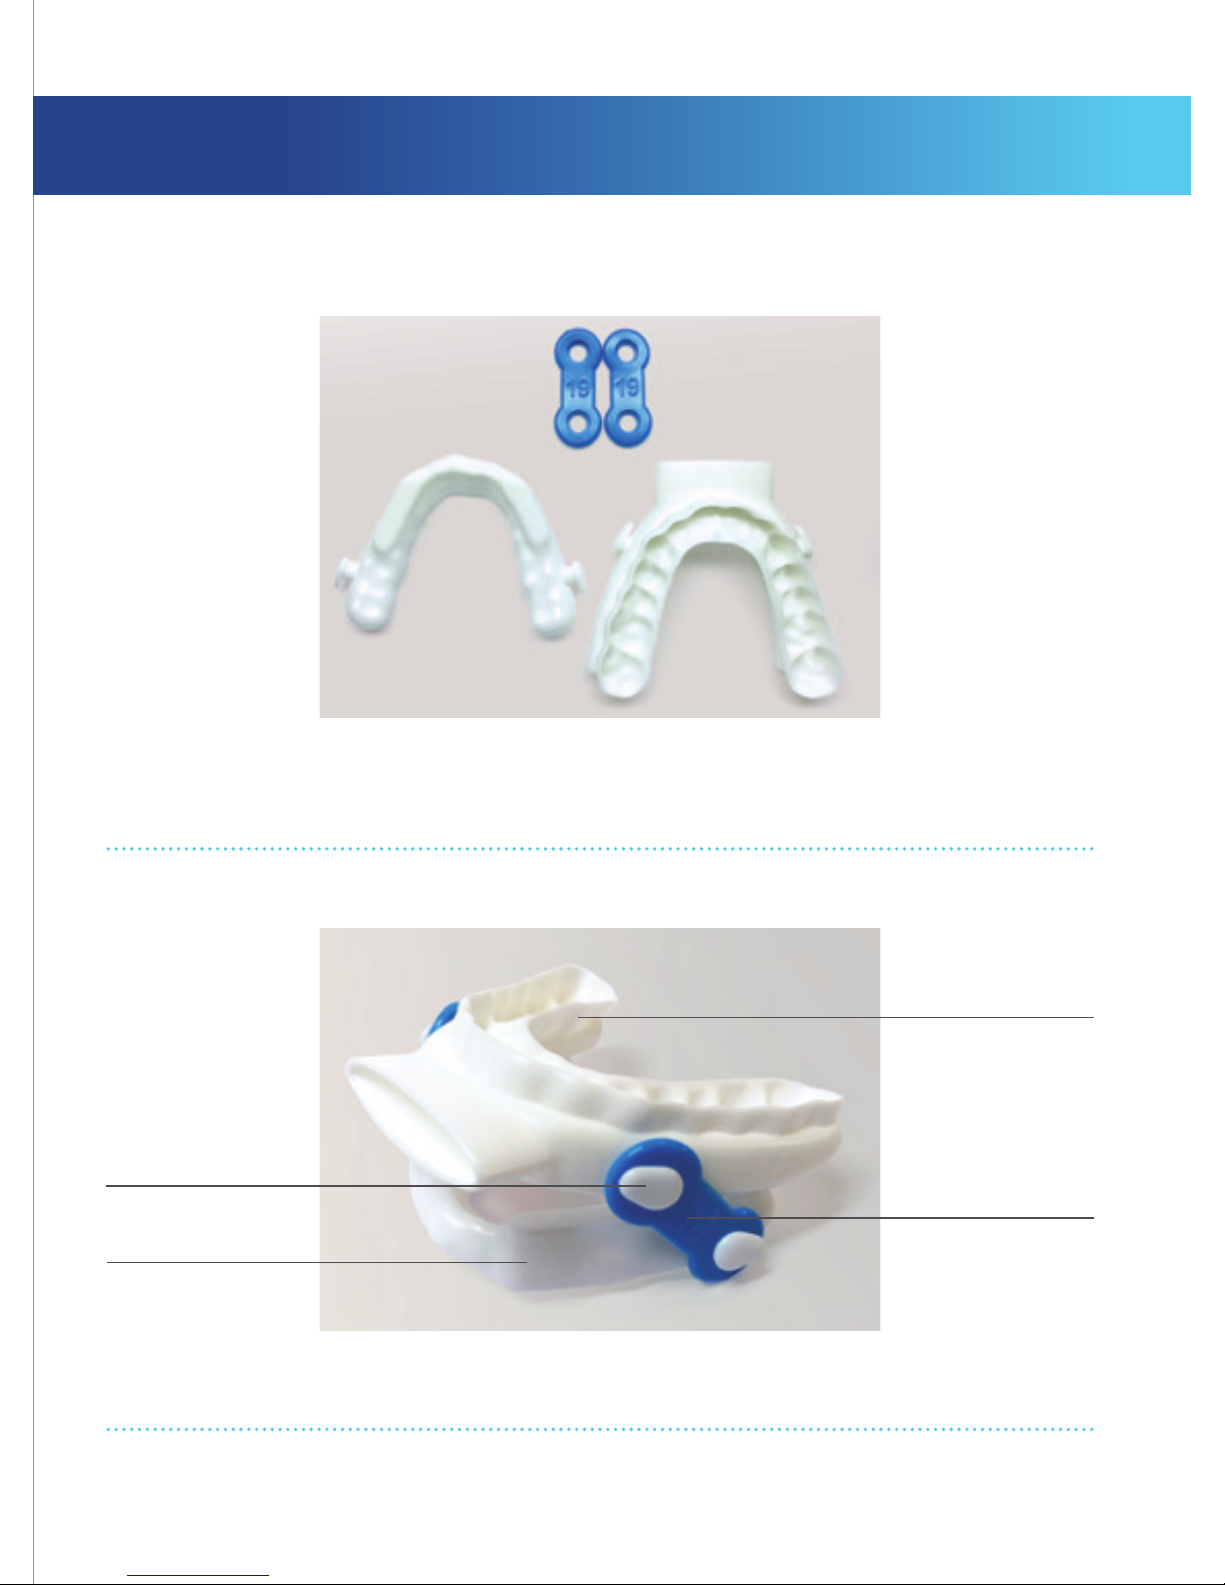
Optima parts (before assembly):
lower tray, upper tray and connector bands
Optima (fully assembled)
Your Optima features the following components:
OPTIMA DESCRIPTION
Upper tray
with airway
Connector band
Lug for attaching
connector band
Lower tray
Page 6

4
OVENTUS
YOUR OPTIMA KIT
Your customised Optima comes fully assembled with 19mm
length connector bands*. The Optima kit contains:
• Two sets of connector bands to adjust titration. Each set
of bands has 9 length size options ranging from 13-21mm.
The size is marked on the band.
• Oventus tub
• Instructions for use
• Warranty
• Antibacterial cleanser tablets
It is important that you check the contents of your
personalised Optima kit and make sure that you nd
everything listed above. Please contact your Healthcare
Professional if anything is missing.
*
In some instances, your Healthcare Professional may recommend a
dierent starting length for your connector bands based on your
jaw anatomy.
Page 7
5
OVENTUS
HOW YOUR OPTIMA DEVICE WORKS
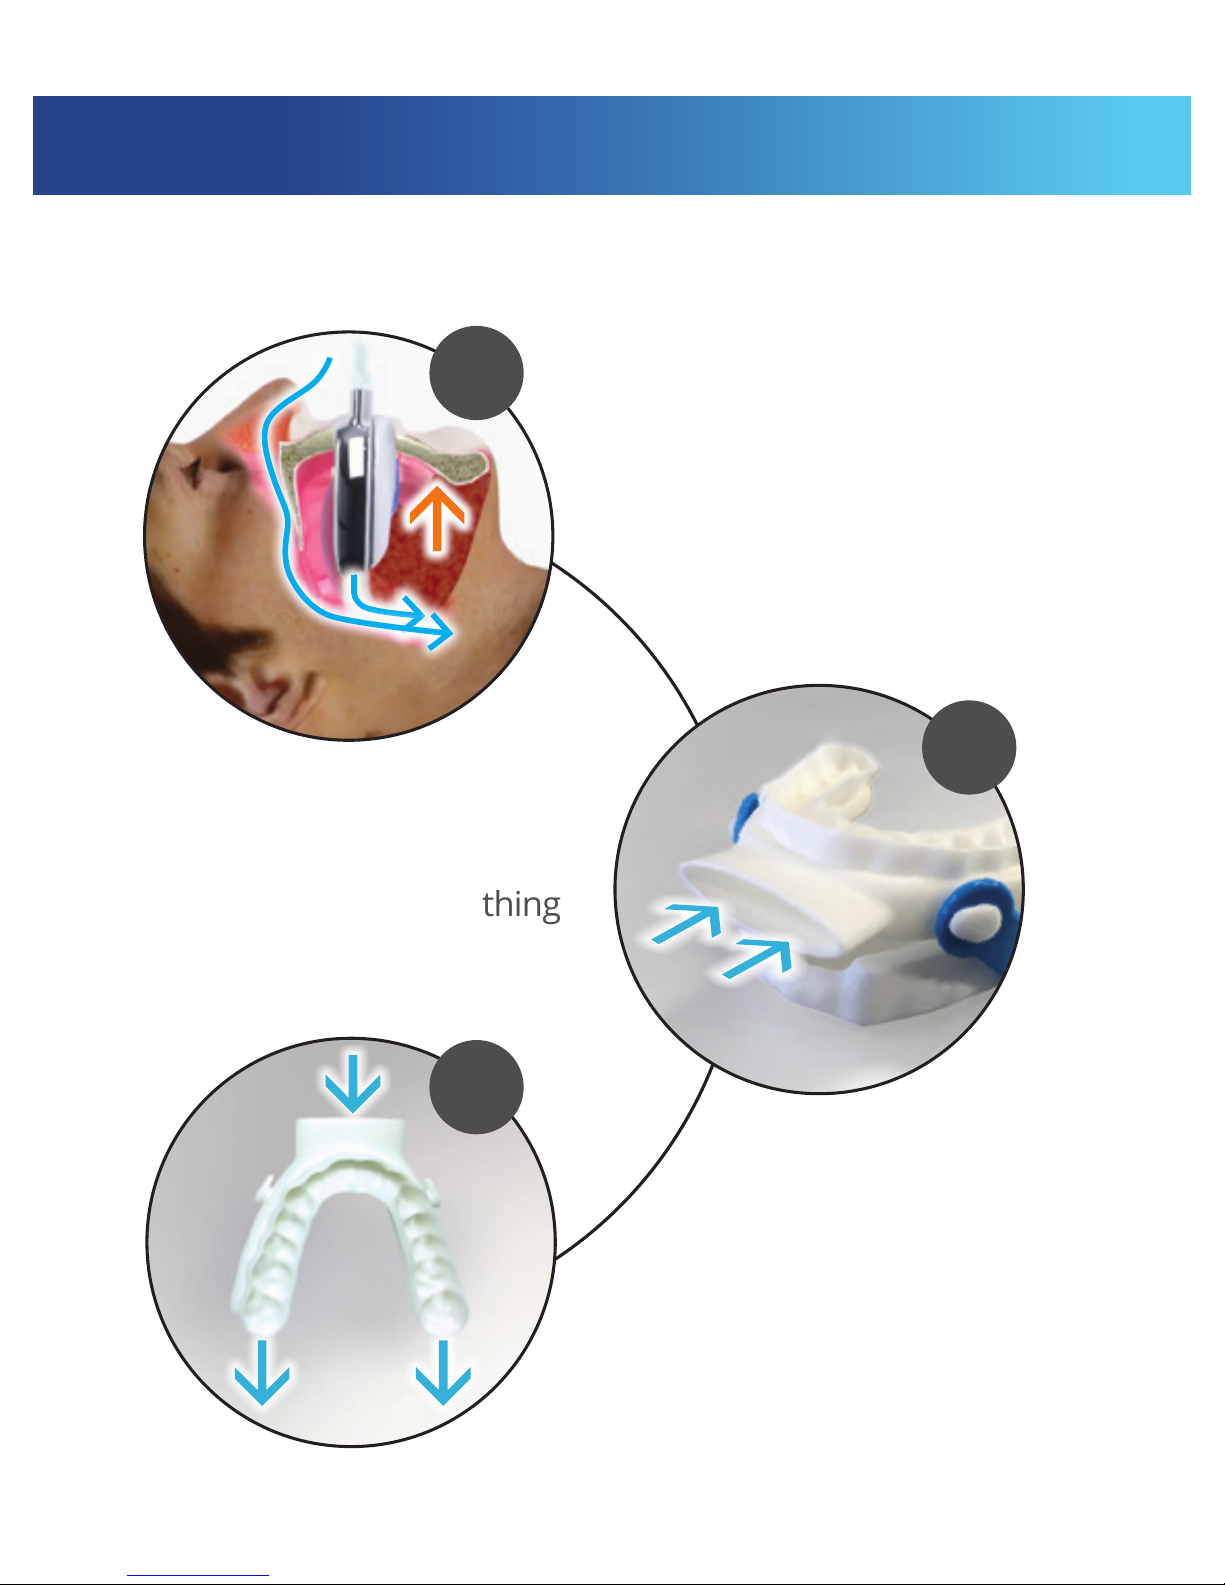
Provides a unique air channel
in case of nasal congestion
or diculties with breathing
through the nose.
Brings/pulls the lower jaw
forward (this opens the airway
and stabilises the tongue)
The air channel allows the
air to ow smoothly to the
back of the airway.
1
2
In general, the Optima works in the following way.
3
Page 8
6
OVENTUS
THE OPTIMA DEVICE
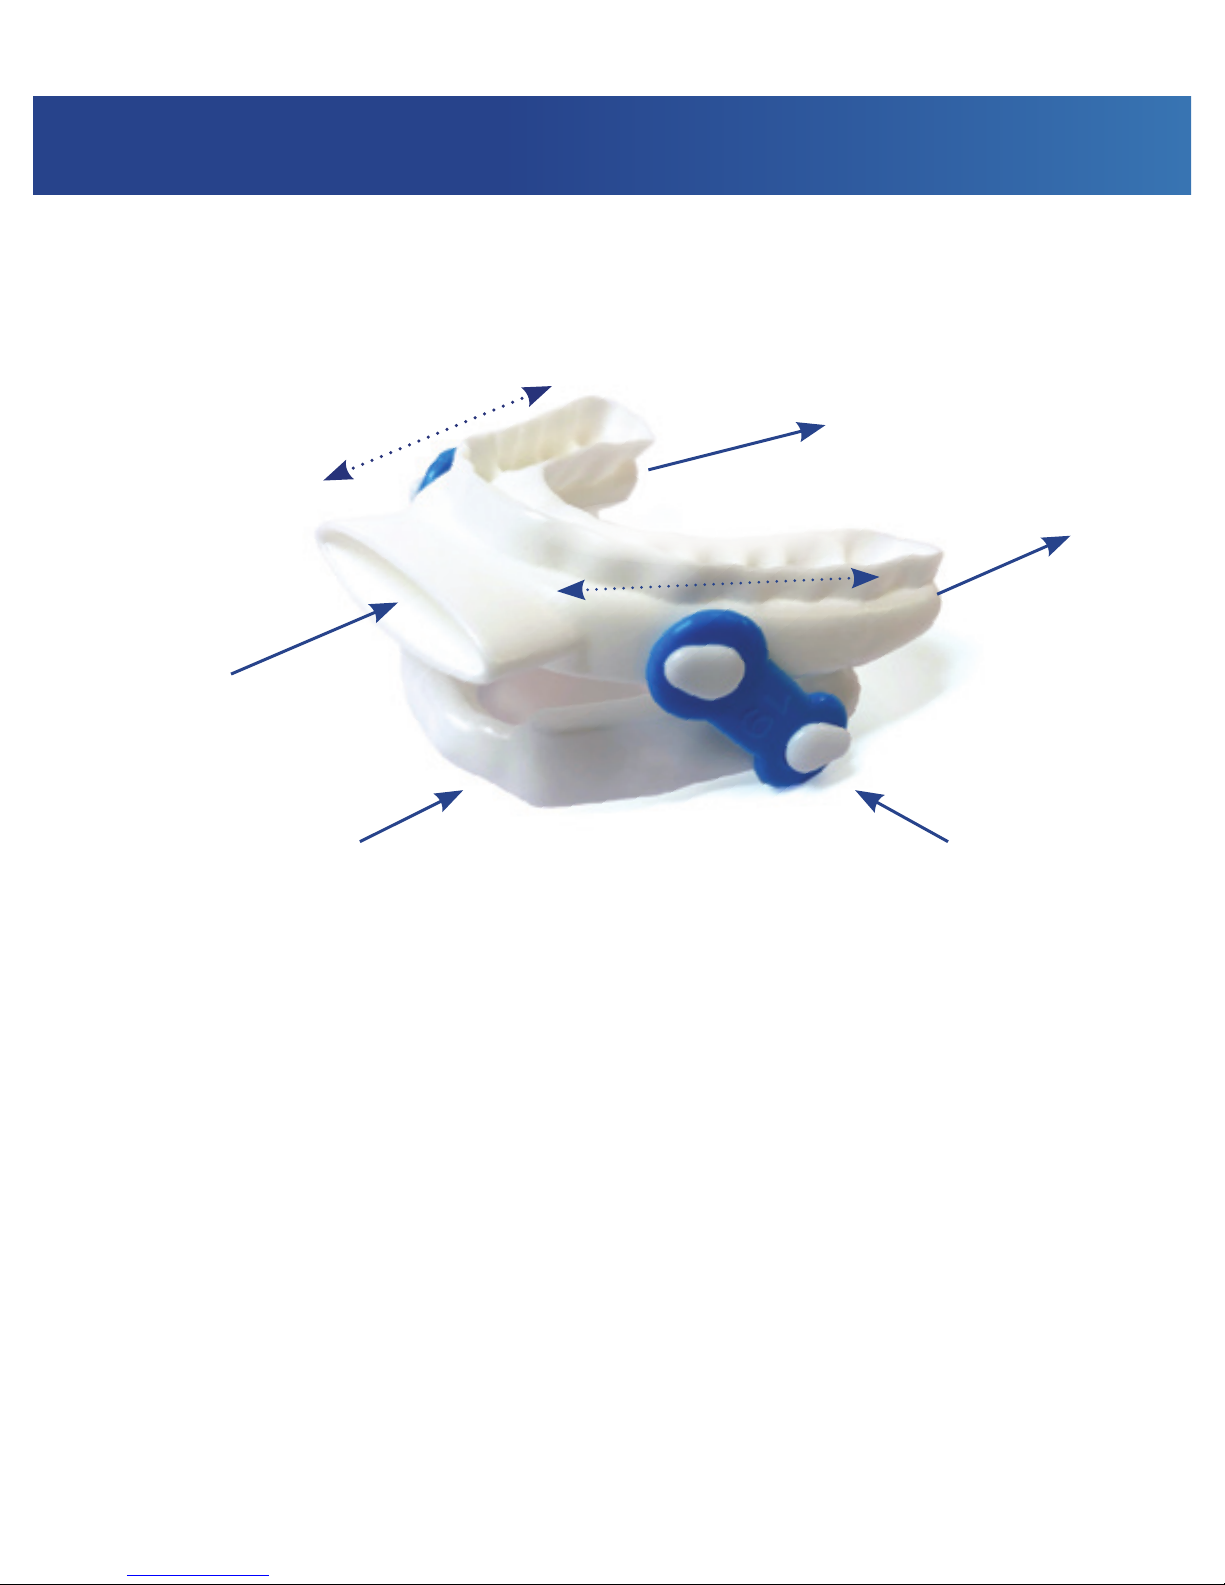
Air in on inhalation,
air out on exhalation
(together with nose)
Lower jaw adjustment helps
clear tongue obstruction
Connector band enables
adjustment to optimise treatment
Air channel at back of
device enabling air ow
Hollow airway bypasses
multiple obstructions
In order manufacture the Optima, an image of the teeth
using 3D scanning or impressions are taken. The information
is sent to a laboratory where your customised Optima
will be made. When the Optima is ready, your Healthcare
Professional will t and assess how well the Optima works to
treat your snoring and/or OSA.
Hollow airway bypasses
multiple obstructions
HOW YOUR OPTIMA DEVICE WORKS CONTINUED
Page 9

7
OVENTUS
The Optima consists of the following parts:
• Upper tray (upper teeth)
• Lower tray (lower teeth)
• Connector bands
The upper and lower trays are connected to each other
by the connector bands and will be delivered assembled:
– The bands are used to move the lower jaw (i.e. adjust
the trays) forward or backward.
– In order to adjust the trays to your specic needs,
the bands come in dierent lengths to enable
titration adjustment. There are 9 length size options
ranging from 13-21mm.
– Your new Optima is delivered fully assembled with the
19mm connector band as the recommended starting
titration length for all new users*.
– The shorter the connector band, the further the lower
jaw is moved forward.
– After the initial use, your Healthcare Professional will
help you to nd the right length of connector bands to
receive the best therapy.
*
In some instances, your Healthcare Professional may recommend a
dierent starting length for your connector bands based on your
jaw anatomy.
Page 10

The Optima trays should never be worn separately.
Always wear both trays (assembled with the
connector bands) when using the device.
8
OVENTUS
INSERTING YOUR OPTIMA
BEFORE YOUR SLEEP PERIOD
1. Inspect your Optima; make sure the air channel is clear.
2. Make sure your Optima is connected with the bands and
they are the same length on each side.
3. Make sure your Optima is clean.
4. Rinse the Optima and brush your teeth before inserting.
5. Using your thumbs, insert the upper tray and gently
“push” onto the upper teeth; the tray should t snugly.
6. Insert the lower tray, “push” onto the lower teeth; the tray
should t snugly.
REMOVING YOUR OPTIMA
AFTER YOUR SLEEP PERIOD
7. Remove your Optima by gently opening your mouth, lift
up the lower tray and then pull down on the upper tray.
You might feel a little “resistance” initially.
8. Make sure BOTH trays are loosened before removing.
USING YOUR OPTIMA
Page 11

9
OVENTUS
FINDING THE RIGHT TITRATION SETTING
• Your Optima will be delivered ready to use, tted with
the 19mm connector bands as the recommended
starting titration for all new users*.
• During the initial phase of using your Optima, you will
work closely with your Healthcare Professional to nd
the correct position. ** It is important that you wear your
Optima each sleep period according to your Healthcare
Professional recommendations**
• Ensure the connector band lengths are the same on
each side.
• The titration may take several weeks or longer to achieve
the best therapy.
• If your Healthcare Professional suggests a shorter or
longer length band, refer to the diagram on page 10 for
length and titration information.
• After your settings have been established, you should
wear your Optima each sleep period.
*
In some instances, your Healthcare Professional may recommend
a dierent starting length for your connector bands based on your
jaw anatomy.
Page 12
10
OVENTUS
USING YOUR OPTIMA
CONTINUED
TIPS
• If you are having problems
adapting, try wearing your
Optima while watching TV
or reading. It will help you
to get used to using it.
• It might be helpful for you
to track how much you use
your Optima, this will help
you to get into the habit
of applying your Optima
before your sleep period.
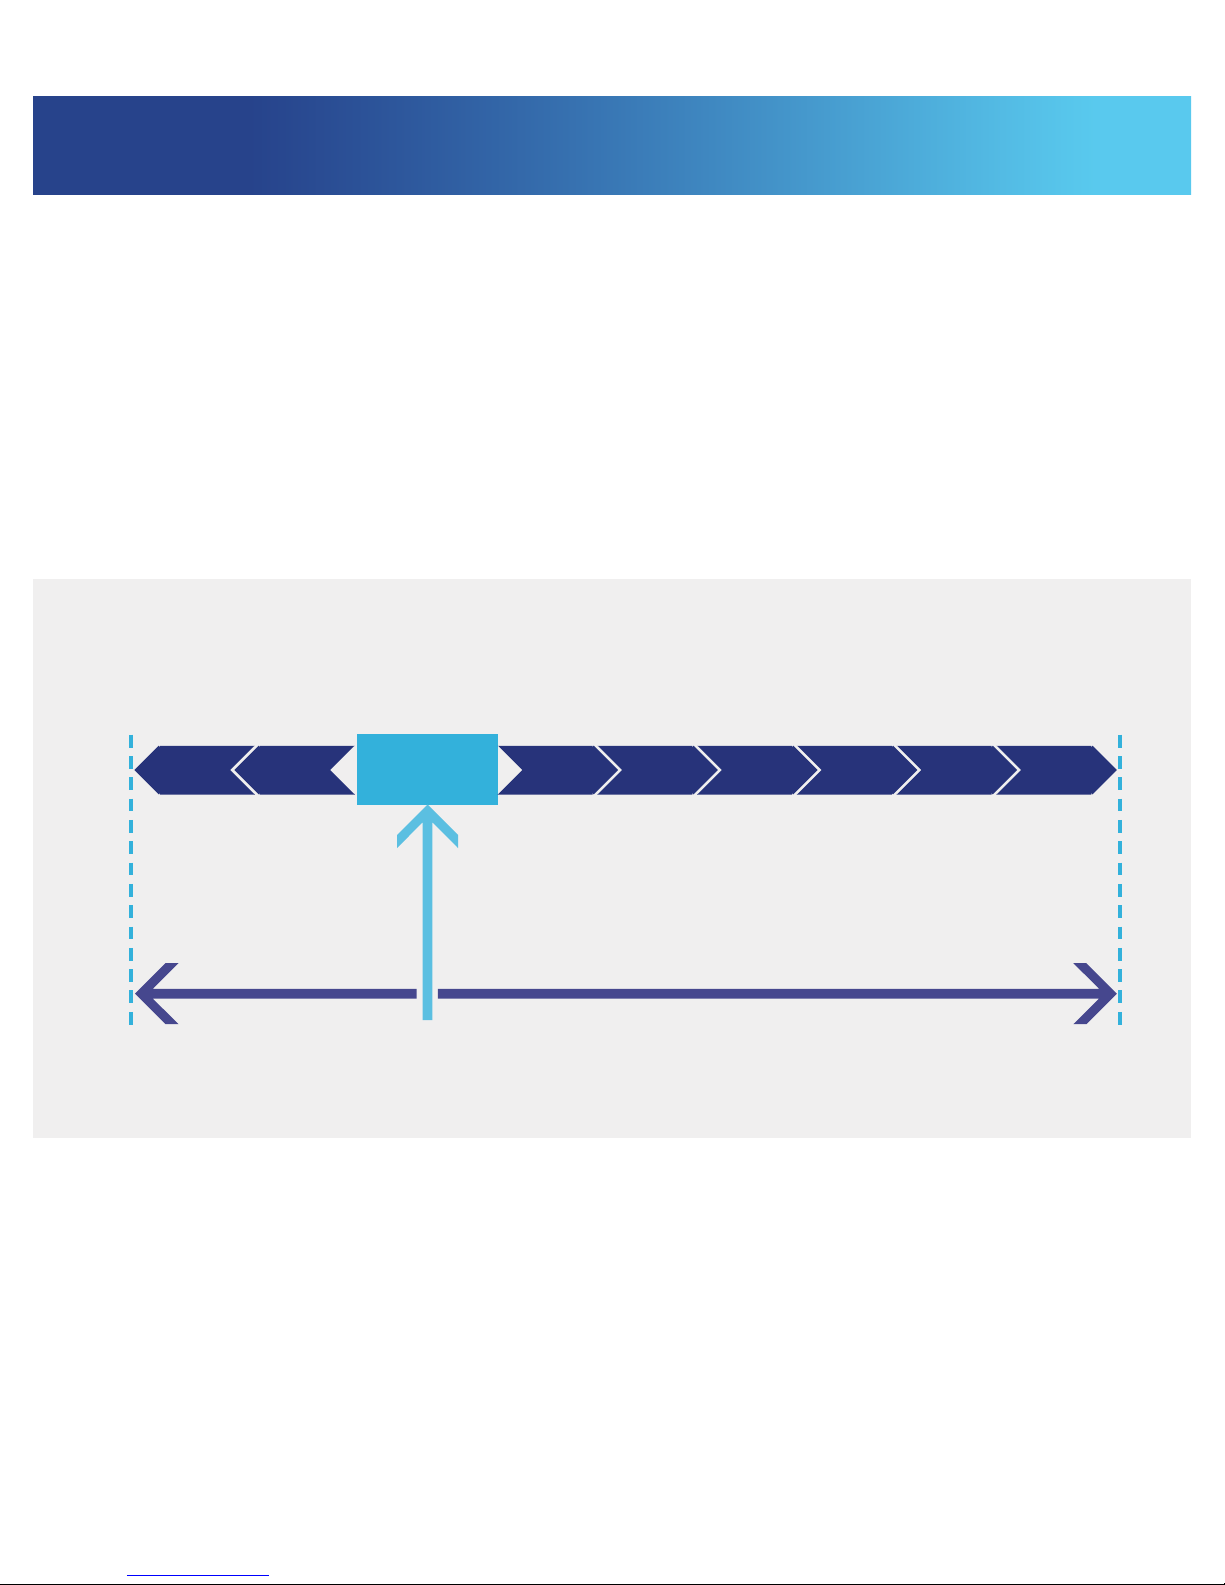
The table below shows the lower jaw positioning range that
can be set by the connector band lengths. This is a guide only.
The recommended starting titration for new users in most
instances is the 19mm connector bands.
NOTE: The shorter the connector band, the further the lower jaw is
advanced. The longer the connector band, the less the lower jaw is advanced.
OPTIMA LOWER JAW POSITIONING RANGE
Titration length range: 13-21mm. The shorter the connector
band length, the further the lower jaw is moved forward
Longer length band = less advanced jaw
Shorter length band = further advanced jaw
Minimum
lower jaw
advancement
Maximum
lower jaw
advancement
Starting
band titration
19mm
Advancement 6mmRetrusion 2mm
18mm20mm21mm 17mm 16mm 15mm 14mm 13mm
Page 13

11
OVENTUS
• Detrimental eects on
sleep-quality and health
• Increases the risk of obesity
• High blood pressure
• Stroke
• Heart attack
• Type-2 diabetes
• Depression, impotence,
mood disorders and
increased risk of motor
vehicle and workplace
accidents
WHAT ARE
THE RISKS
OF OSA?
The Optima device is
contraindicated for patients who:
• Have central sleep apnoea
• Have severe respiratory
disorders
• Have loose teeth or
advanced periodontal
disease or restorative needs
• Are under 18 years of age
CONTRA-
INDICATIONS
It is important to use your Optima during each sleep period
to receive the best possible outcomes.
Page 14
12
OVENTUS
RECOMMENDED AFTER EACH USE
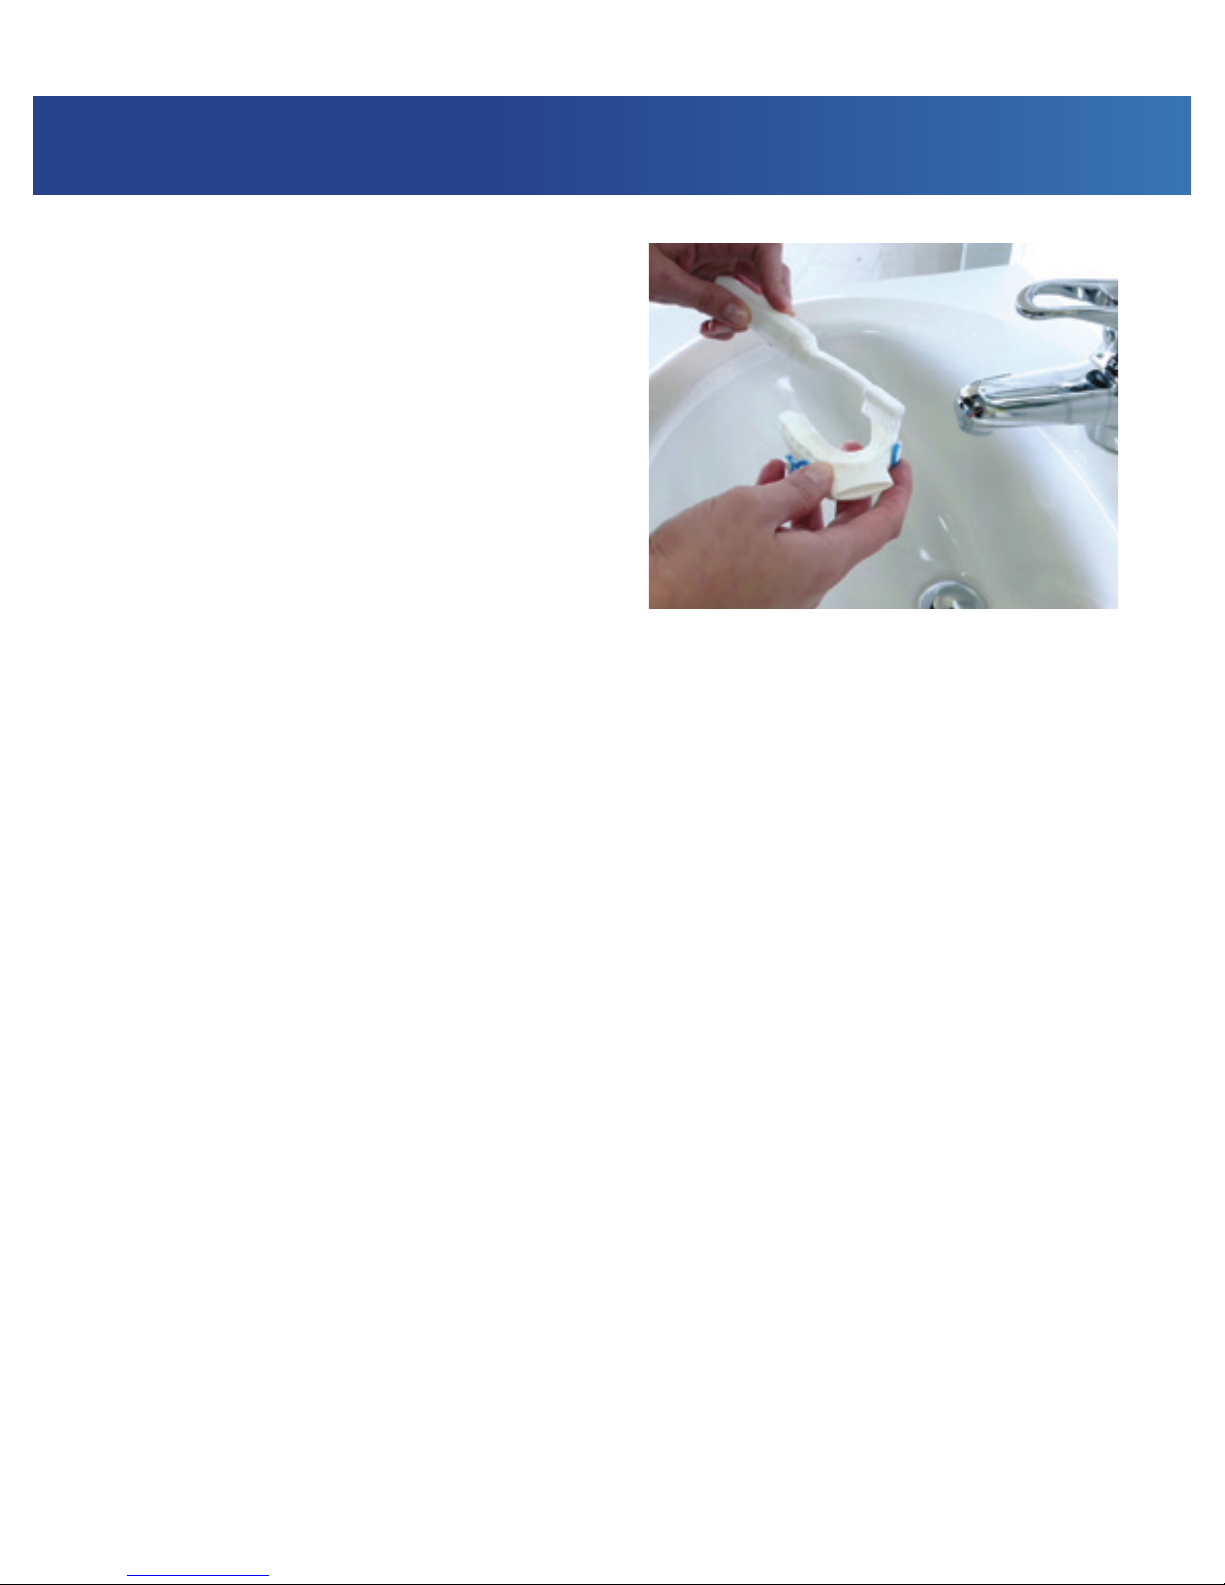
• Rinse the Optima with
lukewarm water and
clean with a soft clean
toothbrush (not the same
toothbrush you use to
brush your teeth, as
toothpaste can damage
the device).
• Thoroughly rinse the device with lukewarm water,
including through the airway entry and exit points.
• Ensure the airway entry and exit are free from any debris.
• Dry your device after each cleaning with a clean tissue or
towel and shake to clear water from the airway.
• Return to the Oventus tub to store, with the lid open to
allow the internal airway to dry.
RECOMMENDED TWICE A WEEK
• Clean your Optima device more thoroughly twice a week,
or more frequently as required, using the provided
Oventus tub and an antibacterial cleanser (free from
chlorine, bleach, acetic acid or alcohol-based products).
• Conduct the daily cleaning as above.
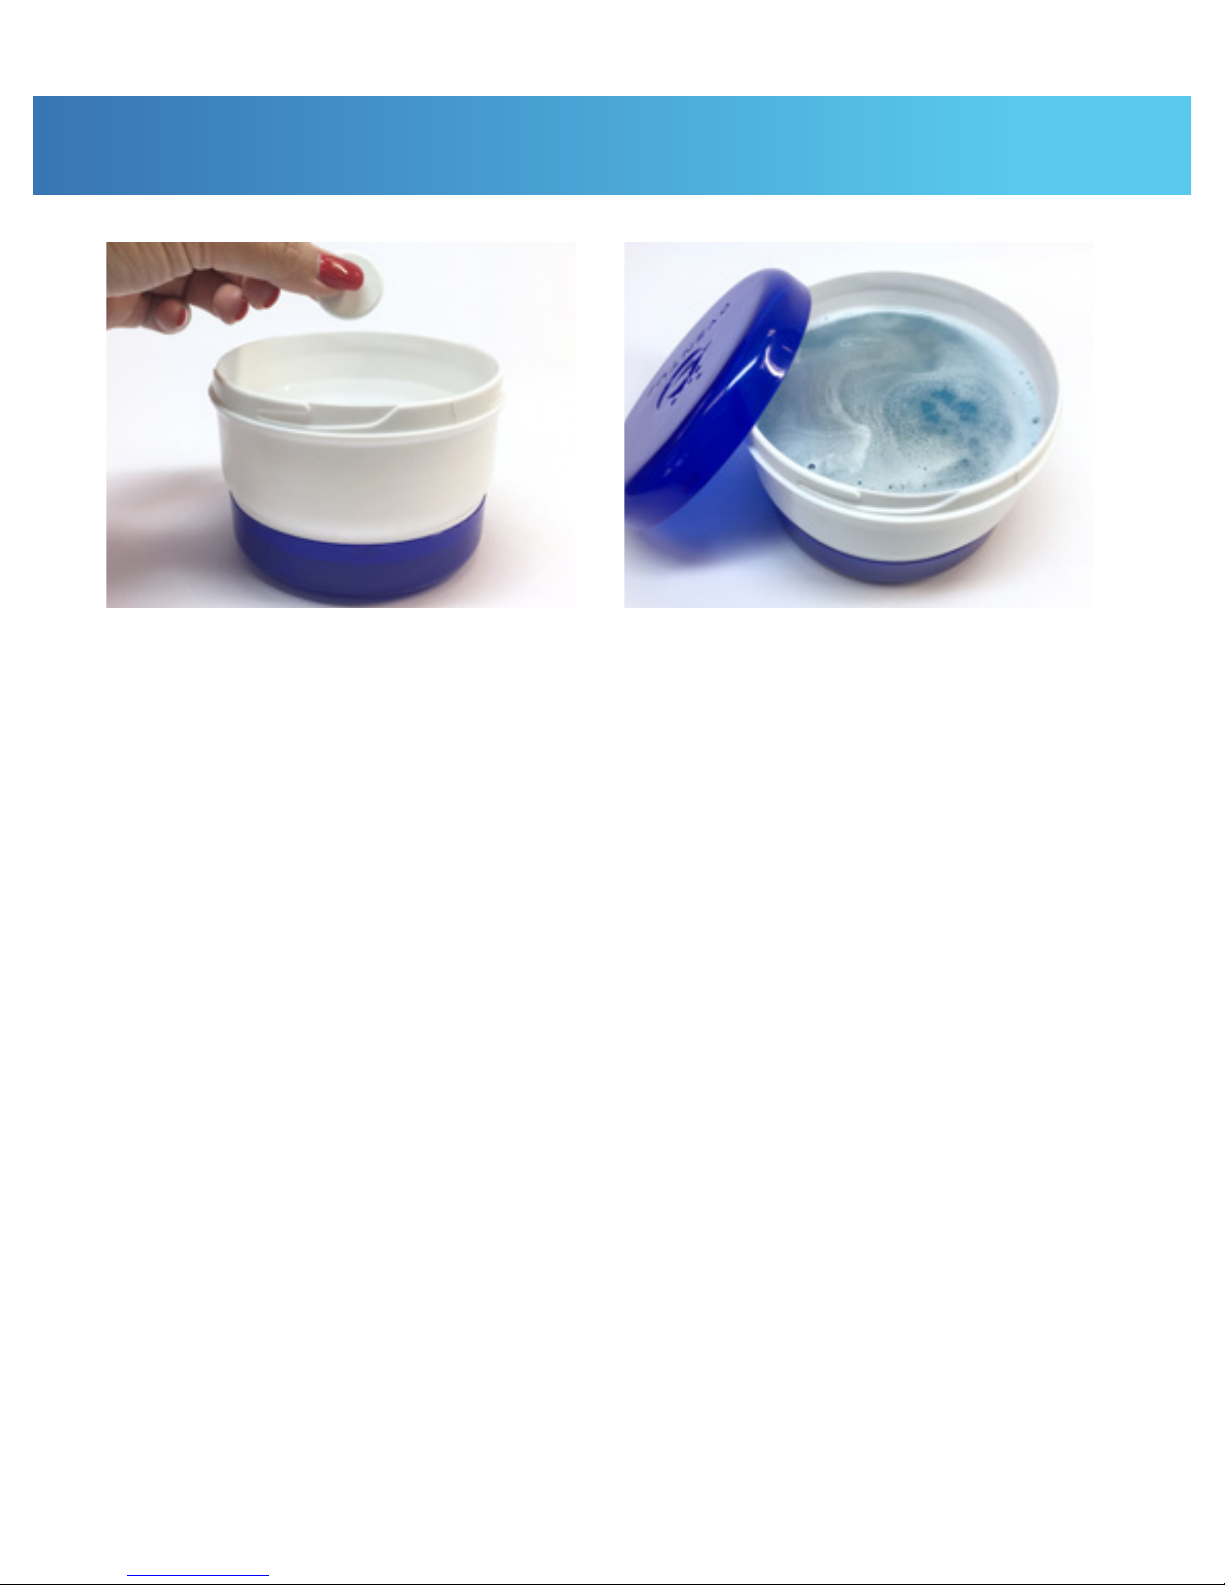
• Fill the Oventus tub provided about ¾ full (about 10mm
below the top) with warm water.
OPTIMA CLEANING INSTRUCTIONS
Page 15
13
OVENTUS
• Place the antibacterial cleanser and the Optima device
in the water so that they are completely submerged and
leave them to soak, following the recommended time
according to the cleanser packet instructions.
• Remove and rinse both the Optima device and Oventus
tub thoroughly with lukewarm water, including through the
airway entry and exit points, to remove the cleaning agent.
• Dry your device after each cleaning with a clean cloth.
• Return to the Oventus tub to store, with the lid open to
allow the internal airway to dry.
• The Optima may change colour over time, which could
be due to certain foods/liquids. This will not change
the eectiveness of the device. If you use coloured
mouthwash after cleaning your teeth, wait 15 minutes
before inserting your Optima, to avoid discolouration. For
best results, follow these provided cleaning instructions.
Page 16

14
OVENTUS
GENERAL WARNINGS AND PRECAUTIONS
Use of the Optima may cause the following side eects:
• Tooth movement, discomfort, pain or changes in
dental occlusion
• Gum irritation, gingival or dental soreness
• Pain or soreness to the temporomandibular joint (TMJ)
• Dry mouth or excessive salivation
• Cheek or tongue pain
• Jaw discomfort, pain or jaw set (clenched jaw)
• Temporary bite change. This will subside approximately
30 minutes after the Optima is taken out of the mouth
after each sleep period
• Permanent bite change may occur as a result of long
term use
If any side eects or ongoing dental issues persist while using the
Optima, please seek advice from your Healthcare Professional.
PRECAUTIONS:
• Never use chlorine, bleach, acetic acid or alcohol-based
products (including mouthwash) to clean your Optima
• Only use warm water, not to exceed 45°C or 113°F
(boiling water may cause damage)
• Do not use toothpaste or mouthwash to clean your Optima
• If you require dental work such as llings, crowns,
extractions etc., these may change the t of your
Optima. You should always discuss this with your
Healthcare Professional
• The Optima trays should never be worn separately
Page 17
15
OVENTUS
MAINTENANCE
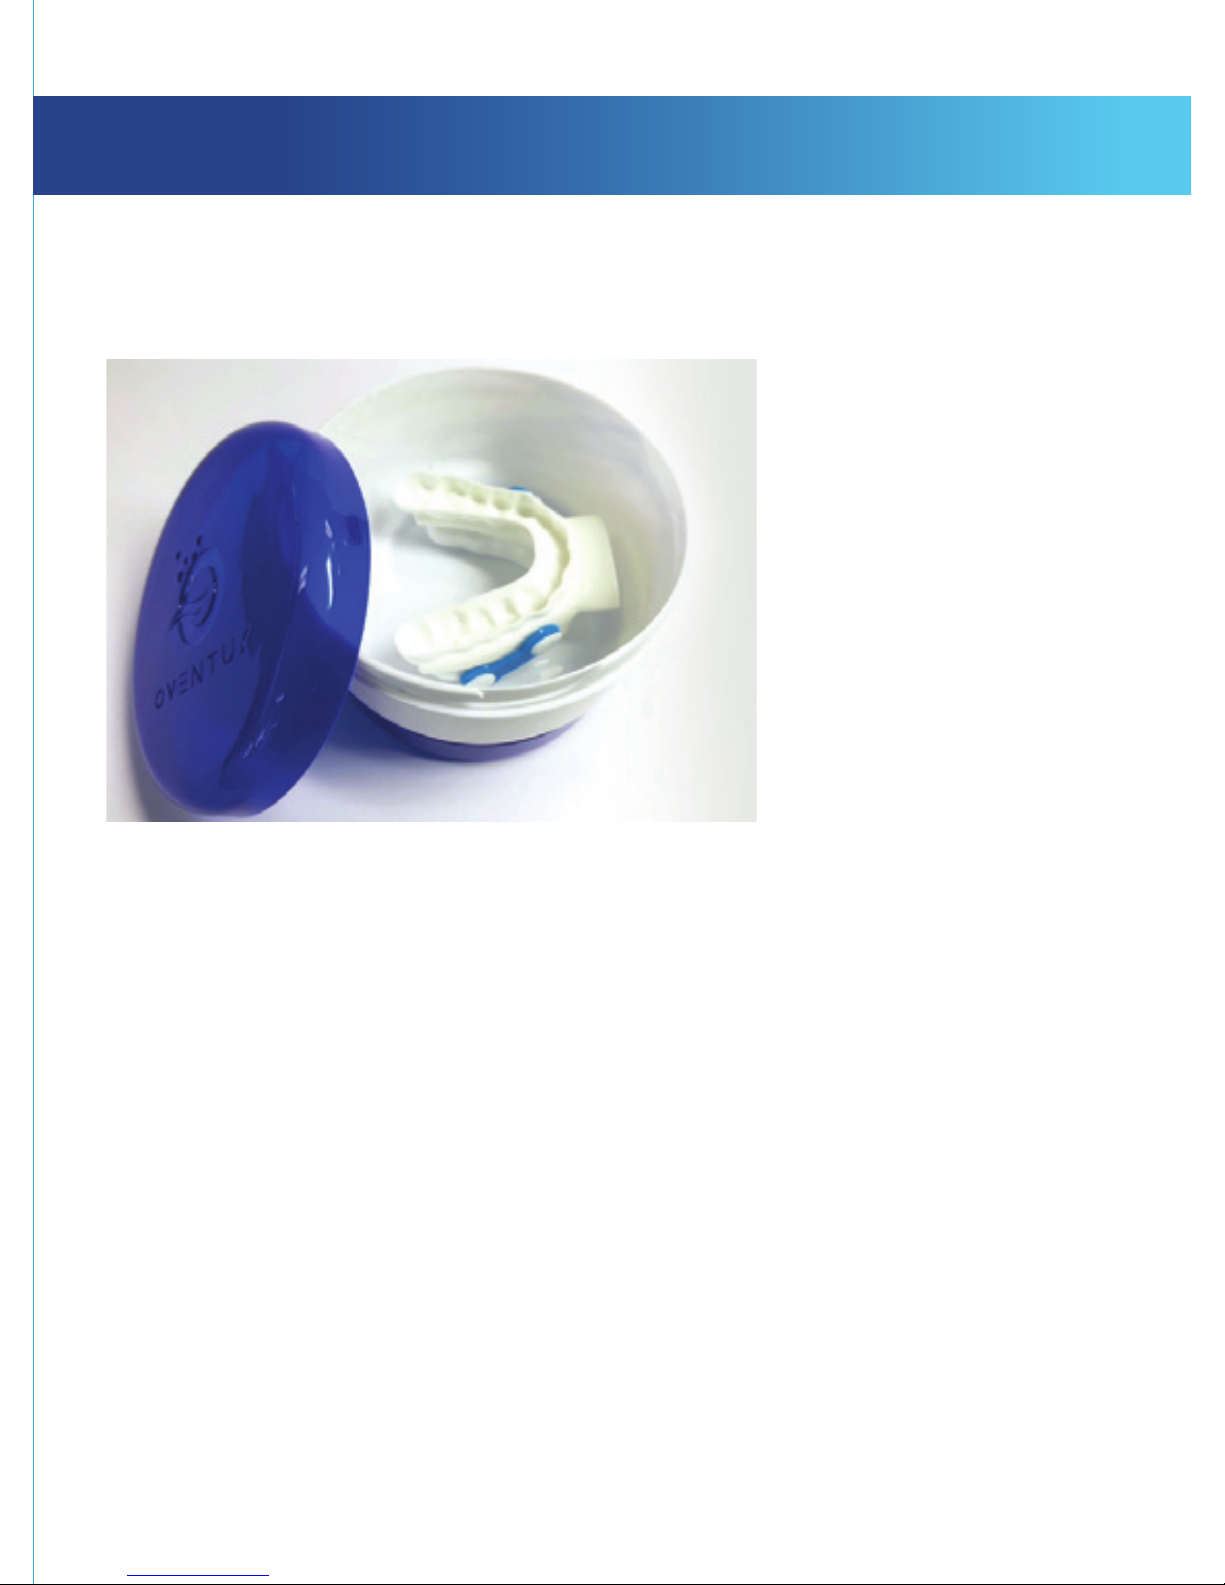
Your Optima should be stored in the Oventus tub provided
as shown, during transport or when not in use.
Keep your device away from sunlight and out of reach of pets
and children.
Once you have determined the band length that optimises
your therapy, you can re-order them in packs of 25. To reorder the connector bands, ask your Health Professional or
visit www.oventus.com.au
The Optima connector bands have a recommended usage
time frame of one month, as usage can aect the band length
and the titration of your device. The connector bands should
be replaced every month or more frequently if required.
Page 18
16
OVENTUS
REPLACING CONNECTOR BANDS
The connector bands are essential for keeping your Optima
device assembled, with the lower jaw set at the chosen
position eg. with 19mm bands. The connector bands need to
be replaced every month as they may lose elasticity. To identify
when both bands need changing, compare their length against
a new band. If the bands are longer or the holes stretch from
circular to oval, it is time to change both bands.
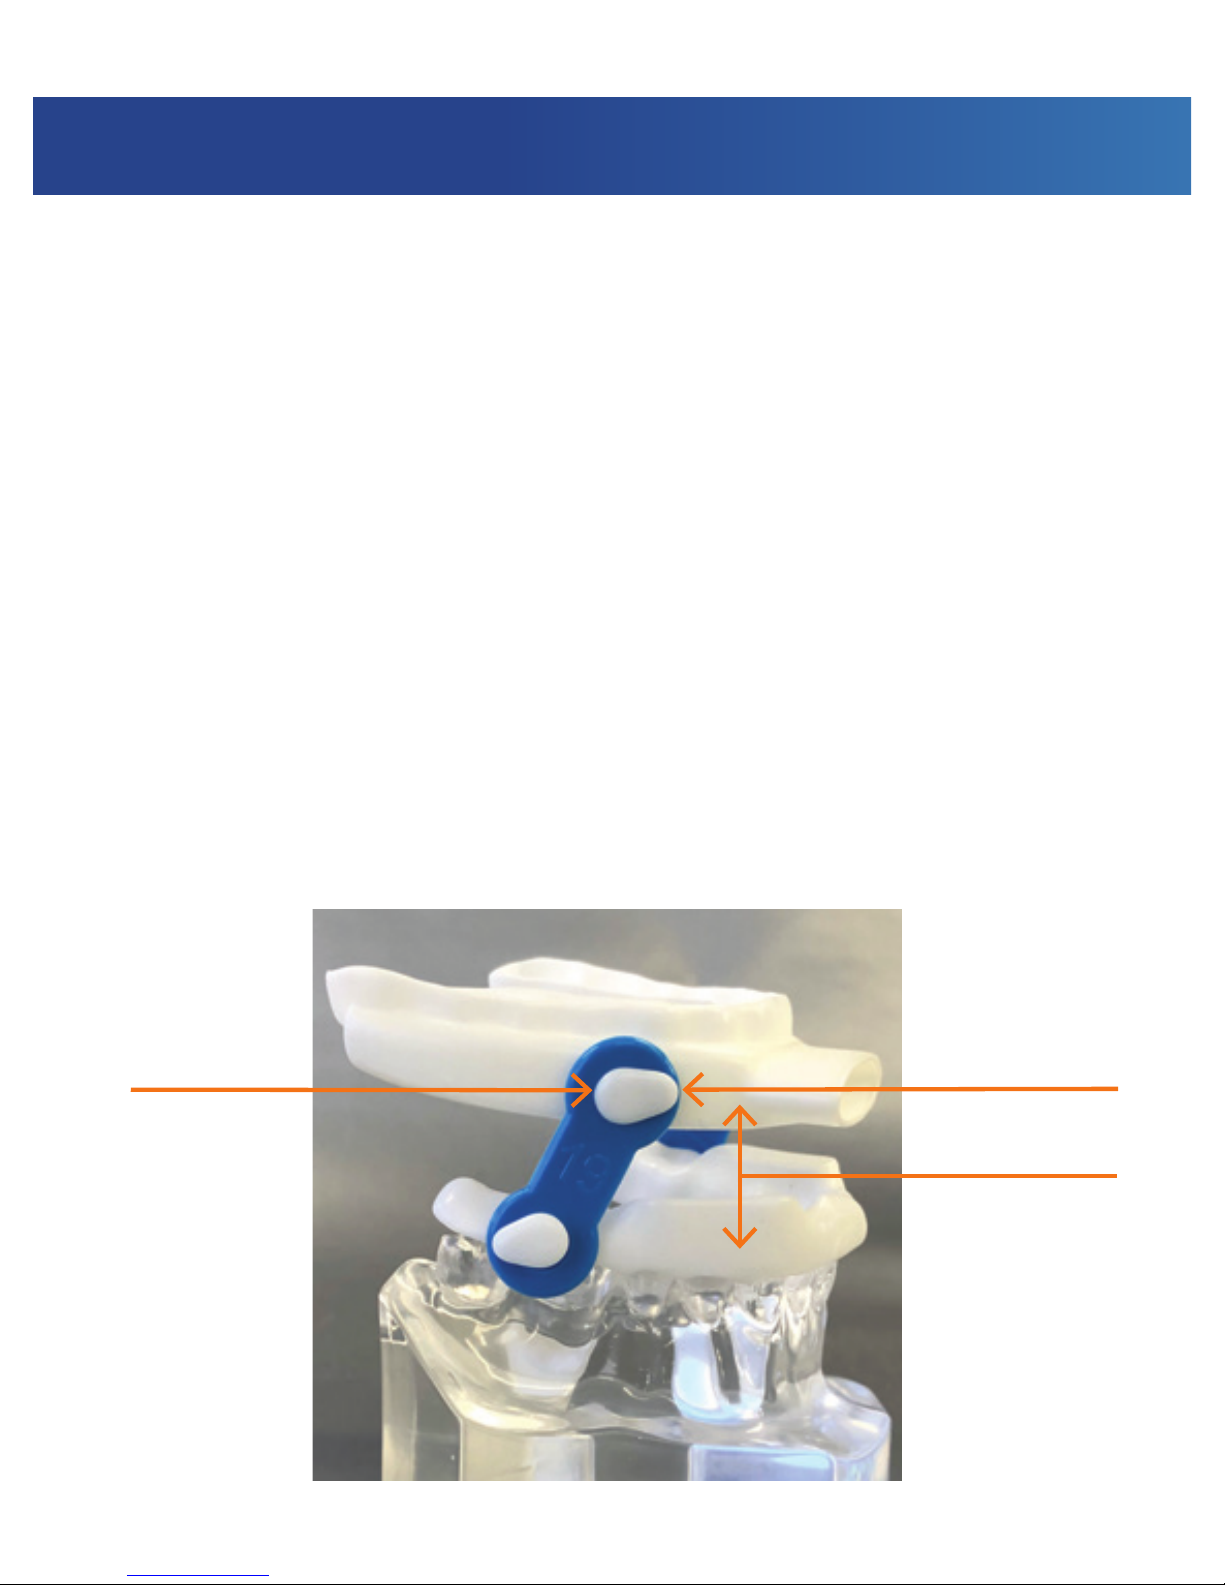
To remove a connector band from your Optima device,
pull the upper and lower device pieces apart (as shown in
diagram). Peel the band away from the wider end of the “lug”
and o the “lug” point.
To apply a connector band, hook the band over the pointed end
of the “lug” and pull gently to hook over the wider “lug” end.
Pointed
end of lug
Separate upper
and lower device
parts as shown
to remove
connector bands
Wider
end of lug
Page 19

17
OVENTUS
KEEP A LOG OF YOUR OPTIMA TITRATION
It is recommended that you keep a usage log of your Optima
titration setting for the rst month of wear (recording which
length connector bands you try, to advance your lower jaw).
Your entry may be weekly or daily. It may take several weeks
or longer to achieve the best therapy. Refer to page 10 for
the lower jaw positioning range as a guide.
Date
Connector
band length
Comment
EXAMPLE:
1 Sep 2018
19mm After 1 week wearing, still snoring, some dribble.
Changed to shorter band
EXAMPLE:
8 Sep 2018
18mm Still snoring, less dribble. Changed to shorter
band
EXAMPLE:
22 Sep 2018
17mm Worn for 2 weeks. No snoring. Dribble stopped
Page 20

PRODUCT CODE: O2VB R58_Sep 2018
WARRANTY:
Please see the Oventus Warranty Policy Card
included with your device.
MANUFACTURER AND AUSTRALIAN SPONSOR:
Oventus Manufacturing Pty Ltd
1 Swann Road, Indooroopilly,
QLD, 4068, Australia
Ph: (+61) 1300 533 159
(Toll free only in Australia)
[email protected]
www.oventus.com.au
 Loading...