

Page 1
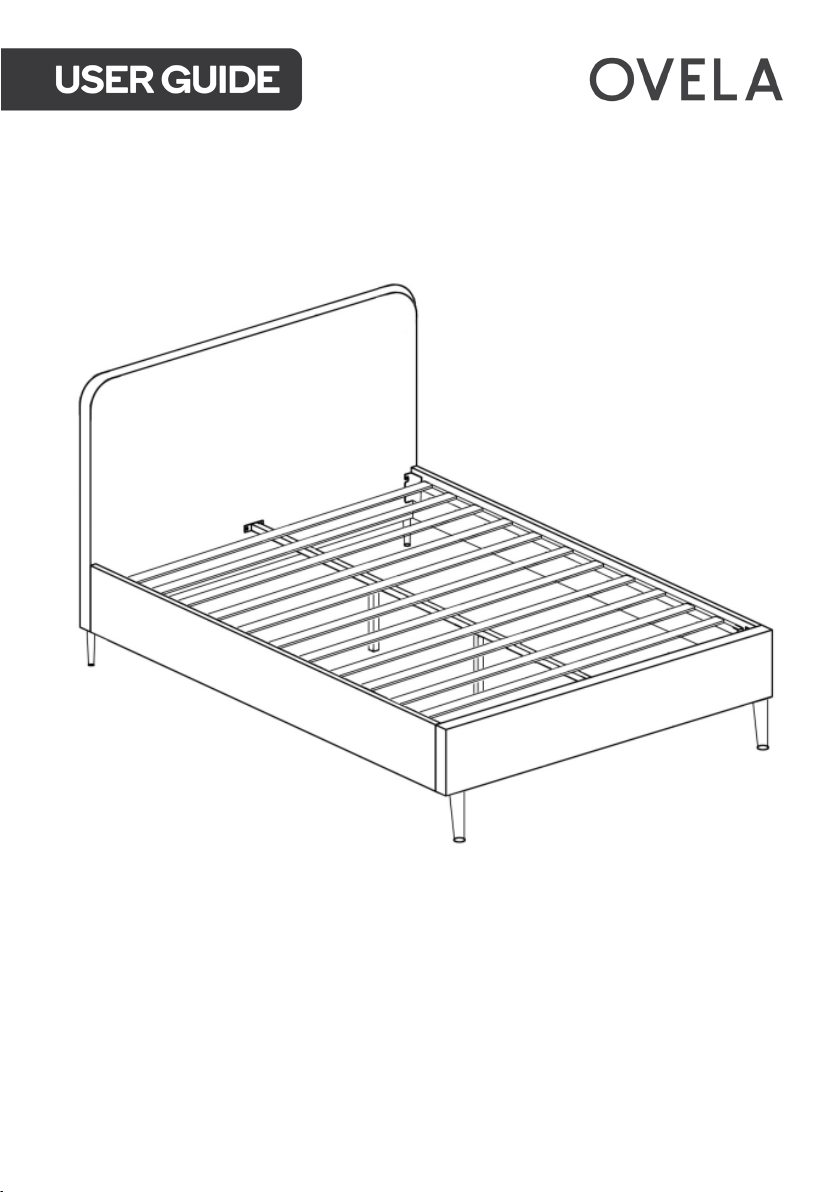
VAIL VELVET BED
DOUBLE / QUEEN
OVVAILVLNDA, OVVAILVLNQA, OVVAILVLBDA, OVVAILVLGDA, OVVAILVLGQA
Page 2

Page 3

SAFETY & WARNINGS
Ensure to read all warnings and instructions in this user guide prior to assembly. Retain for
future reference.
Do not, for any reason, use a power tool to assemble this product. Use of
power may apply excess force on the fixtures, causing damage.
The fittings may loosen over extended use. This is normal for flatpack
furniture. Ensure to periodically check all fittings are secure and tighten when necessary.
CLEANING & CARE
To clean the bed, wipe the surface with a damp cloth or brush with a duster.
Standard furniture polish may also be used to maintain the condition and appearance of
the bed.
Page 4
COMPONENTS
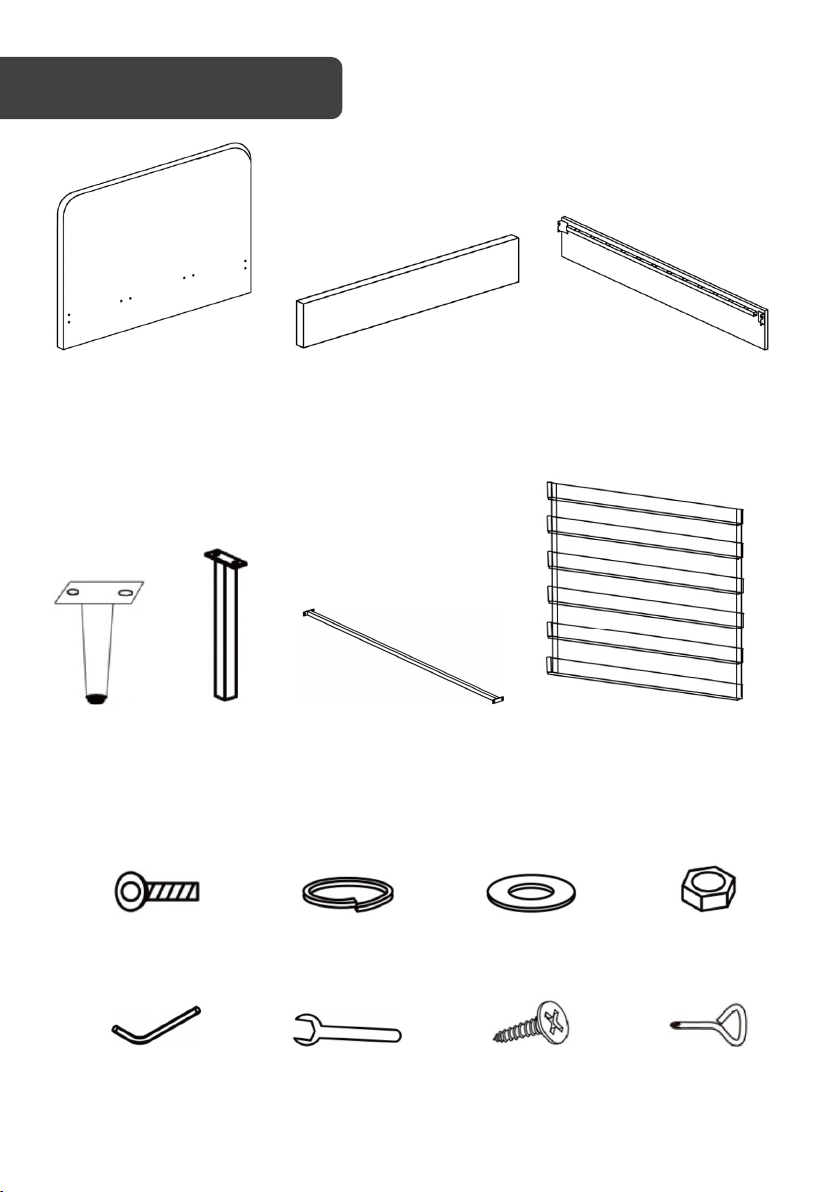
1 Headboard (x1) 2 Footboard (x1) 3 Side rail (x2)
4 Leg (x4) 5 Support (x2) 6 Vertical slat (x1) 7 Horizontal slat assembly (x2)
Hardware
A 35mm M8 bolt (x24) B Spring washer (x8) C Washer (x20) D Nut (x4)
E Allen key (x1) F Wrench (x1) G 25mm M4 bolt (x8) H Phillips head
screwdriver tool (x1)
Page 5
ASSEMBLY
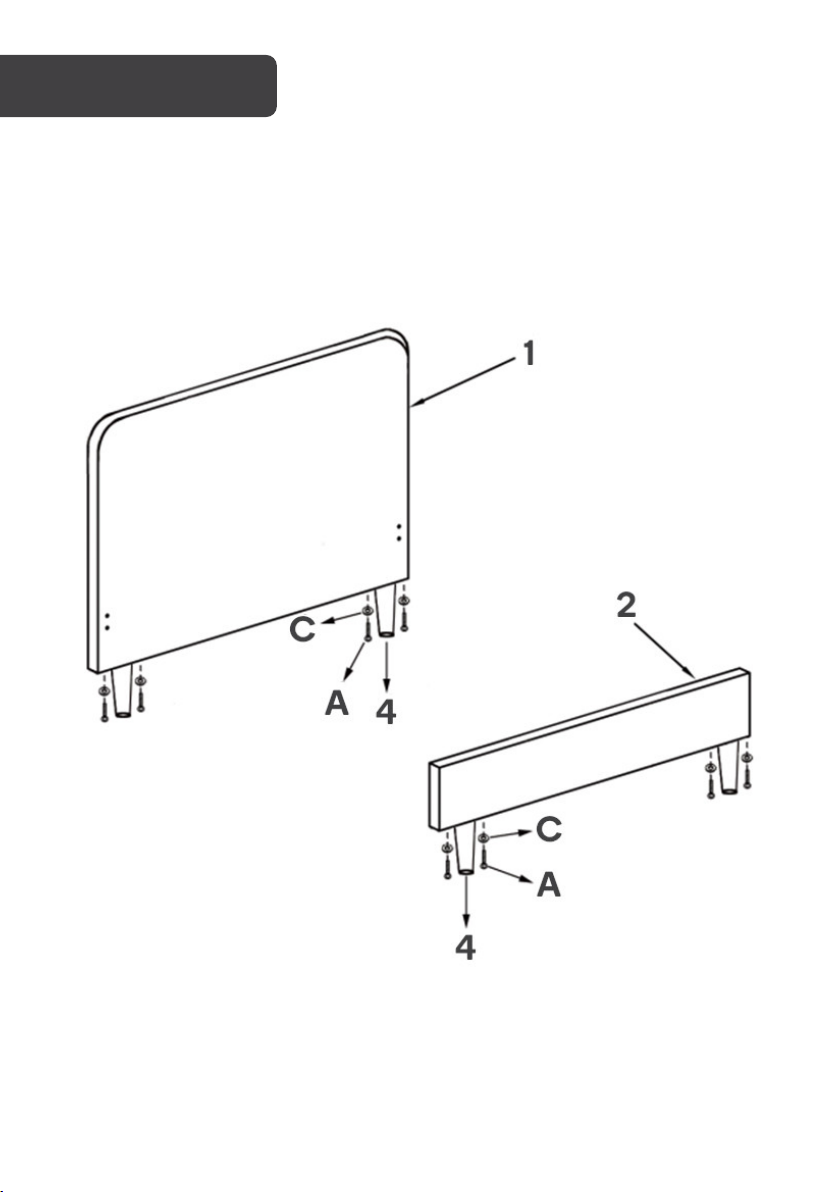
Step 1: Align the holes on the legs (4) to the holes on the headboard (1). Secure the legs (4)
by placing a washer (C) over the hole and screwing through a 35mm M8 bolt (A) using the
Allen key (E).
Repeat this process to secure the legs (4) onto the footboard (2).
Page 6
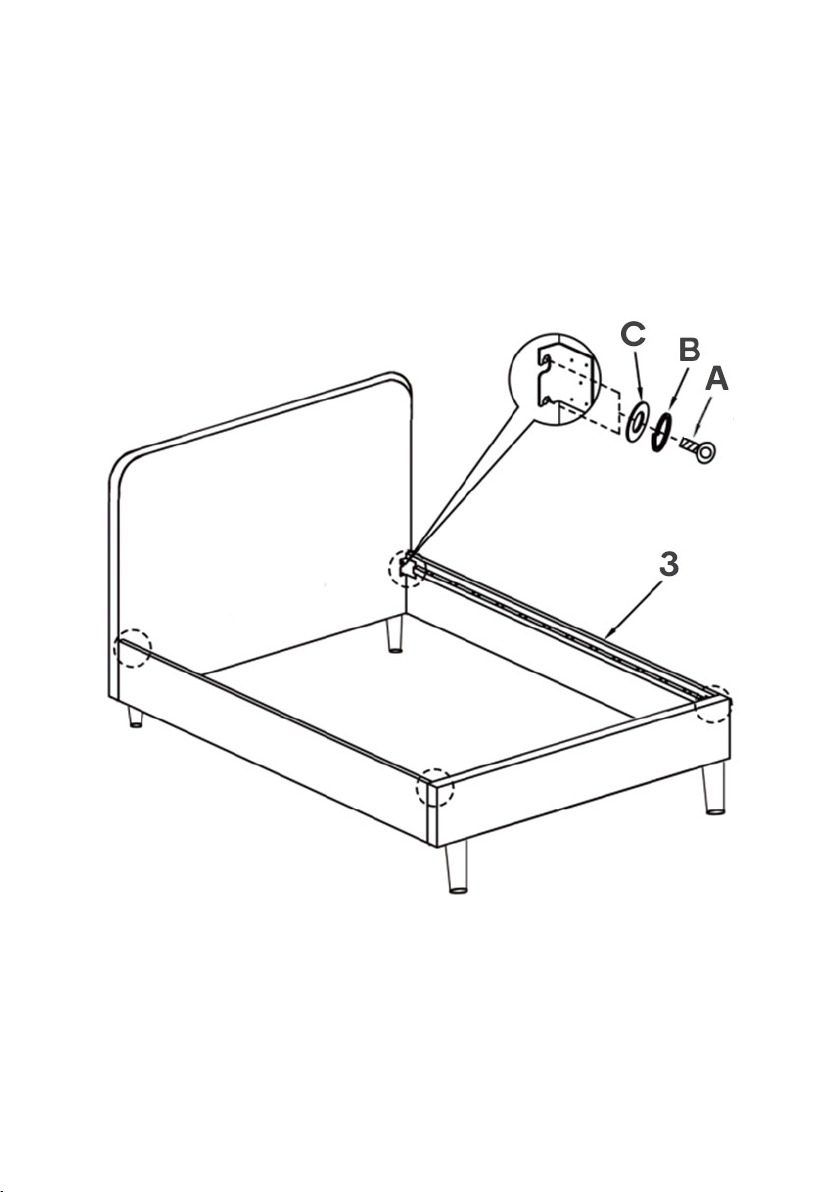
Step 2: Align the two holes on the bracket of a side rail (3) to the holes on the headboard (1).
Place a washer (C) and spring washer (B) over each hole and screw 35mm M8 bolts (A)
through the washers (B, C) using the Allen key (E).
Attach the other end of the side rail (3) to secure it to the footboard (2) the same way, then
repeat the process with the remaining side rail (3) on the other side of the bed.
Page 7
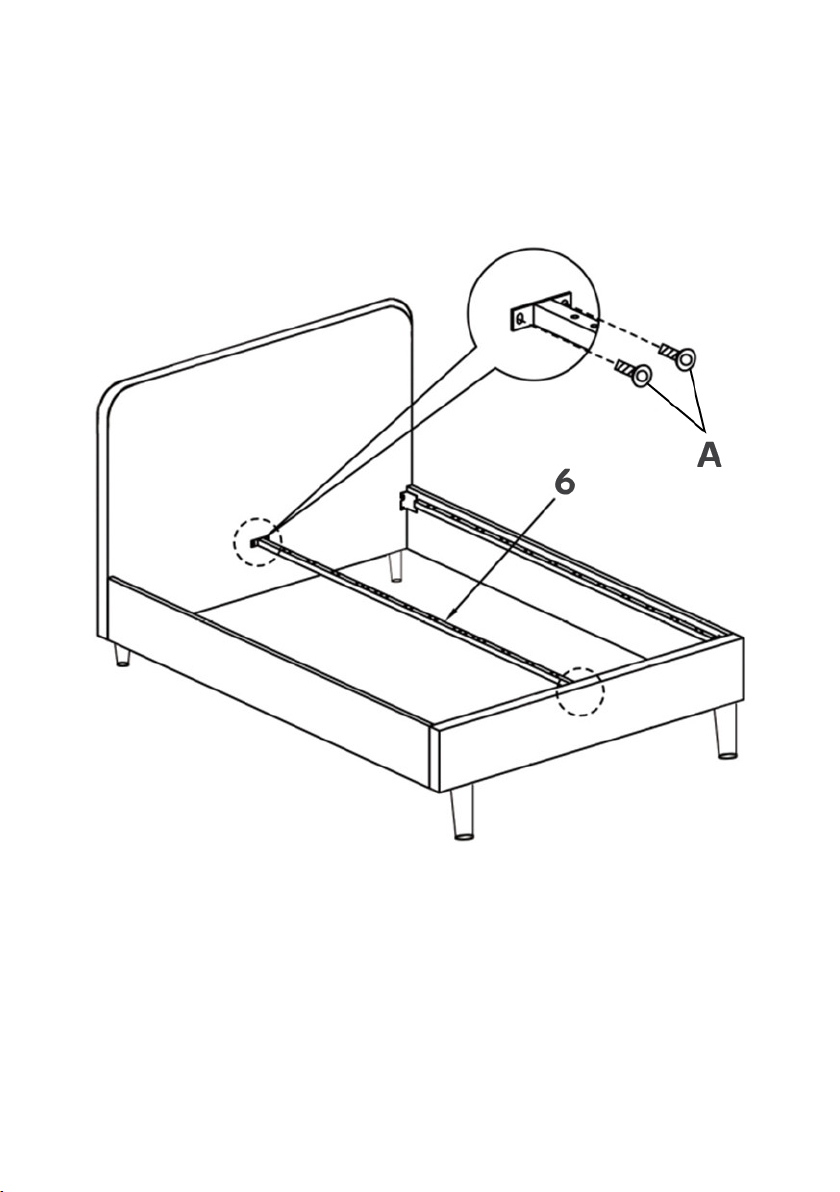
Step 3: Align the holes of a vertical slat (6) with the headboard (1). Using the Allen key (E),
screw through 35mm M8 bolts (A) to secure it in place. Attach the other end of the vertical
slat (6) to the footboard (2) the same way.
Page 8
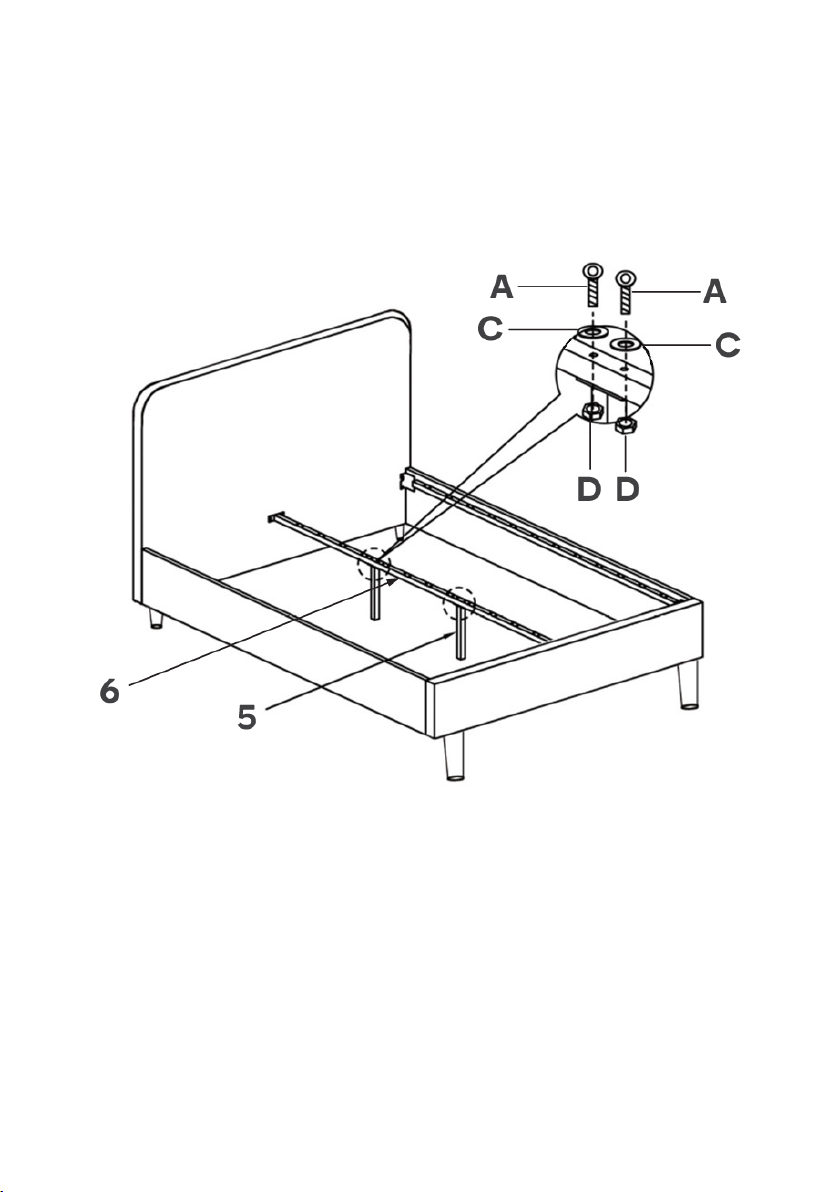
Step 4: Align the holes on the supports (5) under the holes marked on the vertical slats (6).
Place a washer (C) on top and insert a 35mm M8 bolt (A) through the washer. Tighten
using the Allen key (E). Insert and tighten a nut (5) on the underside of the support (5) using
the wrench (7).
Repeat this process with the remaining holes.
Page 9
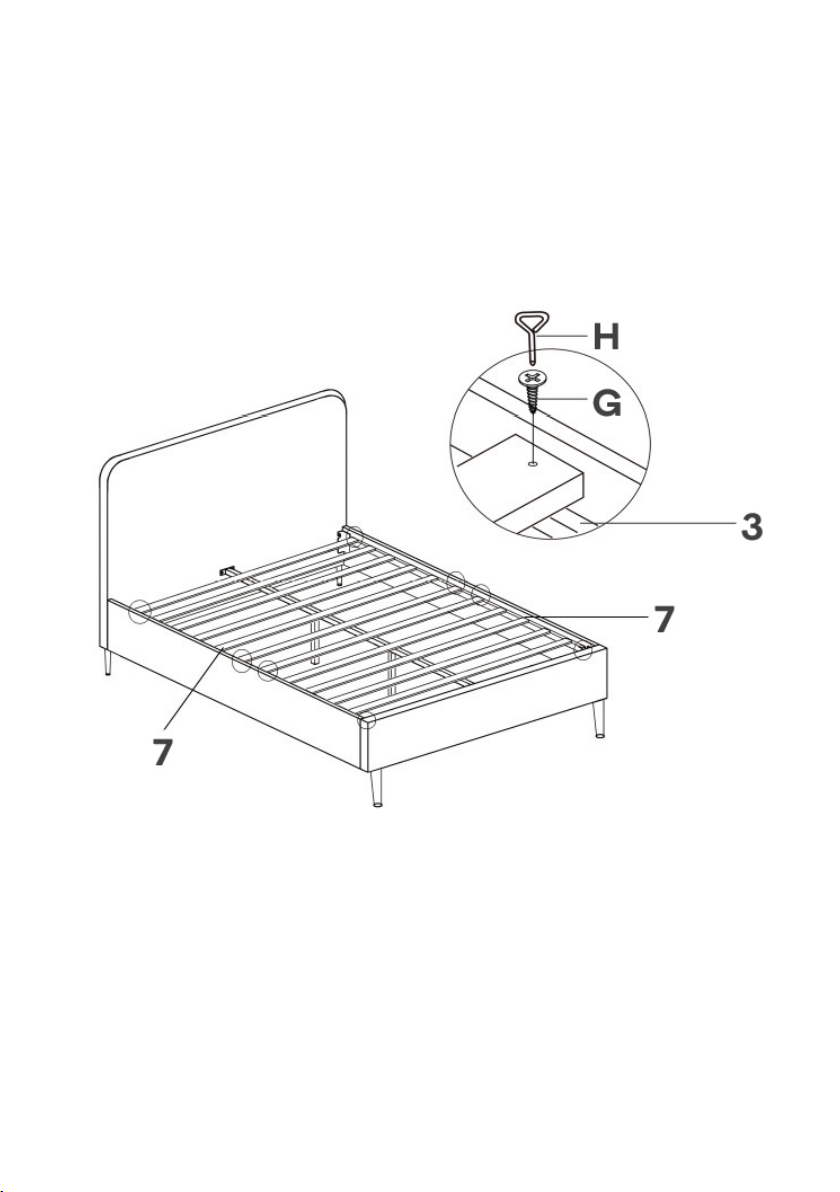
Step 5: Place the horizontal slat assemblies (7) on top of the bed. Using the Phillips head
screwdriver tool (H), secure each corner of the slat assemblies to the holes on the side rails
(3) with the 25mm M4 bolts (G).
Page 10
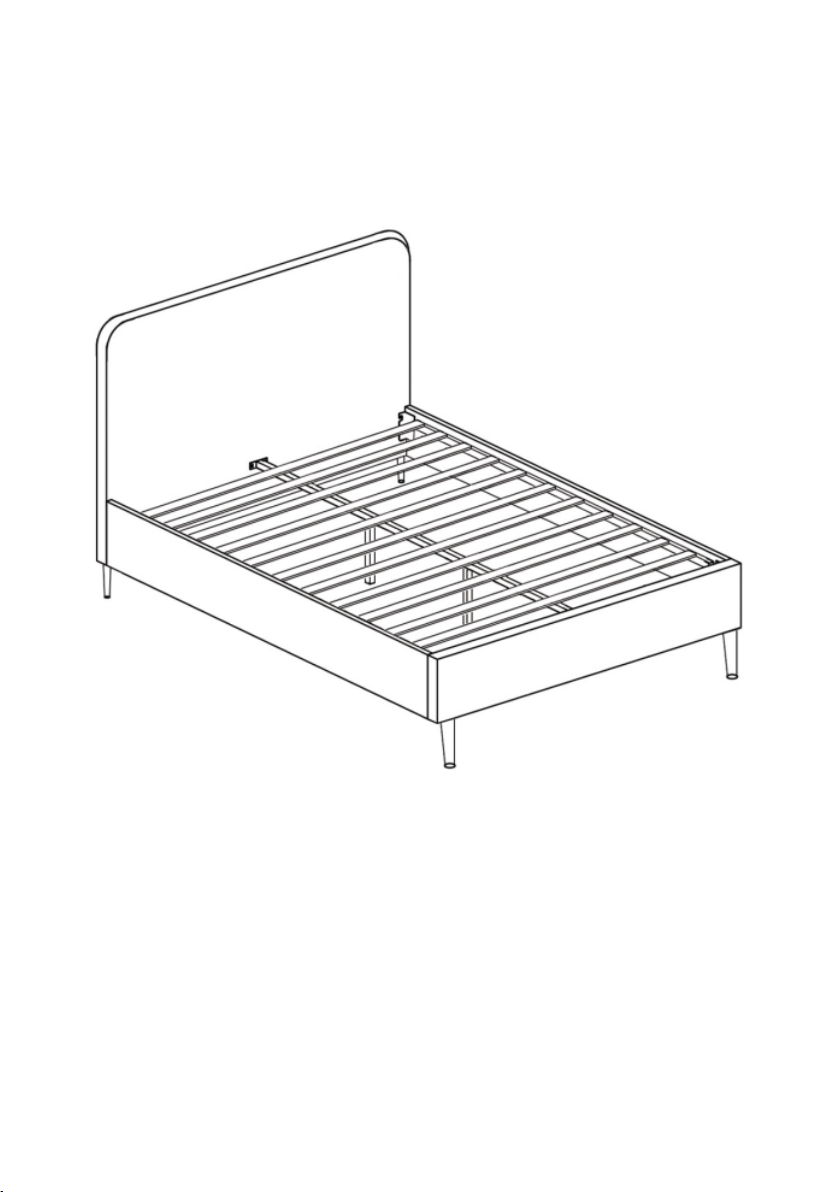
Assembly complete.
Page 11

Page 12

Need more information?
We hope that this user guide has given you
the assistance needed for a simple set-up.
For the most up-to-date guide for your product,
as well as any additional assistance you may require,
head online to help.kogan.com
 Loading...