

Page 1
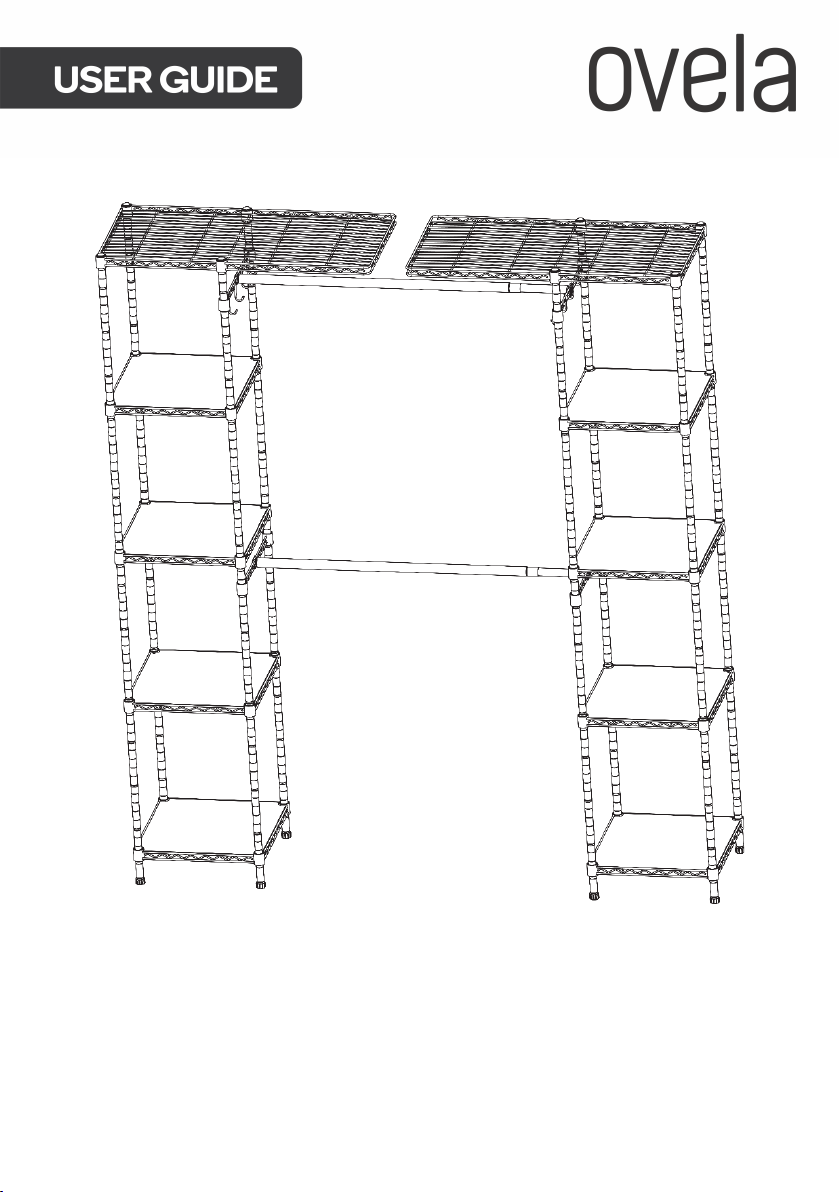
LA MESA METAL
WARDROBE
OVLAMESAWDA
Page 2

Page 3
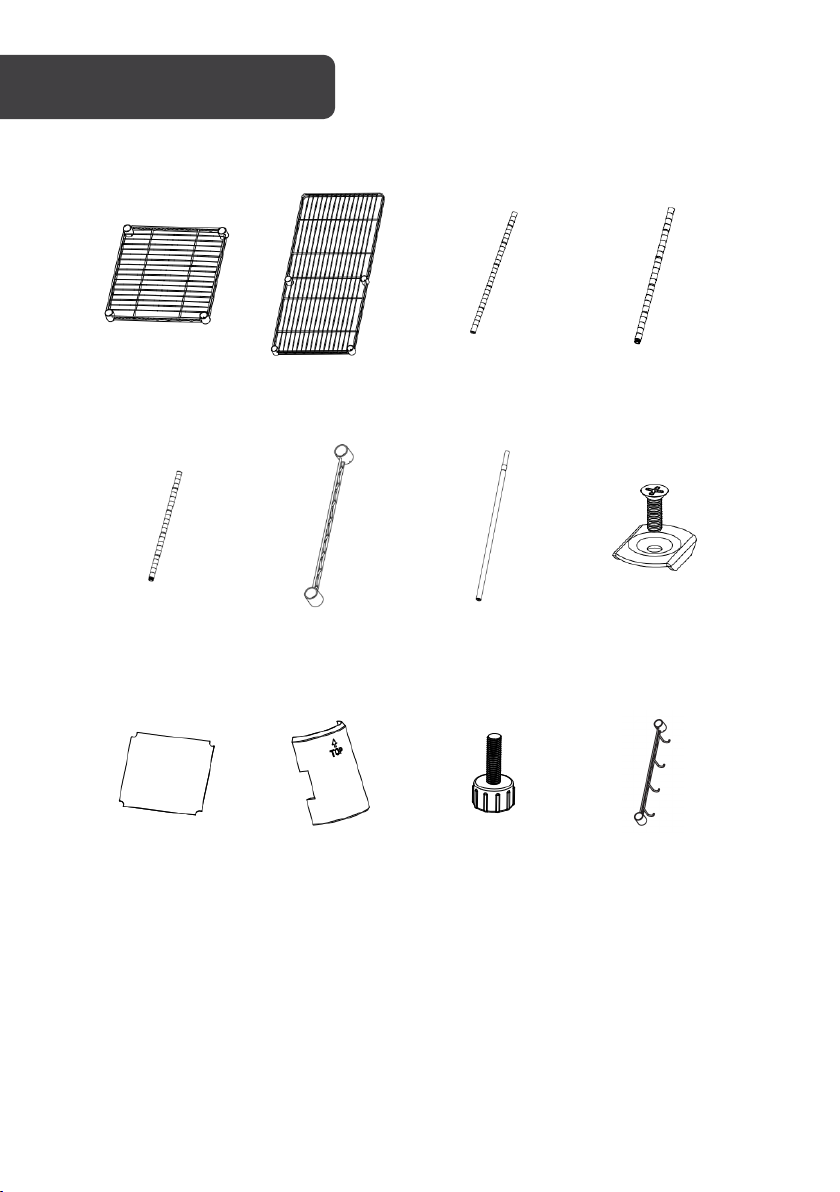
A
B
D
E
F
G
H
I
J
K
L
Square Wire
Shelf (x8)
Upper Pole
(x8)
PP Mat (x8)
Top Wire Shelf (x2) C Lower Pole
Support Rail (x2)
Plastic Clips (x96)
(x8)
Expandable
Hanger Rods
Leveling Feet
(2Set)
(x8)
Middle Pole (x8)
Steel Bracket &
Screw (4Set)
Support Rail
with Hooks (x2)
Page 4
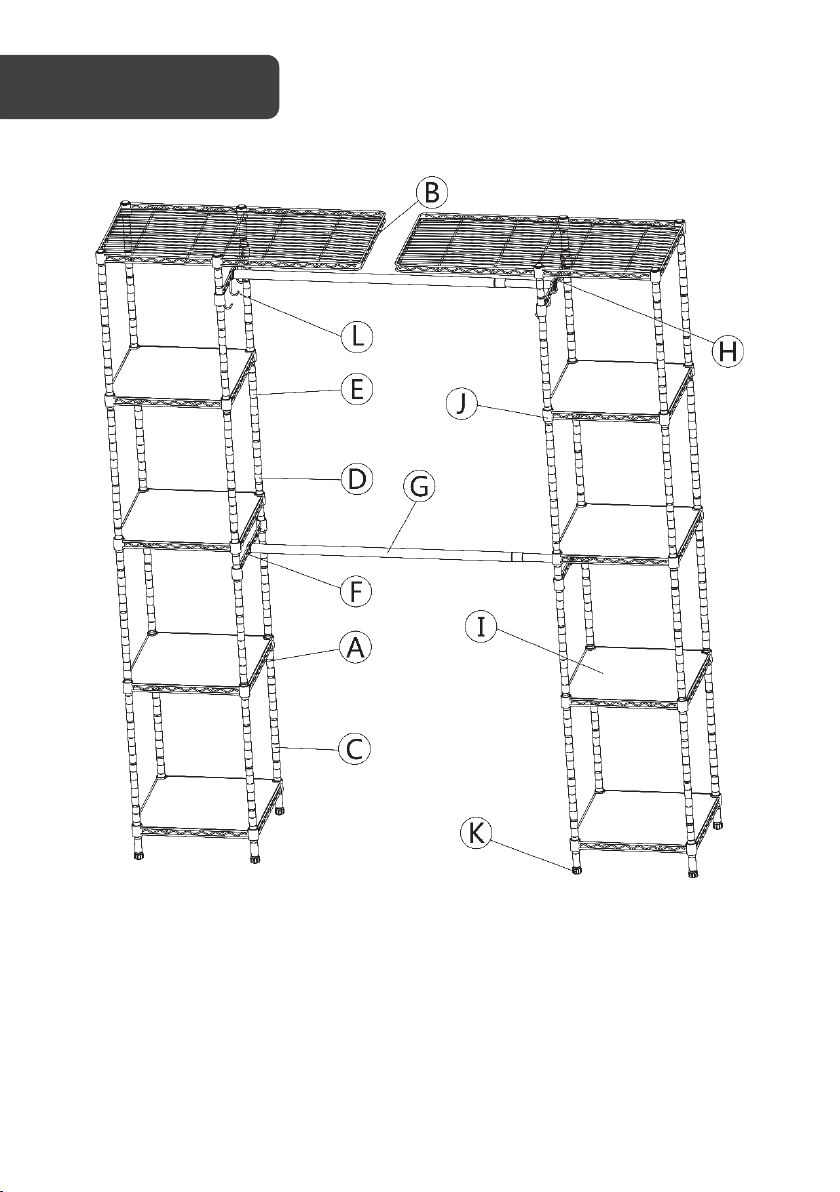
OVERVIEW
Page 5
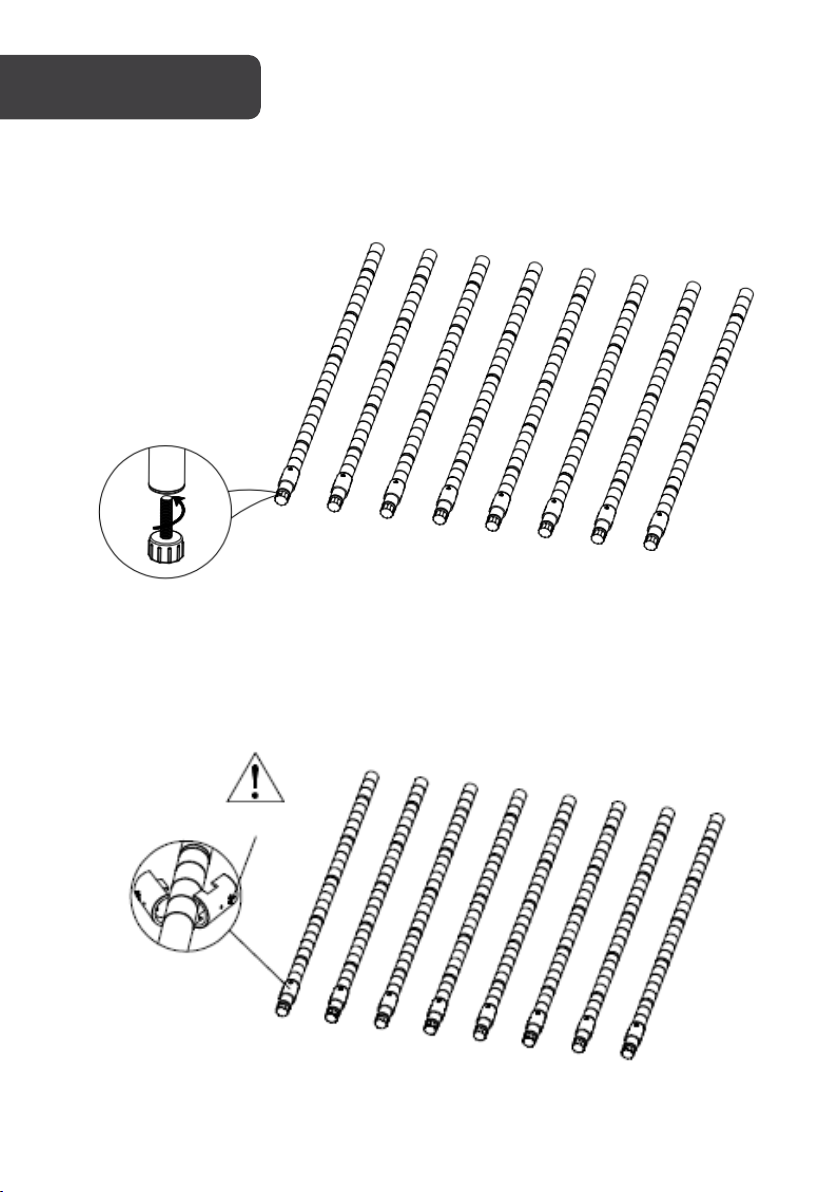
Arrow points up
Step 1:
Screw the x8 Leveling Feet (L) into the bottom of the Lower Poles (C).
Step 2:
Snap the Plastic Clips (J) into the pole grooves of the Lower Poles, each at the same
position, and ensuring that the arrow on each plastic clip is pointed up.
Page 6
Up
Collar
Down
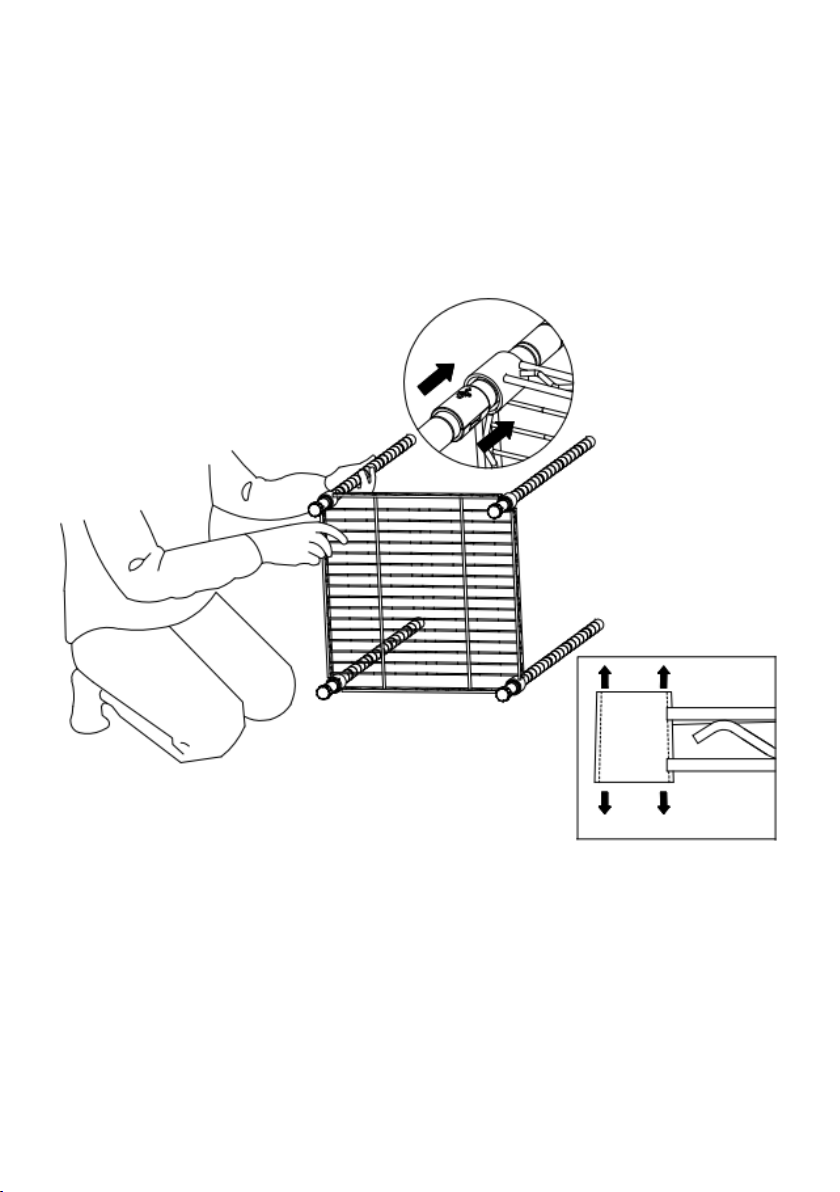
Step 3:
Take Square Wire Shelf (A) and ensure it is positioned the correct way up, as per the image
below. Hold the wire shelf on its side and slide the top of x4 lower poles through the bottom
of the shelf at its corners until there is snug fit.
After 4 poles have been slid through the shelf collar holes, set the shelf upright.
Page 7
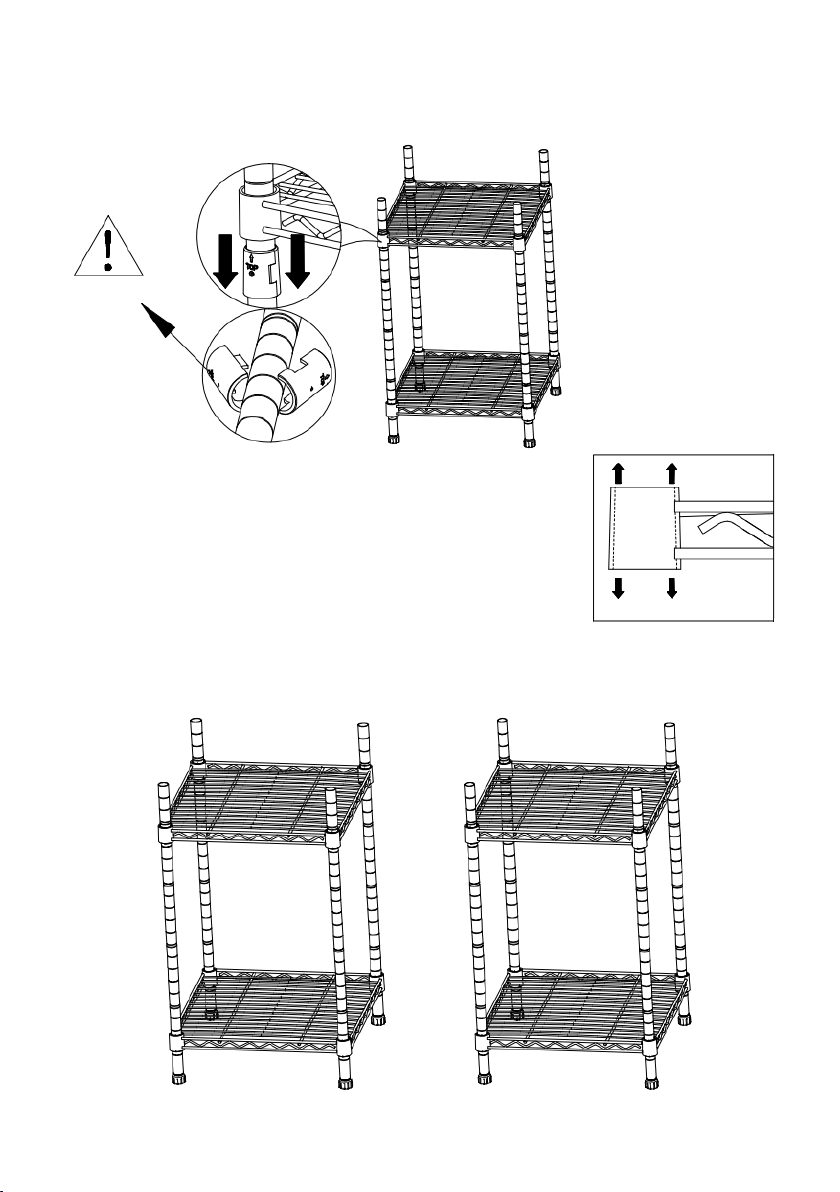
Step 4:
Arrow points up
Up
Collar
Down
Snap the plastic clips into the pole grooves at the desired height for the next square wire
shelf (A), and slide the shelf down onto the plastic clips.
Step 5:
Repeat steps 3-4 to create the other base assembly, ensuring the height for the shelving is
identical between the two.
Page 8
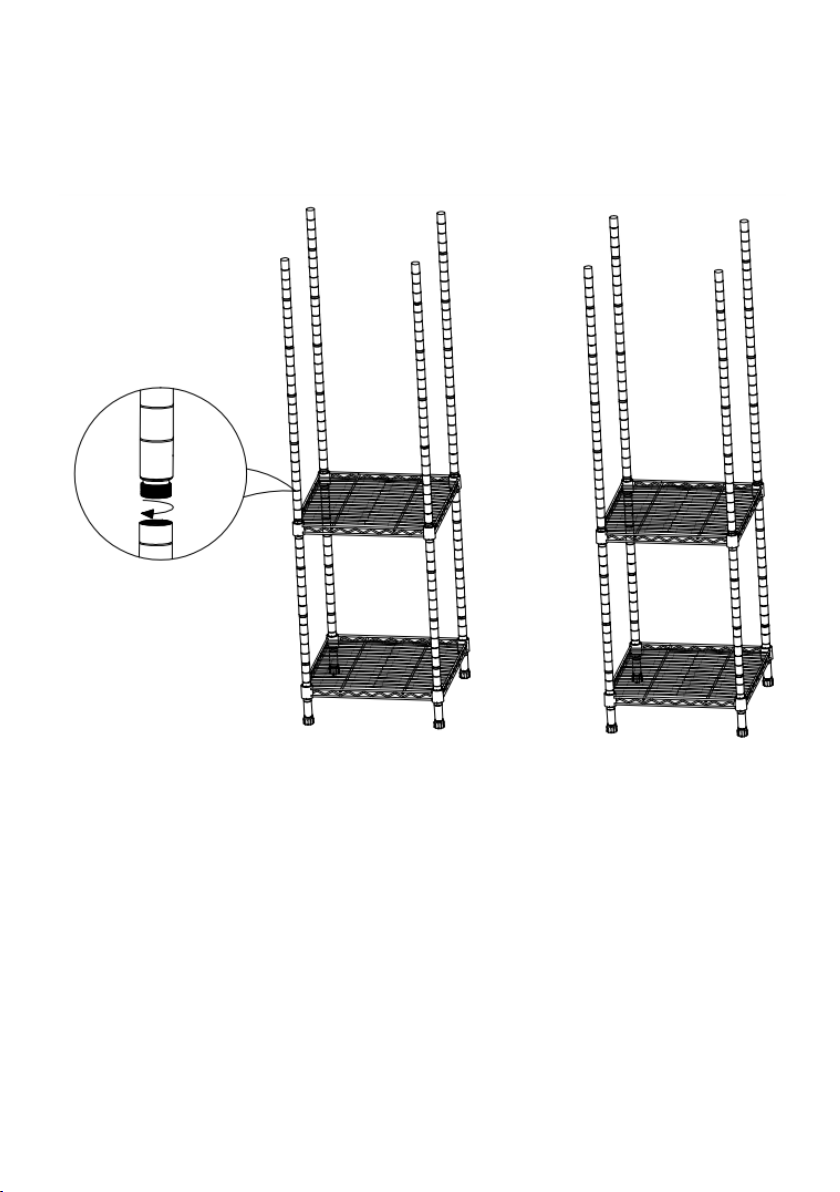
Step 6:
The Middle Poles (D) are fitted with screw connectors (shown in the image below). Use these
connectors to attach the middle poles to the lower poles.
Page 9
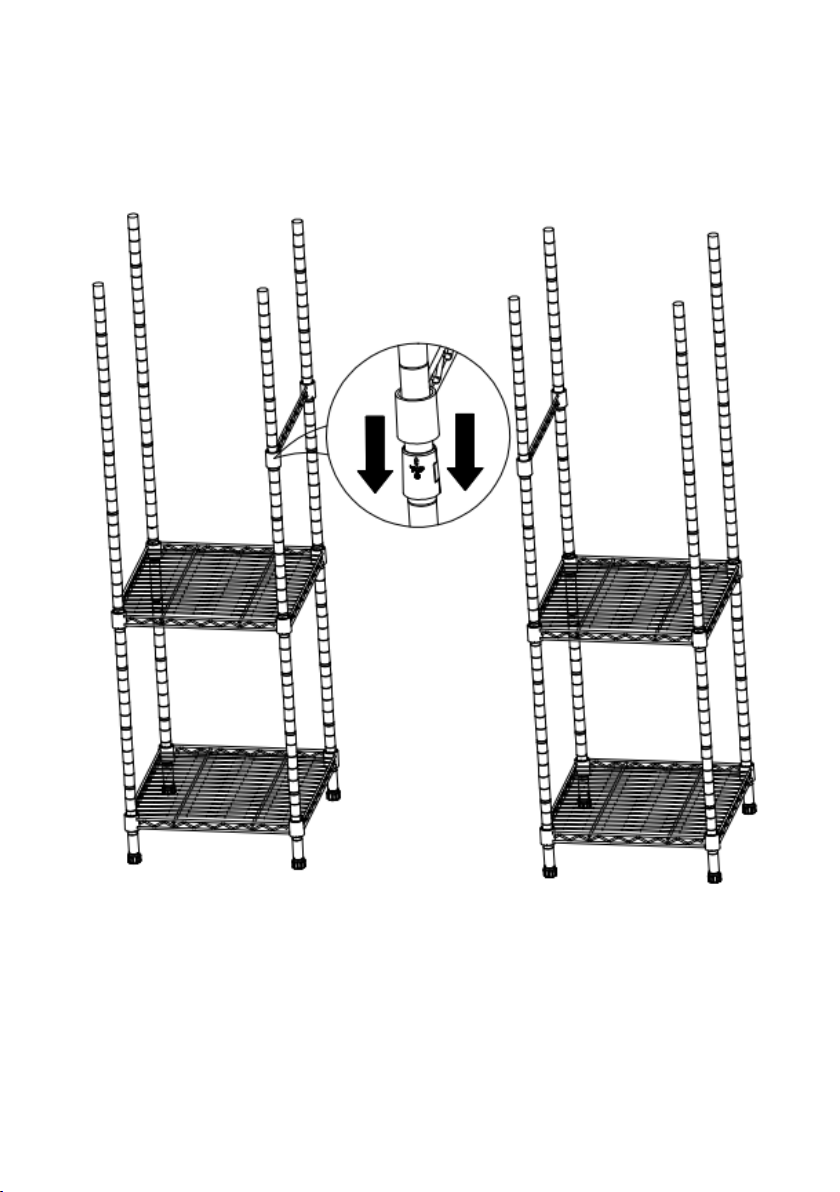
Step 7:
Fix the plastic clips (as per step 4) on the four middle poles in the centre of the assembly (see
image below for reference), then slide down the Support Rails (F) from the pole top onto the
plastic clips. Ensure assembly position of the support rails is correct and matches the
images shown here before advancing to the following steps.
Page 10
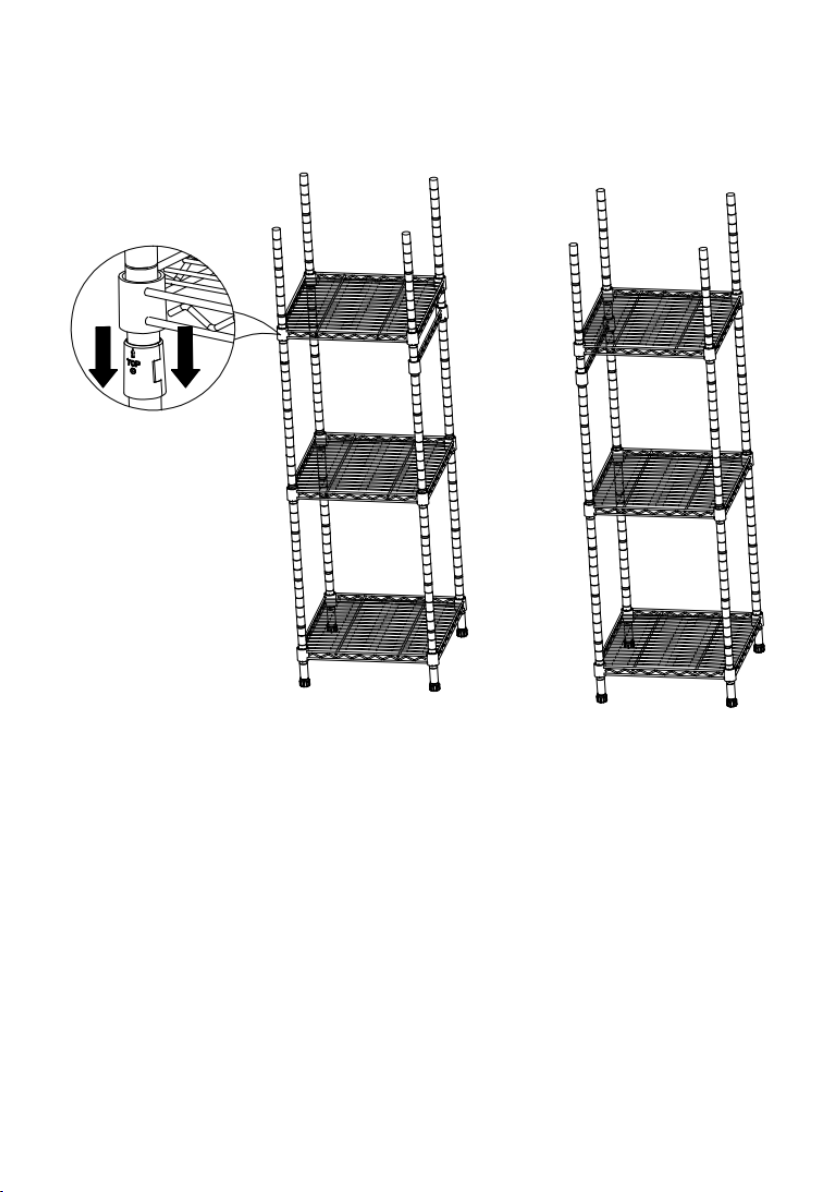
Step 8:
Snap the plastic clips into the pole grooves at the desired height for the next square wire
shelf (A), and slide the shelf down onto the plastic clips. Repeat this for both sides.
Page 11
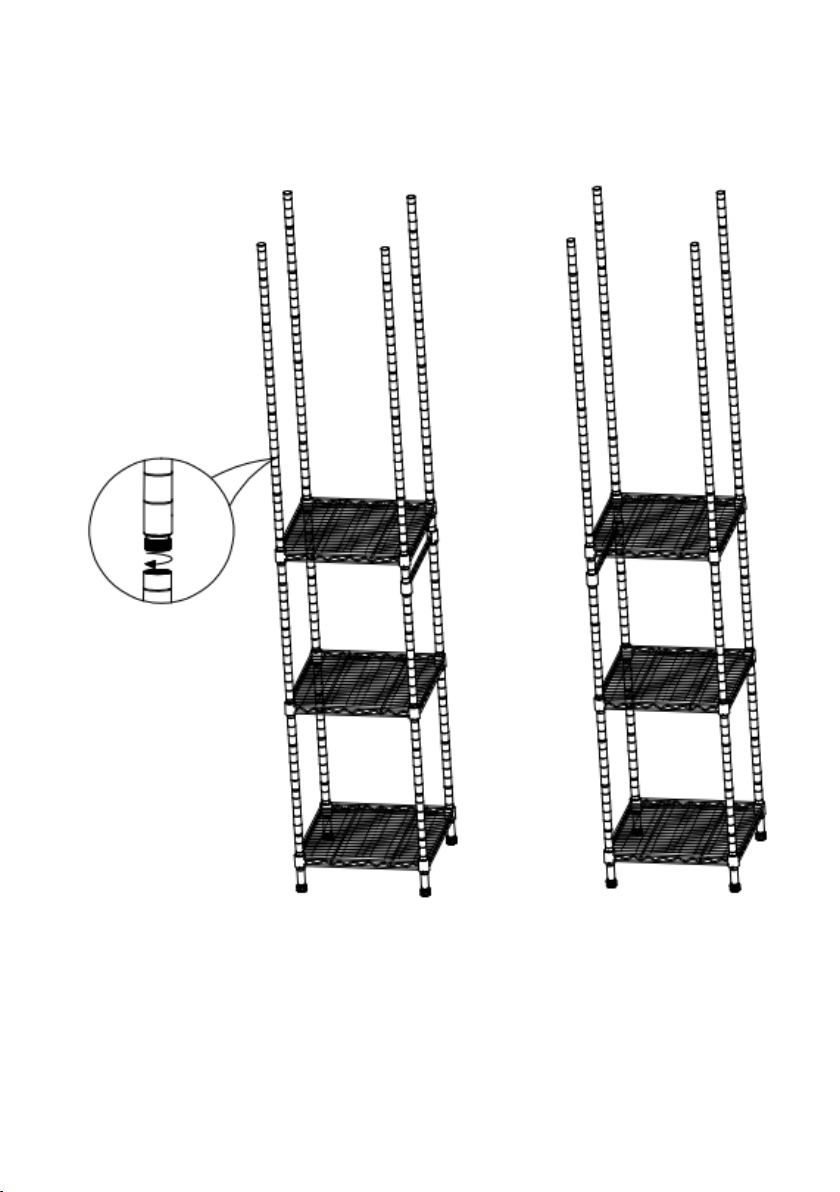
Step 9:
The Upper Poles (E) are fitted with screw connectors (shown in the image below). Use these
connectors to attach the x8 upper poles to the middle poles (E).
Page 12

Step 10:
Snap the plastic clips into the pole grooves at the desired height for the next square wire
shelf (A), and slide the shelf down onto the plastic clips. Repeat this for both sides.
Page 13
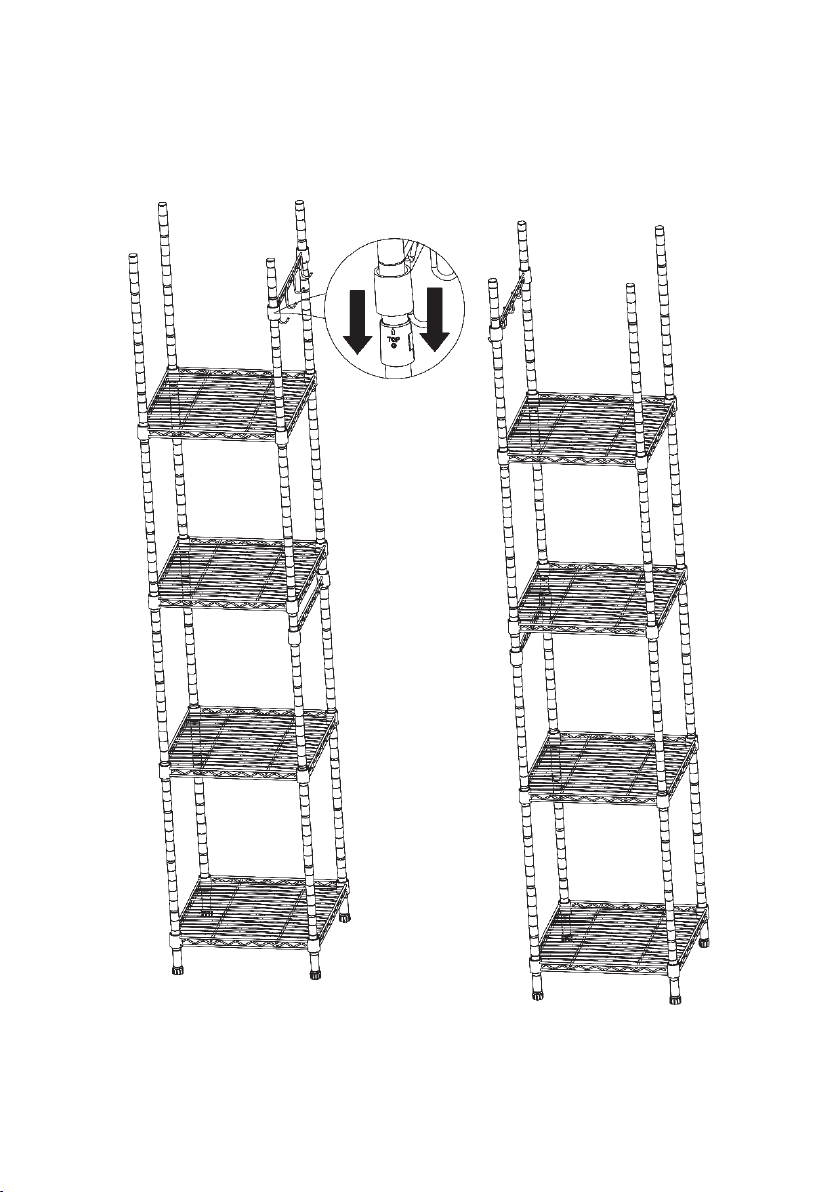
Step 11:
Fix the plastic clips on the four upper poles in the centre of the assembly (see image below
for reference), then slide down the Support Rails with Hooks (L) from the pole top onto the
plastic clips. Ensure assembly position of the support rails is correct and matches the
images shown here before advancing to the following steps.
Page 14
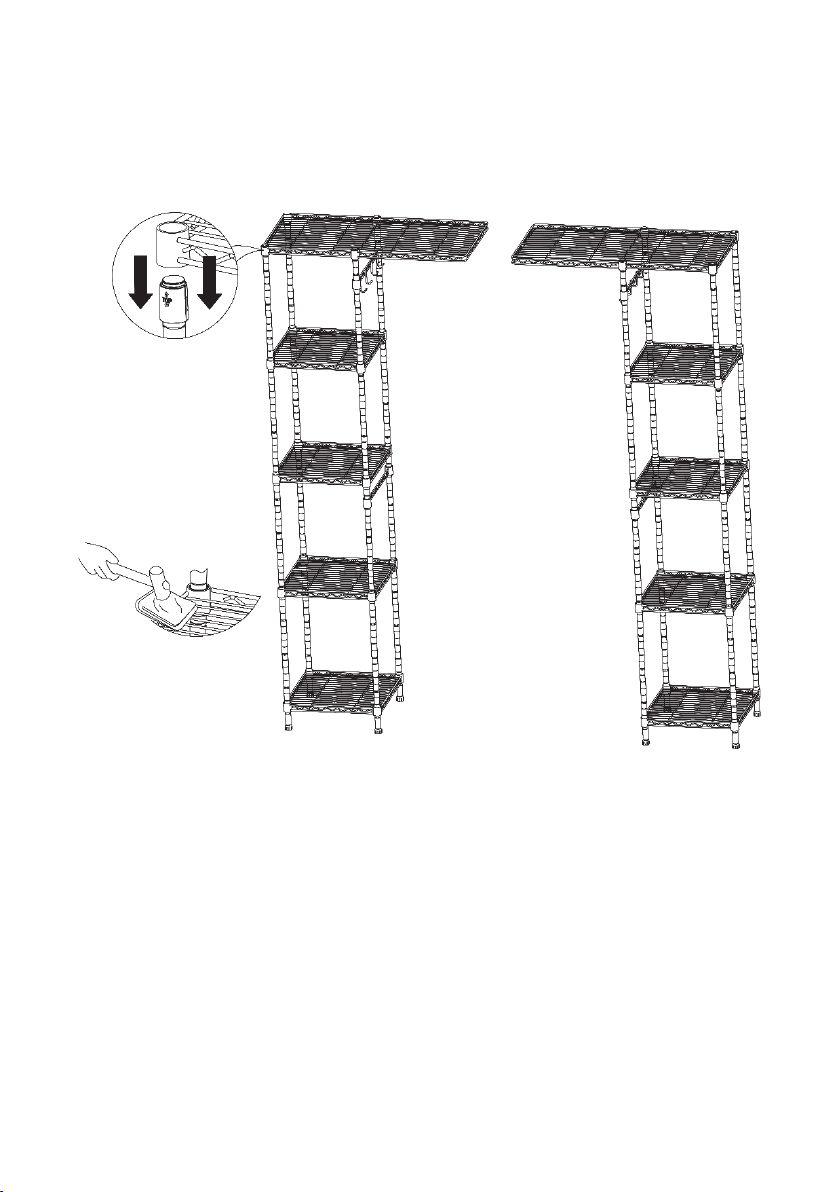
Step 12:
Fit plastic clips at the top of upper poles and place the Top Wire Shelf (B) into position on
top, pushing firmly down on every shelf at corners. Use a rubber mallet to ensure the shelf is
firmly in place over the plastic clips.
Page 15
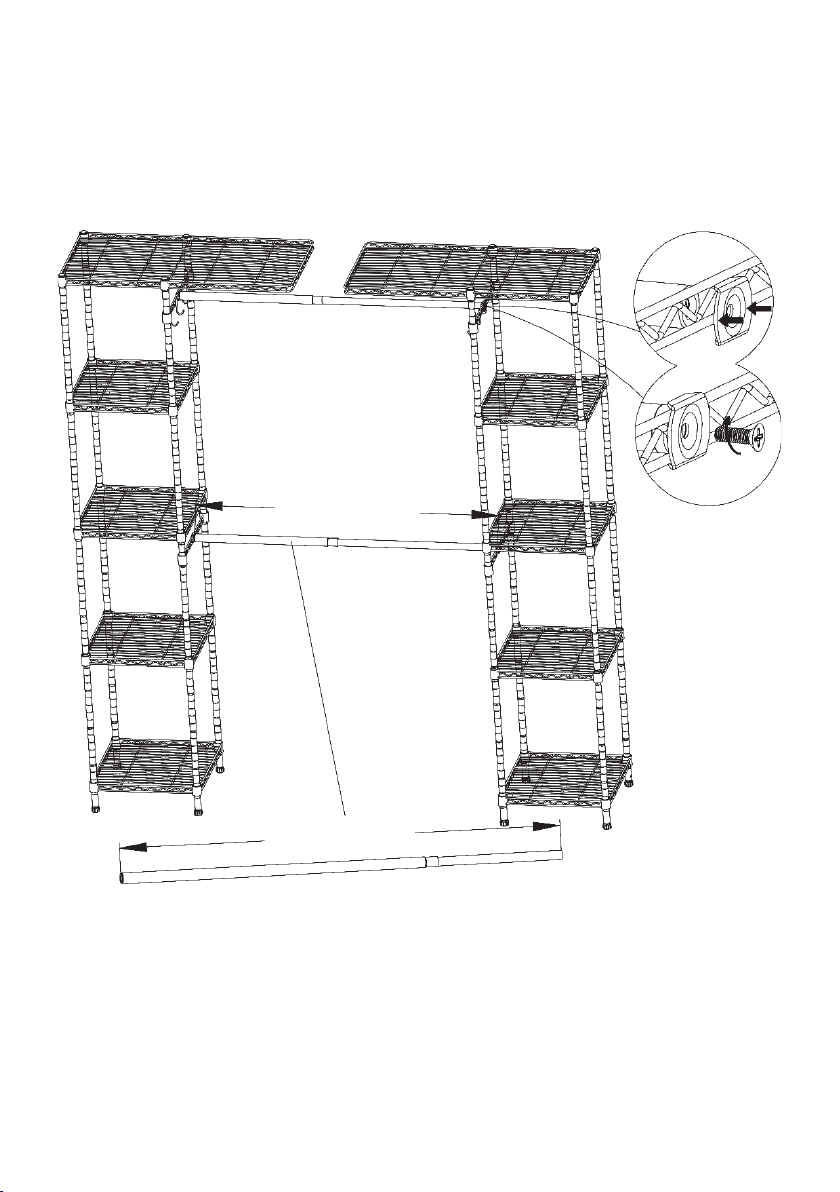
Step 13:
Length B
Length A
Adjust the length of the two Expandable Clothes Hanger Rods (H) to your preference,
ensuring Length A and Length B are equal. Screw both expandable clothes hanger rods into
position onto the Support Rails (F) using the Steel Screw & Brackets (I). Refer to the image
below for reference.
Page 16
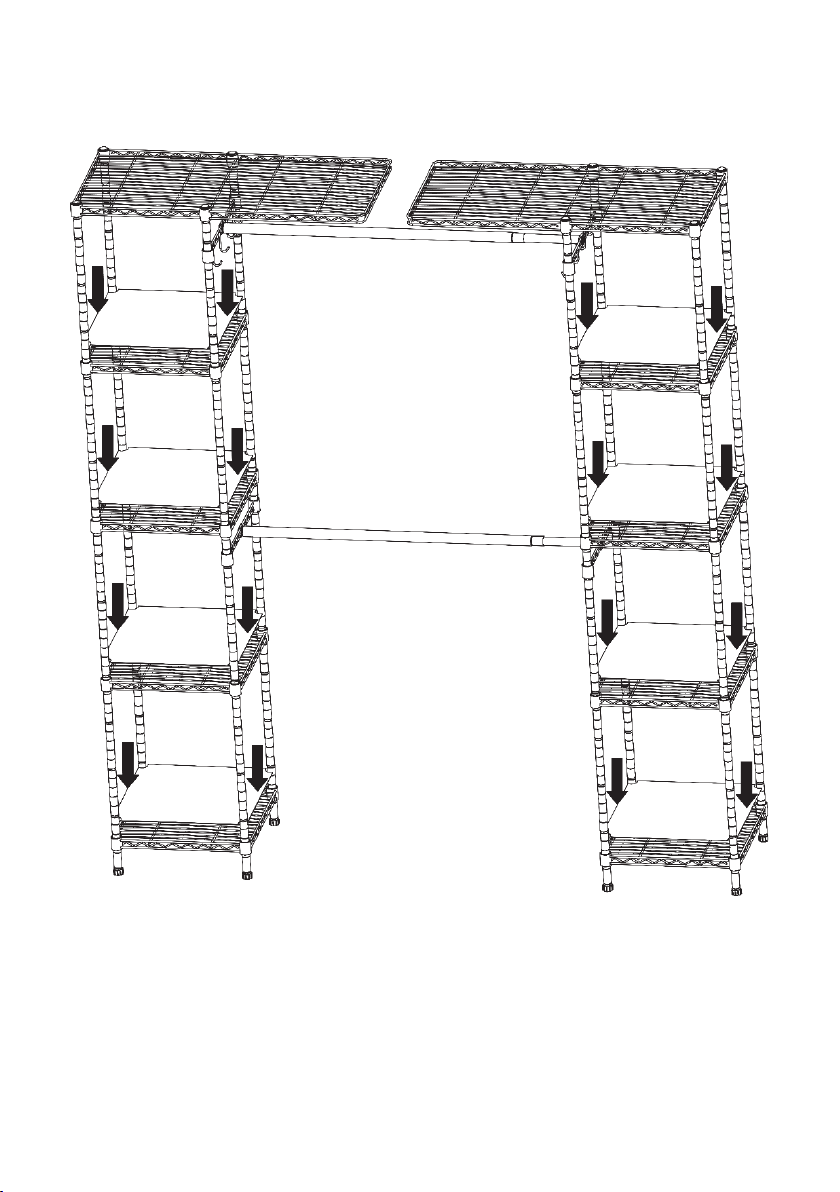
Step 14:
Place the PP Mat (J) onto all square wire shelves.
Page 17
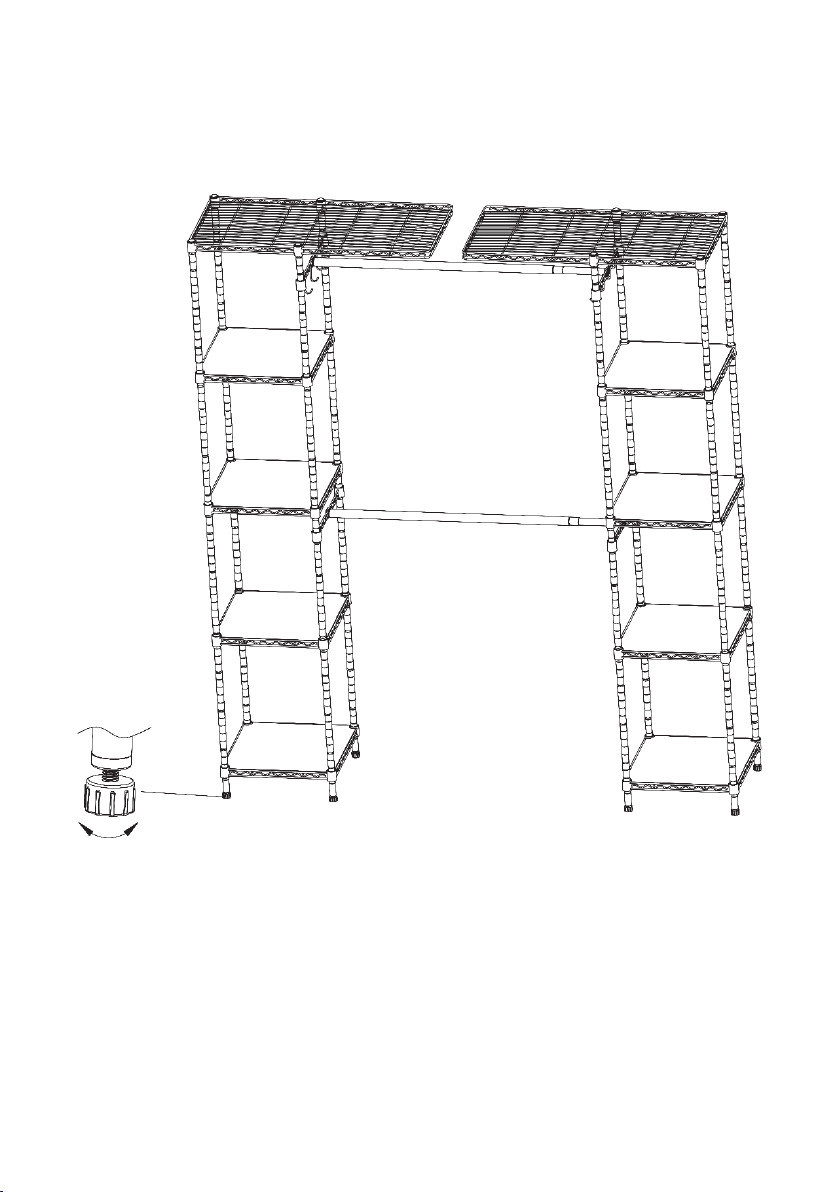
Step 15:
Tall
Low
To ensure stability, adjust the levelling feet on each of the 8 lower poles, ensuring the
wardrobe can stand straight upright with no imbalance.
Page 18
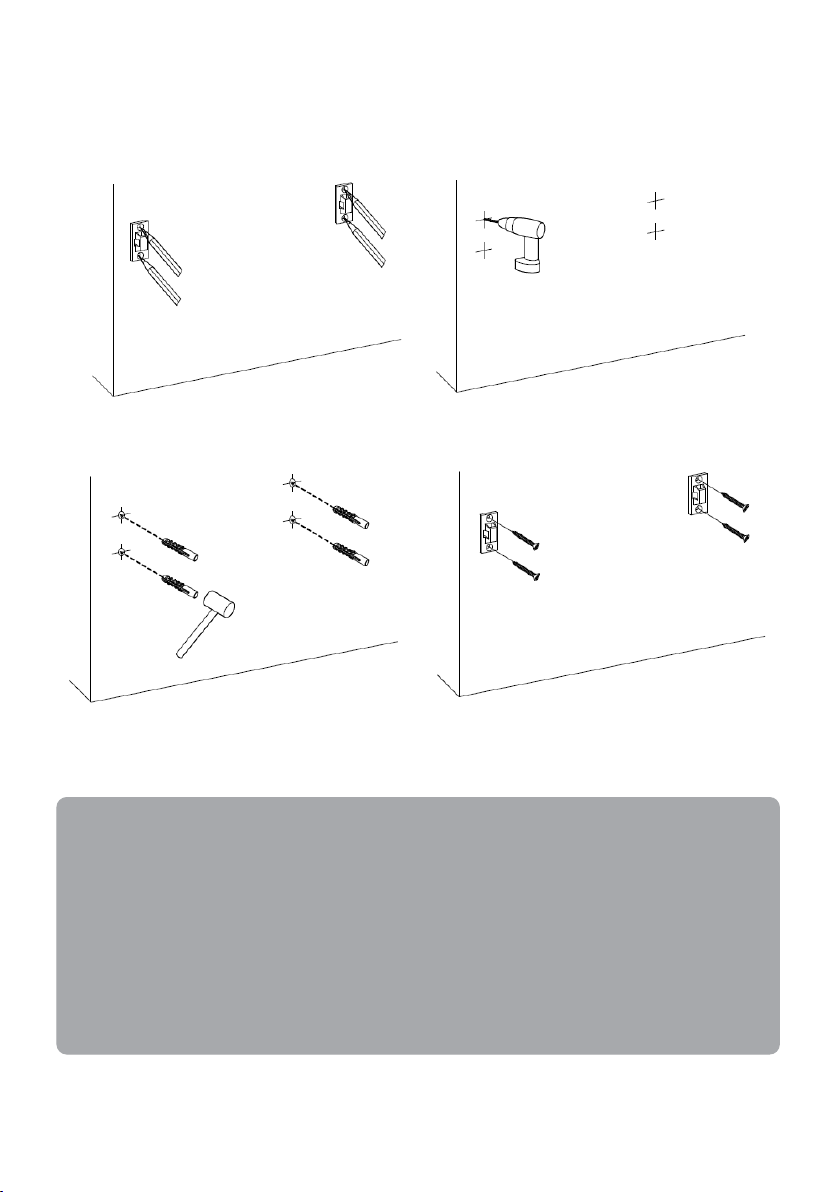
Step 16:
TOPPLING FURNITURE WARNING:
Fasten the wardrobe to the wall with the anti-toppling kit included in the package.
• It is strongly recommended that this product is permanently fixed to the wall.
• Please seek professional advice if you are in doubt of what fixing device to use.
• Regularly check that anchors are securely maintained.
• Stability of tall items may be affected by thick carpets or uneven floors.
• Do not place unanchored televisions on furniture.
Caution! For your safety when attaching the anchor fixings, please note the following:
Check any electrical wires or plumbing inside the wall before drilling any holes (if you
are unsure please seek professional advice from a qualified tradesperson).
Page 19
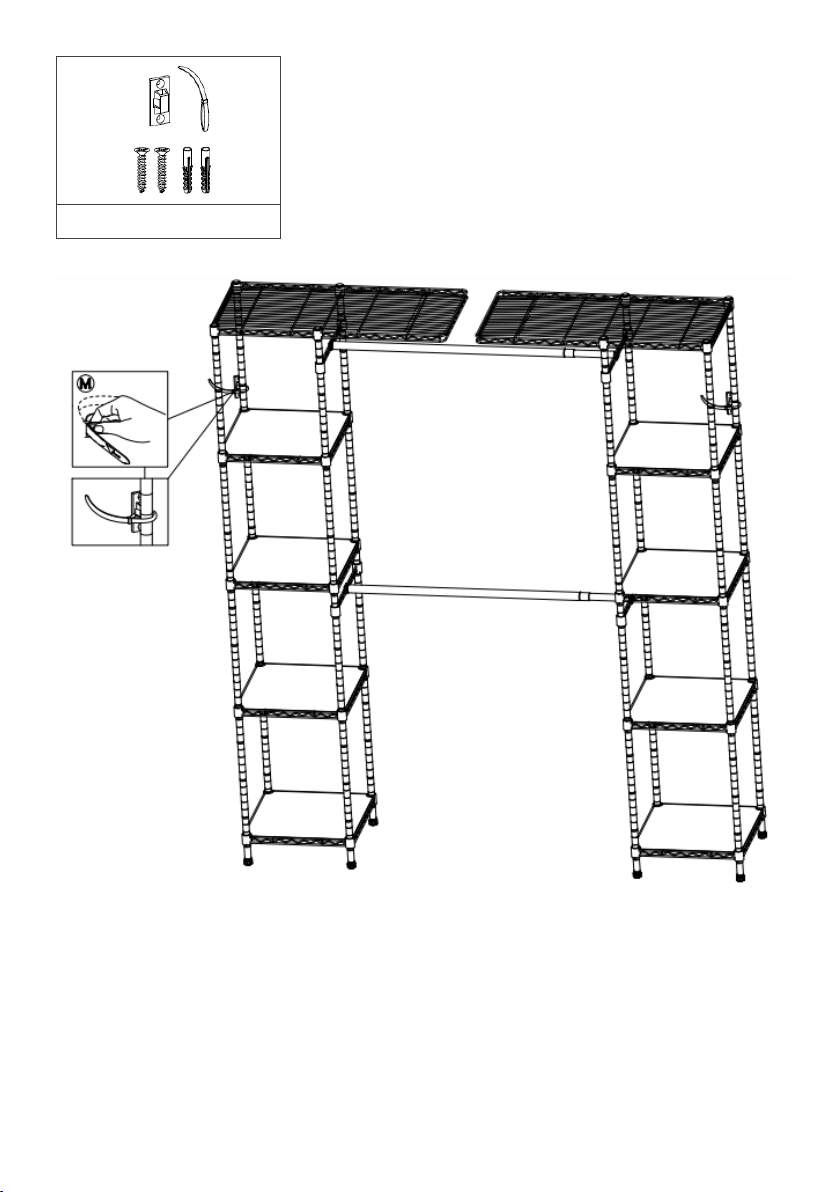
M Anti-Tip Device (2 Sets)
Assembly complete
Page 20

Need more information?
We hope that this user guide has given you
the assistance needed for a simple set-up.
For the most up-to-date guide for your product,
as well as any additional assistance you may require,
head online to help.kogan.com.
 Loading...