

Page 1
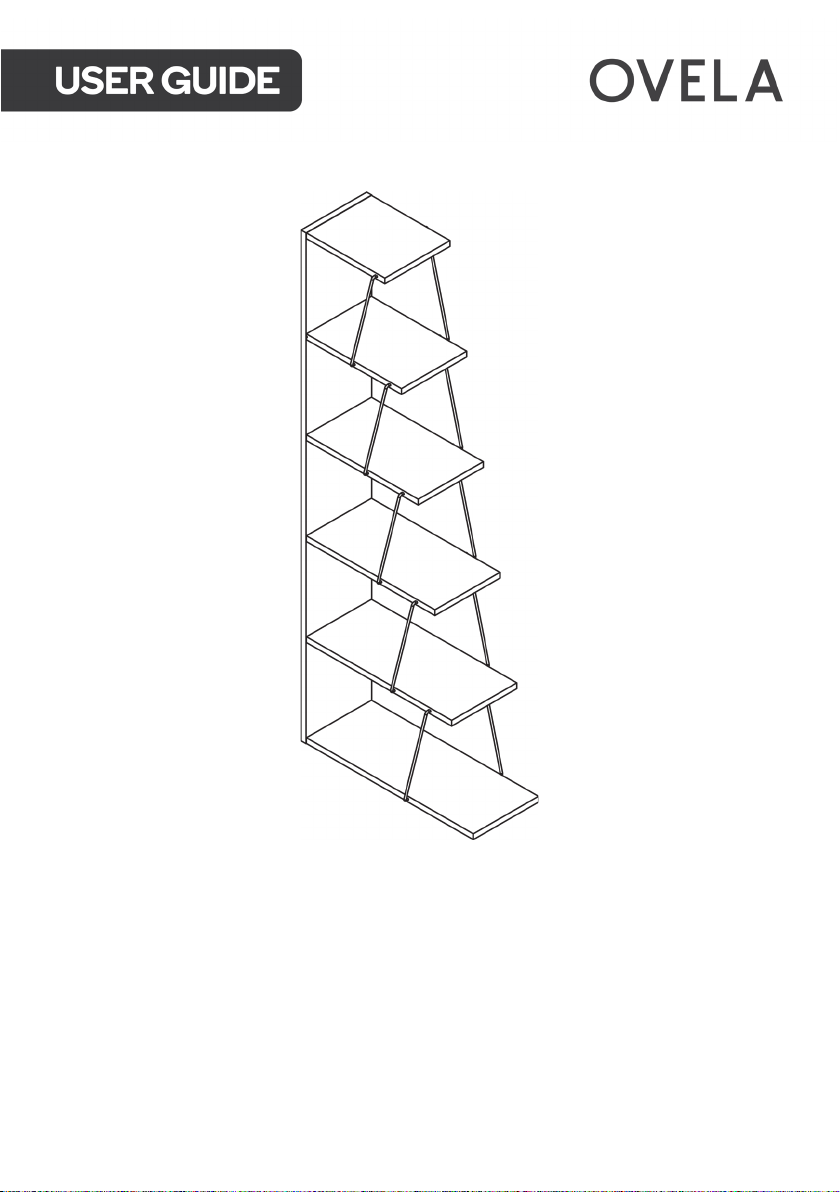
CINDY STAGGERED
BOOKSHELF
OVCINDYBSWA, OVCINDYBSBA, OVCAMCDSMNA
Page 2

Page 3
SAFETY & WARNINGS
Ensure to read all instructions and warnings in this user guide prior to assembly. Retain this
user guide for future reference.
• Ensure no parts are missing.
• Lay out all the components on a soft surface.
• Carefully identify each component, especially those that are similar. The most
common mistake is getting things back to front.
• Do not fully tighten screws (leave slightly loose). When the item is fully assembled,
tighten the screws but do not overtighten.
• Separate and identify each component from the hardware pack and rest each one in
its proper location before fastening.
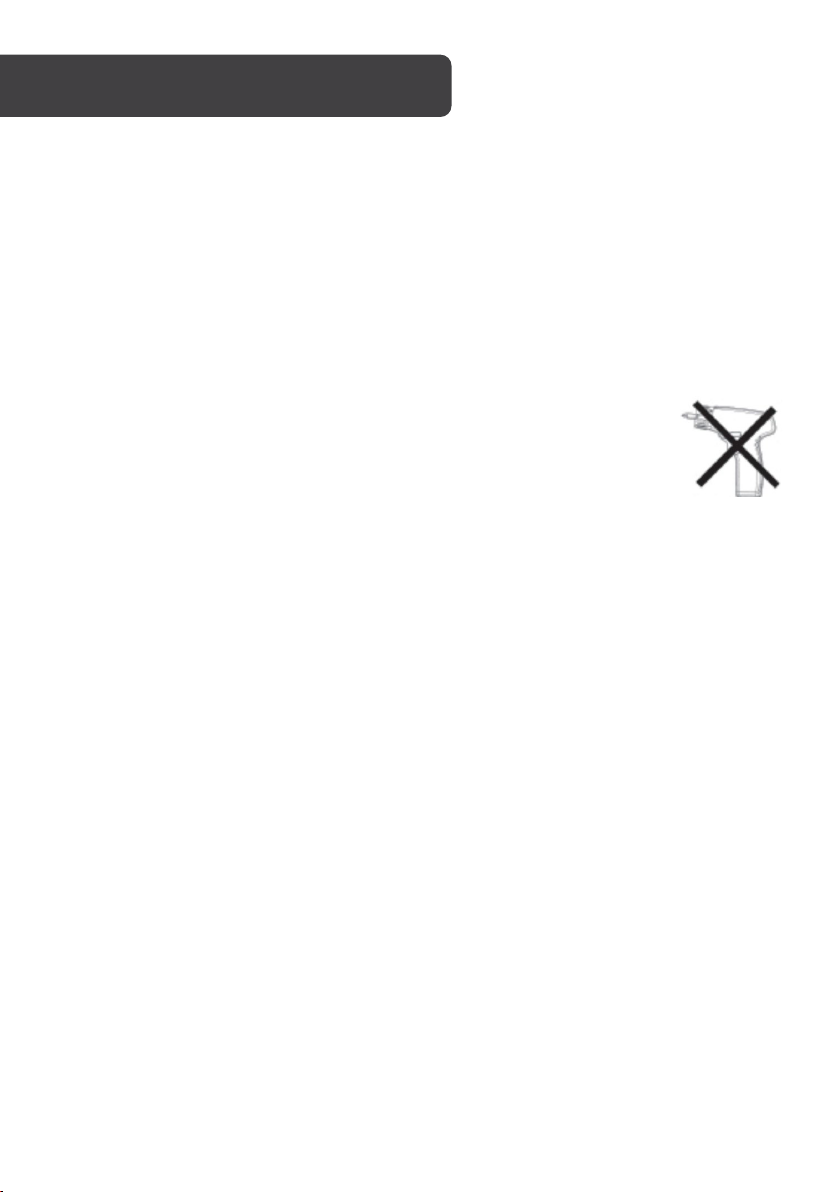
• Do not, for any reason, use a power tool to assemble this product. The
use of power tools may apply excess force on the fixtures, causing
damage.
• A Phillips head screwdriver (not supplied) is required for assembly.
Page 4
COMPONENTS
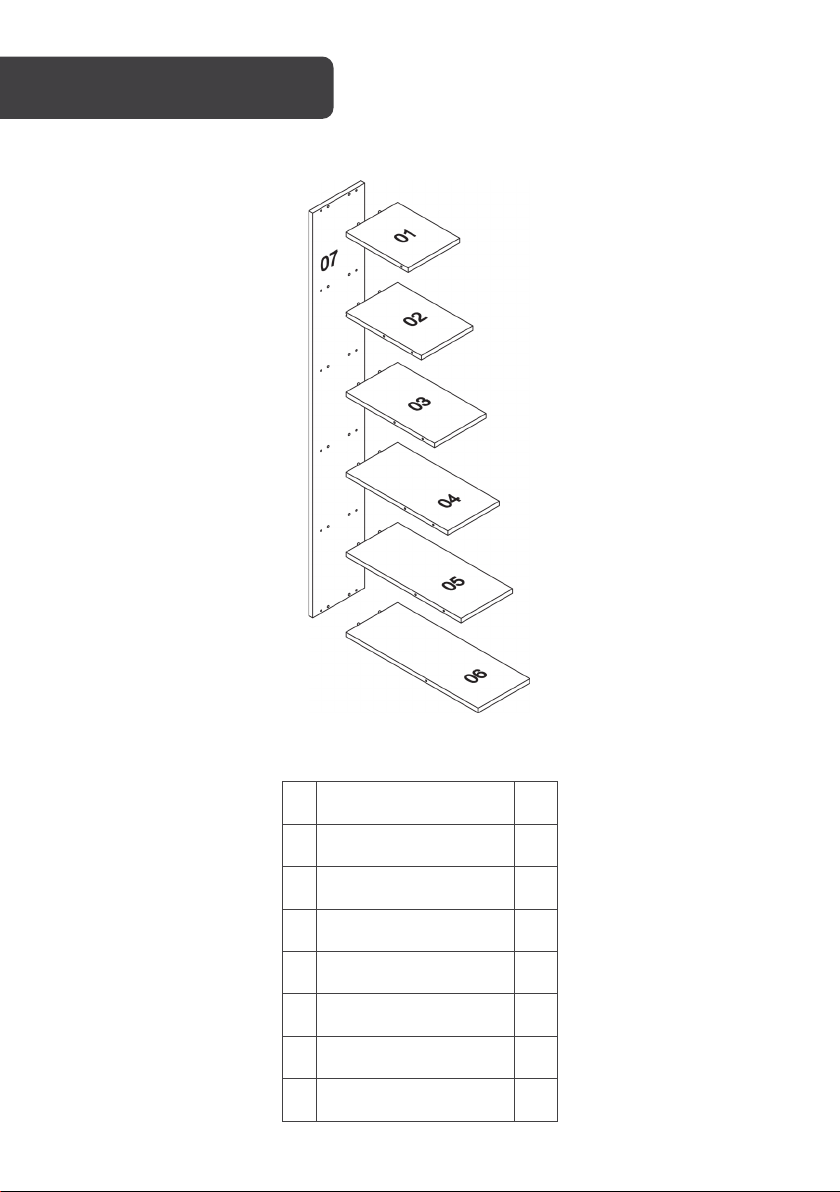
Parts list
No Size (mm) Qty
1 234 x 282 x 18 1
2 234 x 342 x 18 1
3 234 x 402 x 18 1
4 234 x 462 x 18 1
5 234 x 522 x 18 1
6 234 x 600 x 18 1
7 236 x 1594 x 18 1
Page 5
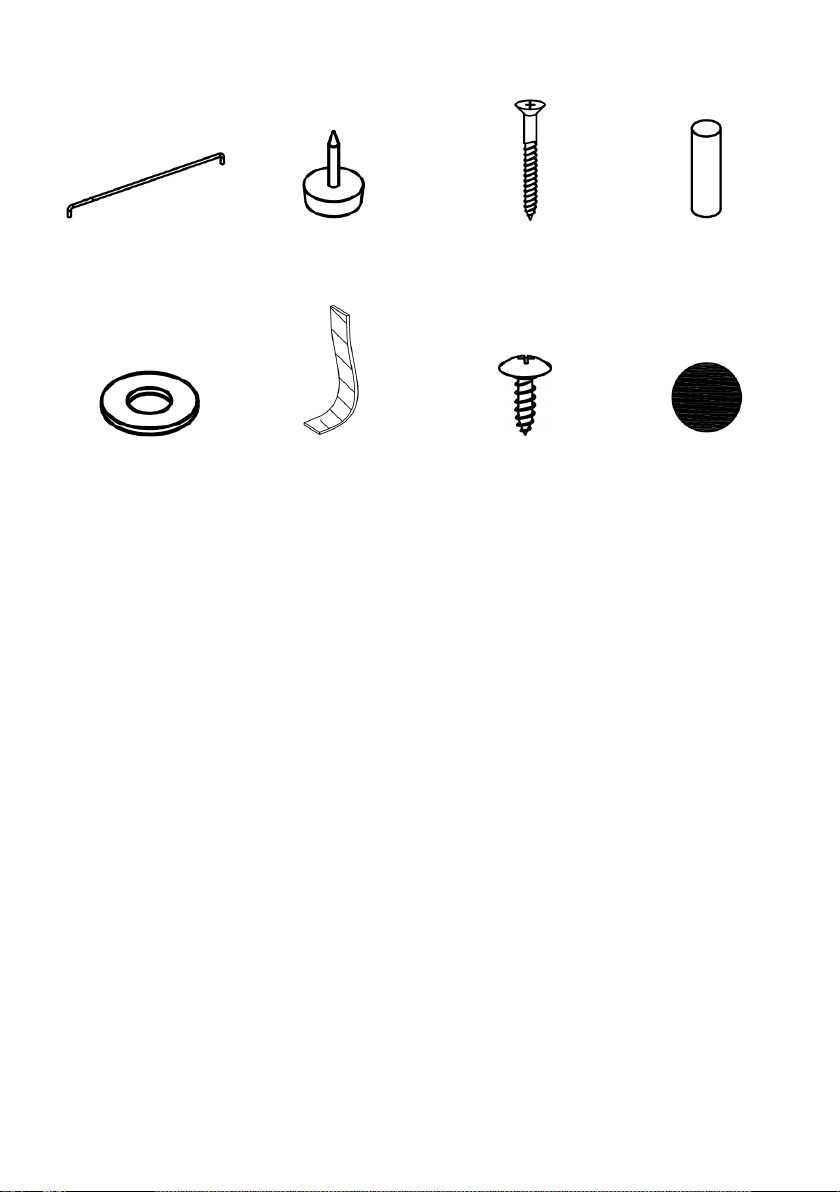
Hardware
A Ø30 x 325mm (x10) B 12mm (x4) C Ø5.5 x 38mm (x12) D Ø8 x 30mm (x12)
E Ø6 x 15 x 1mm (x1) F (x1) G Ø4 x 16mm (x1) H (x12)
Page 6
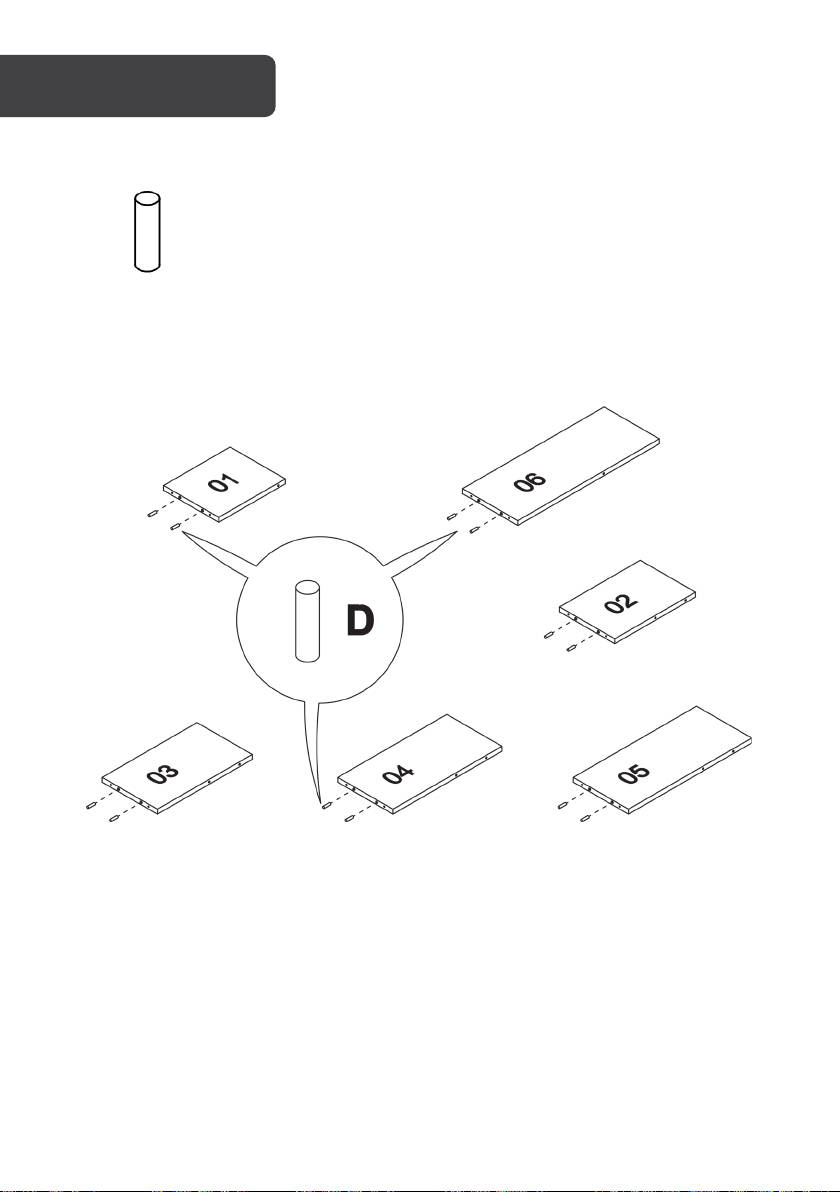
ASSEMBLY
Step 1: Insert D into the parts shown below.
D Ø8 x 30mm (x12)
Page 7
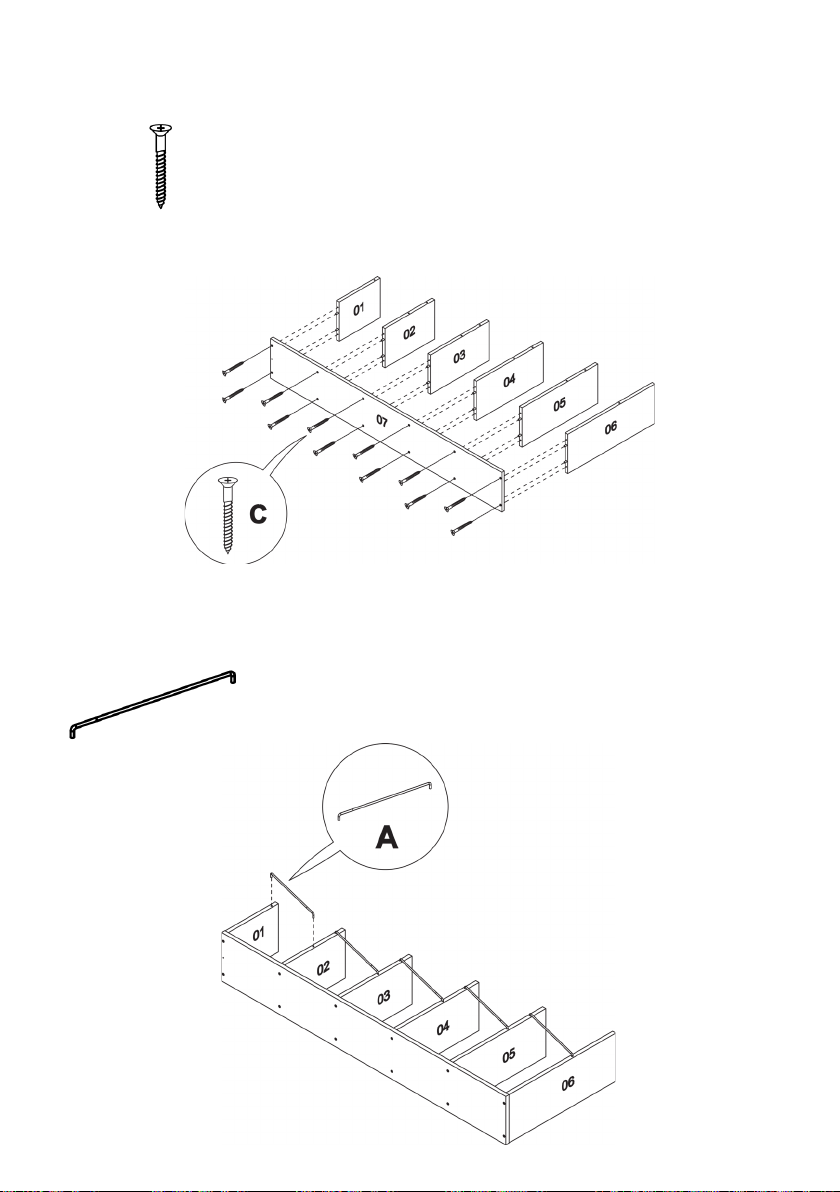
Step 2: Using a Phillips screwdriver (not supplied), secure C screws to connect the parts
shown below.
C Ø5.5 x 38mm (x12)
Step 3: Attach A through the holes between parts 1, 2, 3, 4, 5, and 6.
A Ø30x325 (x5)
Page 8
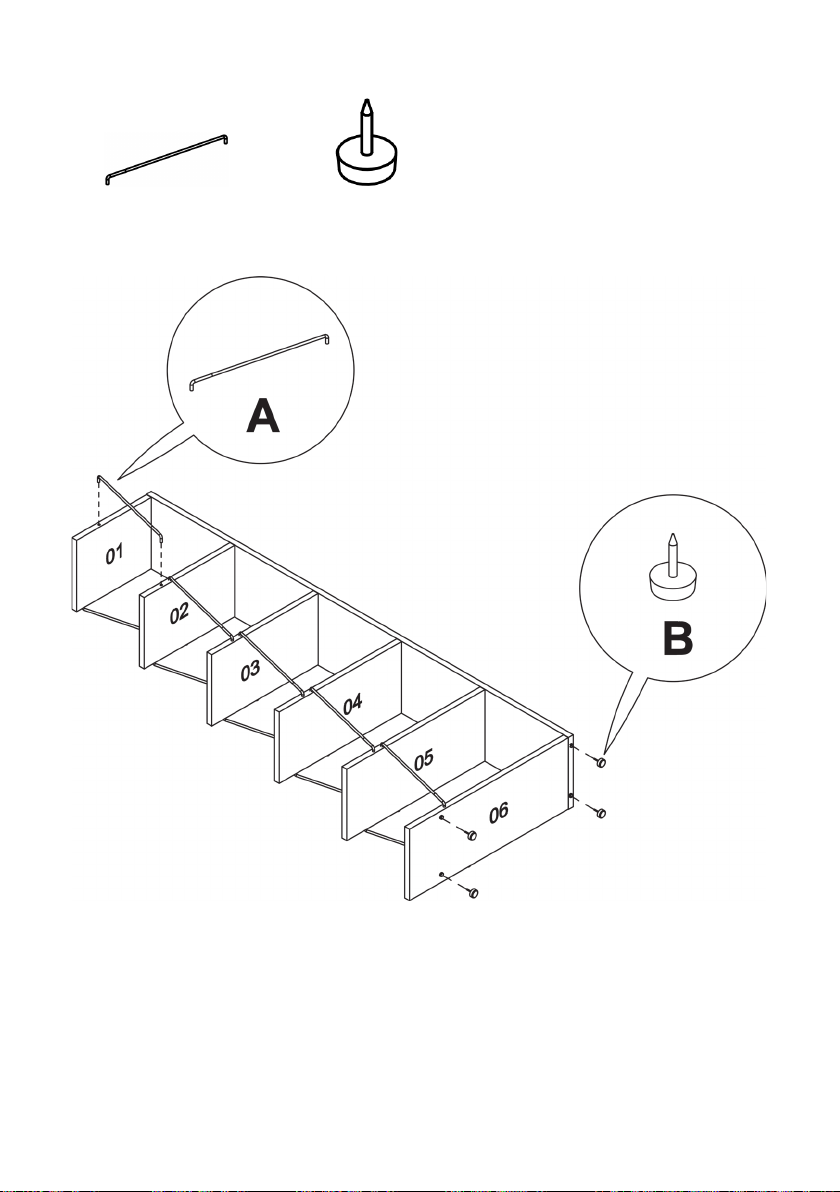
Step 4: Turn over the assembly and attach A and B as shown below.
A Ø30 x 325mm (x5) B 12mm (x4)
Page 9
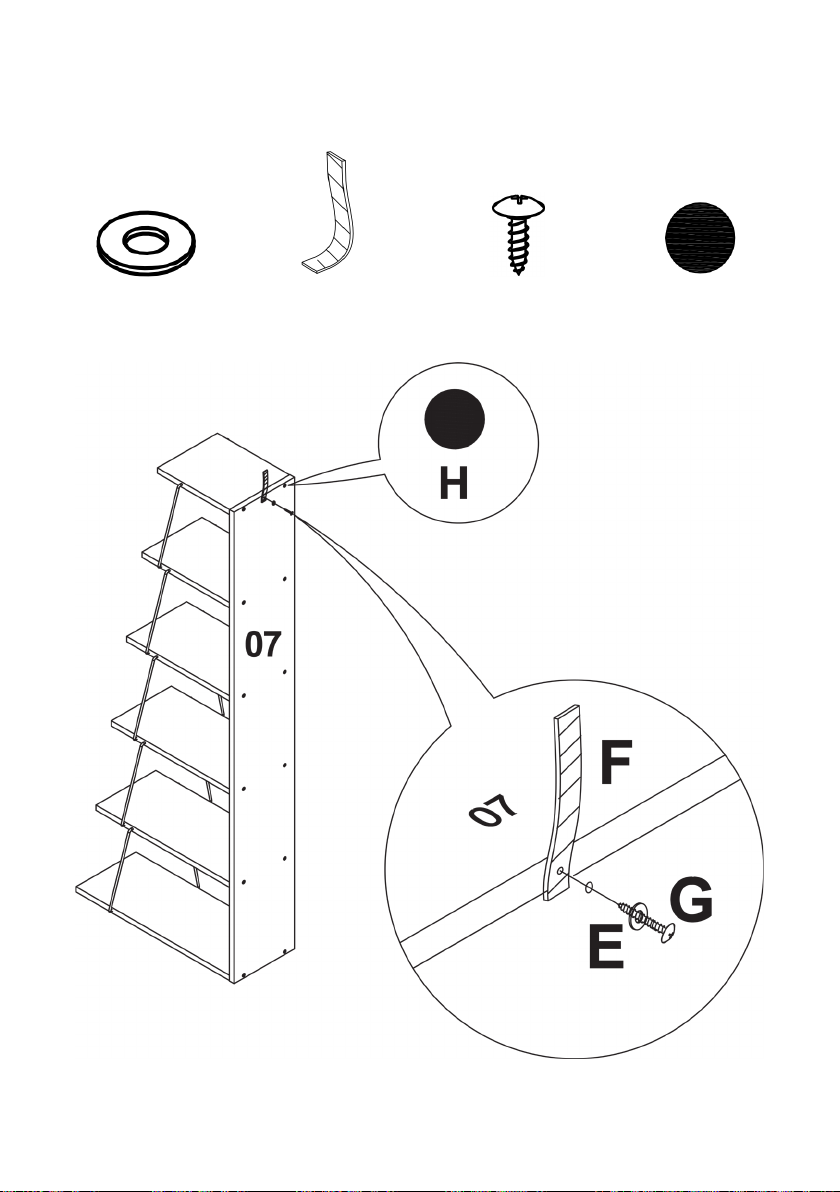
Step 5: Cover visible screws on part 7 with H.
Align F on the top of part 7. Place E on top then using a Phillips screwdriver (not supplied),
secure a G screw through E and F.
E Ø6 x 15 x 1mm (x1) F (x1) G Ø4 x 16mm (x1) H (x12)
Page 10
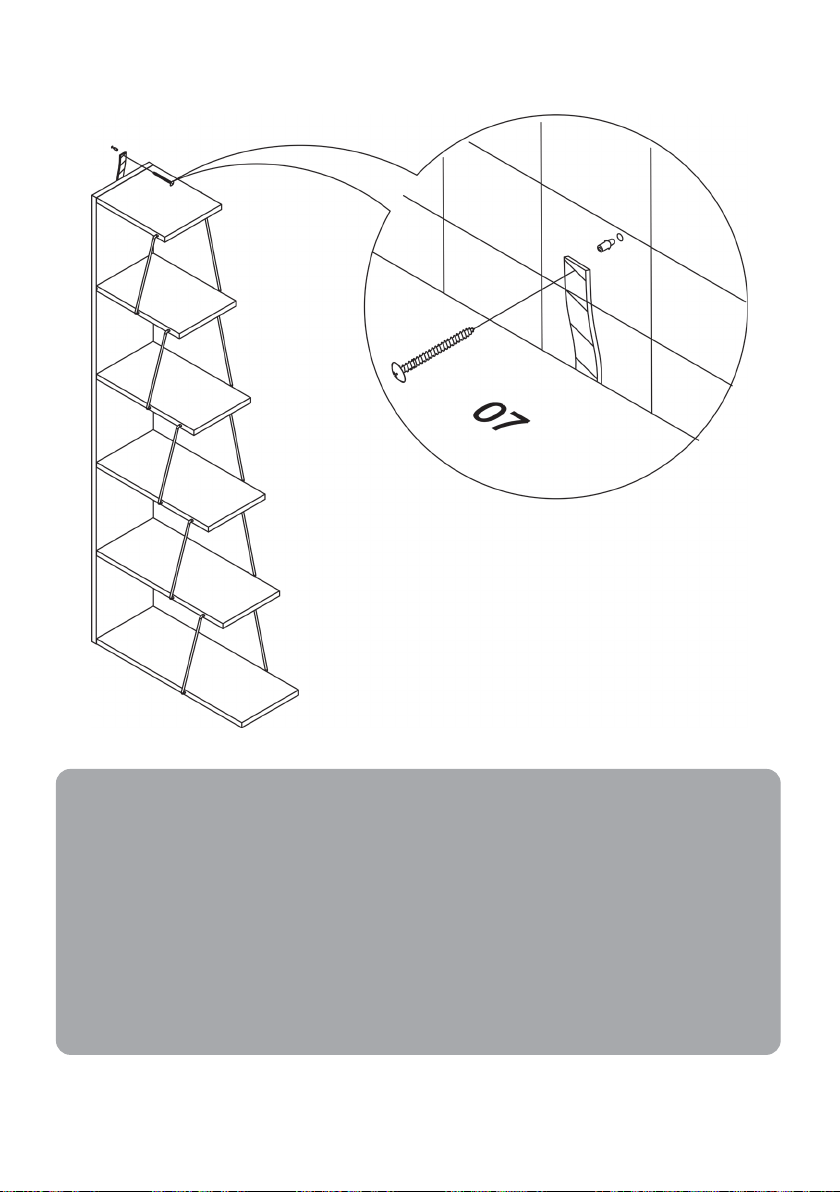
Step 6: Secure a screw (not supplied) through F to prevent the shelf from toppling.
TOPPLING FURNITURE WARNING:
• It is strongly recommended that this product is permanently fixed to the wall.
• Please seek professional advice if you are in doubt of what fixing device to use.
• Regularly check that anchors are securely maintained.
• Stability of tall items may be affected by thick carpets or uneven floors.
• Do not place unanchored televisions on furniture.
Caution! For your safety when attaching the anchor fixings, please note the following:
Check any electrical wires or plumbing inside the wall before drilling any holes (if you
are unsure, please seek professional advice from a qualified tradesperson).
Page 11
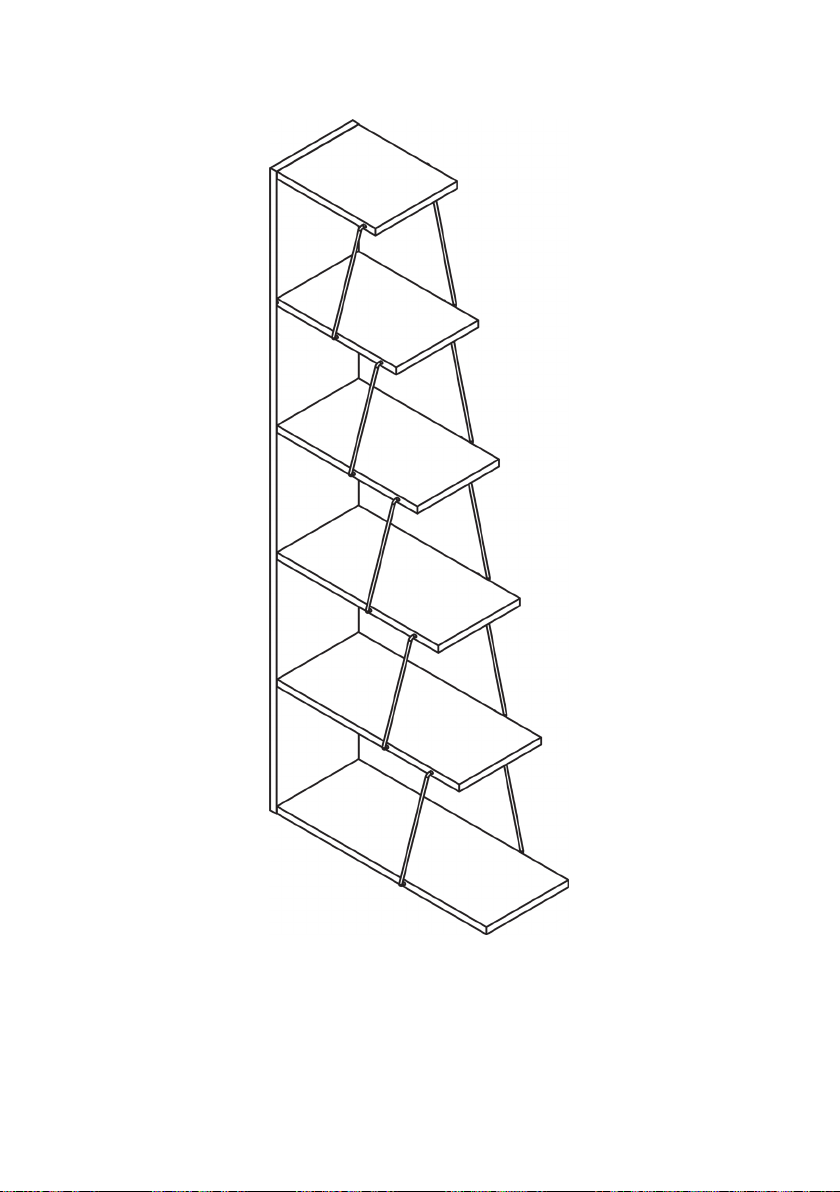
Assembly complete.
Page 12

Need more information?
We hope that this user guide has given you
the assistance needed for a simple set-up.
For the most up-to-date guide for your product,
as well as any additional assistance you may require,
head online to help.kogan.com
 Loading...